Table of Contents
Sugar Cookie Icing: The Only Recipe You’ll Ever Need
Imagine transforming your simple sugar cookies into stunning, professional-looking treats that dazzle at holiday parties or family gatherings. Sugar Cookie Icing is the ultimate secret weapon for bakers, offering an ultra-glossy finish that sets quickly and adds a touch of magic to every bite. In this comprehensive guide from exorecipes.com, we’ll dive into the easiest, most foolproof way to create this glossy delight, perfect for decorating dozens of cookies with minimal effort. Whether you’re a novice or a seasoned pro, this Sugar Cookie Icing recipe ensures your creations look as good as they taste, elevating your baking game effortlessly.
The allure of Sugar Cookie Icing lies in its irresistible sensory appeal. Picture a smooth, velvety texture that glides onto cookies like a silky veil, drying to a hard, shiny shell that crunches just right. The sweet aroma of powdered sugar and a hint of vanilla extract fills the air, making your kitchen feel like a cozy bakery. Once applied, this icing delivers a burst of pure sweetness with every bite, enhancing the buttery goodness of sugar cookies without overwhelming their flavor. Its ultra-glossy surface not only catches the light beautifully but also provides a canvas for creative designs, making your treats visually captivating and utterly delicious.
What sets this Sugar Cookie Icing recipe apart on exorecipes.com is its reliability and innovation, drawing from the expertise of Chef Mia and our rigorous testing process. We’ve fine-tuned every detail to deliver consistent, ultra-glossy results that outperform standard recipes found elsewhere. You’ll discover the Chef’s Secret for achieving that perfect consistency, along with practical tips, ingredient spotlights, and step-by-step guidance that builds your confidence in the kitchen. By the end, you’ll have all the tools to master Sugar Cookie Icing and impress your loved ones with bakery-quality cookies every time.
Why This Sugar Cookie Icing Recipe is a Game-Changer
The Chef’s Secret: The unique angle of this recipe is its ultra-glossy finish, achieved through the strategic use of light corn syrup, which creates a smooth, professional sheen that other icings often lack. This ingredient acts as a binder, preventing the icing from cracking or becoming brittle, while maintaining flexibility for detailed piping. Chef Mia’s technique ensures that even beginners can produce icing that looks store-bought, making it ideal for intricate designs on sugar cookies.
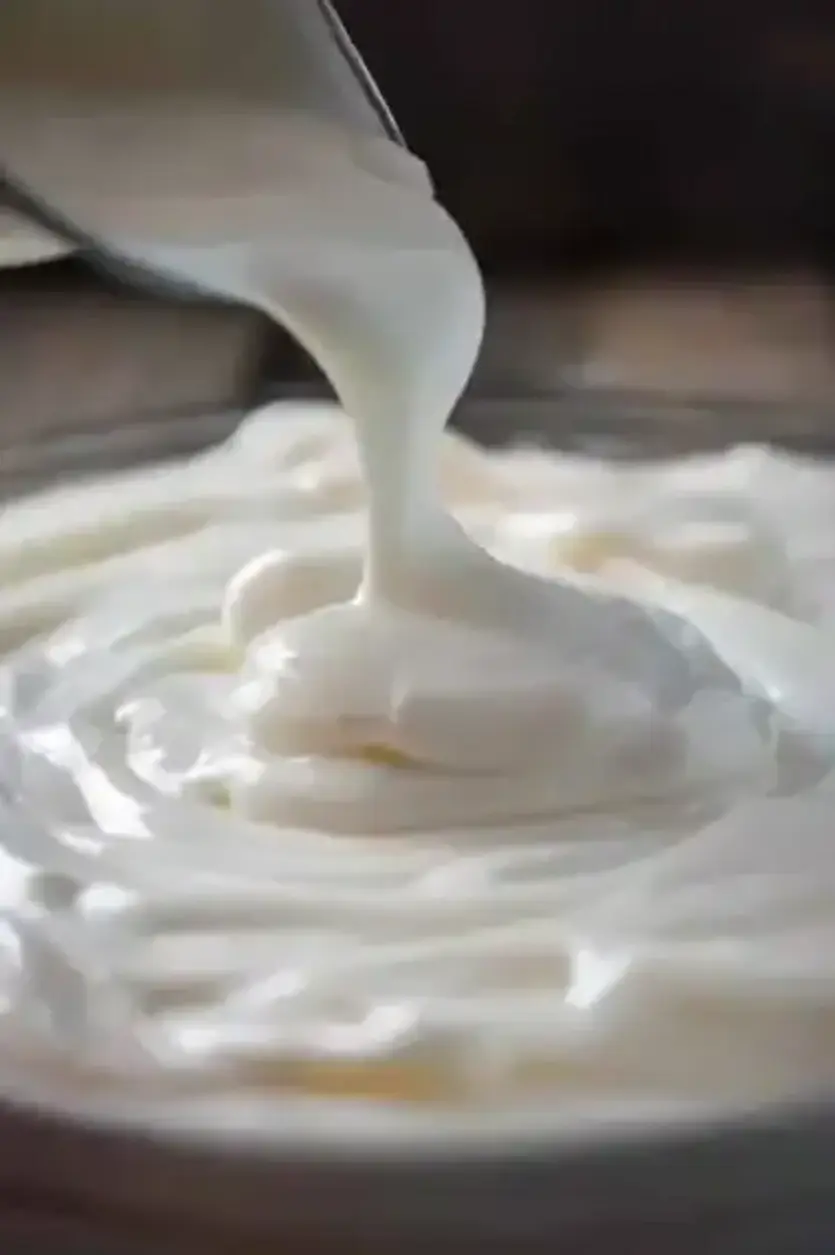
Unbeatable Texture: The science behind the texture involves the precise balance of powdered sugar and warm water, which dissolves evenly to form a stable emulsion. Light corn syrup adds viscosity and prevents crystallization, resulting in a glossy surface that hardens perfectly without becoming sticky. This combination creates an icing that’s not only visually appealing but also has a satisfying snap when dry, thanks to the controlled drying process that locks in the moisture.
Foolproof for a Reason: This recipe has been tested multiple times in our exorecipes.com kitchen to guarantee success, accounting for variables like humidity and ingredient quality. It’s designed with clear measurements and adjustments, ensuring that anyone can achieve perfect results on the first try, minimizing waste and frustration.
Ingredient Spotlight: Quality Makes the Difference
For powdered sugar, the base of your Sugar Cookie Icing, this finely ground sweetener is crucial for achieving that ultra-smooth, lump-free consistency that coats cookies evenly. High-quality powdered sugar, like one that’s freshly sifted, ensures no grit interferes with your icing’s glossy finish. Its role is to provide sweetness and structure, dissolving quickly into a paste that sets hard. Always opt for pure cane sugar varieties to avoid any off-flavors; if needed, substitute with an equal amount of confectioners’ sugar, but steer clear of granulated sugar as it won’t dissolve properly.
When it comes to warm water, it’s the simple yet essential liquid that activates the mixture in your Sugar Cookie Icing. Warm water helps dissolve the powdered sugar efficiently, creating a base that’s easy to whisk into a glossy texture. Quality matters here—use filtered water to prevent any minerals from altering the taste or consistency. Its primary role is hydration, allowing the icing to reach the perfect viscosity for piping. Tested substitutions include milk for a creamier finish or lemon juice for a subtle tang, but adjust quantities carefully to maintain the ultra-glossy effect.
Light corn syrup is the star player in this Sugar Cookie Icing recipe, providing the key to that enviable ultra-glossy sheen and preventing the icing from drying out too quickly. This ingredient acts as a humectant, keeping the icing flexible while it sets, and it enhances the overall smoothness for effortless decorating. Always choose a pure, light variety without additives for the best results; high-fructose versions can make the icing overly sticky. If substituting, try honey in the same amount for a natural alternative, though it may introduce a mild flavor that could subtly alter the ultra-glossy finish—test a small batch first to ensure it meets your needs.
Step-by-Step Instructions
Step 1: Preparing the Powdered Sugar
Start by taking a medium bowl and sifting 1 and ½ cups (180g) of powdered sugar into it. This process breaks up any lumps, ensuring a silky base for your Sugar Cookie Icing. Use a fine-mesh sieve and gently tap it to distribute the sugar evenly.
Pro Tip: Sift the powdered sugar twice for an even finer texture, which helps achieve that ultra-glossy finish without any gritty surprises—measuring accurately prevents inconsistencies.
Step 2: Creating the Icing Mixture
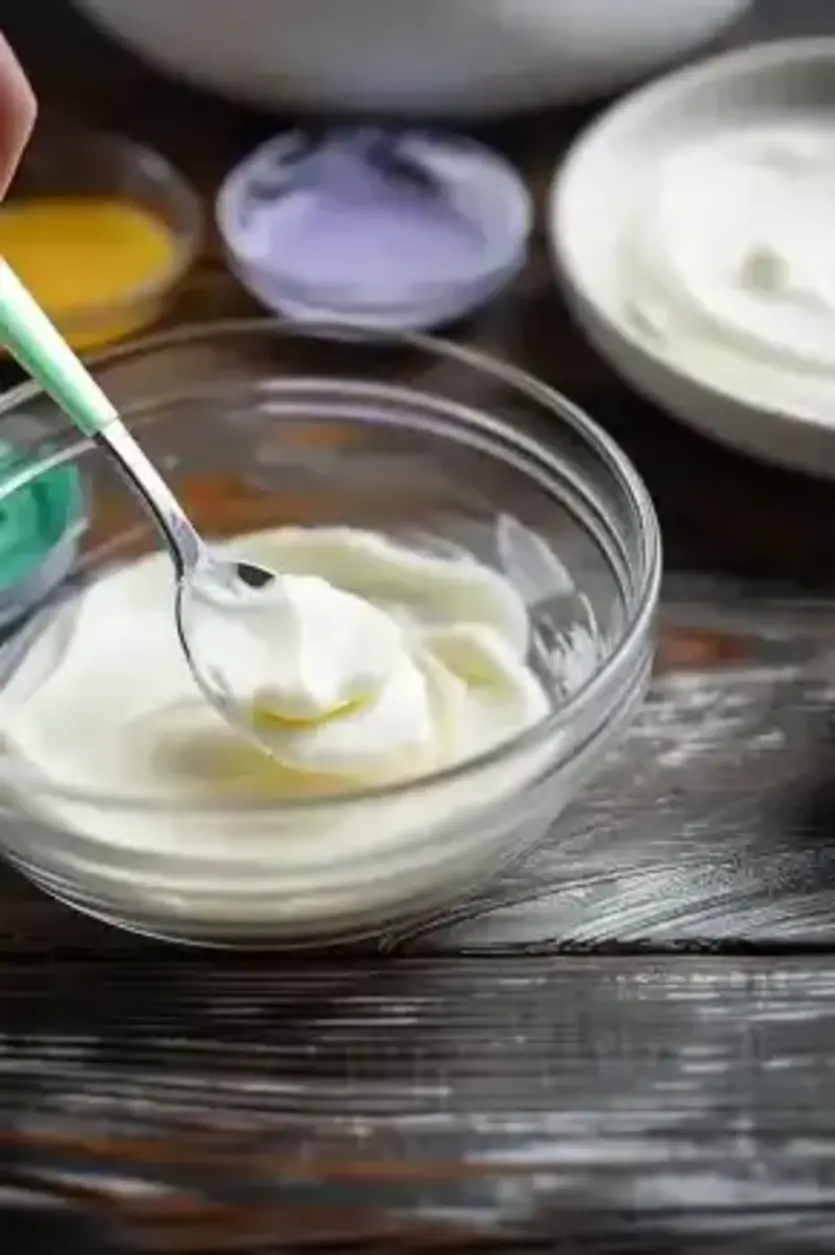
Add 2 tablespoons (30mL) of warm water, ½ tablespoon (10g) of light corn syrup, and your extract of choice (such as vanilla) to the sifted powdered sugar in the bowl. Using a whisk, stir vigorously until the mixture becomes smooth and glossy, which should take about 1-2 minutes of consistent motion.
Common Mistake to Avoid: Over-whisking can introduce air bubbles that ruin the smooth surface; stop as soon as it’s glossy to maintain the ultra-glossy consistency and prevent a frothy texture.
Step 3: Adjusting the Consistency
Test the icing’s thickness by dipping a spoon into it—if it drips slowly, it’s ready; otherwise, add more warm water by the teaspoon or powdered sugar by the tablespoon to reach your desired consistency for Sugar Cookie Icing.
Pro Tip: For outlining, keep it thicker like honey; for flooding, thin it to the consistency of syrup for even coverage, ensuring your ultra-glossy finish spreads perfectly without running off the edges.
Step 4: Adding Food Coloring
If desired, mix in a few drops of gel food coloring to the icing until you achieve your preferred hues, stirring gently to incorporate without creating bubbles.
Common Mistake to Avoid: Using too much liquid-based food coloring can thin the icing unexpectedly; opt for gel colors and add gradually to preserve the ultra-glossy texture and vibrant results.
Step 5: Transferring and Decorating
Spoon the prepared Sugar Cookie Icing into piping bags fitted with your choice of tip, then use it to decorate your cooled sugar cookies as desired, starting with outlines and filling in as needed.
Pro Tip: Chill the piping bag for a minute if the icing feels too warm, which helps maintain precise lines and that signature ultra-glossy finish for professional-looking designs.
Step 6: Allowing the Icing to Set
Place the decorated cookies on a flat surface and let the Sugar Cookie Icing set at room temperature for 1-2 hours, or until it’s completely hard to the touch.
Common Mistake to Avoid: Rushing the drying process by using a fan or heat can cause cracking; patience ensures the ultra-glossy surface hardens evenly for a flawless, durable finish.
Serving & Presentation
Elevate your Sugar Cookie Icing by focusing on creative presentation that turns ordinary cookies into edible art. Use piping techniques to create intricate designs like swirls, dots, or even personalized messages, making them perfect for holidays, birthdays, or themed events. For an impressive garnish, sprinkle edible glitter or colorful nonpareils immediately after piping while the icing is still tacky, adding a fun crunch and visual pop. Pair these glossy cookies with complementary desserts like fresh fruit platters or a simple vanilla ice cream to balance the sweetness, or serve them alongside a warm cup of tea or coffee for a cozy afternoon treat. The ultra-glossy finish of this Sugar Cookie Icing makes it ideal as a standalone star or as an accompaniment to richer desserts, ensuring your table looks as delightful as it tastes.
Make-Ahead & Storage Solutions
Make-Ahead Strategy: Prepare your Sugar Cookie Icing up to 3 days in advance by following the recipe through to the mixing stage, then store it in an airtight container at room temperature. For best results, cover the surface with plastic wrap directly touching the icing to prevent drying, and give it a quick stir before using to restore its ultra-glossy consistency.
Storing Leftovers: Once your icing has been used on cookies, store any unused portion in an airtight container in the refrigerator for up to a week. If you’ve made extra icing, let it cool completely before sealing to maintain its texture; for longer storage, freeze it in portions for up to a month, thawing it in the fridge overnight.
The Best Way to Reheat: To restore the original ultra-glossy texture and flavor, bring refrigerated icing to room temperature for about 30 minutes, then whisk gently. If it’s too thick, add a few drops of warm water and stir until smooth—avoid microwaving, as it can cause separation and ruin the consistency.
Frequently Asked Questions (FAQ)
What are some tips for making perfect Sugar Cookie Icing?
To make perfect Sugar Cookie Icing, start with sifted powdered sugar for a lump-free base, and always use warm water to ensure even dissolving. Measure ingredients precisely to achieve that ultra-glossy finish, and adjust consistency gradually—thicker for outlining, thinner for flooding. A pro tip is to let the icing rest for a few minutes after mixing, as it thickens slightly, allowing for better control during decorating.
Can I substitute ingredients in Sugar Cookie Icing, like corn syrup for something else?
Yes, you can substitute light corn syrup in Sugar Cookie Icing, but choose alternatives carefully to maintain the ultra-glossy texture. Options include honey or agave nectar in the same amount, which provide similar binding properties, though honey may add a subtle flavor. For a neutral substitute, try glucose syrup; however, test a small batch first, as changes could affect the icing’s consistency and hardening time.
How long does it take to make Sugar Cookie Icing?
Making Sugar Cookie Icing is quick and straightforward, with a total time of just 10 minutes for preparation—no cooking required. This includes mixing and adjusting the consistency, but factor in an additional 1-2 hours for the icing to set on cookies at room temperature, ensuring that ultra-glossy finish hardens properly for serving.
What are the best ways to store and serve homemade Sugar Cookie Icing?
The best way to store homemade Sugar Cookie Icing is in an airtight container in the refrigerator for up to a week, or freeze it for a month. Before serving, bring it to room temperature and stir to regain its smooth texture. Serve by piping onto cooled sugar cookies for that ultra-glossy effect, and pair with beverages like milk or coffee to enhance the experience—always decorate just before events to keep designs fresh.
Can I make this recipe vegan or gluten-free?
Absolutely, this Sugar Cookie Icing recipe can be easily adapted for vegan or gluten-free diets. For a vegan version, ensure your extract is plant-based (like vanilla) and use any standard light corn syrup, as the ingredients are naturally vegan. It’s already gluten-free since it contains no flour or gluten sources, but double-check for cross-contamination in powdered sugar. No major swaps are needed, making it a versatile, ultra-glossy option for all dietary preferences.
How do I fix icing that’s too thick or too thin?
If your Sugar Cookie Icing is too thick, add warm water one teaspoon at a time until it reaches the desired consistency; if it’s too thin, incorporate more powdered sugar gradually. This adjustment maintains the ultra-glossy finish, and testing on a scrap piece of cookie helps ensure it’s perfect before full application.
Tried This Recipe? Leave a Comment!
Did you make this recipe? I’d love to hear how it turned out! Please leave a comment and a rating below. Your feedback helps other home cooks and supports exorecipes!
For more delicious inspiration, follow me on Pinterest!

Sugar Cookie Icing
- Prep Time: 10 minutes
- Cook Time: 0 minutes
- Total Time: 10 minutes
- Yield: Enough icing for about 24 cookies
- Method: Dessert
- Cuisine: American
Description
Join me, Emma, as wewhiskour way through the simple joys of making the perfect sugar cookie icing. This easy-to-follow recipe ensures a glossy, delightful finish to your cookies, making every occasion a bit sweeter.
Ingredients
- 1and ½ cup (180g) powdered sugar
- 2 tablespoons(30mL) warm water
- ½ tablespoon(10g) light corn syrup
Instructions
- In a medium bowl, sift the powdered sugar.
- Add warm water, corn syrup, and extract of choice.Whiskuntil smooth and glossy.
- Adjust the consistency by adding more water or powdered sugar as needed.
- Optional: Add food coloring to achieve desired hues.
- Transfer topiping bagsand decorate cookies as desired.
- Allow icing to set at room temperature until hard, about 1-2 hours.
Notes
Consistency Tip: For outlining cookies, keep the icing thicker. Thin it slightly for a flood filling.Storage: Store in an airtight container in the fridge for up to a week. Stir before reusing.
Nutrition
- Calories: 50
- Sugar: 10
- Fat: 0
- Carbohydrates: 13
- Protein: 0
Conclusion
This sugar cookie icing is a simple yet versatile topping that adds a sweet, glossy finish to your favorite baked treats, making them perfect for holidays or everyday snacking. With its easy-to-mix ingredients, it delivers a delightful flavor that’s customizable for any occasion, whether you’re aiming for a classic taste or something more vibrant. For a fun variation, experiment with adding food coloring or flavored extracts to create unique designs, and be sure to let it set on cooled cookies for the best results.
