Table of Contents
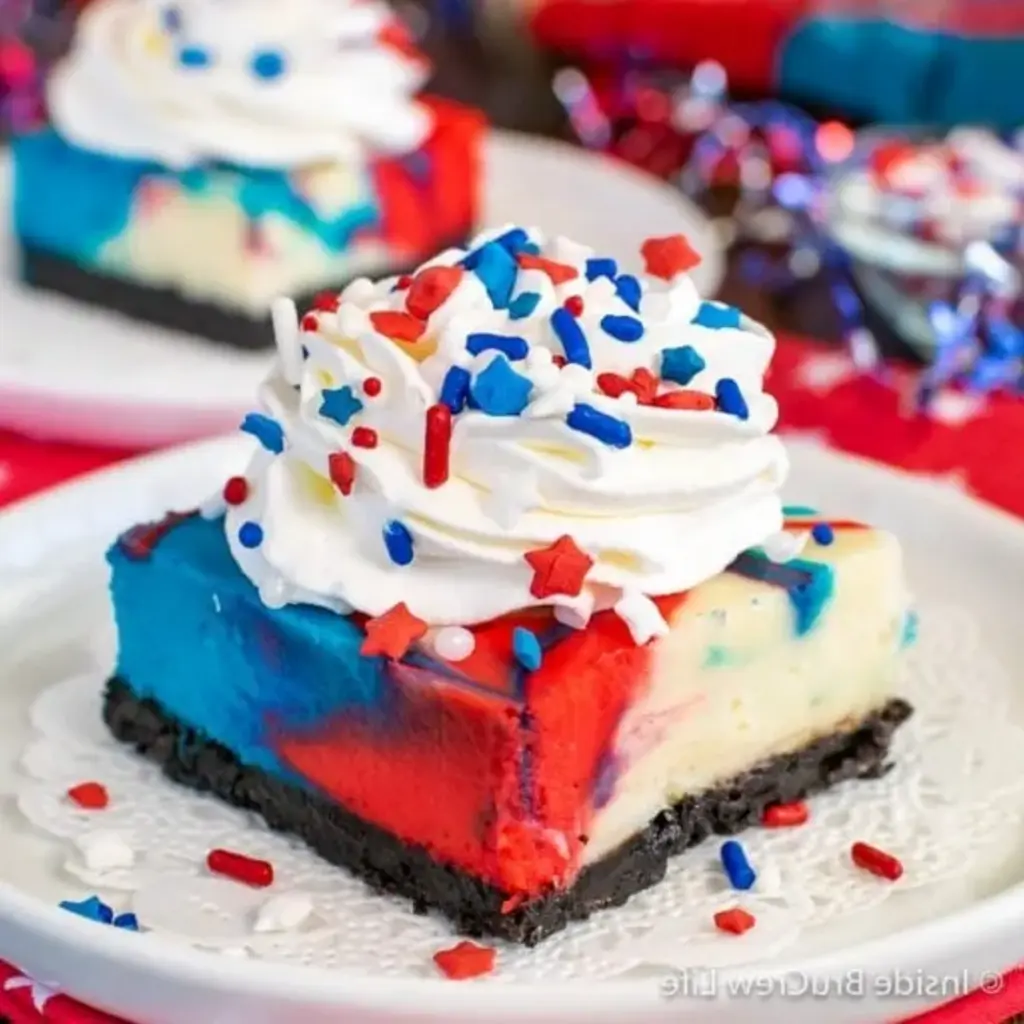
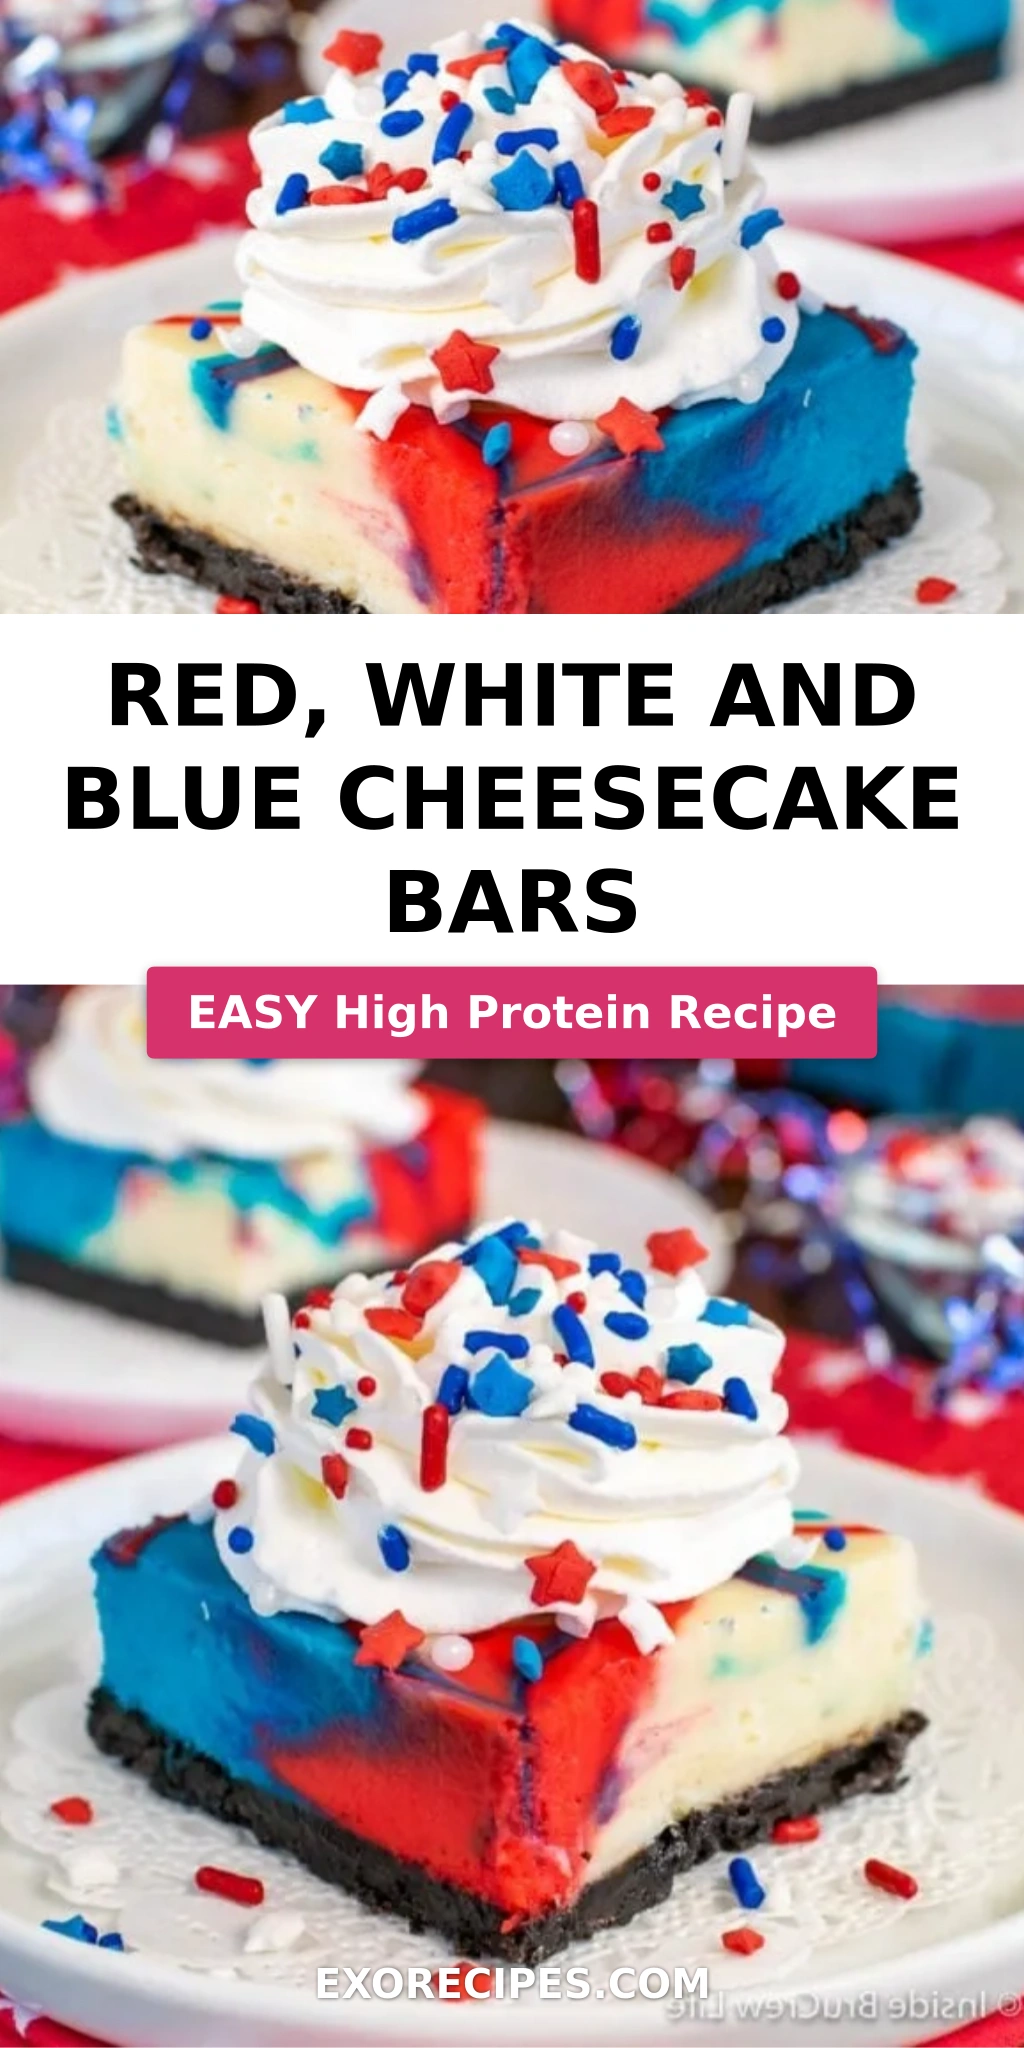
Red, White and Blue Cheesecake Bars with a Delicate Swirl – Easy 4th of July Dessert
Growing up in Morocco, the concept of a holiday barbecue with patriotic colors was a world away, but the joy of sharing homemade sweets has always been universal. When I first moved to New York City and experienced my first 4th of July bash, I was instantly captivated by the vibrant energy and, of course, all the delicious food! It reminded me of the familial warmth of my mother’s kitchen, just with a different palate of flavors and colors. These Red, White and Blue Cheesecake Bars are my ode to that festive spirit, a perfect blend of American tradition with a touch of European finesse. The delicate swirl technique I’ll show you elevates these from a simple dessert to a stunning showstopper.
I’ve always believed that food should be a feast for all the senses. That’s why these Red, White and Blue Cheesecake Bars aren’t just a treat for the eyes with their striking, patriotic layers. Imagine a creamy, velvety cheesecake texture that melts in your mouth, balanced by the delightful crunch of an Oreo crust. The subtle tang of cream cheese is perfectly complemented by a hint of vanilla, all brought together with that touch of Parisian pastry expertise I adore. Each bite is a symphony of flavors and textures, making it an irresistible addition to any summer gathering, from Memorial Day picnics to festive 4th of July celebrations.
While many cheesecake bars can feel heavy or overly complicated, I’ve refined this recipe to be effortlessly elegant and surprisingly simple. My secret is in achieving that perfect cheesecake consistency – not too dense, not too airy – and guiding you through the delicate art of the swirl without overmixing. I’ll share my pro tip for ensuring those vibrant colors stay separate enough for that beautiful marble effect, and we’ll even debunk a common mistake that can lead to cracked cheesecake. Trust me, these easy cheesecake bars will become your go-to summer dessert recipes for any patriotic occasion, impressing everyone with minimal effort.
Why This Cheesecake Bars Recipe Is the Best
The true magic of these 4th of July cheesecake bars lies in their balanced flavor profile. Drawing from my French culinary training, I emphasize quality ingredients and careful execution. The rich, tangy cream cheese base is perfectly sweetened, not cloyingly so, allowing the subtle vanilla notes to truly shine. It’s a classic cheesecake flavor, but with that touch of elegance that makes it stand out from typical picnic fare, reminding me of the simple yet profound flavors of a Parisian pâtisserie.
Achieving the perfect texture in cheesecake is an art form. My technique, honed through years of practice, ensures these cheesecake bars are incredibly smooth and creamy, without being rubbery or crumbly. The water bath method I employ, a trick I picked up during my training in Paris, provides a gentle, even heat that prevents cracking and results in a custard-like interior. Pair that with a robust Oreo cookie crust that manages to stay crisp, and you have a textural masterpiece that will have everyone asking for the recipe.
As a busy cook in NYC, I understand the need for reliable, delicious recipes that don’t take all day. These easy cheesecake bars are designed to be foolproof. From the simple two-ingredient crust to the straightforward batter preparation, I guide you through each step to ensure success, even if you’re new to baking. The ‘delicate swirl’ technique is easier than it looks, and I’ll make sure you nail it every time, resulting in a visually stunning dessert that requires minimal fuss for maximum impact.
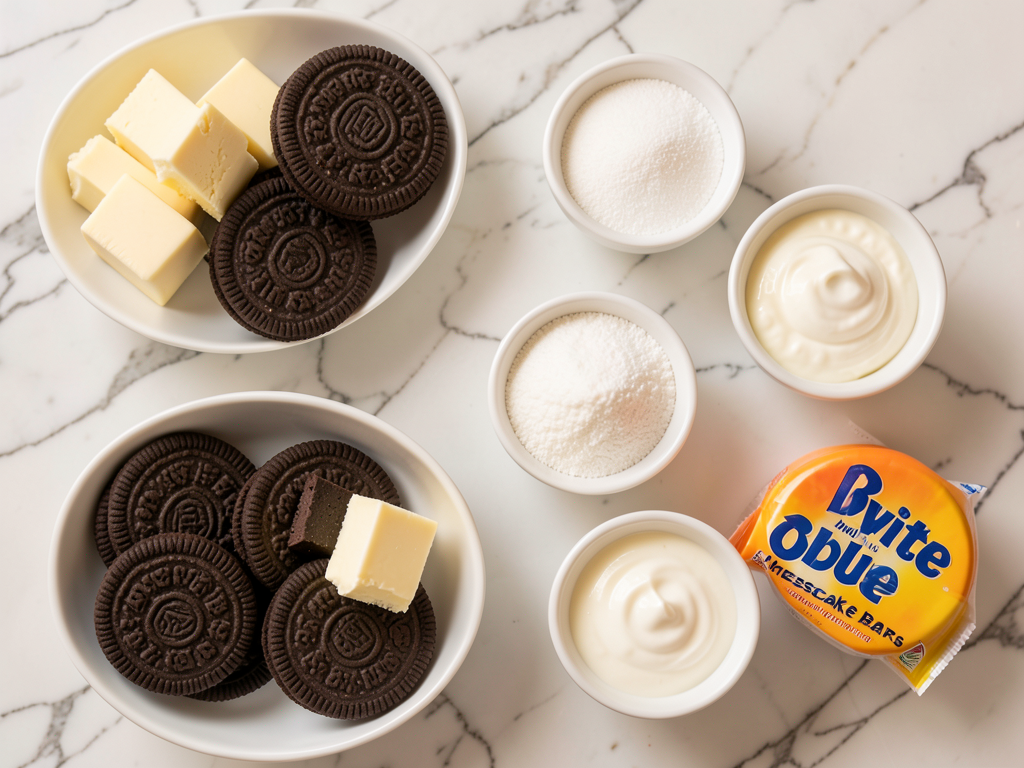
Red, White and Blue Cheesecake Bars Ingredients
Just like discovering fresh produce at a vibrant NYC farmers market or selecting the finest spices in a Marrakech souk, starting with good ingredients is key. For these Red, White and Blue Cheesecake Bars, I always look for high-quality cream cheese and butter – it truly makes a difference in the final product.
Ingredients List
- 30 Oreo cookies
- 4 Tablespoons unsalted butter, melted
- 3 – 8 ounce packages cream cheese, softened
- 1 1/2 cups granulated sugar
- 1/4 cup sour cream
- 2 teaspoons vanilla extract
- 1/4 cup all purpose flour
- 3 large eggs
- red & blue gel food colors
Ingredient Spotlight
Oreo Cookies: These form the perfect base for our cheesecake, providing a slightly salty, chocolatey crunch that contrasts beautifully with the creamy filling. When selecting, just grab a standard package; no need for specific flavors unless you want to experiment! For a gluten-free option, simply swap in gluten-free sandwich cookies – the texture will be quite similar, though the flavor might be slightly different.
Cream Cheese: The star of our show! Always opt for full-fat cream cheese in block form, not the spreadable kind from a tub. Softened to room temperature, it whips up into an incredibly smooth, lump-free batter. If you’re looking for a slight tang, you could try a Neufchâtel cheese for a slightly lighter texture, but full-fat cream cheese is truly superior for that classic cheesecake richness.
Sour Cream: This humble ingredient is a secret weapon in cheesecake baking. It adds a subtle tang that cuts through the richness of the cream cheese, and its slight acidity actually helps to tenderize the proteins, contributing to that silky-smooth texture. When choosing, go for full-fat sour cream. Greek yogurt can be a decent substitute in a pinch, but it might make the cheesecake a little denser.
Gel Food Coloring: For those vibrant red and blue hues, gel food coloring is a must. Unlike liquid food coloring, gels are highly concentrated, meaning you need very little to achieve intense colors without adding excess moisture to your batter. You’ll find these in the baking aisle of most grocery stores or craft stores. A quality brand will give you the best results without any off-flavors.
| Original Ingredient | Best Substitution | Flavor / Texture Impact |
|---|---|---|
| Oreo cookies | Graham crackers or vanilla wafers | A slightly different flavor profile; a bit less chocolatey but still delicious. |
| Unsalted butter | Salted butter | Reduce any added salt in the recipe slightly, if applicable, to avoid an overly salty taste. |
| Sour cream | Full-fat Greek yogurt | May result in a slightly denser cheesecake with a tangier flavor. |
| All-purpose flour | Cornstarch or arrowroot powder | Use half the amount for cornstarch or arrowroot; helps bind the batter and prevent cracks. |
How to Make Red, White and Blue Cheesecake Bars — Step-by-Step
Don’t be intimidated by cheesecake! With these clear, step-by-step instructions and a few of my chef’s tips, you’ll create beautiful, delicious Red, White and Blue Cheesecake Bars with ease.
Step 1: Prepare the Pan and Crust
Preheat your oven to 325°F. This is an important starting point for even baking. Line a 9×13-inch pan with foil, allowing some overhang on the sides – this will act as “handles” later for easy removal. Next, process 30 Oreo cookies (yes, cream filling and all!) in a food processor until they’re fine crumbs. Stir in 4 tablespoons of melted unsalted butter until well combined. Press this mixture evenly into the bottom of your prepared pan. Bake for 10 minutes, then remove and let it cool completely while you prepare the filling.
💡 mia’s Pro Tip: For an extra sturdy crust, after pressing, use the bottom of a flat glass or measuring cup to really compact the crumbs. This prevents crumbling when you cut the bars later.
Step 2: Set Up the Water Bath
This is a crucial step for preventing cracks and achieving that perfectly smooth cheesecake texture, a technique I learned and perfected in Paris. Place a large baking sheet on the bottom rack of your oven. Fill it halfway with hot water. Let your oven preheat again to 325°F. This water bath creates a humid environment, allowing the cheesecake to bake gently and evenly, preventing the edges from cooking faster than the center.
⚠️ Common Mistake to Avoid: Don’t skip the water bath! Without it, your cheesecake is much more likely to crack, especially as it cools. Also, make sure your foil lining is secure around your pan to prevent any water from seeping into the crust.
Step 3: Make the Cheesecake Batter
In a large mixing bowl, beat the 3 softened 8-ounce packages of cream cheese and 1 1/2 cups of granulated sugar until the mixture is creamy and smooth, with no lumps remaining. Next, add 1/4 cup of sour cream, 2 teaspoons of vanilla extract, and 1/4 cup of all-purpose flour. Beat again until just combined. Finally, add the 3 large eggs, beating gently on low speed just until they are mixed in. Overmixing the eggs can incorporate too much air, leading to cracks in the final product.
💡 mia’s Pro Tip: Ensure your cream cheese is truly at room temperature. Cold cream cheese will result in a lumpy batter, no matter how long you beat it. If it’s not soft enough, briefly microwave it for 10-15 seconds at a time until pliable.
Step 4: Color the Batter
Divide the cheesecake batter evenly into three separate bowls. Leave one bowl white. In the second bowl, add a few drops of red gel food coloring and mix until you achieve a vibrant red. In the third bowl, do the same with blue gel food coloring. Start with a small amount of gel color, as it’s concentrated, and add more until you reach your desired patriotic shades. Be gentle when mixing the colors to maintain the batter’s lightness.
Step 5: Create the Swirl
This is where the artistic fun begins for your Red, White and Blue Cheesecake Bars! Spoon the colored batters evenly over the cooled Oreo crust, alternating Dollops of red, then white, then blue. You don’t need to be precise, just distribute the colors generally. Then, gently drag a butter knife or a skewer through the batter, going both up and down and back and forth. This creates a beautiful, marbled swirl effect. Be careful not to overmix, or the colors will blend too much and lose their distinctiveness.
Step 6: Bake and Chill
Carefully place your cheesecake pan on the oven rack directly above the pan of water (the water bath). Bake for 45-50 minutes. The cheesecake is done when the edges are set, but the center still has a slight jiggle. Immediately remove the pan from the oven and place it on a wire rack to cool on the counter for 1 hour. Once it’s cooled, transfer it to the refrigerator and chill for at least 4-6 hours, or preferably overnight. This chilling time is absolutely essential for the cheesecake to set properly and be easy to cut into clean bars.
💡 mia’s Pro Tip: For perfectly clean slices, dip your knife in hot water and wipe it clean between each cut. This will prevent the colors from smudging and give you picture-perfect bars.
| Step | Action | Duration | Key Visual Cue |
|---|---|---|---|
| 1 | Prepare Crust | 10 mins bake time | Evenly pressed, lightly golden crust. |
| 2 | Set Up Water Bath | During preheat | Baking sheet half-filled with hot water. |
| 3 | Make Batter | 10-15 mins | Smooth, creamy, lump-free batter. |
| 4 | Color Batter | 5 mins | Three distinct bowls of red, white, blue batter. |
| 5 | Create Swirl | 2 mins | Distinct colored dollops, then marbled pattern. |
| 6 | Bake & Chill | 45-50 mins bake, 4-6 hours chill | Edges set, center slightly jiggly, then firm to the touch. |
Serving & Presentation
My time in Paris taught me that presentation is almost as important as the taste. These beautiful Red, White and Blue Cheesecake Bars deserve to be showcased! Once thoroughly chilled, lift the cheesecake from the pan using the foil overhangs and transfer it to a cutting board. Cut into neat squares or rectangles. I like to serve them on a simple white platter to let the vibrant colors truly pop.
For an extra touch of festivity, you can serve these with a dollop of freshly whipped cream. For the 4th of July or Memorial Day, a sprinkle of fresh blueberries and sliced strawberries adds a natural, vibrant garnish that enhances the patriotic theme. Sometimes, a dusting of powdered sugar just before serving gives it that elegant, “pâtisserie-worthy” finish.
In my NYC kitchen, I enjoy pairing these with a refreshing glass of homemade berry lemonade or a light sparkling wine. The slight acidity of the drink cuts through the creaminess of the cheesecake beautifully. For a playful touch for the kids, a scoop of vanilla bean ice cream on the side is always a hit!
| Pairing Type | Suggestions | Why It Works |
|---|---|---|
| Side Dish | Fresh berry salad, grilled fruit skewers | Adds a burst of freshness and contrasts the rich cheesecake. |
| Sauce / Dip | Raspberry coulis, blueberry compote | Bright, fruity sauces elevate the flavor and add moisture. |
| Beverage | Sparkling wine, iced tea, raspberry lemonade | Cleanses the palate and complements the dessert without overpowering it. |
| Garnish | Whipped cream, fresh berries, mint sprigs, patriotic sprinkles | Enhances visual appeal and adds textural contrast. |
Make-Ahead, Storage & Reheating
With my busy schedule here in New York, I’m always looking for ways to streamline my cooking without sacrificing flavor or quality. These cheesecake bars are fabulous for making ahead, which means less stress on the day of your gathering!
| Method | Container | Duration | Reheating Tip |
|---|---|---|---|
| Refrigerator | Airtight container or covered with plastic wrap | Up to 5 days | Serve chilled directly from the fridge. |
| Freezer | Individually wrapped in plastic and then foil, in an airtight container | Up to 1 month | Thaw overnight in the refrigerator before serving. |
| Make-Ahead | Baked and chilled pan, uncut | Up to 2 days before serving | Cut just before serving for the cleanest edges. |
When freezing, I always make sure the cheesecake is completely chilled before wrapping. This prevents ice crystals from forming and preserves that creamy texture. The beauty of these Red, White and Blue Cheesecake Bars is that they are meant to be served cold, so there’s no reheating necessary! Just pull them out of the fridge a few minutes before serving to let them lose their chill slightly, but they are equally delightful perfectly cold.
Variations & Easy Swaps
Part of the fun of cooking is playing with flavors and adapting a recipe to your taste or what you have on hand. Just like how I adapt traditional Moroccan spices to French techniques, these cheesecake bars are wonderfully versatile.
| Variation | Key Change | Best For | Difficulty Impact |
|---|---|---|---|
| Fruit Swirl | Mix berry purées into colored batters instead of food coloring. | Using natural colors and flavors, adding slight tartness. | Slightly higher, requires making fruit purées. |
| Gluten-Free Crust | Swap Oreo cookies for gluten-free sandwich cookies. | Dietary restrictions, still get that crunchy chocolate base. | None, direct swap. |
| Lemon Berry | Add lemon zest to batter, use berry compote for swirl. | Bright, zesty flavor profile for a different summer vibe. | Slightly higher, for making compote. |
Red, White and Blue Fruit Swirl Cheesecake Bars
Instead of gel food coloring, you can use natural fruit purées for your patriotic hues. For the red, blend fresh raspberries or strawberries and strain them for a smooth purée. For blue, blend blueberries. Swirl these purées directly into portions of the cheesecake batter just like you would the food coloring. This adds an extra layer of fresh, fruity flavor, reminiscent of the vibrant fruit stalls I adore in the markets here in NYC.
Gluten-Free Oreo Cheesecake Bars
Making these accessible for everyone is important to me, which is why a gluten-free option is essential. Simply swap out the regular Oreo cookies for gluten-free chocolate sandwich cookies. The process remains exactly the same – pulse them in the food processor with melted butter for a delicious, crunchy crust. I’ve tested this myself, and the texture is remarkably similar, ensuring no one misses out on this festive treat.
Lemon Berry Cheesecake Bars
For a zestier twist that still feels perfect for summer, consider adding the finely grated zest of one lemon to your cheesecake batter. You can then use a blueberry and raspberry compote (made by simmering berries with a little sugar and lemon juice) to create your patriotic swirl, much like a Moroccan fruit preserve. This combination brightens the flavor considerably and offers a lovely balance to the rich creaminess.
How do you keep the layers from mixing in red, white, and blue cheesecake bars?
The key to maintaining distinct layers and achieving that beautiful swirl in your Red, White and Blue Cheesecake Bars is all about technique, not just pouring! After spooning alternating dollops of your colored batters over the crust, use a butter knife or a thin skewer. Gently drag it through the batter, first vertically, then horizontally. Do this only once or twice in each direction. The goal is to marble the colors, not to fully mix them into a single shade. Overmixing is the most common culprit for muddy colors. Also, ensure your batters are of similar consistency, and don’t tap the pan too hard once the swirl is created.
Can I use frozen berries instead of fresh for these cheesecake bars?
You absolutely can use frozen berries if you’re making a fruit swirl variation or using them as a topping! If you plan to incorporate them into the batter for color, I recommend thawing them first and then puréeing them. Strain the purée to remove excess liquid and seeds; this will help maintain the right consistency of your cheesecake batter and prevent it from becoming watery. For garnishing, frozen berries can be thawed and served alongside, or you can even create a quick compote with them. Just be mindful of the extra moisture that thawed berries can release.
How long do red, white, and blue cheesecake bars need to chill before serving?
Proper chilling time is critical for Red, White and Blue Cheesecake Bars to set correctly and ensure that perfect creamy texture. I recommend chilling them in the refrigerator for at least 4-6 hours. However, if you have the patience, chilling overnight is even better! This extended chill time allows the cheesecake to fully firm up, making it much easier to cut into clean, elegant bars without crumbling or sticking to your knife. Patience here truly pays off for the best results.
What’s the best crust for no-bake red, white, and blue cheesecake bars?
Although this recipe uses a baked crust, for no-bake red, white, and blue cheesecake bars, the best crust is typically a simple crushed cookie or graham cracker crust bound with melted butter. My go-to would be crushed graham crackers or vanilla wafers mixed with about a quarter cup of melted butter and a tablespoon of sugar for an 8×8 inch pan. Press it firmly into the bottom of the pan and chill it in the refrigerator for at least 30 minutes to an hour to firm up before adding your no-bake cheesecake filling. This provides a stable, flavorful base without requiring any oven time.
Why does my cheesecake crack when it cools?
Cheesecake cracks are often caused by rapid temperature changes or overbaking. If your cheesecake bakes too quickly, the outer edges set and dry out before the center, causing it to pull apart as it cools. My water bath technique, a classic French patisserie trick, helps immensely by providing even, moist heat. Another common reason is opening the oven door too frequently or taking the cheesecake out of the oven too soon. Let it cool gradually in the oven with the door ajar, and then slowly on a wire rack before refrigerating. Lastly, over-beating the eggs can incorporate too much air, leading to expansion and subsequent shrinkage and cracking.
Share Your Version!
I absolutely adore seeing your culinary creations! These Red, White and Blue Cheesecake Bars are so much fun to make and share. So, once you’ve whipped up your own patriotic masterpiece, please don’t be shy! Leave a star rating and a comment below to let me know how it turned out and if you added any special touches.
Even better, snap a photo and share it on Instagram or Pinterest! Tag @exorecipes so I can admire your beautiful swirls and festive flair. I’m always curious: What’s your favorite part of making these bars—the colorful swirl, or the first creamy bite? I can’t wait to hear from you!
From my NYC kitchen to yours — I hope this recipe brings as much warmth to your table as it does to mine. — mia 🧡
Love This Recipe? Save It to Pinterest!
If you enjoyed this Red, White and Blue Cheesecake Bars recipe, don’t let it get lost in your browser tabs! 😄 Pin it now so you can find it again anytime — and explore hundreds more tried-and-tested recipes waiting for you on my Pinterest boards.
👉 Follow mia on Pinterest @chefrecipes2
📌 Pin this recipe · 🔁 Re-pin your favorites · 💬 Tag me when you make it — I love seeing your creations!
Red White and Blue Cheesecake Bars Recipe
Description
Swirls of colors make these Red White and Blue Cheesecake Bars a fun dessert to share at holiday BBW’s. This super simple red, white, and blue dessert is sure to brighten your Memorial Day and 4th of July picnics.
Ingredients
- 30 Oreo cookies
- 4 Tablespoons unsalted butter, melted
- 3 – 8 ounce packages cream cheese, softened
- 1 1/2 cups granulated sugar
- 1/4 cup sour cream
- 2 teaspoons vanilla extract
- 1/4 cup all purpose flour
- 3 large eggs
- red & blue gel food colors
Instructions
- Preheat the oven to 325 degrees. Line a 9×13 pan with foil.
- Place the cookies (cream included) in a food processor. Pulse until the cookies become crumbs.
- Stir in the butter until mixed in. Press the mixture evenly in the bottom of the prepared pan. Bake for 10 minutes. Remove and cool.
- Place a large baking sheet on the bottom rack of the oven. Fill it halfway with water. Let the oven preheat again.
- Beat the cream cheese and sugar until creamy. Add the sour cream, vanilla, and flour and beat again.
- Add the eggs and beat gently just until they are mixed in.
- Divide the batter evenly into 3 bowls. Use the food coloring to tint two of the bowls red and blue.
- Spoon the mixture evenly over the crust, alternating the colors. Drag a butter knife through the batter going up and down and back and forth until you get a good swirl pattern. Do not over mix.
- Place the pan on the oven rack above the pan of water. Bake for 45-50 minutes. Remove from the oven immediately and place on a wire rack.
- Let the cheesecake cool on the counter for 1 hour, then refrigerate for 4-6 hours.
- Cut into squares and serve with whipped cream and sprinkles, if desired.
Nutrition
- Calories: 251 calories
- Sugar: 20 grams sugar
- Fat: 16 grams fat
- Carbohydrates: 26 grams carbohydrates
- Protein: 3 grams protein
Tried This Recipe? Leave a Comment!
Did you make this recipe? I’d love to hear how it turned out! Please leave a comment and a rating below. Your feedback helps other home cooks and supports cheerychop.com!
For more delicious inspiration, follow me on Pinterest!
