Table of Contents
- Golden Snowflake Puffs with Caramelized Pears, Creamy Brie Warm Honey Drizzle: The Only Recipe You’ll Ever Need
- Why This Golden Snowflake Puffs with Caramelized Pears, Creamy Brie Warm Honey Drizzle Recipe is a Game-Changer
- Unbeatable Texture: The Science of Flaky Perfection
- Foolproof for a Reason: Guaranteed Success
- Ingredient Spotlight: Quality Makes the Difference
- Step-by-Step Instructions
- Serving & Presentation
- Make-Ahead & Storage Solutions
- Frequently Asked Questions (FAQ)
Golden Snowflake Puffs with Caramelized Pears, Creamy Brie Warm Honey Drizzle: The Only Recipe You’ll Ever Need
Are you searching for an appetizer that’s both elegant and incredibly easy to make? Look no further! This recipe for Golden Snowflake Puffs with Caramelized Pears, Creamy Brie Warm Honey Drizzle is destined to become your go-to for any occasion, from casual get-togethers to sophisticated dinner parties. We’re talking about perfectly flaky puff pastry, kissed with golden goodness, cradling sweet, tender caramelized pears, and topped with a luscious, melt-in-your-mouth creamy brie that’s bathed in warm honey. Forget complicated techniques; this recipe focuses on simplicity and exceptional flavor, delivering a gourmet experience without the stress.
Imagine the symphony of textures and tastes: the crisp, airy shatter of the golden snowflake puff as you bite in, giving way to the soft, jammy sweetness of the pears, all complemented by the rich, slightly tangy, and wonderfully gooey brie. Then comes the highlight – a warm, golden honey drizzle that ties everything together in a sweet embrace. The aroma alone, a blend of baked pastry, fruit, and warm honey, will transport you to a place of pure culinary bliss. This is more than just an appetizer; it’s an experience.
At Exorecipes, we believe that exceptional food should be accessible to everyone. That’s why we’ve perfected this Golden Snowflake Puffs with Caramelized Pears, Creamy Brie Warm Honey Drizzle recipe, focusing on foolproof techniques and premium ingredient spotlights to ensure your success. We’ve uncovered the secret to achieving that ethereal golden hue on your puffs every single time, and we’re sharing our tested methods for caramelizing pears to perfection. Get ready to impress your guests, and yourself, with a creation that looks as stunning as it tastes, all with a little help from Chef Sally and our exclusive tips.
Why This Golden Snowflake Puffs with Caramelized Pears, Creamy Brie Warm Honey Drizzle Recipe is a Game-Changer
The Chef’s Secret Revealed: Perfectly Golden Pastry
The true magic behind these Golden Snowflake Puffs lies in a very specific, yet simple, technique: starting your puff pastry at a slightly higher oven temperature for the initial bake, then reducing it. This initial blast of heat causes the layers of butter and dough in the puff pastry to rapidly expand, creating that signature flaky, airy texture. However, to achieve that perfect, irresistible golden-brown hue without burning, we then lower the oven temperature. This allows the pastry to bake through evenly, developing a beautiful, uniform “golden” color that’s as stunning as it is delicious. It’s this careful temperature management that prevents a pale, undercooked appearance or a scorched exterior, ensuring your puffs are a visual and culinary masterpiece.
Unbeatable Texture: The Science of Flaky Perfection
The remarkable flakiness of puff pastry is a beautiful interplay of science and ingredients. When puff pastry is baked, the water in the dough turns to steam, and the layers of butter melt. This steam gets trapped between the dough layers, forcing them apart and creating the signature airy pockets and delicate, crisp layers. For this recipe, using a high-quality, all-butter puff pastry (preferably European-style with a higher fat content) is crucial. The higher fat content in European butter leads to steam pockets that are more distinct and a crisper, more tender bite. When baked correctly, the exterior of the puff pastry develops a delicate crust that shatters with each bite, while the interior remains wonderfully light and airy, providing the perfect foundation for our sweet and savory toppings.
Foolproof for a Reason: Guaranteed Success
We understand that puff pastry can sometimes seem intimidating, but this recipe is designed for absolute success. Months of testing and refinement have gone into perfecting the baking times, temperatures, and ingredient ratios. Each step is clearly laid out to guide you, and the “Chef’s Secret” technique is explained in detail. We’ve accounted for common pitfalls, like avoiding overhandling the dough or ensuring even baking, so you can be confident that you’ll achieve restaurant-quality results every single time. This recipe is a testament to the fact that sophisticated-looking dishes can be surprisingly simple to execute with the right guidance.
Ingredient Spotlight: Quality Makes the Difference
Puff Pastry: The Flaky Foundation
The star of our snowflake puffs is undoubtedly the puff pastry. For the best results, we highly recommend using a high-quality, all-butter puff pastry. Brands like Pepperidge Farm (their frozen, all-butter version) or Dufour Pastry Kitchens are excellent choices. The difference in flavor and texture between all-butter and margarine-based puff pastry is significant. All-butter pastry will yield a richer flavor and a superior flaky texture. If you’re feeling ambitious, you can even make your own, but for a foolproof and quick appetizer, store-bought is a fantastic option. Ensure it’s thawed according to package directions before use – never microwave it, as this can melt the butter unevenly.
Pears: Sweetness and Soft Texture
The type of pear you choose for caramelizing will significantly impact the final flavor and texture. We recommend firm but ripe pears that hold their shape well when cooked. Varieties like Bosc, Anjou, or Bartlett are excellent choices. They offer a pleasant balance of sweetness and slight tartness, and their flesh softens beautifully without becoming mushy during caramelization. Avoid overripe pears, as they will disintegrate. If your pears aren’t perfectly ripe, don’t worry; they will still caramelize well, contributing a delightful sweetness. Aim for pears that yield slightly to gentle pressure.
Creamy Brie: The Luxurious Melter
Brie is the perfect cheese for this recipe because of its wonderfully creamy texture and mild, buttery flavor that melts beautifully. When warmed, it becomes luscious and gooey, creating pockets of pure indulgence. For this recipe, choose a good quality brie, preferably one that is fully ripe (it should feel slightly soft to the touch). You can use brie with or without the rind; the rind is edible and adds a subtle earthy note, but some prefer to remove it for a creamier consistency. If you’re not a fan of brie, a creamy Camembert or even a mild, soft goat cheese can be used as a substitute, though the flavor profile will change.
Warm Honey Drizzle: The Golden Finish
Honey is the sweetening agent that binds all the flavors together. For the best aromatic quality and distinct flavor, we recommend using a good quality, natural honey. A local honey or a varietal like clover or wildflower honey will add a wonderful depth. Simply warming the honey slightly makes it easier to drizzle and enhances its sweetness. You want it warm enough to be pourable but not so hot that it “cooks” the other ingredients or burns. A gentle warming in a small saucepan or even in a microwave-safe bowl for a few seconds will do the trick. This final touch elevates the entire appetizer, providing a beautiful sheen and a touch of sweetness.
Step-by-Step Instructions
Step 1: Preparing the Pears and Pastry
Begin by preheating your oven to 400°F (200°C). This initial high heat is key to achieving those perfectly golden, airy puffs. While the oven heats, prepare your ingredients. Peel, core, and thinly slice your pears into bite-sized pieces. In a medium bowl, toss the pear slices with granulated sugar, a pinch of cinnamon (optional, but recommended!), and a squeeze of lemon juice (this brightens the flavor and prevents browning). Next, unfold your thawed puff pastry sheet onto a lightly floured surface. Using a sharp knife or a pizza cutter, cut the pastry into roughly 3-inch squares or circles. If you want to get fancy, you can use snowflake cookie cutters for a whimsical touch! Arrange these shapes on a baking sheet lined with parchment paper, leaving a little space between them.
Pro Tip: For extra flavor, toss your pears with a teaspoon of cornstarch along with the sugar and cinnamon. This helps to thicken any juices released during baking, preventing a soggy bottom.
Step 2: Creating the Pear & Cheese Base
Now, let’s build the delectable topping. For each puff pastry shape, spoon a small portion of the prepared pear slices onto the center, leaving about a quarter-inch border. Don’t overload them; you want the pastry edges to puff up beautifully. Next, cut small cubes of brie cheese and arrange them generously over the pears. You can leave the rind on or remove it, according to your preference. The goal is to have a good balance of pear and creamy brie on each puff.
Common Mistake to Avoid: Overfilling the puff pastry. If you pack too much filling onto each piece, the pastry won’t be able to rise evenly, and the toppings might spill over during baking. Keep the filling focused on the center, allowing those flaky edges to do their magic.
Step 3: Baking to Golden Perfection
Place the baking sheet with the prepared puffs into the preheated 400°F (200°C) oven. Bake for 10-12 minutes, or until the pastry begins to puff up and turn a light golden brown. Now, here’s our Chef’s Secret in action: reduce the oven temperature to 375°F (190°C). Continue baking for another 8-10 minutes, or until the pastry is a deep, rich golden brown and the brie is melted and slightly bubbly. The change in temperature ensures the pastry cooks through without burning the exterior while achieving that beautiful golden finish. Keep an eye on them to prevent any burning!
Pro Tip: If your brie starts to brown too quickly before the pastry is done, you can loosely tent the puffs with aluminum foil.
Step 4: The Warm Honey Drizzle and Final Touches
Once the Golden Snowflake Puffs are baked to perfection and the brie is beautifully melted, carefully remove them from the oven. While they are still warm, gently warm your honey in a small saucepan or microwave-safe dish until it’s easily pourable. Using a spoon, artfully drizzle the warm honey over each puff, letting it cascade over the melted brie and caramelized pears. For an extra touch of elegance and flavor, sprinkle with a few chopped toasted walnuts or a tiny pinch of fresh thyme leaves. Serve immediately while warm and delightfully gooey.
Common Mistake to Avoid: Drizzling cold honey. Cold honey will be thick and clumpy, and it won’t spread as nicely or impart that warm, sweet flavor. Always give your honey a quick warm-up for the best drizzling experience.
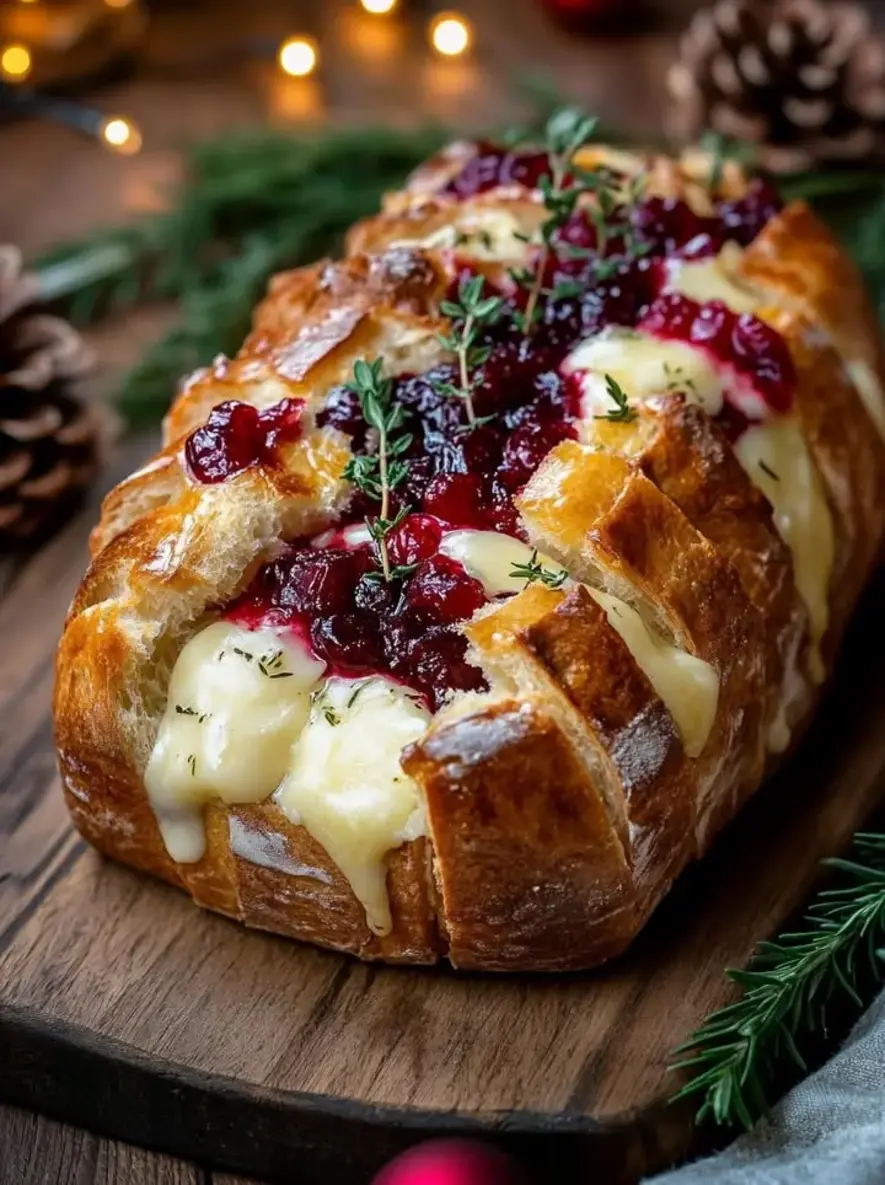
Serving & Presentation
These Golden Snowflake Puffs are designed to be the star of your appetizer spread. For a truly impressive presentation, arrange them artfully on a rustic wooden board or a beautiful ceramic platter. A scattering of fresh thyme sprigs, a few red berries (like cranberries or pomegranate seeds for a festive touch), or a dusting of finely chopped toasted nuts will add visual appeal and an extra layer of flavor. They are best served immediately, while the puff pastry is crisp, the brie is gooey, and the honey is warm. Pair them with a crisp white wine like a Sauvignon Blanc or a Pinot Grigio, or even a light-bodied red like a Beaujolais. For a more casual gathering, they make a delightful addition to a cheese board, offering a warm, sweet counterpoint to colder cheeses and crackers.
Make-Ahead & Storage Solutions
While these Golden Snowflake Puffs are undeniably best served fresh from the oven, their components can be prepped in advance to make party day a breeze.
Make-Ahead Strategy:
Pears: Peel, core, slice, and toss your pears with the sugar, cinnamon, and lemon juice up to 1 day in advance. Store them in an airtight container in the refrigerator. Toss them gently before assembling to ensure even coating.
Brie: Cube the brie cheese a day ahead and store it in a separate airtight container in the refrigerator.
Puff Pastry: Thaw your puff pastry according to package directions the day before or the morning of. Keep it chilled until ready to cut and assemble.
Assembly: You can assemble the puffs (topping the pastry with pears and brie) up to 2-3 hours before baking. Cover them loosely with plastic wrap and keep them refrigerated. This allows the flavors to meld slightly.
Storing Leftovers:
Unfortunately, baked puff pastry does not store particularly well as it loses its crispness. If you absolutely must store leftovers, allow them to cool completely. Store them in an airtight container in the refrigerator for no more than 1-2 days. They will become soft and less appealing.
The Best Way to Reheat:
The key to reheating puff pastry is to try and restore its crispness. The oven is your best friend here. Preheat your oven to 350°F (175°C). Place the leftover puffs on a baking sheet and reheat them for 5-8 minutes, or until warmed through. This will help to crisp them up again, though they may not be quite as light and airy as when freshly baked. Microwaving is not recommended, as it will make them chewy and soggy. For the honey, you can re-warm it gently for a few seconds in the microwave before re-drizzling if desired.
Frequently Asked Questions (FAQ)
How do I achieve a perfectly “golden” puff for the snowflake puffs?
Achieving that perfect golden hue involves a two-stage baking process. Start by baking the puffs at a higher temperature (400°F/200°C) for the initial 10-12 minutes. This gives the puff pastry a rapid rise and starts the browning process. Then, reduce the oven temperature to 375°F (190°C) for the remaining 8-10 minutes. This lower temperature allows the pastry to cook through evenly to a beautiful, deep golden brown without burning. Keep a close eye on them during the last few minutes of baking.
What are the best types of pears for caramelizing with this dessert?
For this recipe, firm but ripe pears are ideal. Varieties like Bosc, Anjou, or Bartlett work wonderfully because they hold their shape well when cooked, avoiding a mushy texture. They also have a good balance of sweetness and a subtle tartness that complements the creamy brie and honey.
Can I substitute brie with another cheese for the warm honey drizzle?
Absolutely! While brie offers a wonderfully creamy and luxurious melt, you can certainly substitute it. A creamy Camembert would be a very close alternative. For a slightly different but equally delicious flavor, consider a soft, mild goat cheese or a creamy fontina. The key is to use a cheese that melts well and has a rich, smooth texture.
How long should I bake the snowflake puffs to ensure they are fully cooked?
The total baking time is typically around 18-22 minutes. The initial 10-12 minutes at 400°F (200°C) will puff the pastry and begin browning, while the subsequent 8-10 minutes at 375°F (190°C) ensures the interior is cooked through and the exterior reaches a deep golden-brown color. Your puffs are fully cooked when they are deeply golden, have visibly puffed up, and the brie is melted and bubbling.
Can I make this recipe vegan/gluten-free?
Making this recipe completely vegan or gluten-free requires significant substitutions. For a vegan version, you would need to find vegan puff pastry (many are available), a vegan brie-style cheese, and ensure your honey is replaced with a vegan sweetener like agave nectar or maple syrup. For a gluten-free version, you would need to use a gluten-free puff pastry alternative. The pears and honey would remain the same. Note that the texture of vegan and gluten-free puff pastries can differ significantly from traditional ones.
Can I use different fruit instead of pears?
Yes, while pears are wonderful, other fruits caramelize beautifully! Apples (like Honeycrisp or Fuji) are a fantastic alternative. You could also try figs (halved or quartered) or even firm berries like blueberries or raspberries, though berries may cook down more quickly and require less baking time. Adjust spices as needed to complement the fruit.
Tried This Recipe? Leave a Comment!
Did you make this recipe? I’d love to hear how it turned out! Please leave a comment and a rating below. Your feedback helps other home cooks and supports exorecipes!
For more delicious inspiration, follow me on Pinterest!
.
Print