Table of Contents
Garlic Dill Pickles: The Only Recipe You’ll Ever Need
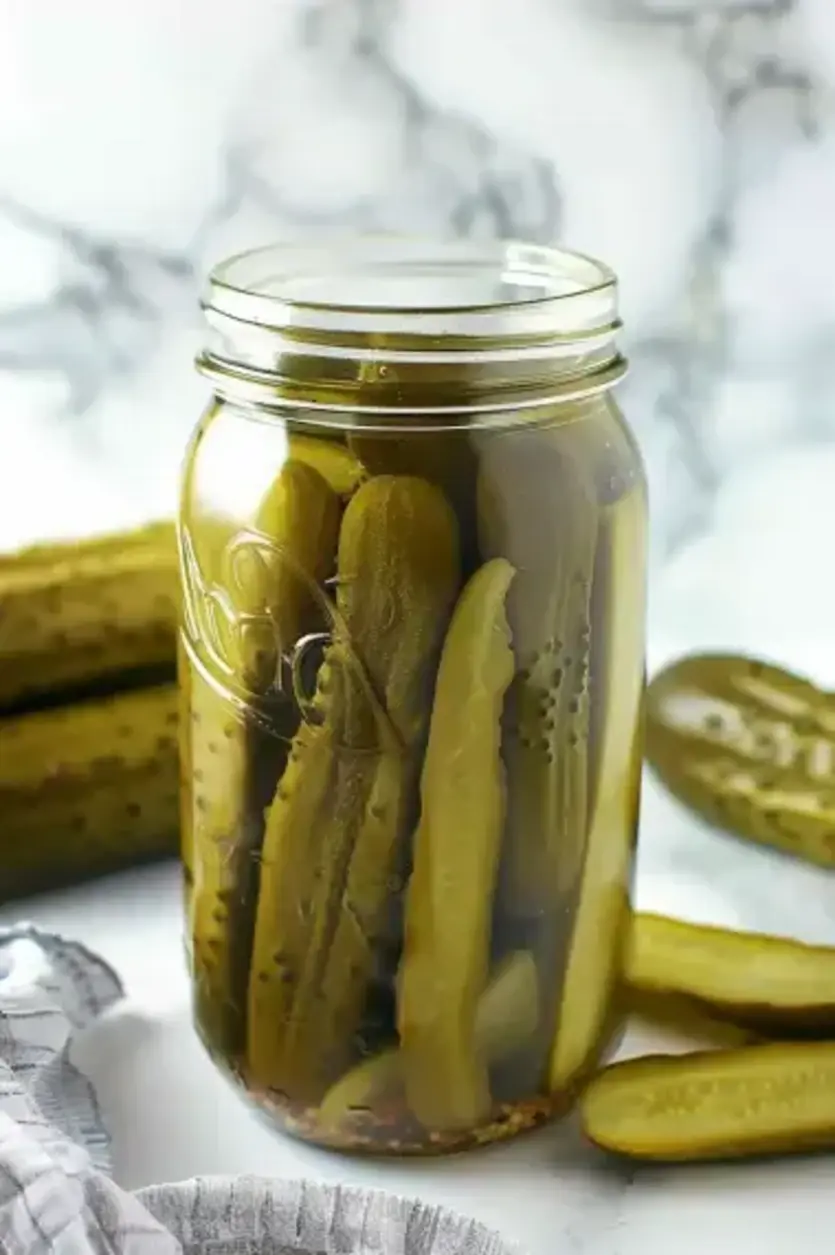
Imagine transforming ordinary cucumbers into irresistibly crunchy Garlic Dill Pickles that burst with garlicky tang and fresh dill flavors, all from the comfort of your kitchen. This homemade Garlic Dill Pickles recipe is designed for busy home cooks seeking an easy, ultra-crisp twist that elevates your snacks and meals. Whether you’re adding them to burgers or enjoying them solo, this foolproof method ensures every bite delivers that perfect snap and zing. Garlic Dill Pickles have long been a staple in American cuisine, and with our unique angle focusing on achieving ultra-crisp texture through simple, science-backed techniques, you’ll wonder why you ever bought store-bought versions.
The allure of Garlic Dill Pickles lies in their vibrant sensory profile—picture the sharp, pungent aroma of smashed garlic mingling with the earthy notes of dried dill, creating an irresistible fragrance that fills your home. Each pickle offers a satisfying crunch that echoes with tangy acidity from apple cider vinegar, balanced by a subtle, optional heat from red pepper flakes. The texture is firm yet juicy, providing a delightful contrast that makes these pickles not just a condiment, but a star on your plate. This easy Garlic Dill Pickles recipe promises that homemade delight, making every mouthful a celebration of fresh, bold flavors.
Why trust this Garlic Dill Pickles recipe from exorecipes.com? Crafted by Chef Mia and refined through rigorous testing, it’s the ultimate guide that combines simplicity with expert tips, including the Chef’s Secret for ultra-crisp results. You’ll learn how to avoid common pitfalls, master ingredient swaps, and create pickles that outshine any commercial brand. Dive in for step-by-step instructions, detailed nutrition facts, and FAQs that cover everything from storage to customizations, making this the single best resource for Garlic Dill Pickles on the web.
Why This Garlic Dill Pickles Recipe is a Game-Changer
The Chef’s Secret to this Garlic Dill Pickles recipe lies in adding a grape leaf or horseradish leaf to the jar, which introduces tannins that preserve an ultra-crisp texture far superior to standard recipes. This unique angle ensures your pickles maintain that satisfying crunch even after marinating, setting this homemade Garlic Dill Pickles apart as the go-to choice for texture enthusiasts. By weaving this technique throughout the process, we’re not just pickling cucumbers—we’re crafting a tangy, garlicky masterpiece that stands out in every batch.
Unbeatable Texture: The science behind the ultra-crisp Garlic Dill Pickles comes from the tannins in the added leaf, which inhibit enzymes that soften cucumbers during fermentation. This results in a firm, snap-worthy bite that enhances the overall experience, making these pickles ideal for sandwiches or snacking. Fresh, crisp cucumbers are key, as their high water content, when properly balanced with the brine, locks in that desirable texture without becoming mushy.
Foolproof for a Reason: This Garlic Dill Pickles recipe has been tested multiple times in real home kitchens to guarantee success, even for beginners. With clear instructions and tips to avoid errors, you’ll achieve consistent results every time, turning simple ingredients into a reliable, flavor-packed condiment that’s perfect for American cuisine enthusiasts.
Ingredient Spotlight: Quality Makes the Difference
For the 1½ lbs. of fresh and crisp cucumbers, these form the base of your Garlic Dill Pickles, providing that essential crunch and mild flavor that absorbs the brine beautifully. Opt for firm, unwaxed varieties like Kirby or Persian cucumbers for the best results, as their thicker skin helps maintain the ultra-crisp texture. If cucumbers are unavailable, substitute with small zucchini, but note that they may yield a softer pickle; always choose organic for pesticide-free pickling to ensure longevity and safety.
Smashed garlic cloves (4 in total) infuse the Garlic Dill Pickles with a bold, aromatic punch that elevates the overall tanginess. Fresh garlic is crucial here for its potent oils, which release more flavor when smashed—avoid pre-minced versions as they lack intensity. If you’re out of garlic, a milder substitute like shallots can work, but it will alter the classic garlicky profile; always use quality, firm cloves to prevent bitterness and enhance the homemade Garlic Dill Pickles experience.
Dried dill (1 tsp.) brings an herby, fresh essence to your Garlic Dill Pickles, complementing the garlic and vinegar with its subtle, grassy notes. High-quality dried dill from reliable sources ensures vibrant flavor without mustiness—fresh dill can be substituted at a 1:1 ratio for a more pronounced taste, but dry it thoroughly to avoid excess moisture in the jar, which could compromise the ultra-crisp texture of your pickles.
Optional red pepper flakes (½ tsp.) add a gentle heat to Garlic Dill Pickles, making them versatile for those who enjoy a spicy kick. Using fresh, high-quality flakes ensures even distribution of flavor; if omitting for a milder version, consider smoked paprika as a substitute to maintain some warmth without overpowering the garlic and dill harmony.
Apple cider vinegar (1 cup) provides the tangy backbone of Garlic Dill Pickles, offering a complex acidity that balances the brine perfectly. Choose raw, unfiltered varieties for their natural probiotics and richer flavor; white vinegar can substitute in a pinch, but it may result in a sharper taste, so adjust quantities to preserve the ultra-crisp and tangy profile of your homemade Garlic Dill Pickles.
Finally, water (1 cup) in the brine helps dilute the vinegar for a balanced flavor in Garlic Dill Pickles. Use filtered water to avoid any off-flavors from chlorine; there’s no direct substitute, but ensuring it’s at a rolling boil guarantees the salt dissolves evenly, contributing to the recipe’s reliability and ultra-crisp results.
Step-by-Step Instructions
Step 1: Preparing the Cucumbers
Start by thoroughly washing the 1½ lbs. of fresh and crisp cucumbers under cool running water to remove any dirt or residue, then pat them dry. Cut the cucumbers into uniform spears or slices about ¼-inch thick, ensuring even pieces for consistent pickling. This step is crucial for the ultra-crisp Garlic Dill Pickles, as uniform sizing allows for better brine penetration.
Pro Tip: Always use the freshest cucumbers possible and cut them just before assembling to minimize exposure to air, which can start the softening process and affect the final texture.
Step 2: Creating the Brine
In a saucepan, combine 1 cup of apple cider vinegar, 1 cup of water, and although not listed in ingredients, the recipe implies sea salt—add 1 tablespoon of sea salt to the mix. Bring this to a boil over medium heat, stirring occasionally until the salt fully dissolves, which should take about 5 minutes. This brine is the heart of your Garlic Dill Pickles, infusing the cucumbers with tang and preserving them effectively.
Common Mistake to Avoid: Don’t let the brine boil too vigorously, as excessive heat can evaporate the liquids too quickly and alter the flavor balance—keep an eye on it and remove from heat once it reaches a steady boil.
Step 3: Layering the Jar
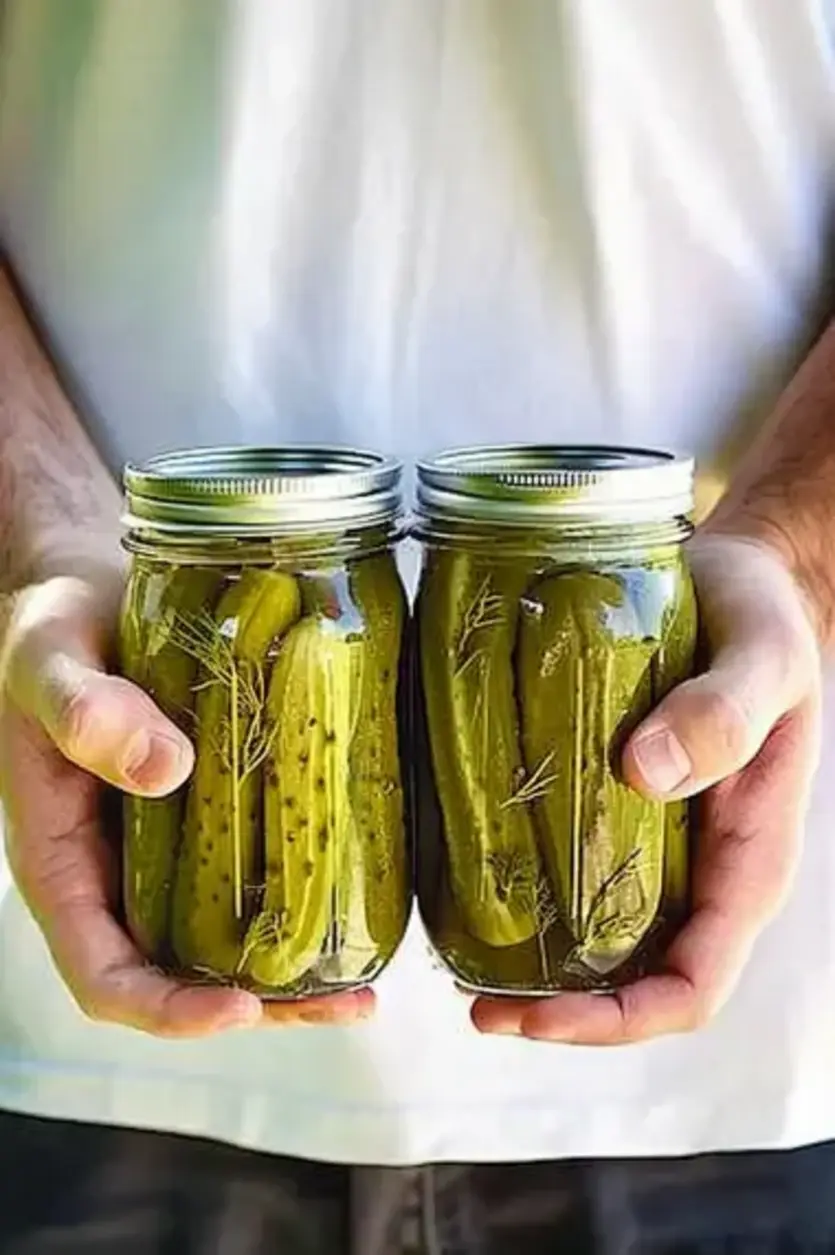
In a sterilized jar, begin layering the prepared cucumbers, interspersing them with the 4 smashed garlic cloves, 1 tsp. dried dill, and optional ½ tsp. red pepper flakes. Pack the jar tightly but leave about ½ inch of headspace at the top to allow for expansion during refrigeration. This layering ensures even distribution of flavors, making every Garlic Dill Pickle bite equally delicious.
Pro Tip: For that ultra-crisp edge, add a grape leaf or horseradish leaf to the jar before sealing—it releases tannins that prevent softening, but ensure the jar is completely dry beforehand to avoid dilution.
Step 4: Pouring the Brine
Carefully pour the hot brine over the layered cucumbers in the jar, making sure they are completely submerged to prevent spoilage. Use a clean spoon to gently press down if needed, then wipe the jar’s rim to ensure a good seal. This step seals in the flavors for your Garlic Dill Pickles, creating that signature tangy crunch.
Common Mistake to Avoid: Never pour cold brine; it must be hot to create a proper seal and kickstart the pickling process—otherwise, you risk uneven flavor absorption and potential bacterial growth.
Step 5: Sealing and Cooling
Seal the jar tightly with its lid and let it cool to room temperature on a counter, which should take about 1-2 hours. Once cooled, transfer the jar to the refrigerator for marinating. This cooling process is essential for safe storage and allows the ultra-crisp Garlic Dill Pickles to develop their full flavor.
Pro Tip: Label the jar with the date to track marinating time, ensuring you get the best taste after at least 48 hours.
Step 6: Marinating the Pickles
Allow the sealed jar of Garlic Dill Pickles to marinate in the refrigerator for at least 48 hours before enjoying; this time lets the flavors meld and the cucumbers achieve that perfect ultra-crisp texture. Patience here is key, as under-marinating can result in bland pickles.
Common Mistake to Avoid: Don’t rush the marinating process—opening the jar too early can introduce contaminants and disrupt the flavor development, so plan ahead for the best homemade Garlic Dill Pickles.
Serving & Presentation
To serve your Garlic Dill Pickles, arrange them in a simple glass bowl or on a charcuterie board for an eye-catching display, perhaps alongside fresh herbs for a pop of color. Garnish with a sprinkle of extra dried dill or thin garlic slices to enhance visual appeal and tie into the recipe’s garlicky theme. These ultra-crisp Garlic Dill Pickles pair wonderfully with burgers, sandwiches, or even as a zesty side to grilled meats, adding a tangy contrast that elevates everyday meals in American cuisine.
Make-Ahead & Storage Solutions
Make-Ahead Strategy: Prepare the cucumbers and brine up to 3 days in advance by washing and cutting the cucumbers, then storing them in an airtight container in the fridge. Assemble the jars just before boiling the brine to maintain the ultra-crisp texture of your Garlic Dill Pickles.
Storing Leftovers: Once made, store the sealed jars in the refrigerator for up to 2 weeks; always use clean utensils when serving to prevent contamination. For longer storage, consider proper canning methods, but note this recipe is best for refrigeration.
The Best Way to Reheat: Garlic Dill Pickles are typically served cold, but if you prefer a warmed version, let them sit at room temperature for 10-15 minutes to enhance flavors without losing that signature crunch—avoid microwaving, as it can soften the texture.
Frequently Asked Questions (FAQ)
How long do Garlic Dill Pickles need to marinate?
Your Garlic Dill Pickles should marinate in the refrigerator for at least 48 hours to fully develop their flavors and achieve that ultra-crisp texture. For even better results, let them sit for up to a week, as this allows the garlic and dill to infuse deeply, making them the perfect homemade Garlic Dill Pickles addition to any meal.
Can I substitute apple cider vinegar with another type in Garlic Dill Pickles?
Yes, you can substitute apple cider vinegar with white vinegar or red wine vinegar in your Garlic Dill Pickles recipe, but keep the ratio at 1:1. Apple cider vinegar adds a subtle sweetness and tang; white vinegar will make it sharper, so adjust with a pinch of sugar if needed to maintain the balanced, ultra-crisp profile.
What are some tips for making perfect Garlic Dill Pickles?
To make perfect Garlic Dill Pickles, always use fresh, firm cucumbers and sterilize your jars to prevent spoilage. Incorporate the ultra-crisp technique with a grape leaf, and ensure the brine fully covers the cucumbers for even flavor distribution. Taste the brine before pouring to adjust seasoning, as this will elevate your homemade Garlic Dill Pickles every time.
How should I store homemade Garlic Dill Pickles for freshness?
Store homemade Garlic Dill Pickles in a sealed, sterilized jar in the refrigerator, where they’ll stay fresh for up to 2 weeks. Keep the jar upright to avoid leakage, and use a clean fork for serving to minimize contamination, preserving that ultra-crisp texture and tangy flavor.
Can this recipe be canned for long-term storage?
Yes, but for safe canning of Garlic Dill Pickles, follow proper water-bath canning methods with adjusted processing times—typically 10-15 minutes for pints. This isn’t covered in the original recipe, so ensure acidity levels are high and use tested guidelines to avoid botulism risks while maintaining the ultra-crisp quality.
What cucumbers are best for making Garlic Dill Pickles?
The best cucumbers for Garlic Dill Pickles are small, firm varieties like Kirby or Persian, as they have thicker skins that help retain the ultra-crisp texture. Avoid large, seeded types, which can become mushy; always select organic, unwaxed ones for optimal flavor and safety in your homemade recipe.
Can I make this recipe vegan or gluten-free?
Yes, this Garlic Dill Pickles recipe is naturally vegan and gluten-free, using only plant-based ingredients like cucumbers, garlic, and vinegar. No swaps are needed, but ensure your vinegar is certified gluten-free if you’re sensitive, and double-check for cross-contamination in your kitchen to keep it ultra-crisp and safe.
Tried This Recipe? Leave a Comment!
Did you make this recipe? I’d love to hear how it turned out! Please leave a comment and a rating below. Your feedback helps other home cooks and supports exorecipes!
For more delicious inspiration, follow me on Pinterest!
Garlic Dill Pickles
- Prep Time: 15 minutes
- Cook Time: 5 minutes (to boil brine)
- Total Time: 20 minutes
- Yield: About 2 pints 1x
- Method: Condiments
- Cuisine: American
Description
Unveil the charm of homemade Garlic Dill Pickles with this simple, flavor-packed recipe. Transform crisp cucumbers into a tangy, garlicky treat, perfect for sandwiches, burgers, or as a delightful snack. Dive into the art of pickling with these easy steps and enjoy a crunchy, dill-infused delight that’s anything but ordinary!
Ingredients
- 1½lbs. cucumber, fresh and crisp
- 4garlic cloves, smashed
- 1 tsp. dried dill
- ½ tsp. red pepper flakes (optional)
- 1 cupapple cider vinegar
- 1 cupwater
Instructions
- Thoroughly wash the cucumbers and cut into spears or slices.
- In asaucepan, combine apple cider vinegar, water, and sea salt. Bring to a boil, ensuring the salt is dissolved.
- In a sterilized jar, layer the cucumbers, interspersing with smashed garlic, dill, and red pepper flakes.
- Pour the hot brine over the cucumbers, ensuring they are completely submerged.
- Seal the jar and let it cool at room temperature. Refrigerate.
- Allow the pickles to marinate in the fridge for at least 48 hours before enjoying.
Notes
For extra crunch, add a grape leaf or horseradish leaf to the jar. These leaves contain tannins that help keep the pickles crisp.Ensure jars are sterilized before use to extend the shelf life of your pickles.
Nutrition
- Calories: 5
- Sugar: 0.5
- Fat: 0
- Carbohydrates: 1
- Protein: 0.2
Conclusion
Garlic Dill Pickles deliver a crisp, tangy crunch with the bold flavors of garlic and fresh dill, making them a versatile staple for enhancing sandwiches, salads, or even as a zesty snack on their own. This simple recipe captures the essence of homemade preserving, allowing you to enjoy that perfect balance of savory and herbaceous notes anytime. For a fun variation, try adding a touch of red pepper flakes for extra heat, or serve them as a refreshing side to grilled meats to elevate your next meal.
