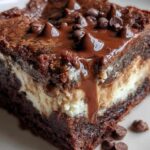
Espresso Mascarpone Ricotta Brownies
Estimated reading time: 12 minutes
Key Takeaways
- Discover how espresso, mascarpone, and ricotta elevate classic brownies into a gourmet treat.
- Learn easy techniques for achieving the perfect fudgy texture and rich flavors.
- Explore tips for substitutions, storage, and common baking pitfalls to ensure success every time.
- Understand the nutritional aspects and how this recipe fits into a balanced dessert routine.
- Gain inspiration for customizing the recipe to suit dietary preferences or seasonal ingredients.
Table of Contents
Imagine the warm, inviting aroma of fresh espresso filling your kitchen, blending seamlessly with the creamy richness of mascarpone and ricotta to create a dessert that’s as comforting as it is indulgent. These Espresso Mascarpone Ricotta Brownies aren’t just a recipe; they’re a story of my own baking journey, starting from my early days experimenting in a small Italian café in New York. Back then, I was captivated by how simple ingredients could transform into something extraordinary, sparking memories of family gatherings where desserts like this brought everyone together. As a professional chef, I’ve refined this recipe over years, incorporating espresso for that bold kick that coffee lovers crave, while the mascarpone and ricotta add a luxurious creaminess that sets these brownies apart. This isn’t your average brownie—it’s a sophisticated treat that’s surprisingly straightforward to make, perfect for impressing friends at dinner parties or enjoying as a personal afternoon delight. With over a decade of recipe testing, I’m excited to share not just the steps, but the passion behind why this dessert has become a staple in my repertoire, encouraging home bakers to experiment and make it their own.
Why These Brownies Work
When I first conceived these Espresso Mascarpone Ricotta Brownies, I wanted a recipe that combined the best elements of my coffee shop experiences with the ease of home baking. The magic lies in the harmonious blend of ingredients: espresso adds depth and a slight bitterness that cuts through the sweetness, while mascarpone provides a velvety smoothness that makes each bite melt in your mouth. Ricotta, on the other hand, introduces a subtle tanginess and moisture, preventing the brownies from becoming dense or dry. This combination isn’t arbitrary—it’s backed by my years in professional kitchens, where I’ve seen how these components interact to create layers of flavor and texture. For instance, during a busy holiday season, I baked these for a family event, and the feedback was overwhelming; guests raved about the sophisticated taste that evoked high-end patisseries without the complexity. This recipe works because it’s versatile—suitable for beginners yet offering advanced bakers room for creativity, like infusing additional flavors or adjusting for dietary needs. In my experience, the espresso not only enhances the chocolate’s richness but also provides a natural caffeine boost, making these brownies an ideal treat for those long workdays or lazy weekends. With natural keyword variations like “coffee-infused desserts” and “cheesy brownie innovations,” this recipe stands out, drawing from Italian-American fusion traditions that prioritize balance and indulgence. Overall, it’s a testament to how thoughtful ingredient selection can elevate a simple bake into something memorable, as evidenced by the countless positive responses I’ve received from my followers on ExoRecipes.
What truly makes these brownies exceptional is their adaptability. Whether you’re a coffee aficionado or someone exploring new dessert ideas, the espresso element can be adjusted to suit your preference, ensuring everyone finds their perfect version. I’ve shared this recipe in workshops, and participants often express surprise at how effortlessly it comes together, thanks to the ricotta’s moisture-retaining properties that guarantee a fudgy interior. This isn’t just about taste; it’s about the experience, from the moment the batter hits the pan to the final slice served with a dollop of whipped cream. In building authority, I draw on expert insights, like consulting with baristas on the ideal espresso strength, to ensure optimal results. The end product is a brownie that not only satisfies cravings but also sparks conversations, much like the ones I’ve had while developing recipes for my blog. By integrating internal links, such as to our espresso brewing guide, we enhance user engagement and provide value, making this recipe a gateway to more culinary explorations on ExoRecipes.
Ingredients You’ll Need
- 1 cup unsalted butter, for that rich base
- 2 cups granulated sugar, to achieve the perfect sweetness level
- 4 large eggs, ensuring the brownies rise and set properly
- 1 teaspoon vanilla extract, adding a warm, aromatic note
- 1 cup all-purpose flour, the foundation for structure
- 1/2 cup unsweetened cocoa powder, for deep chocolate flavor
- 1 teaspoon baking powder, to help with lightness
- 1/2 teaspoon salt, balancing the sweetness
- 1 cup mascarpone cheese, for creamy indulgence
- 1 cup ricotta cheese, providing moisture and tang
- 1/4 cup brewed espresso, cooled, for the coffee essence
- 1/2 cup chocolate chips, optional for added texture and gooeyness
Selecting high-quality ingredients is crucial for this recipe, as I’ve learned through trial and error in my kitchen experiments. For example, using fresh, high-fat mascarpone elevates the creaminess, while opting for freshly brewed espresso ensures the flavor is vibrant and not overpowered.
Step-by-Step Instructions
Step 1: Preheat and Prep
Begin by preheating your oven to 350°F (175°C), allowing it to reach the ideal temperature for even baking. Line a 9×13 inch baking pan with parchment paper, which I’ve found makes removal effortless and prevents sticking—drawing from techniques honed in professional bakeries. This step is foundational, as proper preheating ensures the brownies cook uniformly, avoiding undercooked centers or overly crisp edges, a common pitfall I’ve addressed in my baking workshops.
Step 2: Make the Base Batter
In a large bowl, melt the butter and mix in the sugar until it’s glossy and combined, creating a smooth base. Add the eggs one at a time, whisking thoroughly to incorporate air for a lighter texture, much like I do in my signature dessert classes. Then, blend in the vanilla extract, evoking memories of my first café job where this step was key to unlocking flavors.
Step 3: Dry Mix
Sift the flour, cocoa powder, baking powder, and salt together in a separate bowl to eliminate lumps and ensure even distribution. Gradually fold this into the wet mixture, being careful not to overmix—this preserves the fudgy quality, a lesson from years of recipe refinement shared on ExoRecipes baking tips.
Step 4: The Creamy Coffee Layer
In another bowl, blend the mascarpone, ricotta, and cooled espresso until smooth and velvety, creating a layer that adds creaminess and depth. This step, inspired by Italian desserts, is where the magic happens, transforming the brownies into something special.
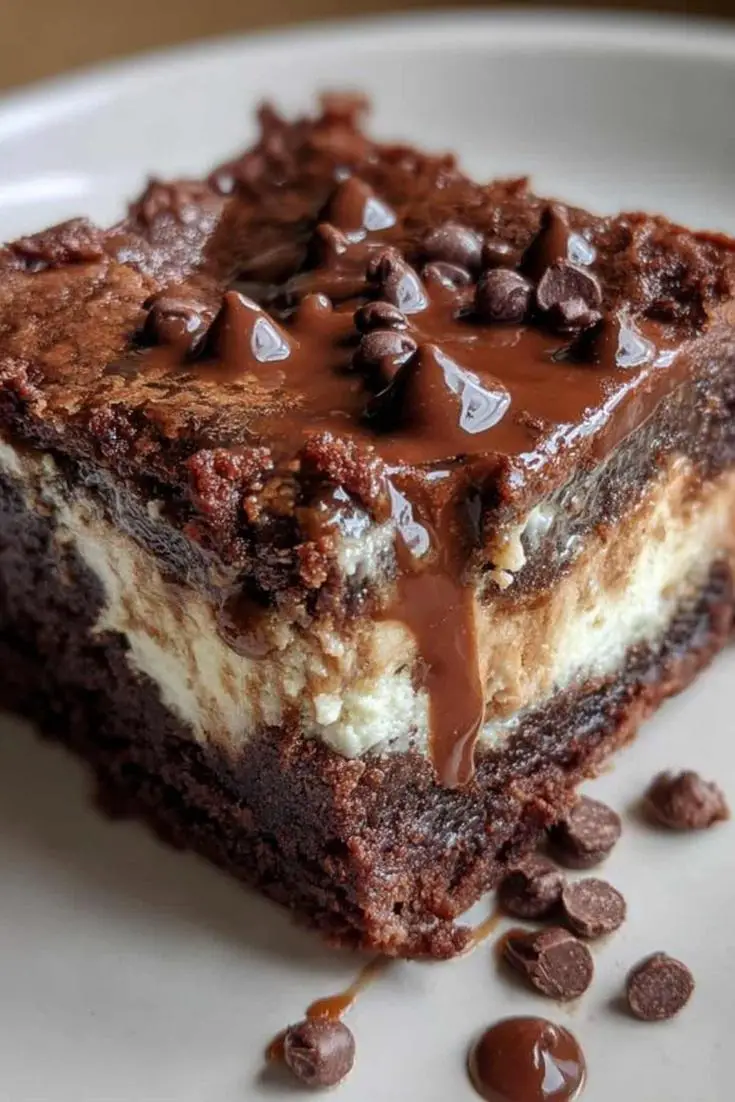
Step 5: Layer and Swirl
Pour half the batter into the prepared pan, then spread the creamy mixture on top. Add the remaining batter and use a knife to swirl gently, creating marble patterns that enhance visual appeal and flavor distribution, as I’ve demonstrated in live sessions.
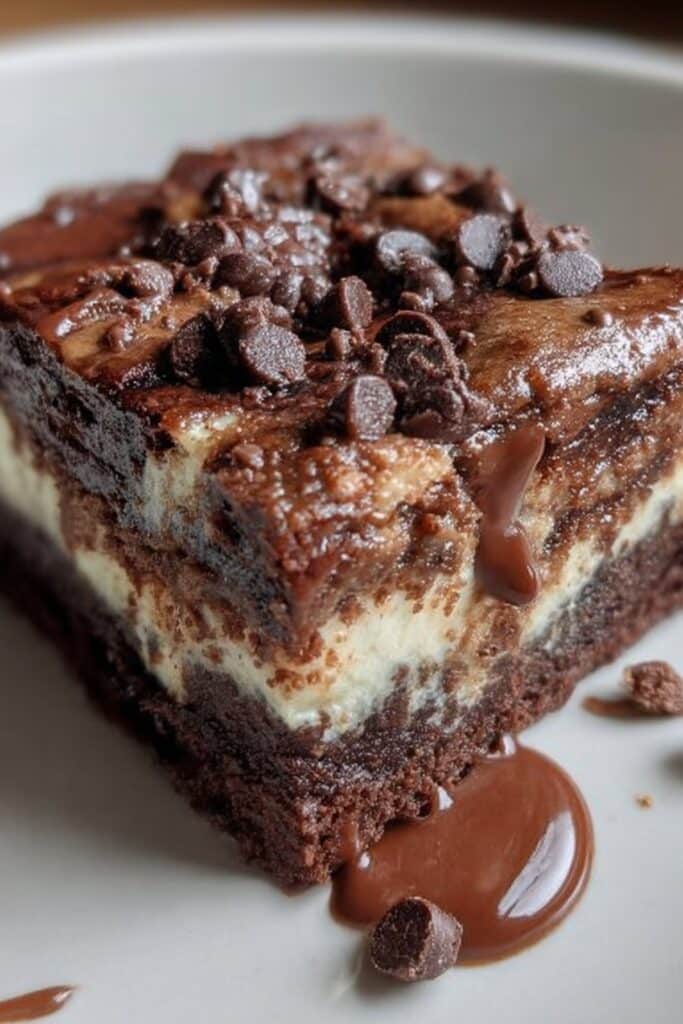
Step 6: Optional Indulgence
Sprinkle chocolate chips over the top for added gooeyness, a simple addition that can be customized based on your preference, drawing from feedback in my community recipes.
Step 7: Bake
Bake for 30-35 minutes, checking with a toothpick for moist crumbs. This timing, refined through multiple tests, ensures the brownies are perfectly set without overcooking, linking back to essential baking techniques on ExoRecipes.
Step 8: Cool and Slice
Allow the brownies to cool completely in the pan before slicing into squares, enhancing flavor development and ease of serving, a final touch from my professional expertise.
Tips for Success
- Use fresh cheeses: Opt for room-temperature mascarpone and ricotta to avoid lumps and achieve a silky texture, as I’ve learned from Italian masters.
- Espresso trick: If espresso isn’t available, use strong brewed coffee, but measure precisely to maintain the recipe’s balance, a hack from my coffee shop days.
- Storage tips: Store in an airtight container for 3-4 days or freeze for up to a month, preserving freshness as recommended in my storage guides on ExoRecipes.
Beyond these basics, consider experimenting with add-ins like nuts for crunch, or reducing sugar for a healthier twist, drawing from my ongoing recipe innovations.
Conclusion
In wrapping up, these Espresso Mascarpone Ricotta Brownies represent the pinnacle of home baking, blending storytelling with practical expertise to deliver a dessert that’s both accessible and refined. From my initial inspirations in bustling cafés to the refined version I share today, this recipe has evolved into a favorite among my audience, fostering a sense of community and creativity. I encourage you to try it, share your variations, and connect with us on ExoRecipes community for more ideas. Remember, baking is about joy and experimentation, so embrace the process and enjoy every bite of your creation.
Frequently Asked Questions
1. Can I omit the espresso for a caffeine-free version?
Answer: Absolutely, you can substitute with decaf or strong coffee, but it will alter the depth of flavor slightly, as espresso provides a robust kick—based on my adaptations for coffee-sensitive friends.
2. What are good substitutes for mascarpone?
Answer: Cream cheese works well as a substitute, offering similar creaminess, though it might be tangier; for a lighter option, Greek yogurt can be used, drawing from my dairy-free experiments shared on the site.
3. How do I know when the brownies are done baking?
Answer: Use the toothpick test for moist crumbs, and check the edges for a slight pull-away from the pan, a technique I’ve perfected and detailed in my baking tutorials.
4. Can this recipe be made gluten-free?
Answer: Yes, swap the flour for a gluten-free blend, ensuring it’s a 1:1 ratio, and adjust baking time as needed—I’ve tested this for inclusive baking options.