Easy Loaded Tater Cups – Crispy & Cheesy Bites for Cozy Gatherings
There’s something magical about bite-sized comfort food, isn’t there? The kind that disappears from the platter before you’ve even finished setting the table. I discovered these Loaded Tater Cups one chilly evening when friends dropped by unexpectedly, and my pantry was looking a little bare. With just a handful of potatoes, some cheese, and a few trusty staples, these golden, crispy cups were born—and they’ve been a staple at my gatherings ever since. Perfect for game nights, potlucks, or even a lazy Sunday snack, they’re little pockets of joy that everyone reaches for again and again.
Ingredients You’ll Need
- 4 medium russet potatoes – The starchy goodness of russets gives these cups their perfect crispiness.
- 2 tbsp olive oil – A light coating to help them crisp up beautifully in the oven.
- 1 tsp garlic powder – Because everything tastes better with a hint of garlic.
- ½ tsp smoked paprika – Adds a subtle warmth that pairs so well with cheese.
- Salt & black pepper – To taste, of course. Don’t be shy!
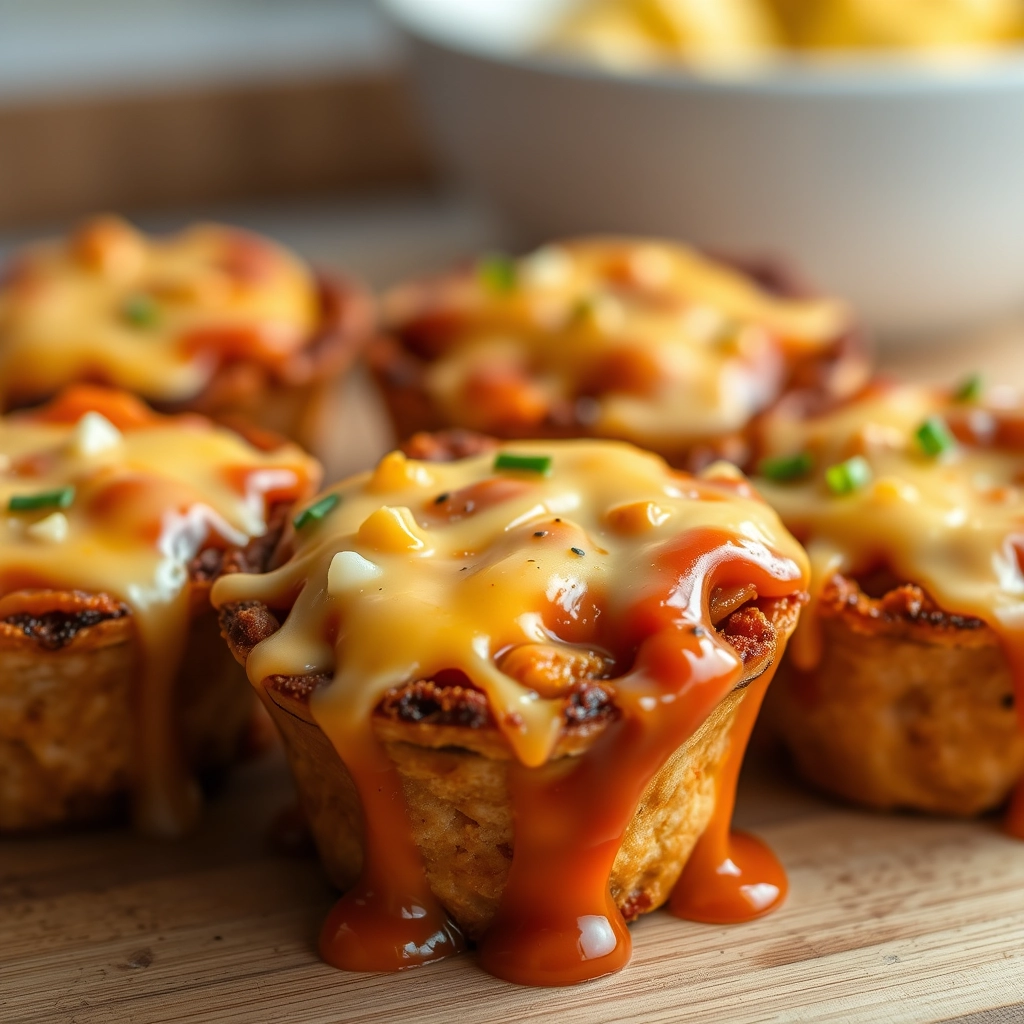
- 1 cup shredded cheddar cheese – Sharp cheddar melts like a dream, but feel free to mix in Monterey Jack for extra gooeyness.
- ½ cup cooked bacon bits – Because bacon makes everything better. (Vegetarian? Skip it or swap in sautéed mushrooms!)
- ¼ cup sour cream – A dollop on top adds the perfect creamy contrast.
- 2 green onions, finely chopped – For that fresh, oniony crunch.
Let’s Make These Crispy Little Bites!
Preheat your oven to 400°F (200°C) and grab a standard muffin tin—no fancy equipment needed here. A little grease or non-stick spray will keep your tater cups from sticking, but trust me, they won’t last long enough to worry about leftovers!
- Prep the potatoes: Scrub them clean (no need to peel!) and grate them using the large holes of a box grater. Toss the shreds in a clean kitchen towel and squeeze out as much moisture as possible—this is the secret to extra crispiness!
- Season & mix: In a bowl, combine the grated potatoes, olive oil, garlic powder, smoked paprika, salt, and pepper. Mix well so every shred is coated in that flavorful goodness.
- Press into cups: Divide the mixture evenly into the muffin tin, pressing firmly into the bottom and up the sides to form little cups. Bake for 25-30 minutes until golden and crispy at the edges.
- Cheese & bacon time: Once the cups are crisp, pull them out and sprinkle cheese and bacon inside. Return to the oven for 3-5 minutes, just until the cheese is melty and bubbly.
At this point, your kitchen will smell unreal. But hold on—just a couple more steps before the best part: eating them!

Pro Tips, Variations & Substitutions
These loaded tater cups are wonderfully forgiving, so don’t be afraid to make them your own! Here are some ways to customize them:
- Swap the potatoes: Sweet potatoes or even frozen hash browns (thawed and patted dry) work beautifully.
- Cheese lovers unite: Try pepper jack for a kick, or swap half the cheddar for creamy goat cheese.
- Make it meaty: Crumbled bacon, diced ham, or even ground sausage take these to the next level.
- Veggie-packed: Stir in sautéed mushrooms, bell peppers, or spinach for extra nutrition.
- Crispier edges: Lightly spray the muffin tin with oil before adding the potato mixture for extra crunch.
What to Serve With Loaded Tater Cups
These little bites are versatile enough for any occasion! Here are some perfect pairings:
- Game day spread: Serve alongside wings, sliders, and a cold beer.
- Brunch favorite: Pair with scrambled eggs and fresh fruit.
- Cozy dinner: Enjoy with a simple green salad and roasted chicken.
- Party appetizer: Set out with dipping sauces like ranch, sriracha mayo, or sour cream.
Storage & Reheating Tips
While these are best fresh, leftovers can still be delicious with a little TLC:
- Fridge: Store in an airtight container for up to 3 days.
- Freezer: Freeze in a single layer, then transfer to a bag for up to 2 months.
- Reheating: For crispiness, pop them in the oven or air fryer at 375°F for 5–8 minutes. The microwave works in a pinch, but they’ll be softer.
Frequently Asked Questions
Can I make these ahead of time?
Yes! Assemble the cups, cover, and refrigerate for up to 24 hours before baking. Add 2–3 extra minutes to the cook time if baking straight from the fridge.
Why are my tater cups soggy?
This usually happens if the potatoes aren’t dried well enough. Squeeze out as much moisture as possible, and make sure your muffin tin is well-greased.
Can I make these gluten-free?
Absolutely! Just ensure your breadcrumbs (if using) are gluten-free, or skip them entirely—they’ll still be delicious.
What’s the best way to remove them from the pan?
Let them cool for 5 minutes, then gently loosen the edges with a butter knife or small spatula. They’ll pop right out!
Final Thoughts
There’s something magical about bite-sized comfort food, and these loaded tater cups deliver every time. Whether you’re hosting friends, treating the family, or just craving something cozy, they’re guaranteed to bring smiles (and empty plates!). The best part? They’re as fun to make as they are to eat—so roll up your sleeves, get creative with toppings, and enjoy every cheesy, crispy bite. Happy cooking!
Print
Loaded Tater Cups
Description
Crispy potato cups filled with cheese, bacon, and green onions for a delicious appetizer or side dish.
Ingredients
For the Crust:
- 4 large russet potatoes
- 2 tbsp olive oil
- 1 tsp salt
- 1/2 tsp black pepper
- 1 cup shredded cheddar cheese
- 6 slices cooked bacon, crumbled
- 1/4 cup sour cream
- 2 green onions, sliced
Instructions
1. Prepare the Crust:
- Preheat oven to 400°F (200°C). Grease a muffin tin.
- Slice potatoes into thin rounds. Toss with olive oil, salt, and pepper.
- Press potato slices into muffin cups, overlapping to form a cup shape.
- Bake for 25-30 minutes until golden and crispy.
- Remove from oven and fill each cup with cheese and bacon. Return to oven for 3-5 minutes until cheese melts.
- Top with sour cream and green onions before serving.
Notes
You can customize the seasonings to taste.
