
“`html
Table of Contents
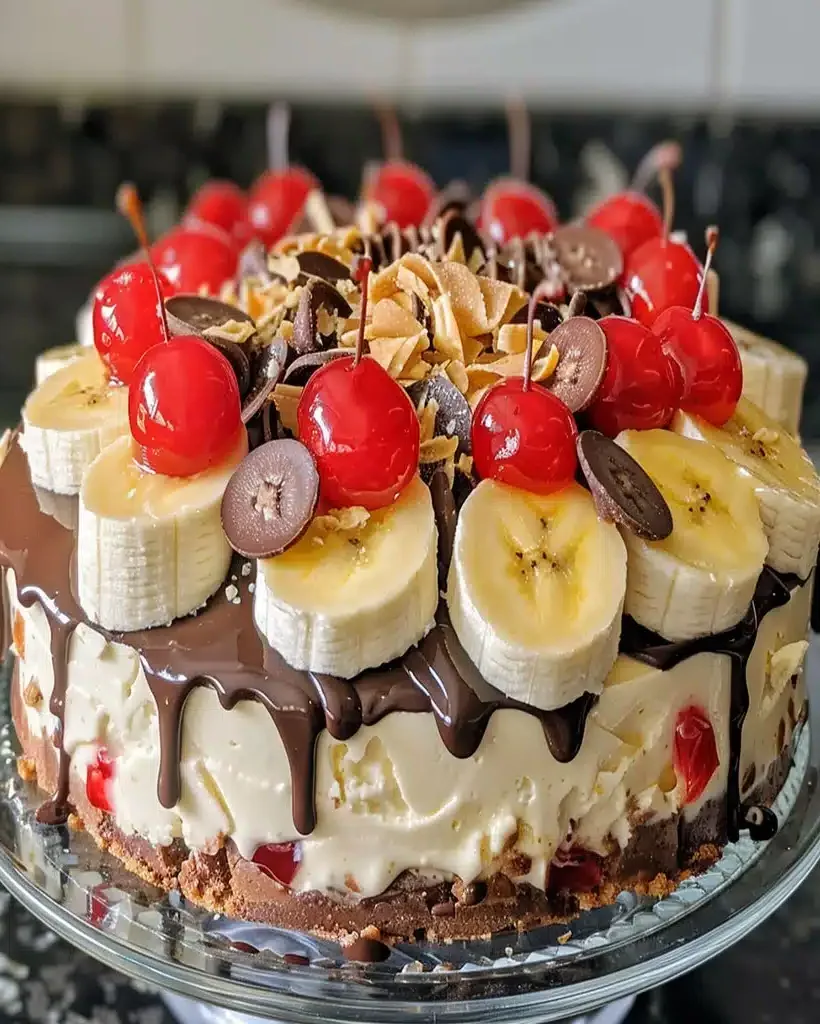
Easy Banana Split Ice Cream Cake!
Embark on a Frozen Dessert Adventure with Our Easy Banana Split Ice Cream Cake!
Hello, dessert lovers! If you’re craving a treat that’s both luxurious and delightful, look no further. Have you ever found yourself gazing longingly at a classic banana split, wishing you could capture its magic in a more shareable, cake-like form? Today, we’re diving into the world of indulgence with this luxurious Banana Split Cake – a frozen dessert that captures the best elements of a classic banana split, with the added bonus of being an easy-to-make cake. If you love banana splits or banana cake desserts, this recipe is going to become your new go-to. It’s the perfect blend of creamy, fruity, and decadent, all chilled to perfection. Let’s dive in and explore how to make this decadent dessert!
The Star-Studded Ingredients for Your Banana Split Masterpiece
To create this symphony of flavors, you’ll need high-quality ingredients. Don’t skimp here; they truly make a difference in the final taste and texture. Imagine the sweet, ripe aroma of fresh bananas, the cool, smooth embrace of premium ice cream, and the delightful crunch of toppings – it’s a sensory explosion waiting to happen!
-
For the Banana Base:
- 3-4 ripe bananas, mashed (about 1.5 cups) – look for bananas with a few brown spots for maximum sweetness and a tender texture.
- 1/4 cup unsalted butter, melted – this adds richness and helps bind the base.
- 1/2 cup crushed graham crackers or vanilla wafers – for that classic, slightly crumbly foundation.
- 2 tablespoons granulated sugar – just a touch to enhance sweetness.
- 1/4 teaspoon ground cinnamon (optional) – for a hint of warmth.
-
For the Ice Cream Layers:
- 1 quart vanilla ice cream, softened – a good quality vanilla is key as it’s the canvas for other flavors.
- 1 pint strawberry ice cream, softened – for that vibrant fruitiness.
- 1 pint chocolate ice cream, softened – to add depth and a rich, decadent note.
Substitution Idea: If you can’t find strawberry or chocolate ice cream, you can use more vanilla and add your own mix-ins like chopped strawberries or chocolate chips.
-
For the Toppings & Garnish:
- 1/2 cup hot fudge sauce, slightly warmed – thick and glossy, it’s the perfect chocolatey drizzle.
- 1/2 cup strawberry topping or sauce – bright, fruity, and bursting with freshness.
- 1/2 cup whipped cream – light, airy, and cloud-like.
- 1/4 cup chopped peanuts or maraschino cherries, for garnish – for that classic finishing touch and a pop of color.
Timing is Everything: Prep, Freeze, and Enjoy!
While the active prep time is a breezy 30 minutes, the magic truly happens in the freezer. Unlike instant desserts, this cake requires patience for optimal freezing. On average, similar layered ice cream cakes take between 4-12 hours to freeze solid, making our Banana Split Ice Cream Cake fall right within the typical range, ensuring a perfectly sliceable and enjoyable dessert!
Step-by-Step Instructions: Crafting Your Frozen Delight
Step 1: Prepare the Banana Base
Let’s start with the foundation! In a medium bowl, combine the mashed ripe bananas, melted butter, crushed graham crackers (or vanilla wafers), granulated sugar, and cinnamon (if using). Mix everything together until it’s well combined and has a consistency similar to damp sand. This mixture will form your delightful, slightly sweet, and firm base.
Step 2: Create the Ice Cream Layers
Now for the creamy goodness! In a separate large bowl, gently stir the softened vanilla ice cream until it’s smooth and spreadable but not melted. This is your first layer. In another bowl, do the same for the softened strawberry ice cream, and then for the chocolate ice cream. The key here is to keep them cold enough to spread but soft enough to layer evenly.
Step 3: Assemble the Split
Grab a 9-inch springform pan. Press the banana mixture evenly into the bottom of the pan to create a compact base. Think of it as building the most delicious foundation imaginable! Now, carefully spread the softened vanilla ice cream evenly over the banana base. Next, gently spread the strawberry ice cream over the vanilla layer. Finally, top it all off with the softened chocolate ice cream. Work efficiently to keep the ice cream from melting too much.
Step 4: Freeze and Decorate
Once assembled, cover the springform pan tightly with plastic wrap and then foil. Place it in the freezer for at least 6-8 hours, or preferably overnight, until it’s completely firm. When it’s ready to serve, carefully remove the sides of the springform pan. Drizzle generously with warmed hot fudge sauce and strawberry topping. Top with swirls of whipped cream and sprinkle with chopped peanuts and maraschino cherries for that iconic banana split finish. Slice and serve immediately!
Nutritional Insights (Per Serving, Approximate)
Please note that nutritional values can vary based on ingredient brands and specific portion sizes. This is an approximate estimate:
- Calories: 450-600 kcal
- Fat: 25-35g
- Carbohydrates: 50-70g
- Protein: 5-10g
- Sugar: 35-50g
Embrace Healthier Choices Without Sacrificing Flavor
Want to lighten it up a bit? You can still enjoy this delightful dessert with a few smart swaps:
- Banana Base: Use a whole wheat graham cracker or opt for a nut-based crust (like almond flour and a touch of maple syrup) for added fiber and healthy fats. You can also reduce the added sugar slightly.
- Ice Cream: Consider using a lower-fat vanilla ice cream. For a dairy-free option, use a good quality coconut milk or cashew-based ice cream. You could also blend frozen bananas and a splash of milk to create a “nice cream” base.
- Toppings: Ditch the sugary sauces for fresh fruit purees. Opt for a dollop of Greek yogurt or a lighter whipped topping instead of heavy cream. For crunch, try toasted slivered almonds or chopped unsalted pecans.
Serving Suggestions for Maximum Delight
This cake is a showstopper on its own, but here are a few ideas to make it even more special:
- Serve immediately after decorating for the best texture.
- Present with a small scoop of extra ice cream on the side if you’re feeling extra decadent.
- Garnish with a sprinkle of chocolate shavings or a drizzle of caramel sauce for an added layer of indulgence.
- If you have guests with allergies, consider making individual servings in ramekins or small dessert rings to control toppings.
Common Mistakes to Avoid for Banana Split Cake Perfection
Learning from common pitfalls can ensure your cake turns out beautifully:
- Not Softening Ice Cream Enough: If the ice cream is too hard, it will be difficult to spread evenly, leading to a lumpy cake.
- Melting Ice Cream Too Much: Conversely, if the ice cream is too melty, it will mix with the layers and become a slushy mess. Aim for spreadable but still cold.
- Not Freezing Long Enough: Impatience can lead to a cake that falls apart when sliced. Ensure it’s frozen solid for easy cutting.
- Using Underripe Bananas: Ripe bananas are much sweeter and easier to mash, providing a better flavor and texture for the base.
Storing Your Banana Split Ice Cream Cake
Because this is an ice cream cake, proper storage is crucial to maintain its integrity and flavor. If you have leftovers (which is unlikely!), wrap the cake tightly in plastic wrap, then aluminum foil. Store it in the coldest part of your freezer. It’s best enjoyed within 1-2 weeks for optimal freshness and texture. Beyond that, ice crystals can start to form, affecting the creaminess.
A Slice of Summertime Bliss, Any Time of Year!
There you have it – a decadent, fun, and surprisingly easy Banana Split Ice Cream Cake that’s guaranteed to impress! It’s the perfect dessert for birthdays, holidays, or simply as a treat to brighten any day. The combination of sweet banana, creamy ice cream layers, and classic toppings is a flavor profile that never disappoints. So, gather your ingredients, embrace the chill, and get ready to create a frozen masterpiece that everyone will love. Give this recipe a try and let us know how it turns out in the comments below!
Frequently Asked Questions
Can I make this ice cream cake ahead of time?
Absolutely! In fact, it’s best made ahead of time to allow for proper freezing. You can assemble it up to a week in advance, keeping it well-wrapped in the freezer.
What kind of pan is best for this recipe?
A 9-inch springform pan is ideal because it allows you to easily remove the sides of the cake once it’s frozen, resulting in clean, beautiful slices.
My ice cream melted too quickly while assembling. What went wrong?
Working quickly is key! Ensure your ice cream is softened just enough to spread, not completely melted. You can also place the pan in the freezer for 15-20 minutes between each layer if your kitchen is particularly warm.
Can I use homemade ice cream?
Yes, you can! If using homemade ice cream, ensure it’s churned and frozen to a firm consistency before softening it slightly for assembly.
What are some other fun topping ideas?
Get creative! Consider sprinkles, mini chocolate chips, crushed cookies (like Oreos or shortbread), a swirl of caramel sauce, or even a dusting of cocoa powder.
Love this recipe? Share it!
Pin it on Pinterest, share on Facebook, or tell your friends about this amazing Easy Banana Split Ice Cream Cake!
Banana Split Cake Recipe – Easy Ice Cream Dessert
Description
Hello, dessert lovers! If you’re craving a treat that’s both luxurious and delightful, look no further. Today, we’re diving into the world of indulgence with thisLuxurious Banana Split Cake– a frozen dessert that captures the best elements of a classic banana split, with the added bonus of being an easy-to-make cake. If you love banana splits or banana cake desserts, this recipe is going to become your new go-to. Let’s dive in and explore how to make this decadent dessert!
Ingredients
- Substitutions: If you’re looking to make this dish more allergen-friendly, consider using gluten-free graham crackers and dairy-free ice cream.
Instructions
- In a medium bowl, combine the graham cracker crumbs, melted butter, and granulated sugar. Press the mixture firmly into the bottom of a 9-inch springform pan to form the crust. Chill for 30 minutes.
- Once the crust has set, spread half of the softened vanilla ice cream evenly over the crust. Top with a layer of sliced bananas, crushed pineapple, and halved maraschino cherries.
- Spread the remaining vanilla ice cream on top of the banana and pineapple layer. Smooth it out evenly.
- Cover the springform pan with plastic wrap and place it in the freezer for at least 4 hours or until the cake is firm and solid.
- Before serving, remove the cake from the springform pan. Drizzle the top with chocolate fudge sauce. Add whipped cream, chocolate chips, and chopped nuts as a garnish. Decorate with extra maraschino cherries and sliced bananas if desired.
Notes
Ice Cream Texture: Ensure the vanilla ice cream is softened before spreading it. This helps to create a smooth, even layer without any lumps or uneven spots.
Banana Freshness: For the best texture, use bananas that are slightly ripe. They should be firm, not overripe or mushy, to hold their shape when layered.
Freezing: If you want a firmer, more solid dessert, let it freeze longer than the recommended 4 hours. The cake can be frozen overnight if needed.
“`
