
“`html
Table of Contents
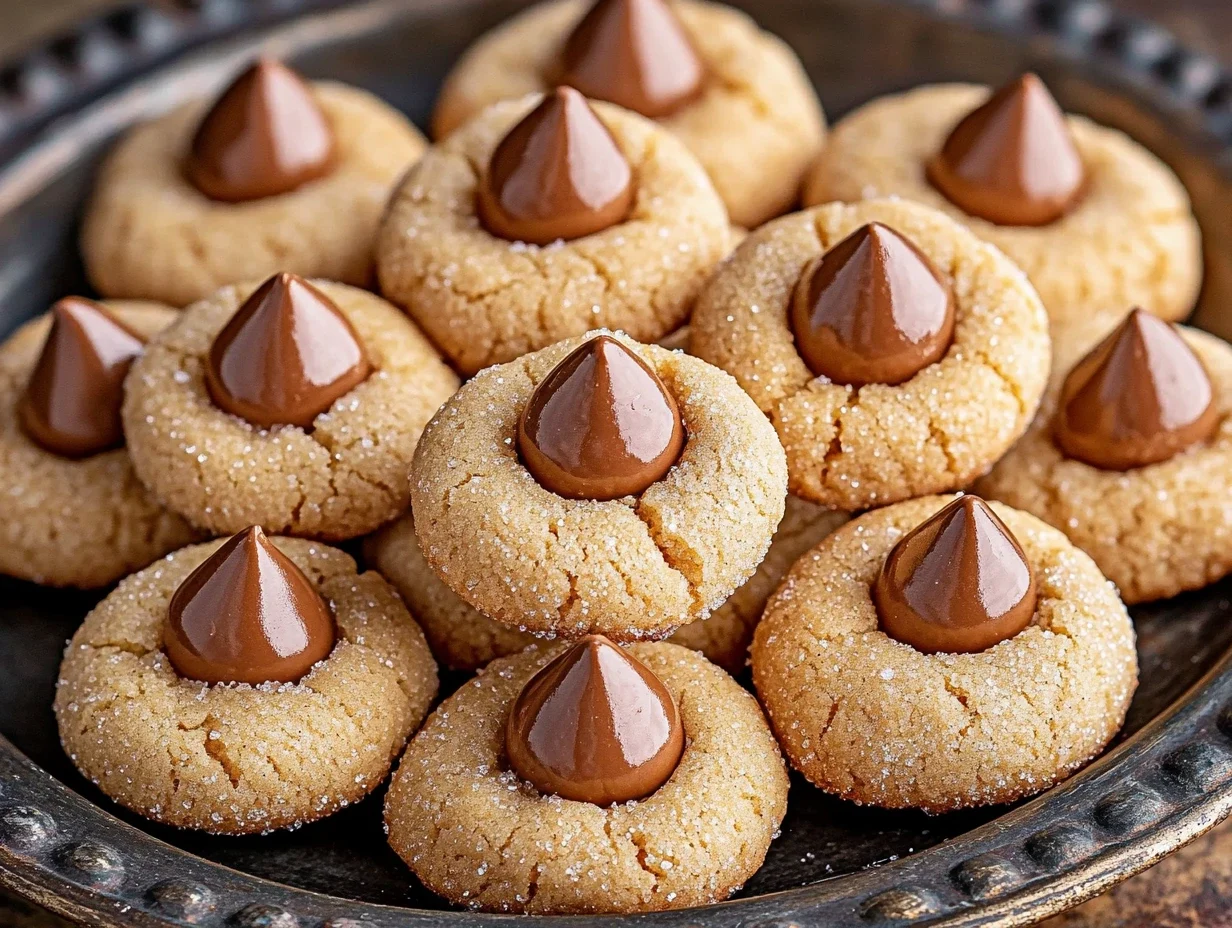
Delicious Peanut Butter Blossom Cookies You’ll Love
Have you ever wondered what makes a cookie so universally loved? It’s the perfect balance of nostalgic comfort and simple, delightful flavors. For many, that magic is found in the classic Peanut Butter Blossom cookie. If you’re looking for a treat that’s both incredibly easy to make and yields consistently delicious results, you’ve come to the right place. We’re diving deep into creating the ultimate Peanut Butter Blossom cookies, the kind that disappear from the plate in minutes and leave everyone asking for more.
Introducing the Beloved Peanut Butter Blossom Cookie
Peanut Butter Blossoms stand out in the crowded world of cookies for a reason. They combine the beloved, slightly salty, wonderfully nutty flavor of peanut butter with a sweet, melty kiss of chocolate right on top. It’s a match made in dessert heaven! These cookies aren’t just a simple sugar cookie with a peanut butter twist; they have a distinct texture and flavor profile that makes them incredibly moreish. The soft, chewy peanut butter cookie base, often with hints of vanilla and a touch of brown sugar for depth, is the perfect canvas for that iconic Hershey’s Kiss. Whether you’re baking for the holidays, preparing for a cookie swap, or simply craving an everyday indulgence, these cookies are a foolproof win. They’re also a fantastic recipe to make with kids, offering a fun and rewarding baking experience.
Ingredients for Perfect Peanut Butter Blossoms
The beauty of Peanut Butter Blossoms lies in their humble, pantry-staple ingredients. Here’s what you’ll need to create these delightful cookies:
- 1 cup (2 sticks) unsalted butter, softened: For that rich, buttery foundation and perfect spread. Ensure it’s truly softened, not melted, for the best texture.
- 1 ½ cups granulated sugar, divided: ½ cup for the cookie dough and 1 cup for rolling the cookie balls. Granulated sugar contributes to the cookie’s crisp edges and sweet interior.
- 2 large eggs: Bind the ingredients together, adding moisture and richness.
- 1 teaspoon vanilla extract: Enhances all the other flavors and adds a warm aroma. Pure vanilla extract is best for a superior taste.
- 1 ½ cups creamy peanut butter: The star of the show! A good quality, creamy peanut butter (like Jif or Skippy) will yield the best flavor and texture. Avoid natural peanut butters that tend to be oily and can alter the texture significantly.
- 2 ½ cups all-purpose flour: The structure of our cookies. Spooned and leveled, not scooped, to prevent dense cookies.
- 1 teaspoon baking soda: Our leavening agent, essential for a tender crumb and slight rise.
- ½ teaspoon salt: Balances the sweetness and enhances the peanut butter flavor.
- Hershey’s Kisses: Approximately 36-48 unwrapped Hershey’s Kisses. These are strategically placed atop the warm cookies, creating that signature blossom shape. Milk chocolate is traditional, but feel free to experiment with other varieties.
Substitutions and Notes:
- Peanut Butter: If you prefer a crunchier cookie, you can use crunchy peanut butter, but creamy is essential for the classic soft texture. For a nut-free option, sunflower seed butter can be used, though the flavor will be different.
- Sugar: While granulated sugar is traditional, you could lightly reduce it in the dough if you find the 1 ½ cups too sweet. However, remember the rolling sugar is crucial for texture.
- Butter: For a dairy-free option, a good quality vegan butter substitute can be used, ensuring it’s softened.
Timing Guide
Compared to the average cookie recipe which might take 30-40 minutes total, Peanut Butter Blossoms require a bit more active time due to rolling and chilling, but the result is well worth it. The chilling step is crucial for preventing excessive spreading, ensuring your cookies maintain their lovely shape.
Step-by-Step Instructions
Let’s get baking! Follow these simple steps for perfectly crafted Peanut Butter Blossoms.
Step 1: Cream the Butters and Sugars
In a large mixing bowl, or the bowl of your stand mixer fitted with the paddle attachment, cream together the softened butter and ½ cup of granulated sugar until light and fluffy. This usually takes about 2-3 minutes on medium speed. This step is vital for creating a tender cookie with good volume.
Step 2: Add Egg and Vanilla
Beat in the two large eggs, one at a time, until fully incorporated. Then, mix in the vanilla extract. Scrape down the sides of the bowl as needed to ensure everything is evenly combined.
Step 3: Combine Dry Ingredients
In a separate medium bowl, whisk together the all-purpose flour, baking soda, and salt. Whisking helps to evenly distribute the leavening agent and salt, preventing pockets of saltiness or a cookie that doesn’t rise properly.
Step 4: Mix Wet and Dry
Gradually add the dry ingredients to the wet ingredients, mixing on low speed until just combined. Be careful not to overmix, as this can develop the gluten in the flour, leading to tough cookies. Then, mix in the creamy peanut butter until the dough is uniform and smooth. The dough will be quite thick and slightly sticky.
Step 5: Form the Cookies
In a shallow bowl, add the remaining 1 cup of granulated sugar intended for rolling. Roll dough into balls, about 1 inch in diameter. Use a cookie scoop for uniformity. Roll each ball gently in the sugar until evenly coated. Place the sugar-coated balls about 2 inches apart on ungreased baking sheets. For the best results, chill the cookie dough balls in the refrigerator for at least 30 minutes (or freezer for 15). This prevents them from spreading too much during baking.
Step 6: The Iconic Kiss Topping
While the dough balls are chilling, unwrap your Hershey’s Kisses. Once the cookies have chilled, place one unwrapped Hershey’s Kiss on top of each cookie dough ball. Gently press it down into the center of the cookie. The warmth of the chocolate will help it adhere as the cookie bakes and slightly melt.
Step 7: Bake to Perfection
Preheat your oven to 375°F (190°C). Bake for 9-11 minutes, or until the edges are lightly golden brown and the centers look slightly underdone. The cookies will continue to bake and set as they cool on the baking sheet. Remove from oven and immediately press another Hershey’s Kiss into the center of each cookie (if the first one sunk or you want a more pronounced chocolate top). Let cookies cool on the baking sheets for 5 minutes before transferring them to a wire rack to cool completely.
Nutritional Information
While these cookies are a delightful treat, it’s good to be mindful of their nutritional content. Nutritional values can vary based on specific ingredients and portion size. Here’s an approximate breakdown per cookie (assuming 3 dozen cookies made):
- Calories: ~150-180 kcal
- Fat: ~9-11g (includes saturated fat)
- Carbohydrates: ~17-20g
- Sugar: ~10-12g
- Protein: ~4-5g
- Sodium: ~50-70mg
Please note: This is an estimation. For precise nutritional information, it’s recommended to use a recipe calculator with your specific ingredients.
Healthier Alternatives and Swaps
Looking to make these iconic cookies a bit more health-conscious without sacrificing too much flavor? Here are a few ideas:
- Reduced Sugar Dough: Lower the amount of granulated sugar in the dough by ¼ cup. You can also opt to only roll the cookie balls in a portion of the sugar, or skip the rolling sugar altogether for a slightly less sweet cookie.
- Whole Wheat Flour: Swap out half of the all-purpose flour for whole wheat pastry flour or white whole wheat flour. This adds fiber and nutrients.
- Natural Peanut Butter: Use a natural, unsweetened creamy peanut butter. Be aware that this can affect the dough’s texture and may cause more spreading, so a chill time is even more essential.
- Dark Chocolate Kisses: Opt for dark chocolate Hershey’s Kisses or dark chocolate chips pressed into the center for a richer, less sweet chocolate flavor and added antioxidants.
- Coconut Sugar/Maple Syrup: Experiment with reducing granulated sugar and replacing some with coconut sugar for a slightly lower glycemic impact, or a touch of maple syrup for a different flavor profile (note: liquid sweeteners may affect dough consistency).
Serving Suggestions
Peanut Butter Blossoms are wonderfully versatile:
- With Milk: The quintessential pairing! A cold glass of milk is the perfect companion to these sweet cookies.
- Coffee or Tea: Enjoy one (or two!) with your morning coffee or afternoon tea for a comforting break.
- Cookie Platters: They are a must-have addition to any holiday cookie platter, birthday spread, or potluck.
- Dessert Enhancement: Crumble them over ice cream or use them as a base for a no-bake dessert.
Common Mistakes to Avoid
Even with a simple recipe, a few common pitfalls can lead to less-than-perfect results. Here’s how to steer clear:
- Overmixing the Dough: This is the #1 culprit for tough, dense cookies. Mix until *just* combined.
- Not Softening Butter Properly: Using cold or melted butter will affect the cookie’s structure, leading to excessive spreading or a greasy texture.
- Scooping Flour: Always spoon flour into your measuring cup and level it off. Scooping directly from the bag compacts the flour, leading to too much flour and dry, crumbly cookies.
- Skipping the Chill Time: While tempting, chilling the dough balls is crucial, especially if your kitchen is warm or your butter was very soft, to prevent them from spreading into flat discs.
- Overbaking: Pull the cookies out when the edges are just starting to turn golden and the centers still look a little soft. They will firm up as they cool.
Storing Tips
To keep your Peanut Butter Blossoms fresh and delicious:
- At Room Temperature: Store cooled cookies in an airtight container at room temperature for up to 3-4 days. Placing a slice of bread in the container can help keep them soft.
- Freezing Baked Cookies: Wrap cooled, plain (no “kiss” on top if you prefer, or bake them with the kiss) cookies tightly in plastic wrap and then in foil or a freezer bag. They can be frozen for up to 2-3 months. Thaw at room temperature.
- Freezing Dough: You can freeze the rolled and sugared dough balls (before adding the Kisses) for up to 2-3 months. Transfer frozen dough balls directly to a preheated oven (they might need an extra minute or two of baking time) or thaw them completely in the refrigerator before baking and adding the Kisses.
Conclusion
Peanut Butter Blossom cookies are more than just a recipe; they’re a tradition, a taste of childhood, and a guaranteed crowd-pleaser. With their simple ingredients, easy-to-follow steps, and the delightful combination of peanut butter and chocolate, they’re perfect for bakers of all skill levels. Whether you’re baking for a special occasion or just a Tuesday, these cookies will bring smiles and satisfaction. So, gather your ingredients, preheat your oven, and get baking. We guarantee you’ll love these delicious Peanut Butter Blossom Cookies!
Did you try this recipe? We’d love to hear about your experience! Share your thoughts in the comments below, or tag us on social media with your amazing cookie creations!
FAQs
***Do I have to use Hershey’s Kisses?***
While Hershey’s Kisses are traditional and shape the cookie beautifully, you can substitute them with other chocolates. You could gently press in a dollop of chocolate ganache, a different brand of chocolate kiss, or even a scoop of your favorite chocolate chips (though they won’t create the same “blossom” effect). The key is a chocolate center.
***Why are my peanut butter blossom cookies spreading too much?***
Over-spreading is often due to softened butter that is too warm, too much sugar in the dough, or not chilling the dough. Make sure your butter is softened but not melted, measure your flour accurately, and don’t skip the chilling step – it’s crucial for maintaining shape.
***Can I use natural peanut butter?***
You can, but it’s generally not recommended for the classic Blossom cookie texture. Natural peanut butters, especially those that are oily and require stirring, can lead to a softer dough that spreads more. Creamy, emulsified peanut butters like Jif or Skippy are best for consistent results.
***How do I get the Hershey’s Kiss to stick and not melt everywhere?***
The trick is to press the Kiss into the warm cookie right after it comes out of the oven. The residual heat will gently melt the bottom of the Kiss, helping it adhere and create that signature look. You can also press a second Kiss in right after baking if the first one sinks too much or you want a more prominent chocolate top.
***Can I make these cookies ahead of time?***
Yes! The dough balls can be made and chilled for up to 2 days, or frozen for longer storage (see storage tips). Baked and cooled cookies also store well in an airtight container for several days.
Print
Peanut Butter Blossoms
Description
Peanut Butter Blossomsare a delightful classic cookie featuring soft, chewy peanut butter bases topped with a rich Hershey Kiss. Perfect for holidays, cookie swaps, or as an everyday treat, these cookies are as fun to make as they are to eat!
Ingredients
- Wet Ingredients:1 cupsalted butter, room temperature (8 ounces)1 cupcreamy peanut butter (250 grams)1 cupgranulated sugar (200 grams)1 cuplight brown sugar, packed (210 grams)1 teaspoonvanilla extract (5 grams)3large eggsDry Ingredients:4 cupsall-purpose flour (520 grams)2 teaspoonsbaking soda (12 grams)¼ teaspoonsaltFor Rolling:½ cupgranulated sugarTopping:60Hershey Kiss candies, unwrapped
- 1 cupsalted butter, room temperature (8 ounces)1 cupcreamy peanut butter (250 grams)1 cupgranulated sugar (200 grams)1 cuplight brown sugar, packed (210 grams)1 teaspoonvanilla extract (5 grams)3large eggs
- 1 cupcreamy peanut butter (250 grams)1 cupgranulated sugar (200 grams)1 cuplight brown sugar, packed (210 grams)1 teaspoonvanilla extract (5 grams)3large eggs
- 1 cupgranulated sugar (200 grams)1 cuplight brown sugar, packed (210 grams)1 teaspoonvanilla extract (5 grams)3large eggs
- 1 cuplight brown sugar, packed (210 grams)1 teaspoonvanilla extract (5 grams)3large eggs
- 1 teaspoonvanilla extract (5 grams)3large eggs
- 3large eggs
- Dry Ingredients:4 cupsall-purpose flour (520 grams)2 teaspoonsbaking soda (12 grams)¼ teaspoonsaltFor Rolling:½ cupgranulated sugarTopping:60Hershey Kiss candies, unwrapped
- 4 cupsall-purpose flour (520 grams)2 teaspoonsbaking soda (12 grams)¼ teaspoonsalt
- 2 teaspoonsbaking soda (12 grams)¼ teaspoonsalt
- ¼ teaspoonsalt
- For Rolling:½ cupgranulated sugarTopping:60Hershey Kiss candies, unwrapped
- ½ cupgranulated sugar
- Topping:60Hershey Kiss candies, unwrapped
- 60Hershey Kiss candies, unwrapped
Instructions
- 1️⃣Mix wet ingredients:In the bowl of a stand mixer fitted with the paddle attachment (or using an electric hand mixer), cream together the butter, peanut butter, and both sugars on medium speed for 2–3 minutes until light and fluffy. Add the vanilla extract and mix to combine.2️⃣Add eggs:Add the eggs one at a time, mixing well after each addition. Scrape down the sides of the bowl as needed.3️⃣Prepare dry ingredients:In a separate medium bowl, whisk together the flour, baking soda, and salt.4️⃣Combine wet and dry ingredients:Gradually add the dry ingredients to the wet mixture in the stand mixer. Mix until a soft dough forms and all ingredients are well combined.5️⃣Shape and roll:Roll the dough into 1-inch balls, then roll each ball in the additional granulated sugar. Arrange the dough balls on a parchment paper-lined baking sheet, leaving about 2 inches between each ball.6️⃣Chill dough:Refrigerate the cookie dough balls for 15 minutes. While the dough is chilling, preheat your oven to375°F (190°C).7️⃣Bake:Bake the cookies for 8 minutes. The cookies should puff up slightly but remain soft. Do not overbake if you prefer a chewy texture.8️⃣Add Hershey Kisses:Immediately after removing the cookies from the oven, press a Hershey Kiss into the center of each cookie. The warmth of the cookie will slightly melt the base of the candy, securing it in place.9️⃣Cool:Allow the cookies to cool on the baking sheet for 3 minutes, then transfer them to a wire rack to cool completely.
- 2️⃣Add eggs:Add the eggs one at a time, mixing well after each addition. Scrape down the sides of the bowl as needed.
- 3️⃣Prepare dry ingredients:In a separate medium bowl, whisk together the flour, baking soda, and salt.4️⃣Combine wet and dry ingredients:Gradually add the dry ingredients to the wet mixture in the stand mixer. Mix until a soft dough forms and all ingredients are well combined.5️⃣Shape and roll:Roll the dough into 1-inch balls, then roll each ball in the additional granulated sugar. Arrange the dough balls on a parchment paper-lined baking sheet, leaving about 2 inches between each ball.6️⃣Chill dough:Refrigerate the cookie dough balls for 15 minutes. While the dough is chilling, preheat your oven to375°F (190°C).7️⃣Bake:Bake the cookies for 8 minutes. The cookies should puff up slightly but remain soft. Do not overbake if you prefer a chewy texture.8️⃣Add Hershey Kisses:Immediately after removing the cookies from the oven, press a Hershey Kiss into the center of each cookie. The warmth of the cookie will slightly melt the base of the candy, securing it in place.9️⃣Cool:Allow the cookies to cool on the baking sheet for 3 minutes, then transfer them to a wire rack to cool completely.
- 4️⃣Combine wet and dry ingredients:Gradually add the dry ingredients to the wet mixture in the stand mixer. Mix until a soft dough forms and all ingredients are well combined.5️⃣Shape and roll:Roll the dough into 1-inch balls, then roll each ball in the additional granulated sugar. Arrange the dough balls on a parchment paper-lined baking sheet, leaving about 2 inches between each ball.6️⃣Chill dough:Refrigerate the cookie dough balls for 15 minutes. While the dough is chilling, preheat your oven to375°F (190°C).7️⃣Bake:Bake the cookies for 8 minutes. The cookies should puff up slightly but remain soft. Do not overbake if you prefer a chewy texture.8️⃣Add Hershey Kisses:Immediately after removing the cookies from the oven, press a Hershey Kiss into the center of each cookie. The warmth of the cookie will slightly melt the base of the candy, securing it in place.9️⃣Cool:Allow the cookies to cool on the baking sheet for 3 minutes, then transfer them to a wire rack to cool completely.
- 5️⃣Shape and roll:Roll the dough into 1-inch balls, then roll each ball in the additional granulated sugar. Arrange the dough balls on a parchment paper-lined baking sheet, leaving about 2 inches between each ball.
- 6️⃣Chill dough:Refrigerate the cookie dough balls for 15 minutes. While the dough is chilling, preheat your oven to375°F (190°C).7️⃣Bake:Bake the cookies for 8 minutes. The cookies should puff up slightly but remain soft. Do not overbake if you prefer a chewy texture.8️⃣Add Hershey Kisses:Immediately after removing the cookies from the oven, press a Hershey Kiss into the center of each cookie. The warmth of the cookie will slightly melt the base of the candy, securing it in place.9️⃣Cool:Allow the cookies to cool on the baking sheet for 3 minutes, then transfer them to a wire rack to cool completely.
- 7️⃣Bake:Bake the cookies for 8 minutes. The cookies should puff up slightly but remain soft. Do not overbake if you prefer a chewy texture.8️⃣Add Hershey Kisses:Immediately after removing the cookies from the oven, press a Hershey Kiss into the center of each cookie. The warmth of the cookie will slightly melt the base of the candy, securing it in place.9️⃣Cool:Allow the cookies to cool on the baking sheet for 3 minutes, then transfer them to a wire rack to cool completely.
- 8️⃣Add Hershey Kisses:Immediately after removing the cookies from the oven, press a Hershey Kiss into the center of each cookie. The warmth of the cookie will slightly melt the base of the candy, securing it in place.
- 9️⃣Cool:Allow the cookies to cool on the baking sheet for 3 minutes, then transfer them to a wire rack to cool completely.
Notes
Chilling the dough helps maintain the shape and texture of the cookies during baking.Store cookies in an airtight container at room temperature for up to 5 days.These cookies freeze well for up to 3 months; simply thaw at room temperature before serving
Store cookies in an airtight container at room temperature for up to 5 days.These cookies freeze well for up to 3 months; simply thaw at room temperature before serving
These cookies freeze well for up to 3 months; simply thaw at room temperature before serving
“`
