
“`html
Table of Contents
- Dive into Crispy Air Fryer Chicken Breast
- The Crispy Air Fryer Chicken Breast Ingredients
- Timing is Everything for Your Crispy Chicken
- How to Make Crispy Air Fryer Chicken Breast: Step-by-Step
- Nutritional Powerhouse: What You’re Eating
- Healthier Swaps for Even More Goodness
- Serving Suggestions to Elevate Your Meal
- Avoid These Common Mistakes
- Storing Your Crispy Chicken
- Enjoy Your Effortlessly Delicious Meal!
- Frequently Asked Questions
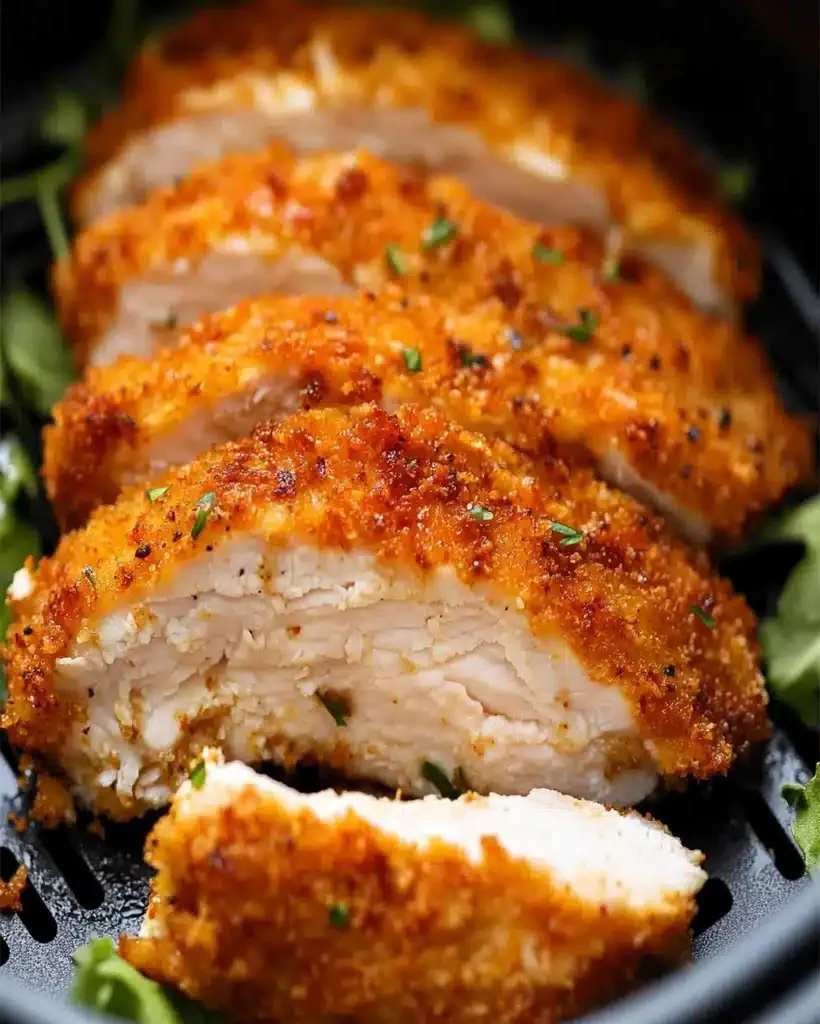
Crispy Air Fryer Chicken Breast – So Easy & Delicious!
Are you craving that satisfying crunch of fried chicken without the guilt or the mess? If you’re aiming to enjoy a healthier, yet incredibly delicious, chicken dinner, then this recipe is your golden ticket!
Dive into Crispy Air Fryer Chicken Breast
Welcome to our kitchen! Today, we’re diving into the wonderful world of air frying with a recipe that combines all the deliciousness of crispy chicken without the extra calories from deep-frying. If you’re a fan of easy, quick, and healthy meals, then this Crispy Chicken Breast in Air Fryer is the perfect choice for you. With just a teaspoon of oil, you’ll get golden, crispy chicken that’s moist and tender on the inside—exactly what you’d expect from your favorite fried chicken spot but without the guilt.
The air fryer has revolutionized home cooking, transforming often-heavy dishes into lighter, healthier versions. This method is particularly brilliant for achieving that coveted crispy exterior on proteins like chicken, without submerging them in a vat of oil. Forget greasy pans and smoky kitchens; the air fryer circulates hot air at high speed, mimicking the crisping effect of deep frying but with a fraction of the fat. This recipe is designed to be incredibly straightforward, perfect for busy weeknights or when you’re just starting out with your air fryer.
The Crispy Air Fryer Chicken Breast Ingredients
The beauty of this recipe lies in its simplicity and the pantry staples it uses. We’re focusing on creating maximum flavor and texture with minimal ingredients.
-
2 (6-ounce) boneless, skinless chicken breasts: Look for chicken breasts that are relatively uniform in thickness. This ensures even cooking. If they are very thick, you can pound them slightly to about 3/4 inch thickness.
Substitution: Boneless, skinless chicken thighs work wonderfully but will require a slightly longer cooking time. -
1 tablespoon olive oil or avocado oil: This is the *minimum* needed for air frying to help the seasonings adhere and aid in crisping. You can also use a spray oil for even lighter coating.
Substitution: Any neutral high-heat oil like grapeseed or canola oil works. For a flavor boost, consider a light olive oil. -
1 teaspoon paprika: Adds a beautiful reddish hue and a mild, smoky-sweet flavor.
Substitution: Smoked paprika is fantastic for a deeper, smokier taste. You can also use sweet paprika. -
1/2 teaspoon garlic powder: For that essential savory depth.
Substitution: Fresh minced garlic can be used, but it may burn more easily in the air fryer. A good compromise is to mix it with the oil. -
1/2 teaspoon onion powder: Complements the garlic and paprika for a well-rounded flavor base.
Substitution: Finely minced dried onion flakes can provide texture as well as flavor. -
1/4 teaspoon black pepper: Freshly ground black pepper offers the best pungent aroma and taste.
Substitution: White pepper can be used for a slightly different heat profile. -
1/2 teaspoon salt: Enhances all the other flavors and is crucial for taste.
Substitution: Sea salt or kosher salt are preferred for their clean flavor. Adjust to your salt preference. -
Optional: Pinch of cayenne pepper: For a little kick of heat.
Substitution: Red pepper flakes can also be used for a spicier note.
Timing is Everything for Your Crispy Chicken
5 minutes
12-16 minutes
17-21 minutes
The average time to prepare and cook chicken breasts can range from 25-40 minutes, depending on the method. Our air fryer method significantly speeds up this process, allowing you to get a delicious, home-cooked meal on the table in under 25 minutes, including prep! This efficiency is one of the top reasons to love your air fryer.
How to Make Crispy Air Fryer Chicken Breast: Step-by-Step
Step 1: Prep Your Chicken Breasts
Begin by patting your chicken breasts thoroughly dry with paper towels. This is a crucial step for achieving a crispy exterior. If your chicken breasts are particularly thick or uneven, you can place them between two pieces of plastic wrap or in a resealable bag and gently pound them with a meat mallet or the bottom of a heavy pan until they are about 3/4 inch thick. This ensures even cooking.
Step 2: Season Generously
In a small bowl, whisk together the paprika, garlic powder, onion powder, salt, black pepper, and cayenne pepper (if using). Place the dried chicken breasts in a larger bowl or on a plate. Drizzle them with the olive oil and rub it all over to coat evenly. Then, generously sprinkle the spice mixture over the chicken breasts, ensuring they are well-coated on all sides. Press the spices onto the chicken so they adhere.
Step 3: Air Fry to Perfection
Preheat your air fryer to 400°F (200°C) for about 5 minutes. Place the seasoned chicken breasts in a single layer in the air fryer basket. It’s important not to overcrowd the basket, as this allows air to circulate properly, ensuring crispiness. If necessary, cook the chicken in batches.
Air fry for 12-16 minutes. The exact time will depend on the thickness of your chicken breasts and your specific air fryer model. Halfway through the cooking time (around 6-8 minutes), carefully flip the chicken breasts to ensure they brown and crisp evenly on both sides.
The chicken is done when it reaches an internal temperature of 165°F (74°C) when tested with an instant-read thermometer inserted into the thickest part. The exterior should be golden brown and crispy.
Step 4: Rest and Serve
Once cooked, carefully remove the chicken breasts from the air fryer basket. Transfer them to a clean cutting board or plate and let them rest for at least 5 minutes before slicing. This resting period allows the juices to redistribute throughout the meat, resulting in a more tender and moist chicken breast.
Nutritional Powerhouse: What You’re Eating
This recipe is a fantastic way to enjoy lean protein with significantly fewer calories and less fat than traditional fried chicken. A typical serving (one 6oz breast, without added sides) is approximately:
- Calories: ~300-350 (depending on oil used)
- Protein: ~50-60g
- Fat: ~10-15g
- Carbohydrates: ~2-3g
(Note: Nutritional values are approximate and can vary based on exact ingredients and portion sizes.)
Healthier Swaps for Even More Goodness
While this recipe is already quite healthy, here are some ways to boost its nutritional profile or adapt it for specific dietary needs:
- Lower Sodium: Use a salt substitute or reduce the salt by half. Be mindful of spice blends used, as some can be high in sodium.
- Gluten-Free Coating: If you want an even crispier coating or are avoiding gluten, you can lightly dredge the oiled chicken in almond flour or gluten-free breadcrumbs before applying the spice mix.
- Herbaceous Twist: Add dried herbs like rosemary, thyme, or oregano to the spice rub for a Mediterranean flair.
- Spiciness Level: Adjust the cayenne pepper to your preference, or omit it entirely if you don’t like heat.
Serving Suggestions to Elevate Your Meal
This versatile crispy chicken breast pairs beautifully with a wide array of side dishes:
- Serve sliced over a crisp green salad with your favorite vinaigrette.
- Pair with steamed or roasted vegetables like broccoli, green beans, or asparagus.
- Enjoy alongside a healthy carb source like quinoa, brown rice, or sweet potato.
- Transform it into a sandwich or wrap by slicing and adding to your favorite bread or lettuce wrap.
- Drizzle with your favorite healthy sauce, like a light ranch or a zesty salsa.
Avoid These Common Mistakes
- Overcrowding the Basket: This is the number one culprit for soggy chicken. Ensure there’s space for air to circulate. Cook in batches if needed.
- Not Patting Dry: Moisture is the enemy of crispiness. Always pat your chicken breasts thoroughly dry.
- Not Resting the Chicken: Skipping the rest period means juices will run out when you cut into it, leading to drier chicken.
- Uneven Thickness: Thick and thin parts of the chicken will cook at different rates, leading to either dry or undercooked chicken. Pound to an even thickness.
Storing Your Crispy Chicken
Once completely cooled, store leftover crispy air fryer chicken breasts in an airtight container in the refrigerator for up to 3-4 days. While it’s best enjoyed fresh, you can reheat it gently in the air fryer or oven for a few minutes to try and revive some crispiness. Microwaving will likely result in a softer texture.
Enjoy Your Effortlessly Delicious Meal!
This Crispy Air Fryer Chicken Breast recipe is a game-changer for quick, healthy, and satisfying meals. It proves that you don’t need to deep-fry to achieve incredible flavor and texture. Whether you’re an air fryer novice or a seasoned pro, give this recipe a try – it’s sure to become a staple in your weekly meal rotation. What are you waiting for? Get your air fryer ready and let’s make some magic!
Frequently Asked Questions
***Can I use frozen chicken breasts?***
It’s best to thaw chicken breasts completely before air frying. Frozen chicken will take much longer to cook and will likely not achieve the same level of crispiness. Ensure your chicken is at room temperature or thawed before seasoning and cooking.
***Do I need to flip the chicken?***
Yes, flipping the chicken halfway through the cooking time is recommended to ensure it cooks evenly and gets crispy on both sides. This is a key step for achieving that perfect golden-brown crust.
***What if my air fryer doesn’t have a temperature setting?***
Most modern air fryers have temperature controls. If yours doesn’t, you might have a simpler model. In that case, you’ll rely more on visual cues and the recommended cooking time, adjusting as needed. Cook for the suggested time and check for doneness. You can also consult your air fryer’s manual for guidance.
***Can I add a breading to this recipe?***
Absolutely! If you want a breaded crust, you can follow a standard breading procedure: dredge the oiled chicken in flour, then an egg wash, and finally in breadcrumbs (panko breadcrumbs work great for extra crispiness). You might need to slightly increase the cooking time or lower the temperature to ensure the breading cooks through without burning.

Crispy Chicken Breast in Air Fryer – Easy & Healthy Recipe
Description
Welcome to our kitchen! Today, we’re diving into the wonderful world of air frying with a recipe that combines all the deliciousness of crispy chicken without the extra calories from deep-frying. If you’re a fan of easy, quick, and healthy meals, then thisCrispy Chicken Breast in Air Fryeris the perfect choice for you. With just a teaspoon of oil, you’ll get golden, crispy chicken that’s moist and tender on the inside—exactly what you’d expect from your favorite fried chicken spot but without the guilt.
Ingredients
- For the bread coating:
- Optional substitutions:
Instructions
- Start by cutting the chicken breasts into even-sized fillets or cutlets. Use a meat mallet or rolling pin to pound the thicker parts to ensure even cooking. This is important for getting that crispy, uniform texture.
- In a bowl, mix together the oil, salt, and pepper. Coat the chicken fillets evenly with this mixture. The oil helps the coating stick while also ensuring the chicken gets that golden, crispy finish in the air fryer.
- In a separate bowl, combine the breadcrumbs, flour, garlic powder, onion powder, thyme, basil, salt, and chili powder. Mix well to create the seasoned breading mixture.
- Place each chicken fillet in the breading mixture, pressing gently to ensure the coating adheres. Flip and coat the other side as well.
- Place the coated chicken fillets in the air fryer basket, making sure they’re not touching. Set the air fryer to 200°C (390°F) and cook for 8-9 minutes. Flip the fillets halfway through and cook for an additional 4 minutes, or until the chicken is crispy and fully cooked through.
Notes
For extra crispiness, usepanko breadcrumbsinstead of regular breadcrumbs.
Marinate the chicken in buttermilk for an hour before coating for a juicier texture.
To avoid overcrowding, cook the chicken in batches if necessary. Overcrowding the basket can result in uneven cooking.
“`
