Best Homemade Bomb Pops – Easy 3-Ingredient Recipe

best-homemade-bomb-pops-recipe

Introduction

Nothing brings back childhood summer memories quite like the vibrant colors and fruity flavors of a classic frozen treat. That’s why I’m thrilled to share my take on Homemade Bomb Pops—a nostalgic yet easy-to-make delight that will transport you straight to those carefree days. Whether you’re hosting a backyard barbecue or simply craving a refreshing snack, these popsicles deliver a burst of joy in every bite. Plus, they’re a fun way to get the kids involved in the kitchen!

Homemade Bomb Pops are a playful twist on the iconic store-bought version, but with a fresher, more wholesome approach. Instead of artificial flavors and excessive sugar, we’re using real fruit juices and natural sweeteners to create layers of vibrant taste. These popsicles not only satisfy your sweet tooth but also let you control the ingredients, making them a healthier alternative for families. They perfectly align with brekcakes.com’s mission to celebrate simple, joyful cooking that brings people together. If you love creative desserts, you’ll also adore our Rainbow Cake or our Berry Smoothie Bowl for more colorful inspiration.

Why I Love This Recipe

Homemade Bomb Pops hold a special place in my heart because they remind me of summers spent with my grandparents. Every year, we’d make batches together, experimenting with different fruit combinations and laughing as the vibrant colors dripped down our hands. Now, I love recreating that same magic with my own family. There’s something incredibly rewarding about watching my kids’ faces light up when they see those red, white, and blue layers—just like mine did years ago. It’s more than a recipe; it’s a tradition filled with love and laughter.

Health and Nutrition

Why it’s good for your body

Homemade Bomb Pops pack a refreshing punch while offering surprising health perks. First, they deliver hydration, especially on hot days, thanks to their high water content. Additionally, when you make them at home, you control the ingredients, avoiding artificial dyes and excess sugar found in store-bought versions. For instance, using real fruit juice boosts vitamin C, which supports immunity and skin health.

Moreover, Homemade Bomb Pops can be a smart way to satisfy sweet cravings without derailing your nutrition. By blending yogurt or coconut milk into the layers, you add protein and healthy fats, keeping you fuller longer. Transitioning to natural sweeteners like honey or maple syrup also reduces blood sugar spikes compared to refined sugars. Plus, the vibrant colors from berries or citrus fruits mean you’re getting antioxidants, which fight inflammation.

Finally, these frozen treats encourage creativity with nutrient-dense mix-ins. Whether you swirl in spinach for iron or chia seeds for omega-3s, Homemade Bomb Pops adapt to your wellness goals. They’re a fun, guilt-free way to stay cool and nourished.

How it fits in a healthy lifestyle

Homemade Bomb Pops fit seamlessly into balanced eating habits. They work as a light dessert or snack, especially if you prioritize whole-food ingredients. For gluten-free or dairy-free diets, simply swap yogurt for almond milk or coconut cream. If heart health is a focus, opt for layers with potassium-rich bananas or antioxidant-packed blueberries.

Pairing these pops with protein-rich meals, like our high-protein breakfast options, ensures steady energy levels. They also complement active lifestyles—freeze them post-workout for a cool reward. For more ways to enjoy wholesome sweets, explore our guilt-free dessert recipes. With endless variations, Homemade Bomb Pops make healthy living deliciously simple.

Print

clock clock iconcutlery cutlery iconflag flag iconfolder folder iconinstagram instagram iconpinterest pinterest iconfacebook facebook iconprint print iconsquares squares iconheart heart iconheart solid heart solid icon

Homemade Bomb Pops


  • Author:
    Chef Mia


Description

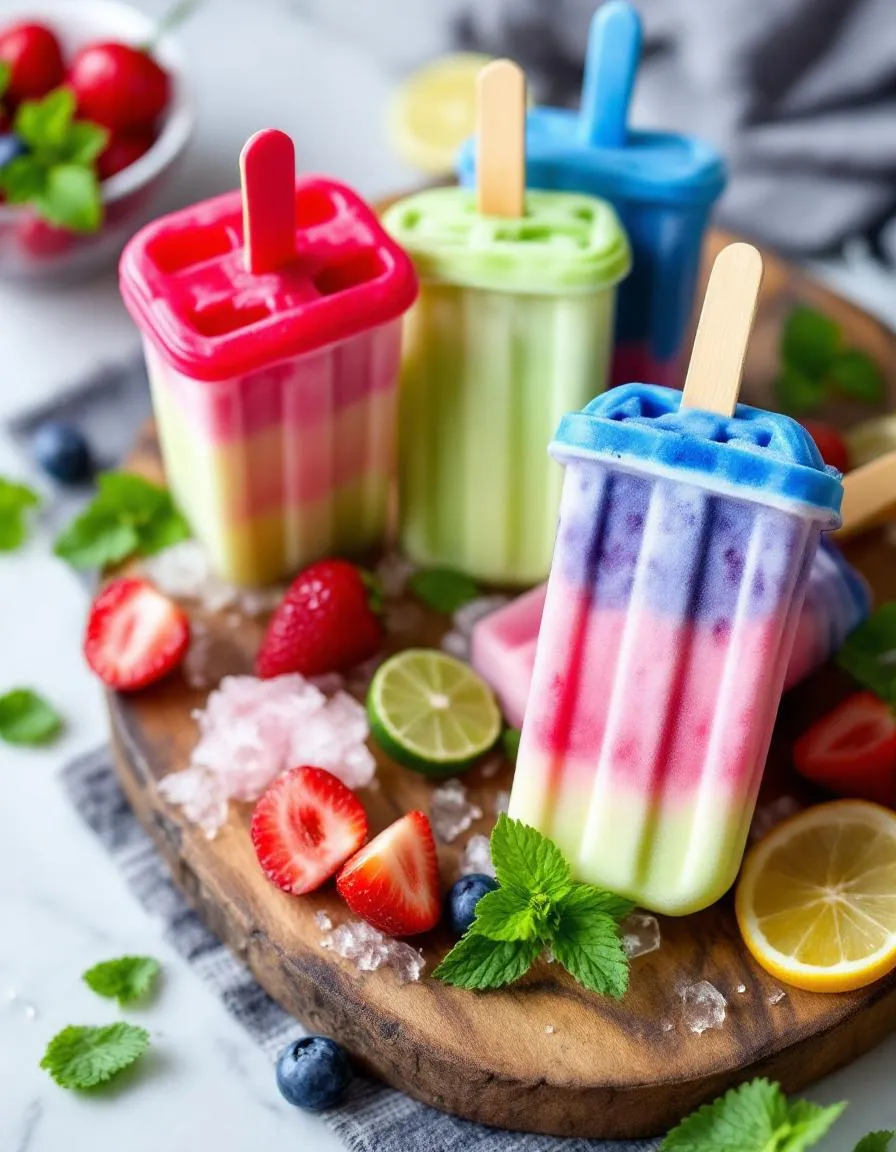
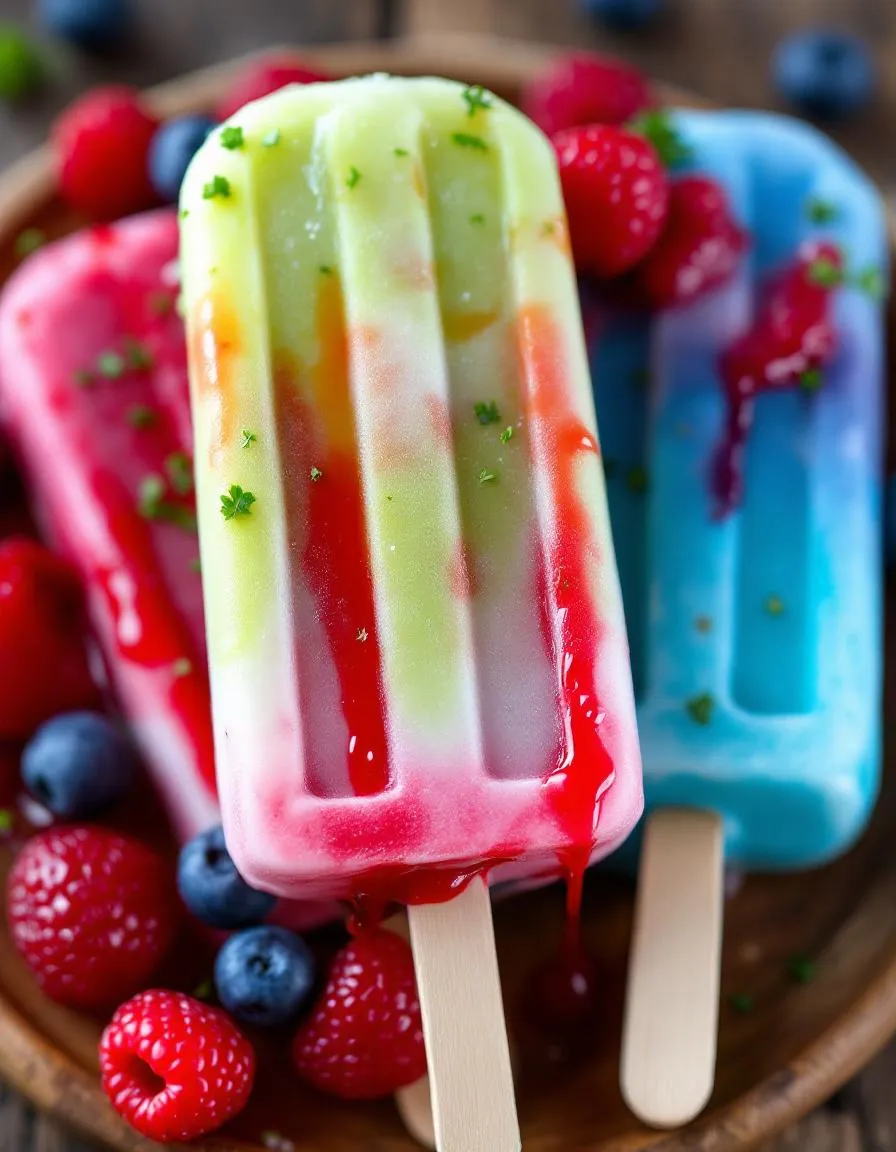
A fun and refreshing homemade version of the classic Bomb Pop with layers of cherry, lime, and blue raspberry flavors.


Ingredients


Scale

For the Crust:

  • 1 cup cherry juice or cherry-flavored drink
  • 1 cup limeade
  • 1 cup blue raspberry drink
  • 1/4 cup sugar (optional, adjust to taste)
  • 12 popsicle sticks
  • Popsicle molds


Instructions

1. Prepare the Crust:

  1. Pour the cherry juice into the popsicle molds, filling each one-third full. Freeze for 1 hour or until partially set.
  2. Insert popsicle sticks into the partially frozen cherry layer. Freeze for another 30 minutes.
  3. Carefully pour the limeade over the cherry layer, filling another third. Freeze for 1 hour.
  4. Pour the blue raspberry drink as the final layer. Freeze for at least 4 hours or until fully set.
  5. To unmold, briefly run warm water over the molds to loosen the popsicles.


Notes

You can customize the seasonings to taste.


ync" src="https://exorecipes.com/wp-content/uploads/2025/06/best-homemade-bomb-pops-recipe-ingrediants.webp" />

“`html

How to Prepare This Dish

Steps and time-saving tips

Making Homemade Bomb Pops is easier than you think, and the results are worth every minute. First, gather your ingredients and three small bowls for mixing. Divide your fruit juices or flavored liquids evenly among the bowls. For a vibrant look, use contrasting colors like cherry, lemonade, and blue raspberry. Whisk each liquid with a bit of sugar or honey to sweeten, but don’t overdo it—these pops should taste refreshing, not overly sugary. Next, gently pour the first layer into your popsicle molds, filling them about one-third of the way. Freeze this layer for 30 minutes or until firm but not solid. Meanwhile, prep the next layer so it’s ready to go. Once the first layer sets, pour the second liquid and freeze again. Repeat for the final layer, then insert popsicle sticks and freeze for at least 4 hours. To save time, prep all three layers in advance and store them in the fridge until you’re ready to layer and freeze. If you’re short on time, use store-bought juices instead of fresh-squeezed—they’ll still taste great.

and-learned-from">Mistakes I’ve made and learned from

When I first tried making Homemade Bomb Pops, I rushed the freezing process and ended up with messy, blended layers. Patience is key—wait until each layer is firm before adding the next. Another mistake? Using flimsy popsicle sticks that snapped when I tried to unmold the pops. Now, I always use sturdy wooden sticks or reusable molds with built-in handles. If your pops won’t release, run the mold under warm water for a few seconds—just don’t overdo it, or they’ll melt. For more tips on perfecting frozen treats, check out my guide on avoiding common popsicle mistakes. And if you love experimenting with flavors, my creative popsicle combinations post has plenty of inspiration. Trust me, learning from these hiccups made my Homemade Bomb Pops way better—and yours will be too!

“`

n-and-variations">Cultural Connection and Variations

Where this recipe comes from

Homemade Bomb Pops bring back memories of sticky summer afternoons and neighborhood ice cream trucks. Originally inspired by the classic American rocket pops, these vibrant treats first gained popularity in the 1950s as a patriotic symbol with their red, white, and blue layers. However, families quickly made them their own by experimenting with flavors like tropical fruit or even swapping dairy for coconut milk in vegan versions.

Around the world, similar frozen treats take on local twists. In Mexico, paletas often feature fresh mango or chili-lime flavors, while Italian gelato pops might layer espresso and cream. Even within the U.S., regional variations pop up—some Southern cooks add a splash of sweet tea syrup, while others in the Midwest might blend in fresh berry purees. Homemade Bomb Pops, though, keep that nostalgic charm, whether you’re making them for a Fourth of July bash or just to beat the heat.

In my family, we turned them into a tradition by using grandma’s vintage popsicle molds and letting the kids mix their own color combinations. The best part? You can tailor them to any season—swap the berries for pumpkin spice in fall or peppermint in winter. No matter how you tweak them, Homemade Bomb Pops always deliver that same burst of joy.

ays-cooking">How it fits in today’s cooking

Today, Homemade Bomb Pops still shine as a crowd-pleaser, especially for those seeking easy, customizable desserts. Modern cooks love them because they’re freezer-friendly and perfect for meal prep, just like these no-bake desserts that save time without sacrificing flavor. They’re also a hit at birthday parties or as a refreshing post-workout snack.

With dietary trends evolving, many now make them sugar-free or packed with superfoods like açai. Others pair them with boozy adult versions for summer barbecues. And let’s be honest—after trying these healthy snacks, you’ll see why Homemade Bomb Pops fit right into today’s balanced lifestyles. Whether you stick to the classic or go wild with new flavors, they’re proof that some traditions only get better with time.

Taste and Texture

What makes it delicious

Homemade Bomb Pops deliver a burst of vibrant, fruity flavors with every lick. The first layer zings with tangy citrus, while the middle swells sweet and juicy, like ripe berries straight from the sun. Finally, the bottom layer cools your palate with smooth, creamy vanilla. Each bite melts into a refreshing, icy-crisp texture that’s light yet satisfying. Natural fruit purees and real vanilla extract make these pops taste brighter and richer than store-bought versions. Plus, the playful swirls of color make Homemade Bomb Pops as fun to look at as they are to eat.

r">Boosting the flavor

For an extra flavor kick, try swapping fruit juices for pureed mango or pineapple—their tropical sweetness pairs perfectly with the vanilla base. Alternatively, drizzle melted dark chocolate over the pops before freezing for a decadent twist. If you love bold contrasts, sprinkle a pinch of chili powder or Tajín on top for a spicy-sweet kick. For more inspiration, check out our guide to healthy summer desserts or explore creative DIY ice cream mix-ins to customize your pops even further.

Tips for Success

Best practices for results

Always use fresh, high-quality fruit juices to ensure your Homemade Bomb Pops have vibrant flavor and color. Meanwhile, chill the popsicle molds for at least 15 minutes before filling them to help the layers set faster. Additionally, pour each layer slowly and evenly to prevent mixing, and freeze for at least 30 minutes between layers for clean stripes. Finally, run warm water over the molds for just a few seconds to release the pops easily without breaking them.

>Mistakes to avoid

Avoid overfilling the molds, as the mixture will expand slightly while freezing and may cause messy spills. Instead, leave about 1/4 inch of space at the top for the best results. Also, don’t skip the layering freeze time—rushing this step will blend the colors of your Homemade Bomb Pops. For more troubleshooting tips, check out our guide on fixing common frozen treat mistakes. If your popsicles stick, try using silicone molds or lightly coating the insides with coconut oil, as explained in our popsicle perfection tutorial.

Serving and Pairing Suggestions

How to serve this dish

Serve Homemade Bomb Pops straight from the freezer for the perfect icy treat on a hot day. For a fun twist, arrange them in a colorful tray or stand them upright in a bed of crushed ice to keep them chilled. Meanwhile, if you’re hosting a summer party, layer them in a clear glass bowl with fresh berries for a vibrant centerpiece. These pops also make a delightful dessert for kids’ birthdays or Fourth of July celebrations. To elevate the presentation, drizzle them with a light honey glaze or sprinkle edible glitter for a festive touch.

What goes well with it

Pair Homemade Bomb Pops with a refreshing glass of homemade lemonade to balance their sweet-tart flavors. Alternatively, serve them alongside a scoop of vanilla bean ice cream for a creamy contrast. If you’re planning a full dessert spread, try pairing them with our Easy Strawberry Shortcake for a fruity combo. For a lighter option, enjoy them with a crisp, chilled Cucumber Mint Infused Water to cleanse the palate between bites.

rc="https://s3-placid.s3.eu-central-1.amazonaws.com/production/rest-images/rawp1noeia0hh/int-c2d9e9d089b99809284e1a1d02c960de-sq386vcb.jpg" />

How do you make Homemade Bomb Pops without molds?

You can make Homemade Bomb Pops using small paper cups or ice cube trays as alternatives to molds. Simply layer your fruit juices or purees, freeze each layer for 30 minutes before adding the next, and insert popsicle sticks halfway through freezing. Homemade Bomb Pops taste just as delicious with this simple hack!

What are the best flavors for Homemade Bomb Pops?

The classic Homemade Bomb Pop flavors are cherry, lime, and blue raspberry, but you can get creative with strawberry, lemonade, or even tropical flavors like mango and pineapple. Use natural fruit juices or purees for vibrant colors and fresh taste in your Homemade Bomb Pops.

rank-math-faq-item"> How long do Homemade Bomb Pops take to freeze?

Homemade Bomb Pops typically need 4-6 hours to freeze completely, depending on your freezer temperature. For best results, freeze each colorful layer for 30 minutes before adding the next to maintain distinct layers. Your Homemade Bomb Pops will be ready to enjoy the next day!

Can you make healthier Homemade Bomb Pops?

Absolutely! Make healthier Homemade Bomb Pops by using 100% fruit juice with no added sugar, blending fresh fruit with yogurt, or using natural sweeteners like honey. These alternatives create refreshing, guilt-free Homemade Bomb Pops that kids and adults will love.

Leave a Reply