Luxurious Chocolate Caramel Pecan Cake

Luxurious Chocolate Caramel Pecan Cake Recipe

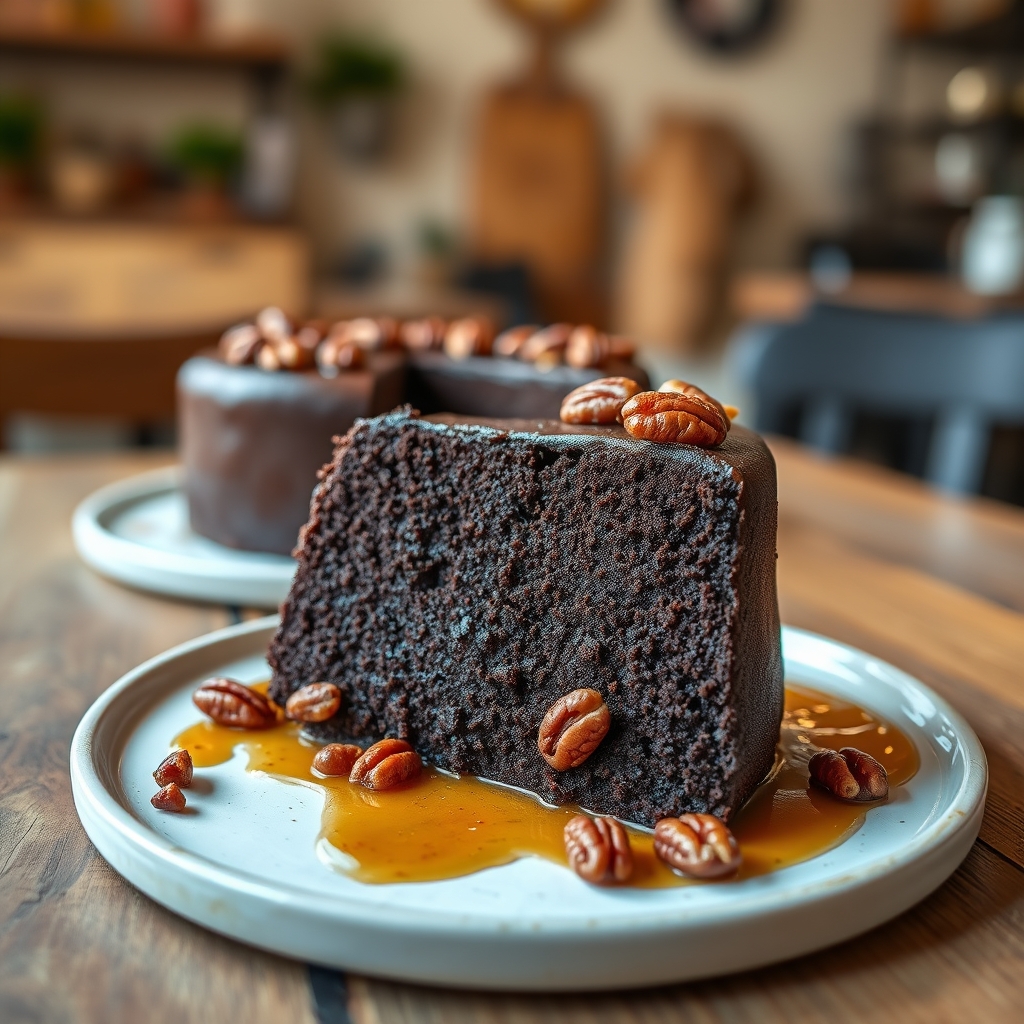
Indulge in the ultimate dessert experience with this Luxurious Chocolate Caramel Pecan Cake. Perfect for special occasions or when you crave something decadent, this rich cake combines velvety chocolate, gooey caramel, and crunchy pecans for an unforgettable treat. Follow our step-by-step guide to create this showstopping dessert that will impress any crowd.

Why You’ll Love This Chocolate Caramel Pecan Cake

This Luxurious Chocolate Caramel Pecan Cake stands out because:

  • Features three layers of moist chocolate cake
  • Includes homemade caramel sauce with toasted pecans
  • Finished with silky chocolate ganache
  • Perfect balance of textures and flavors
  • Impressive presentation for special occasions

Ingredients for Chocolate Caramel Pecan Cake

For the Chocolate Cake Layers:

  • 2 cups all-purpose flour
  • 2 cups granulated sugar
  • ¾ cup unsweetened cocoa powder
  • 2 tsp baking powder
  • 1½ tsp baking soda
  • 1 tsp salt
  • 1 cup buttermilk
  • ½ cup vegetable oil
  • 2 large eggs
  • 2 tsp vanilla extract
  • 1 cup hot coffee

For the Caramel Pecan Filling:

  • 1 cup granulated sugar
  • 6 tbsp unsalted butter
  • ½ cup heavy cream
  • 1 tsp sea salt
  • 1½ cups chopped pecans, toasted

For the Chocolate Ganache:

  • 12 oz semisweet chocolate, finely chopped
  • 1½ cups heavy cream

How to Make Luxurious Chocolate Caramel Pecan Cake

Step 1: Bake the Chocolate Cake Layers

Preheat oven to 350°F. Grease and line three 8-inch cake pans. Whisk together dry ingredients in a large bowl. Add buttermilk, oil, eggs, and vanilla, mixing until combined. Carefully stir in hot coffee (batter will be thin). Divide evenly among pans and bake for 30-35 minutes until a toothpick comes out clean. Cool completely.

Step 2: Prepare the Caramel Pecan Filling

Heat sugar in a medium saucepan over medium heat, stirring constantly until melted and amber-colored. Carefully whisk in butter until melted. Slowly drizzle in cream while whisking (mixture will bubble vigorously). Remove from heat and stir in salt. Let cool slightly before folding in toasted pecans.

Step 3: Make the Chocolate Ganache

Place chopped chocolate in a heatproof bowl. Heat cream until just simmering, then pour over chocolate. Let sit for 5 minutes before whisking until smooth. Cool to spreading consistency.

Step 4: Assemble the Cake

Place first cake layer on serving plate. Spread half the caramel pecan filling evenly over the top. Repeat with second layer and remaining filling. Top with final cake layer. Frost entire cake with chocolate ganache, allowing some to drip down the sides decoratively. Garnish with additional pecans if desired.

Expert Tips for the Best Chocolate Caramel Cake

  • Toast pecans for maximum flavor – spread on baking sheet at 350°F for 8-10 minutes
  • Use room temperature ingredients for even mixing
  • Let caramel cool slightly before adding to cake layers
  • Chill cake for 30 minutes before slicing for cleaner cuts
  • Store leftovers in an airtight container at room temperature for up to 3 days

Frequently Asked Questions

Can I make this cake ahead of time?

Yes! Bake the cake layers up to 2 days in advance and store wrapped at room temperature. The caramel filling can be made 3 days ahead and refrigerated (reheat gently before using). Assemble the cake the day of serving for best texture.

Can I use store-bought caramel sauce?

While homemade caramel provides superior flavor, you can substitute 1½ cups of high-quality store-bought caramel sauce in a pinch. Warm it slightly and mix with the toasted pecans before assembling.

What’s the best way to slice this rich cake?

For clean slices, dip a sharp knife in hot water and wipe dry between cuts. The warmth helps glide through the ganache and caramel layers smoothly.

Serving Suggestions for Your Decadent Cake

This Luxurious Chocolate Caramel Pecan Cake needs no accompaniment, but for special presentations consider:

  • A scoop of vanilla bean ice cream
  • Fresh whipped cream
  • Drizzle of extra caramel sauce
  • Espresso or dark roast coffee
  • Dessert wine like port or late harvest riesling

Whether you’re celebrating a special occasion or simply treating yourself, this Luxurious Chocolate Caramel Pecan Cake delivers an unforgettable dessert experience. The combination of rich chocolate, buttery caramel, and crunchy pecans creates a symphony of flavors and textures that will have everyone asking for seconds.

{“success”:false,”data”:{“message”:”Invalid JSON data”}}

Sweet BBQ Chicken and Rice Skillet

Sweet BBQ Chicken and Rice Skillet: A One-Pan Weeknight Dinner

This Sweet BBQ Chicken and Rice Skillet brings together tender chicken, fluffy rice, and a homemade barbecue sauce in one easy dish. Perfect for busy weeknights, this family-friendly meal delivers bold flavors with minimal cleanup. Learn how to make this simple yet satisfying dinner that will become a regular in your rotation.

Why You’ll Love This BBQ Chicken Skillet

This Sweet BBQ Chicken and Rice Skillet checks all the boxes for an ideal weeknight meal:

  • Ready in under 30 minutes
  • Only one pan needed
  • Perfect balance of sweet and savory flavors
  • Budget-friendly ingredients
  • Great for meal prep

Ingredients for Sweet BBQ Chicken Skillet

  • 1 lb boneless, skinless chicken breasts, cubed
  • 1 cup long-grain white rice
  • 2 cups chicken broth
  • 1/2 cup barbecue sauce
  • 2 tbsp honey
  • 1 tbsp olive oil
  • 1 bell pepper, diced
  • 1/2 onion, diced
  • 2 cloves garlic, minced
  • 1 tsp smoked paprika
  • 1/2 tsp salt
  • 1/4 tsp black pepper

How to Make BBQ Chicken and Rice Skillet

  1. Heat olive oil in a large skillet over medium-high heat. Add chicken and cook until browned, about 5 minutes.
  2. Add bell pepper, onion, and garlic. Sauté for 3 minutes until vegetables soften.
  3. Stir in rice, smoked paprika, salt, and pepper. Cook for 1 minute to toast the rice slightly.
  4. Pour in chicken broth, barbecue sauce, and honey. Stir well to combine.
  5. Bring to a boil, then reduce heat to low. Cover and simmer for 18-20 minutes until rice is tender.
  6. Remove from heat and let stand covered for 5 minutes. Fluff with a fork before serving.

Tips for the Best Chicken and Rice Skillet

Make your Sweet BBQ Chicken and Rice Skillet even better with these pro tips:

  • For extra flavor, use a cast iron skillet
  • Swap regular barbecue sauce for a spicy variety if you prefer heat
  • Add frozen peas or corn during the last 5 minutes of cooking
  • Top with fresh cilantro or green onions before serving
  • Double the recipe for easy leftovers – it reheats beautifully

What to Serve With BBQ Chicken Skillet

This complete meal stands on its own, but pairs well with:

  • Simple green salad
  • Roasted vegetables
  • Cornbread muffins
  • Coleslaw

Nutrition Information

One serving of this Sweet BBQ Chicken and Rice Skillet contains approximately:

  • Calories: 450
  • Protein: 32g
  • Carbohydrates: 55g
  • Fat: 8g
  • Fiber: 2g

Frequently Asked Questions

Can I use brown rice instead of white rice?

Yes, but you’ll need to increase the cooking time to about 40 minutes and may need additional liquid.

How should I store leftovers?

Store in an airtight container in the refrigerator for up to 4 days. Reheat in the microwave with a splash of water.

Can I make this dish in a rice cooker?

While possible, we recommend the stovetop method for best texture and flavor development.

More Easy Skillet Dinner Recipes

If you enjoyed this Sweet BBQ Chicken and Rice Skillet, try these other simple one-pan meals:

  • Creamy Garlic Chicken Skillet
  • Mexican Beef and Rice Skillet
  • Lemon Butter Shrimp and Rice
  • Vegetable Stir Fry with Brown Rice

{“success”:false,”data”:{“message”:”Invalid JSON data”}}

Cinnamon-Sugar Air Fryer Banana Chips

Cinnamon-Sugar Air Fryer Banana Chips: A Healthy Snack Recipe

These cinnamon-sugar air fryer banana chips are the perfect guilt-free snack for any time of day. Crispy, sweet, and packed with flavor, this easy recipe transforms simple bananas into delicious chips without deep frying. Using your air fryer makes them healthier than traditional banana chips while maintaining that satisfying crunch.

Frequently Asked Questions

Can I make banana chips without an air fryer?

Yes, you can bake them at 200°F for 2-3 hours in conventional oven, flipping halfway through.

Are banana chips healthy?

These air fried banana chips are healthier than store-bought versions since they contain less oil and you control the sugar content.

Why are my banana chips not crispy?

This usually means they needed more cooking time or were sliced too thick. Make sure to let them cool completely as they crisp up more while cooling.

Nutrition Information

Serving size: 1/4 recipe (about 15 chips)

  • Calories: 85
  • Carbohydrates: 22g
  • Fiber: 2g
  • Sugar: 12g
  • Protein: 1g

These cinnamon-sugar air fryer banana chips make a wonderful healthy snack, lunchbox addition, or dessert alternative. The combination of sweet banana with warm cinnamon creates irresistible flavor in every crispy bite. Try this simple recipe today for a nutritious treat the whole family will love!

{“success”:false,”data”:{“message”:”Invalid JSON data”}}

Chocolate Lava M&M Surprise Cookies

Chocolate Lava M&M Surprise Cookies: A Gooey Delight

These Chocolate Lava M&M Surprise Cookies combine rich chocolate flavor with a molten center and colorful M&M candies for an irresistible treat. Perfect for parties, holidays, or anytime you crave a decadent dessert, these cookies will quickly become your new favorite.

Why You’ll Love These Chocolate Lava Cookies

What makes these cookies special is the surprise molten center hidden beneath a crisp exterior. The addition of M&Ms adds texture and visual appeal, making them perfect for cookie exchanges or gifting. They’re easier to make than you might think!

Chocolate Lava M&M Surprise Cookies Ingredients

  • 1 cup all-purpose flour
  • 1/2 cup unsweetened cocoa powder
  • 1 teaspoon baking powder
  • 1/4 teaspoon salt
  • 1/2 cup unsalted butter, softened
  • 3/4 cup granulated sugar
  • 1 large egg
  • 1 teaspoon vanilla extract
  • 24 chocolate truffles or chocolate kisses
  • 1/2 cup M&M candies

How to Make Chocolate Lava Cookies with M&Ms

  1. Preheat oven to 350°F (175°C) and line baking sheets with parchment paper
  2. Whisk together flour, cocoa powder, baking powder, and salt in a medium bowl
  3. Cream butter and sugar until light and fluffy, about 3 minutes
  4. Beat in egg and vanilla until well combined
  5. Gradually mix in dry ingredients until a soft dough forms
  6. Scoop 1 tablespoon of dough and flatten slightly in your palm
  7. Place a chocolate truffle in the center and wrap dough around it
  8. Roll into a ball and press M&Ms into the top
  9. Bake for 10-12 minutes until cookies are set but still soft
  10. Cool on baking sheets for 5 minutes before transferring to wire racks

Tips for Perfect Molten Center Cookies

For the best results with your Chocolate Lava M&M Surprise Cookies, follow these expert tips:

  • Use room temperature ingredients for even mixing
  • Don’t overbake – the centers should remain gooey
  • Experiment with different chocolate center options like caramel-filled chocolates
  • Let cookies cool slightly before eating to avoid burns from the hot center

Storage and Serving Suggestions

These cookies are best served warm when the chocolate center is still molten. Store leftovers in an airtight container at room temperature for up to 3 days. To reheat, microwave for 10-15 seconds to restore the gooey center.

Frequently Asked Questions

Can I use different candy in these lava cookies?

Absolutely! Try Reese’s Pieces, chopped peanut butter cups, or your favorite candy pieces instead of M&Ms.

How do I prevent my cookies from spreading too much?

Chill the dough for 30 minutes before baking and make sure your baking powder is fresh.

Can I make these cookies ahead of time?

You can prepare the dough balls (without baking) and freeze them for up to 3 months. Bake from frozen, adding 1-2 minutes to the baking time.

These Chocolate Lava M&M Surprise Cookies offer the perfect combination of textures and flavors that will impress any dessert lover. The crisp exterior gives way to a molten chocolate center, while the colorful M&Ms add festive crunch. Whether you’re baking for a special occasion or just treating yourself, these cookies deliver maximum deliciousness with every bite.

{“success”:false,”data”:{“message”:”Invalid JSON data”}}

Frozen S’mores Cheesecake Bars

Frozen S’mores Cheesecake Bars: A No-Bake Summer Dessert

These Frozen S’mores Cheesecake Bars combine the classic flavors of s’mores with creamy cheesecake in an easy no-bake dessert. Perfect for summer gatherings, potlucks, or whenever you crave a cool, indulgent treat. With layers of graham cracker crust, marshmallow cheesecake filling, and chocolate ganache, this dessert is sure to impress.

Why You’ll Love These Frozen S’mores Cheesecake Bars

If you love the combination of graham crackers, marshmallows, and chocolate, this recipe is for you. The no-bake method makes it simple to prepare, and the frozen texture keeps it refreshing on hot days. Plus, these bars are perfect for making ahead—just store them in the freezer until ready to serve.

Ingredients for Frozen S’mores Cheesecake Bars

For the Graham Cracker Crust:

  • 2 cups graham cracker crumbs
  • 1/4 cup granulated sugar
  • 1/2 cup unsalted butter, melted

For the Marshmallow Cheesecake Filling:

  • 16 oz cream cheese, softened
  • 1 cup marshmallow fluff
  • 1/2 cup powdered sugar
  • 1 tsp vanilla extract
  • 1 cup heavy whipping cream, whipped

For the Chocolate Ganache Topping:

  • 1 cup semi-sweet chocolate chips
  • 1/2 cup heavy cream
  • Mini marshmallows and graham cracker crumbs for garnish

How to Make Frozen S’mores Cheesecake Bars

Step 1: Prepare the Graham Cracker Crust

In a bowl, mix graham cracker crumbs, sugar, and melted butter until well combined. Press firmly into the bottom of a lined 9×9-inch baking dish. Chill in the freezer while preparing the filling.

Step 2: Make the Marshmallow Cheesecake Layer

Beat softened cream cheese until smooth. Add marshmallow fluff, powdered sugar, and vanilla, mixing until fully incorporated. Gently fold in whipped cream. Spread evenly over the chilled crust.

Step 3: Add the Chocolate Ganache

Heat heavy cream until steaming, then pour over chocolate chips. Let sit for 2 minutes before stirring until smooth. Pour over the cheesecake layer and spread evenly.

Step 4: Freeze and Garnish

Freeze for at least 4 hours or until firm. Before serving, sprinkle with mini marshmallows and graham cracker crumbs. Slice into bars and enjoy!

Tips for Perfect Frozen Cheesecake Bars

  • Use full-fat cream cheese for the creamiest texture.
  • For a toasted marshmallow effect, briefly torch the top before serving.
  • Store leftovers in an airtight container in the freezer for up to 2 weeks.

Variations and Substitutions

Try using dark chocolate ganache for a richer flavor, or swap graham crackers for chocolate cookies. For a nutty twist, add chopped pecans to the crust.

Final Thoughts

These Frozen S’mores Cheesecake Bars are the ultimate summer dessert—creamy, chocolaty, and packed with nostalgic s’mores flavor. Whether you’re serving them at a barbecue or enjoying a sweet treat at home, they’re guaranteed to be a hit. Give this easy no-bake recipe a try and enjoy a taste of summer in every bite!

{“success”:false,”data”:{“message”:”Invalid JSON data”}}