Cinnamon Donut Bread

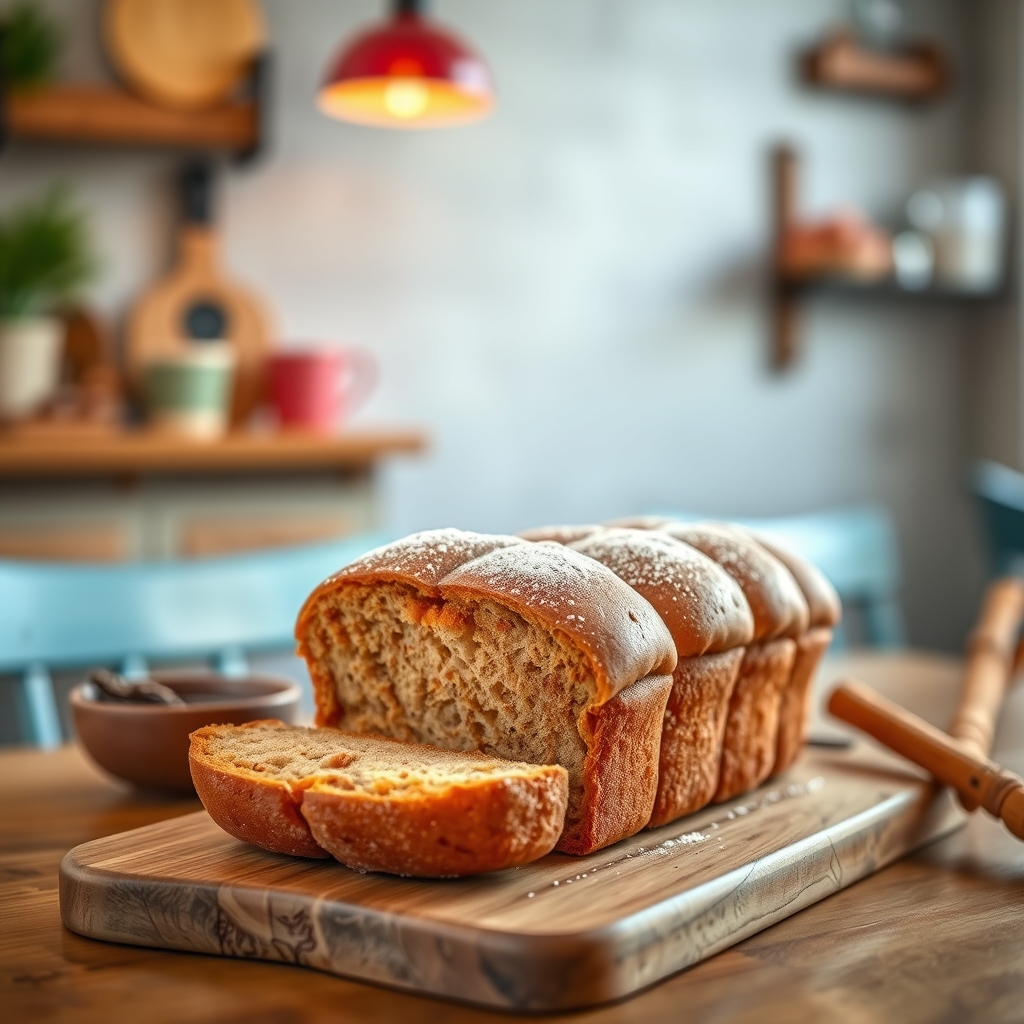
Cinnamon Donut Bread: A Delicious Twist on Classic Flavors

This Cinnamon Donut Bread combines the comforting flavors of freshly baked cinnamon donuts with the easy preparation of a quick bread. Perfect for breakfast, brunch, or an afternoon treat, this recipe delivers soft, fluffy texture with that signature cinnamon sugar coating everyone loves. Learn how to make this simple yet impressive baked good that will fill your home with irresistible aromas.

Why You’ll Love This Cinnamon Donut Bread

If you enjoy the taste of cinnamon sugar donuts but want something easier than frying, this cinnamon donut loaf is your perfect solution. The bread bakes up moist and tender with a crisp cinnamon sugar crust that mimics your favorite donut shop treat. It’s excellent served warm with coffee or as a sweet snack any time of day.

Ingredients for Cinnamon Donut Bread

For the Bread:

  • 2 cups all-purpose flour
  • 1 1/2 teaspoons baking powder
  • 1/2 teaspoon salt
  • 1/2 teaspoon ground nutmeg
  • 1/2 cup granulated sugar
  • 1/3 cup brown sugar
  • 1 large egg
  • 1 cup whole milk
  • 1/4 cup melted butter
  • 2 teaspoons vanilla extract

For the Cinnamon Sugar Topping:

  • 1/4 cup granulated sugar
  • 1 tablespoon ground cinnamon
  • 2 tablespoons melted butter

How to Make Cinnamon Donut Bread

  1. Preheat oven to 350°F (175°C). Grease a 9×5 inch loaf pan.
  2. In a large bowl, whisk together flour, baking powder, salt, and nutmeg.
  3. In another bowl, mix sugars, egg, milk, melted butter, and vanilla until well combined.
  4. Gradually add wet ingredients to dry ingredients, stirring just until incorporated.
  5. Pour batter into prepared loaf pan and bake for 45-50 minutes until a toothpick comes out clean.
  6. While bread bakes, mix sugar and cinnamon for topping in a small bowl.
  7. Let bread cool in pan for 10 minutes, then brush top with melted butter and sprinkle generously with cinnamon sugar mixture.
  8. Allow to cool slightly before slicing and serving.

Tips for Perfect Cinnamon Donut Bread

For best results with your cinnamon sugar donut bread, follow these expert suggestions:

  • Don’t overmix the batter – stir just until ingredients combine to keep the texture light
  • Use room temperature ingredients for even mixing
  • Adjust baking time as needed based on your oven – start checking at 40 minutes
  • For extra donut-like flavor, add 1/4 teaspoon of ground cloves to the dry ingredients
  • Serve warm for the ultimate cinnamon donut experience

Variations to Try

This versatile cinnamon loaf recipe adapts well to different flavors:

  • Apple cinnamon: Add 1 cup diced apples to the batter
  • Pumpkin spice: Replace 1/4 cup milk with pumpkin puree and add pumpkin pie spice
  • Chocolate chip: Fold in 1/2 cup mini chocolate chips before baking
  • Glazed: Drizzle with a simple powdered sugar glaze after the cinnamon sugar topping

Storing and Freezing

Store leftover cinnamon donut bread in an airtight container at room temperature for up to 3 days. For longer storage, wrap tightly and freeze for up to 3 months. Thaw at room temperature and refresh in a 300°F oven for 5-10 minutes if desired.

Frequently Asked Questions

Can I make this cinnamon donut bread gluten-free?

Yes, you can substitute a 1:1 gluten-free flour blend for the all-purpose flour. The texture may be slightly different but still delicious.

Can I use buttermilk instead of regular milk?

Absolutely! Buttermilk will add extra tenderness and a slight tang that complements the sweetness nicely.

Why does my bread sink in the middle?

This usually happens if the bread is underbaked or if the oven temperature is too low. Make sure to test with a toothpick and consider using an oven thermometer to verify your oven temperature.

Final Thoughts

This Cinnamon Donut Bread recipe offers all the nostalgic flavors of cinnamon sugar donuts in an easy-to-make loaf form. With its tender crumb and sweet, spiced topping, it’s sure to become a favorite in your baking repertoire. Whether you enjoy it for breakfast, as a snack, or as a dessert, this aromatic bread delivers comfort and satisfaction in every bite.

Print
clock clock iconcutlery cutlery iconflag flag iconfolder folder iconinstagram instagram iconpinterest pinterest iconfacebook facebook iconprint print iconsquares squares iconheart heart iconheart solid heart solid icon

Cinnamon Donut Bread

  • Author: Baking Enthusiast

Description

A deliciously moist and fluffy bread that tastes just like a cinnamon sugar donut. Perfect for breakfast or as a sweet treat with coffee!


Ingredients

Scale

For the Crust:

  • For the bread:
  • 2 cups all-purpose flour
  • 1 1/2 tsp baking powder
  • 1/2 tsp baking soda
  • 1/2 tsp salt
  • 1/2 cup unsalted butter, softened
  • 3/4 cup granulated sugar
  • 2 large eggs
  • 1 tsp vanilla extract
  • 1 cup buttermilk
  • For the cinnamon sugar topping:
  • 1/4 cup unsalted butter, melted
  • 1/2 cup granulated sugar
  • 1 tbsp ground cinnamon

Instructions

1. Prepare the Crust:

  1. Preheat oven to 350°F (175°C). Grease a 9×5-inch loaf pan.
  2. In a medium bowl, whisk together flour, baking powder, baking soda, and salt.
  3. In a large bowl, beat butter and sugar until light and fluffy. Add eggs one at a time, then mix in vanilla.
  4. Alternately add flour mixture and buttermilk to the butter mixture, beginning and ending with flour.
  5. Pour batter into prepared loaf pan and bake for 45-50 minutes, or until a toothpick comes out clean.
  6. Let bread cool in pan for 10 minutes, then transfer to a wire rack.
  7. While still warm, brush melted butter over the entire surface of the bread.
  8. Mix sugar and cinnamon in a shallow dish, then roll the buttered bread in the mixture until fully coated.
  9. Slice and serve warm or at room temperature.

Notes

For extra donut-like flavor, you can double the cinnamon sugar coating. Store leftovers wrapped tightly at room temperature for up to 3 days.

Crockpot Corned Beef and Cabbage

Crockpot Corned Beef and Cabbage: An Easy St. Patrick’s Day Classic

Celebrate St. Patrick’s Day or enjoy a comforting meal any time of year with this Crockpot Corned Beef and Cabbage recipe. This slow-cooked dish delivers tender, flavorful meat and perfectly cooked vegetables with minimal effort. Whether you’re hosting a festive gathering or craving a hearty dinner, this classic Irish-American meal is sure to satisfy.

Why You’ll Love This Crockpot Corned Beef and Cabbage

This slow cooker corned beef and cabbage is the ultimate set-it-and-forget-it meal. The crockpot does all the work, infusing the beef with rich spices while keeping it juicy and tender. Paired with cabbage, carrots, and potatoes, this dish is a complete one-pot wonder. Plus, it’s perfect for feeding a crowd or enjoying leftovers throughout the week.

Ingredients for Crockpot Corned Beef and Cabbage

  • 3-4 lbs corned beef brisket (with spice packet included)
  • 1 large head of cabbage, cut into wedges
  • 1 lb baby potatoes, halved
  • 4 large carrots, peeled and cut into chunks
  • 1 onion, quartered
  • 3 cloves garlic, minced
  • 4 cups beef broth or water
  • 1 bay leaf
  • 1 tsp black peppercorns
  • 2 tbsp whole-grain mustard (optional)

How to Make Crockpot Corned Beef and Cabbage

  1. Prepare the ingredients: Rinse the corned beef under cold water and pat dry. If your brisket includes a spice packet, set it aside.
  2. Layer the vegetables: Place potatoes, carrots, and onion in the bottom of the crockpot. Add minced garlic and bay leaf.
  3. Add the corned beef: Place the brisket fat-side up on top of the vegetables. Sprinkle the spice packet (or your own blend) over the meat.
  4. Pour in the liquid: Add beef broth or water until the meat is nearly covered (about ¾ submerged).
  5. Cook: Cover and cook on LOW for 8-9 hours or HIGH for 5-6 hours, until the meat is fork-tender.
  6. Add cabbage: In the last hour of cooking, tuck cabbage wedges into the liquid. Cover and cook until tender.
  7. Serve: Slice the corned beef against the grain and serve with vegetables and a drizzle of cooking liquid or mustard.

Tips for the Best Slow Cooker Corned Beef

  • Trim excess fat: While some fat adds flavor, trimming excess helps prevent greasiness.
  • Don’t skip rinsing: Rinsing the brisket removes excess salt for a balanced flavor.
  • Add cabbage last: Cabbage cooks quickly—adding it late prevents mushiness.
  • Use the broth: Reserve some cooking liquid for serving or reheating leftovers.

Serving Suggestions

This easy corned beef and cabbage pairs well with Irish soda bread, roasted Brussels sprouts, or a simple green salad. For a traditional touch, serve with horseradish sauce or whole-grain mustard. Leftovers make fantastic Reuben sandwiches or hash the next day.

Frequently Asked Questions

Can I make corned beef and cabbage ahead of time?

Yes! Cook the brisket and vegetables, then store them separately in the fridge for up to 3 days. Reheat gently in broth.

What if my corned beef is too salty?

Soak the brisket in cold water for 1-2 hours before cooking to reduce saltiness.

Can I use Guinness in this recipe?

Absolutely! Substitute 1 cup of broth with Guinness for a deeper flavor.

Whether you’re honoring Irish traditions or simply craving comfort food, this Crockpot Corned Beef and Cabbage is a foolproof recipe that delivers every time. The slow cooker ensures melt-in-your-mouth meat and perfectly cooked veggies—all with minimal hands-on time. Give it a try and enjoy a taste of Ireland at home!

Print
clock clock iconcutlery cutlery iconflag flag iconfolder folder iconinstagram instagram iconpinterest pinterest iconfacebook facebook iconprint print iconsquares squares iconheart heart iconheart solid heart solid icon

Crockpot Corned Beef and Cabbage

  • Author: Home Chef

Description

A classic St. Patrick’s Day dish made easy in the slow cooker. Tender corned beef brisket simmers with cabbage, carrots, and potatoes for a hearty, flavorful meal.


Ingredients

Scale

For the Crust:

  • For the meat and vegetables:
  • 34 lb corned beef brisket (with spice packet)
  • 1 lb baby potatoes, halved
  • 4 large carrots, peeled and cut into chunks
  • 1 small head green cabbage, cut into wedges
  • For the cooking liquid:
  • 4 cups water
  • 2 cloves garlic, minced
  • 1 tbsp brown sugar
  • 1 tbsp apple cider vinegar
  • 1 tsp whole black peppercorns
  • 2 bay leaves

Instructions

1. Prepare the Crust:

  1. 1. Rinse the corned beef brisket under cold water and pat dry.
  2. 2. Place potatoes and carrots in the bottom of a 6-quart crockpot.
  3. 3. Put the corned beef on top of the vegetables, fat side up. Sprinkle the included spice packet over the meat.
  4. 4. Add water, garlic, brown sugar, vinegar, peppercorns and bay leaves around the meat.
  5. 5. Cover and cook on LOW for 8 hours or HIGH for 4 hours.
  6. 6. Add cabbage wedges during the last 2 hours of cooking (push them down into the liquid).
  7. 7. When done, remove meat and let rest 15 minutes before slicing against the grain.
  8. 8. Serve with vegetables and cooking liquid as au jus.

Notes

For extra flavor, substitute 2 cups of the water with beer or beef broth. Leftovers make excellent Reuben sandwiches.

Thin Mint Cookie Bars

Thin Mint Cookie Bars: An Irresistible Chocolatey Treat

These Thin Mint Cookie Bars combine the classic flavors of Girl Scout cookies with a rich, fudgy brownie base. Perfect for mint chocolate lovers, this easy dessert recipe delivers that iconic thin mint taste in every bite. Whether you’re craving a nostalgic treat or need a crowd-pleasing dessert, these bars will become your new favorite.

Why You’ll Love These Thin Mint Cookie Bars

With just a few simple ingredients, you can recreate the beloved thin mint flavor at home. The chocolate mint combination makes these bars perfect for holidays, bake sales, or anytime cravings strike. These bars are:

  • Rich and fudgy with a crisp cookie topping
  • Packed with refreshing mint flavor
  • Easy to make with pantry staples
  • Perfect for sharing at parties

Ingredients for Thin Mint Cookie Bars

Gather these simple ingredients to make your mint chocolate bars:

  • 1 box chocolate fudge brownie mix
  • 2 eggs
  • 1/2 cup vegetable oil
  • 1/4 cup water
  • 1 teaspoon peppermint extract
  • 1 sleeve thin mint cookies (or similar mint chocolate cookies)
  • 1 cup semi-sweet chocolate chips
  • 1/2 teaspoon coconut oil (optional, for smoother melting)

How to Make Thin Mint Cookie Bars

Follow these simple steps for perfect mint chocolate cookie bars every time:

  1. Preheat oven to 350°F and line a 9×9 baking pan with parchment paper
  2. In a large bowl, mix brownie mix, eggs, oil, water, and peppermint extract until combined
  3. Pour batter into prepared pan and bake for 20 minutes
  4. Remove from oven and immediately press cookie pieces into the warm brownie base
  5. Return to oven for 5 more minutes
  6. Let cool completely before cutting into bars

Tips for Perfect Mint Chocolate Bars

For the best results with your thin mint dessert bars:

  • Use high-quality chocolate chips for the topping
  • Add a pinch of sea salt to balance the sweetness
  • Let bars cool completely before slicing for clean edges
  • Store in an airtight container at room temperature

Variations on Thin Mint Dessert Bars

Customize your mint chocolate treats with these delicious ideas:

  • Add chopped Andes mints to the batter
  • Swirl cream cheese into the brownie base
  • Top with white chocolate drizzle
  • Use gluten-free brownie mix for dietary restrictions

Frequently Asked Questions

Can I use homemade brownie batter instead of mix?

Absolutely! Substitute your favorite homemade brownie recipe for the boxed mix. Just be sure to add the peppermint extract to the batter.

How long do these cookie bars stay fresh?

Stored properly in an airtight container, your thin mint bars will stay fresh for 3-4 days at room temperature or up to a week in the refrigerator.

Can I freeze thin mint cookie bars?

Yes! These bars freeze beautifully for up to 3 months. Wrap individual bars in plastic wrap before freezing for easy portioning.

Serving Suggestions for Your Mint Chocolate Treats

These versatile thin mint bars are delicious on their own, but try these serving ideas:

  • Top with vanilla ice cream for a mint chocolate sundae
  • Crumble over yogurt for a breakfast treat
  • Serve with coffee or hot chocolate
  • Package in decorative boxes for homemade gifts

Whether you’re a fan of Girl Scout cookies or just love the chocolate mint combination, these Thin Mint Cookie Bars are sure to satisfy your sweet tooth. The easy preparation and crowd-pleasing flavor make them perfect for any occasion. Try this recipe today and enjoy the classic thin mint taste anytime!

Print
clock clock iconcutlery cutlery iconflag flag iconfolder folder iconinstagram instagram iconpinterest pinterest iconfacebook facebook iconprint print iconsquares squares iconheart heart iconheart solid heart solid icon

Thin Mint Cookie Bars

  • Author: Cookie Lover

Description

A delicious no-bake dessert inspired by the classic Thin Mint cookies, featuring a chocolatey crust, minty filling, and a smooth chocolate topping. Perfect for mint chocolate lovers!


Ingredients

Scale

For the Crust:

  • For the crust:
  • 1 1/2 cups chocolate cookie crumbs
  • 1/4 cup unsalted butter, melted
  • 2 tablespoons granulated sugar
  • For the mint layer:
  • 1/2 cup unsalted butter, softened
  • 2 cups powdered sugar
  • 1 1/2 teaspoons peppermint extract
  • 12 drops green food coloring (optional)
  • 2 tablespoons heavy cream
  • For the chocolate topping:
  • 1 cup semi-sweet chocolate chips
  • 1/4 cup heavy cream
  • 1/2 teaspoon vanilla extract

Instructions

1. Prepare the Crust:

  1. 1. Line an 8×8-inch baking dish with parchment paper, leaving an overhang on the sides for easy removal.
  2. 2. In a medium bowl, mix the chocolate cookie crumbs, melted butter, and sugar until well combined. Press firmly into the bottom of the prepared dish. Chill for 15 minutes.
  3. 3. For the mint layer, beat the softened butter and powdered sugar until smooth. Add the peppermint extract, food coloring (if using), and heavy cream. Mix until fluffy and spreadable.
  4. 4. Spread the mint layer evenly over the chilled crust. Return to the fridge for 30 minutes to set.
  5. 5. For the chocolate topping, heat the heavy cream in a small saucepan until just simmering. Pour over the chocolate chips in a heatproof bowl. Let sit for 2 minutes, then stir until smooth. Stir in the vanilla extract.
  6. 6. Pour the chocolate topping over the mint layer and spread evenly. Chill for at least 2 hours or until fully set.
  7. 7. Use the parchment overhang to lift the bars out of the dish. Cut into squares and serve chilled.

Notes

Store leftovers in an airtight container in the refrigerator for up to 5 days. For a stronger mint flavor, add an extra 1/2 teaspoon of peppermint extract to the mint layer.

Crispy Parmesan Artichoke Hearts

Crispy Parmesan Artichoke Hearts: A Perfect Appetizer

These Crispy Parmesan Artichoke Hearts are the ultimate crowd-pleasing appetizer. Golden, crunchy, and packed with savory flavor, they make an irresistible snack or party food. With just a few simple ingredients, you can create this restaurant-quality dish at home.

Why You’ll Love These Crispy Parmesan Artichoke Hearts

Artichoke hearts get transformed into crispy perfection with a parmesan breadcrumb coating. The contrast between the tender interior and crunchy exterior makes these bite-sized treats absolutely addictive. They’re perfect for game day, holiday gatherings, or anytime you want a delicious appetizer.

Ingredients for Crispy Parmesan Artichoke Hearts

  • 2 cans (14 oz each) artichoke hearts in water, drained and quartered
  • 1 cup panko breadcrumbs
  • 1/2 cup grated parmesan cheese
  • 1 teaspoon garlic powder
  • 1 teaspoon Italian seasoning
  • 1/2 teaspoon salt
  • 1/4 teaspoon black pepper
  • 2 large eggs
  • 1 tablespoon water
  • 1/2 cup all-purpose flour
  • Vegetable oil for frying
  • Lemon wedges for serving

How to Make Crispy Parmesan Artichoke Hearts

  1. Pat the artichoke hearts dry with paper towels to remove excess moisture.
  2. In a shallow bowl, mix together panko, parmesan, garlic powder, Italian seasoning, salt, and pepper.
  3. In another bowl, whisk eggs with water. Place flour in a third bowl.
  4. Dredge each artichoke piece in flour, then dip in egg mixture, and finally coat with the breadcrumb mixture.
  5. Heat about 1 inch of oil in a large skillet to 350°F. Fry the breaded artichokes in batches for 2-3 minutes until golden brown.
  6. Transfer to a paper towel-lined plate to drain excess oil.
  7. Serve immediately with lemon wedges and your favorite dipping sauce.

Tips for Perfect Crispy Artichoke Hearts

For the best results when making these crispy parmesan artichoke hearts, follow these expert tips:

  • Make sure to thoroughly dry the artichokes before breading to help the coating stick
  • Don’t overcrowd the pan when frying to ensure even cooking
  • For extra crispiness, you can double-coat the artichokes by repeating the egg and breadcrumb steps
  • Serve immediately for maximum crunch

Serving Suggestions

These parmesan crusted artichoke hearts pair wonderfully with various dipping sauces. Try them with:

  • Lemon garlic aioli
  • Marinara sauce
  • Ranch dressing
  • Spicy remoulade

They also make a great addition to antipasto platters or as a topping for salads.

Storage and Reheating

While best enjoyed fresh, you can store leftover crispy fried artichoke hearts in an airtight container in the refrigerator for up to 2 days. Reheat in a 375°F oven for 5-7 minutes to restore crispiness.

Frequently Asked Questions

Can I make baked artichoke hearts instead of fried?

Yes! For a healthier version, arrange breaded artichokes on a baking sheet and bake at 400°F for 15-20 minutes, flipping halfway through. They won’t be quite as crispy but still delicious.

Can I use frozen artichoke hearts?

Frozen artichoke hearts will work, but be sure to thaw and thoroughly dry them first to prevent the coating from becoming soggy.

What’s the best oil for frying artichokes?

Vegetable, canola, or peanut oil all work well for frying these crispy parmesan artichoke hearts because of their high smoke points.

Print
clock clock iconcutlery cutlery iconflag flag iconfolder folder iconinstagram instagram iconpinterest pinterest iconfacebook facebook iconprint print iconsquares squares iconheart heart iconheart solid heart solid icon

Crispy Parmesan Artichoke Hearts

  • Author: Chef Maria

Description

Golden, crispy artichoke hearts coated in a savory Parmesan and breadcrumb crust, perfect as an appetizer or side dish. These are baked to perfection for a healthier twist without sacrificing crunch.


Ingredients

Scale

For the Crust:

  • For the artichokes:
  • 1 (14 oz) can artichoke hearts, drained and patted dry
  • For the coating:
  • 1/2 cup grated Parmesan cheese
  • 1/2 cup Panko breadcrumbs
  • 1 tsp garlic powder
  • 1 tsp dried oregano
  • 1/2 tsp smoked paprika
  • 1/4 tsp black pepper
  • For the wet mixture:
  • 2 large eggs
  • 1 tbsp water
  • For garnish:
  • Fresh parsley, chopped
  • Lemon wedges

Instructions

1. Prepare the Crust:

  1. 1. Preheat oven to 400°F (200°C). Line a baking sheet with parchment paper.
  2. 2. In a shallow bowl, mix Parmesan, Panko, garlic powder, oregano, paprika, and pepper.
  3. 3. In another bowl, whisk eggs with water.
  4. 4. Dip each artichoke heart in egg mixture, then coat thoroughly in breadcrumb mixture.
  5. 5. Place on baking sheet in a single layer. Lightly spray with olive oil.
  6. 6. Bake for 15-18 minutes until golden and crispy. Flip halfway through.
  7. 7. Garnish with parsley and serve with lemon wedges.

Notes

For extra crispiness, broil for 1-2 minutes at the end. Fresh artichoke hearts can be used (steam first until tender). Store leftovers in an airtight container (reheat in oven).

Slow Cooker Garlic Butter Beef Bites & Potatoes

Slow Cooker Garlic Butter Beef Bites & Potatoes: An Easy One-Pot Meal

These Slow Cooker Garlic Butter Beef Bites & Potatoes deliver tender beef and perfectly cooked potatoes in a rich garlic butter sauce. This simple crockpot recipe requires minimal prep and delivers maximum flavor, making it ideal for busy weeknights or lazy weekends. Let your slow cooker do the work while you enjoy this hearty comfort food.

Why You’ll Love This Garlic Butter Beef Recipe

This slow cooker beef and potatoes dish combines convenience with restaurant-quality flavors. The garlic butter sauce infuses every bite with savory goodness, while the slow cooking process ensures fork-tender meat. It’s a complete meal in one pot that pleases both kids and adults.

Ingredients for Slow Cooker Garlic Butter Beef Bites

  • 2 lbs sirloin steak, cut into 1-inch cubes
  • 1.5 lbs baby potatoes, halved
  • 1/2 cup unsalted butter, melted
  • 8 garlic cloves, minced
  • 1 tbsp fresh thyme leaves
  • 1 tsp onion powder
  • 1 tsp smoked paprika
  • 1/2 tsp red pepper flakes (optional)
  • Salt and black pepper to taste
  • 2 tbsp chopped fresh parsley for garnish

How to Make Garlic Butter Beef Bites in the Slow Cooker

  1. Prep the ingredients: Cut the beef into uniform cubes and halve the potatoes. Mince the garlic and chop the fresh herbs.
  2. Make the garlic butter sauce: In a small bowl, combine melted butter, minced garlic, thyme, onion powder, paprika, red pepper flakes, salt, and pepper.
  3. Layer in the slow cooker: Place potatoes in the bottom of the crockpot, then arrange beef cubes on top. Pour the garlic butter mixture evenly over everything.
  4. Cook: Cover and cook on LOW for 6-7 hours or HIGH for 3-4 hours, until beef is tender and potatoes are cooked through.
  5. Serve: Garnish with fresh parsley and serve directly from the slow cooker for an impressive presentation.

Tips for Perfect Slow Cooker Beef and Potatoes

  • For best results, use a good quality cut of beef like sirloin or tenderloin
  • Don’t skip the fresh garlic – it makes all the difference in flavor
  • If you prefer crispier potatoes, broil the dish for 2-3 minutes before serving
  • Add vegetables like carrots or mushrooms for extra nutrition
  • Store leftovers in an airtight container for up to 3 days

Serving Suggestions for Garlic Butter Beef Bites

This hearty slow cooker meal is satisfying on its own, but pairs beautifully with:

  • A crisp green salad with vinaigrette
  • Steamed green beans or asparagus
  • Crusty bread to soak up the delicious garlic butter sauce
  • A glass of full-bodied red wine

Frequently Asked Questions

Can I use frozen beef for this recipe?

We recommend using fresh beef for best texture, but you can use frozen if needed. Increase cooking time by 1-2 hours and make sure the beef is fully thawed before serving.

What other potatoes work besides baby potatoes?

Yukon gold potatoes or red potatoes cut into 1-inch pieces work well. Russet potatoes may become too soft during the long cooking time.

Can I make this garlic butter beef dish ahead?

Yes! Prepare the ingredients and store them separately in the refrigerator overnight. In the morning, simply assemble in the slow cooker and turn it on.

This slow cooker garlic butter beef bites and potatoes recipe proves that comfort food can be both easy and elegant. The rich garlic butter sauce transforms simple ingredients into a memorable meal that will have everyone asking for seconds. Try it tonight and taste the magic of slow-cooked perfection!

Print
clock clock iconcutlery cutlery iconflag flag iconfolder folder iconinstagram instagram iconpinterest pinterest iconfacebook facebook iconprint print iconsquares squares iconheart heart iconheart solid heart solid icon

Slow Cooker Garlic Butter Beef Bites & Potatoes

  • Author: Chef SlowCook

Description

Tender beef bites and potatoes cooked to perfection in a rich garlic butter sauce, all made effortlessly in your slow cooker for a comforting meal.


Ingredients

Scale

For the Crust:

  • For the Beef & Potatoes:
  • 1.5 lbs beef sirloin, cut into bite-sized pieces
  • 1.5 lbs baby potatoes, halved
  • 1 small onion, finely chopped
  • 4 cloves garlic, minced
  • 1 tsp salt
  • 1/2 tsp black pepper
  • 1 tsp dried thyme
  • For the Garlic Butter Sauce:
  • 1/2 cup unsalted butter, melted
  • 2 tbsp Worcestershire sauce
  • 1 tbsp Dijon mustard
  • 1 tsp garlic powder
  • 1/2 tsp onion powder
  • 1/4 tsp red pepper flakes (optional)
  • For Garnish:
  • 2 tbsp fresh parsley, chopped
  • 1 tbsp grated Parmesan cheese (optional)

Instructions

1. Prepare the Crust:

  1. 1. In the slow cooker, combine beef bites, potatoes, onion, garlic, salt, pepper, and thyme. Toss lightly to mix.
  2. 2. In a separate bowl, whisk together melted butter, Worcestershire sauce, Dijon mustard, garlic powder, onion powder, and red pepper flakes (if using).
  3. 3. Pour the garlic butter sauce evenly over the beef and potatoes in the slow cooker. Stir gently to coat.
  4. 4. Cover and cook on LOW for 6-7 hours or HIGH for 3-4 hours, until beef is tender and potatoes are fork-tender.
  5. 5. Garnish with fresh parsley and Parmesan cheese before serving.

Notes

For extra flavor, sear the beef bites in a skillet before adding to the slow cooker. Adjust red pepper flakes to taste for more or less heat. Leftovers can be stored in an airtight container for up to 3 days.