Creamy Crockpot Crack Chicken

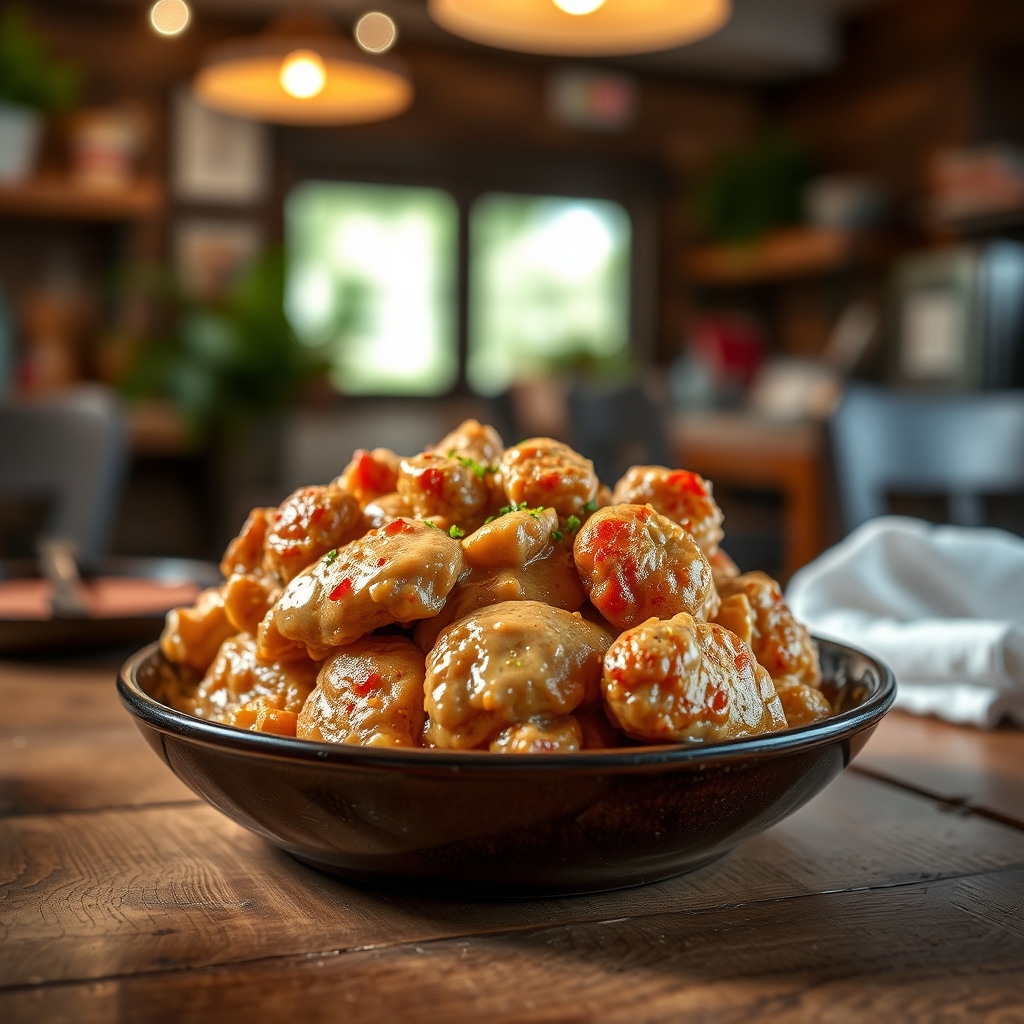
Creamy Crockpot Crack Chicken: An Irresistible Slow Cooker Favorite

This Creamy Crockpot Crack Chicken recipe lives up to its name—it’s so addictive you won’t be able to stop eating it! Perfect for busy weeknights, this slow cooker chicken dish combines tender shredded chicken with creamy cheeses, crispy bacon, and ranch seasoning for maximum flavor with minimal effort.

This Creamy Crockpot Crack Chicken is guaranteed to become one of your most-requested slow cooker recipes. The combination of creamy cheese, savory bacon, and zesty ranch creates an irresistible flavor that keeps everyone coming back for more. Whether you’re meal prepping for the week or feeding a crowd, this easy chicken dish delivers satisfaction every time.

Print
clock clock iconcutlery cutlery iconflag flag iconfolder folder iconinstagram instagram iconpinterest pinterest iconfacebook facebook iconprint print iconsquares squares iconheart heart iconheart solid heart solid icon

Creamy Crockpot Crack Chicken

  • Author: Slow Cooker Queen

Description

This addictive slow-cooked chicken dish gets its name from being so delicious you can’t stop eating it! Tender shredded chicken, crispy bacon, cream cheese, and cheddar melt together for the ultimate comfort food. Perfect for sandwiches, dips, or eating straight from the crock.


Ingredients

Scale

For the Crust:

  • For the chicken:
  • 2 lbs boneless, skinless chicken breasts
  • 1 packet (1 oz) ranch seasoning mix
  • For the creamy sauce:
  • 8 oz cream cheese, cubed
  • 1/2 cup chicken broth
  • 1/2 cup shredded cheddar cheese
  • For toppings:
  • 6 slices bacon, cooked and crumbled
  • 2 green onions, sliced
  • 1/2 teaspoon garlic powder
  • 1/2 teaspoon onion powder

Instructions

1. Prepare the Crust:

  1. 1. Place chicken breasts in the bottom of a 6-quart slow cooker.
  2. 2. Sprinkle ranch seasoning evenly over the chicken.
  3. 3. Add cubed cream cheese and chicken broth around the chicken.
  4. 4. Cover and cook on LOW for 6-7 hours or HIGH for 3-4 hours.
  5. 5. Shred chicken with two forks directly in the slow cooker.
  6. 6. Stir in cheddar cheese, garlic powder, and onion powder until melted and combined.
  7. 7. Top with crumbled bacon and green onions before serving.
  8. 8. Serve on buns, over rice, or with crackers for dipping.

Notes

Store leftovers in an airtight container for up to 3 days. This freezes well – portion into freezer bags for quick meals. For extra heat, add 1/4 teaspoon cayenne pepper with the seasonings.

CRISPY BATTERED COD AND ONION RINGS PLATTER

Crispy Battered Cod and Onion Rings Platter: The Ultimate Seafood Feast

This crispy battered cod and onion rings platter brings together golden, crunchy seafood with sweet onion rings for a restaurant-quality meal at home. Perfect for fish fry nights or casual gatherings, this platter delivers satisfying textures and flavors that will impress any seafood lover.

Why You’ll Love This Crispy Battered Cod and Onion Rings Combo

Combining two classic favorites creates the ultimate seafood platter. The light, airy batter crisps up beautifully on both the flaky cod fillets and sweet onion rings, while the double-fry technique ensures maximum crunch. Serve with tartar sauce, lemon wedges, and your favorite sides for a complete meal.

Ingredients for Crispy Battered Cod and Onion Rings

For the Batter:

  • 1 ½ cups all-purpose flour
  • ½ cup cornstarch
  • 1 tablespoon baking powder
  • 1 teaspoon salt
  • 1 teaspoon garlic powder
  • 1 teaspoon paprika
  • 1 ½ cups ice-cold beer or sparkling water

For the Cod and Onion Rings:

  • 4 cod fillets (about 6 oz each)
  • 2 large sweet onions, sliced into ½-inch rings
  • Vegetable oil for frying
  • Salt to taste
  • Lemon wedges for serving

How to Make Crispy Battered Cod and Onion Rings

Step 1: Prepare the Batter

In a large bowl, whisk together flour, cornstarch, baking powder, salt, garlic powder, and paprika. Gradually whisk in the cold beer or sparkling water until smooth. The batter should coat the back of a spoon but still be slightly runny.

Step 2: Heat the Oil

Fill a heavy-bottomed pot or Dutch oven with 3 inches of vegetable oil. Heat to 350°F (175°C) using a deep-fry thermometer. Maintain this temperature throughout cooking.

Step 3: Fry the Onion Rings

Dip onion rings in batter, letting excess drip off. Fry in batches for 2-3 minutes until light golden. Drain on paper towels. Increase oil temperature to 375°F (190°C).

Step 4: Fry the Cod

Pat cod fillets dry, then dip in batter. Carefully lower into hot oil. Fry for 4-5 minutes until golden brown and crispy. Drain on a wire rack.

Step 5: Double Fry for Extra Crispiness

Return onion rings to hot oil for 1 minute for extra crispness. Do the same with cod if desired. Season immediately with salt.

Serving Suggestions for Your Seafood Platter

Arrange the crispy battered cod and onion rings on a large platter with lemon wedges. Serve with:

  • Homemade tartar sauce
  • Malt vinegar
  • Coleslaw
  • French fries or roasted potatoes
  • Fresh green salad

Tips for Perfect Crispy Battered Seafood

  • Keep batter cold for maximum crispiness
  • Don’t overcrowd the frying pot
  • Use a thermometer to maintain proper oil temperature
  • Pat fish and onions dry before battering
  • Serve immediately for best texture

Frequently Asked Questions

Can I make this gluten-free?

Yes, substitute the all-purpose flour with a gluten-free flour blend and use gluten-free beer or sparkling water.

What’s the best oil for frying?

Vegetable, canola, or peanut oil work best for their high smoke points and neutral flavors.

Can I bake instead of fry?

While baking won’t achieve the same crispiness, you can bake at 425°F (220°C) on a wire rack for 15-20 minutes, flipping halfway.

Storage and Reheating Instructions

Store leftovers in an airtight container in the refrigerator for up to 2 days. Reheat in a 375°F (190°C) oven for 5-7 minutes to restore crispiness. Avoid microwaving as it will make the batter soggy.

This crispy battered cod and onion rings platter brings the fish and chips experience home with minimal effort. The contrast between the flaky cod and sweet onion rings makes every bite exciting, while the golden batter delivers that satisfying crunch we all crave in fried seafood.

Print
clock clock iconcutlery cutlery iconflag flag iconfolder folder iconinstagram instagram iconpinterest pinterest iconfacebook facebook iconprint print iconsquares squares iconheart heart iconheart solid heart solid icon

CRISPY BATTERED COD AND ONION RINGS PLATTER

  • Author: Seafood Delights Kitchen

Description

A classic British-style fish and chips platter with perfectly crispy battered cod and golden onion rings. Served with tartar sauce and lemon wedges for a delicious seafood feast.


Ingredients

Scale

For the Crust:

  • For the Cod:
  • 4 cod fillets (about 6 oz each)
  • 1 cup all-purpose flour
  • 1 tsp baking powder
  • 1 tsp salt
  • 1/2 tsp black pepper
  • 1 cup cold beer (or sparkling water)
  • Vegetable oil (for frying)
  • For the Onion Rings:
  • 2 large sweet onions, sliced into 1/2-inch rings
  • 1 cup buttermilk
  • 1 cup all-purpose flour
  • 1/2 cup cornstarch
  • 1 tsp paprika
  • 1 tsp garlic powder
  • 1/2 tsp cayenne pepper
  • For Serving:
  • Lemon wedges
  • Tartar sauce
  • Malt vinegar
  • French fries (optional)

Instructions

1. Prepare the Crust:

  1. 1. Prepare the onion rings: Soak onion slices in buttermilk for 30 minutes. In a bowl, mix flour, cornstarch, paprika, garlic powder, and cayenne.
  2. 2. Make the batter: Whisk together flour, baking powder, salt, and pepper. Gradually add beer until smooth. Let rest 15 minutes.
  3. 3. Heat oil to 375°F (190°C) in a deep fryer or heavy pot.
  4. 4. Coat onion rings: Drain buttermilk, dredge onions in flour mixture, then dip in batter. Fry in batches for 2-3 minutes until golden. Drain on paper towels.
  5. 5. Cook the cod: Pat fish dry, dip in batter, and fry for 4-5 minutes until crispy and cooked through. Drain on a rack.
  6. 6. Serve immediately with onion rings, lemon wedges, tartar sauce, and malt vinegar.

Notes

For extra crispiness, double-fry the onion rings. Keep cooked items warm in a 200°F oven while finishing batches. Use a thermometer for consistent oil temperature.

Crack Green Beans

Crack Green Beans: The Addictive Side Dish You Need to Try

If you’re searching for the ultimate crack green beans recipe that will have everyone begging for seconds, look no further. This irresistible side dish combines crisp green beans with a savory, slightly sweet sauce and crispy bacon for a flavor explosion that lives up to its addictive name. Perfect for potlucks, holiday meals, or weeknight dinners, these green beans disappear faster than you can make them.

Frequently Asked Questions

Can I use frozen green beans for this recipe?

While fresh green beans yield the best texture, you can substitute frozen in a pinch. Thaw completely and pat dry before using, and reduce baking time by 5 minutes.

How long do leftover crack green beans last?

Store leftovers in an airtight container in the refrigerator for up to 3 days. Reheat in the oven at 350°F for best results.

Can I make this recipe vegetarian?

For vegetarian crack green beans, omit the bacon and use 2 tablespoons olive oil instead of bacon drippings. Add 1 teaspoon smoked paprika for depth of flavor.

Why This Recipe Works

The magic of these easy crack green beans lies in the perfect balance of flavors and textures. The blanching preserves the beans’ vibrant color and crispness, while the sweet and salty sauce penetrates just enough to flavor without making them soggy. Bacon adds smoky richness, and the quick bake at the end brings all the elements together into an irresistible side dish that will become your new go-to recipe for any occasion.

Print
clock clock iconcutlery cutlery iconflag flag iconfolder folder iconinstagram instagram iconpinterest pinterest iconfacebook facebook iconprint print iconsquares squares iconheart heart iconheart solid heart solid icon

Crack Green Beans

  • Author: Anonymous

Description

These addictive green beans are loaded with bacon, butter, and brown sugar for an irresistible side dish that earns its ‘crack’ nickname.


Ingredients

Scale

For the Crust:

  • For the green beans:
  • 2 lbs fresh green beans, trimmed
  • 6 slices bacon, chopped
  • For the sauce:
  • 1/2 cup unsalted butter
  • 1/2 cup packed brown sugar
  • 2 tbsp soy sauce
  • 1 tsp garlic powder
  • 1/2 tsp onion powder
  • 1/4 tsp black pepper
  • For garnish:
  • 1/4 cup sliced almonds, toasted (optional)

Instructions

1. Prepare the Crust:

  1. 1. Preheat oven to 350°F (175°C).
  2. 2. In a large skillet over medium heat, cook chopped bacon until crispy. Remove with slotted spoon, leaving drippings in pan.
  3. 3. Add green beans to bacon drippings and sauté for 3-4 minutes until bright green.
  4. 4. Transfer green beans to 9×13 baking dish. Sprinkle cooked bacon over top.
  5. 5. In same skillet, melt butter over low heat. Whisk in brown sugar, soy sauce, garlic powder, onion powder, and pepper until smooth.
  6. 6. Pour sauce evenly over green beans and bacon.
  7. 7. Bake uncovered for 30 minutes, stirring halfway through.
  8. 8. Remove from oven and let stand 5 minutes before serving. Garnish with toasted almonds if desired.

Notes

For crispier texture, reduce baking time to 20-25 minutes. Can substitute frozen green beans (thawed) in a pinch. Leftovers reheat well in microwave.

Cheeseburger Tot Nachos

Cheeseburger Tot Nachos: The Ultimate Game Day Snack

These Cheeseburger Tot Nachos combine two classic favorites into one irresistible appetizer. Perfect for game day, parties, or a fun family dinner, this recipe transforms crispy tater tots into a loaded nacho-style dish with all the flavors of a juicy cheeseburger. With melty cheese, savory ground beef, and classic burger toppings, this crowd-pleasing dish will disappear fast!

Why You’ll Love These Cheeseburger Tot Nachos

If you love the combination of crispy potatoes and cheeseburger flavors, this recipe is for you. The Cheeseburger Tot Nachos offer:

  • Easy preparation with minimal ingredients
  • Customizable toppings to suit any taste
  • Crispy tater tot base that holds up to toppings
  • All the classic cheeseburger flavors in nacho form

Cheeseburger Tot Nachos Ingredients

Gather these simple ingredients to make your loaded tater tot nachos:

  • 1 (32 oz) bag frozen tater tots
  • 1 lb ground beef (80/20 blend recommended)
  • 1 packet taco seasoning or burger seasoning
  • 2 cups shredded cheddar cheese
  • 1 cup shredded Monterey Jack cheese
  • 1/2 cup diced tomatoes
  • 1/4 cup diced red onion
  • 1/4 cup pickles, chopped
  • 1/4 cup ketchup
  • 1/4 cup mustard
  • 1 tbsp mayonnaise
  • 1 tsp Worcestershire sauce

How to Make Cheeseburger Tot Nachos

Follow these simple steps for perfect loaded tater tot nachos every time:

  1. Preheat oven to 425°F (220°C). Arrange tater tots in single layer on baking sheet.
  2. Bake tots for 20-25 minutes until golden brown and crispy.
  3. While tots bake, brown ground beef in skillet over medium heat. Drain excess fat.
  4. Add seasoning packet and 1/4 cup water to beef. Simmer 5 minutes.
  5. Mix mayonnaise, ketchup, mustard, and Worcestershire sauce to create special sauce.
  6. Remove tots from oven, sprinkle with cheeses and beef mixture.
  7. Return to oven for 3-5 minutes until cheese melts.
  8. Top with tomatoes, onions, pickles, and drizzle with special sauce.

Serving Suggestions for Your Tot Nachos

These Cheeseburger Tot Nachos are delicious on their own, but you can enhance them with:

  • Additional toppings like bacon bits or jalapeños
  • A side of ranch dressing for dipping
  • Cold beer or soda to drink
  • Extra napkins – these get messy!

Tips for Perfect Cheeseburger Tot Nachos

For the best results with your tater tot nacho recipe:

  • Use freshly shredded cheese for better melting
  • Spread tots evenly so every bite gets toppings
  • Add delicate toppings after baking to maintain texture
  • Serve immediately while hot and crispy

Storage and Reheating Instructions

While best enjoyed fresh, you can store leftovers in airtight container in refrigerator for 2 days. Reheat in 350°F oven for 10 minutes to restore crispiness. Microwave reheating will make tots soggy.

These Cheeseburger Tot Nachos offer all the satisfaction of a loaded burger in fun, shareable form. Whether you’re feeding a crowd or just craving something different, this creative twist on two classics will become a new favorite. The combination of crispy tots, seasoned beef, melty cheese, and classic burger toppings creates irresistible flavors and textures in every bite.

Print
clock clock iconcutlery cutlery iconflag flag iconfolder folder iconinstagram instagram iconpinterest pinterest iconfacebook facebook iconprint print iconsquares squares iconheart heart iconheart solid heart solid icon

Cheeseburger Tot Nachos

  • Author: The Comfort Kitchen

Description

A fun twist on classic nachos, these Cheeseburger Tot Nachos combine crispy tater tots with all the flavors of a juicy cheeseburger. Topped with melty cheese, seasoned ground beef, pickles, and a special sauce, they’re perfect for game day or a family-friendly dinner.


Ingredients

Scale

For the Crust:

  • For the nachos:
  • 1 (32 oz) bag frozen tater tots
  • 1 lb ground beef (80/20 blend)
  • 1 tsp garlic powder
  • 1 tsp onion powder
  • 1 tsp paprika
  • 1/2 tsp salt
  • 1/2 tsp black pepper
  • 2 cups shredded cheddar cheese
  • 1 cup shredded Monterey Jack cheese
  • For the toppings:
  • 1/2 cup diced dill pickles
  • 1/4 cup diced red onion
  • 1 cup shredded iceberg lettuce
  • 1 tomato, diced
  • For the special sauce:
  • 1/2 cup mayonnaise
  • 2 tbsp ketchup
  • 1 tbsp yellow mustard
  • 1 tsp pickle juice
  • 1/2 tsp smoked paprika
  • 1/4 tsp garlic powder

Instructions

1. Prepare the Crust:

  1. 1. Preheat oven to 425°F (220°C). Arrange tater tots in a single layer on a large baking sheet. Bake for 20-25 minutes until crispy and golden brown.
  2. 2. While tots bake, cook ground beef in a skillet over medium heat, breaking it into small crumbles. Drain excess fat.
  3. 3. Add garlic powder, onion powder, paprika, salt, and pepper to the beef. Stir well and cook for another 2 minutes. Remove from heat.
  4. 4. In a small bowl, mix all special sauce ingredients until smooth. Refrigerate until ready to use.
  5. 5. Remove tots from oven. Sprinkle both cheeses evenly over the tots. Return to oven for 3-5 minutes until cheese melts.
  6. 6. Top with seasoned beef, then add pickles, red onion, lettuce, and tomato.
  7. 7. Drizzle with special sauce and serve immediately.

Notes

For extra crispiness, bake the tots on a wire rack set over the baking sheet. You can substitute ground turkey for a lighter version. Leftover sauce keeps refrigerated for up to 1 week.

Smothered Pork Chop Scalloped Potato Casserole

Smothered Pork Chop Scalloped Potato Casserole

This Smothered Pork Chop Scalloped Potato Casserole combines tender pork chops with creamy scalloped potatoes for the ultimate comfort food experience. Perfect for family dinners or special occasions, this hearty dish brings together classic flavors in one delicious bake. Follow our easy recipe to create this crowd-pleasing casserole that’s sure to become a regular in your meal rotation.

Frequently Asked Questions

Can I use boneless pork chops?

Yes, boneless pork chops work well in this recipe. Reduce cooking time by about 10 minutes as they cook faster than bone-in chops.

Can I make this casserole ahead?

You can assemble the casserole up to a day in advance. Cover and refrigerate until ready to bake. Add 10-15 minutes to the baking time if starting from cold.

What potatoes work best?

Russet potatoes are ideal for scalloped potatoes as they hold their shape well. Yukon Gold potatoes also work nicely for a creamier texture.

Final Thoughts

This smothered pork chop scalloped potato casserole delivers comfort food perfection with minimal effort. The combination of tender pork, creamy potatoes, and melted cheese creates a satisfying meal that pleases both kids and adults. Whether you’re looking for an easy weeknight dinner or a dish to bring to potlucks, this recipe is sure to impress with its delicious flavors and hearty portions.

Print
clock clock iconcutlery cutlery iconflag flag iconfolder folder iconinstagram instagram iconpinterest pinterest iconfacebook facebook iconprint print iconsquares squares iconheart heart iconheart solid heart solid icon

Smothered Pork Chop Scalloped Potato Casserole

  • Author: Chef Comfort

Description

A hearty and comforting casserole featuring tender pork chops smothered in a rich gravy and layered with creamy scalloped potatoes. Perfect for a family dinner or special occasion.


Ingredients

Scale

For the Crust:

  • For the Pork Chops:
  • 4 bone-in pork chops (about 1-inch thick)
  • 1 teaspoon salt
  • 1 teaspoon black pepper
  • 1 teaspoon garlic powder
  • 1 teaspoon onion powder
  • 2 tablespoons olive oil
  • For the Scalloped Potatoes:
  • 4 large russet potatoes, thinly sliced
  • 1 medium onion, thinly sliced
  • 2 cups shredded cheddar cheese
  • 1 cup heavy cream
  • 1/2 cup whole milk
  • 2 tablespoons butter
  • 2 tablespoons all-purpose flour
  • 1 teaspoon salt
  • 1/2 teaspoon black pepper
  • 1/2 teaspoon dried thyme
  • For the Gravy:
  • 2 cups chicken broth
  • 1/4 cup all-purpose flour
  • 2 tablespoons butter
  • 1 teaspoon Worcestershire sauce
  • 1/2 teaspoon garlic powder
  • Salt and pepper to taste

Instructions

1. Prepare the Crust:

  1. Preheat oven to 375°F (190°C). Grease a 9×13-inch baking dish.
  2. Season pork chops with salt, pepper, garlic powder, and onion powder. Heat olive oil in a large skillet over medium-high heat. Sear pork chops for 3-4 minutes per side until golden brown. Remove and set aside.
  3. In the same skillet, melt 2 tablespoons butter over medium heat. Whisk in 2 tablespoons flour and cook for 1 minute. Gradually whisk in heavy cream and milk until smooth. Add salt, pepper, and thyme. Simmer for 2-3 minutes until slightly thickened.
  4. Layer half of the sliced potatoes and onions in the prepared baking dish. Pour half of the cream mixture over the potatoes and sprinkle with 1 cup of cheddar cheese. Repeat with remaining potatoes, cream mixture, and cheese.
  5. Place seared pork chops on top of the potato layers.
  6. For the gravy: In the same skillet, melt 2 tablespoons butter over medium heat. Whisk in 1/4 cup flour and cook for 1 minute. Gradually whisk in chicken broth and Worcestershire sauce. Add garlic powder, salt, and pepper. Simmer for 3-4 minutes until thickened.
  7. Pour gravy over the pork chops and potatoes. Cover with foil and bake for 45 minutes. Remove foil and bake for an additional 15-20 minutes until potatoes are tender and top is golden brown.
  8. Let rest for 10 minutes before serving.

Notes

For extra flavor, add a sprinkle of smoked paprika to the pork chops before searing. Leftovers can be stored in the refrigerator for up to 3 days. Reheat in the oven at 350°F (175°C) for best results.