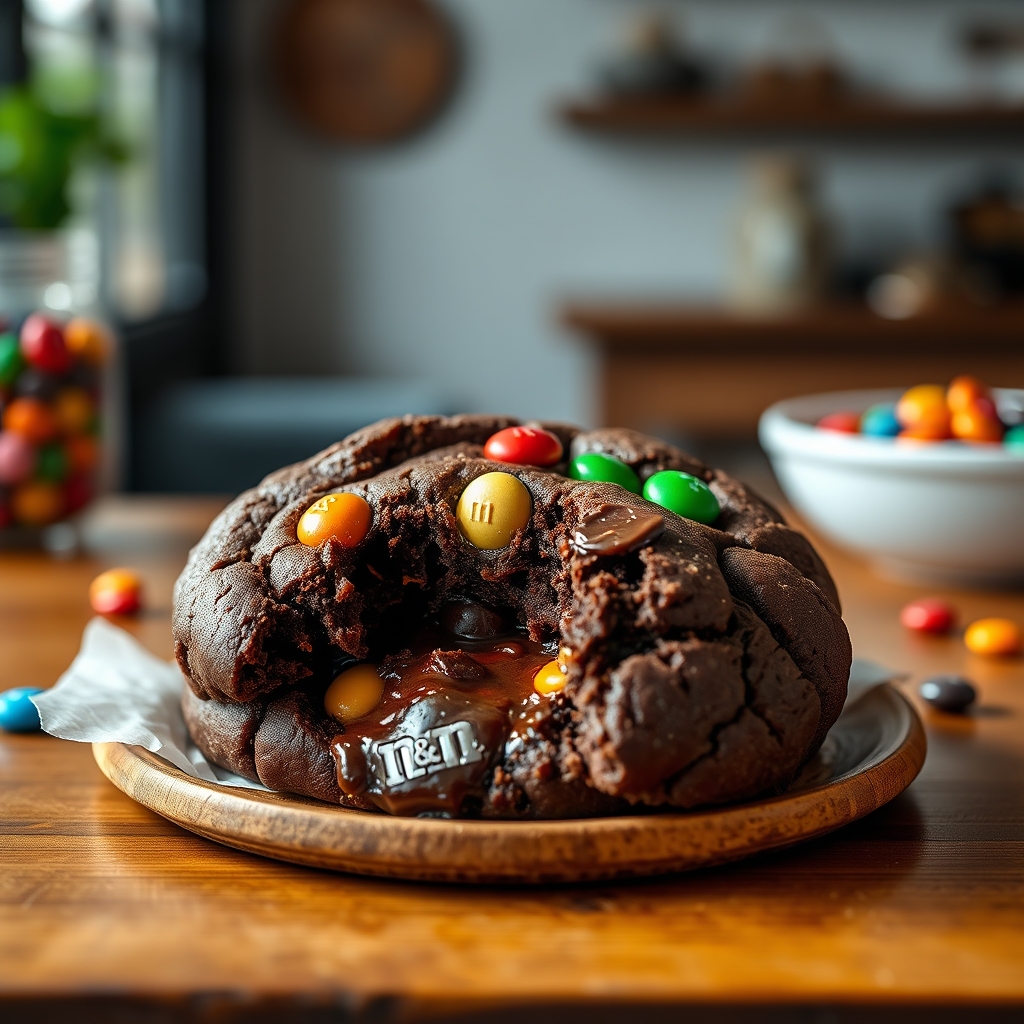
Chocolate Lava M&M Surprise Cookies
There’s something magical about biting into a cookie and discovering a molten chocolate center, especially when it’s studded with colorful M&Ms. These Chocolate Lava M&M Surprise Cookies are a playful twist on classic chocolate cookies, delivering a gooey, decadent experience with every bite. Perfect for bake sales, holiday treats, or just because, these cookies are guaranteed to bring smiles to faces young and old. Let’s dive into this irresistible recipe that’s as fun to make as it is to eat.
Why You’ll Love This Recipe
- Gooey Chocolate Center – The molten lava filling creates a luxurious, melt-in-your-mouth experience that contrasts beautifully with the chewy cookie exterior.
- Colorful & Fun – M&Ms add a burst of color and crunch, making these cookies visually appealing and perfect for celebrations.
- Easy to Make – Despite their impressive appearance, these cookies come together with simple ingredients and straightforward steps.
- Crowd-Pleasing – Whether for kids’ parties or adult gatherings, these cookies are universally loved and disappear fast.
- Customizable – Swap out M&Ms for other candies or adjust the chocolate filling to suit your taste.
Ingredients Breakdown
Understanding each ingredient’s role ensures the best possible outcome for your Chocolate Lava M&M Surprise Cookies.
- All-Purpose Flour – The foundation of the cookie dough, providing structure and chewiness.
- Unsalted Butter – Adds richness and moisture; using unsalted allows you to control the salt level.
- Granulated Sugar & Brown Sugar – A mix of both sugars ensures sweetness while brown sugar contributes moisture and a slight caramel note.
- Eggs – Binds the dough and adds moisture for a tender texture.
- Cocoa Powder – Intensifies the chocolate flavor, making these cookies deeply indulgent.
- Baking Soda & Salt – Leavening agents that help the cookies rise slightly, while salt balances sweetness.
- Vanilla Extract – Enhances the overall flavor profile with warm, aromatic notes.
- M&Ms – Brings color, crunch, and a playful candy-coated chocolate surprise.
- Chocolate Chunks or Melting Wafers – The key to the molten lava center; high-quality chocolate ensures a smooth, velvety melt.
How to Make Chocolate Lava M&M Surprise Cookies
Follow these steps for perfectly baked cookies with a molten chocolate center every time.
- Preheat & Prep – Preheat your oven to 350°F (175°C) and line baking sheets with parchment paper.
- Cream Butter & Sugars – In a large bowl, beat softened butter with granulated and brown sugar until light and fluffy, about 3 minutes.
- Add Wet Ingredients – Mix in eggs one at a time, followed by vanilla extract, ensuring everything is well incorporated.
- Combine Dry Ingredients – In a separate bowl, whisk together flour, cocoa powder, baking soda, and salt.
- Mix Dough – Gradually add the dry ingredients to the wet mixture, mixing just until combined. Avoid overmixing to keep the cookies tender.
- Fold in M&Ms – Gently stir in M&Ms, reserving a few for pressing on top before baking.
- Shape Cookies – Scoop dough into 2-tablespoon portions. Flatten slightly, place a chocolate chunk in the center, then wrap the dough around it, sealing well.
- Bake – Place cookies on the prepared sheets, press a few extra M&Ms on top, and bake for 10-12 minutes. The edges should be set, but the centers will still look soft.
- Cool Slightly – Let cookies rest on the baking sheet for 5 minutes before transferring to a wire rack.
Pro Tips for the Best Results
- Chill the Dough – If the dough feels too sticky, refrigerate for 30 minutes to make shaping easier.
- Use High-Quality Chocolate – Opt for baking bars or melting wafers instead of chocolate chips for a smoother lava center.
- Don’t Overbake – The cookies will firm up as they cool, so pull them out when the edges are set but the centers are still slightly underdone.
- Uniform Sizing – Use a cookie scoop to ensure even baking and consistent molten centers.
- Press Extra M&Ms on Top – This ensures a vibrant, eye-catching presentation.
Variations and Substitutions
Customize these cookies to suit dietary needs or flavor preferences.
- Gluten-Free – Substitute all-purpose flour with a 1:1 gluten-free baking blend.
- Dairy-Free – Use plant-based butter and dairy-free chocolate chunks.
- Nutty Twist – Add chopped pecans or walnuts for extra crunch.
- Peanut Butter Lava – Replace the chocolate center with a small scoop of peanut butter for a different surprise.
- Seasonal M&Ms – Use holiday-themed M&Ms for festive variations throughout the year.
What to Serve With It
These cookies shine on their own but pair wonderfully with:
- A cold glass of milk for classic dunking.
- Vanilla ice cream for an over-the-top dessert.
- Fresh berries to balance the richness.
- A warm cup of coffee or hot chocolate for a cozy treat.
How to Store and Reheat
Keep your cookies fresh and delicious with these storage tips.
- Room Temperature – Store in an airtight container for up to 4 days.
- Freezing – Freeze baked cookies in a single layer before transferring to a freezer bag for up to 3 months. Thaw at room temperature or reheat in the microwave for 10 seconds.
- Reheating – Warm in the microwave for 5-10 seconds to revive the molten center.
Frequently Asked Questions (FAQs)
Can I use chocolate chips instead of chunks?
While chocolate chips work, they contain stabilizers that prevent them from melting as smoothly as baking bars or wafers. For the best lava effect, use high-quality chocolate chunks.
Why did my cookies spread too much?
Overly soft butter or insufficient chilling can cause spreading. Ensure your butter is softened but not melted, and chill the dough if needed.
Can I make the dough ahead of time?
Yes! Refrigerate the dough for up to 2 days or freeze shaped cookie dough balls for up to 1 month. Bake straight from the fridge, adding an extra minute if needed.
How do I know when the cookies are done?
The edges should be set, but the centers will still look slightly underbaked. They’ll firm up as they cool.
Can I omit the M&Ms?
Absolutely. Skip them or replace with chopped nuts, toffee bits, or even dried fruit for a different texture.
Final Thoughts
There’s no denying the joy that comes from biting into a warm, gooey Chocolate Lava M&M Surprise Cookie. Whether you’re baking for a special occasion or just indulging in a sweet craving, these cookies deliver on both flavor and fun. The best part? Watching the delighted reactions when someone discovers the molten center. So grab your mixing bowl, preheat that oven, and get ready to bake a batch of pure happiness. Happy baking!
Print
Chocolate Lava M&M Surprise Cookies
Description
Decadent chocolate cookies with a gooey molten center and colorful M&M surprises in every bite. Perfect for celebrations or satisfying sweet cravings!
Ingredients
For the Crust:
- For the cookie dough:
- 1 cup (2 sticks) unsalted butter, softened
- 1 1/2 cups granulated sugar
- 2 large eggs
- 2 teaspoons vanilla extract
- 2 cups all-purpose flour
- 3/4 cup cocoa powder
- 1 teaspoon baking soda
- 1/2 teaspoon salt
- For the filling & topping:
- 24 chocolate truffles or chocolate squares (for lava center)
- 1 cup M&M’s (plus extra for decoration)
- 1/4 cup powdered sugar (for dusting)
Instructions
1. Prepare the Crust:
- 1. Preheat oven to 375°F (190°C) and line baking sheets with parchment paper.
- 2. Cream together butter and sugar until light and fluffy (about 3 minutes).
- 3. Beat in eggs one at a time, then add vanilla extract.
- 4. In separate bowl, whisk flour, cocoa powder, baking soda, and salt.
- 5. Gradually mix dry ingredients into wet ingredients until just combined.
- 6. Fold in 1/2 cup M&M’s (reserve rest for topping).
- 7. Scoop 2 tbsp dough, flatten slightly, place 1 truffle in center, and wrap dough around it completely.
- 8. Place cookies 2 inches apart on baking sheets. Press 3-4 M&M’s onto each cookie top.
- 9. Bake for 10-12 minutes until edges are set but centers still look soft.
- 10. Cool on baking sheets for 5 minutes, then transfer to wire racks.
- 11. Dust with powdered sugar while warm. Serve immediately for maximum lava effect!
Notes
• For best results, use room temperature ingredients. • Freeze truffles for 15 minutes before baking to prevent over-melting. • Store in airtight container for up to 3 days (reheat 10 sec in microwave to restore lava center). • Substitute with peanut butter cups for variation.