Creamy Crockpot Crack Chicken

Creamy Crockpot Crack Chicken

If you’re searching for a dish that effortlessly combines comfort, convenience, and irresistible flavor, look no further than Creamy Crockpot Crack Chicken. This slow-cooked marvel is a creamy, cheesy, and savory delight that has earned its name for being downright addictive. Whether you’re feeding a hungry family, hosting a potluck, or simply craving a no-fuss meal, this recipe delivers every time. Let’s dive into why this dish is a must-try and how you can make it perfectly every single time.

Why You’ll Love This Recipe

There are countless reasons why Creamy Crockpot Crack Chicken has become a fan favorite, but here are the top five that make it stand out:

  • Minimal Effort, Maximum Flavor – With just a few minutes of prep and a trusty slow cooker, you can let the Crockpot do all the work while you go about your day.
  • Ultra-Comforting and Satisfying – The creamy, cheesy texture combined with tender shredded chicken makes this dish the ultimate comfort food.
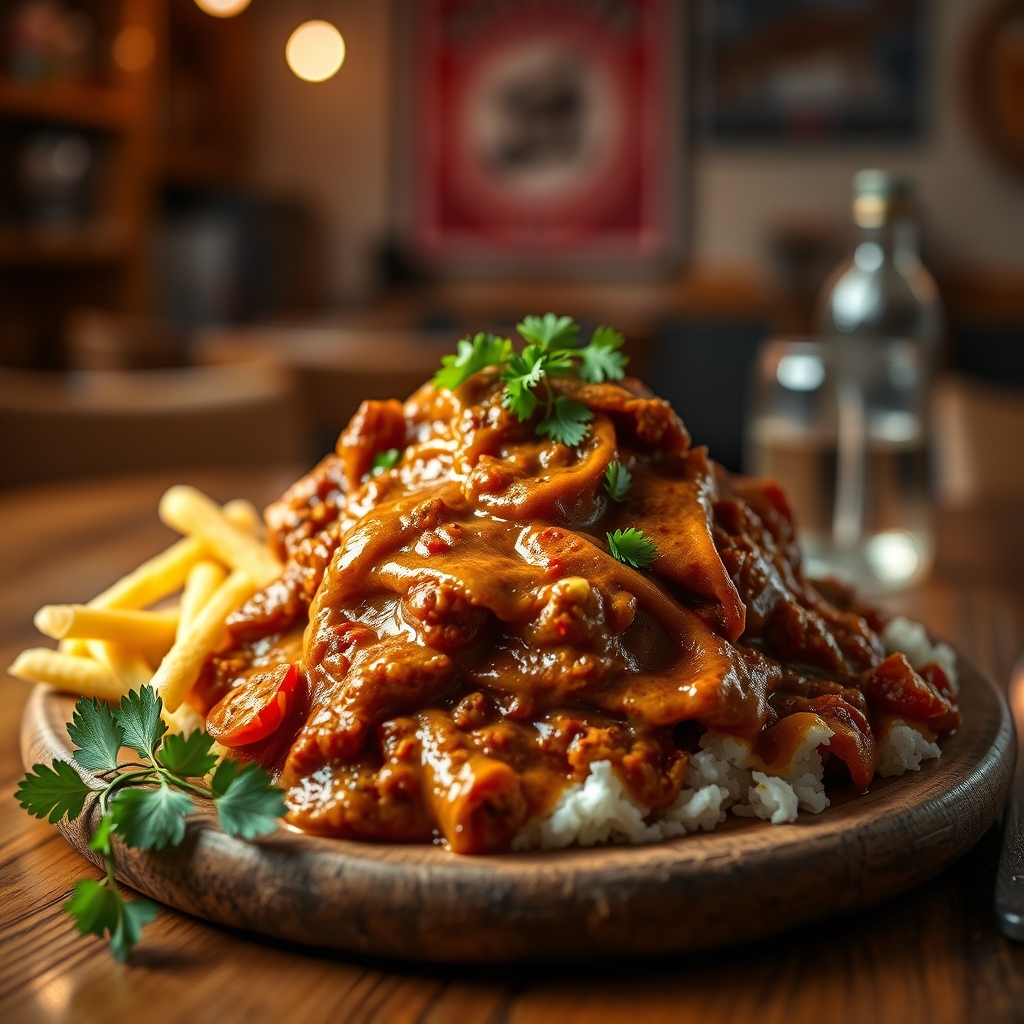
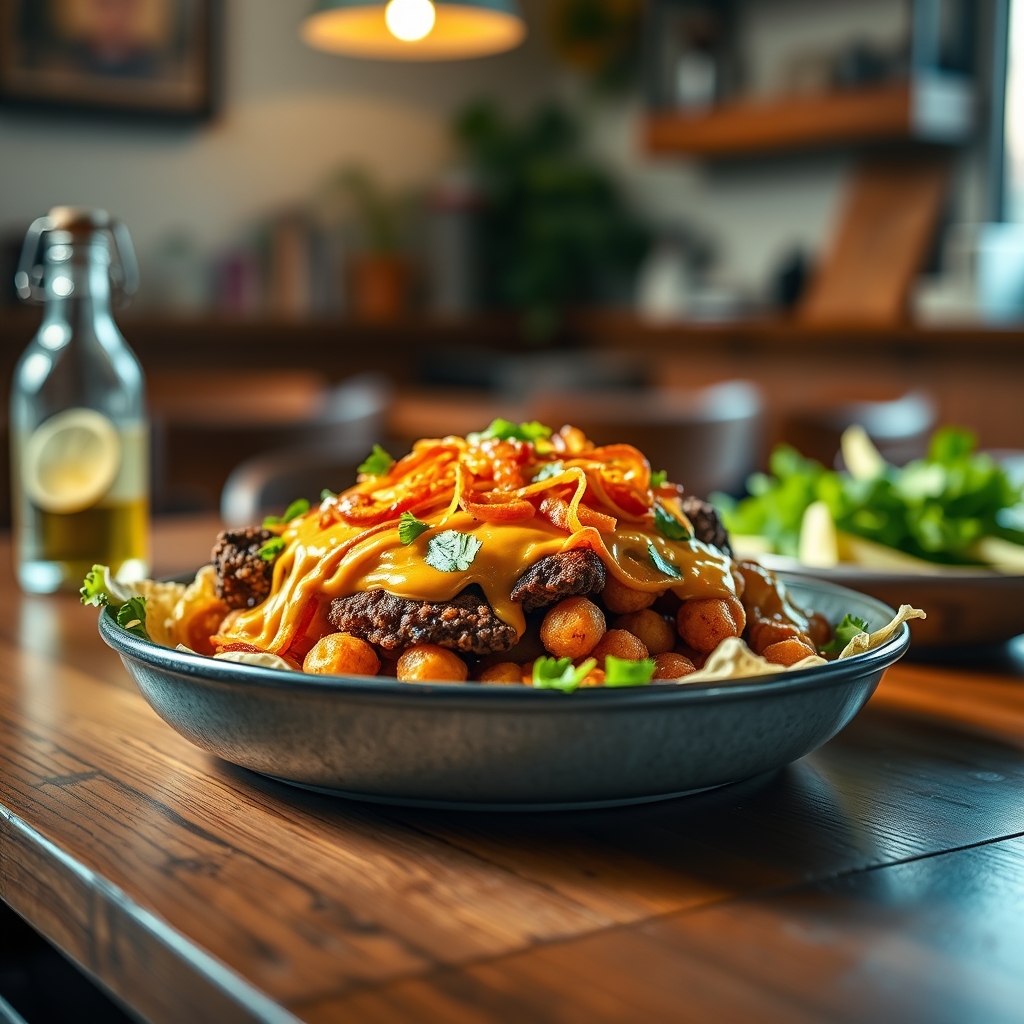
  • Versatile Serving Options – Enjoy it as a sandwich filling, over rice, in a wrap, or even as a dip—it adapts to any meal style.
  • Crowd-Pleasing Appeal – Perfect for gatherings, game days, or weeknight dinners, this dish disappears fast because everyone loves it.
  • Meal Prep Friendly – It stores and reheats beautifully, making it ideal for busy schedules and leftovers that taste just as good the next day.

Ingredients Breakdown

Understanding each component of Creamy Crockpot Crack Chicken helps you appreciate how the flavors and textures come together. Here’s what you’ll need:

  • Boneless, Skinless Chicken Breasts or Thighs – The protein base of the dish. Thighs add extra juiciness, while breasts keep it lean.
  • Cream Cheese – Melts into a luscious, velvety sauce that binds everything together.
  • Ranch Seasoning Mix – Adds a tangy, herby depth that’s signature to crack chicken.
  • Cheddar Cheese – Sharp cheddar brings a rich, cheesy goodness that takes the creaminess to the next level.
  • Bacon – Crispy, smoky bacon bits provide a salty crunch that contrasts beautifully with the creamy chicken.
  • Green Onions – A fresh, slightly peppery garnish that brightens up the dish.

How to Make Creamy Crockpot Crack Chicken

Follow these simple steps for a foolproof, delicious result every time:

  1. Prep the Chicken – Place the chicken breasts or thighs in the slow cooker. Season lightly with salt and pepper if desired.
  2. Add the Cream Cheese and Ranch – Place blocks of cream cheese on top of the chicken, then sprinkle the ranch seasoning mix evenly over everything.
  3. Slow Cook to Perfection – Cover and cook on low for 6-7 hours or high for 3-4 hours, until the chicken is tender and easily shreddable.
  4. Shred the Chicken – Use two forks to shred the chicken directly in the Crockpot, allowing it to soak up all the creamy sauce.
  5. Stir in Cheese and Bacon – Add shredded cheddar and crispy bacon pieces, stirring until the cheese melts into the mixture.
  6. Garnish and Serve – Top with sliced green onions and extra bacon if desired. Serve warm over your choice of sides.

Pro Tips for the Best Results

  • Don’t Overcook the Chicken – Check for doneness at the earliest recommended time to prevent dryness.
  • Use Full-Fat Ingredients – Low-fat cream cheese or cheese can result in a less creamy texture.
  • Cook Bacon Separately – For maximum crispiness, cook bacon in the oven or skillet before adding it to the dish.
  • Let It Rest Before Serving – Allowing the mixture to sit for 10 minutes helps the flavors meld even more.

Variations and Substitutions

This recipe is wonderfully adaptable. Here are some ways to customize it:

  • Spicy Kick – Add diced jalapeños or a dash of hot sauce for heat.
  • Lighter Version – Swap in Greek yogurt for cream cheese and turkey bacon for a lower-calorie option.
  • Different Cheeses – Try pepper jack for a spicy twist or mozzarella for a milder flavor.
  • Vegetable Boost – Stir in sautéed mushrooms, spinach, or bell peppers for extra nutrition.

What to Serve With It

Creamy Crockpot Crack Chicken pairs beautifully with a variety of sides and accompaniments:

  • Buttery Buns or Rolls – Perfect for making sliders or sandwiches.
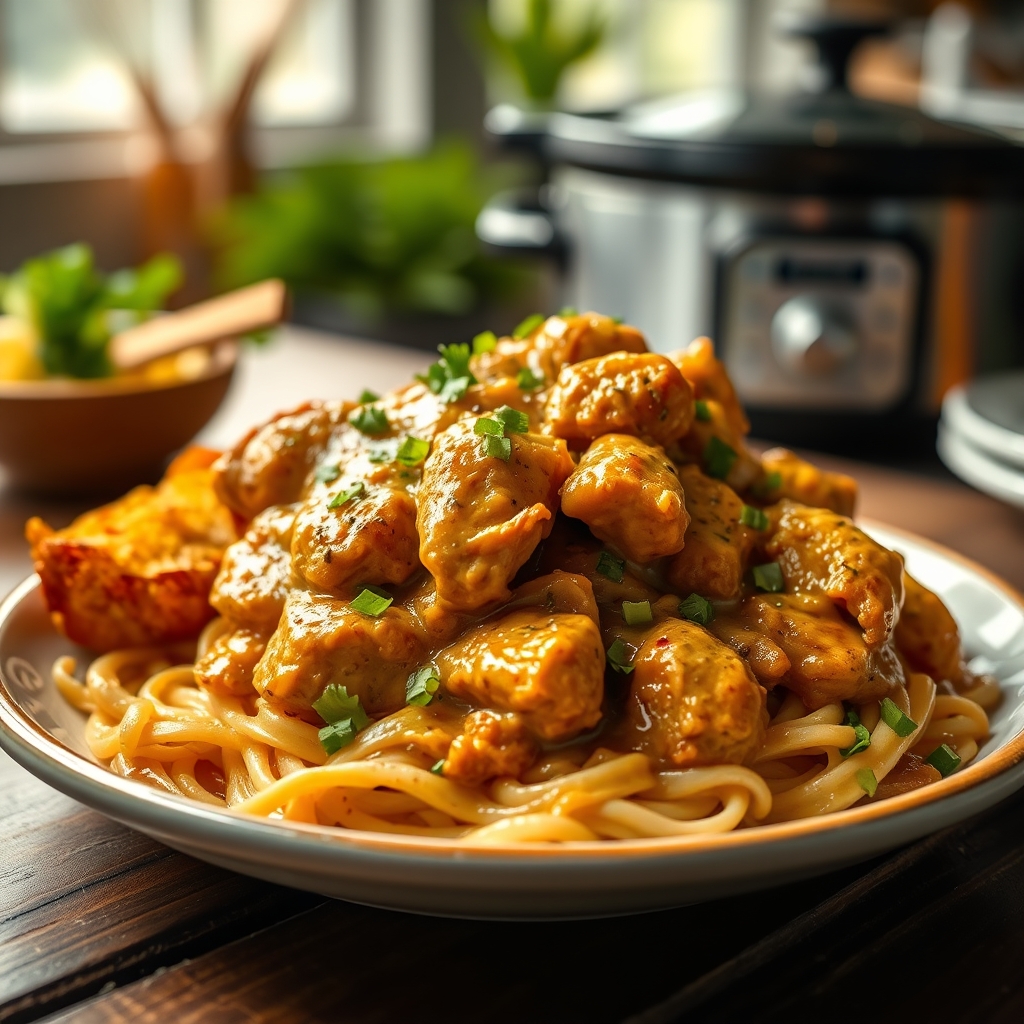
  • Steamed Rice or Pasta – A simple base to soak up the creamy sauce.
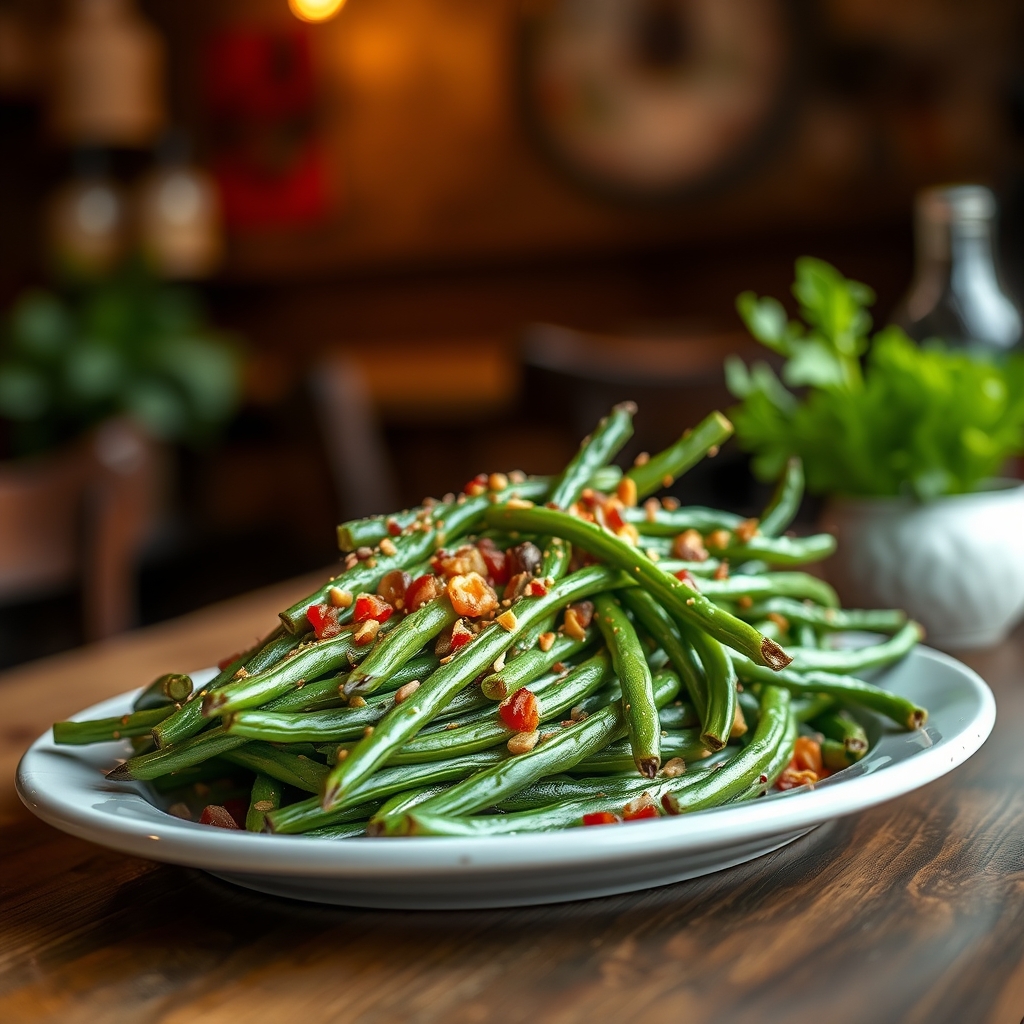
  • Roasted Vegetables – Broccoli, carrots, or Brussels sprouts add a healthy contrast.
  • Crispy Salad – A fresh garden salad with ranch dressing complements the flavors.

How to Store and Reheat

Leftovers stay delicious for days with proper storage:

  • Refrigeration – Store in an airtight container for up to 4 days.
  • Freezing – Freeze in portioned containers for up to 3 months. Thaw overnight in the fridge before reheating.
  • Reheating – Warm in the microwave or on the stovetop with a splash of broth or milk to revive creaminess.

Frequently Asked Questions (FAQs)

Can I make this recipe in an Instant Pot?
Yes! Cook on high pressure for 10 minutes, then quick release, shred, and stir in cheese and bacon.

Can I use frozen chicken?
It’s best to thaw chicken first for even cooking, but if using frozen, extend the cooking time by 1-2 hours.

What can I use instead of ranch seasoning?
A mix of dried dill, garlic powder, onion powder, and parsley can mimic ranch flavors.

Is this dish gluten-free?
Check your ranch seasoning for gluten-containing additives, or use a gluten-free brand.

Final Thoughts

Creamy Crockpot Crack Chicken is one of those rare recipes that manages to be both incredibly easy and undeniably delicious. Whether you’re a busy parent, a meal prep enthusiast, or just someone who loves a good comfort dish, this recipe is sure to become a staple in your kitchen. The best part? It invites creativity—so don’t be afraid to tweak it to your taste. Give it a try, and you’ll see why it’s earned such a devoted following. Happy cooking!

Print
clock clock iconcutlery cutlery iconflag flag iconfolder folder iconinstagram instagram iconpinterest pinterest iconfacebook facebook iconprint print iconsquares squares iconheart heart iconheart solid heart solid icon

Creamy Crockpot Crack Chicken

  • Author: Slow Cooker Queen

Description

This addictive slow cooker chicken gets its name from being so delicious you can’t stop eating it! Tender shredded chicken, cream cheese, cheddar, bacon, and ranch seasoning come together for the ultimate comfort food. Perfect for sandwiches, dips, or eating straight from the pot.


Ingredients

Scale

For the Crust:

  • For the chicken:
  • 2 lbs boneless, skinless chicken breasts
  • 1 packet (1 oz) dry ranch seasoning mix
  • For the creamy sauce:
  • 8 oz cream cheese, cubed
  • 1/2 cup chicken broth
  • 1/2 cup sour cream
  • For toppings:
  • 1 cup shredded cheddar cheese
  • 6 slices bacon, cooked and crumbled
  • 2 green onions, sliced

Instructions

1. Prepare the Crust:

  1. 1. Place chicken breasts in the bottom of a 6-quart slow cooker.
  2. 2. Sprinkle ranch seasoning evenly over the chicken.
  3. 3. Add cream cheese cubes, chicken broth, and sour cream on top.
  4. 4. Cover and cook on LOW for 6-7 hours or HIGH for 3-4 hours.
  5. 5. Shred chicken with two forks directly in the slow cooker.
  6. 6. Stir in cheddar cheese until melted and fully combined.
  7. 7. Top with crumbled bacon and green onions before serving.

Notes

Serve on buns as sandwiches, with crackers as a dip, or over rice/pasta. Leftovers keep well for 3-4 days refrigerated. For extra flavor, reserve some bacon and green onions for garnish.

𝐂𝐇𝐈𝐋𝐈 𝐂𝐇𝐄𝐄𝐒𝐄 𝐂𝐎𝐍𝐄𝐘

CHILI CHEESE CONEY

There’s something undeniably comforting about a classic Chili Cheese Coney. Whether you grew up enjoying them at summer cookouts or discovered them later in life, this dish is a nostalgic nod to American diner culture with its savory chili, melty cheese, and soft hot dog bun. Today, I’m sharing my tried-and-true recipe that brings together all those beloved flavors in a way that’s easy to make at home yet tastes like it came straight from a retro roadside stand.

Why You’ll Love This Recipe

If you’re looking for a crowd-pleasing dish that’s quick to prepare and packed with flavor, this Chili Cheese Coney recipe is a must-try. Here’s why it stands out:

  • Perfect for gatherings – Whether it’s game day, a backyard barbecue, or a casual weeknight dinner, these Coneys are always a hit.
  • Balanced textures – The combination of juicy hot dogs, rich chili, and gooey cheese creates a satisfying bite every time.
  • Customizable – You can tweak the spice level, cheese type, or toppings to suit your taste.
  • Quick and easy – With minimal prep and cook time, this recipe is ideal for busy days.
  • Kid-friendly – Even picky eaters will love the familiar flavors of this classic dish.

Ingredients Breakdown

Every ingredient in this Chili Cheese Coney recipe plays a crucial role in building layers of flavor and texture. Here’s what you’ll need:

  • Hot dogs – All-beef franks are my top choice for their robust flavor and snap.
  • Hot dog buns – Soft, slightly sweet buns hold everything together without falling apart.
  • Ground beef – The base of the chili, providing richness and depth.
  • Tomato sauce and paste – These add tangy sweetness and help thicken the chili.
  • Spices – Chili powder, cumin, garlic powder, and onion powder create that signature chili flavor.
  • Cheese – Shredded cheddar melts beautifully, but American cheese is also a great option.
  • Yellow mustard and diced onions – Classic toppings that add brightness and crunch.

How to Make CHILI CHEESE CONEY

Follow these simple steps to create the perfect Chili Cheese Coneys at home:

  1. Brown the beef – In a skillet over medium heat, cook the ground beef until no pink remains. Drain excess fat.
  2. Simmer the chili – Add tomato sauce, tomato paste, and spices to the beef. Stir well and let it simmer for 10-15 minutes until thickened.
  3. Prepare the hot dogs – While the chili simmers, grill or boil the hot dogs until heated through.
  4. Toast the buns – Lightly toast the buns in a toaster or on a skillet for extra texture.
  5. Assemble – Place a hot dog in each bun, top with a generous spoonful of chili, then sprinkle with shredded cheese.
  6. Add toppings – Finish with a drizzle of mustard and a sprinkle of diced onions.
  7. Serve immediately – Enjoy while the cheese is still melty and the chili is warm.

Pro Tips for the Best Results

Take your Chili Cheese Coneys to the next level with these expert tips:

  • For extra flavor, mix a splash of Worcestershire sauce into the chili.
  • If you prefer a smokier taste, add a pinch of smoked paprika to the chili seasoning.
  • To prevent soggy buns, lightly butter and toast them before assembling.
  • Let the chili rest for 5 minutes after cooking to allow flavors to meld.
  • For a spicier kick, add a dash of cayenne pepper or diced jalapeños.

Variations and Substitutions

This recipe is highly adaptable to different tastes and dietary needs. Here are some ideas:

  • Vegetarian option – Swap the beef for plant-based crumbles and use veggie dogs.
  • Cheese alternatives – Try pepper jack for spice or a dairy-free cheese for lactose intolerance.
  • Gluten-free – Use gluten-free hot dog buns and ensure all other ingredients are certified GF.
  • Extra toppings – Pickles, relish, or even coleslaw can add fun twists.
  • Different meats – Ground turkey or chicken can replace beef for a lighter version.

What to Serve With It

Chili Cheese Coneys are hearty on their own, but they pair wonderfully with these sides:

  • Crispy french fries or sweet potato fries
  • A simple green salad with tangy vinaigrette
  • Classic potato chips or onion rings
  • Baked beans or macaroni salad for a picnic vibe
  • An ice-cold root beer or lemonade

How to Store and Reheat

If you have leftovers (which is rare!), here’s how to keep them fresh:

  • Refrigeration – Store assembled Coneys in an airtight container for up to 2 days.
  • Freezing – Freeze the chili separately for up to 3 months. Thaw overnight before reheating.
  • Reheating – Warm the chili in a saucepan over low heat, then assemble fresh Coneys.
  • Best method – For the crispiest results, reheat hot dogs separately before assembling.

Frequently Asked Questions (FAQs)

Can I make the chili ahead of time?
Absolutely! The chili actually tastes better after sitting overnight as the flavors develop. Just reheat gently before serving.

What’s the best way to melt the cheese?
For perfectly melted cheese, place assembled Coneys under a broiler for 30 seconds or microwave briefly.

Can I use canned chili instead?
Yes, but homemade chili has far superior flavor. If using canned, doctor it up with extra spices.

How do I prevent the buns from getting soggy?
Toast them well and don’t assemble until right before serving. You can also spread a thin layer of mustard first as a moisture barrier.

What’s the origin of Chili Cheese Coneys?
They trace back to early 20th century American diners, particularly in the Midwest, as a quick, satisfying meal for workers.

Final Thoughts

There’s a reason Chili Cheese Coneys have stood the test of time – they’re simply delicious. This recipe captures all the nostalgic flavors while allowing for modern twists to suit your preferences. Whether you’re serving them at a casual family dinner or a festive gathering, they’re guaranteed to bring smiles. The beauty of this dish lies in its simplicity and the joy of watching everyone customize their perfect Coney. So fire up the stove, gather your favorite toppings, and get ready to enjoy a classic American comfort food that never goes out of style.

Print
clock clock iconcutlery cutlery iconflag flag iconfolder folder iconinstagram instagram iconpinterest pinterest iconfacebook facebook iconprint print iconsquares squares iconheart heart iconheart solid heart solid icon

Chili Cheese Coney

  • Author: Classic American Diner

Description

A classic American hot dog smothered in savory chili and melted cheese, perfect for game day or a quick comfort meal.


Ingredients

Scale

For the Crust:

  • For the hot dogs:
  • 4 all-beef hot dogs
  • 4 hot dog buns
  • For the chili:
  • 1/2 lb ground beef
  • 1 small onion, finely chopped
  • 1 clove garlic, minced
  • 1/2 cup tomato sauce
  • 1/2 cup beef broth
  • 1 tbsp chili powder
  • 1 tsp cumin
  • 1/2 tsp paprika
  • Salt and pepper to taste
  • For toppings:
  • 1 cup shredded cheddar cheese
  • 1/4 cup diced onions (optional)
  • Yellow mustard (optional)

Instructions

1. Prepare the Crust:

  1. 1. Prepare the chili: In a skillet over medium heat, cook the ground beef until browned. Drain excess fat.
  2. 2. Add chopped onions and garlic to the skillet. Cook until onions are translucent.
  3. 3. Stir in tomato sauce, beef broth, chili powder, cumin, paprika, salt, and pepper. Simmer for 15-20 minutes until thickened.
  4. 4. Cook the hot dogs: Grill, boil, or pan-fry the hot dogs until heated through.
  5. 5. Toast the buns lightly if desired.
  6. 6. Assemble: Place a hot dog in each bun, top generously with chili, and sprinkle with shredded cheese.
  7. 7. Optional: Add diced onions and a drizzle of mustard.
  8. 8. Serve immediately while hot.

Notes

For a spicier kick, add a dash of cayenne pepper to the chili. Vegan alternatives can use plant-based hot dogs and cheese.

CRISPY BATTERED COD AND ONION RINGS PLATTER

CRISPY BATTERED COD AND ONION RINGS PLATTER

There’s something undeniably comforting about a golden, crispy platter of battered cod and onion rings. Whether you’re craving a nostalgic fish fry at home or planning a casual weekend feast, this recipe delivers the perfect balance of crunch and tenderness. The light, airy batter encases flaky cod fillets, while the onion rings bring a sweet, savory contrast that keeps you reaching for more. Serve it with tartar sauce, a squeeze of lemon, and your favorite sides for a meal that feels like a celebration.

Why You’ll Love This Recipe

If you’re looking for a dish that’s both satisfying and straightforward, this crispy battered cod and onion rings platter is a winner. Here’s why:

  • Perfect Texture: The batter fries up light and crisp, creating a satisfying crunch without being greasy.
  • Versatile Crowd-Pleaser: Great for family dinners, game day gatherings, or even a Friday night treat.
  • Easy to Customize: Adjust the seasoning to your liking or swap in gluten-free flour for dietary needs.
  • Restaurant-Quality at Home: Skip the takeout—this homemade version tastes even better.
  • Fun to Make: Frying might seem intimidating, but with a few simple tips, you’ll master it in no time.

Ingredients Breakdown

Every great recipe starts with quality ingredients. Here’s what you’ll need and why each one matters:

  • Fresh Cod Fillets: Mild, flaky, and perfect for frying. Look for thick, even pieces for consistent cooking.
  • Large Sweet Onions: Yellow or Vidalia onions work best for their natural sweetness and sturdy rings.
  • All-Purpose Flour: Forms the base of the batter, ensuring a crispy exterior.
  • Cornstarch: Adds extra crunch and helps keep the batter light.
  • Baking Powder: Creates bubbles in the batter for an airy, crispy finish.
  • Cold Beer or Sparkling Water: Carbonation keeps the batter light; beer adds flavor, while sparkling water keeps it neutral.
  • Seasonings: Paprika, garlic powder, salt, and pepper enhance the flavor profile.
  • Oil for Frying: Use a neutral oil with a high smoke point, like vegetable or peanut oil.

How to Make CRISPY BATTERED COD AND ONION RINGS PLATTER

Follow these steps for perfectly crispy results every time:

  1. Prep the Ingredients: Pat the cod fillets dry with paper towels and cut into even portions. Slice the onions into ½-inch rings and separate them.
  2. Make the Batter: In a large bowl, whisk together flour, cornstarch, baking powder, and seasonings. Gradually pour in cold beer or sparkling water, stirring until smooth. The batter should coat the back of a spoon but still be slightly runny.
  3. Heat the Oil: Fill a deep pot or Dutch oven with about 3 inches of oil. Heat to 375°F (190°C) using a thermometer for accuracy.
  4. Dip and Fry the Onion Rings: Dip each onion ring into the batter, letting excess drip off, then carefully lower into the hot oil. Fry in batches for 2-3 minutes until golden brown. Transfer to a wire rack or paper towel-lined plate.
  5. Fry the Cod: Repeat the process with the cod fillets, frying for 4-5 minutes until golden and cooked through. Avoid overcrowding the pot to maintain oil temperature.
  6. Serve Immediately: Arrange the crispy cod and onion rings on a platter with lemon wedges and dipping sauces.

Pro Tips for the Best Results

  • Keep the Batter Cold: Chilling the batter for 10-15 minutes before frying helps create a crispier texture.
  • Double-Fry for Extra Crunch: For ultra-crispy onion rings, fry them once at 325°F (160°C) to cook through, then again at 375°F (190°C) for color and crunch.
  • Use a Thermometer: Maintaining the right oil temperature prevents greasy, soggy results.
  • Drain Properly: Let fried items rest on a wire rack instead of paper towels to keep them crisp.

Variations and Substitutions

This recipe is flexible—here are some ways to make it your own:

  • Gluten-Free: Swap all-purpose flour for a gluten-free blend and use gluten-free beer or sparkling water.
  • Spicy Kick: Add cayenne pepper or hot sauce to the batter for a fiery twist.
  • Herb-Infused: Stir fresh chopped parsley, dill, or chives into the batter for extra flavor.
  • Alternative Fish: Try haddock, halibut, or even shrimp if cod isn’t available.

What to Serve With It

Complete your meal with these delicious pairings:

  • Classic Tartar Sauce: Creamy, tangy, and perfect with fried fish.
  • Malt Vinegar or Lemon Wedges: A bright, acidic contrast to the richness.
  • Coleslaw: Adds a refreshing crunch.
  • French Fries or Sweet Potato Fries: Because more crispy sides are always welcome.
  • Ice-Cold Beer or Lemonade: Balances the meal with a refreshing drink.

How to Store and Reheat

Leftovers can be saved with a little care:

  • Refrigeration: Store in an airtight container for up to 2 days.
  • Freezing: Freeze on a baking sheet before transferring to a freezer bag for up to 1 month.
  • Reheating: For best results, reheat in an air fryer or oven at 375°F (190°C) for 5-7 minutes until crispy again. Avoid microwaving, which makes them soggy.

Frequently Asked Questions (FAQs)

Can I bake instead of fry?
While frying gives the best texture, you can bake at 425°F (220°C) on a greased rack for 15-20 minutes, flipping halfway. The results won’t be as crispy but will still be tasty.

What’s the best oil for frying?
Neutral oils like vegetable, canola, or peanut oil work best due to their high smoke points.

How do I prevent the batter from falling off?
Make sure the fish and onions are dry before dipping, and let excess batter drip off before frying.

Can I make the batter ahead of time?
It’s best used immediately, but if needed, refrigerate for up to 30 minutes and whisk again before using.

Why is my batter not crispy?
The oil may be too cold, or the batter might be too thick. Use a thermometer and adjust batter consistency with a little more liquid if needed.

Final Thoughts

There’s nothing quite like the satisfaction of biting into a perfectly crispy piece of battered cod or a sweet, crunchy onion ring. This recipe is a labor of love that pays off with every golden bite. Whether you’re serving it up for a casual weeknight or a weekend gathering, it’s sure to impress. Don’t be afraid to experiment with seasonings or dipping sauces—after all, the best meals are the ones made with joy and a little creativity. Happy frying!

Print
clock clock iconcutlery cutlery iconflag flag iconfolder folder iconinstagram instagram iconpinterest pinterest iconfacebook facebook iconprint print iconsquares squares iconheart heart iconheart solid heart solid icon

CRISPY BATTERED COD AND ONION RINGS PLATTER

  • Author: Seafood Delights Kitchen

Description

A classic fish and chips platter with perfectly crispy beer-battered cod and golden onion rings. Served with tartar sauce and lemon wedges for a satisfying meal.


Ingredients

Scale

For the Crust:

  • For the Cod:
  • 4 cod fillets (68 oz each)
  • 1 cup all-purpose flour
  • 1 tsp baking powder
  • 1 tsp salt
  • 1/2 tsp black pepper
  • 1 tsp paprika
  • 1 cup cold beer (lager or pilsner)
  • 1 egg
  • Vegetable oil (for frying)
  • For the Onion Rings:
  • 2 large yellow onions (sliced into 1/2-inch rings)
  • 1 cup all-purpose flour
  • 1/2 cup cornstarch
  • 1 tsp garlic powder
  • 1 tsp smoked paprika
  • 1 cup buttermilk
  • Salt to taste
  • For Serving:
  • Tartar sauce
  • Lemon wedges
  • Fresh parsley (chopped)

Instructions

1. Prepare the Crust:

  1. 1. Prep the Cod: Pat cod fillets dry with paper towels. Season lightly with salt and set aside.
  2. 2. Make the Batter: In a bowl, whisk together flour, baking powder, salt, pepper, and paprika. Add beer and egg, mixing until smooth (small lumps are okay). Chill for 15 minutes.
  3. 3. Fry the Onion Rings: Heat oil to 375°F (190°C) in a deep fryer or heavy pot. Soak onion rings in buttermilk for 10 minutes. Mix flour, cornstarch, garlic powder, and paprika. Dredge rings in flour mixture, shaking off excess. Fry in batches for 2-3 minutes until golden. Drain on paper towels.
  4. 4. Fry the Cod: Dip each fillet into the chilled batter, letting excess drip off. Carefully lower into hot oil (350°F/175°C). Fry for 4-5 minutes until golden brown and crispy. Drain on a rack.
  5. 5. Serve: Arrange cod and onion rings on a platter. Garnish with parsley and serve immediately with tartar sauce and lemon wedges.

Notes

For extra crispiness, double-dip onion rings in buttermilk and flour mixture. Maintain oil temperature—if too low, food will be greasy; if too high, it’ll burn. Use a thermometer for best results.

Crack Green Beans

Crack Green Beans

If you’ve ever been to a potluck or family gathering where a certain dish disappears before you even get a chance to try it, chances are it was something like Crack Green Beans. This irresistible side dish earns its name because it’s downright addictive—sweet, savory, smoky, and packed with flavor. Whether you’re serving it for a holiday feast, a weeknight dinner, or a backyard barbecue, these green beans will steal the show. Let’s dive into why this recipe is a must-make and how you can whip it up with ease.

Why You’ll Love This Recipe

There’s a reason this dish has a cult following. Here’s why you’ll fall in love with Crack Green Beans:

  • Explosive flavor: The combination of brown sugar, bacon, and a hint of tangy vinegar creates a symphony of sweet, salty, and smoky notes that make these green beans impossible to resist.
  • Effortless to make: With just a few simple ingredients and minimal prep time, this recipe is perfect for busy cooks who want big flavor without the hassle.
  • Crowd-pleasing appeal: Whether you’re serving picky eaters or gourmet food lovers, these green beans disappear fast—guaranteed.
  • Versatile: They pair beautifully with everything from grilled meats to holiday roasts, making them a year-round staple.
  • Leftovers taste even better: The flavors deepen overnight, so you’ll enjoy them just as much the next day.

Ingredients Breakdown

Every ingredient in Crack Green Beans plays a crucial role in building its signature taste. Here’s what you’ll need and why each one matters:

  • Fresh green beans: The star of the dish, providing a crisp-tender texture. While canned or frozen can work in a pinch, fresh beans deliver the best bite.
  • Bacon: Adds smoky richness and a crispy texture. Thick-cut bacon works best for maximum flavor.
  • Brown sugar: Balances the savory elements with caramelized sweetness. Light or dark brown sugar both work well.
  • Soy sauce: Brings umami depth and a touch of saltiness. For a gluten-free option, use tamari or coconut aminos.
  • Garlic: Infuses the dish with aromatic warmth. Fresh minced garlic is ideal, but garlic powder can be substituted in a pinch.
  • Butter: Enhances richness and helps meld all the flavors together. Unsalted butter is recommended to control sodium levels.
  • Apple cider vinegar: A splash brightens the dish and cuts through the sweetness.

How to Make Crack Green Beans

Ready to make the most irresistible green beans of your life? Follow these simple steps:

  1. Prep the green beans: Trim the ends off the green beans and rinse them thoroughly. If you prefer shorter pieces, cut them in half.
  2. Cook the bacon: In a large skillet over medium heat, cook the bacon until crispy. Remove the bacon and set aside, leaving the drippings in the pan.
  3. Sauté the aromatics: In the same skillet, add minced garlic and sauté for about 30 seconds until fragrant. Be careful not to burn it.
  4. Add the green beans: Toss the green beans in the bacon drippings and sauté for 3–4 minutes until they start to soften.
  5. Incorporate the sauce: Stir in the brown sugar, soy sauce, and apple cider vinegar, ensuring the beans are well coated. Let them simmer for 5–7 minutes until tender but still crisp.
  6. Finish with butter and bacon: Add the butter, stirring until melted, then crumble the cooked bacon on top. Toss everything together and serve immediately.

Pro Tips for the Best Results

Take your Crack Green Beans to the next level with these expert tricks:

  • Blanch the green beans first: For extra crisp-tender texture, blanch the beans in boiling water for 2 minutes, then shock them in ice water before sautéing.
  • Use high-quality bacon: Thick-cut, applewood-smoked bacon adds an unbeatable depth of flavor.
  • Don’t skip the vinegar: Even a small amount brightens the dish and keeps it from being overly sweet.
  • Adjust sweetness to taste: If you prefer less sugar, reduce the amount slightly or add a pinch of red pepper flakes for heat.
  • Let them rest: Allowing the dish to sit for 5–10 minutes before serving helps the flavors meld.

Variations and Substitutions

This recipe is flexible enough to accommodate different tastes and dietary needs. Try these twists:

  • Vegetarian version: Skip the bacon and use smoked paprika or liquid smoke for a similar depth. Swap butter for olive oil.
  • Spicy kick: Add a dash of sriracha or red pepper flakes for heat.
  • Nutty crunch: Sprinkle toasted almonds or pecans on top before serving.
  • Maple glaze: Replace brown sugar with pure maple syrup for a deeper, earthy sweetness.
  • Asian-inspired: Swap soy sauce for teriyaki sauce and add a sprinkle of sesame seeds.

What to Serve With It

Crack Green Beans are a versatile side that pairs well with countless mains. Here are some winning combinations:

  • Classic comfort food: Serve alongside meatloaf, mashed potatoes, and buttery rolls.
  • Holiday spread: Perfect with roasted turkey, glazed ham, or prime rib.
  • Summer BBQ: Pair with grilled chicken, ribs, or burgers for a sweet-and-savory contrast.
  • Light meal: Enjoy with a simple roasted salmon or seared tofu for balance.
  • Southern feast: Complement fried chicken, cornbread, and mac and cheese.

How to Store and Reheat

If you somehow have leftovers, here’s how to keep them tasting great:

  • Refrigeration: Store in an airtight container for up to 4 days. The flavors will deepen over time.
  • Freezing: While possible, freezing may slightly alter the texture. Thaw in the fridge before reheating.
  • Reheating: Warm in a skillet over medium heat with a splash of water to prevent drying out. Microwaving works in a pinch, but stovetop reheating preserves texture best.

Frequently Asked Questions (FAQs)

Can I use canned green beans instead of fresh?
Yes, but drain and rinse them well to reduce sodium. Adjust cooking time since canned beans are already soft.

How can I make this dish ahead of time?
Prepare the recipe up to the final toss with bacon. Reheat gently before serving and add the bacon at the last minute to keep it crispy.

Is there a way to reduce the sugar without losing flavor?
Try using half the sugar and adding a touch of Dijon mustard or Worcestershire sauce for complexity.

Can I make this in the oven instead of the stovetop?
Absolutely! Toss all ingredients (except bacon) on a sheet pan and roast at 400°F for 20–25 minutes, stirring halfway. Add bacon at the end.

What if I don’t have apple cider vinegar?
White vinegar or lemon juice can substitute, but use slightly less as they’re more acidic.

Final Thoughts

Crack Green Beans are more than just a side dish—they’re a conversation starter, a potluck legend, and a guaranteed way to make any meal feel special. Whether you’re cooking for a weeknight family dinner or a festive gathering, this recipe delivers big flavors with minimal effort. The next time you need a dish that’ll have everyone asking for seconds (and the recipe), give these green beans a try. One bite, and you’ll understand the hype.

Print
clock clock iconcutlery cutlery iconflag flag iconfolder folder iconinstagram instagram iconpinterest pinterest iconfacebook facebook iconprint print iconsquares squares iconheart heart iconheart solid heart solid icon

Description

These addictive green beans are loaded with bacon, brown sugar, and garlic for an irresistible side dish that everyone will love. Perfect for potlucks and holiday meals!


Ingredients

Scale

For the Crust:

  • For the green beans:
  • 2 lbs fresh green beans, trimmed
  • 6 slices bacon, chopped
  • For the sauce:
  • 1/4 cup unsalted butter
  • 1/4 cup packed brown sugar
  • 3 cloves garlic, minced
  • 1 tbsp soy sauce
  • 1/2 tsp black pepper
  • For garnish:
  • 1/4 cup sliced almonds, toasted (optional)

Instructions

1. Prepare the Crust:

  1. 1. Preheat oven to 375°F (190°C).
  2. 2. In a large skillet over medium heat, cook chopped bacon until crispy. Remove with a slotted spoon and set aside, leaving drippings in pan.
  3. 3. Add green beans to the skillet and sauté in bacon drippings for 3-4 minutes until bright green.
  4. 4. In a small saucepan, melt butter with brown sugar, garlic, soy sauce, and black pepper. Stir until sugar dissolves.
  5. 5. Transfer green beans to a 9×13 baking dish. Pour sauce over beans and toss to coat.
  6. 6. Sprinkle cooked bacon pieces evenly over the top.
  7. 7. Bake uncovered for 20-25 minutes until beans are tender.
  8. 8. If using, sprinkle with toasted almonds before serving.

Notes

For crispier bacon texture, add half the bacon before baking and reserve the rest to sprinkle on top after baking. Can be made ahead – prepare through step 6, cover and refrigerate up to 24 hours before baking.

Cheeseburger Tot Nachos

Cheeseburger Tot Nachos

Imagine the crispy crunch of golden tater tots, the savory richness of seasoned ground beef, and the gooey melt of cheddar cheese—all piled high and baked to perfection. Cheeseburger Tot Nachos are the ultimate comfort food mashup, combining the best elements of a loaded cheeseburger and nachos into one irresistible dish. Whether you’re hosting game day, feeding a hungry family, or just craving something indulgent, this recipe is guaranteed to be a hit. Let’s dive in and explore why this dish deserves a spot in your recipe rotation.

Why You’ll Love This Recipe

Cheeseburger Tot Nachos are more than just a fun twist on two classics—they’re a guaranteed crowd-pleaser for so many reasons.

  • Easy to Make: With simple ingredients and minimal prep, this dish comes together quickly, making it perfect for busy weeknights or last-minute gatherings.
  • Kid-Friendly: Kids adore the familiar flavors of cheeseburgers and tater tots, making this a surefire way to get even picky eaters excited about dinner.
  • Customizable: From toppings to spice levels, you can tweak this recipe to suit any taste preference or dietary need.
  • Perfect for Sharing: Served on a large sheet pan, these nachos are ideal for feeding a group, whether it’s family movie night or a backyard BBQ.
  • Comfort Food at Its Best: The combination of crispy, cheesy, and meaty textures is pure comfort in every bite.

Ingredients Breakdown

Every great dish starts with quality ingredients, and Cheeseburger Tot Nachos are no exception. Here’s what you’ll need and why each component matters:

  • Tater Tots: The crispy base of this dish, tater tots provide a satisfying crunch and potato flavor that pairs perfectly with the toppings.
  • Ground Beef: Opt for 80/20 ground beef for the best balance of flavor and juiciness. Leaner beef can dry out, while fattier blends may leave too much grease.
  • Cheddar Cheese: Sharp cheddar melts beautifully and adds a rich, tangy depth. Shred it yourself for the best texture—pre-shredded cheese often contains anti-caking agents that affect meltability.
  • Burger Seasonings: A mix of garlic powder, onion powder, paprika, salt, and pepper gives the beef that classic cheeseburger flavor.
  • Diced Tomatoes and Pickles: These add freshness and acidity, cutting through the richness of the cheese and beef.
  • Mustard and Ketchup: A drizzle of these condiments ties everything together, mimicking the flavors of a traditional burger.

How to Make Cheeseburger Tot Nachos

Follow these steps to create the ultimate Cheeseburger Tot Nachos with ease:

  1. Preheat the Oven: Start by preheating your oven to 425°F. This ensures the tater tots get crispy right from the start.
  2. Bake the Tots: Spread the tater tots in a single layer on a large baking sheet. Bake for about 20 minutes, flipping halfway, until golden and crisp.
  3. Cook the Beef: While the tots bake, brown the ground beef in a skillet over medium heat. Drain excess fat, then stir in the seasonings—garlic powder, onion powder, paprika, salt, and pepper.
  4. Assemble the Nachos: Once the tots are crispy, sprinkle the seasoned beef evenly over them. Top with shredded cheddar cheese.
  5. Broil for Melted Cheese: Return the tray to the oven and broil for 2–3 minutes, just until the cheese is bubbly and golden.
  6. Add Toppings: Finish with diced tomatoes, pickles, and a drizzle of mustard and ketchup. For extra flair, add a sprinkle of chopped onions or a dollop of special sauce.

Pro Tips for the Best Results

Want to take your Cheeseburger Tot Nachos to the next level? Try these expert tricks:

  • Double-Layer for Extra Crispiness: If you prefer a sturdier base, bake the tots in two layers with a sprinkle of cheese between them.
  • Use Freshly Shredded Cheese: Pre-shredded cheese contains additives that prevent clumping but can make the melt less smooth. Freshly grated cheddar melts much better.
  • Broil at the End: A quick broil ensures the cheese gets perfectly gooey without overcooking the tots.
  • Drain the Beef Well: Too much grease can make the tots soggy. Take the extra minute to drain the beef thoroughly.
  • Serve Immediately: Like traditional nachos, these are best enjoyed fresh out of the oven while the cheese is still melty.

Variations and Substitutions

One of the best things about Cheeseburger Tot Nachos is how adaptable they are. Here are some delicious ways to mix things up:

  • Turkey or Chicken: Swap the ground beef for ground turkey or chicken for a lighter version.
  • Vegetarian Option: Use plant-based ground meat or seasoned lentils for a meat-free alternative.
  • Spicy Kick: Add diced jalapeños, hot sauce, or a sprinkle of crushed red pepper for heat lovers.
  • Bacon Lovers: Crumble cooked bacon over the top for extra smokiness.
  • Different Cheeses: Try pepper jack for spice or American cheese for that classic burger taste.

What to Serve With It

While Cheeseburger Tot Nachos are a meal on their own, here are some tasty pairings to round out your spread:

  • Side Salad: A simple green salad with ranch or vinaigrette balances the richness of the nachos.
  • Pickle Spears: Extra pickles on the side add a refreshing crunch.
  • French Fries: If you’re going all-in on potato goodness, serve with a side of crispy fries.
  • Milkshakes: A classic vanilla or chocolate milkshake makes for a fun, diner-style pairing.
  • Beer or Soda: A cold lager or root beer complements the savory flavors perfectly.

How to Store and Reheat

If you somehow have leftovers, here’s how to keep them tasting great:

  • Refrigeration: Store in an airtight container for up to 3 days. Keep toppings separate if possible.
  • Freezing: While you can freeze assembled nachos, the tots may lose crispiness. If freezing, reheat in the oven instead of the microwave.
  • Reheating: For best results, reheat in a 350°F oven for 10–15 minutes until warmed through. Avoid the microwave, which can make the tots soggy.

Frequently Asked Questions (FAQs)

Here are answers to some common questions about making Cheeseburger Tot Nachos:

Can I use frozen hash browns instead of tater tots? Yes, but the texture will be different. Tater tots hold their shape better, while hash browns may spread out.

Can I make this recipe ahead of time? You can prep the beef and toppings in advance, but assemble and bake just before serving for the best texture.

How do I prevent the nachos from getting soggy? Drain the beef well, bake the tots until extra crispy, and avoid overloading with wet toppings.

Can I make this gluten-free? Absolutely! Just ensure your tater tots and condiments are gluten-free certified.

What other toppings can I add? Get creative! Try avocado, sautéed mushrooms, or even a fried egg for a breakfast twist.

Final Thoughts

Cheeseburger Tot Nachos are the kind of dish that brings people together—whether it’s for a casual family dinner, a game day snack, or a fun weekend treat. The combination of crispy tater tots, savory beef, and melty cheese is downright irresistible, and the customizable toppings mean everyone can build their perfect bite. Next time you’re craving something hearty and satisfying, skip the drive-thru and whip up a batch of these instead. Trust me, your taste buds (and your hungry crowd) will thank you.

Print
clock clock iconcutlery cutlery iconflag flag iconfolder folder iconinstagram instagram iconpinterest pinterest iconfacebook facebook iconprint print iconsquares squares iconheart heart iconheart solid heart solid icon

Cheeseburger Tot Nachos

  • Author: The Comfort Kitchen

Description

A fun and indulgent twist on classic nachos, featuring crispy tater tots, seasoned ground beef, melty cheese, and all your favorite burger toppings. Perfect for game day or a cozy night in!


Ingredients

Scale

For the Crust:

  • For the base:
  • 1 (32 oz) bag frozen tater tots
  • For the cheeseburger topping:
  • 1 lb ground beef (80/20 blend)
  • 1 tsp garlic powder
  • 1 tsp onion powder
  • 1 tsp smoked paprika
  • 1/2 tsp salt
  • 1/2 tsp black pepper
  • 1 tbsp Worcestershire sauce
  • 1 tbsp ketchup
  • 1 tbsp yellow mustard
  • For the cheese sauce:
  • 2 tbsp butter
  • 2 tbsp all-purpose flour
  • 1 cup whole milk
  • 2 cups shredded cheddar cheese
  • 1/4 tsp salt
  • For garnish:
  • 1 cup shredded lettuce
  • 1/2 cup diced tomatoes
  • 1/4 cup diced red onion
  • 1/4 cup sliced pickles
  • 1/4 cup ketchup
  • 1/4 cup yellow mustard
  • 1/4 cup mayonnaise

Instructions

1. Prepare the Crust:

  1. Preheat oven to 425°F (220°C). Arrange tater tots in a single layer on a large baking sheet. Bake for 20-25 minutes until golden and crispy.
  2. While tots bake, brown ground beef in a skillet over medium heat, breaking it into small pieces. Drain excess fat.
  3. Add garlic powder, onion powder, smoked paprika, salt, pepper, Worcestershire, ketchup, and mustard to beef. Stir to combine and cook 2 more minutes. Set aside.
  4. Make cheese sauce: Melt butter in saucepan over medium heat. Whisk in flour and cook 1 minute. Gradually whisk in milk until smooth. Cook until slightly thickened (3-4 minutes).
  5. Remove from heat and stir in cheddar cheese until melted. Season with salt.
  6. Assemble nachos: Spread crispy tots on serving platter. Top with beef mixture, then drizzle with cheese sauce.
  7. Garnish with lettuce, tomatoes, red onion, pickles, and drizzle with ketchup, mustard, and mayonnaise.
  8. Serve immediately while warm.

Notes

For crispier tots, bake on a wire rack set over the baking sheet. Substitute ground turkey for a lighter version. Add jalapeños for spice. Leftovers reheat well in air fryer.