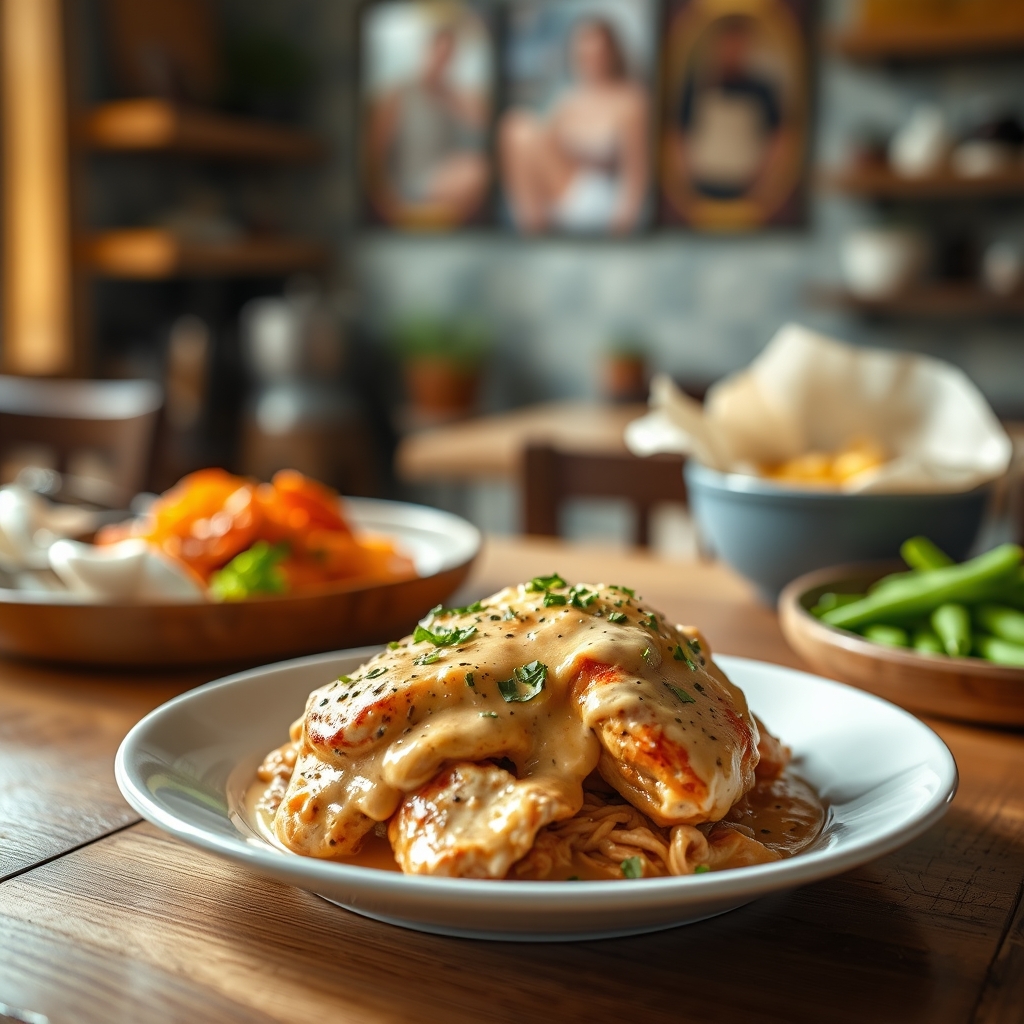
Parmesan Crusted Chicken Sheet Pan Dinner

Parmesan Crusted Chicken Sheet Pan Dinner

There’s something magical about a meal that comes together effortlessly yet tastes like you spent hours in the kitchen. This Parmesan Crusted Chicken Sheet Pan Dinner is exactly that—a golden, crispy, flavor-packed dish that delivers maximum satisfaction with minimal cleanup. Whether you’re a busy parent, a meal-prep enthusiast, or just someone who loves a deliciously easy dinner, this recipe is about to become a staple in your rotation. Let’s dive into why this dish is a winner and how you can make it perfectly every time.

Why You’ll Love This Recipe

First, let’s talk about why this Parmesan Crusted Chicken Sheet Pan Dinner deserves a spot on your table. Here are just a few reasons:

  • One-Pan Wonder: Everything cooks together on a single sheet pan, meaning fewer dishes and more time to relax after dinner.
  • Crispy, Cheesy Goodness: The Parmesan crust adds a savory, golden crunch to tender chicken, while roasted vegetables soak up all those delicious flavors.
  • Customizable: Swap veggies, adjust seasonings, or even change up the protein—this recipe is endlessly adaptable.
  • Meal-Prep Friendly: Perfect for making ahead and reheating, so you can enjoy a gourmet-tasting meal even on your busiest days.
  • Family-Approved: Kids and adults alike will love the crispy texture and cheesy flavor, making it a crowd-pleaser for any occasion.

Ingredients Breakdown

Great recipes start with great ingredients. Here’s what you’ll need and why each one matters:

  • Chicken Breasts: Boneless, skinless chicken breasts are the star. They cook evenly and absorb the Parmesan crust beautifully.
  • Parmesan Cheese: Freshly grated Parmesan melts into a crispy, nutty crust that’s irresistible.
  • Panko Breadcrumbs: These Japanese-style breadcrumbs stay extra crispy, giving the chicken that perfect crunch.
  • Garlic Powder & Italian Seasoning: These spices add depth and warmth, complementing the Parmesan without overpowering it.
  • Olive Oil: Helps bind the crust and ensures the chicken stays juicy while roasting.
  • Assorted Vegetables: Think broccoli, cherry tomatoes, zucchini, or bell peppers—they roast alongside the chicken, soaking up all the savory flavors.

How to Make Parmesan Crusted Chicken Sheet Pan Dinner

Ready to cook? Follow these simple steps for a flawless sheet pan dinner:

  1. Prep the Chicken: Pat the chicken breasts dry with paper towels—this helps the crust stick better. Season lightly with salt and pepper.
  2. Make the Parmesan Crust: In a bowl, mix grated Parmesan, Panko breadcrumbs, garlic powder, Italian seasoning, and a drizzle of olive oil. The mixture should hold together when pressed.
  3. Coat the Chicken: Press the Parmesan mixture firmly onto both sides of each chicken breast. The more compact the crust, the crispier it will be.
  4. Arrange on the Sheet Pan: Place the coated chicken on one side of a parchment-lined sheet pan. Toss your chosen vegetables with olive oil, salt, and pepper, then spread them on the other side.
  5. Roast to Perfection: Bake at 400°F for 20-25 minutes, until the chicken reaches 165°F internally and the crust is golden brown. For extra crispiness, broil for the last 2-3 minutes.
  6. Rest and Serve: Let the chicken rest for 5 minutes before slicing. This keeps it juicy and tender.

Pro Tips for the Best Results

Want to take your Parmesan Crusted Chicken Sheet Pan Dinner to the next level? Try these expert tips:

  • Use Freshly Grated Parmesan: Pre-shredded cheese contains anti-caking agents that can prevent proper melting. Freshly grated Parmesan gives the best texture.
  • Don’t Crowd the Pan: Spread everything in a single layer to ensure even cooking and crispiness.
  • Add a Squeeze of Lemon: A little citrus brightens the dish and balances the richness of the cheese.
  • Check Internal Temperature: A meat thermometer ensures your chicken is perfectly cooked—no guesswork needed.

Variations and Substitutions

This recipe is wonderfully flexible. Here are some ways to mix it up:

  • Protein Swap: Try chicken thighs for extra juiciness or even pork chops for a different twist.
  • Gluten-Free: Use gluten-free breadcrumbs or almond flour instead of Panko.
  • Veggie Variations: Swap in sweet potatoes, asparagus, or Brussels sprouts depending on the season.
  • Extra Herbs: Fresh basil or parsley stirred into the crust adds a pop of freshness.

What to Serve With It

While this dish is a complete meal on its own, here are a few pairing ideas to round it out:

  • Garlic Bread: For soaking up any extra cheesy goodness.
  • Light Salad: A simple arugula salad with lemon vinaigrette adds a refreshing contrast.
  • Mashed Cauliflower: A low-carb side that complements the crispy chicken beautifully.
  • White Wine: A crisp Pinot Grigio or Chardonnay pairs wonderfully with the Parmesan flavors.

How to Store and Reheat

Leftovers? No problem. Here’s how to keep them tasting fresh:

  • Refrigeration: Store in an airtight container for up to 3 days.
  • Freezing: Freeze cooked chicken (without veggies) for up to 2 months. Thaw overnight in the fridge before reheating.
  • Reheating: For best results, reheat in a 350°F oven or air fryer until warmed through. This keeps the crust crispy.

Frequently Asked Questions (FAQs)

Let’s tackle some common questions about this recipe:

  • Can I use chicken tenders instead of breasts? Absolutely! Just reduce the cooking time to 15-18 minutes to prevent drying out.
  • Why is my crust falling off? Make sure to pat the chicken dry before coating, and press the mixture firmly onto the meat.
  • Can I make this dairy-free? Yes! Swap Parmesan for nutritional yeast and use a dairy-free cheese alternative.
  • What if my veggies aren’t done when the chicken is? Remove the chicken and continue roasting the veggies until tender.
  • Can I prep this ahead? Yes! Assemble the crusted chicken and chop veggies up to a day in advance. Store separately until ready to bake.

Final Thoughts

This Parmesan Crusted Chicken Sheet Pan Dinner is proof that simple ingredients can create something truly extraordinary. It’s the kind of meal that feels indulgent yet comes together with ease—perfect for weeknights, entertaining, or even meal prep. The crispy, cheesy crust paired with tender chicken and roasted veggies is a combination that never gets old. So grab your sheet pan, preheat that oven, and get ready to fall in love with this dish. Happy cooking!

Print
clock clock iconcutlery cutlery iconflag flag iconfolder folder iconinstagram instagram iconpinterest pinterest iconfacebook facebook iconprint print iconsquares squares iconheart heart iconheart solid heart solid icon

Parmesan Crusted Chicken Sheet Pan Dinner

  • Author: Chef Emily

Description

A delicious one-pan meal featuring crispy parmesan-crusted chicken with roasted vegetables for an easy weeknight dinner.


Ingredients

Scale

For the Crust:

  • For the Chicken:
  • 4 boneless, skinless chicken breasts
  • 1 cup grated parmesan cheese
  • 1/2 cup panko breadcrumbs
  • 1 tsp garlic powder
  • 1 tsp dried oregano
  • 1/2 tsp salt
  • 1/4 tsp black pepper
  • 1 large egg, beaten
  • For the Vegetables:
  • 1 lb baby potatoes, halved
  • 2 cups broccoli florets
  • 1 red bell pepper, sliced
  • 1 yellow bell pepper, sliced
  • 2 tbsp olive oil
  • 1/2 tsp salt
  • 1/4 tsp black pepper
  • 1/2 tsp dried thyme
  • For Garnish:
  • Fresh parsley, chopped
  • Lemon wedges

Instructions

1. Prepare the Crust:

  1. Preheat oven to 400°F (200°C). Line a large sheet pan with parchment paper.
  2. In a shallow dish, mix parmesan, panko, garlic powder, oregano, salt, and pepper.
  3. Dip each chicken breast in beaten egg, then coat thoroughly with the parmesan mixture. Place on one side of the sheet pan.
  4. In a large bowl, toss potatoes, broccoli, and bell peppers with olive oil, salt, pepper, and thyme. Spread on the other side of the sheet pan.
  5. Bake for 20 minutes, then flip chicken and stir vegetables. Bake another 15-20 minutes until chicken reaches 165°F internal temperature.
  6. Garnish with fresh parsley and serve with lemon wedges.

Notes

For extra crispiness, broil for the last 2-3 minutes. Can substitute vegetables with zucchini, carrots, or asparagus.

Quick & Easy One-Pot Teriyaki Noodles

Quick & Easy One-Pot Teriyaki Noodles

There’s something magical about a dish that comes together effortlessly yet delivers bold, restaurant-quality flavors. These Quick & Easy One-Pot Teriyaki Noodles are exactly that—a weeknight lifesaver that’s packed with savory-sweet goodness, tender noodles, and just the right amount of crunch from fresh veggies. Whether you’re a busy parent, a college student, or simply craving a fuss-free meal, this recipe is your ticket to a satisfying dinner with minimal cleanup. Let’s dive in!

Why You’ll Love This Recipe

If you’re on the fence about trying this dish, here’s why it’s about to become a staple in your kitchen:

  • Minimal cleanup: Everything cooks in one pot, meaning fewer dishes and more time to relax.
  • Ready in under 30 minutes: Perfect for those nights when you need dinner on the table fast.
  • Versatile and customizable: Swap proteins or veggies based on what’s in your fridge.
  • Family-friendly flavors: The sweet and savory teriyaki glaze is a crowd-pleaser for all ages.
  • Meal prep hero: Leftovers taste just as delicious the next day, making it ideal for packed lunches.

Ingredients Breakdown

Every ingredient in this one-pot teriyaki noodles recipe plays a crucial role in building layers of flavor and texture:

  • Noodles: Use udon, ramen, or even spaghetti for a hearty base. The thicker the noodle, the more sauce it can soak up.
  • Soy sauce: The backbone of the teriyaki sauce, delivering umami depth.
  • Honey or brown sugar: Balances the saltiness with a touch of sweetness.
  • Garlic and ginger: Freshly minced for aromatic warmth that elevates the dish.
  • Veggies: Bell peppers, carrots, and snap peas add color and crunch.
  • Protein: Chicken, shrimp, or tofu work beautifully—choose your favorite.
  • Sesame oil: A drizzle at the end adds nutty richness.

How to Make Quick & Easy One-Pot Teriyaki Noodles

Follow these simple steps for a flawless one-pot teriyaki noodle dish:

  1. Prep your ingredients: Slice veggies, mince garlic and ginger, and cut protein into bite-sized pieces. Having everything ready ensures smooth cooking.
  2. Cook the protein: Heat a large pot or deep skillet over medium-high heat. Add a splash of oil and cook your protein until browned. Remove and set aside.
  3. Sauté aromatics: In the same pot, add garlic and ginger, stirring for 30 seconds until fragrant. Toss in the veggies and cook until slightly tender.
  4. Make the sauce: Pour in soy sauce, honey, and a splash of water. Let it simmer for a minute to thicken slightly.
  5. Add noodles and protein: Stir in cooked noodles (or uncooked noodles with extra water) and return the protein to the pot. Toss everything until evenly coated.
  6. Finish with flair: Drizzle with sesame oil and sprinkle sesame seeds or green onions for garnish.

Pro Tips for the Best Results

  • Don’t overcook the noodles: They’ll continue to soften in the sauce, so aim for al dente if boiling separately.
  • Adjust sweetness to taste: Prefer a tangier sauce? Add a splash of rice vinegar. Like it sweeter? Extra honey does the trick.
  • Use high heat for veggies: A quick sear keeps them crisp-tender rather than soggy.
  • Toast sesame seeds: A dry pan toast brings out their nutty flavor before garnishing.

Variations and Substitutions

This recipe is a canvas for creativity. Here are some delicious twists:

  • Gluten-free: Swap soy sauce for tamari and use rice noodles.
  • Spicy kick: Add sriracha or red pepper flakes to the sauce.
  • Vegetarian: Skip the meat and double up on mushrooms or edamame.
  • Pineapple twist: Toss in diced pineapple for a tropical teriyaki vibe.

What to Serve With It

Round out your meal with these pairings:

  • Side dishes: A simple cucumber salad or steamed dumplings complement the noodles beautifully.
  • Drinks: Iced green tea or a crisp lager balance the richness.
  • Extra sauce: Serve with a small bowl of teriyaki sauce for dipping.

How to Store and Reheat

Leftovers? No problem. Here’s how to keep them tasting fresh:

  • Refrigeration: Store in an airtight container for up to 3 days.
  • Freezing: Freeze without garnishes for up to 1 month. Thaw overnight in the fridge.
  • Reheating: Warm in a skillet with a splash of water to revive the sauce, or microwave in 30-second intervals.

Frequently Asked Questions (FAQs)

Can I use store-bought teriyaki sauce?
Yes, but homemade tastes fresher and lets you control the sweetness and saltiness. If using store-bought, opt for a high-quality brand.

How do I prevent the noodles from sticking together?
Toss them with a bit of oil after cooking, or rinse briefly under cold water if not using immediately.

Can I make this ahead for meal prep?
Absolutely! Divide into containers and refrigerate. Add a splash of water when reheating to loosen the sauce.

What’s the best protein for this dish?
Chicken thighs stay juicy, shrimp cook quickly, and tofu soaks up the sauce wonderfully—it’s all about preference.

Final Thoughts

These Quick & Easy One-Pot Teriyaki Noodles are proof that great flavor doesn’t require complicated techniques or a mountain of dishes. Whether you’re cooking for one or feeding a family, this recipe adapts to your needs without sacrificing taste. The next time you’re short on time but craving something delicious, remember this dish—it’s got your back. Happy cooking!

Print
clock clock iconcutlery cutlery iconflag flag iconfolder folder iconinstagram instagram iconpinterest pinterest iconfacebook facebook iconprint print iconsquares squares iconheart heart iconheart solid heart solid icon

Quick & Easy One-Pot Teriyaki Noodles

  • Author: Chef Jamie Lin

Description

A flavorful 20-minute meal with tender noodles, crisp veggies, and a homemade teriyaki sauce. Perfect for busy weeknights!


Ingredients

Scale

For the Crust:

  • For the sauce:
  • 1/4 cup soy sauce
  • 2 tbsp honey
  • 1 tbsp rice vinegar
  • 1 tsp grated ginger
  • 2 cloves garlic, minced
  • 1 tsp cornstarch
  • 2 tbsp water
  • For the noodles:
  • 8 oz udon or ramen noodles
  • 1 tbsp sesame oil
  • 1 cup shredded carrots
  • 1 red bell pepper, sliced
  • 2 cups chopped bok choy
  • 2 green onions, sliced
  • 1 tbsp sesame seeds (for garnish)

Instructions

1. Prepare the Crust:

  1. 1. Whisk all sauce ingredients (soy sauce through water) in a small bowl. Set aside.
  2. 2. Cook noodles according to package instructions. Drain and set aside.
  3. 3. Heat sesame oil in a large skillet or wok over medium-high heat. Add carrots and bell pepper, stir-frying for 3 minutes.
  4. 4. Add bok choy and cook for another 2 minutes until slightly wilted.
  5. 5. Pour in the prepared teriyaki sauce and bring to a simmer. Let thicken for 1 minute.
  6. 6. Add cooked noodles to the skillet, tossing to coat evenly with sauce and vegetables.
  7. 7. Garnish with green onions and sesame seeds before serving.

Notes

For extra protein, add 1 cup of cooked chicken or tofu with the vegetables. Store leftovers in an airtight container for up to 3 days.

Marry Me Chicken

Marry Me Chicken

There’s a reason this dish has earned such a romantic name—Marry Me Chicken is the kind of meal that makes people fall in love at first bite. Creamy, flavorful, and utterly irresistible, this recipe has taken the internet by storm, and once you try it, you’ll understand why. Whether you’re cooking for a special date night, a family dinner, or just craving something indulgent, this dish delivers every time. Let’s dive into what makes it so magical.

Why You’ll Love This Recipe

Marry Me Chicken isn’t just another chicken dish—it’s a showstopper. Here’s why it’s bound to become a staple in your recipe collection:

  • Unforgettable Flavor: The combination of sun-dried tomatoes, garlic, cream, and Parmesan creates a rich, savory sauce that coats tender chicken perfectly.
  • Restaurant-Quality at Home: This dish tastes like it came from a high-end Italian bistro, yet it’s simple enough to make on a weeknight.
  • Versatile and Adaptable: Whether you serve it over pasta, mashed potatoes, or crusty bread, it’s always a hit. Plus, it’s easy to tweak for dietary preferences.
  • Impressive Yet Easy: Despite its fancy appearance, Marry Me Chicken comes together in under an hour, making it ideal for both casual dinners and special occasions.
  • Crowd-Pleasing Magic: It’s the kind of meal that earns compliments—and maybe even a marriage proposal (hence the name!).

Ingredients Breakdown

Every ingredient in Marry Me Chicken plays a crucial role in building its signature flavor. Here’s what you’ll need and why each one matters:

  • Chicken Breasts: Boneless, skinless chicken breasts are the star, offering a lean yet tender base that soaks up the creamy sauce.
  • Sun-Dried Tomatoes: These add a sweet, tangy depth that balances the richness of the cream. Opt for the oil-packed variety for extra flavor.
  • Heavy Cream: The foundation of the luscious sauce, heavy cream creates a velvety texture that clings to the chicken.
  • Parmesan Cheese: Freshly grated Parmesan melts into the sauce, adding a salty, nutty complexity.
  • Garlic: Fresh minced garlic infuses the dish with aromatic warmth.
  • Chicken Broth: This thins the sauce slightly while enhancing the savory notes.
  • Italian Seasoning: A blend of herbs like oregano, basil, and thyme ties everything together with classic Italian flair.
  • Red Pepper Flakes: Just a pinch adds a subtle heat that keeps the dish from feeling too heavy.

How to Make Marry Me Chicken

Follow these steps to create a dish that’s as beautiful as it is delicious:

  1. Season and Sear the Chicken: Pat the chicken breasts dry and season generously with salt and pepper. Heat olive oil in a large skillet over medium-high heat, then sear the chicken for 5–6 minutes per side until golden brown. Transfer to a plate and set aside.
  2. Sauté the Aromatics: In the same skillet, add minced garlic and sun-dried tomatoes, stirring for about 30 seconds until fragrant. Be careful not to burn the garlic.
  3. Deglaze the Pan: Pour in the chicken broth, scraping up any browned bits from the bottom of the pan. This adds incredible depth to the sauce.
  4. Create the Creamy Sauce: Reduce the heat to medium and stir in the heavy cream, Parmesan, Italian seasoning, and red pepper flakes. Let the sauce simmer for 2–3 minutes until slightly thickened.
  5. Finish Cooking the Chicken: Return the chicken to the skillet, spooning the sauce over the top. Cover and cook for another 5–7 minutes, or until the chicken reaches an internal temperature of 165°F.
  6. Garnish and Serve: Sprinkle with fresh basil or parsley for a pop of color and freshness. Serve immediately over your favorite side.

Pro Tips for the Best Results

  • Don’t Overcook the Chicken: Use a meat thermometer to ensure the chicken stays juicy. Overcooked chicken becomes tough and dry.
  • Freshly Grated Parmesan: Pre-shredded cheese contains anti-caking agents that can make the sauce grainy. Grating your own ensures a smooth, creamy texture.
  • Adjust the Sauce Consistency: If the sauce is too thick, add a splash of broth. If it’s too thin, let it simmer a bit longer.
  • Let the Chicken Rest: Allowing the chicken to rest for a few minutes before serving helps redistribute the juices.

Variations and Substitutions

Marry Me Chicken is adaptable to different tastes and dietary needs. Here are some ideas:

  • Dairy-Free: Swap heavy cream for full-fat coconut milk and use nutritional yeast instead of Parmesan.
  • Low-Carb: Serve over cauliflower rice or zucchini noodles instead of pasta.
  • Extra Veggies: Add spinach, mushrooms, or artichoke hearts for more texture and nutrition.
  • Spicier Version: Increase the red pepper flakes or add a dash of hot sauce for more heat.

What to Serve With It

This dish pairs beautifully with a variety of sides. Here are some favorites:

  • Pasta: Fettuccine, penne, or linguine are perfect for soaking up the sauce.
  • Mashed Potatoes: Creamy mashed potatoes make a comforting base.
  • Crusty Bread: A warm baguette is ideal for mopping up every last drop of sauce.
  • Roasted Vegetables: Asparagus, green beans, or Brussels sprouts add a fresh contrast.
  • Light Salad: A simple arugula salad with lemon vinaigrette balances the richness.

How to Store and Reheat

Leftovers (if you have any!) can be stored and reheated easily:

  • Refrigeration: Store in an airtight container for up to 3 days.
  • Freezing: Freeze for up to 2 months, though the cream-based sauce may separate slightly upon thawing.
  • Reheating: Warm gently in a skillet over low heat, adding a splash of broth or cream to revive the sauce. Avoid microwaving, as it can make the chicken rubbery.

Frequently Asked Questions (FAQs)

Can I use chicken thighs instead of breasts?
Absolutely! Chicken thighs are more forgiving and stay juicy even if slightly overcooked. Adjust cooking time as needed.

What if I don’t have sun-dried tomatoes?
You can substitute with roasted red peppers or a tablespoon of tomato paste for a different but still delicious twist.

Can I make this in a slow cooker?
Yes! Sear the chicken first, then transfer everything to a slow cooker and cook on low for 4–5 hours. Add the cream and Parmesan in the last 30 minutes.

Is there a way to lighten up the recipe?
Use half-and-half instead of heavy cream, though the sauce will be slightly less rich. You can also reduce the amount of cheese.

Can I prepare this ahead of time?
You can sear the chicken and prepare the sauce base ahead, then combine and finish cooking just before serving.

Final Thoughts

Marry Me Chicken is more than just a meal—it’s an experience. From the first whiff of garlic and sun-dried tomatoes to the last bite of creamy, Parmesan-kissed chicken, this dish is guaranteed to impress. Whether you’re cooking for someone special or simply treating yourself, it’s a recipe that delivers joy with every forkful. So go ahead, whip it up, and watch the magic happen. Who knows? It might just earn you a proposal—or at least a standing ovation at the dinner table.

Print
clock clock iconcutlery cutlery iconflag flag iconfolder folder iconinstagram instagram iconpinterest pinterest iconfacebook facebook iconprint print iconsquares squares iconheart heart iconheart solid heart solid icon

Marry Me Chicken

  • Author: Chef Inspired

Description

This creamy, flavorful chicken dish is so delicious it might just earn you a marriage proposal! Tender chicken breasts are seared and simmered in a rich, garlicky sun-dried tomato and cream sauce.


Ingredients

Scale

For the Crust:

  • For the Chicken:
  • 4 boneless, skinless chicken breasts
  • 1 tsp salt
  • 1/2 tsp black pepper
  • 1/2 tsp paprika
  • 2 tbsp olive oil
  • For the Sauce:
  • 3 cloves garlic, minced
  • 1/2 cup sun-dried tomatoes, chopped
  • 1 tsp dried oregano
  • 1 tsp dried basil
  • 1/2 tsp red pepper flakes
  • 1 cup chicken broth
  • 1 cup heavy cream
  • 1/2 cup grated parmesan cheese
  • 1/4 cup fresh basil, chopped
  • For Garnish:
  • Extra parmesan cheese
  • Fresh basil leaves

Instructions

1. Prepare the Crust:

  1. 1. Season chicken breasts with salt, pepper, and paprika on both sides.
  2. 2. Heat olive oil in a large skillet over medium-high heat. Add chicken and cook for 5-6 minutes per side until golden brown. Remove and set aside.
  3. 3. In the same skillet, add garlic and sauté for 30 seconds until fragrant.
  4. 4. Add sun-dried tomatoes, oregano, basil, and red pepper flakes. Cook for 1 minute.
  5. 5. Pour in chicken broth to deglaze the pan, scraping up any browned bits.
  6. 6. Stir in heavy cream and parmesan cheese. Bring to a simmer and cook for 3-4 minutes until slightly thickened.
  7. 7. Return chicken to the skillet and simmer for 5-7 minutes until chicken is cooked through.
  8. 8. Garnish with fresh basil and extra parmesan before serving.

Notes

For a lighter version, substitute half-and-half for heavy cream. Serve over pasta or with crusty bread to soak up the delicious sauce. The sauce thickens as it cools.

Creamy Ranch Chicken

Creamy Ranch Chicken

There’s something undeniably comforting about a dish that combines tender chicken with a rich, creamy sauce. This Creamy Ranch Chicken recipe is a weeknight dinner hero—simple enough for busy evenings but flavorful enough to impress guests. Whether you’re a ranch dressing enthusiast or just looking for a new way to enjoy chicken, this dish delivers on taste, texture, and ease. Let’s dive into why this recipe deserves a spot in your regular rotation.

Why You’ll Love This Recipe

First, let’s talk about what makes this Creamy Ranch Chicken so irresistible. Here are just a few reasons you’ll want to make it again and again:

  • Effortless elegance: With minimal prep and cook time, this dish feels gourmet without the fuss. Perfect for when you want something delicious without spending hours in the kitchen.
  • Crowd-pleasing flavors: The tangy, herby notes of ranch dressing blend beautifully with creamy sauce, creating a balanced taste that appeals to both kids and adults.
  • Versatile serving options: Serve it over pasta, rice, or mashed potatoes—or even as a filling for wraps. The possibilities are endless.
  • Meal prep friendly: This recipe reheats beautifully, making it ideal for leftovers or batch cooking.
  • Customizable heat level: Add a pinch of cayenne or red pepper flakes if you like a little kick, or keep it mild for a family-friendly meal.

Ingredients Breakdown

Every great recipe starts with quality ingredients. Here’s what you’ll need and why each component matters:

  • Chicken breasts: Boneless, skinless chicken breasts are lean and cook quickly. For extra tenderness, pound them to an even thickness before cooking.
  • Ranch seasoning: The star of the show! A packet of dry ranch seasoning infuses the dish with its signature herb and buttermilk flavor. You can use store-bought or make your own blend.
  • Heavy cream: Creates the luscious, velvety sauce. For a lighter version, half-and-half or whole milk can work, but the sauce won’t be as rich.
  • Chicken broth: Adds depth and balances the creaminess. Low-sodium broth lets you control the salt level.
  • Garlic: Fresh minced garlic enhances the savory notes. Don’t skip it—this tiny ingredient makes a big difference.
  • Parmesan cheese: Grated Parmesan melts into the sauce, adding a subtle umami richness.
  • Butter and olive oil: Used for searing the chicken, this combo prevents sticking while adding flavor.

How to Make Creamy Ranch Chicken

Now, let’s walk through the steps to create this mouthwatering dish:

  1. Prep the chicken: Pat the chicken breasts dry with paper towels and season lightly with salt and pepper. For even cooking, slice thicker breasts horizontally into cutlets or pound them to an even thickness.
  2. Sear the chicken: Heat a large skillet over medium-high heat and add butter and olive oil. Once hot, add the chicken and cook for 5–6 minutes per side until golden brown and cooked through. Transfer to a plate and tent with foil to keep warm.
  3. Make the sauce: In the same skillet, reduce the heat to medium and sauté the garlic for about 30 seconds until fragrant. Pour in the chicken broth, scraping up any browned bits from the pan—this adds incredible flavor.
  4. Incorporate ranch and cream: Whisk in the ranch seasoning until fully dissolved, then stir in the heavy cream. Let the sauce simmer for 2–3 minutes to thicken slightly.
  5. Finish with Parmesan: Sprinkle in the grated Parmesan, stirring until melted and smooth. Return the chicken to the skillet, spooning the sauce over each piece. Simmer for another 2 minutes to let the flavors meld.
  6. Garnish and serve: Sprinkle with fresh parsley or chopped chives for a pop of color and freshness.

Pro Tips for the Best Results

Want to take your Creamy Ranch Chicken to the next level? Try these expert tips:

  • Don’t overcrowd the pan: Cook the chicken in batches if needed to ensure a proper sear. Crowding leads to steaming instead of browning.
  • Use room-temperature cream: Cold cream can cause the sauce to separate. Let it sit out for 10–15 minutes before adding.
  • Adjust consistency: If the sauce is too thick, thin it with a splash of broth. Too thin? Let it simmer a bit longer or add a sprinkle of flour.
  • Rest the chicken: Letting the chicken rest before slicing ensures juicy, tender meat.
  • Fresh herbs: Stir in a handful of chopped dill or parsley at the end for a bright, herby finish.

Variations and Substitutions

This recipe is wonderfully adaptable. Here are some ways to make it your own:

  • Protein swaps: Try boneless chicken thighs for extra juiciness, or even pork chops for a different twist.
  • Dairy-free: Use coconut cream and nutritional yeast in place of heavy cream and Parmesan for a dairy-free version.
  • Extra veggies: Sauté mushrooms, spinach, or sun-dried tomatoes along with the garlic for added texture and nutrition.
  • Spicy ranch: Mix in a dash of hot sauce or diced jalapeños for a kick.
  • Grilled option: Grill the chicken instead of pan-searing for a smoky flavor, then finish with the stovetop sauce.

What to Serve With It

Creamy Ranch Chicken pairs beautifully with a variety of sides. Here are some winning combinations:

  • Mashed potatoes: The ultimate comfort pairing—the creamy sauce soaks into the potatoes perfectly.
  • Buttered noodles or fettuccine: A simple pasta lets the sauce shine.
  • Roasted vegetables: Try asparagus, broccoli, or Brussels sprouts for a healthy contrast.
  • Crusty bread: Ideal for mopping up every last drop of sauce.
  • Fresh salad: A crisp green salad with a light vinaigrette balances the richness.

How to Store and Reheat

Leftovers? No problem. Here’s how to keep your Creamy Ranch Chicken tasting great:

  • Refrigeration: Store in an airtight container for up to 3 days. The sauce may thicken—just stir in a splash of broth when reheating.
  • Freezing: Freeze portions in freezer-safe containers for up to 2 months. Thaw overnight in the fridge before reheating.
  • Reheating: Warm gently in a skillet over low heat, stirring occasionally. Avoid microwaving at high power to prevent the sauce from separating.

Frequently Asked Questions (FAQs)

Here are answers to some common questions about Creamy Ranch Chicken:

  • Can I use Greek yogurt instead of heavy cream? Yes, but add it at the very end and stir gently over low heat to prevent curdling.
  • Is there a way to reduce the sodium? Use a low-sodium ranch seasoning or make your own blend with less salt.
  • Can I make this in a slow cooker? Absolutely! Sear the chicken first, then combine all ingredients in the slow cooker and cook on low for 4–5 hours.
  • What if my sauce is too thin? Simmer it longer, or create a quick slurry with cornstarch and water to thicken it.
  • Can I use fresh herbs instead of ranch seasoning? Yes, but you’ll need a mix of dill, parsley, chives, garlic powder, and onion powder to mimic the flavor.

Final Thoughts

Creamy Ranch Chicken is one of those recipes that feels like a warm hug—comforting, satisfying, and endlessly adaptable. Whether you’re cooking for a busy weeknight or a casual dinner with friends, this dish delivers on flavor without demanding too much time or effort. The creamy, herby sauce clings to every bite of chicken, making each forkful irresistible. Give it a try, and don’t be surprised if it becomes a regular in your meal plan. Happy cooking!

Print
clock clock iconcutlery cutlery iconflag flag iconfolder folder iconinstagram instagram iconpinterest pinterest iconfacebook facebook iconprint print iconsquares squares iconheart heart iconheart solid heart solid icon

Creamy Ranch Chicken

  • Author: Chef Emily Carter

Description

A delicious and easy-to-make creamy ranch chicken dish that’s perfect for weeknight dinners. Tender chicken breasts smothered in a rich, creamy ranch sauce with a hint of garlic and Parmesan cheese.


Ingredients

Scale

For the Crust:

  • For the Chicken:
  • 4 boneless, skinless chicken breasts
  • 1 tablespoon olive oil
  • 1 teaspoon garlic powder
  • 1 teaspoon onion powder
  • Salt and pepper to taste
  • For the Sauce:
  • 1 cup heavy cream
  • 1/2 cup chicken broth
  • 1 packet (1 oz) ranch seasoning mix
  • 1/2 cup grated Parmesan cheese
  • 1 teaspoon minced garlic
  • 1 tablespoon butter
  • For Garnish:
  • Fresh parsley, chopped
  • Extra Parmesan cheese

Instructions

1. Prepare the Crust:

  1. 1. Season the chicken breasts with garlic powder, onion powder, salt, and pepper.
  2. 2. Heat olive oil in a large skillet over medium-high heat. Add the chicken and cook for 5-6 minutes per side, or until golden brown and cooked through. Remove from the skillet and set aside.
  3. 3. In the same skillet, melt the butter over medium heat. Add the minced garlic and sauté for about 30 seconds until fragrant.
  4. 4. Pour in the chicken broth and heavy cream, stirring to combine. Sprinkle in the ranch seasoning mix and whisk until smooth.
  5. 5. Bring the sauce to a simmer and let it cook for 2-3 minutes, stirring occasionally, until slightly thickened.
  6. 6. Stir in the Parmesan cheese until melted and the sauce is creamy.
  7. 7. Return the chicken to the skillet, spooning the sauce over the top. Let it simmer for another 2-3 minutes to heat through.
  8. 8. Garnish with fresh parsley and extra Parmesan cheese before serving.

Notes

For a lighter version, you can substitute half-and-half for the heavy cream. Serve over pasta, rice, or with a side of roasted vegetables for a complete meal.

Thin Mint Cookie Bars

Thin Mint Cookie Bars

If you’re a fan of the iconic Girl Scout Thin Mints, prepare to fall head over heels for these Thin Mint Cookie Bars. Imagine the perfect marriage of rich chocolate, refreshing mint, and a buttery cookie crust—all in one irresistible dessert. Whether you’re craving a nostalgic treat or need a show-stopping dessert for your next gathering, these bars deliver on flavor, texture, and simplicity. Let’s dive into why this recipe is a must-try and how you can make it your own.

Why You’ll Love This Recipe

There’s a reason Thin Mint Cookie Bars are destined to become a staple in your dessert rotation. Here’s why:

  • Nostalgia meets simplicity: These bars capture the beloved flavor of Thin Mints without the hassle of rolling and cutting dough. It’s a no-fuss way to enjoy that classic combination of chocolate and mint.
  • Perfect for sharing: Whether it’s a potluck, holiday party, or casual get-together, these bars are easy to slice and serve, making them a crowd-pleaser every time.
  • Make-ahead friendly: You can prepare these bars in advance, allowing the flavors to meld beautifully in the fridge. They’re just as delicious on day three as they are fresh out of the pan.
  • Customizable: From adjusting the mint intensity to adding crunchy toppings, this recipe is adaptable to suit your personal taste.

Ingredients Breakdown

Understanding the role of each ingredient helps you achieve the perfect balance of flavors and textures in your Thin Mint Cookie Bars.

  • Butter: The base of the cookie crust, butter provides richness and helps bind the ingredients together. Use unsalted butter to control the salt level.
  • Chocolate sandwich cookies: Crushed cookies form the foundation of the crust, delivering that familiar chocolatey crunch. Oreos or similar brands work perfectly.
  • Cream cheese: Adds a slight tang and creamy texture to the filling, balancing the sweetness of the chocolate.
  • Peppermint extract: The star of the show, peppermint extract infuses the bars with that refreshing, cool flavor. A little goes a long way, so measure carefully.
  • Chocolate chips: Semi-sweet or dark chocolate chips melt into a smooth, decadent topping that contrasts beautifully with the minty filling.
  • Heavy cream: Used to create a silky ganache, heavy cream ensures the chocolate topping is luscious and spreadable.

How to Make Thin Mint Cookie Bars

Follow these steps to create perfectly layered Thin Mint Cookie Bars with minimal effort.

  1. Prepare the crust: Preheat your oven to 350°F. In a food processor, pulse the chocolate sandwich cookies into fine crumbs. Mix with melted butter until the crumbs are evenly coated. Press the mixture firmly into a lined 9×9-inch baking pan and bake for 10 minutes. Let it cool slightly.
  2. Make the mint filling: In a mixing bowl, beat softened cream cheese until smooth. Add powdered sugar, peppermint extract, and a pinch of salt, blending until creamy. Spread this layer evenly over the cooled crust and refrigerate for 20 minutes to set.
  3. Create the chocolate ganache: Heat heavy cream in a small saucepan until just simmering. Pour over chocolate chips in a heatproof bowl and let sit for 2 minutes. Stir until smooth, then spread over the mint layer.
  4. Chill and slice: Refrigerate the bars for at least 2 hours, or until fully set. For clean slices, use a sharp knife dipped in hot water and wiped dry between cuts.

Pro Tips for the Best Results

Elevate your Thin Mint Cookie Bars with these expert techniques:

  • Chill the crust: After baking, let the crust cool completely before adding the mint layer. This prevents the filling from melting or becoming greasy.
  • Adjust mint intensity: If you prefer a subtler mint flavor, reduce the extract to ½ teaspoon. For an extra kick, add a drop or two more.
  • Use high-quality chocolate: The ganache will taste even better with premium chocolate chips or chopped baking chocolate.
  • Garnish creatively: Sprinkle crushed peppermint candies or a dusting of cocoa powder on top for a festive touch.

Variations and Substitutions

Tailor these bars to your dietary needs or flavor preferences with these easy swaps:

  • Gluten-free: Use gluten-free chocolate sandwich cookies for the crust.
  • Dairy-free: Substitute vegan butter, dairy-free cream cheese, and coconut cream in place of heavy cream.
  • Extra crunch: Stir chopped Andes mints or toasted nuts into the filling for added texture.
  • White chocolate twist: Swap the semi-sweet ganache for white chocolate for a sweeter, creamier finish.

What to Serve With It

While these bars shine on their own, pairing them with complementary treats enhances the experience:

  • Hot beverages: Serve with a mug of hot cocoa, coffee, or peppermint tea for a cozy dessert moment.
  • Ice cream: A scoop of vanilla or mint chocolate chip ice cream turns these bars into an indulgent sundae.
  • Fresh fruit: Balance the richness with berries or citrus segments for a refreshing contrast.

How to Store and Reheat

Keep your Thin Mint Cookie Bars fresh with these storage tips:

  • Refrigeration: Store in an airtight container in the fridge for up to 5 days. The bars firm up when chilled, making them easier to slice.
  • Freezing: Wrap individual bars in parchment paper and freeze for up to 2 months. Thaw in the refrigerator before serving.
  • Reheating: These bars are best enjoyed cold, but if you prefer a slightly softened texture, let them sit at room temperature for 10 minutes before serving.

Frequently Asked Questions (FAQs)

Here are answers to common questions about making Thin Mint Cookie Bars:

  • Can I use mint extract instead of peppermint? Yes, but peppermint extract has a sharper, cooler flavor, while mint extract is milder. Adjust the amount to taste.
  • Why is my ganache not smooth? If the chocolate seizes or becomes grainy, gently reheat the mixture with a splash of warm cream and stir until smooth.
  • Can I make these bars without a food processor? Absolutely. Place the cookies in a zip-top bag and crush them with a rolling pin for a rustic texture.
  • How do I prevent the crust from crumbling? Press the crust firmly into the pan and let it cool completely before adding the next layer.

Final Thoughts

Thin Mint Cookie Bars are more than just a dessert—they’re a celebration of timeless flavors in an easy-to-make format. Whether you’re reliving childhood memories or introducing someone new to the magic of chocolate and mint, these bars are sure to impress. Don’t be surprised if they disappear faster than a box of Girl Scout cookies. Happy baking!

Print
clock clock iconcutlery cutlery iconflag flag iconfolder folder iconinstagram instagram iconpinterest pinterest iconfacebook facebook iconprint print iconsquares squares iconheart heart iconheart solid heart solid icon

Thin Mint Cookie Bars

  • Author: Cookie Lover

Description

A delicious no-bake dessert combining the classic flavors of Thin Mint cookies with a rich chocolate ganache topping. Perfect for mint chocolate lovers!


Ingredients

Scale

For the Crust:

  • For the crust:
  • 24 Thin Mint cookies (crushed)
  • 1/4 cup unsalted butter (melted)
  • For the filling:
  • 1 cup heavy cream
  • 2 cups semi-sweet chocolate chips
  • 1/2 teaspoon peppermint extract
  • For garnish:
  • Additional Thin Mint cookies (crushed)
  • Mint leaves (optional)

Instructions

1. Prepare the Crust:

  1. 1. Line an 8×8 inch baking pan with parchment paper, leaving overhang on the sides for easy removal.
  2. 2. In a food processor, pulse Thin Mint cookies into fine crumbs. Transfer to a bowl and mix with melted butter until combined.
  3. 3. Press the cookie mixture firmly into the prepared pan to form an even crust. Chill in the refrigerator for 15 minutes.
  4. 4. In a small saucepan, heat heavy cream until just simmering. Remove from heat and pour over chocolate chips in a heatproof bowl. Let sit for 2 minutes, then stir until smooth.
  5. 5. Stir in peppermint extract. Pour ganache over the chilled crust and spread evenly.
  6. 6. Sprinkle crushed Thin Mint cookies on top for garnish. Chill in the refrigerator for at least 2 hours or until set.
  7. 7. Use parchment overhang to lift bars from pan. Cut into squares and serve chilled.

Notes

For a stronger mint flavor, add an extra 1/4 teaspoon peppermint extract. Store leftovers in an airtight container in the refrigerator for up to 5 days.