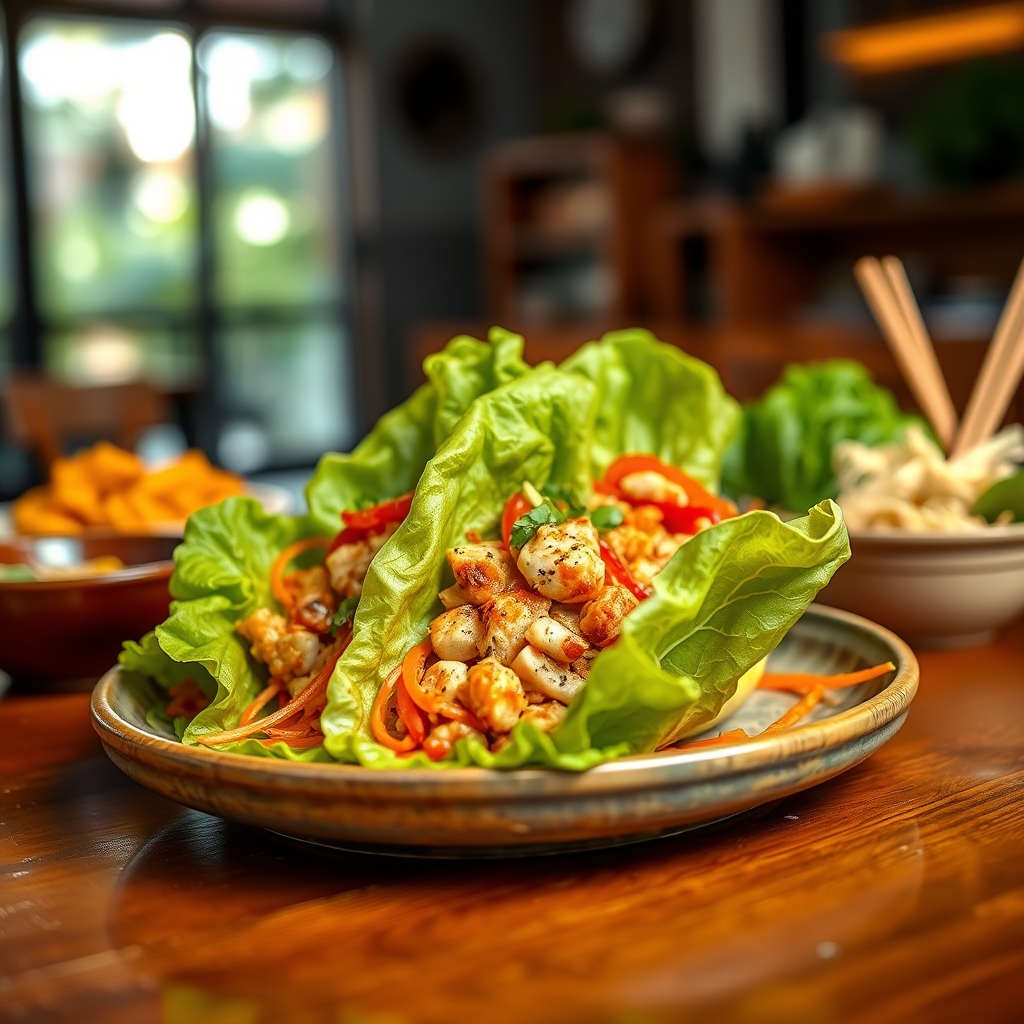
Thai Chicken Lettuce Wraps
There’s something undeniably satisfying about Thai chicken lettuce wraps—fresh, vibrant, and packed with bold flavors, they’re the perfect balance of light and hearty. Whether you’re looking for a quick weeknight dinner or an impressive appetizer for guests, these wraps deliver. Inspired by the aromatic street food of Thailand, this recipe brings together tender ground chicken, crisp vegetables, and a tangy-sweet sauce, all cradled in cool, crisp lettuce leaves. Let’s dive into why this dish deserves a spot in your recipe rotation.
Why You’ll Love This Recipe
First, these Thai chicken lettuce wraps are bursting with flavor. The combination of savory chicken, fresh herbs, and a zesty sauce creates a taste experience that’s both complex and refreshing. Second, they’re incredibly versatile—serve them as a light lunch, a party appetizer, or a main course with sides. Third, they’re healthy and low-carb, making them a great option for those watching their carb intake or simply craving something nutritious. Finally, they come together in under 30 minutes, making them perfect for busy weeknights when you want something delicious without the fuss.
Ingredients Breakdown
Let’s take a closer look at the key ingredients that make these Thai chicken lettuce wraps shine:
- Ground Chicken: Lean and tender, ground chicken absorbs the flavors of the sauce beautifully while keeping the dish light.
- Lettuce Leaves: Butter lettuce or romaine works best—their sturdy yet pliable leaves make the perfect edible vessel.
- Fresh Herbs: Cilantro, mint, and Thai basil add brightness and an authentic Thai flair.
- Fish Sauce: A staple in Thai cooking, fish sauce adds umami depth to the sauce.
- Lime Juice: Provides a tangy contrast to the sweetness of the sauce.
- Garlic and Ginger: These aromatics build a flavorful foundation for the chicken filling.
- Crushed Peanuts: For a satisfying crunch and nutty finish.
How to Make Thai Chicken Lettuce Wraps
Follow these simple steps to create restaurant-quality Thai chicken lettuce wraps at home:
- Prepare the Sauce: In a small bowl, whisk together fish sauce, lime juice, soy sauce, honey, and a pinch of red pepper flakes. Set aside.
- Sauté the Aromatics: Heat oil in a large skillet over medium heat. Add minced garlic and grated ginger, cooking until fragrant (about 30 seconds).
- Cook the Chicken: Add ground chicken to the skillet, breaking it apart with a wooden spoon. Cook until no longer pink, about 5-6 minutes.
- Add the Sauce: Pour the prepared sauce over the chicken, stirring to coat evenly. Let simmer for 2-3 minutes until slightly thickened.
- Assemble the Wraps: Spoon the chicken mixture into lettuce leaves, then top with shredded carrots, fresh herbs, and crushed peanuts.
Pro Tips for the Best Results
- For extra flavor, toast the crushed peanuts lightly in a dry pan before sprinkling them on top.
- If your lettuce leaves are too small, use two overlapping leaves per wrap for added stability.
- Let the chicken mixture cool slightly before assembling to prevent the lettuce from wilting.
- For a spicier kick, add a diced Thai chili or extra red pepper flakes to the sauce.
Variations and Substitutions
This recipe is wonderfully adaptable:
- Protein Swap: Try ground turkey, pork, or even tofu for a vegetarian version.
- Lettuce Alternatives: If butter lettuce isn’t available, romaine, iceberg, or even cabbage leaves work well.
- Sauce Adjustments: Swap honey for brown sugar or maple syrup if preferred.
- Extra Veggies: Add diced bell peppers, water chestnuts, or shredded zucchini for extra crunch.
What to Serve With It
These Thai chicken lettuce wraps pair beautifully with:
- Steamed jasmine rice or coconut rice for a heartier meal.
- A side of cucumber salad with a light vinegar dressing.
- Thai iced tea or a crisp white wine like Sauvignon Blanc.
- Extra lime wedges and sriracha for those who love an extra kick.
How to Store and Reheat
Leftovers? No problem:
- Refrigerate: Store the chicken filling in an airtight container for up to 3 days.
- Freeze: The cooked chicken mixture freezes well for up to 2 months. Thaw overnight in the fridge before reheating.
- Reheat: Warm the chicken in a skillet over medium heat with a splash of water to prevent drying out. Assemble fresh lettuce wraps when ready to serve.
Frequently Asked Questions (FAQs)
Can I make these wraps ahead of time?
Yes! Prepare the chicken filling up to a day in advance, but assemble the wraps just before serving to keep the lettuce crisp.
Is fish sauce necessary?
Fish sauce adds authentic Thai flavor, but if you’re allergic or prefer a substitute, use soy sauce or coconut aminos with a pinch of salt.
How do I prevent the wraps from falling apart?
Use sturdy lettuce leaves and avoid overfilling them. Double-layering the leaves can also help.
Can I use pre-cooked chicken?
Absolutely. Shred or finely chop cooked chicken and sauté it with the sauce until heated through.
Final Thoughts
Thai chicken lettuce wraps are a delightful way to enjoy bold, fresh flavors without spending hours in the kitchen. They’re perfect for warm evenings when you crave something light yet satisfying, or for entertaining friends with a dish that’s as beautiful as it is delicious. Once you try this recipe, you’ll find yourself coming back to it again and again—it’s that good. So grab those lettuce leaves and get ready to wrap up a taste of Thailand right in your own home.
Print
Thai Chicken Lettuce Wraps
Description
A light and flavorful Thai-inspired dish featuring ground chicken cooked with aromatic spices, wrapped in crisp lettuce leaves. Perfect for a healthy appetizer or main course.
Ingredients
For the Crust:
- For the Chicken Filling:
- 1 lb ground chicken
- 1 tbsp vegetable oil
- 3 cloves garlic, minced
- 1 small onion, finely chopped
- 1 red bell pepper, diced
- 1 tbsp fresh ginger, grated
- 2 tbsp soy sauce
- 1 tbsp fish sauce
- 1 tbsp lime juice
- 1 tsp brown sugar
- 1/2 tsp red pepper flakes
- For the Wraps:
- 1 head butter lettuce, leaves separated
- 1/4 cup fresh cilantro, chopped
- 1/4 cup fresh mint, chopped
- 1/4 cup peanuts, crushed
- For the Dipping Sauce:
- 2 tbsp soy sauce
- 1 tbsp lime juice
- 1 tsp honey
- 1/2 tsp sesame oil
- 1/2 tsp red pepper flakes
Instructions
1. Prepare the Crust:
- 1. Heat vegetable oil in a large skillet over medium heat.
- 2. Add garlic, onion, and ginger. Sauté for 2-3 minutes until fragrant.
- 3. Add ground chicken and cook until browned, breaking it apart with a spoon.
- 4. Stir in red bell pepper, soy sauce, fish sauce, lime juice, brown sugar, and red pepper flakes. Cook for 5-7 minutes until the chicken is fully cooked and the flavors meld.
- 5. Remove from heat and let cool slightly.
- 6. Meanwhile, prepare the dipping sauce by whisking together soy sauce, lime juice, honey, sesame oil, and red pepper flakes in a small bowl.
- 7. To assemble, spoon the chicken mixture into lettuce leaves. Top with cilantro, mint, and crushed peanuts.
- 8. Serve with the dipping sauce on the side.
Notes
For a spicier version, add more red pepper flakes or a diced Thai chili. You can also substitute ground turkey or tofu for the chicken.