Pancake Sausage Casserole

Pancake Sausage Casserole

There’s something magical about a dish that effortlessly combines breakfast comfort with the ease of a casserole. This Pancake Sausage Casserole is the ultimate crowd-pleaser, blending fluffy pancakes, savory sausage, and a touch of maple sweetness into one irresistible bake. Whether you’re hosting a weekend brunch or prepping a make-ahead breakfast for busy mornings, this recipe is a game-changer. Let’s dive into why this dish deserves a permanent spot in your recipe rotation.

Why You’ll Love This Recipe

First, this casserole is incredibly versatile. It works just as well for a lazy Sunday brunch as it does for a holiday breakfast spread. The combination of tender pancake bites and savory sausage creates a perfect balance of flavors that appeals to both kids and adults.

Second, it’s a time-saver. Instead of standing over a griddle flipping pancakes, you can mix everything in one bowl, pour it into a baking dish, and let the oven do the work. This means more time sipping coffee and less time stressing over breakfast.

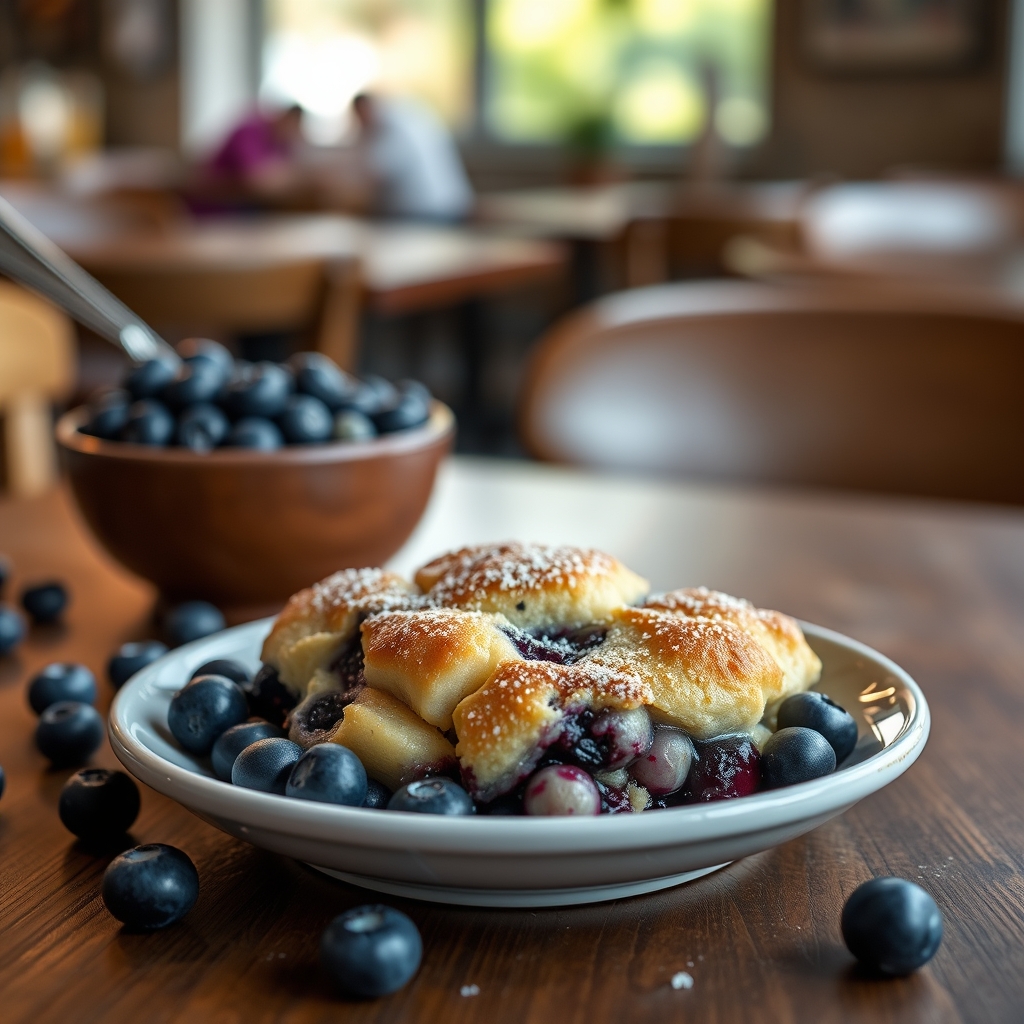
Third, the recipe is easily customizable. Whether you prefer turkey sausage, want to add blueberries, or need a gluten-free version, this dish adapts effortlessly to your preferences.

Finally, it’s a great make-ahead meal. Assemble it the night before, pop it in the fridge, and bake it fresh in the morning. Leftovers reheat beautifully, making it a practical choice for meal prep.

Ingredients Breakdown

Understanding the role of each ingredient helps you perfect this pancake sausage casserole and even experiment with confidence.

Breakfast sausage – The savory backbone of the dish. Opt for maple-flavored sausage for extra sweetness or spicy sausage if you like a kick. You can use pork, turkey, or plant-based sausage depending on dietary needs.

Pancake mix – The base of the casserole. A buttermilk pancake mix works best for flavor and texture, but any standard mix will do. For a homemade touch, you can use your favorite pancake batter recipe.

Milk and eggs – These bind the casserole and create a custard-like texture. Whole milk adds richness, but 2% or even almond milk works in a pinch.

Maple syrup – A drizzle of real maple syrup enhances the sweetness and ties all the flavors together. Avoid pancake syrup substitutes for the best taste.

Butter – Melted butter adds moisture and richness to the pancake batter. If you’re dairy-free, coconut oil is a great substitute.

Cinnamon and vanilla extract – These warm spices elevate the flavor profile, making the casserole taste like a cozy breakfast treat.

How to Make Pancake Sausage Casserole

Follow these steps for a foolproof pancake sausage casserole that comes out perfectly every time.

Step 1: Cook the sausage – In a skillet over medium heat, brown the breakfast sausage until fully cooked, breaking it into small crumbles. Drain any excess grease and set aside.

Step 2: Prepare the batter – In a large mixing bowl, whisk together the pancake mix, milk, eggs, melted butter, cinnamon, and vanilla extract until smooth. The batter should be slightly thick but pourable.

Step 3: Layer the casserole – Lightly grease a 9×13-inch baking dish. Spread the cooked sausage evenly across the bottom. Pour the pancake batter over the sausage, ensuring it covers the entire dish.

Step 4: Bake to perfection – Place the casserole in a preheated 375°F oven for 30-35 minutes, or until the top is golden brown and a toothpick inserted in the center comes out clean.

Step 5: Serve warm – Let the casserole cool for 5 minutes before slicing. Drizzle with maple syrup and serve immediately.

Pro Tips for the Best Results

For an extra-fluffy texture, let the batter rest for 10 minutes before baking. This allows the gluten to relax and the baking powder to activate, resulting in a lighter casserole.

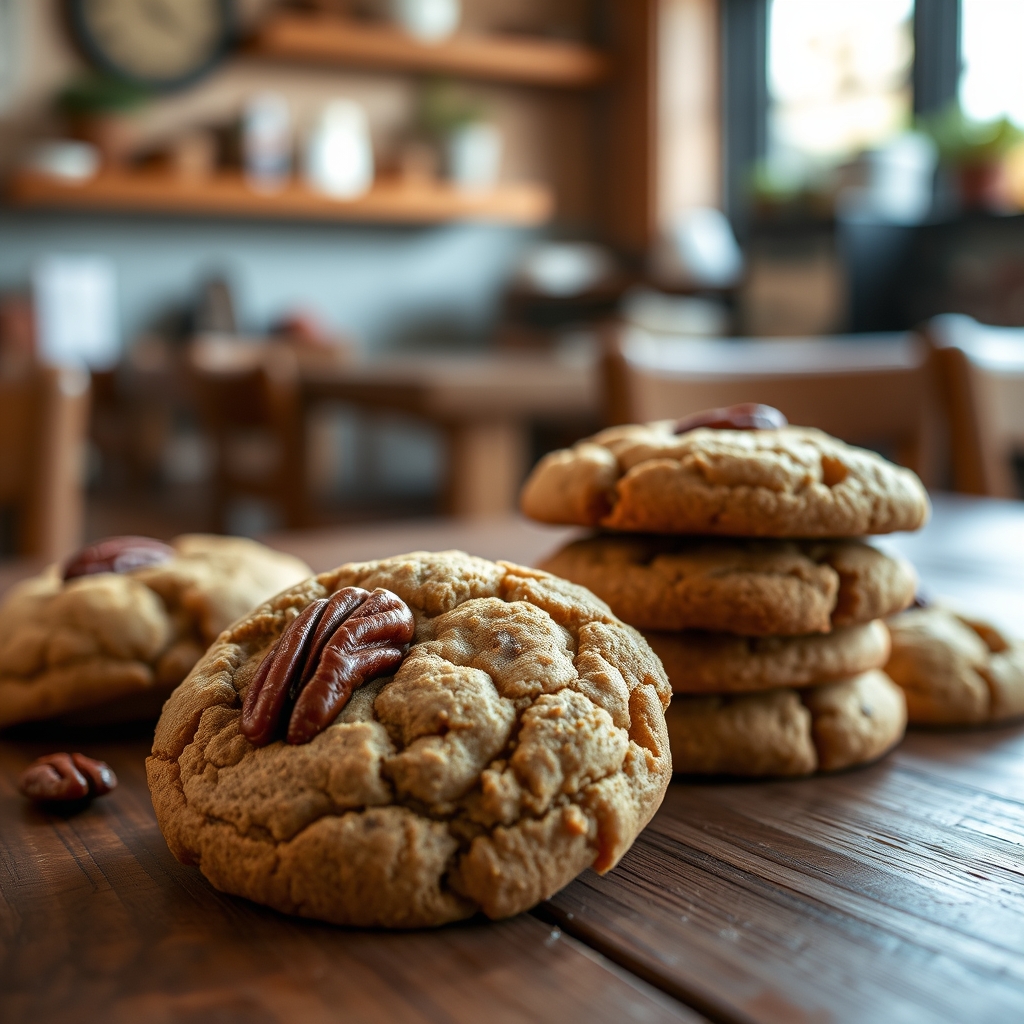
If you love a crispy top, sprinkle a handful of coarse sugar or chopped pecans over the batter before baking. The added crunch takes this dish to the next level.

For a deeper flavor, try browning the butter before mixing it into the batter. The nutty aroma pairs beautifully with the sausage and maple.

If making ahead, cover the unbaked casserole tightly with foil and refrigerate overnight. Add 5-10 minutes to the baking time if starting from cold.

Variations and Substitutions

This pancake sausage casserole is endlessly adaptable. Here are some delicious ways to switch it up:

Vegetarian option – Swap the sausage for sautéed mushrooms, spinach, or meatless crumbles. Add a sprinkle of cheese for extra richness.

Sweet twist – Fold in fresh blueberries, diced apples, or banana slices into the batter before baking. A streusel topping would also work wonderfully.

Gluten-free – Use a gluten-free pancake mix and ensure your sausage is gluten-free. The texture remains just as satisfying.

Dairy-free – Substitute almond or oat milk for regular milk and use coconut oil instead of butter.

What to Serve With It

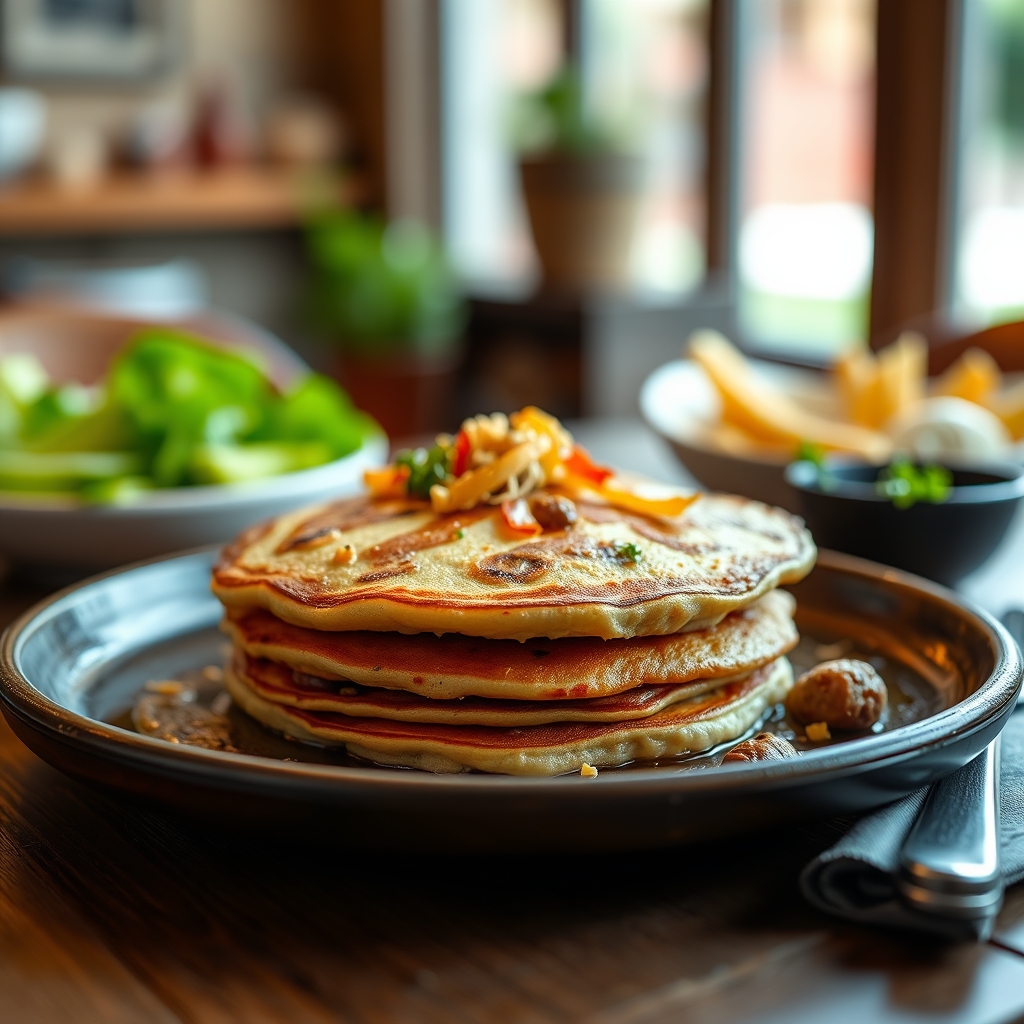
This casserole is hearty enough to stand alone, but pairing it with the right sides makes it a complete meal. Fresh fruit like berries or sliced oranges adds a refreshing contrast. A simple green salad with a light vinaigrette balances the richness if serving for brunch.

For drinks, hot coffee or a cold glass of milk are classic choices. A mimosa or spiced apple cider would elevate a special occasion spread.

If you want extra toppings, set out whipped cream, additional maple syrup, or a bowl of yogurt for guests to customize their servings.

How to Store and Reheat

Leftovers keep well in the refrigerator for up to 3 days. Store in an airtight container or tightly wrap the baking dish with plastic wrap.

To reheat, place individual portions in the microwave for 30-60 seconds until warmed through. For larger servings, cover with foil and bake at 350°F for 10-15 minutes.

For longer storage, freeze slices in a single layer on a baking sheet before transferring to a freezer bag. Reheat frozen slices in the oven at 375°F for 15-20 minutes.

Frequently Asked Questions (FAQs)

Can I use homemade pancake batter instead of a mix? Absolutely! Use your favorite homemade pancake recipe—just ensure it yields about 2 cups of batter.

Can I make this casserole without eggs? Yes, replace each egg with ¼ cup of unsweetened applesauce or a flax egg (1 tbsp ground flaxseed + 3 tbsp water per egg).

Why is my casserole soggy? This usually happens if the sausage wasn’t drained well or the casserole was underbaked. Make sure to blot excess grease from the sausage and bake until fully set.

Can I add cheese? Definitely! Sprinkle shredded cheddar or pepper jack over the sausage before adding the batter for a cheesy twist.

How do I know when it’s done baking? The edges should be golden, and the center should spring back when lightly pressed. A toothpick inserted in the middle should come out clean.

Final Thoughts

This Pancake Sausage Casserole is more than just a breakfast dish—it’s a celebration of comfort food at its finest. Whether you’re serving it for a holiday crowd or enjoying leftovers on a quiet morning, it never fails to satisfy. The best part? It brings people together around the table with minimal effort. So go ahead, whip up this casserole, and watch it disappear faster than you can say seconds, please.

Print
clock clock iconcutlery cutlery iconflag flag iconfolder folder iconinstagram instagram iconpinterest pinterest iconfacebook facebook iconprint print iconsquares squares iconheart heart iconheart solid heart solid icon

Pancake Sausage Casserole

  • Author: Chef Breakfast Lover

Description

A hearty breakfast casserole that combines fluffy pancakes and savory sausage in one delicious dish. Perfect for feeding a crowd or meal prepping for the week!


Ingredients

Scale

For the Crust:

  • For the pancake batter:
  • 2 cups all-purpose flour
  • 2 tablespoons granulated sugar
  • 1 tablespoon baking powder
  • 1/2 teaspoon salt
  • 2 cups milk
  • 2 large eggs
  • 1/4 cup melted butter
  • 1 teaspoon vanilla extract
  • For the sausage layer:
  • 1 pound breakfast sausage, cooked and crumbled
  • 1/2 cup maple syrup
  • For topping:
  • 1/2 cup chopped pecans (optional)
  • Additional maple syrup for serving

Instructions

1. Prepare the Crust:

  1. 1. Preheat oven to 375°F (190°C) and grease a 9×13 inch baking dish.
  2. 2. In a large bowl, whisk together flour, sugar, baking powder, and salt for the pancake batter.
  3. 3. In another bowl, mix milk, eggs, melted butter, and vanilla extract.
  4. 4. Pour wet ingredients into dry ingredients and stir until just combined (some lumps are okay).
  5. 5. Spread cooked sausage evenly in the prepared baking dish.
  6. 6. Pour pancake batter over the sausage layer.
  7. 7. Drizzle 1/2 cup maple syrup over the batter.
  8. 8. Sprinkle with chopped pecans if using.
  9. 9. Bake for 25-30 minutes until golden brown and a toothpick inserted comes out clean.
  10. 10. Let cool for 5 minutes before serving with additional maple syrup.

Notes

For a lighter version, you can use turkey sausage and skim milk. The casserole can be assembled the night before and baked in the morning – just add 5-10 minutes to baking time if starting cold.

Butter Pecan Cookies

Butter Pecan Cookies

There’s something undeniably comforting about the aroma of butter pecan cookies baking in the oven. The rich, nutty fragrance fills the kitchen, promising a treat that’s crisp on the edges, tender in the center, and packed with toasted pecans. Whether you’re a seasoned baker or a beginner, this butter pecan cookie recipe is a must-try. It’s simple enough for weeknight baking yet elegant enough for holiday gatherings. Let’s dive into why these cookies deserve a spot in your recipe collection.

Why You’ll Love This Recipe

If you’re looking for a cookie that balances buttery richness with a satisfying crunch, these butter pecan cookies are perfection. Here’s why they’ll become a favorite:

  • Irresistible Texture: A golden exterior gives way to a soft, chewy center, while toasted pecans add a delightful crunch.
  • Simple Ingredients: Made with pantry staples, these cookies come together effortlessly without fancy equipment.
  • Versatile: Enjoy them as-is or dress them up with a drizzle of caramel or a dusting of powdered sugar.
  • Crowd-Pleasing: Loved by kids and adults alike, these cookies are perfect for bake sales, potlucks, or cozy nights in.
  • Freezer-Friendly: The dough can be prepped ahead, so you can bake fresh cookies anytime.

Ingredients Breakdown

Every ingredient in these butter pecan cookies plays a crucial role in creating the perfect balance of flavor and texture. Here’s what you’ll need:

  • Unsalted Butter: The star of the show, butter provides richness and depth. Using unsalted allows you to control the saltiness.
  • Brown Sugar: Adds moisture and a subtle caramel note, enhancing the buttery flavor.
  • Granulated Sugar: Helps create a crisp exterior while keeping the center soft.
  • Eggs: Binds the dough and contributes to the cookies’ structure.
  • Vanilla Extract: Elevates the nutty, buttery flavors with warmth.
  • All-Purpose Flour: The foundation of the dough, ensuring a tender crumb.
  • Baking Soda & Salt: Leavening agents for lift, while salt balances sweetness.
  • Pecans: Toasted to perfection, they add crunch and a nutty depth.

How to Make Butter Pecan Cookies

Follow these steps for foolproof butter pecan cookies every time:

  1. Toast the Pecans: Spread pecans on a baking sheet and toast at 350°F for 5-7 minutes until fragrant. Let cool, then chop roughly.
  2. Cream the Butter and Sugars: In a large bowl, beat softened butter with brown and granulated sugar until light and fluffy, about 3 minutes.
  3. Add Wet Ingredients: Mix in the egg and vanilla extract until fully incorporated.
  4. Combine Dry Ingredients: In a separate bowl, whisk flour, baking soda, and salt. Gradually add to the butter mixture, mixing just until combined.
  5. Fold in Pecans: Gently stir in the toasted pecans, reserving a few for topping if desired.
  6. Chill the Dough: Cover and refrigerate for at least 30 minutes. This prevents spreading and enhances flavor.
  7. Bake: Scoop dough into 1.5-inch balls, place on a parchment-lined baking sheet, and bake at 375°F for 10-12 minutes until edges are golden.
  8. Cool: Let cookies rest on the baking sheet for 5 minutes before transferring to a wire rack.

Pro Tips for the Best Results

  • Room-Temperature Butter: Softened butter creams better with sugar, creating a lighter texture.
  • Don’t Overmix: Stir just until ingredients combine to avoid tough cookies.
  • Chill the Dough: Skipping this step leads to flat cookies. For even better results, chill overnight.
  • Uniform Sizing: Use a cookie scoop for evenly sized cookies that bake uniformly.
  • Underbake Slightly: Cookies continue to set as they cool, so pull them out when edges are just golden.

Variations and Substitutions

Customize your butter pecan cookies with these delicious twists:

  • Gluten-Free: Swap all-purpose flour for a 1:1 gluten-free blend.
  • Vegan: Use plant-based butter and a flax egg (1 tbsp ground flax + 3 tbsp water).
  • Spiced: Add 1 tsp cinnamon or pumpkin spice for a warm, autumnal flavor.
  • Chocolate Drizzle: Melt dark chocolate and drizzle over cooled cookies for extra decadence.
  • Maple Glaze: Whisk powdered sugar with maple syrup and a splash of milk for a sweet finish.

What to Serve With It

Butter pecan cookies are delightful on their own, but they pair beautifully with:

  • A glass of cold milk or hot coffee for dunking.
  • Vanilla ice cream sandwiched between two cookies for an indulgent treat.
  • A cheese board featuring sharp cheddar or creamy brie for a sweet-savory contrast.
  • Spiced chai tea or hot cocoa during colder months.

How to Store and Reheat

Keep your butter pecan cookies fresh with these storage tips:

  • Room Temperature: Store in an airtight container for up to 5 days.
  • Freezing Dough: Portion dough balls and freeze on a tray before transferring to a bag. Bake from frozen, adding 1-2 extra minutes.
  • Freezing Baked Cookies: Layer between parchment paper in a freezer-safe container for up to 3 months. Thaw at room temperature.
  • Reheating: Warm cookies in a 300°F oven for 3-5 minutes to revive crispness.

Frequently Asked Questions (FAQs)

Can I use salted butter instead?

Yes, but reduce added salt by half to avoid overly salty cookies.

Why did my cookies spread too much?

This usually happens if the butter was too soft or the dough wasn’t chilled. Ensure proper chilling and measure flour accurately.

Can I substitute walnuts for pecans?

Absolutely! Walnuts offer a similar crunch, though the flavor will be slightly different.

How do I prevent my pecans from burning?

Toast them just until fragrant, and keep an eye on them—they can go from golden to burnt quickly.

Can I make these cookies without nuts?

Yes, omit the pecans for a classic butter cookie, though the texture will differ.

Final Thoughts

Butter pecan cookies are a timeless treat that never goes out of style. Whether you’re baking them for a special occasion or just because, their buttery, nutty goodness is sure to bring smiles. Don’t be surprised if this recipe becomes a staple in your kitchen—it’s that good. Happy baking, and may your home always smell like warm cookies!

Print
clock clock iconcutlery cutlery iconflag flag iconfolder folder iconinstagram instagram iconpinterest pinterest iconfacebook facebook iconprint print iconsquares squares iconheart heart iconheart solid heart solid icon

Butter Pecan Cookies

  • Author: Baking Enthusiast

Description

These Butter Pecan Cookies are rich, buttery, and packed with crunchy pecans. Perfect for holiday gatherings or a sweet treat any time of the year.


Ingredients

Scale

For the Crust:

  • For the cookies:
  • 1 cup unsalted butter, softened
  • 1 cup granulated sugar
  • 1 cup packed brown sugar
  • 2 large eggs
  • 2 teaspoons vanilla extract
  • 3 cups all-purpose flour
  • 1 teaspoon baking soda
  • 1/2 teaspoon baking powder
  • 1 teaspoon salt
  • 1 1/2 cups chopped pecans
  • For the glaze (optional):
  • 1 cup powdered sugar
  • 2 tablespoons milk
  • 1/2 teaspoon vanilla extract

Instructions

1. Prepare the Crust:

  1. Preheat oven to 350°F (175°C). Line baking sheets with parchment paper.
  2. In a large bowl, cream together the butter, granulated sugar, and brown sugar until light and fluffy.
  3. Beat in the eggs one at a time, then stir in the vanilla extract.
  4. In a separate bowl, whisk together the flour, baking soda, baking powder, and salt.
  5. Gradually add the dry ingredients to the wet ingredients, mixing until just combined.
  6. Fold in the chopped pecans.
  7. Drop tablespoon-sized portions of dough onto the prepared baking sheets, spacing them about 2 inches apart.
  8. Bake for 10-12 minutes, or until the edges are lightly golden.
  9. Allow cookies to cool on the baking sheet for 5 minutes before transferring to a wire rack to cool completely.
  10. For the glaze (optional): Whisk together powdered sugar, milk, and vanilla extract until smooth. Drizzle over cooled cookies.

Notes

Store cookies in an airtight container at room temperature for up to 5 days. For extra crunch, toast the pecans before adding them to the dough.

Shrimp Egg Rolls

Shrimp Egg Rolls

Crispy, golden, and bursting with succulent shrimp and fresh vegetables, shrimp egg rolls are a beloved appetizer that never fails to impress. Whether you’re hosting a party or simply craving a homemade version of this takeout favorite, this recipe delivers restaurant-quality results with a fraction of the effort. Today, I’m sharing my tried-and-true method for making the most irresistible shrimp egg rolls—complete with pro tips, variations, and everything you need to know to make them perfect every time.

Why You’ll Love This Recipe

If you’re on the fence about making shrimp egg rolls at home, let me give you a few reasons why this recipe is a must-try:

  • Perfectly crispy texture: Frying these egg rolls to golden perfection ensures a satisfying crunch with every bite, while the filling stays juicy and flavorful.
  • Versatile and customizable: Swap ingredients based on what you have on hand or adjust the spice level to suit your taste.
  • Great for entertaining: These shrimp egg rolls disappear fast at parties, making them an ideal appetizer for gatherings.
  • Better than takeout: Homemade means fresher ingredients, no mystery additives, and the ability to tweak flavors to your liking.
  • Fun to make: Rolling egg rolls is a simple yet rewarding process—perfect for getting the whole family involved in the kitchen.

Ingredients Breakdown

Understanding the role of each ingredient helps you make the best shrimp egg rolls possible. Here’s what you’ll need:

  • Shrimp: The star of the show! Use fresh or frozen shrimp (peeled and deveined) for the best flavor and texture.
  • Cabbage and carrots: These add crunch and sweetness, balancing the savory shrimp filling.
  • Garlic and ginger: Essential aromatics that bring depth and warmth to the filling.
  • Soy sauce and sesame oil: These seasonings provide umami richness and a nutty finish.
  • Egg roll wrappers: Thin, pliable sheets that crisp up beautifully when fried or baked.
  • Cornstarch slurry: A simple mixture of cornstarch and water to seal the wrappers, ensuring they don’t unravel during cooking.

How to Make Shrimp Egg Rolls

Follow these step-by-step instructions for foolproof shrimp egg rolls:

  1. Prepare the filling: In a large skillet, sauté minced garlic and ginger in a bit of oil until fragrant. Add finely shredded cabbage and carrots, cooking until softened but still crisp. Stir in chopped shrimp, soy sauce, and sesame oil, cooking just until the shrimp turns pink. Let the mixture cool slightly.
  2. Assemble the egg rolls: Lay an egg roll wrapper on a clean surface in a diamond shape. Spoon about 2 tablespoons of filling near the bottom corner. Fold the bottom corner over the filling, then fold in the sides. Roll tightly toward the top corner, sealing the edge with a dab of cornstarch slurry.
  3. Fry to perfection: Heat oil in a deep skillet or pot to 350°F. Fry the egg rolls in batches until golden brown, about 2-3 minutes per side. Drain on paper towels to remove excess oil.
  4. Serve immediately: Enjoy your shrimp egg rolls hot with a side of sweet chili sauce or soy dipping sauce.

Pro Tips for the Best Results

  • Dry your shrimp thoroughly: Excess moisture can make the filling soggy. Pat the shrimp dry before cooking.
  • Don’t overfill the wrappers: Too much filling can cause the egg rolls to burst during frying.
  • Maintain oil temperature: Use a thermometer to keep the oil at 350°F for even cooking and maximum crispiness.
  • Try baking for a lighter option: Brush egg rolls with oil and bake at 400°F for 15-20 minutes, flipping halfway.

Variations and Substitutions

Customize your shrimp egg rolls with these delicious twists:

  • Vegetarian option: Replace shrimp with mushrooms or tofu for a meat-free version.
  • Spicy kick: Add sriracha or red pepper flakes to the filling for heat.
  • Extra crunch: Toss in bean sprouts or water chestnuts for added texture.
  • Different proteins: Swap shrimp for ground pork, chicken, or crab for a new flavor profile.

What to Serve With It

Shrimp egg rolls pair beautifully with a variety of sides and sauces:

  • Dipping sauces: Sweet chili sauce, duck sauce, or a simple soy-vinegar dip.
  • Light salads: A refreshing cucumber salad or tangy Asian slaw balances the richness.
  • Noodle dishes: Serve alongside lo mein or fried rice for a complete meal.
  • Tea or beer: A crisp lager or jasmine tea complements the flavors perfectly.

How to Store and Reheat

Leftover shrimp egg rolls? Here’s how to keep them tasting fresh:

  • Refrigeration: Store in an airtight container for up to 3 days.
  • Freezing: Freeze uncooked egg rolls on a baking sheet, then transfer to a freezer bag. Fry directly from frozen, adding a few extra minutes to the cooking time.
  • Reheating: For best results, reheat in an air fryer or oven at 375°F until crispy again. Avoid microwaving, which can make them soggy.

Frequently Asked Questions (FAQs)

Can I use pre-cooked shrimp?
Yes, but add them at the end of cooking the vegetables to prevent overcooking. Chop them finely so they blend well with the filling.

Why did my egg rolls turn out greasy?
This usually happens if the oil isn’t hot enough. Make sure it reaches 350°F before frying, and avoid overcrowding the pan.

Can I make these ahead of time?
Absolutely! Assemble the egg rolls and refrigerate them for a few hours before frying. You can also freeze them for longer storage.

Are shrimp egg rolls gluten-free?
Traditional egg roll wrappers contain wheat, but you can find gluten-free wrappers or use rice paper for a lighter alternative.

What’s the best oil for frying?
Peanut or vegetable oil works best due to their high smoke points and neutral flavors.

Final Thoughts

Making shrimp egg rolls at home is easier than you might think, and the results are so rewarding. Whether you’re serving them as an appetizer, snack, or part of a larger Asian-inspired feast, these crispy delights are sure to be a hit. Don’t be afraid to experiment with fillings and dipping sauces—after all, the best recipes are the ones you make your own. Happy rolling, and enjoy every crunchy bite!

Print
clock clock iconcutlery cutlery iconflag flag iconfolder folder iconinstagram instagram iconpinterest pinterest iconfacebook facebook iconprint print iconsquares squares iconheart heart iconheart solid heart solid icon

Shrimp Egg Rolls

  • Author: Chef Emily Carter

Description

Crispy homemade shrimp egg rolls filled with succulent shrimp, crunchy vegetables, and savory seasonings. Perfect as an appetizer or snack, these egg rolls are fried to golden perfection and served with a tangy dipping sauce.


Ingredients

Scale

For the Crust:

  • For the Filling:
  • 1 lb shrimp, peeled, deveined, and chopped
  • 2 cups shredded cabbage
  • 1 cup shredded carrots
  • 1/2 cup chopped green onions
  • 2 cloves garlic, minced
  • 1 tbsp fresh ginger, grated
  • 2 tbsp soy sauce
  • 1 tbsp oyster sauce
  • 1 tsp sesame oil
  • 1/2 tsp sugar
  • 1/4 tsp black pepper
  • For Assembly:
  • 12 egg roll wrappers
  • 1 egg, beaten (for sealing)
  • Vegetable oil (for frying)
  • For the Dipping Sauce:
  • 1/4 cup soy sauce
  • 2 tbsp rice vinegar
  • 1 tbsp honey
  • 1 tsp sesame oil
  • 1 tsp sriracha (optional)

Instructions

1. Prepare the Crust:

  1. 1. Prepare the filling: In a large skillet or wok, heat 1 tbsp of vegetable oil over medium-high heat. Add garlic and ginger, sauté for 30 seconds until fragrant.
  2. 2. Add chopped shrimp and cook for 2-3 minutes until pink. Remove from heat and set aside.
  3. 3. In the same skillet, add cabbage, carrots, and green onions. Stir-fry for 2-3 minutes until slightly softened.
  4. 4. Return shrimp to the skillet. Add soy sauce, oyster sauce, sesame oil, sugar, and black pepper. Mix well and cook for another 1-2 minutes. Let the filling cool.
  5. 5. Assemble the egg rolls: Lay an egg roll wrapper on a clean surface with a corner facing you. Place 2 tbsp of filling near the bottom corner.
  6. 6. Fold the bottom corner over the filling, then fold in the sides. Roll tightly, sealing the top corner with beaten egg. Repeat with remaining wrappers.
  7. 7. Heat 2 inches of vegetable oil in a deep skillet to 350°F (175°C). Fry egg rolls in batches for 2-3 minutes per side until golden brown. Drain on paper towels.
  8. 8. Make the dipping sauce: Whisk together soy sauce, rice vinegar, honey, sesame oil, and sriracha (if using).
  9. 9. Serve hot egg rolls with dipping sauce.

Notes

For a healthier version, bake egg rolls at 400°F (200°C) for 15-20 minutes, flipping halfway, until crispy. Substitute shrimp with tofu for a vegetarian option.

Blueberry Cobbler

Blueberry Cobbler

There’s something undeniably comforting about a warm blueberry cobbler fresh from the oven. The juicy, sweet-tart blueberries bubbling beneath a golden, buttery crust create a dessert that feels like a hug in a dish. Whether you’re serving it at a summer barbecue, a cozy winter gathering, or just as a weeknight treat, this blueberry cobbler recipe is a timeless classic that never fails to impress. Let’s dive into why this recipe is a must-try and how to make it perfectly every time.

Why You’ll Love This Recipe

First, let’s talk about why this blueberry cobbler deserves a spot in your recipe collection. Here are a few reasons it’s a crowd-pleaser:

  • Simple yet impressive: With minimal ingredients and straightforward steps, this recipe is beginner-friendly but delivers a dessert that looks and tastes like it came from a bakery.
  • Versatile for any occasion: Serve it warm with ice cream for dessert, or enjoy it cold for breakfast—it’s delicious any time of day.
  • Bursting with fresh flavor: The natural sweetness of blueberries shines, enhanced by a hint of lemon and a tender, biscuit-like topping.
  • Perfect for seasonal baking: While fresh blueberries are ideal in summer, frozen berries work just as well, making this a year-round treat.
  • Comfort food at its finest: There’s a reason cobblers have been beloved for generations—they’re homey, satisfying, and evoke nostalgia with every bite.

Ingredients Breakdown

Understanding the role of each ingredient helps you make the best blueberry cobbler possible. Here’s what you’ll need:

  • Fresh or frozen blueberries: The star of the show. Fresh berries offer the best texture, but frozen work well too—just don’t thaw them first to avoid excess liquid.
  • Granulated sugar: Sweetens the blueberries and balances their natural tartness.
  • Lemon juice and zest: Brightens the flavor and adds a subtle citrus note that complements the berries beautifully.
  • Cornstarch: Thickens the blueberry filling, preventing it from becoming too runny.
  • All-purpose flour: The base of the cobbler topping, providing structure and tenderness.
  • Baking powder: Gives the topping its light, slightly fluffy texture.
  • Salt: Enhances all the flavors and balances the sweetness.
  • Unsalted butter: Adds richness and a golden, crispy edge to the topping.
  • Milk or buttermilk: Binds the dough and adds moisture. Buttermilk lends a slight tang for extra depth.

How to Make Blueberry Cobbler

Now, let’s walk through the steps to create this irresistible dessert:

  1. Preheat and prepare: Start by preheating your oven to 375°F (190°C). Lightly grease a 9-inch baking dish or cast-iron skillet with butter.
  2. Make the blueberry filling: In a large bowl, toss the blueberries with sugar, lemon juice, lemon zest, and cornstarch until evenly coated. Pour the mixture into the prepared baking dish.
  3. Prepare the cobbler topping: In another bowl, whisk together the flour, sugar, baking powder, and salt. Cut in the cold butter using a pastry cutter or your fingers until the mixture resembles coarse crumbs. Stir in the milk or buttermilk just until a soft dough forms.
  4. Assemble the cobbler: Drop spoonfuls of the dough over the blueberry filling, covering it unevenly for a rustic look. Don’t worry about perfection—the gaps allow the berries to bubble up beautifully.
  5. Bake to perfection: Bake for 35–40 minutes, or until the topping is golden brown and the blueberries are bubbling. Let it cool slightly before serving to allow the filling to thicken.

Pro Tips for the Best Results

Want to take your blueberry cobbler to the next level? Try these expert tips:

  • Use cold butter: For a flakier topping, ensure your butter is cold when incorporating it into the flour mixture.
  • Don’t overmix the dough: Stir just until the ingredients come together to avoid a tough topping.
  • Add a sprinkle of sugar: Before baking, dust the top with a little coarse sugar for extra crunch and sparkle.
  • Adjust sweetness to taste: If your blueberries are very tart, add an extra tablespoon of sugar to the filling.
  • Test for doneness: The cobbler is ready when the topping is firm to the touch and a toothpick inserted comes out clean.

Variations and Substitutions

This recipe is wonderfully adaptable. Here are some delicious twists to try:

  • Mixed berry cobbler: Swap half the blueberries for raspberries, blackberries, or strawberries.
  • Gluten-free option: Use a 1:1 gluten-free flour blend in place of all-purpose flour.
  • Vegan version: Substitute plant-based butter and almond milk, and use a flax egg if needed.
  • Spiced cobbler: Add a pinch of cinnamon or nutmeg to the filling for warmth.
  • Citrus twist: Replace lemon with orange zest and juice for a different flavor profile.

What to Serve With It

Blueberry cobbler is delicious on its own, but these pairings make it even better:

  • Vanilla ice cream: The classic pairing—warm cobbler with cold, creamy ice cream is unbeatable.
  • Whipped cream: Light and fluffy, it adds a luxurious touch.
  • Greek yogurt: A tangy, protein-rich alternative for breakfast or brunch.
  • Hot coffee or tea: The perfect beverage to balance the sweetness.
  • Fresh mint: A garnish that adds color and a refreshing contrast.

How to Store and Reheat

To keep your blueberry cobbler tasting fresh:

  • Room temperature: Cover loosely with foil and store for up to 2 days.
  • Refrigerate: For longer storage, refrigerate in an airtight container for up to 5 days.
  • Freeze: Wrap tightly and freeze for up to 3 months. Thaw overnight in the fridge before reheating.
  • Reheating: Warm individual portions in the microwave for 30 seconds, or reheat the whole dish in a 350°F oven for 10–15 minutes.

Frequently Asked Questions (FAQs)

Here are answers to common questions about making blueberry cobbler:

  • Can I use frozen blueberries? Absolutely. Just toss them in frozen—no need to thaw, as they’ll release too much liquid.
  • Why is my cobbler soggy? This usually happens if the filling isn’t thick enough. Ensure you’re using the right amount of cornstarch and let the cobbler cool slightly before serving.
  • Can I make this ahead of time? Yes! Assemble the cobbler and refrigerate it unbaked for up to 24 hours. Bake just before serving.
  • What’s the difference between cobbler and crisp? Cobblers have a biscuit-like topping, while crisps use a streusel made with oats.
  • Can I use a different fruit? Definitely. Peaches, apples, or cherries work wonderfully with this same method.

Final Thoughts

Blueberry cobbler is one of those desserts that feels like a celebration of simplicity. It’s humble yet deeply satisfying, and it has a way of bringing people together. Whether you’re baking it for a special occasion or just because, I hope this recipe becomes a staple in your kitchen. Don’t be afraid to make it your own—add a splash of bourbon to the filling, experiment with different berries, or serve it with a dollop of homemade whipped cream. No matter how you enjoy it, this blueberry cobbler is sure to become a beloved favorite.

Print
clock clock iconcutlery cutlery iconflag flag iconfolder folder iconinstagram instagram iconpinterest pinterest iconfacebook facebook iconprint print iconsquares squares iconheart heart iconheart solid heart solid icon

Classic Blueberry Cobbler

  • Author: Jane Doe

Description

A warm and comforting blueberry cobbler with a golden biscuit topping. Perfect for summer when blueberries are at their peak, but delicious any time of year with frozen berries.


Ingredients

Scale

For the Crust:

  • For the filling:
  • 6 cups fresh or frozen blueberries
  • 1/2 cup granulated sugar
  • 1 tablespoon lemon juice
  • 1 teaspoon lemon zest
  • 2 tablespoons cornstarch
  • For the topping:
  • 1 1/2 cups all-purpose flour
  • 1/2 cup granulated sugar
  • 1 1/2 teaspoons baking powder
  • 1/2 teaspoon salt
  • 6 tablespoons cold unsalted butter, cubed
  • 3/4 cup buttermilk
  • 1 teaspoon vanilla extract
  • For garnish:
  • Vanilla ice cream or whipped cream (optional)

Instructions

1. Prepare the Crust:

  1. 1. Preheat oven to 375°F (190°C). Grease a 9×13-inch baking dish.
  2. 2. Make the filling: In a large bowl, gently toss blueberries with sugar, lemon juice, lemon zest, and cornstarch until well coated. Transfer to prepared baking dish.
  3. 3. Make the topping: In a medium bowl, whisk together flour, sugar, baking powder, and salt. Cut in butter with a pastry cutter or fingers until mixture resembles coarse crumbs.
  4. 4. Stir in buttermilk and vanilla just until dough comes together (don’t overmix).
  5. 5. Drop spoonfuls of dough over blueberry filling, covering most of the surface but leaving some gaps.
  6. 6. Bake for 35-45 minutes until topping is golden and filling is bubbly.
  7. 7. Let cool for 15 minutes before serving. Serve warm with ice cream or whipped cream if desired.

Notes

For best results, use fresh blueberries in season. If using frozen, don’t thaw first – just increase baking time by 5-10 minutes. The cobbler can be stored covered at room temperature for 1 day or refrigerated for up to 3 days.

Garlic Shrimp Pasta

Garlic Shrimp Pasta

There’s something undeniably comforting about a bowl of perfectly cooked pasta tossed with plump, garlicky shrimp. This garlic shrimp pasta recipe is a weeknight lifesaver, a date night showstopper, and a guaranteed crowd-pleaser all in one. With its rich, buttery sauce infused with garlic and a hint of lemon, it’s a dish that feels indulgent yet comes together in under 30 minutes. Whether you’re cooking for yourself or hosting a dinner party, this recipe will never disappoint.

Why You’ll Love This Recipe

If you’re still on the fence about making this garlic shrimp pasta, let me give you a few reasons why it deserves a spot in your recipe rotation.

  • Quick and Easy: From prep to plate, this dish takes less than 30 minutes, making it perfect for busy weeknights.
  • Restaurant-Quality Flavor: The combination of garlic, butter, and white wine creates a sauce that tastes like it came from a high-end Italian restaurant.
  • Versatile: You can customize it with different herbs, spices, or even a splash of cream for extra richness.
  • Impressive Yet Simple: The dish looks elegant enough to serve at a dinner party but is straightforward enough for a casual family meal.
  • Balanced and Fresh: The bright acidity from lemon and parsley keeps the dish from feeling too heavy, making it a well-rounded meal.

Ingredients Breakdown

Every great dish starts with quality ingredients, and this garlic shrimp pasta is no exception. Here’s what you’ll need and why each component matters.

  • Shrimp: Opt for large, peeled, and deveined shrimp for the best texture. Wild-caught shrimp tend to have better flavor.
  • Pasta: Linguine or spaghetti works best, as their shape holds the sauce beautifully. Fresh pasta can be used for an even quicker cook time.
  • Garlic: Freshly minced garlic is non-negotiable here—it’s the star of the dish.
  • Butter and Olive Oil: A combination of both ensures richness without overpowering the delicate shrimp.
  • White Wine: A dry white wine like Pinot Grigio or Sauvignon Blanc adds depth to the sauce. If you don’t cook with wine, substitute with chicken broth.
  • Lemon Juice and Zest: Brightens the dish and balances the richness of the butter.
  • Fresh Parsley: Adds a pop of color and freshness.
  • Red Pepper Flakes: Optional, but a pinch adds a subtle kick.

How to Make Garlic Shrimp Pasta

Now, let’s dive into the step-by-step process of making this irresistible garlic shrimp pasta.

  1. Prep the Shrimp: Pat the shrimp dry with paper towels to ensure they sear properly. Season lightly with salt and pepper.
  2. Cook the Pasta: Bring a large pot of salted water to a boil and cook the pasta until al dente. Reserve about ½ cup of pasta water before draining.
  3. Sauté the Shrimp: Heat olive oil and butter in a large skillet over medium-high heat. Add the shrimp in a single layer and cook for 1-2 minutes per side until pink and opaque. Remove and set aside.
  4. Make the Garlic Sauce: In the same skillet, add more butter if needed, then sauté the minced garlic and red pepper flakes for about 30 seconds until fragrant. Deglaze with white wine, scraping up any browned bits.
  5. Combine Everything: Add the cooked pasta to the skillet, tossing to coat in the sauce. If the sauce is too thick, add a splash of reserved pasta water. Stir in the shrimp, lemon juice, and zest.
  6. Finish with Fresh Herbs: Sprinkle chopped parsley over the top and give everything one final toss before serving.

Pro Tips for the Best Results

To take your garlic shrimp pasta from good to unforgettable, keep these expert tips in mind.

  • Don’t Overcook the Shrimp: Shrimp cook quickly and can become rubbery if left too long in the pan. Remove them as soon as they turn pink.
  • Use Pasta Water: The starchy pasta water helps bind the sauce to the noodles, creating a silky texture.
  • Fresh Garlic Only: Pre-minced garlic lacks the punch of freshly minced cloves. Take the extra minute to mince it yourself.
  • Let the Wine Simmer: If using wine, let it reduce slightly before adding the pasta to cook off the alcohol and concentrate the flavor.
  • Season in Layers: Lightly season the shrimp, then adjust the final dish with salt and pepper as needed.

Variations and Substitutions

This recipe is wonderfully adaptable. Here are a few ways to make it your own.

  • Add Vegetables: Spinach, cherry tomatoes, or asparagus can be sautéed with the garlic for extra nutrition.
  • Creamy Version: Stir in a splash of heavy cream or a dollop of mascarpone for a richer sauce.
  • Gluten-Free: Use gluten-free pasta and ensure all other ingredients are gluten-free compliant.
  • Spicier Kick: Increase the red pepper flakes or add a drizzle of chili oil before serving.
  • Protein Swap: Replace shrimp with scallops or chicken for a different twist.

What to Serve With It

While this garlic shrimp pasta is a complete meal on its own, here are a few pairing ideas to round out your dinner.

  • Side Salad: A simple arugula salad with lemon vinaigrette adds freshness.
  • Garlic Bread: Perfect for soaking up any extra sauce.
  • White Wine: Serve with the same wine used in the recipe for a harmonious pairing.
  • Roasted Vegetables: Broccoli or zucchini roasted with olive oil and herbs make a great side.

How to Store and Reheat

Leftovers are rare with this dish, but if you do have some, here’s how to keep them tasting great.

  • Refrigeration: Store in an airtight container for up to 2 days.
  • Reheating: Gently warm in a skillet with a splash of water or broth to loosen the sauce. Microwaving can dry out the shrimp.
  • Freezing: Not recommended, as the shrimp may become tough upon thawing.

Frequently Asked Questions (FAQs)

Here are answers to some common questions about making garlic shrimp pasta.

  • Can I use frozen shrimp? Yes, just thaw them completely and pat dry before cooking to avoid excess moisture.
  • What if I don’t have white wine? Substitute with chicken or vegetable broth, or even a splash of lemon juice mixed with water.
  • How do I prevent the garlic from burning? Keep the heat at medium and stir constantly—garlic burns quickly.
  • Can I make this ahead of time? It’s best served fresh, but you can prep ingredients in advance for quicker assembly.
  • Is this dish kid-friendly? Absolutely! Skip the red pepper flakes if serving to little ones.

Final Thoughts

Garlic shrimp pasta is one of those dishes that never fails to impress, yet it’s so simple to make. Whether you’re cooking for a special occasion or just craving a comforting meal, this recipe delivers every time. The key is using fresh, quality ingredients and not overcomplicating the process. So grab your skillet, pour yourself a glass of wine, and enjoy the magic of this classic dish. Trust me, your taste buds will thank you.

Print
clock clock iconcutlery cutlery iconflag flag iconfolder folder iconinstagram instagram iconpinterest pinterest iconfacebook facebook iconprint print iconsquares squares iconheart heart iconheart solid heart solid icon

Garlic Shrimp Pasta

  • Author: Chef Maria

Description

A creamy and garlicky shrimp pasta dish that’s quick to make and packed with flavor. Perfect for a weeknight dinner or special occasion.


Ingredients

Scale

For the Crust:

  • For the pasta:
  • 8 oz linguine or spaghetti
  • 2 tbsp salt (for pasta water)
  • For the shrimp:
  • 1 lb large shrimp, peeled and deveined
  • 1 tsp salt
  • 1/2 tsp black pepper
  • 1/2 tsp paprika
  • For the sauce:
  • 3 tbsp unsalted butter
  • 4 cloves garlic, minced
  • 1/2 cup heavy cream
  • 1/2 cup chicken broth
  • 1/4 cup grated parmesan cheese
  • 1/4 tsp red pepper flakes (optional)
  • For garnish:
  • 2 tbsp chopped fresh parsley
  • Lemon wedges

Instructions

1. Prepare the Crust:

  1. 1. Cook pasta according to package instructions in salted water until al dente. Reserve 1/2 cup pasta water before draining.
  2. 2. While pasta cooks, season shrimp with salt, pepper, and paprika.
  3. 3. In a large skillet, melt 1 tbsp butter over medium-high heat. Add shrimp and cook 1-2 minutes per side until pink. Remove and set aside.
  4. 4. In same skillet, melt remaining butter. Add garlic and sauté 30 seconds until fragrant.
  5. 5. Stir in heavy cream, chicken broth, and red pepper flakes. Simmer 2-3 minutes until slightly thickened.
  6. 6. Reduce heat to low, stir in parmesan until melted. Add cooked pasta and toss to coat, adding reserved pasta water as needed.
  7. 7. Return shrimp to skillet and gently toss. Garnish with parsley and serve with lemon wedges.

Notes

For extra richness, substitute 1/4 cup of the heavy cream with cream cheese. Frozen shrimp works well – just thaw completely before cooking. Leftovers keep refrigerated for 2 days.