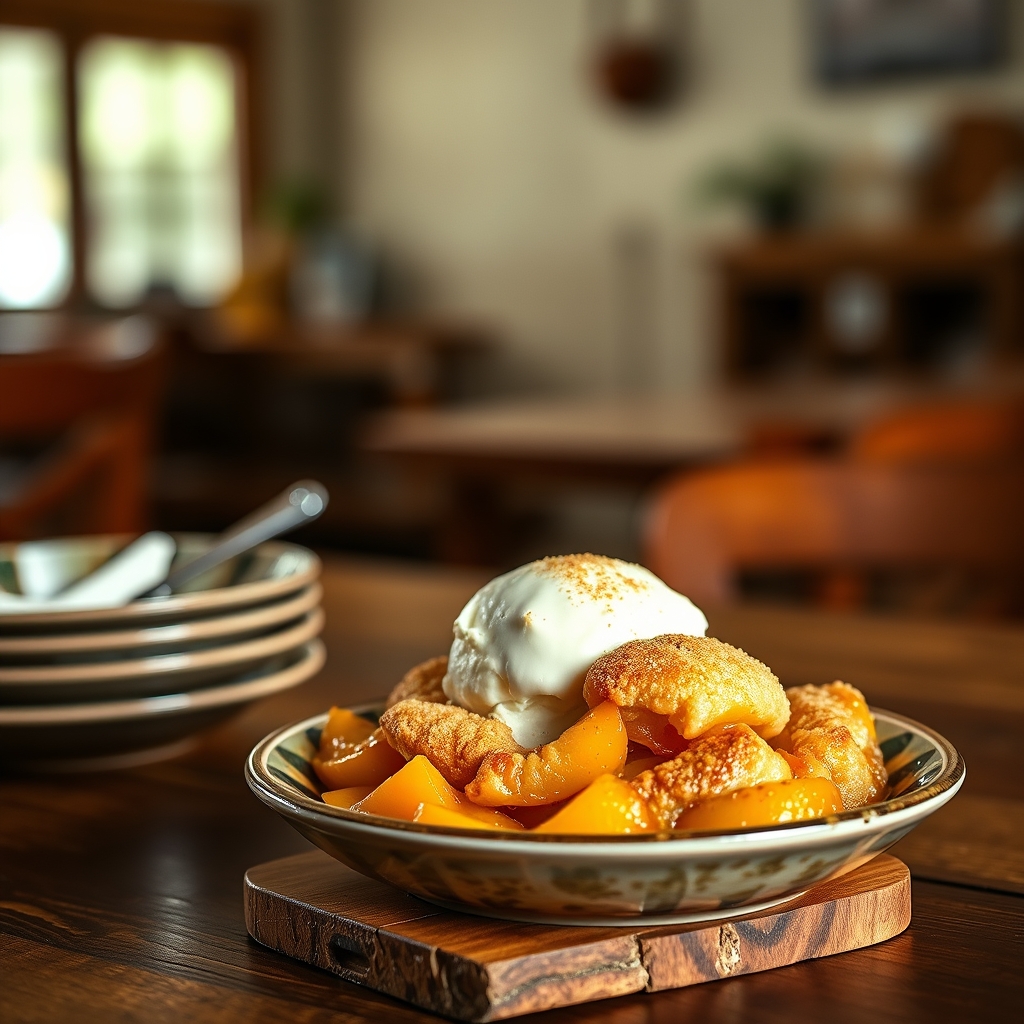
Old-Time Oven Peach Cobbler
There’s something undeniably comforting about a warm, bubbling peach cobbler fresh from the oven. This old-time oven peach cobbler recipe is a nostalgic nod to simpler days, where ripe summer peaches met a buttery, golden crust in a symphony of flavors. Whether you’re serving it at a family gathering or enjoying it as a sweet ending to a weeknight meal, this dessert is a timeless classic that never fails to delight. Let’s dive into why this recipe is a must-try and how you can make it perfectly every time.
Why You’ll Love This Recipe
First, this old-fashioned peach cobbler is effortlessly delicious. With just a handful of pantry staples and fresh peaches, you can create a dessert that tastes like it took hours to prepare. The simplicity is part of its charm.
Second, the texture is divine. The juicy peaches soften into a luscious filling while the topping bakes into a tender, slightly crisp crust. Every bite is a perfect balance of sweet fruit and buttery dough.
Third, it’s incredibly versatile. Serve it warm with a scoop of vanilla ice cream for a decadent treat, or enjoy it at room temperature with a dollop of whipped cream. It’s equally fitting for a casual backyard barbecue or an elegant dinner party.
Finally, this recipe is a crowd-pleaser. Whether you’re baking for kids or adults, the familiar flavors of cinnamon, brown sugar, and fresh peaches make it universally loved.
Ingredients Breakdown
Let’s take a closer look at the key ingredients that make this old-time oven peach cobbler so special:
- Fresh Peaches – The star of the show. Ripe, juicy peaches provide natural sweetness and a soft texture. If fresh peaches aren’t in season, frozen or canned peaches (drained) can work in a pinch.
- Granulated Sugar & Brown Sugar – A combination of both sugars enhances the depth of flavor. Brown sugar adds a subtle caramel note that complements the peaches beautifully.
- All-Purpose Flour – The base of the cobbler topping, giving it structure and a tender crumb.
- Unsalted Butter – Melted butter adds richness to the batter and helps create a golden, slightly crisp crust.
- Baking Powder & Salt – These ensure the topping rises lightly and balances the sweetness.
- Ground Cinnamon & Vanilla Extract – Warm spices and vanilla elevate the peaches, adding aromatic depth.
- Milk – Helps bind the batter and keeps the topping moist.
How to Make Old-Time Oven Peach Cobbler
Follow these step-by-step instructions for a foolproof peach cobbler that will have everyone asking for seconds.
Step 1: Prepare the Peaches
Start by peeling and slicing 4-5 large peaches (about 4 cups). Toss them with ½ cup granulated sugar, ¼ cup brown sugar, 1 teaspoon cinnamon, and 1 teaspoon vanilla extract. Let them sit for 10 minutes to release their juices.
Step 2: Make the Cobbler Batter
In a mixing bowl, whisk together 1 cup all-purpose flour, 1 cup granulated sugar, 2 teaspoons baking powder, and a pinch of salt. Stir in ¾ cup milk and ½ cup melted butter until just combined. The batter will be thick but pourable.
Step 3: Assemble and Bake
Pour the batter into a greased 9×13-inch baking dish. Spoon the peach mixture evenly over the batter—do not stir. The peaches will sink slightly as they bake, creating a layered effect. Bake at 375°F for 40-45 minutes, or until the top is golden and a toothpick inserted comes out clean.
Step 4: Serve Warm
Let the cobbler cool for 10 minutes before serving. The filling will thicken slightly as it rests. For the best experience, top with vanilla ice cream or freshly whipped cream.
Pro Tips for the Best Results
- Use ripe but firm peaches – Overly soft peaches can turn mushy, while underripe ones won’t be as sweet.
- Don’t overmix the batter – A few lumps are fine. Overmixing can make the topping dense.
- Adjust sweetness to taste – If your peaches are very sweet, reduce the sugar slightly. Tart peaches may need a bit more.
- Bake until deeply golden – The edges should be slightly crisp for the best texture.
Variations and Substitutions
This recipe is wonderfully adaptable. Here are a few ways to make it your own:
- Gluten-Free – Swap all-purpose flour for a 1:1 gluten-free baking blend.
- Dairy-Free – Use almond milk and vegan butter instead of traditional dairy.
- Add Nuts – Sprinkle chopped pecans or almonds over the top before baking for extra crunch.
- Spiced Version – Add a pinch of nutmeg or cardamom to the peaches for a warm, aromatic twist.
What to Serve With It
Old-time oven peach cobbler is delightful on its own, but pairing it with the right accompaniments can take it to the next level:
- A scoop of vanilla bean ice cream melts into the warm cobbler, creating a creamy contrast.
- Freshly whipped cream or a drizzle of caramel sauce adds an extra layer of indulgence.
- For a brunch twist, serve it alongside a cup of hot coffee or iced tea.
How to Store and Reheat
Leftovers (if you have any!) can be stored covered in the refrigerator for up to 3 days. To reheat, place individual portions in the microwave for 30-45 seconds or warm the entire dish in a 300°F oven for 10-15 minutes. For longer storage, freeze the cobbler in an airtight container for up to 2 months. Thaw overnight in the fridge before reheating.
Frequently Asked Questions (FAQs)
Can I use canned peaches instead of fresh?
Yes, you can substitute canned peaches. Drain them well and pat dry to avoid excess liquid in the filling.
Why does my cobbler sink in the middle?
This can happen if the batter is overmixed or if the oven temperature is too low. Make sure your baking powder is fresh and your oven is properly preheated.
Can I make this ahead of time?
While best served fresh, you can prepare the peach mixture and batter separately a few hours in advance. Assemble just before baking.
How do I prevent a soggy bottom?
Ensure your baking dish is properly greased and that the peaches aren’t overly juicy. Letting the cobbler rest before serving also helps the filling set.
Final Thoughts
There’s a reason this old-time oven peach cobbler has stood the test of time. It’s simple, satisfying, and brimming with the flavors of summer. Whether you’re baking it for a special occasion or just because, it’s a dessert that brings people together. So preheat that oven, grab your peaches, and get ready to enjoy a slice of homemade comfort. Happy baking!
Print
Old-Time Oven Peach Cobbler
Description
A classic Southern peach cobbler with a buttery crust and juicy peach filling, baked to golden perfection. This comforting dessert is best served warm with a scoop of vanilla ice cream.
Ingredients
For the Crust:
- For the peach filling:
- 6 cups fresh peaches, peeled and sliced (about 8 medium peaches)
- 3/4 cup granulated sugar
- 1/4 cup brown sugar
- 1 tablespoon lemon juice
- 1 teaspoon vanilla extract
- 1/2 teaspoon ground cinnamon
- 1/4 teaspoon ground nutmeg
- 2 tablespoons cornstarch
- For the cobbler crust:
- 1 cup all-purpose flour
- 1/2 cup granulated sugar
- 1 teaspoon baking powder
- 1/4 teaspoon salt
- 1/2 cup unsalted butter, melted
- 1/2 cup milk
- 1 teaspoon vanilla extract
- For topping:
- 1 tablespoon coarse sugar (optional)
- 1/2 teaspoon ground cinnamon (optional)
Instructions
1. Prepare the Crust:
- 1. Preheat oven to 375°F (190°C). Grease a 9×13-inch baking dish.
- 2. Make the peach filling: In a large bowl, combine peaches, sugars, lemon juice, vanilla, cinnamon, and nutmeg. Let sit for 15 minutes, then stir in cornstarch.
- 3. Pour peach mixture into prepared baking dish and bake for 10 minutes.
- 4. Meanwhile, make the crust: Whisk together flour, sugar, baking powder, and salt in a medium bowl.
- 5. Stir in melted butter, milk, and vanilla until just combined.
- 6. Remove peaches from oven and drop spoonfuls of batter over the hot peaches. Spread gently to mostly cover.
- 7. If desired, mix coarse sugar with cinnamon and sprinkle over batter.
- 8. Bake 35-40 minutes until golden brown and bubbly. Let cool 15 minutes before serving.
Notes
For best results, use ripe but firm peaches. Frozen peaches can be substituted – thaw and drain first. The cobbler thickens as it cools. Store leftovers covered at room temperature for up to 2 days.