Creamy Deviled Egg Potato Salad

Creamy Deviled Egg Potato Salad

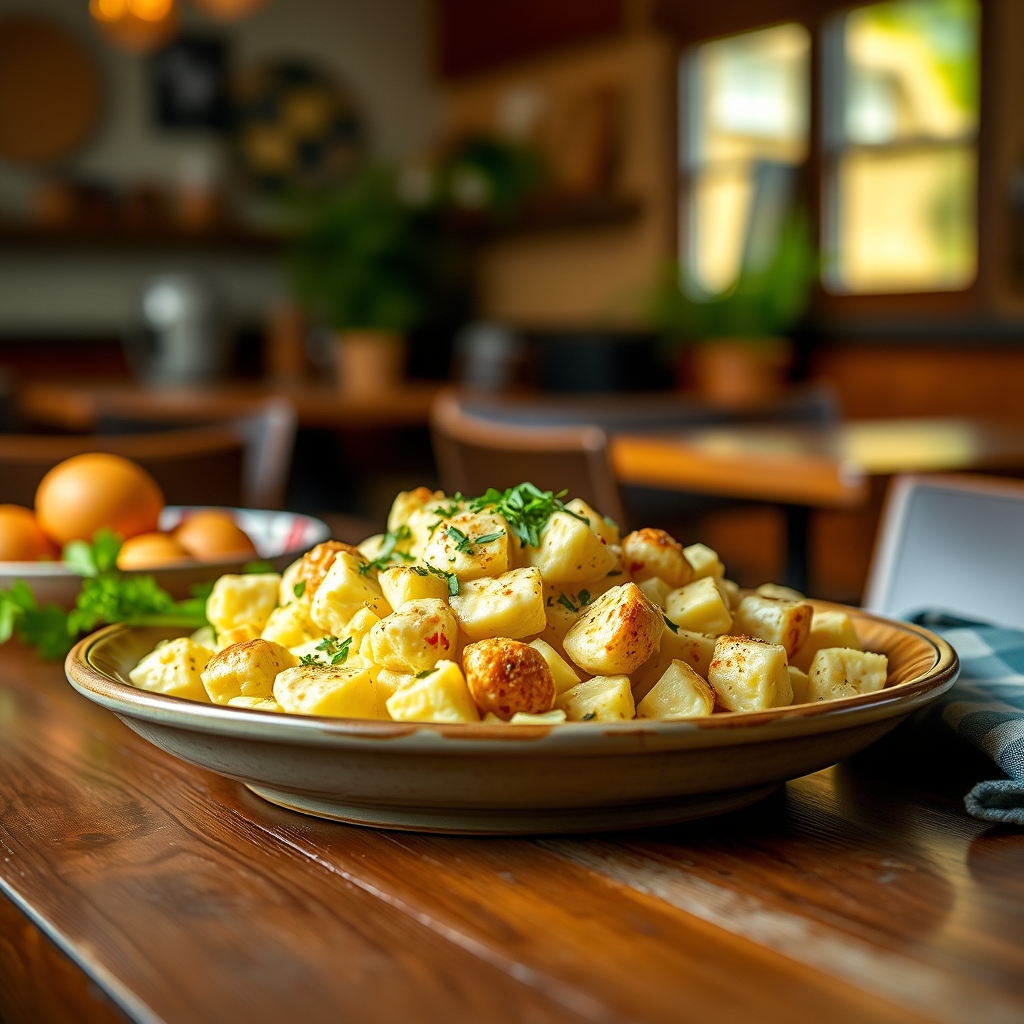
There’s something magical about combining two classic dishes into one unforgettable side. This Creamy Deviled Egg Potato Salad is the perfect marriage of velvety deviled eggs and hearty potato salad, creating a dish that’s rich, tangy, and packed with flavor. Whether you’re hosting a summer barbecue, a holiday gathering, or simply craving comfort food, this recipe delivers a creamy, satisfying bite every time. Let’s dive into why this dish deserves a spot on your table.

Why You’ll Love This Recipe

First, this isn’t just any potato salad—it’s a deviled egg potato salad, which means it brings the best of both worlds. The creamy, slightly tangy filling from deviled eggs blends seamlessly with tender potatoes, creating a texture that’s irresistibly smooth yet satisfyingly chunky.

Second, it’s incredibly versatile. Serve it warm, cold, or at room temperature—it’s delicious no matter how you present it. This makes it perfect for picnics, potlucks, or even meal prep for the week.

Third, the flavors are perfectly balanced. The mustard and vinegar add a subtle tang, while the mayonnaise and egg yolks create a luscious creaminess. Every bite is a harmonious blend of savory, tangy, and slightly sweet.

Finally, it’s a crowd-pleaser. Whether you’re serving it at a family reunion or a casual weeknight dinner, this dish disappears fast. It’s nostalgic enough to remind you of grandma’s cooking but unique enough to feel fresh and exciting.

Ingredients Breakdown

To make this creamy deviled egg potato salad, you’ll need a mix of pantry staples and fresh ingredients. Here’s why each one matters:

  • Yukon Gold potatoes – Their buttery texture and thin skins make them ideal for potato salad. They hold their shape while still being tender.
  • Hard-boiled eggs – The star of the deviled egg component. The yolks blend into the dressing for richness, while the whites add protein and texture.
  • Mayonnaise – The base of the creamy dressing, providing smoothness and depth.
  • Dijon mustard – Adds a sharp, tangy kick that balances the richness of the mayo and eggs.
  • Apple cider vinegar – A touch of acidity brightens the flavors and keeps the salad from feeling too heavy.
  • Sweet relish – Brings a hint of sweetness and crunch, tying all the flavors together.
  • Paprika and chives – For garnish, adding color and a subtle smoky or fresh oniony finish.

How to Make Creamy Deviled Egg Potato Salad

Follow these steps for a foolproof, creamy potato salad with deviled egg flair:

  1. Cook the potatoes. Start by cubing the Yukon Gold potatoes into even, bite-sized pieces. Boil them in salted water until fork-tender, about 10-12 minutes. Drain and let them cool slightly.
  2. Prepare the hard-boiled eggs. While the potatoes cook, peel and chop the hard-boiled eggs, separating the yolks from the whites. Set aside the whites for later.
  3. Make the deviled egg dressing. Mash the egg yolks with mayonnaise, Dijon mustard, apple cider vinegar, sweet relish, salt, and pepper until smooth and creamy.
  4. Combine everything. Gently fold the cooked potatoes, chopped egg whites, and dressing together in a large bowl. Be careful not to overmix—you want to keep some texture.
  5. Chill and garnish. Refrigerate for at least an hour to let the flavors meld. Before serving, sprinkle with paprika and fresh chives for a pop of color.

Pro Tips for the Best Results

  • Don’t overcook the potatoes. They should be tender but still hold their shape when mixed.
  • Use room-temperature eggs for boiling. They peel more easily than cold eggs straight from the fridge.
  • Adjust the tanginess. If you prefer a sharper flavor, add a little extra mustard or vinegar.
  • Let it rest before serving. Chilling allows the flavors to develop fully.

Variations and Substitutions

This recipe is flexible, so feel free to tweak it to your taste:

  • For a lighter version, swap half the mayo with Greek yogurt.
  • Add crunch with diced celery, red onion, or pickles.
  • Spice it up with a dash of hot sauce or cayenne pepper.
  • Make it vegan by using mashed avocado instead of egg yolks and a plant-based mayo.

What to Serve With It

This deviled egg potato salad pairs beautifully with grilled meats like barbecue ribs, smoked chicken, or burgers. For a lighter meal, serve it alongside a fresh green salad or grilled vegetables. It’s also fantastic as part of a brunch spread with quiche or fried chicken.

How to Store and Reheat

Store leftovers in an airtight container in the refrigerator for up to 3 days. This salad is best served cold, so reheating isn’t necessary. If you prefer it slightly warmer, let it sit at room temperature for about 15 minutes before serving. Avoid freezing, as the texture of the potatoes and mayo can become grainy.

Frequently Asked Questions (FAQs)

Can I use red potatoes instead of Yukon Gold? Yes, red potatoes work well, but their texture is slightly waxier. Russet potatoes are too starchy and may fall apart.

How far in advance can I make this? You can prepare it up to 24 hours ahead. The flavors deepen as it sits, making it even tastier the next day.

What if I don’t have sweet relish? Dill relish or finely chopped pickles can be used instead, though the flavor will be more tangy than sweet.

Final Thoughts

This Creamy Deviled Egg Potato Salad is more than just a side dish—it’s a conversation starter, a comfort food staple, and a guaranteed hit at any gathering. The creamy texture, the tangy-sweet dressing, and the hearty potatoes make it a dish you’ll crave again and again. Whether you’re making it for a special occasion or just because, I hope it brings as much joy to your table as it does to mine. Happy cooking!

Print
clock clock iconcutlery cutlery iconflag flag iconfolder folder iconinstagram instagram iconpinterest pinterest iconfacebook facebook iconprint print iconsquares squares iconheart heart iconheart solid heart solid icon

Creamy Deviled Egg Potato Salad

  • Author: Classic Comfort Kitchen

Description

A rich and tangy potato salad that combines the creaminess of deviled eggs with tender potatoes for the ultimate picnic side dish. Perfect for BBQs, potlucks, or family gatherings.


Ingredients

Scale

For the Crust:

  • For the salad:
  • 2 lbs Yukon Gold potatoes (peeled and cubed)
  • 6 large eggs
  • 1/2 cup finely diced celery
  • 1/4 cup finely diced red onion
  • 2 tbsp chopped fresh dill (or 1 tbsp dried)
  • For the dressing:
  • 1/2 cup mayonnaise
  • 2 tbsp yellow mustard
  • 1 tbsp apple cider vinegar
  • 1 tsp sugar
  • 1/2 tsp paprika
  • 1/4 tsp garlic powder
  • Salt and black pepper to taste
  • For garnish:
  • Extra paprika or fresh dill

Instructions

1. Prepare the Crust:

  1. 1. Place potatoes in a large pot, cover with cold water, and bring to a boil. Cook for 10-12 minutes until fork-tender. Drain and let cool slightly.
  2. 2. Meanwhile, hard-boil eggs: cover eggs with water in a saucepan, bring to a boil, then remove from heat, cover, and let sit for 12 minutes. Transfer to ice water to cool, then peel and chop.
  3. 3. In a large bowl, whisk together all dressing ingredients until smooth.
  4. 4. Gently fold in slightly warm potatoes, chopped eggs, celery, red onion, and dill until evenly coated.
  5. 5. Cover and refrigerate for at least 2 hours (preferably overnight) to allow flavors to meld.
  6. 6. Before serving, sprinkle with additional paprika or dill for presentation.

Notes

For best texture, don’t overcook potatoes. For a smokier flavor, substitute 1 tsp smoked paprika in the dressing. Leftovers keep for 3-4 days refrigerated.
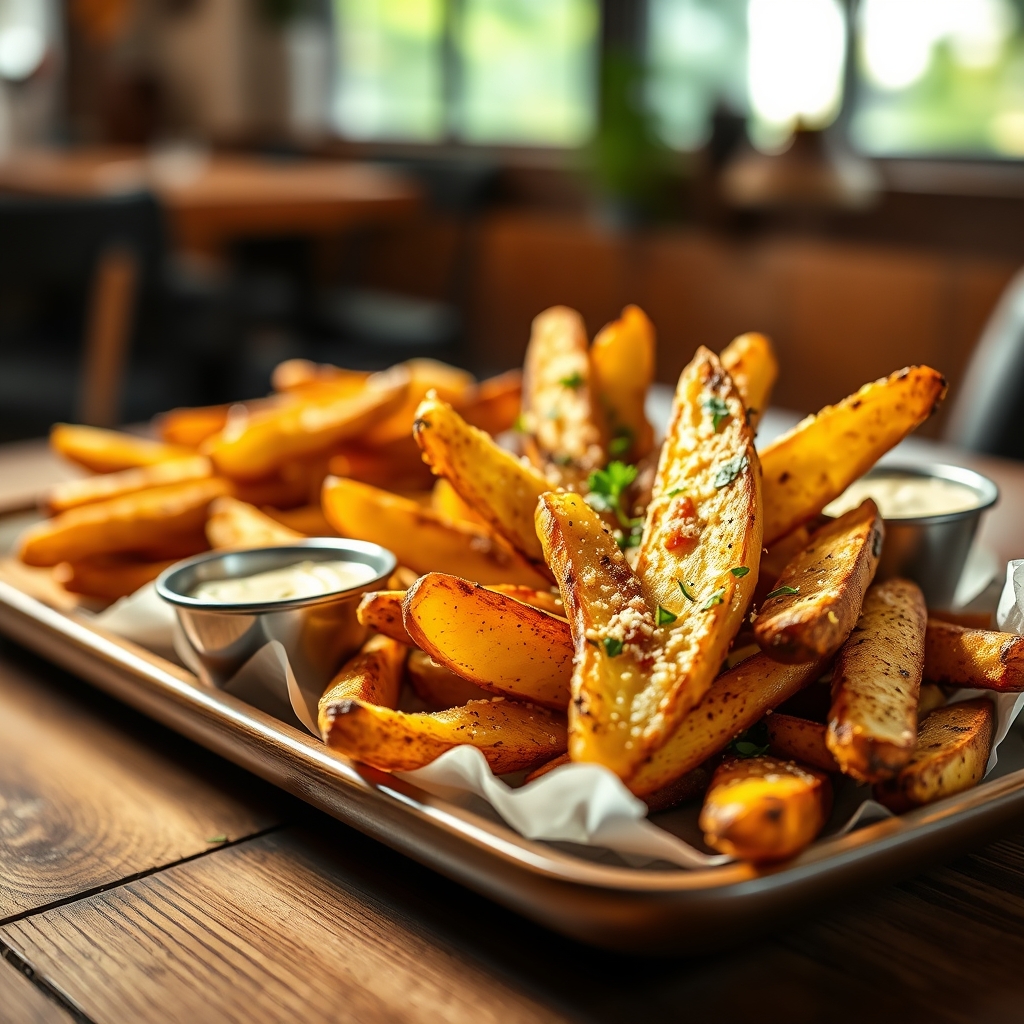
Garlic Parmesan Potato Wedges

Garlic Parmesan Potato Wedges

There’s something undeniably comforting about crispy, golden potato wedges straight out of the oven. But when you toss them with garlic, Parmesan, and a hint of herbs, they transform into something truly irresistible. Whether you’re hosting a game night, looking for a side dish to elevate weeknight dinners, or simply craving a savory snack, these Garlic Parmesan Potato Wedges are the answer. They’re easy to make, packed with flavor, and guaranteed to disappear fast.

Why You’ll Love This Recipe

If you’re still on the fence about whether to make these Garlic Parmesan Potato Wedges, let me give you a few reasons why they deserve a spot on your table.

  • Perfect Texture: Crispy on the outside, tender on the inside—these wedges strike the ideal balance.
  • Bold Flavor: The combination of garlic, Parmesan, and herbs creates a savory, umami-rich bite every time.
  • Versatile: Serve them as an appetizer, side dish, or even a snack with your favorite dipping sauce.
  • Easy to Make: With just a handful of ingredients and minimal prep, this recipe is foolproof.
  • Crowd-Pleasing: Whether for family dinners or parties, these wedges are always a hit.

Ingredients Breakdown

Let’s take a closer look at the key ingredients that make these Garlic Parmesan Potato Wedges so delicious.

  • Russet Potatoes: Their high starch content ensures a fluffy interior and crispy exterior.
  • Olive Oil: Helps crisp up the wedges while adding a rich, savory note.
  • Garlic: Fresh minced garlic infuses the wedges with aromatic depth.
  • Parmesan Cheese: Adds a salty, nutty flavor and helps create a golden crust.
  • Italian Seasoning: A blend of dried herbs like oregano, basil, and thyme enhances the overall taste.
  • Salt & Black Pepper: Essential for seasoning and balancing the flavors.

How to Make Garlic Parmesan Potato Wedges

Follow these simple steps to achieve perfectly crispy, flavorful wedges every time.

  1. Prep the Potatoes: Scrub the potatoes clean and cut them into even wedges. Leaving the skin on adds texture and nutrients.
  2. Soak the Wedges: Soak the wedges in cold water for 20-30 minutes to remove excess starch, which helps them crisp up better.
  3. Dry Thoroughly: Pat the wedges completely dry with a kitchen towel to ensure maximum crispiness.
  4. Toss with Oil & Seasonings: In a large bowl, toss the wedges with olive oil, minced garlic, Italian seasoning, salt, and black pepper.
  5. Arrange on a Baking Sheet: Spread the wedges in a single layer on a parchment-lined baking sheet, ensuring they don’t overlap.
  6. Bake Until Golden: Bake at 425°F for 25-30 minutes, flipping halfway through, until crispy and golden brown.
  7. Sprinkle with Parmesan: Immediately after baking, sprinkle the wedges with freshly grated Parmesan for a melty, savory finish.

Pro Tips for the Best Results

Want to take your Garlic Parmesan Potato Wedges to the next level? Try these expert tips.

  • Use Freshly Grated Parmesan: Pre-shredded cheese contains anti-caking agents that can affect melting. Freshly grated Parmesan delivers better flavor and texture.
  • Don’t Skip the Soaking Step: Soaking removes excess starch, preventing soggy wedges and ensuring crispiness.
  • Flip for Even Browning: Flipping the wedges halfway through baking ensures they cook evenly on all sides.
  • Add a Spicy Kick: For a little heat, sprinkle with red pepper flakes or smoked paprika before baking.
  • Broil for Extra Crispiness: If you want an extra crunch, broil the wedges for the last 2-3 minutes of baking.

Variations and Substitutions

Feel free to customize these wedges to suit your taste or dietary needs.

  • Cheese Alternatives: Swap Parmesan for Pecorino Romano or Asiago for a different flavor profile.
  • Herb Variations: Use rosemary, thyme, or smoked paprika instead of Italian seasoning.
  • Gluten-Free Option: This recipe is naturally gluten-free, but always check seasoning blends for hidden gluten.
  • Dairy-Free Version: Skip the Parmesan or use a dairy-free alternative like nutritional yeast.
  • Sweet Potato Wedges: Substitute russet potatoes with sweet potatoes for a slightly sweeter, nutrient-rich twist.

What to Serve With It

These Garlic Parmesan Potato Wedges pair beautifully with a variety of dishes.

  • Dipping Sauces: Try them with garlic aioli, ranch, spicy ketchup, or chipotle mayo.
  • Main Dishes: Serve alongside grilled chicken, steak, burgers, or fish for a hearty meal.
  • Salads: Balance the richness with a crisp Caesar salad or a fresh arugula salad.
  • Appetizer Spread: Include them in a game-day spread with wings, nachos, and sliders.
  • Brunch Option: Pair with eggs and bacon for a savory brunch side.

How to Store and Reheat

If you have leftovers (which is rare!), here’s how to keep them fresh.

  • Refrigeration: Store cooled wedges in an airtight container for up to 3 days.
  • Freezing: Freeze in a single layer before transferring to a freezer bag for up to 2 months.
  • Reheating: For best results, reheat in the oven at 375°F for 10-15 minutes or in an air fryer for 5-7 minutes to restore crispiness.
  • Microwave Option: While not ideal, microwaving for 1-2 minutes can work in a pinch, though they may lose crispiness.

Frequently Asked Questions (FAQs)

Here are some common questions about making Garlic Parmesan Potato Wedges.

Can I use other types of potatoes?

Yes! While russet potatoes are ideal for their starch content, Yukon Gold or red potatoes can also work, though the texture may be slightly different.

Why are my wedges not crispy?

This usually happens if the wedges are overcrowded on the baking sheet or not dried properly before seasoning. Ensure they’re in a single layer and patted dry.

Can I make these ahead of time?

You can prep the wedges and soak them in water up to a day in advance, but for best results, bake them fresh before serving.

Do I have to peel the potatoes?

No, the skin adds texture and nutrients. Just make sure to scrub them well before cutting.

Can I air-fry these instead?

Absolutely! Air-fry at 400°F for 15-20 minutes, shaking the basket halfway through, for an even crispier result.

Final Thoughts

There’s a reason Garlic Parmesan Potato Wedges are a timeless favorite—they’re simple, satisfying, and packed with flavor. Whether you’re serving them as a side dish, party snack, or indulgent treat, they’re sure to impress. The next time you’re craving something crispy, savory, and downright delicious, give this recipe a try. And don’t be surprised if they become a regular on your menu—they’re that good.

Print
clock clock iconcutlery cutlery iconflag flag iconfolder folder iconinstagram instagram iconpinterest pinterest iconfacebook facebook iconprint print iconsquares squares iconheart heart iconheart solid heart solid icon

Garlic Parmesan Potato Wedges

  • Author: Chef Alex

Description

Crispy on the outside, tender on the inside, these Garlic Parmesan Potato Wedges are the perfect side dish or snack. Loaded with garlicky goodness and topped with freshly grated Parmesan cheese, they’re irresistible!


Ingredients

Scale

For the Crust:

  • For the potato wedges:
  • 4 large russet potatoes
  • 2 tablespoons olive oil
  • 1 teaspoon salt
  • 1/2 teaspoon black pepper
  • For the garlic parmesan topping:
  • 3 cloves garlic, minced
  • 1/4 cup freshly grated Parmesan cheese
  • 2 tablespoons chopped fresh parsley
  • 1/2 teaspoon garlic powder
  • 1/4 teaspoon salt

Instructions

1. Prepare the Crust:

  1. Preheat oven to 400°F (200°C) and line a baking sheet with parchment paper.
  2. Scrub potatoes clean and cut each into 8 wedges.
  3. In a large bowl, toss potato wedges with olive oil, salt, and black pepper until evenly coated.
  4. Arrange wedges in a single layer on the prepared baking sheet, skin side down.
  5. Bake for 35-40 minutes, flipping halfway through, until golden brown and crispy.
  6. While wedges bake, prepare topping by mixing minced garlic, Parmesan, parsley, garlic powder, and salt in a small bowl.
  7. Remove wedges from oven and immediately sprinkle with garlic Parmesan topping.
  8. Serve hot with your favorite dipping sauce.

Notes

For extra crispiness, soak potato wedges in cold water for 30 minutes before baking and pat very dry. Adjust garlic amount to taste. Freshly grated Parmesan works best for melting.

Chocolate Chip Cookie Dough Bars with Ganache

Chocolate Chip Cookie Dough Bars with Ganache

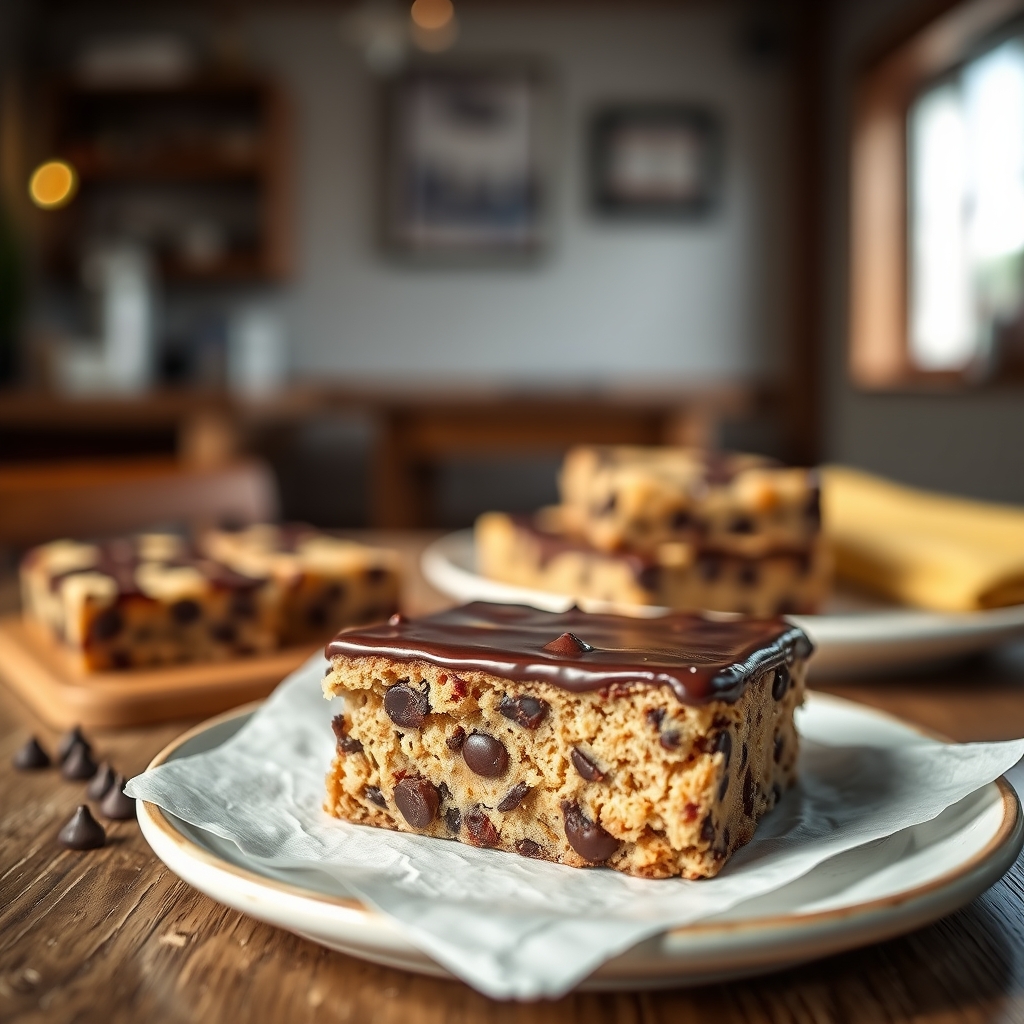
If you’ve ever found yourself sneaking spoonfuls of raw cookie dough straight from the mixing bowl, this recipe is about to become your new obsession. These Chocolate Chip Cookie Dough Bars with Ganache combine the nostalgic joy of edible cookie dough with the luxurious richness of dark chocolate ganache—all in one irresistible dessert bar. Whether you’re prepping for a potluck, satisfying a late-night sweet tooth, or simply treating yourself to something indulgent, these bars deliver on every level. Let’s dive into why this recipe deserves a permanent spot in your dessert rotation.

Why You’ll Love This Recipe

  • No-bake convenience: Skip the oven and enjoy these bars in minutes—perfect for hot summer days or when you need a quick dessert fix.
  • Safe-to-eat cookie dough: Made without eggs or raw flour, this dough is perfectly safe to devour by the spoonful (not that we’d judge).
  • Decadent ganache topping: A silky layer of dark chocolate ganache takes these bars from tasty to extraordinary.
  • Crowd-pleasing appeal: These bars disappear fast at parties, bridging the gap between cookie lovers and chocolate enthusiasts.
  • Customizable: Easily adapt the recipe with different mix-ins or dietary substitutions to suit your preferences.

Ingredients Breakdown

Understanding the role of each ingredient ensures your Chocolate Chip Cookie Dough Bars with Ganache turn out perfectly every time.

  • Butter: Use unsalted butter for better control over sweetness. It provides richness and helps bind the dough.
  • Brown sugar: Adds moisture and that classic caramel-like depth to the cookie dough layer.
  • Vanilla extract: A splash enhances the warm, buttery flavor of the dough.
  • Heat-treated flour: Baking the flour first eliminates any bacteria, making it safe to eat raw.
  • Mini chocolate chips: Their small size distributes evenly throughout the bars for consistent chocolate in every bite.
  • Heavy cream: The base of the ganache, creating a smooth, velvety texture when melted with chocolate.
  • Dark chocolate: Opt for high-quality chocolate (around 60-70% cacao) for a balanced, not-too-sweet ganache.

How to Make Chocolate Chip Cookie Dough Bars with Ganache

Follow these steps for foolproof bars that look and taste like they came from a bakery.

Step 1: Prepare the Cookie Dough Base

Start by heat-treating your flour. Spread it on a baking sheet and bake at 350°F for 5-7 minutes to kill any potential bacteria. Let it cool completely. In a large bowl, cream together softened butter and brown sugar until light and fluffy. Stir in vanilla extract, then gradually mix in the heat-treated flour and a pinch of salt. Fold in mini chocolate chips until evenly distributed.

Step 2: Press Into Pan

Line an 8×8 inch baking pan with parchment paper, leaving overhang on two sides for easy removal. Transfer the cookie dough to the pan and press it into an even layer using slightly damp hands (this prevents sticking). Chill in the refrigerator while you prepare the ganache.

Step 3: Make the Ganache

Chop your dark chocolate into fine pieces and place in a heatproof bowl. Heat heavy cream in a small saucepan until it just begins to simmer—do not boil. Pour the hot cream over the chocolate and let sit undisturbed for 2 minutes. Gently whisk until smooth and glossy.

Step 4: Assemble and Chill

Pour the warm ganache over the chilled cookie dough layer, tilting the pan to spread it evenly. Return to the refrigerator for at least 2 hours, or until the ganache is completely set. Use the parchment overhang to lift the slab from the pan before slicing into squares.

Pro Tips for the Best Results

  • For ultra-smooth ganache, ensure your chocolate is finely chopped and your cream is hot enough to melt it completely.
  • If your ganache develops bubbles, gently tap the pan on the counter to release them before chilling.
  • For clean cuts, run your knife under hot water and wipe it dry between slices.
  • Let the bars sit at room temperature for 5 minutes before serving—this softens the ganache slightly for the perfect bite.

Variations and Substitutions

This versatile recipe welcomes creativity:

  • Gluten-free: Substitute heat-treated gluten-free 1:1 baking flour.
  • Dairy-free: Use plant-based butter and coconut cream in place of dairy ingredients.
  • Flavor twists: Add a teaspoon of espresso powder to the ganache for mocha bars, or mix crushed pretzels into the dough for sweet-salty contrast.
  • Holiday version: Swap chocolate chips for festive sprinkles or crushed candy canes during the winter season.

What to Serve With It

While these bars shine on their own, consider these pairings:

  • A scoop of vanilla bean ice cream for an à la mode treat
  • Fresh berries to cut through the richness
  • Cold milk for classic cookie-and-milk nostalgia
  • Espresso or dark roast coffee to complement the chocolate ganache

How to Store and Reheat

Store leftovers in an airtight container in the refrigerator for up to 5 days. For longer storage, wrap individual bars in plastic wrap and freeze for up to 3 months. Thaw frozen bars overnight in the refrigerator. While you can eat them cold, letting them sit at room temperature for 10 minutes before serving improves texture.

Frequently Asked Questions (FAQs)

Can I use milk chocolate instead of dark for the ganache?

Absolutely, though the bars will be significantly sweeter. We recommend using semi-sweet as a happy medium if dark chocolate isn’t your preference.

Why does my ganache look grainy?

This usually happens if the cream wasn’t hot enough to fully melt the chocolate or if the mixture was stirred too vigorously. Next time, ensure your cream is steaming hot and stir gently in one direction only.

Can I make these bars nut-free?

Yes, the base recipe contains no nuts. Just double-check that your chocolate chips are processed in a nut-free facility if allergies are a concern.

How do I know when my flour is properly heat-treated?

The flour should reach 165°F internally to be safe. If you don’t have a thermometer, bake it for the full 7 minutes and let it cool completely before using.

Can I double this recipe?

Yes, simply use a 9×13 inch pan and double all ingredients. The chilling time may need to be extended by about 30 minutes for the ganache to set properly.

Final Thoughts

These Chocolate Chip Cookie Dough Bars with Ganache represent everything wonderful about dessert—they’re nostalgic yet sophisticated, simple yet impressive. Whether you’re making them for a special occasion or just because it’s Tuesday, they’re guaranteed to bring smiles. The next time cookie dough cravings strike, skip the spoon and the risk, and whip up a batch of these instead. Your future self (and anyone lucky enough to get a bite) will thank you.

Print
clock clock iconcutlery cutlery iconflag flag iconfolder folder iconinstagram instagram iconpinterest pinterest iconfacebook facebook iconprint print iconsquares squares iconheart heart iconheart solid heart solid icon

Chocolate Chip Cookie Dough Bars with Ganache

  • Author: Baking Enthusiast

Description

These indulgent bars feature a rich, edible cookie dough layer topped with a smooth chocolate ganache. Perfect for satisfying sweet cravings without baking!


Ingredients

Scale

For the Crust:

  • For Cookie Dough Layer:
  • 1 cup unsalted butter, softened
  • 1 1/2 cups packed brown sugar
  • 1/4 cup milk
  • 2 teaspoons vanilla extract
  • 1/2 teaspoon salt
  • 2 1/2 cups all-purpose flour
  • 1 cup mini chocolate chips
  • For Ganache Layer:
  • 1 1/2 cups semi-sweet chocolate chips
  • 1/2 cup heavy cream
  • 1 tablespoon unsalted butter
  • For Garnish:
  • 1/4 cup mini chocolate chips
  • Flaky sea salt (optional)

Instructions

1. Prepare the Crust:

  1. 1. Line an 8×8 inch baking pan with parchment paper, leaving overhang for easy removal.
  2. 2. Make the cookie dough: In a large bowl, beat butter and brown sugar until creamy. Add milk, vanilla, and salt; mix until combined.
  3. 3. Gradually add flour, mixing until fully incorporated. Fold in 1 cup mini chocolate chips.
  4. 4. Press dough evenly into prepared pan. Chill for 30 minutes.
  5. 5. Prepare ganache: Heat heavy cream until steaming (not boiling). Pour over chocolate chips in a heatproof bowl. Let sit 2 minutes, then stir until smooth. Add butter and stir until melted.
  6. 6. Pour ganache over chilled cookie dough layer. Spread evenly with an offset spatula.
  7. 7. Immediately sprinkle with remaining chocolate chips and optional sea salt.
  8. 8. Chill for 2 hours or until ganache is set before slicing into bars.

Notes

• Store bars in refrigerator for up to 1 week
• For nutty variation, add 1/2 cup chopped toasted pecans to dough
• Ensure all ingredients are heat-treated if concerned about raw flour safety

No-Bake Strawberry Cheesecake Lasagna

No-Bake Strawberry Cheesecake Lasagna

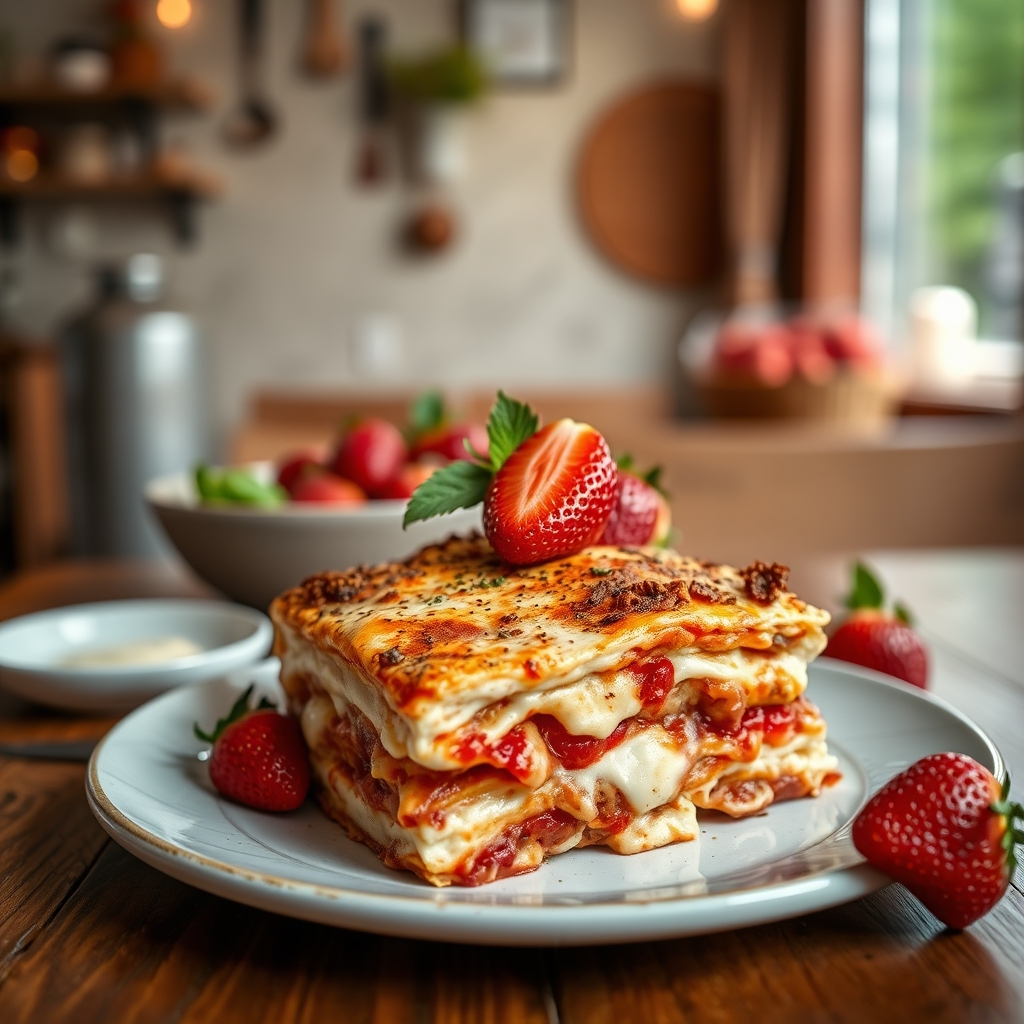
If you’re looking for a show-stopping dessert that requires zero oven time, this No-Bake Strawberry Cheesecake Lasagna is your answer. Imagine layers of creamy cheesecake filling, fresh strawberries, and a golden graham cracker crust—all coming together in a dessert that’s as stunning as it is delicious. Perfect for summer gatherings, potlucks, or just treating yourself, this recipe is a guaranteed crowd-pleaser. Let’s dive into why this dessert deserves a spot in your recipe collection.

Why You’ll Love This Recipe

First, let’s talk about why this No-Bake Strawberry Cheesecake Lasagna is a must-try. Here are a few reasons it stands out:

  • No oven required: This dessert comes together entirely in the fridge, making it perfect for hot summer days when turning on the oven feels unbearable.
  • Layers of texture and flavor: The combination of crunchy graham cracker crust, velvety cheesecake filling, and juicy strawberries creates a symphony of taste and texture in every bite.
  • Easy to customize: Whether you want to swap fruits, adjust sweetness, or make it gluten-free, this recipe is incredibly adaptable.
  • Feeds a crowd: With its large serving size, this dessert is ideal for parties, family gatherings, or any occasion where you need a reliable sweet treat.
  • Make-ahead friendly: You can prepare it hours (or even a day) in advance, letting the flavors meld while you focus on other things.

Ingredients Breakdown

Understanding the role of each ingredient will help you make the best No-Bake Strawberry Cheesecake Lasagna possible. Here’s what you’ll need and why:

  • Graham crackers: These form the base of the crust, providing a sweet, slightly nutty crunch. If you prefer, you can substitute with digestive biscuits or gluten-free alternatives.
  • Butter: Melted butter binds the graham cracker crumbs together, ensuring a firm and cohesive crust.
  • Cream cheese: The star of the cheesecake layer, cream cheese delivers that signature tangy richness. For best results, use full-fat and ensure it’s softened to room temperature.
  • Powdered sugar: Unlike granulated sugar, powdered sugar dissolves effortlessly into the cream cheese, creating a smooth, lump-free filling.
  • Whipped topping: This lightens the cheesecake layer, making it airy and mousse-like. You can use store-bought or homemade whipped cream.
  • Fresh strawberries: They add a burst of natural sweetness and a vibrant pop of color. For extra depth, you can macerate them with a bit of sugar before layering.
  • Strawberry glaze or jam: This enhances the strawberry flavor and helps hold the fruit layer together. Opt for a high-quality glaze or make your own by reducing strawberry puree with a touch of sugar.

How to Make No-Bake Strawberry Cheesecake Lasagna

Now, let’s walk through the step-by-step process to create this stunning dessert:

  1. Prepare the crust: Crush graham crackers into fine crumbs using a food processor or rolling pin. Mix with melted butter until the texture resembles wet sand. Press firmly into the bottom of a 9×13-inch baking dish. Chill for 15 minutes to set.
  2. Make the cheesecake layer: In a large bowl, beat softened cream cheese until smooth. Gradually add powdered sugar, then fold in whipped topping until fully incorporated. Spread this mixture evenly over the chilled crust.
  3. Layer the strawberries: Slice fresh strawberries and arrange them in a single layer over the cheesecake filling. If using glaze, drizzle it over the strawberries for extra shine and flavor.
  4. Repeat the layers: For a more decadent dessert, add a second layer of graham cracker crumbs, followed by another cheesecake layer and more strawberries.
  5. Chill and set: Cover the dish with plastic wrap and refrigerate for at least 4 hours (or overnight) to allow the layers to firm up.
  6. Serve and enjoy: Slice into squares and garnish with additional whipped cream or fresh mint if desired.

Pro Tips for the Best Results

Want to take your No-Bake Strawberry Cheesecake Lasagna to the next level? Here are some expert tips:

  • Room temperature cream cheese is key: Cold cream cheese can lead to lumps in your filling. Let it sit out for at least 30 minutes before mixing.
  • Press the crust firmly: A well-packed crust prevents crumbling when slicing. Use the bottom of a measuring cup to press it down evenly.
  • Use ripe strawberries: The sweeter and juicier the berries, the better the flavor. If strawberries aren’t in season, frozen (thawed and drained) can work in a pinch.
  • Chill thoroughly: Patience pays off—letting the dessert set for at least 4 hours ensures clean slices and perfect layers.
  • Add a touch of lemon zest: A hint of citrus brightens the cheesecake layer and balances the sweetness.

Variations and Substitutions

This recipe is wonderfully adaptable. Here are some delicious twists to try:

  • Mixed berry version: Swap strawberries for raspberries, blueberries, or blackberries, or use a combination for a colorful medley.
  • Chocolate graham crackers: For a deeper flavor, use chocolate graham crackers or Oreo crumbs for the crust.
  • Dairy-free option: Substitute cream cheese with a vegan alternative and use coconut whipped topping.
  • Nutty crunch: Add chopped pecans or almonds to the crust for extra texture.
  • Lemon blueberry twist: Replace strawberries with blueberries and add a tablespoon of lemon juice to the cheesecake layer for a zesty variation.

What to Serve With It

While this dessert is fantastic on its own, pairing it with complementary flavors can elevate the experience:

  • Fresh mint or basil: A sprinkle of herbs adds a refreshing contrast to the sweetness.
  • Vanilla ice cream: Serve a scoop alongside for an indulgent treat.
  • Sparkling wine or prosecco: The effervescence cuts through the richness, making it perfect for celebrations.
  • Hot coffee or tea: A warm beverage balances the cool, creamy layers beautifully.

How to Store and Reheat

Since this is a no-bake dessert, proper storage is essential for maintaining freshness:

  • Refrigeration: Cover tightly with plastic wrap or store in an airtight container. It will keep for up to 3 days.
  • Freezing: For longer storage, freeze individual slices wrapped in plastic and foil. Thaw in the fridge overnight before serving.
  • Reheating: This dessert is best enjoyed cold, so reheating isn’t necessary. If the crust softens, let it sit at room temperature for 10 minutes before serving.

Frequently Asked Questions (FAQs)

Here are answers to some common questions about No-Bake Strawberry Cheesecake Lasagna:

  • Can I use frozen strawberries? Yes, but thaw and drain them thoroughly to avoid excess moisture in the layers.
  • How do I prevent a soggy crust? Ensure the butter is evenly mixed with the crumbs, and chill the crust before adding the filling.
  • Can I make this gluten-free? Absolutely! Use gluten-free graham crackers or almond flour for the crust.
  • Is there a substitute for whipped topping? You can use freshly whipped heavy cream stabilized with a bit of powdered sugar.
  • Can I use a different pan size? A 9×13-inch dish works best, but an 8×8-inch pan will yield thicker layers—just adjust chilling time accordingly.

Final Thoughts

No-Bake Strawberry Cheesecake Lasagna is the kind of dessert that looks like you spent hours in the kitchen, yet it’s surprisingly simple to make. Whether you’re hosting a summer barbecue, celebrating a special occasion, or just craving something sweet, this recipe delivers on every front. The layers of creamy cheesecake, fresh strawberries, and buttery crust create a harmony of flavors that’s hard to resist. Give it a try, and don’t be surprised when everyone asks for the recipe!

Print
clock clock iconcutlery cutlery iconflag flag iconfolder folder iconinstagram instagram iconpinterest pinterest iconfacebook facebook iconprint print iconsquares squares iconheart heart iconheart solid heart solid icon

No-Bake Strawberry Cheesecake Lasagna

  • Author: Dessert Delights

Description

A luscious layered dessert combining creamy cheesecake, fresh strawberries, and golden graham crackers—no oven required! Perfect for summer gatherings or when you crave something sweet without the hassle of baking.


Ingredients

Scale

For the Crust:

  • For the crust:
  • 2 cups graham cracker crumbs
  • 1/2 cup unsalted butter, melted
  • 1/4 cup granulated sugar
  • For the cheesecake layer:
  • 16 oz cream cheese, softened
  • 1 cup powdered sugar
  • 1 tsp vanilla extract
  • 1 cup heavy whipping cream, whipped to stiff peaks
  • For the strawberry layer:
  • 2 cups fresh strawberries, sliced
  • 1/4 cup granulated sugar
  • 1 tbsp lemon juice
  • For topping:
  • 1 cup whipped cream
  • 1/2 cup fresh strawberries, halved
  • 1 tbsp graham cracker crumbs (optional)

Instructions

1. Prepare the Crust:

  1. 1. Prepare the crust: Mix graham cracker crumbs, melted butter, and sugar in a bowl. Press firmly into the bottom of a 9×13-inch dish. Chill for 15 minutes.
  2. 2. Make the strawberry layer: Combine sliced strawberries, sugar, and lemon juice in a bowl. Let sit for 10 minutes, then mash lightly with a fork.
  3. 3. Whip the cream cheese: Beat softened cream cheese, powdered sugar, and vanilla until smooth. Gently fold in whipped cream.
  4. 4. Assemble layers: Spread half the cheesecake mixture over the crust. Top with strawberry mixture, then remaining cheesecake mixture.
  5. 5. Chill: Refrigerate for at least 4 hours (or overnight). Before serving, top with whipped cream, strawberry halves, and a sprinkle of graham crumbs.

Notes

For a firmer texture, freeze for 1 hour before serving. Substitute raspberries or blueberries for strawberries if preferred. Store leftovers covered in the fridge for up to 3 days.

Cheesy Cajun Chicken Alfredo Skillet

Cheesy Cajun Chicken Alfredo Skillet

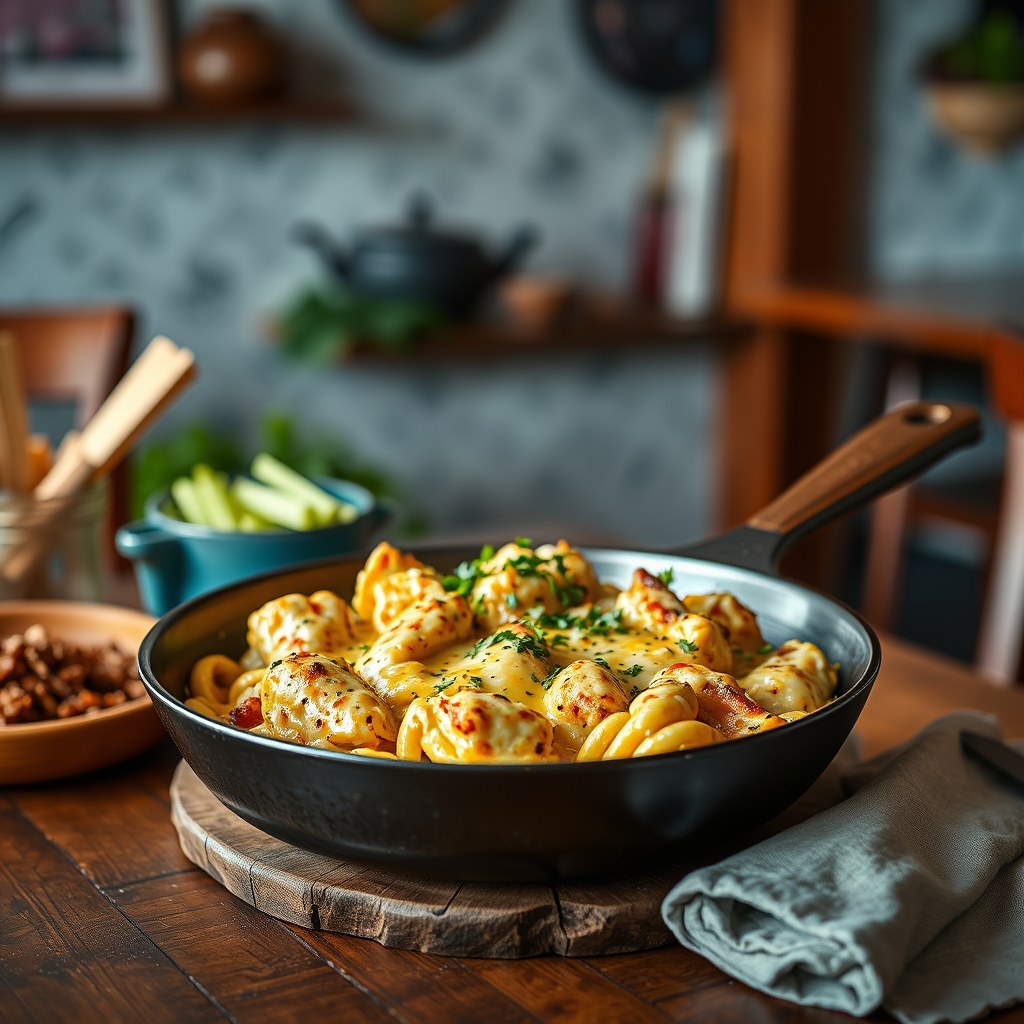
There’s something undeniably comforting about a creamy, cheesy pasta dish—especially when it’s packed with bold Cajun flavors and tender chicken. This Cheesy Cajun Chicken Alfredo Skillet is a one-pan wonder that brings together the richness of Alfredo sauce, the smoky heat of Cajun seasoning, and the satisfying texture of perfectly cooked pasta. Whether you’re cooking for a weeknight dinner or entertaining guests, this dish is guaranteed to impress. Let’s dive into why this recipe is a must-try and how to make it perfectly every time.

Why You’ll Love This Recipe

First, let’s talk about what makes this Cheesy Cajun Chicken Alfredo Skillet so special. Here are a few reasons why it’s bound to become a favorite in your kitchen:

  • Bold, Balanced Flavors: The combination of creamy Alfredo and spicy Cajun seasoning creates a harmony of flavors that’s rich but never overwhelming.
  • One-Pan Convenience: Everything cooks in a single skillet, meaning fewer dishes to wash and more time to enjoy your meal.
  • Quick and Easy: Despite its restaurant-quality taste, this dish comes together in under 30 minutes, making it perfect for busy nights.
  • Crowd-Pleasing: Whether you’re serving picky eaters or spice lovers, this recipe is versatile enough to please everyone at the table.
  • Meal Prep Friendly: Leftovers taste just as delicious the next day, making it a great option for meal planning.

Ingredients Breakdown

To achieve the perfect Cheesy Cajun Chicken Alfredo Skillet, it’s important to understand the role each ingredient plays. Here’s what you’ll need:

  • Chicken Breast: Boneless, skinless chicken breast works best for quick cooking and tender bites. You can also use chicken thighs for extra juiciness.
  • Cajun Seasoning: This spice blend brings heat, smokiness, and depth. Look for a high-quality blend or make your own with paprika, garlic powder, onion powder, cayenne, and oregano.
  • Fettuccine: The classic choice for Alfredo, but penne or linguine work well too. Cook it al dente so it holds up in the skillet.
  • Heavy Cream: The base of the Alfredo sauce, providing a luscious, velvety texture.
  • Parmesan Cheese: Freshly grated Parmesan melts smoothly and adds a nutty, salty flavor.
  • Garlic: A must for depth and aroma. Fresh minced garlic is best, but garlic powder can work in a pinch.
  • Butter: Adds richness to both the chicken and the sauce.
  • Mozzarella Cheese: For that irresistible stretchy, gooey topping.

How to Make Cheesy Cajun Chicken Alfredo Skillet

Now, let’s walk through the steps to create this mouthwatering dish:

  1. Cook the Pasta: Boil the fettuccine in salted water until al dente. Drain and set aside, reserving a bit of pasta water for adjusting sauce consistency later.
  2. Season the Chicken: Cut the chicken into bite-sized pieces and toss with Cajun seasoning until evenly coated.
  3. Sear the Chicken: Heat a large skillet over medium-high heat with butter. Add the chicken and cook until golden and cooked through, about 5-6 minutes. Remove and set aside.
  4. Make the Sauce: In the same skillet, melt more butter and sauté garlic until fragrant. Pour in the heavy cream, stirring to combine, then bring to a gentle simmer.
  5. Add Cheese: Gradually whisk in the Parmesan until the sauce is smooth and thickened. If needed, thin it with a splash of reserved pasta water.
  6. Combine Everything: Return the chicken to the skillet, add the cooked pasta, and toss until everything is well coated in the sauce.
  7. Top with Mozzarella: Sprinkle shredded mozzarella over the top, cover the skillet, and let it melt for 2-3 minutes. For a golden finish, broil for a minute or two.
  8. Garnish and Serve: Sprinkle with fresh parsley or extra Parmesan, then serve immediately.

Pro Tips for the Best Results

To take your Cheesy Cajun Chicken Alfredo Skillet to the next level, keep these expert tips in mind:

  • Don’t Overcook the Pasta: Since it will continue cooking in the sauce, aim for al dente to avoid mushy noodles.
  • Use Freshly Grated Cheese: Pre-shredded cheese contains anti-caking agents that can make the sauce grainy.
  • Adjust the Heat: If you prefer milder flavors, reduce the Cajun seasoning or use a low-sodium blend.
  • Deglaze the Pan: After cooking the chicken, scrape up any browned bits—they add incredible depth to the sauce.
  • Let It Rest: Allow the skillet to sit for a few minutes before serving so the sauce thickens slightly.

Variations and Substitutions

This recipe is highly adaptable. Here are some ways to customize it:

  • Protein Swap: Try shrimp, sausage, or even tofu for a vegetarian version.
  • Gluten-Free: Use gluten-free pasta and ensure your Cajun seasoning is gluten-free.
  • Lighter Option: Substitute half-and-half for heavy cream and add a touch of cornstarch for thickness.
  • Extra Veggies: Stir in sautéed bell peppers, mushrooms, or spinach for added nutrition.
  • Spice It Up: Add a dash of hot sauce or red pepper flakes for extra heat.

What to Serve With It

This dish is hearty on its own, but these sides round out the meal beautifully:

  • Garlic Bread: Perfect for soaking up every last bit of sauce.
  • Simple Salad: A crisp Caesar or garden salad balances the richness.
  • Roasted Vegetables: Try asparagus, broccoli, or zucchini for a healthy touch.
  • White Wine: A chilled Chardonnay or Pinot Grigio complements the creamy sauce.

How to Store and Reheat

Leftovers? Here’s how to keep them tasting great:

  • Refrigeration: Store in an airtight container for up to 3 days.
  • Freezing: Freeze portions for up to 2 months. Thaw overnight in the fridge before reheating.
  • Reheating: Warm in a skillet over low heat with a splash of cream or milk to restore creaminess. Microwave works too, but stir occasionally for even heating.

Frequently Asked Questions (FAQs)

Can I use pre-cooked chicken?
Yes, but add it at the end to avoid overcooking. Adjust seasoning since pre-cooked chicken may lack flavor.

What if my sauce is too thick?
Thin it with reserved pasta water, milk, or broth until you reach the desired consistency.

Can I make this ahead of time?
While best fresh, you can prep components (cook pasta, season chicken) in advance and assemble before serving.

Is there a dairy-free alternative?
Use coconut cream and dairy-free cheese, but note the flavor will differ slightly.

How do I prevent the cheese from clumping?
Add cheese gradually over low heat, stirring constantly until fully melted.

Final Thoughts

This Cheesy Cajun Chicken Alfredo Skillet is more than just a meal—it’s a celebration of bold flavors and comforting textures. Whether you’re cooking for family or friends, it’s a dish that brings people together with minimal effort and maximum satisfaction. Don’t be afraid to make it your own by experimenting with different proteins, veggies, or spice levels. Once you try it, I’m confident it’ll earn a permanent spot in your dinner rotation. Happy cooking!

Print
clock clock iconcutlery cutlery iconflag flag iconfolder folder iconinstagram instagram iconpinterest pinterest iconfacebook facebook iconprint print iconsquares squares iconheart heart iconheart solid heart solid icon

Cheesy Cajun Chicken Alfredo Skillet

  • Author: Skillet Master

Description

A creamy, spicy, and cheesy one-pan wonder that combines tender Cajun-spiced chicken with rich Alfredo sauce and perfectly cooked pasta. This dish is packed with bold flavors and comes together in under 30 minutes for an easy weeknight dinner.


Ingredients

Scale

For the Crust:

  • For the chicken:
  • 1.5 lbs boneless, skinless chicken breasts, cubed
  • 2 tbsp Cajun seasoning
  • 1 tbsp olive oil
  • For the sauce:
  • 3 tbsp unsalted butter
  • 4 garlic cloves, minced
  • 1.5 cups heavy cream
  • 1 cup grated Parmesan cheese
  • 1 tsp black pepper
  • 1/2 tsp salt
  • For the pasta:
  • 12 oz fettuccine pasta
  • For garnish:
  • 1/4 cup chopped fresh parsley
  • 1/2 cup shredded mozzarella cheese

Instructions

1. Prepare the Crust:

  1. 1. Cook pasta according to package instructions until al dente. Drain and set aside.
  2. 2. Toss chicken cubes with Cajun seasoning until evenly coated.
  3. 3. Heat olive oil in large skillet over medium-high heat. Add chicken and cook 5-6 minutes per side until browned and cooked through. Remove and set aside.
  4. 4. In same skillet, melt butter over medium heat. Add garlic and sauté 30 seconds until fragrant.
  5. 5. Pour in heavy cream, stirring constantly. Bring to gentle simmer.
  6. 6. Reduce heat to low, whisk in Parmesan until smooth. Season with pepper and salt.
  7. 7. Add cooked pasta and chicken to skillet, tossing to coat in sauce.
  8. 8. Sprinkle mozzarella over top, cover with lid for 2 minutes to melt cheese.
  9. 9. Garnish with fresh parsley before serving hot.

Notes

For extra spice, add 1/4 tsp cayenne pepper to sauce. Substitute half-and-half for heavy cream for lighter version (sauce will be thinner). Leftovers keep refrigerated for 3 days – reheat with splash of milk to restore creaminess.