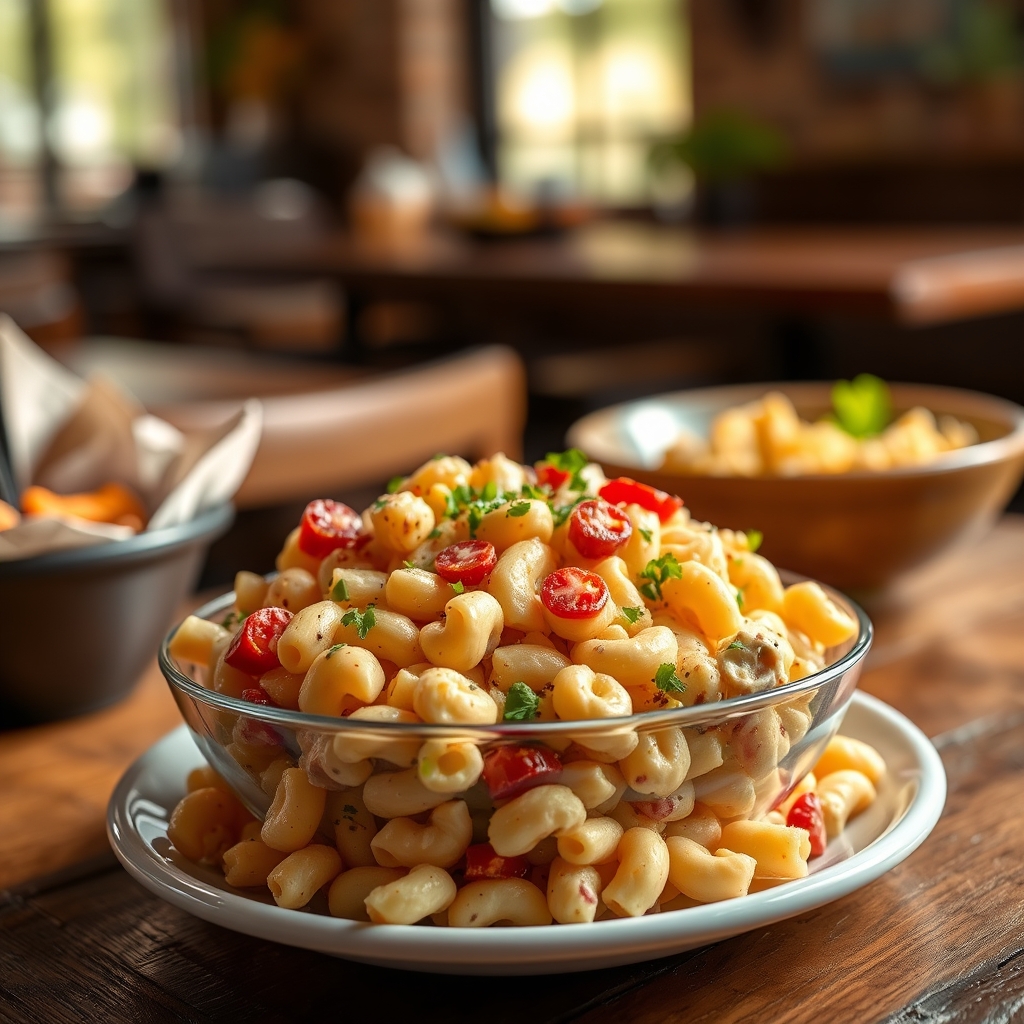
Amish Macaroni Salad
There’s something undeniably comforting about a bowl of creamy, tangy, and slightly sweet Amish macaroni salad. This classic dish has graced countless potlucks, family gatherings, and summer picnics for generations, and for good reason. Unlike its heavier counterparts, Amish macaroni salad strikes the perfect balance between rich and refreshing, making it a versatile side that pairs beautifully with everything from grilled meats to sandwiches. Today, I’m sharing my tried-and-true version of this beloved recipe, complete with tips, variations, and all the secrets to making it unforgettable.
Why You’ll Love This Recipe
If you’re new to Amish macaroni salad or simply looking for a foolproof version, here’s why this recipe will become a staple in your kitchen:
- Creamy yet light texture: The dressing is luxuriously creamy without feeling heavy, thanks to a blend of mayonnaise, vinegar, and a touch of sugar.
- Perfectly balanced flavors: Sweet, tangy, and savory notes come together in harmony, with crisp vegetables adding freshness.
- Easy to customize: This recipe is adaptable to your taste—add more crunch, spice, or even protein to make it your own.
- Crowd-pleasing appeal: It’s a guaranteed hit at gatherings, potlucks, and weeknight dinners alike.
- Make-ahead friendly: The flavors meld beautifully when prepared in advance, making it a stress-free dish for busy hosts.
Ingredients Breakdown
Every ingredient in Amish macaroni salad plays a specific role in creating its signature taste and texture. Here’s what you’ll need and why each one matters:
- Elbow macaroni: The foundation of the dish, cooked al dente to hold up against the dressing.
- Mayonnaise: Provides the creamy base for the dressing. Use full-fat for the best texture.
- Apple cider vinegar: Adds a subtle tang and balances the richness of the mayo.
- Granulated sugar: A small amount enhances the sweetness, a hallmark of Amish-style salads.
- Yellow mustard: Offers depth and a slight sharpness to the dressing.
- Celery and onion: These crunchy vegetables add freshness and a bit of bite.
- Hard-boiled eggs: A traditional addition that contributes richness and protein.
- Sweet relish: Brings a pop of sweetness and acidity.
- Salt and pepper: Essential for seasoning and bringing all the flavors together.
How to Make Amish Macaroni Salad
Follow these steps to create a flawless Amish macaroni salad every time:
- Cook the pasta: Bring a large pot of salted water to a boil. Add the elbow macaroni and cook until al dente, about 7–8 minutes. Drain and rinse under cold water to stop the cooking process. Let it cool completely.
- Prepare the dressing: In a large bowl, whisk together the mayonnaise, apple cider vinegar, sugar, and yellow mustard until smooth. Taste and adjust the sweetness or tanginess as needed.
- Combine the ingredients: Add the cooled macaroni, diced celery, finely chopped onion, chopped hard-boiled eggs, and sweet relish to the dressing. Gently fold everything together until evenly coated.
- Season and chill: Sprinkle with salt and pepper, then cover and refrigerate for at least 2 hours (or overnight) to allow the flavors to meld.
- Serve: Give the salad a quick stir before serving. If it seems too thick, loosen it with a splash of milk or vinegar.
Pro Tips for the Best Results
- Don’t overcook the pasta: Mushy macaroni will turn soggy once dressed. Aim for al dente—it should still have a slight bite.
- Rinse the pasta well: This removes excess starch and prevents clumping.
- Let it rest: The salad tastes best after chilling for a few hours, as the flavors deepen and the pasta absorbs the dressing.
- Adjust consistency: If the salad thickens too much in the fridge, stir in a tablespoon of milk or vinegar to revive the creaminess.
- Use fresh vegetables: For the best crunch, dice the celery and onion just before mixing.
Variations and Substitutions
While traditional Amish macaroni salad is delicious as-is, here are some ways to customize it:
- Add protein: Toss in diced ham, shredded chicken, or crumbled bacon for a heartier dish.
- Vegetable swaps: Try adding grated carrots, bell peppers, or even peas for extra color and nutrition.
- Dairy-free or lighter dressing: Substitute Greek yogurt or a vegan mayo for a tangier or lighter version.
- Spice it up: A dash of paprika, cayenne, or hot sauce can add a subtle kick.
- Sweetness adjustments: Reduce the sugar or swap it with honey for a different flavor profile.
What to Serve With It
Amish macaroni salad is a versatile side that pairs well with a variety of dishes. Here are some serving ideas:
- Classic barbecue: Serve alongside grilled chicken, ribs, or pulled pork.
- Sandwiches: A perfect match for pulled pork sandwiches, burgers, or deli-style subs.
- Summer picnics: Pair with fried chicken, corn on the cob, and fresh watermelon.
- Potluck spreads: Complement with baked beans, coleslaw, and deviled eggs.
- Light lunches: Enjoy with a simple green salad or a bowl of soup.
How to Store and Reheat
Proper storage ensures your Amish macaroni salad stays fresh and delicious:
- Refrigeration: Store in an airtight container for up to 3–4 days. Stir well before serving.
- Freezing: Freezing is not recommended, as the mayonnaise-based dressing may separate and the vegetables can become mushy.
- Reviving leftovers: If the salad dries out, mix in a little extra mayo or vinegar to refresh the consistency.
Frequently Asked Questions (FAQs)
Can I use a different type of pasta?
Yes, but elbow macaroni works best because its shape holds the dressing well. Small shells or rotini are good alternatives.
How far in advance can I make this salad?
It’s ideal to prepare it 1 day ahead for the best flavor. Just keep it refrigerated until serving.
Can I omit the sugar?
Yes, but the sugar balances the tanginess. If avoiding sugar, try a pinch of stevia or omit it entirely.
Why is my salad dry?
The pasta may have absorbed too much dressing. Stir in a bit more mayo or vinegar to moisten it.
Is there a way to make it healthier?
Use whole-grain pasta, light mayo, and add extra veggies for a lighter version.
Final Thoughts
Amish macaroni salad is more than just a side dish—it’s a nostalgic, comforting classic that brings people together. Whether you’re serving it at a summer cookout, a holiday spread, or just as a quick weeknight side, its creamy, tangy-sweet goodness never fails to delight. I hope this recipe becomes a favorite in your home, just as it has in mine. Don’t be afraid to make it your own by tweaking the ingredients to suit your taste. After all, the best recipes are the ones that carry a little bit of your personality. Happy cooking!
Print
Amish Macaroni Salad
Description
A creamy, tangy, and slightly sweet macaroni salad packed with crunchy vegetables and hard-boiled eggs, perfect for picnics and potlucks.
Ingredients
For the Crust:
- For the salad:
- 2 cups elbow macaroni, uncooked
- 3 hard-boiled eggs, chopped
- 1/2 cup celery, finely diced
- 1/4 cup red onion, finely diced
- 1/4 cup green bell pepper, finely diced
- 1/4 cup red bell pepper, finely diced
- 1/4 cup sweet pickle relish
- For the dressing:
- 1 cup mayonnaise
- 1/4 cup sour cream
- 2 tablespoons yellow mustard
- 2 tablespoons apple cider vinegar
- 2 tablespoons granulated sugar
- 1 teaspoon salt
- 1/2 teaspoon black pepper
- 1/2 teaspoon celery seed
Instructions
1. Prepare the Crust:
- 1. Cook the macaroni according to package instructions until al dente. Drain and rinse under cold water to cool completely.
- 2. In a large bowl, combine the cooled macaroni, chopped eggs, celery, red onion, green and red bell peppers, and sweet pickle relish.
- 3. In a separate bowl, whisk together the mayonnaise, sour cream, mustard, apple cider vinegar, sugar, salt, black pepper, and celery seed until smooth.
- 4. Pour the dressing over the macaroni mixture and stir gently until everything is evenly coated.
- 5. Cover and refrigerate for at least 2 hours (preferably overnight) to allow flavors to meld.
- 6. Stir well before serving. Adjust seasoning if needed.
Notes
For best results, make this salad a day ahead. Add a splash of milk if the dressing thickens too much in the fridge. Customize with extra veggies like shredded carrots or diced cucumber.