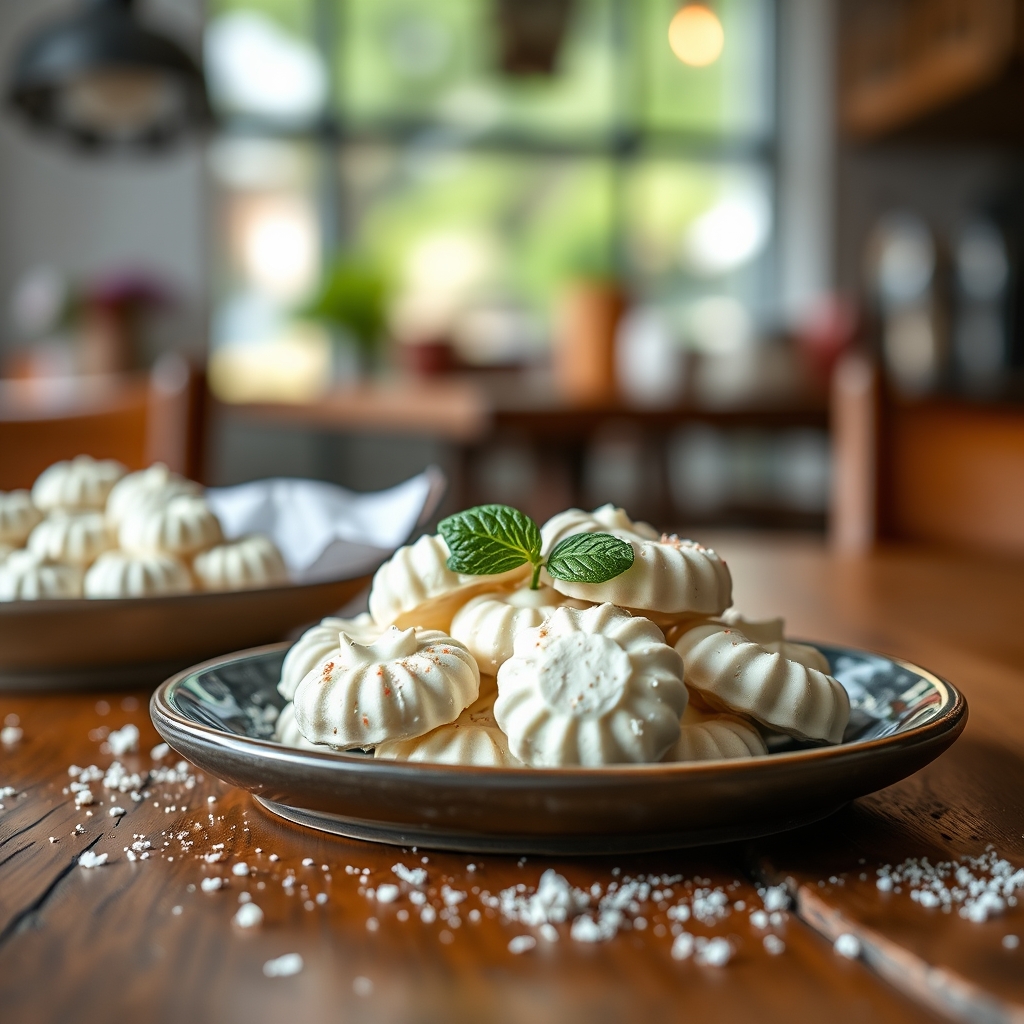
Cream Cheese Mints

Cream Cheese Mints

There’s something undeniably charming about cream cheese mints. These little bites of creamy, melt-in-your-mouth sweetness have graced wedding receptions, holiday parties, and afternoon tea tables for generations. Their delicate texture and refreshing flavor make them a timeless treat that’s as fun to make as it is to eat. Whether you’re a seasoned baker or a beginner in the kitchen, this cream cheese mints recipe is a foolproof way to create something delightful with minimal effort.

Why You’ll Love This Recipe

If you’ve never tried making cream cheese mints at home, you’re in for a treat. Here’s why this recipe deserves a spot in your dessert repertoire:

  • Effortless Elegance – With just a handful of ingredients and no baking required, these mints look and taste like they came from a professional bakery.
  • Customizable Flavors – From classic peppermint to fruity variations, you can tailor these mints to suit any occasion or personal preference.
  • Perfect for Gifting – Packaged in a pretty box or tin, homemade cream cheese mints make a thoughtful and impressive edible gift.
  • Crowd-Pleasing Texture – The smooth, creamy consistency melts delicately on the tongue, making them irresistible to guests of all ages.
  • Make-Ahead Friendly – These mints can be prepared days in advance, freeing up your time for other party preparations.

Ingredients Breakdown

Understanding the role of each ingredient will help you achieve the perfect batch of cream cheese mints every time.

  • Cream Cheese – The star of the show, cream cheese provides the rich, tangy base that balances the sweetness. Always use full-fat cream cheese for the best texture.
  • Powdered Sugar – This fine sugar dissolves seamlessly into the cream cheese, creating a smooth consistency without graininess.
  • Peppermint Extract – The classic flavoring, peppermint extract delivers that refreshing, cool finish. A little goes a long way.
  • Food Coloring (optional) – A drop or two of gel food coloring can transform these mints into festive, eye-catching confections.
  • Granulated Sugar (for coating) – Rolling the mints in sugar adds a slight crunch and keeps them from sticking together.

How to Make Cream Cheese Mints

Follow these simple steps to create perfectly creamy, melt-in-your-mouth mints.

  1. Soften the Cream Cheese – Let the cream cheese sit at room temperature for about 30 minutes until soft. This ensures a smooth, lump-free mixture.
  2. Combine Ingredients – In a large mixing bowl, beat the cream cheese until creamy. Gradually add the powdered sugar, mixing until fully incorporated. Stir in the peppermint extract.
  3. Add Color (Optional) – If using food coloring, add it drop by drop until you achieve the desired hue. Gel coloring works best for vibrant shades without thinning the mixture.
  4. Shape the Mints – Roll teaspoon-sized portions of dough into balls, then flatten slightly with a fork or the bottom of a glass. For uniform shapes, consider using a small candy mold.
  5. Coat in Sugar – Roll each mint in granulated sugar for a delicate sparkle and to prevent sticking.
  6. Chill to Set – Place the mints on a parchment-lined tray and refrigerate for at least an hour before serving. This helps them firm up.

Pro Tips for the Best Results

Take your cream cheese mints from good to exceptional with these expert techniques.

  • For ultra-smooth mints, sift the powdered sugar before adding it to the cream cheese.
  • If the mixture feels too sticky, chill it for 15 minutes before shaping. This makes handling much easier.
  • Experiment with extracts like vanilla, almond, or even citrus for unique flavor profiles.
  • Use decorative sugar or edible glitter instead of plain granulated sugar for a festive touch.
  • For a polished look, dust the molds with powdered sugar before pressing in the mint mixture.

Variations and Substitutions

This versatile recipe welcomes creativity. Try these delicious twists.

  • Chocolate-Dipped Mints – After chilling, dip half of each mint in melted chocolate for an elegant contrast.
  • Fruit Flavors – Swap peppermint for strawberry, orange, or lemon extract for a bright, fruity variation.
  • Vegan Version – Use dairy-free cream cheese and ensure your sugar is vegan-certified.
  • Spiced Mints – Add a pinch of cinnamon or nutmeg to the mixture for a warm, seasonal flavor.
  • Miniature Shapes – Use tiny cookie cutters to create heart, flower, or holiday-themed mints.

What to Serve With It

While delicious on their own, cream cheese mints pair beautifully with.

  • Afternoon tea selections like scones and finger sandwiches
  • A dessert charcuterie board featuring chocolates and fresh berries
  • Champagne or sparkling wine for wedding or celebration menus
  • Hot cocoa or coffee as a sweet after-dinner treat
  • Ice cream as a decorative and flavorful topping

How to Store and Reheat

Proper storage ensures your mints stay fresh and delicious.

  • Refrigeration – Store in an airtight container in the fridge for up to two weeks.
  • Freezing – These mints freeze beautifully for up to three months. Thaw in the refrigerator before serving.
  • Room Temperature – They can sit out for several hours during events but should be refrigerated afterward.
  • No Reheating Needed – These are meant to be served cold or at room temperature.

Frequently Asked Questions (FAQs)

Here are answers to common cream cheese mint queries.

Can I use low-fat cream cheese?
While possible, full-fat cream cheese yields the best texture and flavor. Low-fat versions may make the mints gummy.

Why are my mints too sticky?
This usually means you need more powdered sugar. Add it gradually until the mixture is pliable but not sticky.

How far in advance can I make these?
They actually improve in flavor after 24 hours. Make them up to a week ahead for best results.

Can I use liquid food coloring?
Yes, but use sparingly as it can thin the mixture. Gel or paste colors are preferable.

Are these the same as wedding mints?
Yes! This classic recipe is often used for weddings, though you can adapt the shapes and colors for any occasion.

Final Thoughts

There’s a reason cream cheese mints have stood the test of time. They represent that perfect balance of simplicity and sophistication, offering a sweet bite that feels both nostalgic and fresh. Whether you’re preparing for a special event or simply want to treat yourself to something sweet, this recipe delivers joy in every tiny package. I love making these with my grandmother’s vintage candy molds, creating edible heirlooms that carry forward family traditions. Whatever your reason for making them, I hope these cream cheese mints bring as much happiness to your kitchen as they have to mine.

Print
clock clock iconcutlery cutlery iconflag flag iconfolder folder iconinstagram instagram iconpinterest pinterest iconfacebook facebook iconprint print iconsquares squares iconheart heart iconheart solid heart solid icon

Cream Cheese Mints

  • Author: Baking Enthusiast

Description

These delightful cream cheese mints are soft, creamy, and perfect for parties, weddings, or holiday treats. They are easy to make and can be customized with different flavors and colors.


Ingredients

Scale

For the Crust:

  • For the mints:
  • 4 oz cream cheese, softened
  • 1/4 cup unsalted butter, softened
  • 1/2 tsp peppermint extract (or other flavor extracts like vanilla or almond)
  • 4 cups powdered sugar, sifted
  • Food coloring (optional)
  • For coating:
  • Granulated sugar or additional powdered sugar for rolling

Instructions

1. Prepare the Crust:

  1. 1. In a large mixing bowl, beat the softened cream cheese and butter together until smooth and creamy.
  2. 2. Add the peppermint extract (or other flavor extract) and mix well.
  3. 3. Gradually add the sifted powdered sugar, about 1 cup at a time, mixing well after each addition. The mixture will become thick and dough-like.
  4. 4. If using food coloring, add a few drops and knead it into the dough until the color is evenly distributed.
  5. 5. Roll the dough into small balls (about 1/2 to 1 inch in diameter).
  6. 6. Roll each ball in granulated sugar or powdered sugar to coat lightly.
  7. 7. Flatten each ball slightly with a fork or a decorative mold to create a mint shape.
  8. 8. Place the mints on a parchment-lined baking sheet and let them dry at room temperature for at least 1-2 hours to set.
  9. 9. Once set, store the mints in an airtight container in the refrigerator for up to 2 weeks.

Notes

For a festive touch, use different food colors and molds for various occasions. These mints can also be frozen for longer storage.

Loaded Scalloped Potatoes

Loaded Scalloped Potatoes

There’s something undeniably comforting about a dish of creamy, cheesy scalloped potatoes. But when you take that classic recipe and load it up with crispy bacon, sharp cheddar, and a hint of green onion, you transform it into something extraordinary. These Loaded Scalloped Potatoes are the ultimate side dish—rich, indulgent, and packed with layers of flavor that will have everyone reaching for seconds. Whether you’re serving them for a holiday feast, a Sunday supper, or just because, this recipe is guaranteed to become a family favorite.

Why You’ll Love This Recipe

If you’re looking for a dish that delivers both comfort and wow-factor, these Loaded Scalloped Potatoes are the answer. Here’s why this recipe stands out:

  • Creamy, cheesy perfection: Thinly sliced potatoes are baked in a velvety sauce made with heavy cream, garlic, and melty cheddar for an irresistibly rich texture.
  • Loaded with flavor: Crispy bacon, green onions, and a hint of smoked paprika take these scalloped potatoes to the next level.
  • Crowd-pleasing versatility: This dish pairs beautifully with everything from roasted chicken to grilled steak, making it a go-to for any occasion.
  • Make-ahead friendly: Assemble it ahead of time and bake when ready—perfect for stress-free entertaining.
  • Comfort food at its finest: Warm, hearty, and satisfying, this is the kind of dish that brings people together.

Ingredients Breakdown

Every ingredient in this recipe plays a crucial role in creating the ultimate Loaded Scalloped Potatoes. Here’s what you’ll need and why:

  • Yukon Gold potatoes: Their buttery texture and thin skins make them ideal for scalloped potatoes. Russets can also work, but Yukon Golds hold their shape better.
  • Heavy cream: The base of the creamy sauce, ensuring a luscious, velvety consistency.
  • Sharp cheddar cheese: Adds a tangy depth of flavor and that perfect gooey melt.
  • Bacon: Cooked until crispy, it brings smoky, salty crunch to every bite.
  • Garlic and onion powder: These seasonings enhance the savory notes of the dish.
  • Green onions: A fresh, bright contrast to the rich cream and cheese.
  • Smoked paprika: Just a pinch adds a subtle warmth and complexity.

How to Make Loaded Scalloped Potatoes

Follow these steps for perfectly creamy, cheesy, and loaded scalloped potatoes every time:

  1. Preheat and prep: Preheat your oven to 375°F and grease a 9×13-inch baking dish.
  2. Cook the bacon: In a skillet over medium heat, cook the bacon until crispy. Drain on paper towels, then crumble.
  3. Slice the potatoes: Use a mandoline or sharp knife to slice the potatoes into 1/8-inch thick rounds for even cooking.
  4. Layer the potatoes: Arrange half of the potato slices in the baking dish, slightly overlapping. Sprinkle with half the bacon, half the cheese, and half the green onions.
  5. Repeat the layers: Add the remaining potatoes, then pour the heavy cream evenly over the top. Season with garlic powder, onion powder, smoked paprika, salt, and pepper.
  6. Top with cheese: Sprinkle the remaining cheese, bacon, and green onions over the top.
  7. Bake: Cover with foil and bake for 45 minutes. Remove the foil and bake for another 20-25 minutes until golden and bubbly.
  8. Rest and serve: Let the dish rest for 10 minutes before serving to allow the sauce to thicken slightly.

Pro Tips for the Best Results

For the most delicious Loaded Scalloped Potatoes, keep these expert tips in mind:

  • Slice potatoes evenly: A mandoline ensures uniform thickness, which helps them cook at the same rate.
  • Don’t skip the resting time: Letting the dish sit for 10 minutes after baking helps the sauce set for cleaner slices.
  • Use freshly grated cheese: Pre-shredded cheese contains anti-caking agents that can make the sauce grainy.
  • Adjust baking time as needed: If the top isn’t browning enough, broil for 1-2 minutes at the end (watch closely!).
  • Add a splash of broth: For a slightly lighter version, substitute half the cream with chicken or vegetable broth.

Variations and Substitutions

This recipe is wonderfully adaptable. Here are some delicious ways to mix it up:

  • Vegetarian option: Skip the bacon and add sautéed mushrooms or caramelized onions for depth.
  • Spicy twist: Stir in a diced jalapeño or a pinch of cayenne pepper for heat.
  • Different cheeses: Try Gruyère, Monterey Jack, or a blend of Parmesan and mozzarella.
  • Herb-infused: Add fresh thyme or rosemary between the layers for an aromatic touch.
  • Lighter version: Swap half the cream for whole milk and use turkey bacon.

What to Serve With It

These Loaded Scalloped Potatoes are a versatile side that pairs well with countless mains. Here are some winning combinations:

  • Classic pairings: Serve alongside roasted turkey, glazed ham, or prime rib for a holiday-worthy spread.
  • Weeknight dinners: Pair with grilled chicken, pan-seared pork chops, or baked salmon.
  • Vegetable sides: Balance the richness with a crisp green salad, roasted Brussels sprouts, or steamed asparagus.
  • Drinks: A glass of Chardonnay, an ice-cold beer, or sparkling cider all complement the dish beautifully.

How to Store and Reheat

Leftovers (if you have any!) can be stored and reheated with great results:

  • Refrigeration: Store in an airtight container for up to 4 days.
  • Freezing: While possible, the texture may become slightly grainy. If freezing, thaw overnight in the fridge before reheating.
  • Reheating: Warm individual portions in the microwave, or cover the baking dish with foil and reheat at 350°F for 15-20 minutes. Add a splash of cream if needed to revive the sauce.

Frequently Asked Questions (FAQs)

Can I make Loaded Scalloped Potatoes ahead of time?
Absolutely! Assemble the dish, cover tightly, and refrigerate for up to 24 hours before baking. You may need to add 5-10 minutes to the baking time if starting cold.

Why are my scalloped potatoes watery?
This can happen if the potatoes are sliced too thick or if the dish isn’t baked long enough. Ensure thin, even slices and bake until the cream is fully absorbed and bubbling.

Can I use milk instead of heavy cream?
Heavy cream provides the best richness, but you can use whole milk in a pinch. The sauce will be slightly thinner.

How do I prevent the cheese from burning on top?
Cover with foil for the first half of baking, then uncover to allow browning. If needed, tent loosely with foil if the top darkens too quickly.

What’s the difference between scalloped and au gratin potatoes?
Traditionally, scalloped potatoes are baked in a cream sauce without cheese, while au gratin includes cheese. This recipe blends the best of both!

Final Thoughts

Loaded Scalloped Potatoes are the kind of dish that turns a simple meal into a celebration. Whether you’re serving them at a holiday gathering or just treating your family to a cozy weeknight dinner, the layers of creamy potatoes, crispy bacon, and melted cheese are guaranteed to delight. I love how versatile this recipe is—easy enough for a casual supper but impressive enough for special occasions. Give it a try, and I bet it’ll earn a permanent spot in your recipe rotation. Happy cooking!

Print
clock clock iconcutlery cutlery iconflag flag iconfolder folder iconinstagram instagram iconpinterest pinterest iconfacebook facebook iconprint print iconsquares squares iconheart heart iconheart solid heart solid icon

Loaded Scalloped Potatoes

  • Author: Chef Emily Carter

Description

Creamy, cheesy scalloped potatoes loaded with crispy bacon, green onions, and a hint of garlic for the ultimate comfort food side dish. Perfect for holidays or family dinners.


Ingredients

Scale

For the Crust:

  • For the potatoes:
  • 2 lbs Yukon Gold potatoes, thinly sliced
  • 1 tsp salt
  • 1/2 tsp black pepper
  • For the sauce:
  • 3 tbsp unsalted butter
  • 3 tbsp all-purpose flour
  • 2 cups whole milk
  • 1 cup heavy cream
  • 1 tsp garlic powder
  • 1/2 tsp onion powder
  • 1/2 tsp dried thyme
  • For toppings:
  • 6 slices bacon, cooked and crumbled
  • 1 1/2 cups shredded sharp cheddar cheese
  • 1/2 cup shredded Monterey Jack cheese
  • 2 green onions, thinly sliced

Instructions

1. Prepare the Crust:

  1. 1. Preheat oven to 375°F (190°C). Grease a 9×13 inch baking dish.
  2. 2. Layer half the potato slices in the dish, overlapping slightly. Season with half the salt and pepper.
  3. 3. In a saucepan, melt butter over medium heat. Whisk in flour and cook for 1 minute.
  4. 4. Gradually whisk in milk and cream until smooth. Add garlic powder, onion powder, and thyme. Cook until thickened (about 5 minutes).
  5. 5. Pour half the sauce over the first potato layer. Add remaining potatoes and top with remaining sauce.
  6. 6. Cover with foil and bake for 45 minutes. Remove foil, sprinkle with cheeses and bacon.
  7. 7. Bake uncovered 20-25 more minutes until golden and bubbly. Let rest 10 minutes before serving.
  8. 8. Garnish with green onions before serving.

Notes

For crispier potatoes, soak slices in cold water for 30 minutes before assembling. Can be made ahead – refrigerate before baking, then add 10-15 minutes to baking time.

chewy Pistachio Pudding Cookies

Chewy Pistachio Pudding Cookies

There’s something magical about the combination of buttery dough, sweet pistachio flavor, and that irresistible chewiness in every bite. These Chewy Pistachio Pudding Cookies are a nostalgic yet modern twist on classic pudding cookies, delivering a soft, tender texture with a delightful nutty aroma. Whether you’re baking for a holiday gathering, a cozy afternoon treat, or just because, these cookies are guaranteed to disappear fast. Let’s dive into why this recipe is a must-try and how to make it perfectly every time.

Why You’ll Love This Recipe

First, these cookies are incredibly soft and chewy, thanks to the secret ingredient: pistachio pudding mix. The pudding not only infuses the dough with flavor but also keeps the cookies moist for days.

Second, they’re easy to make with simple pantry staples. No fancy equipment or complicated techniques required—just a bowl, a spoon, and a love for baking.

Third, the pistachio flavor shines without being overpowering. It’s subtle yet distinct, making these cookies a unique alternative to traditional chocolate chip or sugar cookies.

Finally, they’re versatile. Dress them up with a drizzle of white chocolate, add chopped nuts for extra crunch, or keep them classic—they’re delicious any way you make them.

Ingredients Breakdown

Understanding the role of each ingredient ensures baking success. Here’s what you’ll need:

  • Unsalted butter – Provides richness and helps create a tender crumb. Always use softened butter for easy mixing.
  • Granulated sugar and brown sugar – The combination ensures sweetness, moisture, and that perfect chewiness.
  • Eggs – Bind the dough and add structure.
  • Pistachio pudding mix – The star ingredient! It enhances flavor, adds a subtle green hue, and keeps the cookies soft.
  • All-purpose flour – The base of the dough. For a lighter texture, sift it before mixing.
  • Baking soda and salt – Leavening agents that help the cookies rise and balance sweetness.
  • Vanilla extract – Deepens the flavor profile, complementing the pistachio notes.
  • Optional add-ins – White chocolate chips, chopped pistachios, or a pinch of almond extract for extra depth.

How to Make Chewy Pistachio Pudding Cookies

Follow these steps for foolproof, bakery-worthy cookies:

  1. Cream the butter and sugars – In a large bowl, beat softened butter with granulated and brown sugar until light and fluffy. This step incorporates air, ensuring a soft texture.
  2. Add eggs and vanilla – Mix in one egg at a time, followed by vanilla extract, until fully combined.
  3. Incorporate dry ingredients – Whisk together flour, pudding mix, baking soda, and salt in a separate bowl. Gradually add this to the wet ingredients, mixing just until no flour streaks remain.
  4. Fold in extras – If using white chocolate chips or nuts, gently stir them in now.
  5. Chill the dough – Cover and refrigerate for at least 30 minutes. This prevents spreading and intensifies the flavors.
  6. Preheat and scoop – Preheat your oven to 350°F (175°C). Line baking sheets with parchment paper and scoop dough into 1.5-inch balls, spacing them 2 inches apart.
  7. Bake to perfection – Bake for 10–12 minutes, until the edges are lightly golden but the centers are still soft. Let them cool on the sheet for 5 minutes before transferring to a wire rack.

Pro Tips for the Best Results

  • Don’t overmix – Once the flour is incorporated, stop mixing to avoid tough cookies.
  • Use a cookie scoop – For uniform size and even baking, a scoop ensures consistency.
  • Underbake slightly – Remove the cookies when they look just set. They’ll firm up as they cool, staying chewy.
  • Toast the nuts – If adding pistachios, toast them first for deeper flavor.

Variations and Substitutions

Customize these cookies to suit your taste or dietary needs:

  • Gluten-free – Swap all-purpose flour for a 1:1 gluten-free blend.
  • Nut-free – Omit chopped pistachios or replace with sunflower seeds.
  • Different pudding flavors – Try vanilla or cheesecake pudding for a twist.
  • Drizzled cookies – Melt white chocolate and zigzag it over cooled cookies for an elegant finish.

What to Serve With It

These cookies pair beautifully with:

  • A glass of cold milk or a warm cup of chai tea.
  • Vanilla ice cream for an indulgent cookie sandwich.
  • A fruit platter for a balanced dessert spread.

How to Store and Reheat

Keep cookies fresh in an airtight container at room temperature for up to 5 days. For longer storage, freeze baked cookies in a single layer before transferring to a freezer bag—they’ll keep for 3 months. Thaw at room temperature or warm in a 300°F oven for 5 minutes.

Frequently Asked Questions (FAQs)

Can I use instant pistachio pudding mix?
Yes, instant pudding mix works perfectly in this recipe. Just ensure it’s the dry powder—don’t prepare it as directed on the box.

Why did my cookies spread too much?
This usually happens if the butter was too soft or the dough wasn’t chilled. Always chill the dough and use properly softened butter (not melted).

Can I make the dough ahead?
Absolutely! Refrigerate the dough for up to 48 hours or freeze it for 3 months. Let it soften slightly before scooping.

Final Thoughts

These Chewy Pistachio Pudding Cookies are a delightful blend of simplicity and sophistication. Whether you’re a seasoned baker or a beginner, this recipe is forgiving, fun, and utterly rewarding. Share them with friends, pack them in lunchboxes, or savor one with your afternoon coffee—they’re sure to become a cherished favorite. Happy baking!

Print
clock clock iconcutlery cutlery iconflag flag iconfolder folder iconinstagram instagram iconpinterest pinterest iconfacebook facebook iconprint print iconsquares squares iconheart heart iconheart solid heart solid icon

Chewy Pistachio Pudding Cookies

  • Author: Baking Enthusiast

Description

These soft and chewy pistachio pudding cookies are packed with rich nutty flavor and a delightful green hue. Perfect for holiday baking or anytime you crave a sweet, nutty treat!


Ingredients

Scale

For the Crust:

  • For the cookies:
  • 1 cup unsalted butter, softened
  • 3/4 cup granulated sugar
  • 3/4 cup packed brown sugar
  • 2 large eggs
  • 1 teaspoon vanilla extract
  • 1 (3.4 oz) package instant pistachio pudding mix
  • 2 1/4 cups all-purpose flour
  • 1 teaspoon baking soda
  • 1/2 teaspoon salt
  • 1 cup white chocolate chips (optional)
  • For garnish (optional):
  • 1/4 cup chopped pistachios
  • 1/4 cup powdered sugar

Instructions

1. Prepare the Crust:

  1. Preheat oven to 350°F (175°C). Line baking sheets with parchment paper.
  2. In a large bowl, cream together butter, granulated sugar, and brown sugar until light and fluffy.
  3. Beat in eggs one at a time, then stir in vanilla extract.
  4. Add the pistachio pudding mix and blend until fully incorporated.
  5. In a separate bowl, whisk together flour, baking soda, and salt.
  6. Gradually mix the dry ingredients into the wet ingredients until just combined.
  7. Fold in white chocolate chips (if using).
  8. Drop rounded tablespoons of dough onto prepared baking sheets, spacing them 2 inches apart.
  9. Bake for 10-12 minutes, or until edges are lightly golden but centers remain soft.
  10. Let cookies cool on baking sheets for 5 minutes before transferring to a wire rack.
  11. Optional: Sprinkle warm cookies with chopped pistachios or dust with powdered sugar once cooled.

Notes

Store cookies in an airtight container at room temperature for up to 5 days. For extra chewiness, slightly underbake the cookies and let them rest on the baking sheet for 10 minutes before transferring.

classic fried rice

classic fried rice

There’s something undeniably comforting about a steaming plate of classic fried rice. Whether it’s a quick weeknight dinner or a way to repurpose leftovers, this dish has stood the test of time for good reason. With its perfect balance of fluffy rice, savory seasonings, and crisp vegetables, classic fried rice is a versatile staple that never disappoints. Today, I’m sharing my tried-and-true method for making restaurant-quality fried rice at home—complete with pro tips, variations, and everything you need to know to master this beloved dish.

Why You’ll Love This Recipe

If you’ve ever wondered what makes classic fried rice so universally adored, here’s why this recipe will become a regular in your kitchen:

  • Effortless and quick: With just a few simple ingredients and minimal prep time, you can whip up a satisfying meal in under 30 minutes.
  • Perfect for leftovers: This recipe is a fantastic way to breathe new life into leftover rice, proteins, and vegetables, reducing food waste while creating something delicious.
  • Endlessly customizable: Whether you prefer chicken, shrimp, or a vegetarian version, classic fried rice adapts to your tastes and dietary needs effortlessly.
  • Family-friendly: Mild yet flavorful, this dish is a hit with kids and adults alike, making it a reliable option for family dinners.
  • Restaurant-quality at home: By following a few key techniques, you can achieve that signature smoky, savory flavor typically found in your favorite takeout spot.

Ingredients Breakdown

Every great dish starts with quality ingredients, and classic fried rice is no exception. Here’s what you’ll need and why each component matters:

  • Cooked and cooled rice: Day-old rice works best because it’s drier, preventing a mushy texture. The grains stay separate and fry up beautifully.
  • Eggs: Scrambled into the rice, eggs add richness and protein, creating a more substantial dish.
  • Vegetables (such as carrots, peas, and green onions): These add color, texture, and nutrients. Feel free to use whatever you have on hand.
  • Soy sauce: The backbone of flavor, soy sauce provides umami and saltiness. For a gluten-free option, use tamari.
  • Sesame oil: A drizzle at the end enhances aroma and depth, giving the dish an authentic touch.
  • Garlic and ginger: These aromatics build a flavorful foundation, infusing the rice with warmth and complexity.
  • Protein (optional): Chicken, shrimp, pork, or tofu can be added for extra heartiness.

How to Make classic fried rice

Follow these steps for foolproof classic fried rice every time:

  1. Prep your ingredients: Chop all vegetables and protein into small, even pieces. Crack the eggs into a bowl and whisk lightly.
  2. Heat the wok or skillet: Use high heat to achieve that signature smoky flavor. Add a neutral oil like vegetable or canola oil.
  3. Scramble the eggs: Push them to one side of the pan once cooked, ensuring they stay tender.
  4. Sauté aromatics: Add minced garlic and ginger, stirring quickly to avoid burning. Toss in the vegetables and cook until crisp-tender.
  5. Add the rice: Break up any clumps with a spatula. Stir-fry for a few minutes until the rice is heated through.
  6. Season: Drizzle with soy sauce and toss to coat evenly. Finish with a splash of sesame oil for depth.
  7. Combine everything: Mix the eggs back in, along with any additional protein. Garnish with sliced green onions.

Pro tip: Avoid overcrowding the pan. Cook in batches if necessary to maintain high heat and prevent steaming.

Pro Tips for the Best Results

Take your classic fried rice to the next level with these expert techniques:

  • Use cold rice: Freshly cooked rice can be too moist. Spread leftover rice on a tray and refrigerate uncovered for at least an hour to dry it out.
  • High heat is key: A blazing-hot wok or skillet ensures the rice gets slightly crispy instead of soggy.
  • Don’t over-stir: Let the rice sit for brief intervals to develop a slight crust, enhancing texture.
  • Toast the rice: Before adding sauces, fry the rice alone for a minute to intensify its nutty flavor.
  • Season in layers: Add a pinch of salt when cooking the eggs and vegetables, then adjust with soy sauce later.

Variations and Substitutions

Classic fried rice is incredibly adaptable. Here are some delicious twists to try:

  • Protein options: Swap in diced chicken, shrimp, beef, or tofu. For extra indulgence, add crispy bacon or Chinese sausage.
  • Vegetarian or vegan: Skip the eggs and use tofu or tempeh. Replace fish sauce with a vegan alternative if needed.
  • Pineapple fried rice: Add diced pineapple and cashews for a sweet and savory Thai-inspired version.
  • Kimchi fried rice: Stir in chopped kimchi and a fried egg for a spicy Korean twist.
  • Low-carb: Substitute rice with cauliflower rice for a lighter, grain-free alternative.

What to Serve With It

Classic fried rice is a complete meal on its own, but these pairings can round out your spread:

  • Asian-inspired sides: Egg rolls, potstickers, or steamed dumplings complement the flavors perfectly.
  • Simple proteins: Serve alongside teriyaki chicken, honey-glazed shrimp, or grilled tofu.
  • Fresh salads: A cucumber salad or tangy Asian slaw adds a refreshing contrast.
  • Sauces: Offer extra soy sauce, chili oil, or sriracha for drizzling.
  • Beverages: Pair with jasmine tea, a light lager, or a citrusy white wine.

How to Store and Reheat

Leftover classic fried rice keeps well with proper storage:

  • Refrigeration: Store in an airtight container for up to 3 days.
  • Freezing: Portion and freeze for up to 2 months. Thaw overnight in the fridge before reheating.
  • Reheating: For best results, reheat in a skillet over medium heat with a splash of water or oil to revive the texture. Microwave reheating can make the rice dry.

Safety note: Ensure leftover fried rice is piping hot throughout when reheating to avoid foodborne illness.

Frequently Asked Questions (FAQs)

Can I use freshly cooked rice?
While possible, freshly cooked rice tends to be too moist and can turn mushy when fried. For best results, spread cooked rice on a tray and let it cool (or refrigerate) for at least an hour.

What type of rice works best?
Long-grain varieties like jasmine or basmati are ideal because they stay fluffy and separate. Avoid short-grain or sticky rice unless you prefer a clumpier texture.

How do I prevent my fried rice from being greasy?
Use just enough oil to coat the pan lightly. Excess oil can make the rice heavy. A well-seasoned wok or nonstick skillet also helps.

Can I make this gluten-free?
Absolutely! Substitute soy sauce with tamari or coconut aminos, and ensure any added sauces (like oyster sauce) are gluten-free certified.

Why does restaurant fried rice taste different?
Restaurants often use high-powered burners for intense heat, which creates a smoky wok hei flavor. Replicate this at home by cooking in small batches on the highest heat possible.

Final Thoughts

Classic fried rice is more than just a humble dish—it’s a canvas for creativity and a testament to the beauty of simplicity. Whether you’re cooking for one or feeding a crowd, this recipe delivers satisfaction in every bite. The next time you find yourself with leftover rice, don’t hesitate to transform it into something extraordinary. With a little practice and these tips in your back pocket, you’ll be whipping up better-than-takeout fried rice with confidence. Happy cooking!

Print
clock clock iconcutlery cutlery iconflag flag iconfolder folder iconinstagram instagram iconpinterest pinterest iconfacebook facebook iconprint print iconsquares squares iconheart heart iconheart solid heart solid icon

Classic Fried Rice

  • Author: Chef Alex

Description

A simple yet flavorful classic fried rice recipe that’s perfect for using up leftover rice. Packed with vegetables, eggs, and savory soy sauce, this dish comes together in minutes and makes a satisfying meal.


Ingredients

Scale

For the Crust:

  • For the rice:
  • 3 cups cooked and cooled white rice (preferably day-old)
  • For the vegetables:
  • 1/2 cup diced carrots
  • 1/2 cup frozen peas
  • 1/2 cup diced bell peppers
  • 2 green onions, sliced
  • For the protein:
  • 2 large eggs, beaten
  • 1/2 cup diced cooked chicken or shrimp (optional)
  • For seasoning:
  • 2 tablespoons soy sauce
  • 1 tablespoon oyster sauce
  • 1 teaspoon sesame oil
  • 1/2 teaspoon white pepper
  • 1 clove garlic, minced
  • 1 tablespoon vegetable oil

Instructions

1. Prepare the Crust:

  1. 1. Heat a large wok or skillet over medium-high heat. Add 1 tablespoon of vegetable oil.
  2. 2. Add beaten eggs and scramble until just set. Remove from the pan and set aside.
  3. 3. In the same pan, add a bit more oil if needed, then sauté garlic until fragrant (about 30 seconds).
  4. 4. Add carrots and bell peppers. Stir-fry for 2-3 minutes until slightly softened.
  5. 5. Add peas and any optional protein (chicken or shrimp). Cook for another minute.
  6. 6. Increase heat to high and add the cold rice. Break up any clumps with a spatula.
  7. 7. Add soy sauce, oyster sauce, sesame oil, and white pepper. Stir-fry for 2-3 minutes until everything is well combined.
  8. 8. Return the scrambled eggs to the pan and mix well.
  9. 9. Add green onions and stir for another 30 seconds.
  10. 10. Taste and adjust seasoning if needed. Serve hot.

Notes

For best results, use cold, day-old rice as it fries better than fresh rice. You can customize this recipe with any vegetables or protein you have on hand. For vegetarian version, simply omit the meat and eggs or use tofu instead.

gorgeous Strawberry Lasagna

gorgeous Strawberry Lasagna

If you’re looking for a show-stopping dessert that combines the freshness of strawberries with the comforting layers of a classic lasagna, this gorgeous Strawberry Lasagna is your answer. Perfect for summer gatherings, holiday parties, or just a sweet weekend treat, this no-bake dessert is as delightful to look at as it is to eat. With creamy layers, juicy strawberries, and a buttery crust, it’s a dessert that will have everyone asking for seconds.

Why You’ll Love This Recipe

There are countless reasons to fall in love with this gorgeous Strawberry Lasagna, but here are just a few that make it truly special:

  • No-Bake Convenience: Skip the oven and let the refrigerator do the work. This dessert comes together effortlessly, making it ideal for hot summer days or when you’re short on time.
  • Perfect Balance of Flavors: The sweetness of fresh strawberries pairs beautifully with the rich cream cheese filling and the crisp graham cracker crust, creating a harmony of textures and tastes.
  • Eye-Catching Presentation: With its vibrant red strawberries peeking through creamy layers, this dessert is a feast for the eyes—perfect for impressing guests at any gathering.
  • Make-Ahead Friendly: You can prepare this dessert hours or even a day in advance, allowing the flavors to meld together while you focus on other dishes.
  • Versatile for Any Occasion: Whether it’s a family barbecue, a bridal shower, or a simple weeknight indulgence, this strawberry lasagna fits every occasion.

Ingredients Breakdown

Understanding the role of each ingredient helps in achieving the perfect texture and flavor. Here’s what you’ll need:

  • Graham Crackers: The base of the dessert, providing a sweet and slightly crunchy crust that contrasts beautifully with the creamy layers.
  • Butter: Melted butter binds the graham cracker crumbs, ensuring a firm and delicious foundation.
  • Cream Cheese: The star of the creamy layers, offering a rich and tangy balance to the sweetness of the strawberries.
  • Powdered Sugar: Adds sweetness to the cream cheese layer without the graininess of granulated sugar.
  • Whipped Topping: Lightens the texture, making the filling fluffy and airy.
  • Fresh Strawberries: The star of the show, providing juicy bursts of flavor and a stunning visual appeal.
  • Strawberry Jelly or Jam: Enhances the strawberry flavor and helps bind the fruit layer.
  • Vanilla Extract: A touch of warmth and depth to round out the flavors.

How to Make gorgeous Strawberry Lasagna

Follow these simple steps to create this stunning dessert:

  1. Prepare the Crust: Crush graham crackers into fine crumbs and mix with melted butter. Press firmly into the bottom of a 9×13-inch baking dish and refrigerate for 15 minutes to set.
  2. Make the Cream Cheese Layer: Beat softened cream cheese with powdered sugar and vanilla until smooth. Gently fold in whipped topping, then spread this mixture evenly over the chilled crust.
  3. Create the Strawberry Layer: Slice fresh strawberries and toss them with strawberry jelly or jam for extra sweetness and shine. Arrange the strawberries over the cream cheese layer.
  4. Add the Final Topping: Spread another layer of whipped topping over the strawberries, ensuring everything is evenly covered.
  5. Chill and Set: Refrigerate for at least 4 hours, or preferably overnight, to allow the layers to firm up.
  6. Serve and Enjoy: Slice into squares and garnish with additional fresh strawberries or a drizzle of strawberry sauce if desired.

Pro Tips for the Best Results

For a flawless strawberry lasagna every time, keep these expert tips in mind:

  • Use Room Temperature Cream Cheese: This ensures a smooth, lump-free filling. Cold cream cheese can result in a grainy texture.
  • Chill Between Layers: Letting the crust and cream cheese layers firm up in the fridge before adding the strawberries prevents them from sinking.
  • Choose Ripe Strawberries: The sweeter and juicier the berries, the more flavorful your dessert will be.
  • Fold Gently: When incorporating whipped topping into the cream cheese, use a spatula and fold slowly to maintain the airy texture.
  • Slice Neatly: For clean cuts, dip a sharp knife in warm water before slicing each piece.

Variations and Substitutions

This recipe is wonderfully adaptable. Here are some delicious twists to try:

  • Mixed Berry Lasagna: Swap strawberries for a mix of raspberries, blueberries, and blackberries for a colorful variation.
  • Chocolate Graham Crust: Use chocolate graham crackers for a deeper, richer base.
  • Dairy-Free Version: Substitute cream cheese with a vegan alternative and use coconut whipped topping.
  • Lemon Zest Infusion: Add a teaspoon of lemon zest to the cream cheese layer for a bright, citrusy note.
  • Nutty Crunch: Mix finely chopped pecans or almonds into the crust for extra texture.

What to Serve With It

While this dessert is fantastic on its own, pairing it with complementary flavors can elevate the experience:

  • Fresh Mint Garnish: A few sprigs of mint add a refreshing contrast to the sweetness.
  • Vanilla Ice Cream: A scoop on the side makes it even more indulgent.
  • Sparkling Wine or Champagne: The effervescence cuts through the richness, making it perfect for celebrations.
  • Whipped Cream Drizzle: A light drizzle of extra whipped cream adds a decadent touch.

How to Store and Reheat

This dessert is best enjoyed cold, but here’s how to keep it fresh:

  • Refrigeration: Store covered in the fridge for up to 3 days. The crust may soften slightly over time.
  • Freezing: While possible, freezing can alter the texture of the whipped layers. If needed, freeze in an airtight container for up to 1 month and thaw in the fridge before serving.
  • Reheating: Not recommended, as this dessert is meant to be served chilled.

Frequently Asked Questions (FAQs)

Here are answers to some common questions about this recipe:

  • Can I use frozen strawberries? Fresh strawberries are best for texture, but thawed and drained frozen strawberries can work in a pinch.
  • How far in advance can I make this? You can assemble it up to 24 hours ahead, making it perfect for entertaining.
  • Can I use a different fruit? Absolutely! Peaches, raspberries, or a mix of berries would all be delicious.
  • What if I don’t have strawberry jelly? You can omit it or use a light dusting of powdered sugar on the strawberries instead.
  • Is there a gluten-free option? Yes, substitute gluten-free graham crackers for the crust.

Final Thoughts

This gorgeous Strawberry Lasagna is more than just a dessert—it’s a celebration of summer flavors and effortless elegance. Whether you’re serving it at a party or enjoying a quiet slice with a cup of tea, it’s guaranteed to bring smiles. The layers of creamy filling, juicy strawberries, and buttery crust create a symphony of textures that’s simply irresistible. So gather your ingredients, take your time layering, and savor every bite of this delightful treat. Happy baking—or rather, happy no-baking!

Print
clock clock iconcutlery cutlery iconflag flag iconfolder folder iconinstagram instagram iconpinterest pinterest iconfacebook facebook iconprint print iconsquares squares iconheart heart iconheart solid heart solid icon

Gorgeous Strawberry Lasagna

  • Author: Sweet Treats Kitchen

Description

A stunning no-bake dessert lasagna with layers of creamy filling, fresh strawberries, and crunchy graham crackers. Perfect for summer gatherings!


Ingredients

Scale

For the Crust:

  • For the crust:
  • 2 cups graham cracker crumbs
  • 1/2 cup unsalted butter, melted
  • 1/4 cup granulated sugar
  • For the filling:
  • 16 oz cream cheese, softened
  • 1 cup powdered sugar
  • 2 tsp vanilla extract
  • 8 oz whipped topping (like Cool Whip), thawed
  • For the strawberry layer:
  • 2 lbs fresh strawberries, sliced
  • 1/4 cup granulated sugar
  • 1 tbsp lemon juice
  • For topping:
  • Additional whipped topping
  • Fresh mint leaves (optional)

Instructions

1. Prepare the Crust:

  1. 1. Make the crust: Mix graham cracker crumbs, melted butter, and sugar. Press firmly into a 9×13-inch dish. Chill 15 minutes.
  2. 2. Prepare strawberries: Toss sliced strawberries with sugar and lemon juice. Let macerate 10 minutes, then drain excess liquid.
  3. 3. Make filling: Beat cream cheese until smooth. Add powdered sugar and vanilla, mixing well. Fold in whipped topping.
  4. 4. Assemble: Spread half the cream mixture over crust. Add layer of strawberries. Repeat layers.
  5. 5. Chill: Cover and refrigerate at least 4 hours (overnight is best).
  6. 6. Serve: Garnish with whipped topping and mint leaves. Cut into squares.

Notes

For a firmer set, use 1 tbsp unflavored gelatin dissolved in 1/4 cup warm water (mix into cream cheese filling). Substitute raspberries or mixed berries for variation.