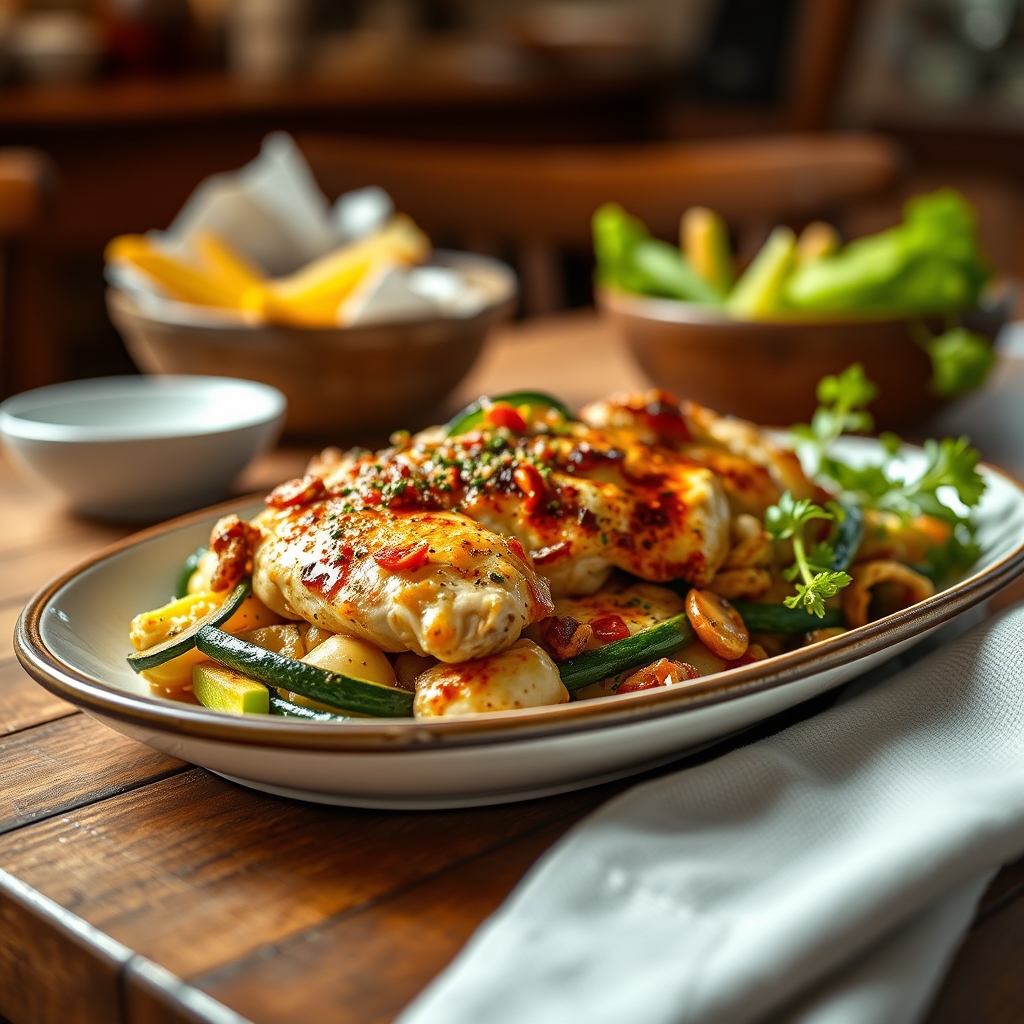
Chicken Zucchini Casserole
There’s something undeniably comforting about a warm, hearty casserole straight from the oven. This Chicken Zucchini Casserole is no exception—it’s a delicious, wholesome dish that brings together tender chicken, fresh zucchini, and a creamy, cheesy topping. Whether you’re looking for a weeknight dinner solution or a dish to impress guests, this recipe delivers on flavor, simplicity, and nutrition. Let’s dive into why this casserole deserves a spot in your recipe rotation.
Why You’ll Love This Recipe
First, this Chicken Zucchini Casserole is a fantastic way to sneak in extra vegetables without sacrificing flavor. The zucchini adds a subtle sweetness and a satisfying texture, making it a hit even with picky eaters.
Second, it’s incredibly versatile. You can easily adapt it to suit different dietary preferences or use whatever ingredients you have on hand. Whether you’re gluten-free, dairy-free, or just looking for a low-carb option, this recipe can be tweaked to fit your needs.
Third, it’s a meal prep dream. You can assemble it ahead of time and bake it when ready, or enjoy leftovers that taste just as good the next day. The flavors meld beautifully, making it even more delicious after sitting for a while.
Finally, it’s a crowd-pleaser. The combination of juicy chicken, creamy sauce, and golden cheese topping is irresistible. Serve it at potlucks, family dinners, or even as a brunch dish—it always gets rave reviews.
Ingredients Breakdown
Let’s take a closer look at the key ingredients that make this Chicken Zucchini Casserole shine.
Chicken: Boneless, skinless chicken breasts or thighs work best. Thighs add extra juiciness, while breasts keep it lean. Either way, the chicken should be cooked and shredded or diced before assembling the casserole.
Zucchini: Fresh zucchini is the star vegetable here. It adds moisture, a mild flavor, and a pleasant texture. Be sure to slice it evenly so it cooks uniformly.
Cheese: A blend of shredded cheddar and mozzarella creates the perfect gooey, golden topping. You can also experiment with Parmesan or Gruyère for a richer flavor.
Creamy Base: A mixture of sour cream or Greek yogurt, cream of chicken soup (or a homemade alternative), and seasonings forms the luscious sauce that binds everything together.
Seasonings: Garlic powder, onion powder, dried thyme, and a pinch of paprika add depth and warmth to the dish. Fresh herbs like parsley or basil can be sprinkled on top for a fresh finish.
How to Make Chicken Zucchini Casserole
Follow these simple steps to create a perfect Chicken Zucchini Casserole every time.
Step 1: Preheat your oven to 375°F and lightly grease a 9×13-inch baking dish.
Step 2: Cook the chicken. You can poach, bake, or sauté it until fully cooked, then shred or dice it into bite-sized pieces.
Step 3: Slice the zucchini into ¼-inch rounds. If your zucchini is very watery, sprinkle the slices with salt and let them sit for 10 minutes, then pat dry with a paper towel to remove excess moisture.
Step 4: In a large bowl, combine the shredded chicken, zucchini, sour cream, cream of chicken soup, and seasonings. Mix until everything is well coated.
Step 5: Transfer the mixture to the prepared baking dish and spread it evenly. Top with the shredded cheese, covering the entire surface.
Step 6: Bake for 25–30 minutes, or until the cheese is bubbly and golden brown. If you prefer a crispier top, broil for the last 2–3 minutes.
Step 7: Let the casserole rest for 5–10 minutes before serving. This allows the sauce to thicken slightly and makes it easier to slice.
Pro Tips for the Best Results
For the best Chicken Zucchini Casserole, keep these expert tips in mind.
If you’re concerned about excess moisture, lightly salt the zucchini slices and let them sit for 10 minutes before patting dry. This prevents the casserole from becoming watery.
For extra flavor, sauté the zucchini in a little olive oil before adding it to the casserole. This enhances its natural sweetness and reduces sogginess.
If you don’t have cream of chicken soup, make a quick substitute by mixing 1 cup of chicken broth with ½ cup of heavy cream and 2 tablespoons of flour. Simmer until thickened.
For a crispy topping, mix breadcrumbs or crushed crackers with melted butter and sprinkle over the cheese before baking.
Let the casserole rest before serving. This helps the layers set and makes it easier to portion.
Variations and Substitutions
This recipe is highly adaptable. Here are some delicious variations to try.
Low-Carb: Skip the cream of chicken soup and use a mixture of heavy cream and cream cheese instead. You can also add cauliflower rice for extra bulk.
Gluten-Free: Use a gluten-free cream of chicken soup or make your own with gluten-free flour.
Vegetarian: Replace the chicken with chickpeas or white beans and use cream of mushroom soup instead of chicken.
Spicy Twist: Add diced jalapeños, a dash of hot sauce, or a sprinkle of red pepper flakes for a kick.
Extra Veggies: Mix in sautéed mushrooms, bell peppers, or spinach for added nutrition and flavor.
What to Serve With It
This Chicken Zucchini Casserole is a complete meal on its own, but here are some great pairings to round out your dinner.
A simple green salad with a tangy vinaigrette provides a refreshing contrast to the rich casserole.
Garlic bread or a crusty baguette is perfect for soaking up the creamy sauce.
Roasted potatoes or a wild rice pilaf make excellent hearty sides.
For a light option, steamed asparagus or roasted Brussels sprouts add a nice crunch.
A crisp white wine like Sauvignon Blanc or a light-bodied red like Pinot Noir pairs beautifully with the flavors of the casserole.
How to Store and Reheat
Leftovers of this Chicken Zucchini Casserole store and reheat beautifully.
To refrigerate, let the casserole cool completely, then cover tightly with plastic wrap or transfer to an airtight container. It will keep for up to 4 days.
To freeze, wrap individual portions in foil or place them in freezer-safe containers. Freeze for up to 3 months. Thaw overnight in the fridge before reheating.
To reheat, place individual servings in the microwave for 2–3 minutes or bake in a 350°F oven for 15–20 minutes until heated through. For best results, sprinkle a little extra cheese on top before reheating.
Frequently Asked Questions (FAQs)
Can I use frozen zucchini instead of fresh? Yes, but thaw and drain it thoroughly to prevent excess moisture. Fresh zucchini is preferred for the best texture.
Can I make this casserole ahead of time? Absolutely. Assemble the casserole up to a day in advance, cover, and refrigerate. Bake as directed, adding a few extra minutes if needed.
What can I use instead of cream of chicken soup? Try cream of mushroom, celery, or a homemade white sauce made with butter, flour, and milk.
How do I prevent the casserole from being watery? Salting the zucchini and letting it sit before patting dry helps. Also, avoid overcooking, as zucchini releases more moisture when baked too long.
Can I add pasta or rice to this casserole? Yes, cooked pasta or rice can be mixed in for a heartier dish. Adjust the sauce quantity if needed.
Final Thoughts
This Chicken Zucchini Casserole is a true testament to how simple ingredients can come together to create something extraordinary. It’s a dish that’s as nourishing as it is delicious, perfect for busy weeknights or leisurely weekend meals. Whether you stick to the classic recipe or experiment with your own twists, I hope it becomes a beloved staple in your kitchen. Happy cooking, and enjoy every cheesy, comforting bite!
Print
Chicken Zucchini Casserole
Description
A delicious and healthy casserole combining tender chicken, fresh zucchini, and a creamy cheese topping. Perfect for a weeknight dinner or meal prep!
Ingredients
For the Crust:
- For the casserole base:
- 2 cups cooked chicken, shredded
- 3 medium zucchinis, thinly sliced
- 1 small onion, diced
- 2 cloves garlic, minced
- 1 tablespoon olive oil
- For the sauce:
- 1 cup sour cream
- 1/2 cup mayonnaise
- 1 teaspoon dried oregano
- 1 teaspoon dried basil
- 1/2 teaspoon salt
- 1/4 teaspoon black pepper
- For the topping:
- 1 cup shredded cheddar cheese
- 1/2 cup grated Parmesan cheese
- 1/2 cup breadcrumbs
Instructions
1. Prepare the Crust:
- Preheat oven to 375°F (190°C) and grease a 9×13 inch baking dish.
- In a large skillet, heat olive oil over medium heat. Add onion and garlic, sauté until fragrant.
- Add sliced zucchini to the skillet and cook for 5-7 minutes until slightly softened. Remove from heat.
- In a bowl, mix together sour cream, mayonnaise, oregano, basil, salt, and pepper to create the sauce.
- Layer half of the zucchini mixture in the prepared baking dish, followed by half of the chicken, and half of the sauce. Repeat layers.
- Combine cheddar cheese, Parmesan cheese, and breadcrumbs in a small bowl. Sprinkle evenly over the top of the casserole.
- Bake for 25-30 minutes until bubbly and golden brown on top.
- Let stand for 5 minutes before serving.
Notes
For a crispier topping, broil for the last 2-3 minutes of baking. Can be made ahead and refrigerated before baking – add 10 minutes to baking time if starting cold.