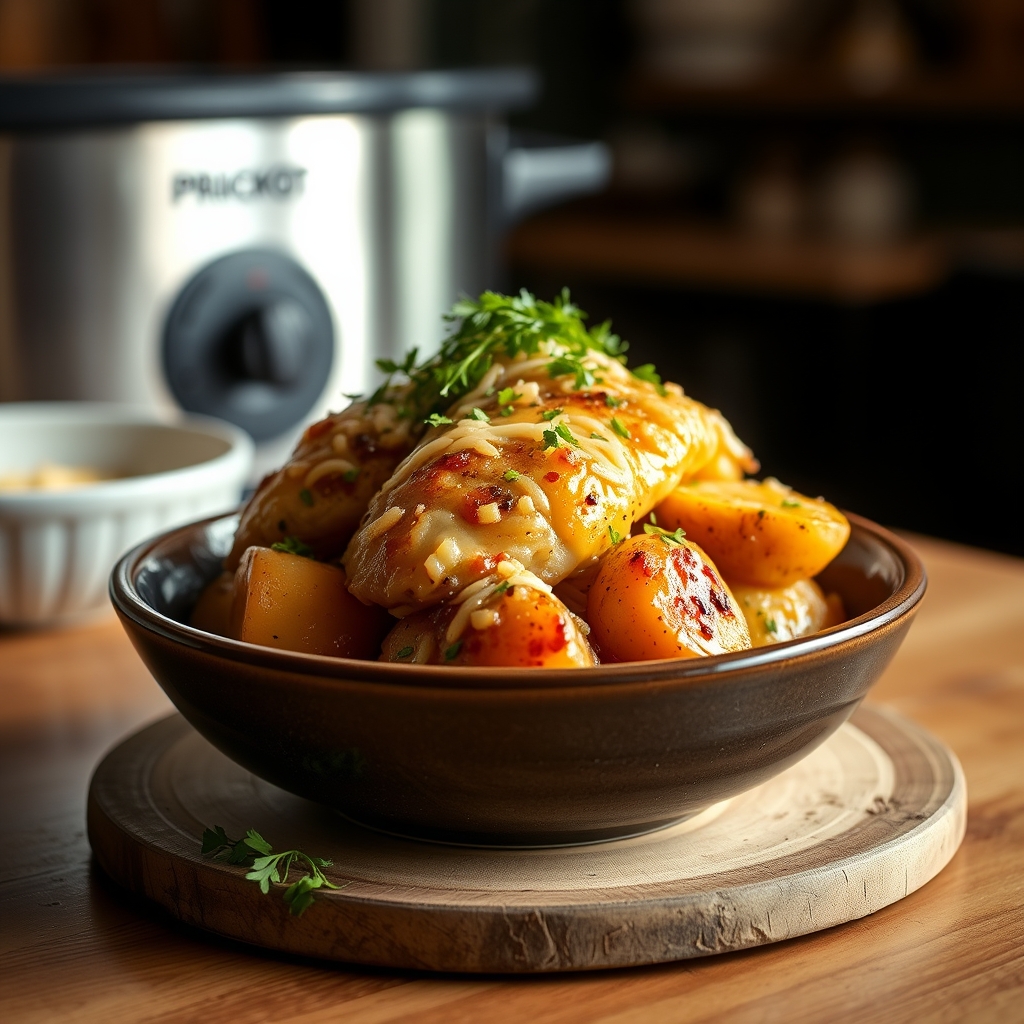
Crockpot Garlic Parmesan Chicken & Potatoes
There’s something magical about a meal that comes together effortlessly yet tastes like you spent hours in the kitchen. This Crockpot Garlic Parmesan Chicken & Potatoes is one of those dishes—comforting, flavorful, and perfect for busy weeknights or lazy weekends. Imagine tender chicken thighs and golden potatoes simmering in a rich garlic parmesan sauce, filling your home with an irresistible aroma. Whether you’re feeding a hungry family or meal prepping for the week, this recipe is a game-changer. Let’s dive into why it’s a must-try and how to make it perfectly every time.
Why You’ll Love This Recipe
First, let’s talk about why this Crockpot Garlic Parmesan Chicken & Potatoes deserves a spot in your regular meal rotation.
- Effortless Cooking: The slow cooker does most of the work for you. Just prep the ingredients, set it, and forget it until dinner time.
- Bold, Comforting Flavors: The combination of garlic, parmesan, and herbs creates a savory, umami-packed sauce that coats every bite.
- One-Pot Wonder: Everything cooks together in the crockpot, meaning fewer dishes and more time to relax.
- Family-Friendly: Kids and adults alike love this dish. It’s hearty, satisfying, and packed with familiar flavors.
- Meal Prep Friendly: This recipe reheats beautifully, making it ideal for leftovers or packed lunches.
Ingredients Breakdown
Understanding the ingredients helps you appreciate how each one contributes to the final dish. Here’s what you’ll need:
- Chicken Thighs: Bone-in, skin-on thighs stay juicy and tender during slow cooking. You can use boneless if preferred, but bone-in adds more flavor.
- Baby Potatoes: Their small size means they cook evenly and soak up the garlic parmesan sauce beautifully.
- Garlic: Fresh minced garlic is essential for that deep, aromatic flavor. Don’t skimp!
- Parmesan Cheese: Freshly grated parmesan melts into the sauce, adding a rich, nutty depth.
- Chicken Broth: Forms the base of the sauce, keeping everything moist and flavorful.
- Heavy Cream: Adds a luscious creaminess to the sauce. For a lighter option, half-and-half works too.
- Italian Seasoning: A blend of herbs like oregano, basil, and thyme that enhances the overall flavor profile.
- Olive Oil & Butter: Used for searing the chicken, adding richness and depth to the dish.
How to Make Crockpot Garlic Parmesan Chicken & Potatoes
Now, let’s walk through the steps to create this delicious meal. Follow these instructions for the best results.
- Sear the Chicken: Heat olive oil and butter in a skillet over medium-high heat. Pat the chicken thighs dry with paper towels, season with salt and pepper, then sear until golden brown on both sides. This step locks in flavor and adds texture.
- Layer the Crockpot: Place the baby potatoes at the bottom of the slow cooker. Sprinkle half the minced garlic and Italian seasoning over them.
- Add the Chicken: Arrange the seared chicken thighs on top of the potatoes. Scatter the remaining garlic and seasoning over the chicken.
- Pour the Liquids: In a bowl, whisk together chicken broth and heavy cream. Pour this mixture evenly over the chicken and potatoes.
- Slow Cook: Cover and cook on low for 6-7 hours or high for 3-4 hours, until the chicken is tender and the potatoes are fork-tight.
- Add Parmesan: In the last 30 minutes of cooking, sprinkle freshly grated parmesan over the dish. Let it melt into the sauce.
- Garnish and Serve: Finish with chopped fresh parsley for a pop of color and freshness. Serve hot, spooning extra sauce over each portion.
Pro Tips for the Best Results
Take your Crockpot Garlic Parmesan Chicken & Potatoes to the next level with these expert tips:
- Don’t Skip the Searing: Browning the chicken first adds depth of flavor that you can’t achieve with slow cooking alone.
- Use Freshly Grated Parmesan: Pre-shredded cheese contains anti-caking agents that can make the sauce grainy. Freshly grated melts smoothly.
- Adjust Cooking Time: If using boneless chicken, reduce the cooking time by about an hour to prevent overcooking.
- Thicken the Sauce: If you prefer a thicker sauce, mix a tablespoon of cornstarch with cold water and stir it in during the last 30 minutes.
- Let It Rest: Allow the dish to sit for 10 minutes after cooking. This helps the flavors meld and the sauce thicken slightly.
Variations and Substitutions
This recipe is versatile. Here are some ways to customize it to your taste or dietary needs:
- Protein Swap: Try boneless chicken breasts (adjust cooking time) or even turkey thighs for a twist.
- Vegetable Add-Ins: Toss in carrots, mushrooms, or green beans for extra veggies.
- Dairy-Free: Use coconut cream instead of heavy cream and nutritional yeast in place of parmesan.
- Spice It Up: Add red pepper flakes or a dash of hot sauce for a kick.
- Herb Variations: Swap Italian seasoning for herbes de Provence or rosemary and thyme.
What to Serve With It
While this dish is hearty on its own, here are some perfect pairings to round out the meal:
- Green Salad: A crisp arugula or spinach salad with lemon vinaigrette balances the richness.
- Garlic Bread: Ideal for soaking up every last drop of that creamy sauce.
- Steamed Vegetables: Broccoli, asparagus, or green beans add a fresh contrast.
- White Wine: A buttery Chardonnay or crisp Pinot Grigio complements the flavors beautifully.
How to Store and Reheat
Leftovers? No problem. Here’s how to keep them tasting great:
- Refrigeration: Store in an airtight container for up to 3 days.
- Freezing: Freeze portions in freezer-safe containers for up to 2 months. Thaw overnight in the fridge before reheating.
- Reheating: Warm in the microwave or on the stovetop over low heat. Add a splash of broth or cream if the sauce has thickened too much.
Frequently Asked Questions (FAQs)
Here are answers to some common questions about this recipe:
Can I use frozen chicken? It’s best to thaw the chicken first to ensure even cooking and proper searing. Frozen chicken may release too much liquid, diluting the sauce.
Can I make this recipe dairy-free? Absolutely. Use coconut cream instead of heavy cream and a dairy-free parmesan alternative.
Why are my potatoes mushy? Overcooking can cause this. Stick to the recommended cooking times and cut potatoes uniformly for even cooking.
Can I cook this on high the entire time? Yes, but low and slow yields more tender results. If short on time, 3-4 hours on high will work.
Can I add other vegetables? Definitely. Root vegetables like carrots or parsnips work well. Add delicate veggies like peas in the last 30 minutes.
Final Thoughts
This Crockpot Garlic Parmesan Chicken & Potatoes is more than just a meal—it’s a comforting, flavorful experience that brings people together. Whether you’re cooking for a weeknight dinner or a casual gathering, it’s a recipe that delivers every time. The creamy garlic parmesan sauce, tender chicken, and perfectly cooked potatoes create a harmony of flavors that’s hard to resist. Give it a try, and don’t be surprised if it becomes a regular in your household. Happy slow cooking!
Print
Crockpot Garlic Parmesan Chicken & Potatoes
Description
A creamy, garlicky one-pot meal with tender chicken and perfectly cooked potatoes. The slow cooker does all the work while infusing every bite with rich Parmesan flavor.
Ingredients
For the Crust:
- For the chicken:
- 1.5 lbs boneless, skinless chicken thighs
- 1/2 teaspoon salt
- 1/4 teaspoon black pepper
- 1 teaspoon paprika
- For the potatoes:
- 1.5 lbs baby potatoes, halved
- 1 tablespoon olive oil
- 1/2 teaspoon garlic powder
- For the sauce:
- 1/2 cup heavy cream
- 1/2 cup chicken broth
- 1/2 cup grated Parmesan cheese
- 4 cloves garlic, minced
- 1 teaspoon Italian seasoning
- 1/4 teaspoon red pepper flakes
- For garnish:
- 2 tablespoons chopped fresh parsley
- Extra Parmesan for serving
Instructions
1. Prepare the Crust:
- 1. Season chicken thighs with salt, pepper, and paprika. Place in the bottom of a 6-quart slow cooker.
- 2. In a bowl, toss potatoes with olive oil and garlic powder. Arrange over chicken.
- 3. Whisk together cream, broth, Parmesan, minced garlic, Italian seasoning, and red pepper flakes. Pour over potatoes.
- 4. Cover and cook on LOW for 5-6 hours or HIGH for 3-4 hours until chicken reaches 165°F.
- 5. Remove chicken and potatoes to serving platter. Whisk sauce until smooth and slightly thickened.
- 6. Spoon sauce over chicken and potatoes. Garnish with parsley and extra Parmesan.
Notes
For crispier potatoes, transfer to baking sheet and broil for 2-3 minutes after cooking. Sauce will thicken upon standing. Substitute half-and-half for heavy cream if needed.


