Loaded Baked Potato Chicken Casserole

Loaded Baked Potato Chicken Casserole

There’s something undeniably comforting about a dish that combines the heartiness of baked potatoes with the savory goodness of tender chicken. This Loaded Baked Potato Chicken Casserole is the ultimate weeknight dinner solution—creamy, cheesy, and packed with flavor. Whether you’re feeding a hungry family or meal prepping for the week, this recipe delivers on taste and convenience. Let’s dive into why this casserole deserves a spot in your recipe rotation.

Why You’ll Love This Recipe

First, this casserole is a complete meal in one dish. With protein, carbs, and veggies layered together, you won’t need to fuss over multiple sides. Second, it’s incredibly customizable—swap ingredients based on what you have on hand or your dietary preferences. Third, the flavors mimic a classic loaded baked potato but with the added richness of juicy chicken. Fourth, it’s a crowd-pleaser, perfect for potlucks or family gatherings. And finally, leftovers taste just as delicious the next day, making it a practical choice for meal prep.

Ingredients Breakdown

Let’s take a closer look at the key ingredients that make this Loaded Baked Potato Chicken Casserole so irresistible.

Chicken Breast: The star protein, chicken breast stays tender and juicy when baked in the creamy sauce. You could also use boneless, skinless chicken thighs for extra richness.

Russet Potatoes: These starchy potatoes hold their shape well and absorb flavors beautifully, just like in a classic baked potato.

Sour Cream & Cream Cheese: These dairy staples create a luscious, creamy base that ties everything together.

Cheddar Cheese: Sharp cheddar melts into gooey perfection, adding a tangy depth to each bite.

Bacon: Crispy bacon bits lend a smoky, salty crunch that contrasts wonderfully with the creamy elements.

Green Onions & Garlic: These aromatics add freshness and a subtle kick, balancing the richness of the dish.

Seasonings: A simple blend of salt, black pepper, and paprika enhances the natural flavors without overpowering them.

How to Make Loaded Baked Potato Chicken Casserole

Follow these step-by-step instructions for a foolproof Loaded Baked Potato Chicken Casserole every time.

Step 1: Preheat and Prep

Preheat your oven to 375°F. Lightly grease a 9×13-inch baking dish to prevent sticking.

Step 2: Cook the Bacon

In a skillet over medium heat, cook the bacon until crispy. Transfer to a paper towel-lined plate to drain, then crumble into bits.

Step 3: Prepare the Chicken

Season the chicken breasts with salt, pepper, and paprika. In the same skillet (with a little bacon fat for extra flavor), sear the chicken for 2-3 minutes per side until golden but not fully cooked. Remove and slice into bite-sized pieces.

Step 4: Layer the Potatoes

Thinly slice the potatoes (peeling is optional) and arrange half of them in the baking dish. Sprinkle with a pinch of salt and minced garlic.

Step 5: Add the Chicken

Scatter the seared chicken pieces evenly over the potatoes.

Step 6: Mix the Creamy Sauce

In a bowl, combine sour cream, softened cream cheese, half of the shredded cheddar, and half of the bacon bits. Spread this mixture over the chicken layer.

Step 7: Top with Remaining Potatoes and Cheese

Layer the remaining potato slices on top, followed by the rest of the cheddar cheese and bacon.

Step 8: Bake to Perfection

Cover with foil and bake for 45 minutes. Remove the foil and bake for another 15-20 minutes until the cheese is bubbly and the potatoes are tender.

Step 9: Garnish and Serve

Let the casserole rest for 5 minutes, then sprinkle with chopped green onions before serving.

Pro Tips for the Best Results

For an even more flavorful Loaded Baked Potato Chicken Casserole, try these expert tips:

Par-Cook the Potatoes: If you’re short on time, microwave the sliced potatoes for 3-4 minutes before layering to speed up baking.

Use Freshly Shredded Cheese: Pre-shredded cheese contains anti-caking agents that can affect meltability. For the creamiest texture, shred your own cheddar.

Let It Rest: Allowing the casserole to sit for a few minutes after baking helps the layers set, making it easier to slice.

Broil for Extra Crispiness: If you love a golden-brown top, broil the casserole for the last 2-3 minutes of baking.

Variations and Substitutions

This recipe is highly adaptable. Here are some tasty twists to consider:

Vegetarian Version: Skip the chicken and bacon, adding extra veggies like mushrooms or bell peppers for heartiness.

Spicy Kick: Mix in diced jalapeños or a dash of hot sauce for those who love heat.

Lighter Option: Substitute Greek yogurt for sour cream and reduced-fat cheese to cut calories without sacrificing creaminess.

Sweet Potato Swap: Replace russet potatoes with sweet potatoes for a slightly sweeter, nutrient-rich variation.

What to Serve With It

While this casserole is a meal on its own, these sides can round out your dinner:

Fresh Salad: A crisp green salad with a tangy vinaigrette balances the richness of the casserole.

Steamed Vegetables: Simple steamed broccoli or green beans add color and nutrition.

Crusty Bread: A warm baguette or garlic bread is perfect for soaking up any extra sauce.

Light White Wine: A chilled Sauvignon Blanc or Pinot Grigio pairs beautifully with the creamy, cheesy flavors.

How to Store and Reheat

This casserole keeps well, making it ideal for leftovers or meal prep.

Refrigeration: Store in an airtight container for up to 3 days. Reheat individual portions in the microwave or the entire dish in a 350°F oven until warmed through.

Freezing: Assemble the casserole but skip baking. Wrap tightly in foil and freeze for up to 2 months. Thaw overnight in the fridge before baking as directed.

Reheating Tip: Add a splash of milk or broth when reheating to revive the creamy texture.

Frequently Asked Questions (FAQs)

Can I use frozen potatoes?

Yes, frozen hash browns or sliced potatoes work in a pinch. Thaw and pat dry to remove excess moisture before layering.

Can I make this ahead of time?

Absolutely. Assemble the casserole up to a day in advance, cover, and refrigerate. Add 10-15 minutes to the baking time if starting cold.

What if I don’t have cream cheese?

You can substitute with additional sour cream or Greek yogurt, though the texture will be slightly less rich.

How do I know when the potatoes are fully cooked?

Insert a knife into the center of the casserole. If it slides through the potatoes easily, they’re done.

Final Thoughts

This Loaded Baked Potato Chicken Casserole is the epitome of comfort food—creamy, cheesy, and packed with satisfying flavors. Whether you’re serving it for a cozy family dinner or bringing it to a potluck, it’s sure to earn rave reviews. Don’t be afraid to make it your own with different add-ins or twists. After all, the best recipes are the ones that bring both nourishment and joy to the table. Happy cooking!

Print
clock clock iconcutlery cutlery iconflag flag iconfolder folder iconinstagram instagram iconpinterest pinterest iconfacebook facebook iconprint print iconsquares squares iconheart heart iconheart solid heart solid icon

Loaded Baked Potato Chicken Casserole

  • Author: The Comfort Kitchen

Description

A hearty casserole combining tender chicken, crispy potatoes, melted cheese, and all the classic baked potato toppings for the ultimate comfort food experience.


Ingredients

Scale

For the Crust:

  • For the casserole base:
  • 2 lbs boneless, skinless chicken breasts (cut into 1-inch cubes)
  • 6 medium russet potatoes (scrubbed and diced into 1/2-inch cubes)
  • 1/4 cup olive oil
  • 1 tsp garlic powder
  • 1 tsp onion powder
  • 1 tsp paprika
  • 1 tsp salt
  • 1/2 tsp black pepper
  • For the toppings:
  • 1 1/2 cups shredded cheddar cheese
  • 6 slices cooked bacon (crumbled)
  • 1/2 cup sour cream
  • 2 green onions (thinly sliced)
  • 1/4 cup chopped fresh chives

Instructions

1. Prepare the Crust:

  1. Preheat oven to 400°F (200°C) and grease a 9×13-inch baking dish.
  2. In a large bowl, toss potato cubes with olive oil, garlic powder, onion powder, paprika, salt, and pepper until evenly coated.
  3. Spread potatoes in an even layer in the prepared baking dish. Bake for 30 minutes.
  4. While potatoes bake, season chicken cubes with salt and pepper. After initial 30 minutes, remove dish from oven and scatter chicken evenly over potatoes.
  5. Return to oven and bake for another 25-30 minutes until chicken is cooked through and potatoes are tender.
  6. Remove from oven and sprinkle cheese evenly over top. Return to oven for 3-5 minutes until cheese is melted.
  7. Top with crumbled bacon, dollops of sour cream, green onions, and chives before serving.

Notes

For crispier potatoes, soak diced potatoes in cold water for 30 minutes before baking and pat dry thoroughly. Leftovers keep well refrigerated for 3 days. Reheat in oven at 350°F for best texture.

Caramel Apple Pull-Apart Bread

Caramel Apple Pull-Apart Bread

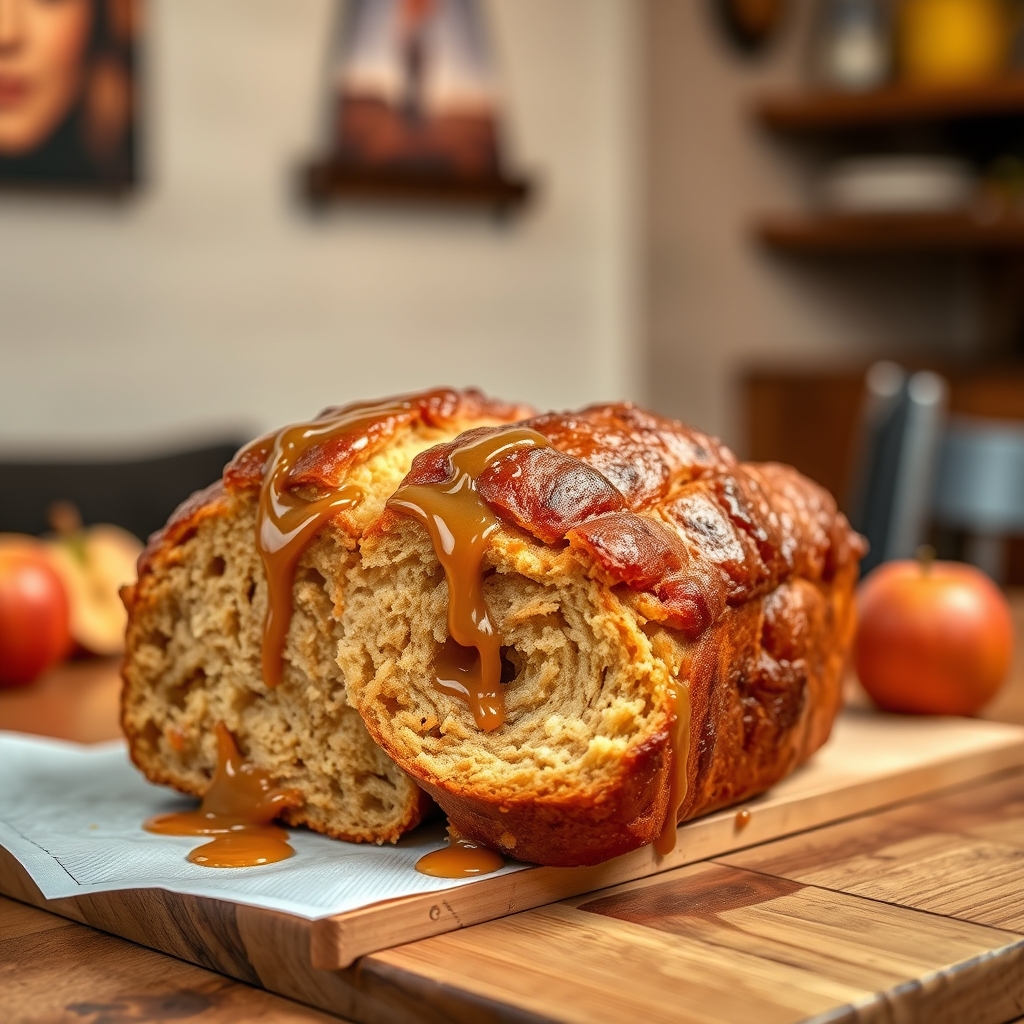
There’s something undeniably magical about the combination of caramel and apples, especially when they come together in a warm, gooey pull-apart bread. This Caramel Apple Pull-Apart Bread is the ultimate comfort food, perfect for cozy mornings, holiday gatherings, or anytime you crave a sweet treat. Imagine layers of soft, buttery dough stuffed with tender cinnamon-spiced apples and drizzled with rich caramel—each piece pulls apart effortlessly, revealing pockets of deliciousness. Whether you’re a seasoned baker or a beginner, this recipe is designed to impress with minimal fuss and maximum flavor.

Why You’ll Love This Recipe

If you’re still on the fence about making this caramel apple pull-apart bread, here are a few reasons why it’s a must-try:

  • Irresistible Flavor: The blend of sweet caramel, tart apples, and warm cinnamon creates a taste that’s nostalgic yet exciting.
  • Perfect Texture: Soft, fluffy bread with tender apple pieces and a sticky caramel glaze makes every bite satisfying.
  • Great for Sharing: Pull-apart bread is inherently fun and interactive, making it ideal for brunches, potlucks, or family breakfasts.
  • Easy to Customize: Swap in different fruits, nuts, or spices to make it your own.
  • Makes Your Kitchen Smell Amazing: The aroma of baking apples and caramel is enough to make anyone’s mouth water.

Ingredients Breakdown

Understanding the ingredients in this caramel apple pull-apart bread will help you appreciate how they work together to create the final masterpiece.

  • All-Purpose Flour: The base of the dough, providing structure and chewiness.
  • Granulated Sugar: Sweetens the dough and helps activate the yeast.
  • Active Dry Yeast: Essential for making the bread rise and giving it a light, airy texture.
  • Butter: Adds richness and moisture to the dough, plus it’s used for sautéing the apples.
  • Apples: Choose firm, slightly tart varieties like Granny Smith or Honeycrisp for the best texture and flavor.
  • Brown Sugar & Cinnamon: These create the spiced apple filling, adding warmth and depth.
  • Caramel Sauce: Store-bought or homemade, this is the crowning glory that makes the bread decadent.

How to Make Caramel Apple Pull-Apart Bread

Follow these step-by-step instructions to create the perfect caramel apple pull-apart bread.

Step 1: Prepare the Dough

In a large mixing bowl, combine warm milk, sugar, and yeast. Let it sit for 5 minutes until foamy. Add melted butter, eggs, and flour, then knead until smooth. Cover and let rise in a warm place until doubled in size.

Step 2: Cook the Apples

While the dough rises, melt butter in a skillet over medium heat. Add diced apples, brown sugar, and cinnamon. Cook until the apples soften slightly, then set aside to cool.

Step 3: Assemble the Bread

Roll the risen dough into a rectangle. Cut into squares, then layer them in a greased loaf pan, alternating with spoonfuls of the apple mixture. Drizzle with half the caramel sauce.

Step 4: Bake to Perfection

Cover the pan and let the dough rise again for 30 minutes. Bake at 350°F until golden brown. Let cool slightly before drizzling with more caramel.

Pro Tips for the Best Results

  • Use Room Temperature Ingredients: Cold eggs or milk can slow down yeast activation.
  • Don’t Overfill: Too much apple filling can make the bread soggy.
  • Let It Rest: Allow the bread to cool for 10 minutes before pulling apart to prevent it from falling apart.
  • Homemade Caramel: If time allows, homemade caramel sauce elevates the flavor significantly.

Variations and Substitutions

This recipe is wonderfully adaptable. Here are some ideas to switch things up:

  • Nutty Twist: Add chopped pecans or walnuts to the apple filling for crunch.
  • Dairy-Free: Use plant-based butter and milk for a vegan-friendly version.
  • Spiced Up: Add a pinch of nutmeg or cardamom to the filling for extra warmth.
  • Different Fruit: Try pears or peaches instead of apples for a seasonal twist.

What to Serve With It

This caramel apple pull-apart bread is delicious on its own, but here are some serving suggestions to make it even better:

  • A scoop of vanilla ice cream for an indulgent dessert.
  • A hot cup of coffee or chai tea to balance the sweetness.
  • Fresh whipped cream or a dollop of Greek yogurt for a lighter option.

How to Store and Reheat

To keep your caramel apple pull-apart bread fresh:

  • Room Temperature: Store in an airtight container for up to 2 days.
  • Refrigerate: For longer storage, refrigerate for up to 5 days.
  • Freeze: Wrap tightly and freeze for up to 3 months. Thaw at room temperature before reheating.
  • Reheating: Warm in the oven at 300°F for 10 minutes or microwave individual portions for 20 seconds.

Frequently Asked Questions (FAQs)

Can I use canned apples instead of fresh?

Fresh apples are recommended for the best texture, but canned apples can work in a pinch. Just be sure to drain them well to avoid excess moisture.

Can I make this recipe ahead of time?

Yes! Assemble the bread the night before, cover, and refrigerate. Let it sit at room temperature for 30 minutes before baking.

Why didn’t my bread rise?

This usually happens if the yeast is expired or the liquid was too hot, killing the yeast. Always check expiration dates and use lukewarm liquids.

Can I use a different type of pan?

A bundt pan or round cake pan can be used instead of a loaf pan for a different presentation.

Is there a way to reduce the sugar?

You can cut back on the sugar in the dough or filling, but keep in mind it may affect texture and flavor.

Final Thoughts

This Caramel Apple Pull-Apart Bread is more than just a recipe—it’s an experience. From the moment you mix the dough to the final drizzle of caramel, every step is worth it. Whether you’re serving it at a holiday brunch or enjoying a quiet morning with a slice, this bread is sure to become a favorite. Don’t be surprised if friends and family start requesting it regularly. Happy baking!

Print
clock clock iconcutlery cutlery iconflag flag iconfolder folder iconinstagram instagram iconpinterest pinterest iconfacebook facebook iconprint print iconsquares squares iconheart heart iconheart solid heart solid icon

Caramel Apple Pull-Apart Bread

  • Author: Baking Enthusiast

Description

A deliciously gooey pull-apart bread filled with caramelized apples and drizzled with homemade caramel sauce. Perfect for fall gatherings or a cozy breakfast treat.


Ingredients

Scale

For the Crust:

  • For the dough:
  • 3 cups all-purpose flour
  • 1/4 cup granulated sugar
  • 1 packet (2 1/4 tsp) active dry yeast
  • 1/2 tsp salt
  • 1/2 cup whole milk, warmed
  • 1/4 cup water, warmed
  • 2 tbsp unsalted butter, melted
  • 1 large egg
  • For the apple filling:
  • 2 medium apples, peeled and diced
  • 2 tbsp unsalted butter
  • 1/4 cup brown sugar
  • 1 tsp cinnamon
  • 1/4 tsp nutmeg
  • For the caramel sauce:
  • 1/2 cup granulated sugar
  • 3 tbsp unsalted butter
  • 1/4 cup heavy cream
  • 1/2 tsp vanilla extract
  • Pinch of salt

Instructions

1. Prepare the Crust:

  1. 1. Make the dough: In a large bowl, mix flour, sugar, yeast, and salt. Add warm milk, water, melted butter, and egg. Knead until smooth (about 5 mins). Cover and let rise for 1 hour.
  2. 2. Prepare filling: Melt butter in skillet over medium heat. Add apples, brown sugar, cinnamon, and nutmeg. Cook until softened (5-7 mins). Set aside to cool.
  3. 3. Make caramel: Heat sugar in saucepan over medium until melted and amber-colored. Remove from heat, carefully whisk in butter, then cream, vanilla, and salt. Set aside.
  4. 4. Assemble: Roll dough into 12×18-inch rectangle. Spread apple mixture evenly, then drizzle with 1/4 cup caramel. Cut into 2-inch squares, stack in greased loaf pan.
  5. 5. Bake at 350°F for 30-35 mins until golden. Cool 10 mins, then drizzle with remaining caramel.

Notes

For best results, use tart apples like Granny Smith. Bread is best served warm but can be reheated. Store leftovers covered at room temperature for up to 2 days.

Cheeseburger Biscuit Bombs

Cheeseburger Biscuit Bombs

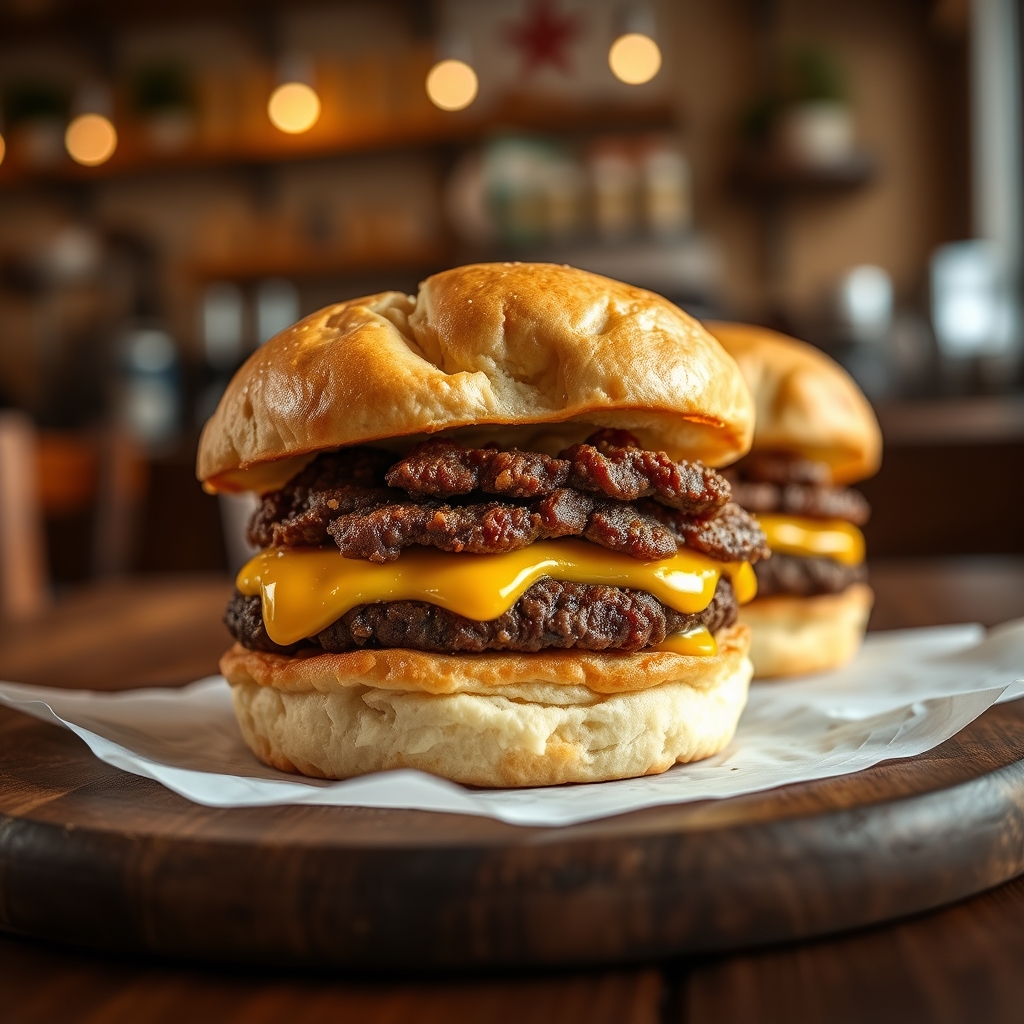
Imagine biting into a golden, flaky biscuit only to discover a savory explosion of juicy ground beef, melted cheese, and all the classic flavors of a cheeseburger. That’s exactly what you get with these irresistible Cheeseburger Biscuit Bombs—a fun, handheld twist on a comfort food favorite. Whether you’re hosting game day, packing lunches, or just craving something indulgent, this recipe delivers big flavor in every bite. Let’s dive into why this dish is a must-try and how you can make it perfectly every time.

Why You’ll Love This Recipe

There’s a reason these Cheeseburger Biscuit Bombs disappear fast whenever they hit the table. Here’s why they’re a guaranteed hit:

  • Easy to Make – With just a handful of simple ingredients, including refrigerated biscuit dough, this recipe comes together in under 30 minutes.
  • Perfect for Any Occasion – Serve them as an appetizer, snack, or even a fun main dish. They’re great for parties, potlucks, or family dinners.
  • Kid-Friendly – Kids adore the handheld size and familiar cheeseburger flavors, making them a win for picky eaters.
  • Customizable – Add your favorite burger toppings inside or serve with dipping sauces for extra flair.
  • Crispy and Cheesy – The buttery biscuit exterior bakes up golden and crisp, while the cheesy beef filling stays perfectly gooey.

Ingredients Breakdown

Every ingredient in this recipe plays a crucial role in creating the ultimate Cheeseburger Biscuit Bomb experience. Here’s what you’ll need:

  • Refrigerated Biscuit Dough – The base of these bombs, providing a flaky, buttery shell that bakes up golden and crisp.
  • Ground Beef – Opt for 80/20 for the best balance of flavor and juiciness. Leaner beef can dry out.
  • Cheese – Cheddar is classic, but American or pepper jack work beautifully for extra meltiness.
  • Onion and Garlic – These aromatics add depth and savory richness to the beef filling.
  • Worcestershire Sauce – A splash enhances the umami flavor, mimicking that signature burger taste.
  • Pickles (Optional) – Finely diced pickles add a tangy crunch, just like a real cheeseburger.
  • Egg Wash – Brushing the biscuits before baking ensures a shiny, golden-brown finish.
  • Sesame Seeds (Optional) – A sprinkle on top adds visual appeal and a subtle nutty flavor.

How to Make Cheeseburger Biscuit Bombs

Follow these simple steps for perfectly baked, flavor-packed Cheeseburger Biscuit Bombs every time.

  1. Preheat and Prep – Preheat your oven to 375°F and line a baking sheet with parchment paper.
  2. Cook the Filling – In a skillet over medium heat, brown the ground beef with diced onions and garlic until fully cooked. Drain excess fat, then stir in Worcestershire sauce, salt, and pepper. Let cool slightly.
  3. Prepare the Biscuits – Flatten each biscuit into a 4-inch round. Place a spoonful of the beef mixture and a small cheese cube in the center.
  4. Seal the Bombs – Gather the edges of the biscuit dough around the filling, pinching to seal tightly. Place seam-side down on the baking sheet.
  5. Brush and Bake – Lightly brush each bomb with beaten egg and sprinkle with sesame seeds if desired. Bake for 12-15 minutes until golden brown.
  6. Serve Warm – Let cool slightly before serving, as the filling will be piping hot.

Pro Tips for the Best Results

  • Don’t Overfill – Too much filling can cause the biscuits to burst open. Stick to about 1 tablespoon of beef per bomb.
  • Use Cold Biscuit Dough – Warm dough is harder to work with. Keep it refrigerated until ready to use.
  • Seal Tightly – Pinch the edges well to prevent cheese from leaking out during baking.
  • Add a Dipping Sauce – Serve with ketchup, mustard, or a special burger sauce for extra flavor.
  • Double the Batch – These freeze well, so make extras for quick future meals.

Variations and Substitutions

Customize your Cheeseburger Biscuit Bombs to suit your taste or dietary needs:

  • Turkey or Chicken – Swap ground beef for leaner ground turkey or chicken.
  • Vegetarian Option – Use plant-based crumbles and vegan cheese for a meat-free version.
  • Spicy Kick – Add diced jalapeños or a dash of hot sauce to the filling.
  • Bacon Lovers – Mix crumbled cooked bacon into the beef for extra smokiness.
  • Gluten-Free – Use gluten-free biscuit dough and ensure Worcestershire sauce is GF.

What to Serve With It

These bombs are delicious on their own, but pairing them with the right sides takes the meal to the next level:

  • Classic Fries – Crispy French fries or sweet potato fries complete the burger experience.
  • Side Salad – A simple garden salad with ranch dressing balances the richness.
  • Coleslaw – Creamy coleslaw adds a refreshing crunch.
  • Pickle Spears – Serve extra pickles on the side for tangy contrast.
  • Milkshakes – For a fun twist, pair with vanilla or chocolate milkshakes.

How to Store and Reheat

Leftovers (if you have any!) can be stored and reheated easily:

  • Refrigerate – Keep in an airtight container for up to 3 days.
  • Freeze – Place cooled bombs in a freezer bag for up to 2 months. Thaw before reheating.
  • Reheat – Warm in a 350°F oven for 10 minutes or microwave for 30-60 seconds until heated through.

Frequently Asked Questions (FAQs)

Can I make these ahead of time?
Yes! Assemble the bombs, cover, and refrigerate for up to 24 hours before baking. Add 1-2 extra minutes to the baking time if cooking from cold.

Can I use homemade biscuit dough?
Absolutely. If you prefer homemade, use a buttermilk biscuit recipe rolled thin for wrapping.

Why did my bombs burst open?
Overfilling or not sealing tightly can cause bursting. Ensure edges are well-pinched and use just enough filling.

Can I air-fry these?
Yes! Air-fry at 375°F for 8-10 minutes, checking for doneness.

What other cheeses work well?
Pepper jack, mozzarella, or Swiss are great alternatives for different flavor profiles.

Final Thoughts

Cheeseburger Biscuit Bombs are the ultimate comfort food mashup—easy, delicious, and endlessly adaptable. Whether you’re serving them at a party or enjoying them as a weeknight treat, they’re sure to become a fast favorite. The best part? You can get creative with fillings and toppings to make them your own. So preheat that oven, gather your ingredients, and get ready to impress with these irresistible little bites. Happy cooking!

Print
clock clock iconcutlery cutlery iconflag flag iconfolder folder iconinstagram instagram iconpinterest pinterest iconfacebook facebook iconprint print iconsquares squares iconheart heart iconheart solid heart solid icon

Cheeseburger Biscuit Bombs

  • Author: The Comfort Kitchen

Description

These bite-sized Cheeseburger Biscuit Bombs are the perfect party snack or weeknight dinner! Flaky biscuit dough is stuffed with seasoned ground beef, melty cheese, and baked until golden. Serve with your favorite burger toppings for dipping!


Ingredients

Scale

For the Crust:

  • For the filling:
  • 1 lb ground beef (80/20 blend recommended)
  • 1 small yellow onion, finely diced
  • 1 tbsp Worcestershire sauce
  • 1 tsp garlic powder
  • 1 tsp onion powder
  • 1/2 tsp salt
  • 1/2 tsp black pepper
  • 1 cup shredded cheddar cheese
  • For the biscuit bombs:
  • 1 (16.3 oz) can refrigerated biscuit dough (8 count)
  • 1 tbsp melted butter
  • 1/2 tsp sesame seeds (optional)
  • For serving:
  • Ketchup, mustard, pickles (optional)

Instructions

1. Prepare the Crust:

  1. Preheat oven to 375°F (190°C). Line a baking sheet with parchment paper.
  2. In a skillet over medium heat, cook ground beef and onion until beef is browned (5-7 minutes). Drain excess fat.
  3. Stir in Worcestershire sauce, garlic powder, onion powder, salt, and pepper. Remove from heat and let cool slightly, then mix in cheddar cheese.
  4. Separate biscuit dough into 8 pieces. Flatten each into a 4-inch circle.
  5. Place 2 tbsp of filling in the center of each biscuit. Gather edges and pinch to seal tightly, forming a ball.
  6. Arrange seam-side down on baking sheet. Brush tops with melted butter and sprinkle with sesame seeds (if using).
  7. Bake for 12-15 minutes until golden brown. Serve warm with dipping sauces.

Notes

For extra cheesiness, add a small cheese cube inside the filling. These can be assembled ahead and refrigerated for up to 24 hours before baking. Reheat leftovers in a 350°F (175°C) oven for 5 minutes.

Stuffed French Toast Roll-Ups

Stuffed French Toast Roll-Ups

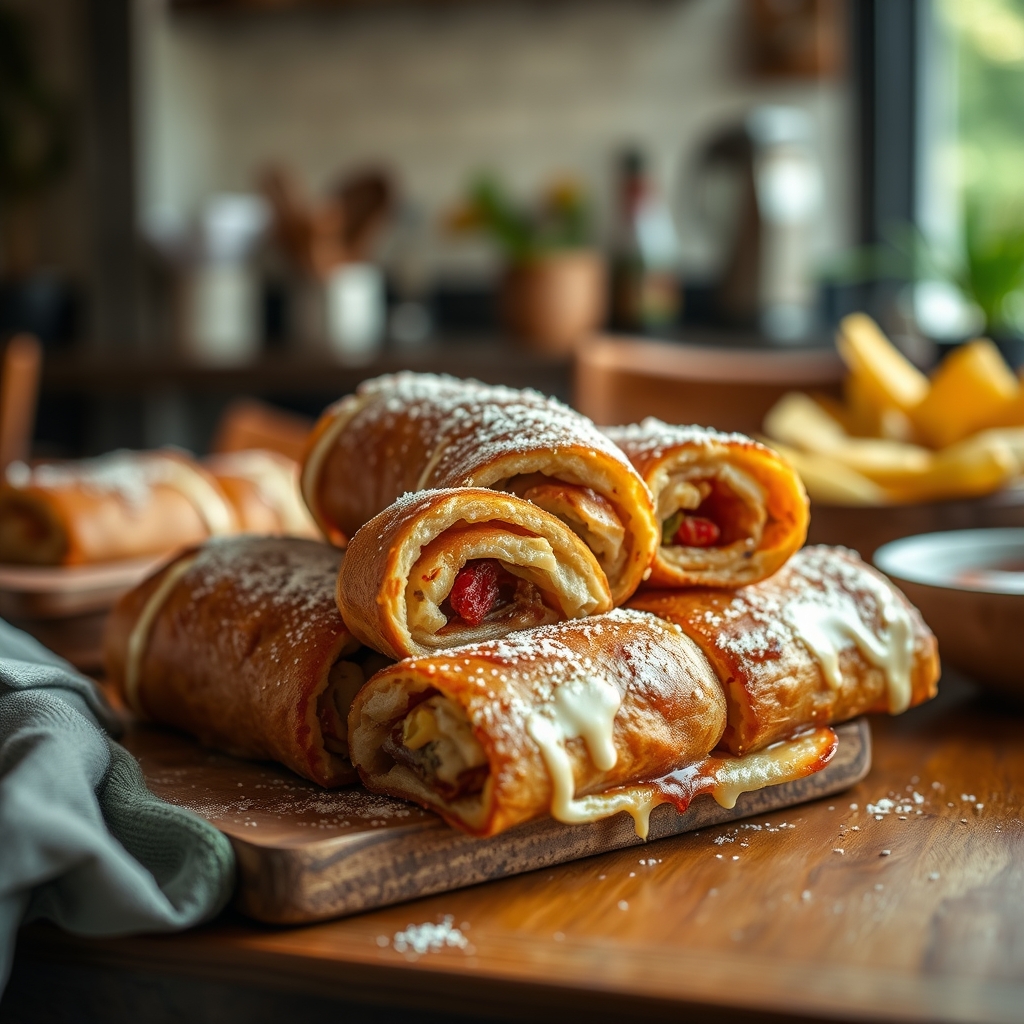
Imagine biting into a warm, golden-brown roll-up filled with creamy sweetness and a hint of cinnamon—this is what awaits you with these irresistible Stuffed French Toast Roll-Ups. A fun twist on classic French toast, this recipe transforms simple ingredients into a breakfast or brunch masterpiece that will have everyone reaching for seconds. Whether you’re hosting a weekend gathering or treating yourself to a cozy morning, these roll-ups deliver comfort and indulgence in every bite.

Why You’ll Love This Recipe

There’s a reason this recipe has become a favorite in kitchens everywhere. Here’s why you’ll adore it too:

  • Kid-friendly and fun: The roll-up shape makes these perfect for little hands, and kids love helping with the assembly.
  • Versatile fillings: From Nutella to cream cheese and berries, the stuffing options are endless, allowing you to customize to your taste.
  • Quick and easy: Ready in under 30 minutes, this recipe is ideal for busy mornings when you want something special without the fuss.
  • Crowd-pleasing: Whether served at brunch or as a sweet snack, these roll-ups disappear fast.
  • Perfect for make-ahead: You can prep them the night before and cook them fresh in the morning for a stress-free meal.

Ingredients Breakdown

Every ingredient in this recipe plays a crucial role in creating the perfect Stuffed French Toast Roll-Ups. Here’s what you’ll need:

  • Bread slices: Soft white or whole wheat bread works best. Avoid crusty or thick slices, as they won’t roll easily.
  • Cream cheese or Nutella: The creamy filling adds richness and holds the roll-ups together.
  • Eggs and milk: The classic French toast batter that gives the roll-ups their tender, custardy texture.
  • Cinnamon and vanilla extract: These warm spices enhance the flavor, making each bite fragrant and cozy.
  • Butter: For frying, ensuring a crisp, golden exterior.
  • Powdered sugar or maple syrup: The finishing touch that adds sweetness and visual appeal.

How to Make Stuffed French Toast Roll-Ups

Follow these simple steps to create the perfect Stuffed French Toast Roll-Ups:

  1. Flatten the bread: Use a rolling pin to gently flatten each slice of bread, making it easier to roll.
  2. Add the filling: Spread a thin layer of cream cheese or Nutella on each slice, leaving a small border at the edges.
  3. Roll them up: Tightly roll each slice from one end to the other, pressing gently to seal.
  4. Dip in the batter: Whisk together eggs, milk, cinnamon, and vanilla. Dip each roll-up into the mixture, coating evenly.
  5. Cook to perfection: Melt butter in a skillet over medium heat. Cook the roll-ups until golden brown on all sides, about 2-3 minutes per side.
  6. Serve warm: Dust with powdered sugar or drizzle with maple syrup for the ultimate finish.

Pro Tips for the Best Results

Take your Stuffed French Toast Roll-Ups to the next level with these expert tips:

  • Use day-old bread: Slightly stale bread holds its shape better and absorbs the batter without becoming soggy.
  • Don’t overfill: Too much filling can cause the roll-ups to burst during cooking. A thin, even layer works best.
  • Keep the heat medium: Cooking too quickly can burn the outside before the inside is fully set.
  • Try a flavored cream cheese: Strawberry or cinnamon cream cheese adds an extra layer of flavor.
  • Double dip for extra richness: For a more custardy texture, dip the roll-ups a second time before cooking.

Variations and Substitutions

This recipe is incredibly adaptable. Here are some delicious ways to switch it up:

  • Fruit-filled: Add thin slices of banana, strawberries, or blueberries before rolling.
  • Savory twist: Swap the sweet filling for scrambled eggs, cheese, and ham for a breakfast burrito-style version.
  • Dairy-free: Use almond milk and vegan cream cheese for a plant-based alternative.
  • Gluten-free: Opt for gluten-free bread to accommodate dietary needs.
  • Chocolate lovers: Mix mini chocolate chips into the cream cheese for an extra-decadent treat.

What to Serve With It

While these roll-ups are delicious on their own, pairing them with the right sides can turn them into a full meal:

  • Fresh fruit: A side of berries or sliced bananas adds freshness and balance.
  • Whipped cream: A dollop of homemade whipped cream makes them feel extra indulgent.
  • Crispy bacon or sausage: The salty-sweet combination is always a winner.
  • Hot coffee or tea: A warm beverage complements the cozy flavors perfectly.
  • Yogurt parfait: For a lighter option, serve with Greek yogurt and granola.

How to Store and Reheat

If you have leftovers (which is rare!), here’s how to keep them fresh:

  • Refrigeration: Store in an airtight container for up to 2 days.
  • Freezing: Place cooled roll-ups in a single layer on a baking sheet to freeze, then transfer to a freezer bag for up to 1 month.
  • Reheating: Warm in a toaster oven or skillet at low heat to restore crispiness. Avoid microwaving, as it can make them soggy.

Frequently Asked Questions (FAQs)

Can I use any type of bread?
While soft sandwich bread works best, you can experiment with brioche or challah for a richer taste. Just ensure it’s pliable enough to roll.

Can I make these ahead of time?
Yes! Assemble the roll-ups the night before, cover tightly, and refrigerate. Dip in the batter and cook in the morning for a fresh, hot breakfast.

How do I prevent the filling from leaking?
Avoid overfilling and press the edges firmly when rolling. A thin layer of filling works best.

Can I bake these instead of frying?
Absolutely. Arrange them on a baking sheet, brush with melted butter, and bake at 375°F for 12-15 minutes, flipping halfway.

Are these suitable for meal prep?
Yes, they freeze well and can be reheated for a quick breakfast throughout the week.

Final Thoughts

Stuffed French Toast Roll-Ups are more than just a breakfast dish—they’re a little bundle of joy that brings people together. Whether you’re making them for a lazy Sunday brunch or a festive holiday spread, their versatility and deliciousness never disappoint. I love how this recipe invites creativity, letting you play with flavors and fillings to suit any mood. So grab your favorite ingredients, roll up your sleeves, and treat yourself to something truly special. Happy cooking!

Print
clock clock iconcutlery cutlery iconflag flag iconfolder folder iconinstagram instagram iconpinterest pinterest iconfacebook facebook iconprint print iconsquares squares iconheart heart iconheart solid heart solid icon

Stuffed French Toast Roll-Ups

  • Author: Home Baker Delights

Description

A fun and delicious twist on classic French toast, these roll-ups are stuffed with sweet cream cheese filling, dipped in cinnamon egg batter, and pan-fried to golden perfection. Perfect for brunch or a special breakfast treat!


Ingredients

Scale

For the Crust:

  • For the roll-ups:
  • 8 slices soft white bread (crusts removed)
  • 4 oz cream cheese (softened)
  • 2 tbsp powdered sugar
  • 1 tsp vanilla extract
  • For the egg batter:
  • 2 large eggs
  • 1/4 cup milk
  • 1 tsp ground cinnamon
  • 1 tsp vanilla extract
  • For cooking & serving:
  • 2 tbsp butter (for frying)
  • Maple syrup (for serving)
  • Additional powdered sugar (for dusting)

Instructions

1. Prepare the Crust:

  1. 1. Flatten each bread slice with a rolling pin to about 1/4-inch thickness.
  2. 2. In a bowl, mix cream cheese, powdered sugar, and vanilla until smooth.
  3. 3. Spread about 1 tbsp of filling along one edge of each flattened bread slice.
  4. 4. Roll up tightly from the filled end, pressing gently to seal.
  5. 5. In a shallow dish, whisk together eggs, milk, cinnamon, and vanilla.
  6. 6. Heat butter in a large skillet over medium heat.
  7. 7. Dip each roll-up in the egg mixture, coating completely but not soaking.
  8. 8. Cook roll-ups in butter for 2-3 minutes per side until golden brown.
  9. 9. Serve warm dusted with powdered sugar and maple syrup for dipping.

Notes

For easier rolling, slightly stale bread works best. Can be made ahead and reheated in a 350°F oven for 5 minutes. Try different fillings like Nutella, fruit preserves, or peanut butter for variety.

Crispy Air Fryer Pickle Chips

Crispy Air Fryer Pickle Chips

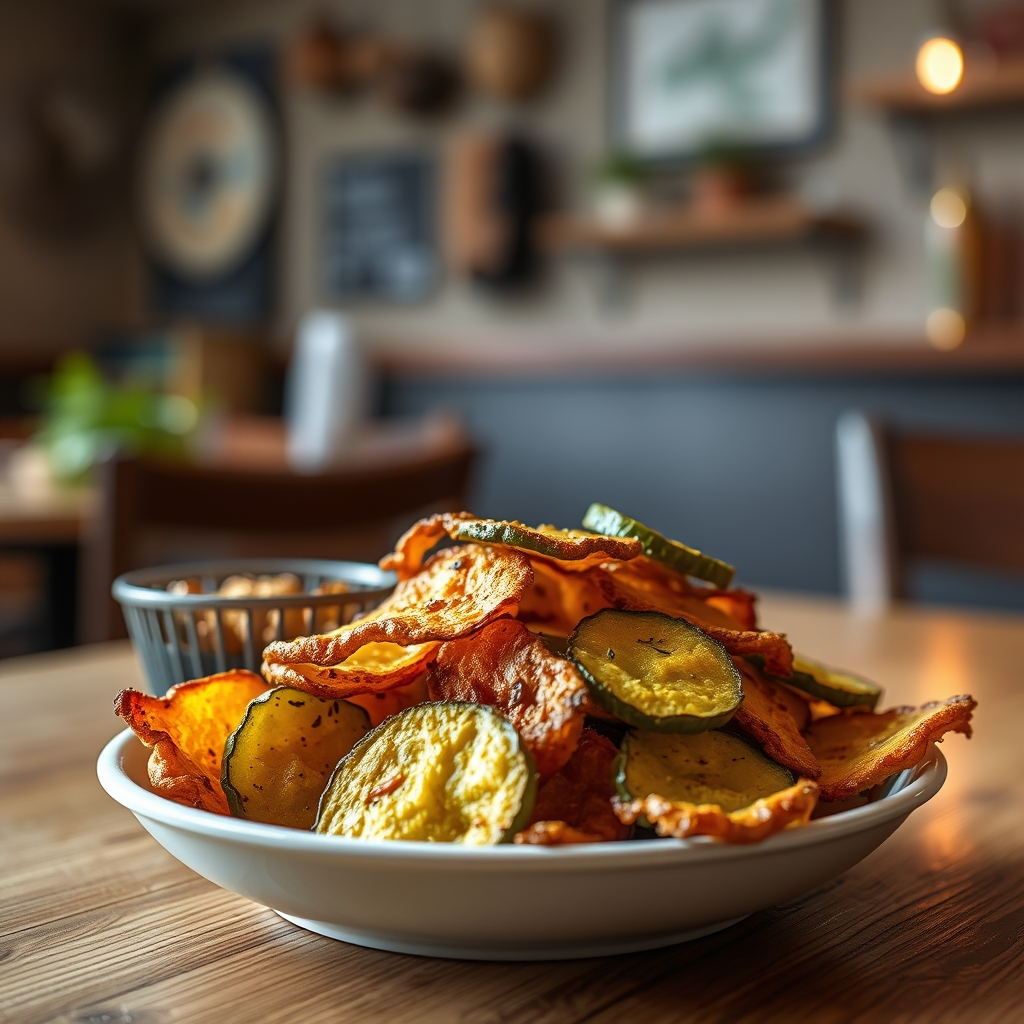
If you love the tangy crunch of fried pickles but want a lighter, fuss-free version, these Crispy Air Fryer Pickle Chips are about to become your new obsession. Perfect for game day, movie nights, or just because, this recipe delivers all the crave-worthy texture of deep-fried pickles without the extra oil. Let’s dive into why these are a must-try and how to make them irresistibly crispy every time.

Why You’ll Love This Recipe

First, let’s talk about what makes these air-fried pickle chips so special. Here are a few reasons you’ll keep coming back to this recipe:

  • Healthier without sacrificing crunch: The air fryer gives you that golden, crispy exterior with just a fraction of the oil used in traditional frying.
  • Quick and easy: From prep to plate, these pickle chips take less than 15 minutes, making them perfect for last-minute cravings or unexpected guests.
  • Versatile flavor: Whether you prefer dill, spicy, or bread-and-butter pickles, this recipe works with any variety, and the seasoning can be customized to your taste.
  • Crowd-pleasing snack: These are guaranteed to disappear fast at parties, potlucks, or family gatherings—serve them with a creamy dipping sauce, and watch them vanish.

Ingredients Breakdown

One of the best things about this recipe is its simplicity. Here’s what you’ll need and why each ingredient matters:

  • Dill pickle chips: The star of the show. Look for pre-sliced pickle chips for convenience, or slice them yourself for thicker, heartier bites.
  • Panko breadcrumbs: These Japanese-style breadcrumbs are lighter and crispier than traditional varieties, giving the pickles an unbeatable crunch.
  • All-purpose flour: Helps the egg wash adhere to the pickles, creating a sturdy base for the breading.
  • Egg wash: A simple mix of beaten eggs and a splash of water binds the coating to the pickles.
  • Seasonings: Garlic powder, paprika, and a pinch of cayenne add depth and a subtle kick. Feel free to adjust to your preference.

How to Make Crispy Air Fryer Pickle Chips

Now, let’s walk through the steps to achieve perfectly crispy pickle chips every time:

  1. Prep the pickles: Drain the pickle chips and pat them dry thoroughly with paper towels. Removing excess moisture is key to preventing sogginess.
  2. Set up your breading station: In three separate shallow bowls, place the flour (mixed with half the seasonings), the egg wash, and the panko breadcrumbs (tossed with the remaining seasonings).
  3. Coat the pickles: Dredge each pickle chip in flour, shaking off excess, then dip in the egg wash, letting any drips fall away. Finally, press into the panko mixture, ensuring an even, generous coating.
  4. Arrange in the air fryer: Lightly spray the air fryer basket with oil and place the breaded pickles in a single layer, leaving space between them for air circulation.
  5. Air fry to perfection: Cook at 400°F for 8–10 minutes, flipping halfway through, until golden brown and crispy. Avoid overcrowding—work in batches if needed.

Pro Tips for the Best Results

Want to take your air fryer pickle chips to the next level? Try these expert tricks:

  • Double-dip for extra crunch: For an even thicker coating, repeat the egg wash and panko steps once after the first breading.
  • Use a rack: If your air fryer has a rack, elevate the pickles for even crisping on both sides.
  • Spritz with oil: A light mist of cooking spray on the breaded pickles before air frying enhances browning.
  • Serve immediately: Like all fried foods, these are best enjoyed right out of the air fryer while they’re at their crispiest.

Variations and Substitutions

This recipe is wonderfully adaptable. Here are some delicious twists to try:

  • Gluten-free: Swap the all-purpose flour for almond flour and use gluten-free panko.
  • Spicy version: Add a teaspoon of hot sauce to the egg wash or mix chili powder into the breadcrumbs.
  • Cheesy twist: Stir grated Parmesan into the panko for a savory, umami-rich coating.
  • Sweet and tangy: Use bread-and-butter pickles and add a touch of brown sugar to the seasoning mix.

What to Serve With It

While these pickle chips are fantastic on their own, pairing them with the right dips and sides takes them to the next level. Consider:

  • Classic ranch dressing: Cool, creamy, and always a winner.
  • Spicy aioli: Mix mayo with sriracha and a squeeze of lemon for a zesty kick.
  • Burger or sandwich: Pile these on top for an extra crunch.
  • Cold beer or sparkling lemonade: The tangy pickles pair beautifully with something crisp and refreshing.

How to Store and Reheat

While these are best fresh, you can save leftovers with these methods:

  • Refrigeration: Store in an airtight container for up to 2 days. Reheat in the air fryer at 375°F for 3–4 minutes to revive the crunch.
  • Freezing: Freeze unbreaded pickles on a baking sheet, then transfer to a bag. Bread and air fry straight from frozen, adding 1–2 extra minutes.

Frequently Asked Questions (FAQs)

Here are answers to some common questions about air fryer pickle chips:

Can I use fresh cucumber slices instead of pickles?

While you can, the result won’t have the same tangy flavor. If trying this, salt the cucumber slices and let them sit for 10 minutes to draw out excess moisture before breading.

Why are my pickle chips soggy?

The most likely culprit is insufficient drying before breading. Make sure to pat the pickles very dry, and avoid overcrowding the air fryer basket.

Can I make these in the oven?

Yes! Bake at 425°F on a wire rack set over a baking sheet for about 15 minutes, flipping halfway. They won’t be quite as crispy but will still be delicious.

Final Thoughts

Once you try these Crispy Air Fryer Pickle Chips, you’ll wonder why you ever bothered with deep-fried versions. They’re lighter, faster, and just as satisfying—plus, they’re a fantastic way to enjoy a beloved snack without guilt. Whether you’re hosting friends or treating yourself to a solo snack attack, this recipe is sure to impress. Happy air frying!

Print
clock clock iconcutlery cutlery iconflag flag iconfolder folder iconinstagram instagram iconpinterest pinterest iconfacebook facebook iconprint print iconsquares squares iconheart heart iconheart solid heart solid icon

Crispy Air Fryer Pickle Chips

  • Author: Air Fryer Enthusiast

Description

These crispy air fryer pickle chips are the perfect crunchy snack or appetizer. Made with dill pickles coated in a seasoned breading and air-fried to golden perfection, they’re healthier than deep-fried versions but just as delicious. Serve with ranch or your favorite dipping sauce!


Ingredients

Scale

For the Crust:

  • For the pickle chips:
  • 1 (16 oz) jar dill pickle chips (well drained)
  • For the coating:
  • 1/2 cup all-purpose flour
  • 2 large eggs (beaten)
  • 1/2 cup panko breadcrumbs
  • 1/2 cup regular breadcrumbs
  • 1 teaspoon garlic powder
  • 1 teaspoon onion powder
  • 1/2 teaspoon paprika
  • 1/4 teaspoon black pepper
  • For serving:
  • Ranch dressing (or dipping sauce of choice)

Instructions

1. Prepare the Crust:

  1. 1. Drain pickle chips thoroughly and pat dry with paper towels to remove excess moisture.
  2. 2. Set up a breading station with three shallow bowls: one with flour, one with beaten eggs, and one with breadcrumbs mixed with all seasonings.
  3. 3. Dredge each pickle chip in flour, shaking off excess. Dip in egg, then coat with breadcrumb mixture, pressing gently to adhere.
  4. 4. Place breaded pickles in a single layer in air fryer basket (may need to work in batches). Lightly spray with cooking oil.
  5. 5. Air fry at 400°F for 8-10 minutes, flipping halfway through, until golden brown and crispy.
  6. 6. Serve immediately with dipping sauce.

Notes

For extra crispiness, let breaded pickles rest for 10 minutes before air frying. If pickles are very wet after breading, you can freeze them for 15 minutes before cooking to help coating adhere better. Store leftovers in airtight container (they’ll lose crispiness but still taste good!).