Peach Mango Smoothie Bowl

Peach Mango Smoothie Bowl

There’s something undeniably magical about starting your day with a vibrant, nutrient-packed smoothie bowl. This Peach Mango Smoothie Bowl is a tropical escape in a bowl—creamy, refreshing, and bursting with natural sweetness. Whether you’re looking for a quick breakfast, a post-workout refuel, or a healthy dessert alternative, this recipe delivers. The combination of ripe peaches, juicy mangoes, and creamy yogurt creates a luscious base, while the toppings add texture and extra nutrition. Let’s dive into why this recipe deserves a spot in your morning routine.

Why You’ll Love This Recipe

If you’re still on the fence about whether to try this Peach Mango Smoothie Bowl, here are a few reasons that might convince you:

  • Bursting with tropical flavors—The natural sweetness of peaches and mangoes makes this bowl taste like a vacation in every spoonful.
  • Nutrient-dense and energizing—Packed with vitamins, fiber, and antioxidants, this smoothie bowl keeps you full and fueled for hours.
  • Customizable to your taste—Swap ingredients, adjust sweetness, or load up on your favorite toppings for endless variations.
  • Quick and easy to make—Ready in under 10 minutes, making it perfect for busy mornings.
  • Visually stunning—The bright colors and artistic toppings make it Instagram-worthy while being delicious.

Ingredients Breakdown

Every ingredient in this Peach Mango Smoothie Bowl plays a crucial role in creating the perfect balance of flavor, texture, and nutrition. Here’s what you’ll need:

  • Frozen peaches—Adds natural sweetness and a thick, creamy texture to the smoothie base.
  • Frozen mango chunks—Brings a tropical tang and velvety consistency.
  • Greek yogurt—Provides creaminess, protein, and a slight tang to balance the sweetness.
  • Almond milk (or any milk of choice)—Helps blend the ingredients smoothly without making the mixture too thin.
  • Honey or maple syrup—Optional, but great for extra sweetness if your fruit isn’t perfectly ripe.
  • Chia seeds—Adds a boost of omega-3s and fiber for extra nutrition.
  • Toppings (granola, coconut flakes, fresh fruit, nuts)—Enhances texture and flavor while making the bowl visually appealing.

How to Make Peach Mango Smoothie Bowl

Creating this smoothie bowl is effortless, but a few key steps ensure the best results. Follow this step-by-step guide for a perfect bowl every time.

  1. Prep your ingredients—Measure out the frozen peaches, mango chunks, yogurt, and almond milk before blending.
  2. Blend the base—In a high-speed blender, combine the frozen peaches, mango, yogurt, and almond milk. Blend until smooth and creamy. If the mixture is too thick, add a splash more milk. Too thin? Add a few more frozen fruit chunks.
  3. Adjust sweetness—Taste the mixture and add honey or maple syrup if desired. Blend again briefly to incorporate.
  4. Pour and decorate—Transfer the smoothie mixture into a bowl and immediately add your favorite toppings. Think granola for crunch, fresh fruit for freshness, and chia seeds for extra nutrients.
  5. Serve immediately—Smoothie bowls are best enjoyed fresh before they start to melt.

Pro Tips for the Best Results

Want to take your Peach Mango Smoothie Bowl to the next level? Try these expert tips:

  • Use frozen fruit—This ensures a thick, ice-cream-like texture without needing ice, which can water down the flavor.
  • Blend in stages—Start with a small amount of liquid and add more as needed to avoid over-thinning.
  • Pre-freeze your bowl—For an extra-chilled experience, place your serving bowl in the freezer for 10 minutes before assembling.
  • Layer textures—Combine creamy, crunchy, and chewy toppings for the most satisfying bite.
  • Add protein—Stir in a scoop of vanilla protein powder or nut butter for a more filling meal.

Variations and Substitutions

This recipe is wonderfully adaptable. Here are some delicious twists to try:

  • Dairy-free version—Swap Greek yogurt for coconut yogurt and use plant-based milk.
  • Green boost—Add a handful of spinach or kale for extra nutrients without altering the taste.
  • Tropical twist—Include pineapple or banana for a different flavor profile.
  • Protein-packed—Add a scoop of collagen peptides or your favorite protein powder.
  • Lower sugar—Skip the honey and rely on the natural sweetness of ripe fruit.

What to Serve With It

While this Peach Mango Smoothie Bowl is satisfying on its own, pairing it with complementary foods can make it a full meal. Consider serving it with:

  • A side of whole-grain toast with almond butter for extra staying power.
  • A cup of herbal tea or cold brew coffee for a balanced breakfast.
  • A handful of roasted nuts or seeds for additional protein and healthy fats.

How to Store and Reheat

Smoothie bowls are best enjoyed fresh, but if you have leftovers, here’s how to handle them:

  • Refrigeration—Store in an airtight container for up to 24 hours. The texture may soften, so give it a quick stir before eating.
  • Freezing—Freeze the blended base in a sealed container for up to a month. Thaw slightly and re-blend before serving.
  • Reheating—Not recommended, as the texture changes. Instead, enjoy it chilled or slightly thawed.

Frequently Asked Questions (FAQs)

Here are answers to some common questions about making the perfect Peach Mango Smoothie Bowl:

Can I use fresh fruit instead of frozen?

Yes, but you’ll need to add ice to achieve the right thickness, which can dilute flavor slightly. Frozen fruit works best.

What if my smoothie bowl is too runny?

Add more frozen fruit or a handful of oats to thicken it up. Blend again until smooth.

Can I make this ahead of time?

It’s best enjoyed immediately, but you can prep the ingredients the night before and blend in the morning.

Is this recipe kid-friendly?

Absolutely! Kids love the sweetness and fun toppings. Let them decorate their own bowls for added excitement.

Can I use a different yogurt?

Yes, any yogurt works—dairy-free, flavored, or even skyr for extra protein.

Final Thoughts

This Peach Mango Smoothie Bowl is more than just a meal—it’s a refreshing, nourishing experience that brightens your day. Whether you’re savoring it on a sunny morning or enjoying it as a post-workout treat, its vibrant flavors and textures make every bite delightful. Don’t be afraid to experiment with different fruits, toppings, or even a drizzle of nut butter for your own signature twist. Once you try it, you’ll understand why this bowl is a breakfast game-changer. Here’s to delicious, healthy mornings!

Print
clock clock iconcutlery cutlery iconflag flag iconfolder folder iconinstagram instagram iconpinterest pinterest iconfacebook facebook iconprint print iconsquares squares iconheart heart iconheart solid heart solid icon

Peach Mango Smoothie Bowl

  • Author: SmoothieLover22

Description

A vibrant and refreshing smoothie bowl packed with tropical flavors, topped with crunchy granola and fresh fruit for a nutritious breakfast or snack.


Ingredients

Scale

For the Crust:

  • For smoothie base:
  • 1 cup frozen peaches
  • 1 cup frozen mango chunks
  • 1 ripe banana
  • 1/2 cup Greek yogurt
  • 1/2 cup almond milk
  • 1 tbsp honey
  • For toppings:
  • 1/4 cup granola
  • 1 tbsp chia seeds
  • 1/4 cup fresh mango cubes
  • 1/4 cup fresh peach slices
  • 1 tbsp shredded coconut

Instructions

1. Prepare the Crust:

  1. 1. In a blender, combine frozen peaches, mango, banana, Greek yogurt, almond milk, and honey.
  2. 2. Blend on high until smooth and creamy, adding more almond milk if needed for desired consistency.
  3. 3. Pour the smoothie into a bowl.
  4. 4. Arrange granola, chia seeds, fresh mango, peach slices, and shredded coconut on top.
  5. 5. Serve immediately with a spoon.

Notes

For a vegan version, substitute Greek yogurt with coconut yogurt and honey with maple syrup. For extra protein, add a scoop of vanilla protein powder to the blender.

Strawberry Cheesecake Chimichangas

Strawberry Cheesecake Chimichangas

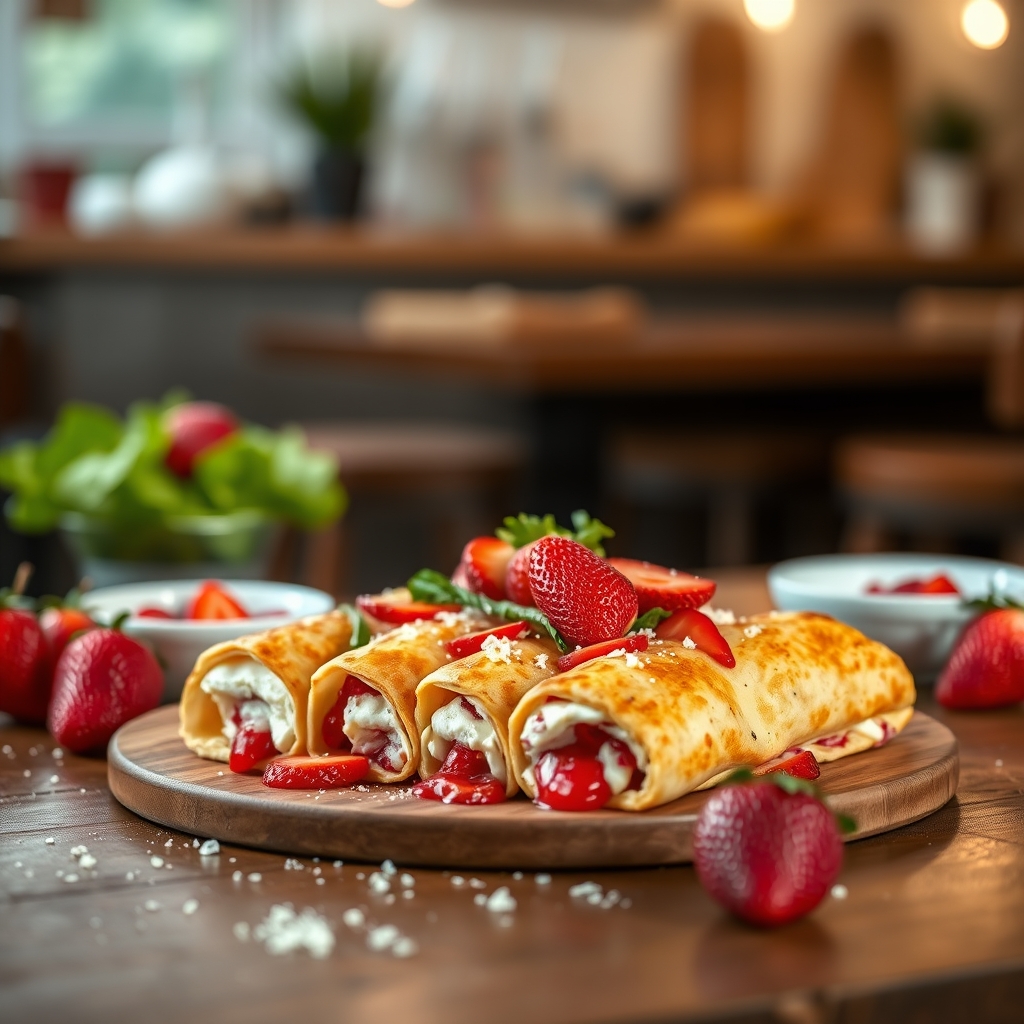
If you’re looking for a dessert that combines the creamy indulgence of cheesecake with the crispy, golden perfection of a chimichanga, you’ve come to the right place. These Strawberry Cheesecake Chimichangas are a delightful fusion of textures and flavors—creamy, fruity, and satisfyingly crunchy. Whether you’re hosting a dinner party or simply craving a sweet treat, this recipe is guaranteed to impress. Let’s dive into the delicious details!

Why You’ll Love This Recipe

There are countless reasons to fall in love with Strawberry Cheesecake Chimichangas, but here are just a few:

  • Irresistible Texture Contrast: The crispy tortilla shell gives way to a luscious, creamy cheesecake filling, while the juicy strawberries add a burst of freshness.
  • Easy to Customize: Swap out strawberries for blueberries, raspberries, or even a drizzle of chocolate to make it your own.
  • Perfect for Any Occasion: Serve them as a fun dessert for Cinco de Mayo, a summer barbecue, or a cozy night in.
  • Quick and Simple: Unlike traditional cheesecake, these chimichangas come together in under 30 minutes, making them ideal for last-minute cravings.
  • Crowd-Pleasing: Kids and adults alike will adore this playful twist on two classic desserts.

Ingredients Breakdown

Understanding the role of each ingredient ensures the best possible results for your Strawberry Cheesecake Chimichangas. Here’s what you’ll need:

  • Cream Cheese: The base of the cheesecake filling, providing richness and tang. Use full-fat for the creamiest texture.
  • Fresh Strawberries: Adds natural sweetness and a bright, fruity contrast to the creamy filling. You can also use frozen strawberries if fresh aren’t available.
  • Granulated Sugar: Sweetens the cheesecake mixture and balances the tartness of the cream cheese.
  • Vanilla Extract: Enhances the flavor profile with warm, aromatic notes.
  • Flour Tortillas: The vessel for the filling, turning crispy and golden when fried or baked.
  • Butter or Oil: Used for frying the chimichangas to achieve that signature crunch.
  • Powdered Sugar and Cinnamon: A light dusting adds the perfect finishing touch.

How to Make Strawberry Cheesecake Chimichangas

Follow these step-by-step instructions for foolproof Strawberry Cheesecake Chimichangas every time:

  1. Prepare the Filling: In a mixing bowl, beat the cream cheese, granulated sugar, and vanilla extract until smooth. Gently fold in diced strawberries.
  2. Assemble the Chimichangas: Lay a flour tortilla flat and spoon about ¼ cup of the cheesecake mixture onto the center. Fold the sides inward, then roll tightly from the bottom to form a burrito shape.
  3. Seal the Edges: Use a dab of water or beaten egg to seal the edges of the tortilla, ensuring the filling stays inside during cooking.
  4. Cook to Perfection: Heat butter or oil in a skillet over medium heat. Carefully place the chimichangas seam-side down and cook until golden brown on all sides, about 2-3 minutes per side. Alternatively, bake at 375°F for 12-15 minutes for a lighter option.
  5. Finish and Serve: Dust with powdered sugar and a sprinkle of cinnamon. Serve warm with extra strawberries or a drizzle of caramel sauce.

Pro Tips for the Best Results

  • Chill the Filling First: If the cheesecake mixture is too soft, refrigerate it for 15-20 minutes before assembling to make rolling easier.
  • Don’t Overfill: Too much filling can cause the chimichangas to burst during cooking. Stick to about ¼ cup per tortilla.
  • Use Fresh Tortillas: Stale tortillas may crack when folded. Warm them slightly in the microwave for a few seconds to make them pliable.
  • Fry at the Right Temperature: If the oil isn’t hot enough, the chimichangas will absorb too much oil and become greasy. Aim for 350°F if using a thermometer.

Variations and Substitutions

This recipe is wonderfully adaptable. Here are some delicious twists to try:

  • Different Fruits: Swap strawberries for blueberries, peaches, or even a mix of berries.
  • Chocolate Lovers: Add mini chocolate chips to the filling or drizzle melted chocolate on top.
  • Nutty Crunch: Sprinkle chopped pecans or almonds into the filling for extra texture.
  • Dairy-Free Option: Use vegan cream cheese and plant-based butter for a lactose-free version.
  • Air Fryer Method: For a healthier alternative, spray the chimichangas with cooking oil and air fry at 375°F for 8-10 minutes.

What to Serve With It

While these Strawberry Cheesecake Chimichangas are fantastic on their own, pairing them with complementary sides can elevate the experience:

  • Vanilla Ice Cream: The classic pairing—warm chimichangas with cold ice cream is pure bliss.
  • Whipped Cream: A dollop of freshly whipped cream adds lightness.
  • Berry Compote: Simmer strawberries or mixed berries with a little sugar for a quick sauce.
  • Mexican Hot Chocolate: The warm spices in the drink contrast beautifully with the sweet dessert.

How to Store and Reheat

If you have leftovers (which is rare!), here’s how to keep them fresh:

  • Refrigeration: Store in an airtight container for up to 2 days. Reheat in a 350°F oven for 5-7 minutes to restore crispiness.
  • Freezing: Wrap each chimichanga individually in foil and freeze for up to 1 month. Reheat from frozen in the oven at 375°F for 12-15 minutes.
  • Microwave Option: While not ideal for crispiness, microwaving for 30-45 seconds will warm the filling if you’re in a hurry.

Frequently Asked Questions (FAQs)

Can I use store-bought cheesecake filling?

Absolutely! If you’re short on time, a high-quality store-bought cheesecake filling works well. Just fold in fresh strawberries before assembling.

Can I make these ahead of time?

Yes, you can assemble the chimichangas a few hours in advance and refrigerate them until ready to cook. For best results, fry or bake just before serving.

What’s the best way to prevent soggy chimichangas?

Ensure the oil is hot enough before frying, and avoid overcrowding the pan. If baking, place them on a wire rack to allow air circulation.

Can I use corn tortillas instead of flour?

Flour tortillas are recommended because they’re more pliable and crisp up better. Corn tortillas may crack when folded.

How do I know when they’re done cooking?

The chimichangas should be golden brown and crispy on all sides. If baking, the edges will be lightly browned.

Final Thoughts

Strawberry Cheesecake Chimichangas are a playful, decadent dessert that brings together the best of both worlds—creamy cheesecake and crispy fried goodness. Whether you’re serving them at a party or enjoying a quiet night in, they’re sure to bring smiles all around. Don’t be afraid to experiment with different fillings and toppings to make them your own. Happy cooking, and may your dessert game be forever strong!

Print
clock clock iconcutlery cutlery iconflag flag iconfolder folder iconinstagram instagram iconpinterest pinterest iconfacebook facebook iconprint print iconsquares squares iconheart heart iconheart solid heart solid icon

Strawberry Cheesecake Chimichangas

  • Author: Dessert Delights

Description

A delicious fusion dessert combining creamy cheesecake filling and fresh strawberries wrapped in a crispy fried tortilla, drizzled with sweet strawberry sauce.


Ingredients

Scale

For the Crust:

  • For the filling:
  • 8 oz cream cheese, softened
  • 1/4 cup granulated sugar
  • 1 tsp vanilla extract
  • 1 cup fresh strawberries, diced
  • For the chimichangas:
  • 4 large flour tortillas
  • 1/2 cup vegetable oil (for frying)
  • For the strawberry sauce:
  • 1 cup fresh strawberries, chopped
  • 1/4 cup granulated sugar
  • 1 tbsp lemon juice
  • For garnish:
  • Powdered sugar
  • Whipped cream

Instructions

1. Prepare the Crust:

  1. 1. In a mixing bowl, beat cream cheese, sugar, and vanilla until smooth. Fold in diced strawberries.
  2. 2. Spoon 1/4 of the filling onto each tortilla, fold sides inward, then roll tightly.
  3. 3. Heat oil in a skillet over medium heat. Fry chimichangas until golden brown on all sides (about 2-3 minutes per side). Drain on paper towels.
  4. 4. For the sauce: Combine strawberries, sugar, and lemon juice in a saucepan. Cook over medium heat until strawberries break down (about 5 minutes). Blend if desired for smoother texture.
  5. 5. Serve chimichangas warm, drizzled with strawberry sauce, dusted with powdered sugar, and topped with whipped cream.

Notes

For best results, use room temperature cream cheese. Can substitute frozen strawberries if fresh aren’t available. Be careful when frying as oil may splatter.

Buffalo Chicken Stuffed Sweet Potatoes

Buffalo Chicken Stuffed Sweet Potatoes

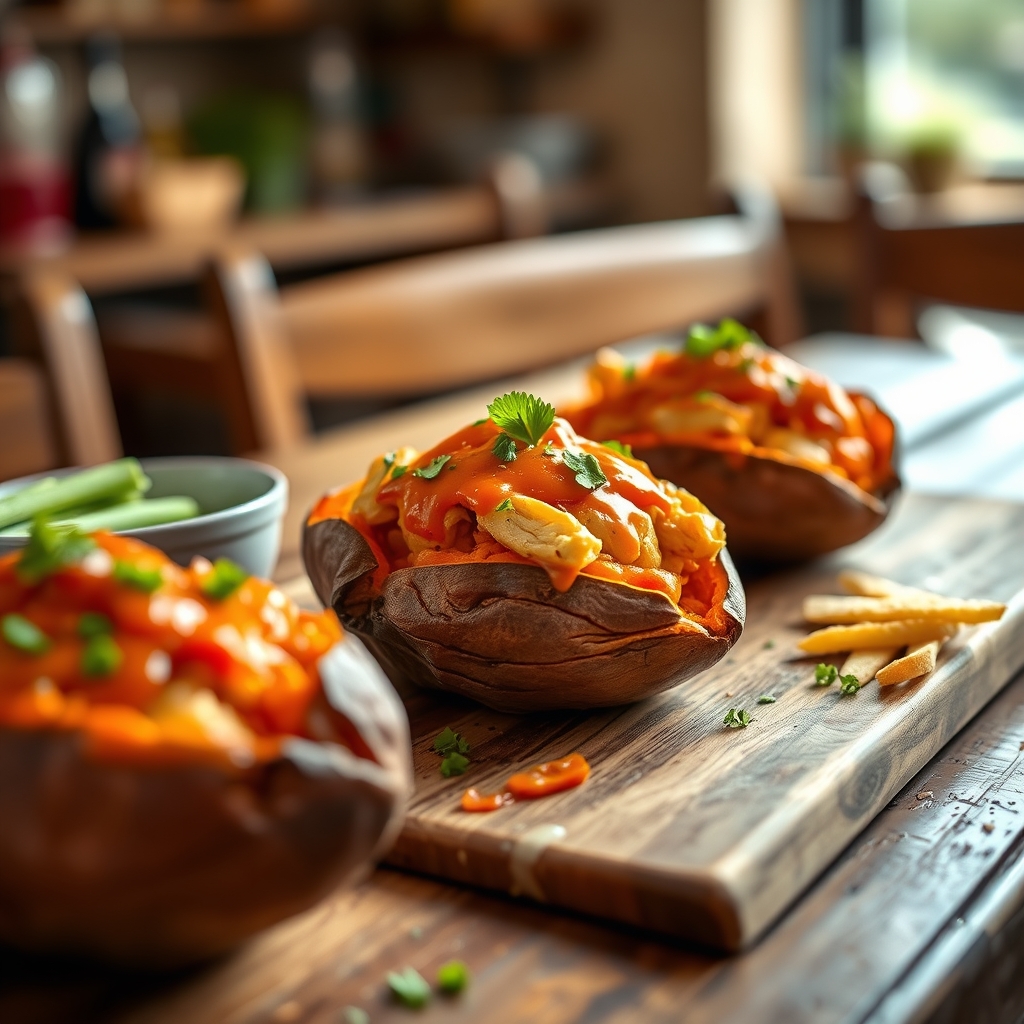
If you’re looking for a meal that combines comfort food with a healthy twist, these Buffalo Chicken Stuffed Sweet Potatoes are about to become your new favorite. Imagine tender, roasted sweet potatoes filled with spicy buffalo chicken, creamy blue cheese, and fresh green onions—each bite delivers a perfect balance of heat, sweetness, and tang. Whether you’re meal prepping for the week or hosting a casual dinner, this dish is a guaranteed crowd-pleaser.

Why You’ll Love This Recipe

First, let’s talk about why this recipe stands out. It’s not just another stuffed sweet potato—it’s a flavor-packed experience that brings together the best of bold and wholesome ingredients.

  • Perfect balance of flavors: The natural sweetness of roasted sweet potatoes contrasts beautifully with the spicy buffalo chicken, while the blue cheese adds a rich, tangy finish.
  • Meal prep friendly: These stuffed sweet potatoes reheat beautifully, making them ideal for lunches or quick dinners throughout the week.
  • Nutrient-dense and satisfying: Sweet potatoes are loaded with fiber and vitamins, while the lean chicken provides protein, keeping you full and energized.
  • Versatile for any occasion: Serve them as a hearty weeknight dinner, a game-day appetizer, or even a creative brunch option.
  • Easy to customize: Whether you prefer extra spice, a dairy-free version, or added veggies, this recipe adapts effortlessly to your tastes.

Ingredients Breakdown

Every ingredient in this buffalo chicken stuffed sweet potato recipe plays a crucial role in building layers of flavor and texture. Here’s what you’ll need and why each one matters.

  • Sweet potatoes: The base of the dish, sweet potatoes bring natural sweetness and a soft, creamy texture when roasted. They also provide fiber, vitamin A, and antioxidants.
  • Chicken breast: Lean and protein-packed, shredded chicken soaks up the buffalo sauce, adding a hearty element. You can also use rotisserie chicken for convenience.
  • Buffalo sauce: The star of the show, this sauce delivers the signature spicy, tangy kick. Use store-bought or homemade for extra depth.
  • Blue cheese crumbles: A classic pairing with buffalo sauce, blue cheese adds a sharp, creamy contrast. If you’re not a fan, substitute with feta or ranch dressing.
  • Green onions: These add a fresh, crisp finish and a pop of color.
  • Greek yogurt or sour cream: A dollop on top cools down the heat and adds creaminess.

How to Make Buffalo Chicken Stuffed Sweet Potatoes

Now, let’s walk through the step-by-step process to create these irresistible stuffed sweet potatoes. Follow these instructions for the best results.

  1. Roast the sweet potatoes: Preheat your oven to 400°F. Scrub the sweet potatoes clean, pierce them with a fork, and rub lightly with olive oil. Place them on a baking sheet and roast for 45-50 minutes, or until tender.
  2. Prepare the buffalo chicken: While the sweet potatoes roast, cook your chicken breast (or shred pre-cooked chicken). Toss the shredded chicken with buffalo sauce in a skillet over medium heat until well-coated and warmed through.
  3. Assemble the stuffed potatoes: Once the sweet potatoes are done, slice them open lengthwise and fluff the insides with a fork. Spoon the buffalo chicken mixture into each potato, then top with blue cheese crumbles.
  4. Broil for a melty finish: Place the stuffed sweet potatoes under the broiler for 2-3 minutes to melt the cheese slightly. Watch closely to avoid burning.
  5. Garnish and serve: Remove from the oven and top with chopped green onions and a drizzle of Greek yogurt or sour cream. Serve immediately while warm.

Pro Tips for the Best Results

Want to take your buffalo chicken stuffed sweet potatoes to the next level? These insider tips will help you nail the recipe every time.

  • Choose similar-sized sweet potatoes: This ensures even cooking so they all finish roasting at the same time.
  • Don’t skip the olive oil rub: A light coating helps the skins crisp up slightly and enhances the natural sweetness.
  • Adjust the spice level: If you’re sensitive to heat, mix the buffalo sauce with a little melted butter or honey to tame the spice.
  • Broil just before serving: This step adds a nice texture contrast with slightly melted cheese and crispy edges.
  • Let sweet potatoes rest: After roasting, let them sit for 5 minutes before slicing open—this helps them hold their shape better when stuffing.

Variations and Substitutions

One of the best things about this recipe is its flexibility. Here are some delicious ways to switch it up based on dietary needs or personal preferences.

  • Dairy-free option: Skip the blue cheese and use a dairy-free yogurt or avocado slices for creaminess.
  • Extra veggies: Add sautéed bell peppers, spinach, or diced celery for extra crunch and nutrition.
  • Alternative proteins: Swap chicken for shredded turkey, chickpeas, or even pulled pork for a different twist.
  • Different cheeses: Try sharp cheddar, pepper jack, or goat cheese instead of blue cheese.
  • Sweet and spicy: Drizzle with a touch of honey or maple syrup to balance the heat.

What to Serve With It

While these stuffed sweet potatoes are satisfying on their own, pairing them with the right sides can turn them into a complete meal. Here are some great options.

  • Fresh salads: A crisp green salad with ranch dressing or a tangy coleslaw complements the spicy flavors.
  • Roasted vegetables: Try simple roasted broccoli, Brussels sprouts, or carrots for added fiber.
  • Cornbread or dinner rolls: Perfect for soaking up any extra buffalo sauce.
  • Light soups: A bowl of tomato soup or creamy cauliflower soup makes a cozy pairing.
  • Refreshing drinks: Balance the heat with an iced tea, lemonade, or a light beer.

How to Store and Reheat

If you have leftovers (which is rare because these are so delicious), here’s how to keep them fresh and tasty for later.

  • Refrigeration: Store stuffed sweet potatoes in an airtight container for up to 3 days. Keep toppings like green onions and yogurt separate if possible.
  • Freezing: While you can freeze them, the texture of the sweet potatoes may change slightly. If freezing, wrap each stuffed potato tightly in foil and store for up to 1 month.
  • Reheating: For best results, reheat in the oven at 350°F for 10-15 minutes until warmed through. Microwaving works in a pinch but may soften the texture.

Frequently Asked Questions (FAQs)

Here are answers to some common questions about making buffalo chicken stuffed sweet potatoes.

  • Can I make these ahead of time? Yes! Roast the sweet potatoes and prepare the buffalo chicken mixture separately. Store them in the fridge and assemble just before reheating and serving.
  • What if I don’t like blue cheese? No problem. Swap it for shredded cheddar, crumbled feta, or even a drizzle of ranch dressing.
  • How can I make this recipe spicier? Add a pinch of cayenne pepper to the buffalo sauce or top with sliced jalapeños for extra heat.
  • Can I use chicken thighs instead of breast? Absolutely. Thighs will add more richness and moisture to the dish.
  • Are sweet potatoes healthier than regular potatoes? Both are nutritious, but sweet potatoes offer more vitamin A and slightly more fiber, while regular potatoes have more potassium.

Final Thoughts

Buffalo chicken stuffed sweet potatoes are the ultimate comfort food with a nutritious twist. They’re easy to make, endlessly customizable, and packed with bold flavors that keep you coming back for more. Whether you’re cooking for a family dinner, meal prepping for the week, or impressing guests at a gathering, this recipe delivers every time. Give it a try, and don’t be surprised if it becomes a regular in your rotation. Happy cooking!

Print
clock clock iconcutlery cutlery iconflag flag iconfolder folder iconinstagram instagram iconpinterest pinterest iconfacebook facebook iconprint print iconsquares squares iconheart heart iconheart solid heart solid icon

Buffalo Chicken Stuffed Sweet Potatoes

  • Author: Chef Jamie Spicer

Description

A spicy and satisfying meal featuring tender shredded buffalo chicken stuffed into roasted sweet potatoes, topped with creamy blue cheese dressing and fresh green onions for a perfect balance of flavors.


Ingredients

Scale

For the Crust:

  • For the sweet potatoes:
  • 4 medium sweet potatoes
  • 1 tablespoon olive oil
  • 1/2 teaspoon salt
  • For the buffalo chicken:
  • 2 cups cooked shredded chicken
  • 1/2 cup buffalo sauce
  • 1 tablespoon butter, melted
  • 1 teaspoon garlic powder
  • For toppings:
  • 1/4 cup blue cheese dressing
  • 2 green onions, sliced
  • 1/4 cup crumbled blue cheese (optional)
  • Fresh cilantro for garnish (optional)

Instructions

1. Prepare the Crust:

  1. Preheat oven to 400°F (200°C). Scrub sweet potatoes clean and pat dry.
  2. Rub sweet potatoes with olive oil and sprinkle with salt. Place on a baking sheet and roast for 45-55 minutes until tender when pierced with a fork.
  3. While potatoes roast, combine shredded chicken, buffalo sauce, melted butter, and garlic powder in a bowl. Mix well and set aside.
  4. When potatoes are done, let cool slightly, then slice each potato lengthwise and gently mash the insides with a fork.
  5. Stuff each potato with buffalo chicken mixture, dividing evenly among all four potatoes.
  6. Return to oven for 5-7 minutes to heat through.
  7. Drizzle with blue cheese dressing and top with green onions, blue cheese crumbles, and cilantro if using.
  8. Serve immediately while warm.

Notes

For extra crispy skins, rub potatoes with oil and salt, then bake directly on oven rack with a baking sheet below to catch drips. Leftover rotisserie chicken works great for this recipe. Adjust buffalo sauce amount to your preferred spice level.

Big Mac Egg Rolls

Big Mac Egg Rolls

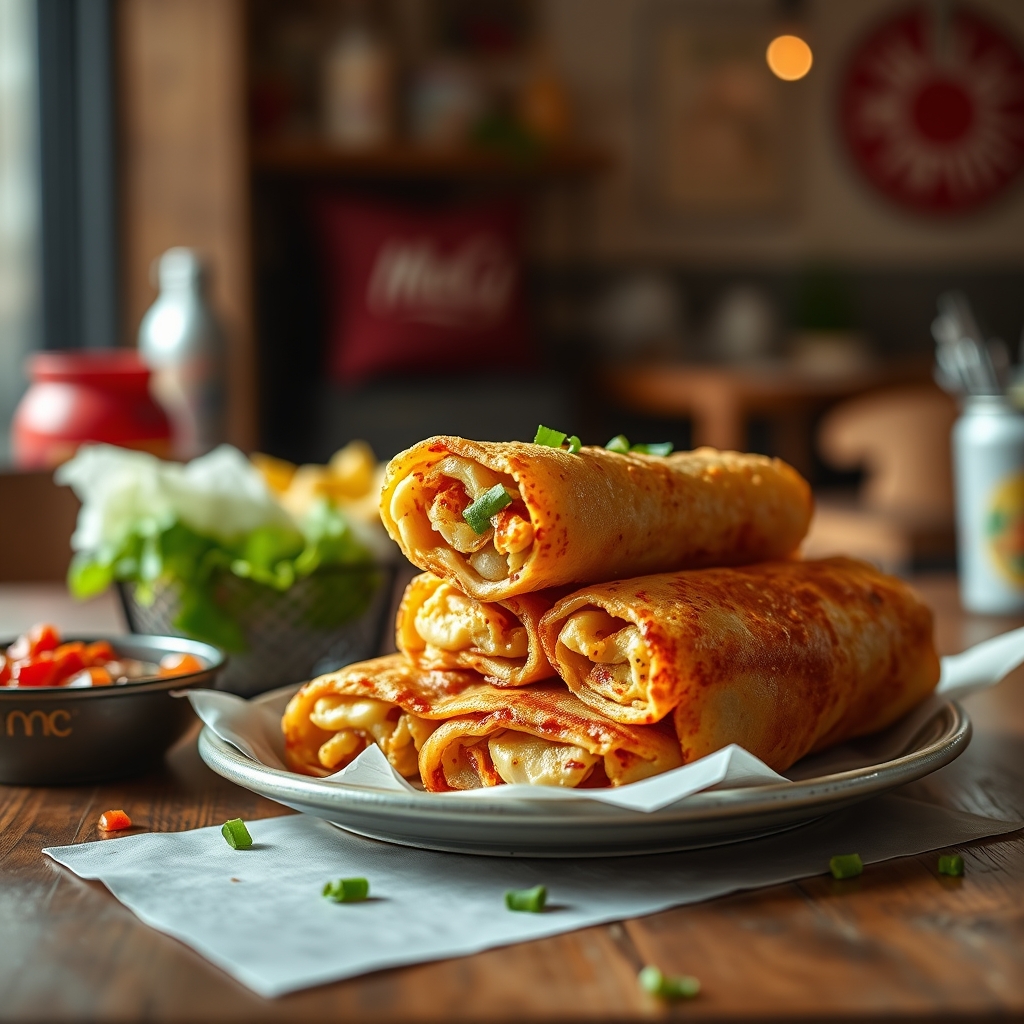
If you love the iconic flavors of a Big Mac but crave something with a crispy, handheld twist, these Big Mac Egg Rolls are about to become your new favorite appetizer or snack. Imagine all the signature tastes—special sauce, seasoned beef, melty cheese, and crunchy pickles—wrapped in a golden, crispy egg roll wrapper and fried to perfection. This recipe is a fun, creative way to enjoy a fast-food classic in a whole new format, perfect for game day, parties, or even a unique weeknight treat.

Why You’ll Love This Recipe

There are so many reasons to fall in love with these Big Mac Egg Rolls, but here are just a few that make them stand out:

  • Irresistible flavor fusion – Combining the beloved Big Mac taste with the satisfying crunch of an egg roll creates a mouthwatering experience that’s hard to resist.
  • Perfect for sharing – These egg rolls are ideal for gatherings, whether it’s a casual get-together, a game day spread, or a fun family snack night.
  • Easy to customize – You can adjust the fillings to suit your preferences, making them as saucy, cheesy, or meaty as you like.
  • Crispy and satisfying – The contrast between the crispy exterior and the juicy, flavorful filling is pure comfort food magic.
  • Nostalgic yet fresh – While the flavors are familiar, the presentation is exciting and new, making it a great conversation starter at any meal.

Ingredients Breakdown

To make these Big Mac Egg Rolls, you’ll need a handful of key ingredients that come together to recreate that iconic Big Mac taste. Here’s what you’ll need and why each one matters:

  • Ground beef – The star of the show, providing that hearty, meaty base. Opt for 80/20 for the best flavor and juiciness.
  • Egg roll wrappers – These thin, pliable sheets crisp up beautifully when fried, giving the perfect crunchy texture.
  • American cheese – Just like the real Big Mac, American cheese melts smoothly and adds that signature creamy richness.
  • Dill pickles – A must for that tangy crunch that cuts through the richness of the meat and cheese.
  • Big Mac sauce – A mix of mayonnaise, ketchup, mustard, relish, and spices, this sauce ties everything together with its creamy, slightly sweet, and tangy profile.
  • Onion and garlic powder – These seasonings enhance the beef, giving it that unmistakable fast-food flavor.
  • Sesame seeds (optional) – A sprinkle on top adds a subtle nutty flavor and a nod to the original Big Mac bun.

How to Make Big Mac Egg Rolls

Making these Big Mac Egg Rolls is easier than you might think. Follow these steps for a foolproof result:

  1. Cook the beef – In a skillet over medium heat, brown the ground beef, breaking it into small crumbles. Drain excess fat, then stir in onion powder, garlic powder, salt, and pepper. Set aside to cool slightly.
  2. Prepare the Big Mac sauce – In a small bowl, whisk together mayonnaise, ketchup, yellow mustard, sweet pickle relish, and a pinch of paprika. Adjust seasoning to taste.
  3. Assemble the egg rolls – Lay an egg roll wrapper on a clean surface in a diamond shape. Place a small amount of cooked beef in the center, followed by a slice of American cheese, a few pickle chips, and a drizzle of Big Mac sauce.
  4. Fold and seal – Fold the bottom corner over the filling, then fold in the sides. Roll tightly toward the top corner, sealing the edge with a dab of water or egg wash to ensure it stays closed.
  5. Fry to perfection – Heat oil in a deep skillet or fryer to 350°F. Fry the egg rolls in batches until golden brown and crispy, about 2-3 minutes per side. Drain on paper towels.
  6. Serve immediately – Enjoy these hot, with extra Big Mac sauce for dipping.

Pro Tips for the Best Results

To take your Big Mac Egg Rolls to the next level, keep these expert tips in mind:

  • Don’t overfill – Too much filling can cause the wrappers to burst during frying. Stick to about 2 tablespoons of filling per egg roll.
  • Keep wrappers moist – Cover unused wrappers with a damp towel to prevent them from drying out while you work.
  • Use fresh oil – For the crispiest results, fry in clean oil that hasn’t been reused multiple times.
  • Bake for a lighter option – If you prefer not to fry, brush the egg rolls with oil and bake at 400°F for 15-20 minutes, flipping halfway.
  • Double the sauce – Make extra Big Mac sauce for dipping—trust me, you’ll want it.

Variations and Substitutions

This recipe is flexible, so feel free to tweak it to your liking:

  • Turkey or chicken – Swap the beef for ground turkey or chicken for a lighter version.
  • Vegetarian option – Use plant-based ground meat and vegan cheese to keep it meat-free.
  • Extra veggies – Add shredded lettuce or diced onions inside for extra crunch and freshness.
  • Spicy kick – Mix a bit of sriracha or hot sauce into the Big Mac sauce for heat.
  • Air fryer method – For a lower-fat option, spray the egg rolls with oil and air fry at 375°F for 10-12 minutes, flipping halfway.

What to Serve With It

These Big Mac Egg Rolls are delicious on their own, but they pair wonderfully with a few sides and dips:

  • Classic French fries – Keep the fast-food theme going with a side of crispy fries.
  • Side salad – A simple green salad with a tangy vinaigrette balances the richness of the egg rolls.
  • Onion rings – Another crunchy favorite that complements the flavors.
  • Cold beer or soda – A fizzy drink cuts through the richness and refreshes the palate.
  • Extra dipping sauces – Ranch, honey mustard, or even a spicy mayo are great alternatives.

How to Store and Reheat

If you have leftovers (which is rare!), here’s how to keep them tasting great:

  • Refrigeration – Store cooled egg rolls in an airtight container in the fridge for up to 3 days.
  • Freezing – Place uncooked egg rolls on a baking sheet to freeze individually, then transfer to a freezer bag. Fry or bake straight from frozen, adding a few extra minutes to the cooking time.
  • Reheating – To revive leftover egg rolls, bake at 375°F for 10-12 minutes or air fry at 350°F for 5-7 minutes until crispy and heated through.

Frequently Asked Questions (FAQs)

Can I make these ahead of time?
Yes! Assemble the egg rolls and keep them covered in the fridge for up to 8 hours before frying. You can also freeze them uncooked for up to a month.

What’s the best oil for frying?
Neutral oils like vegetable, canola, or peanut oil work best because of their high smoke point and mild flavor.

Can I use wonton wrappers instead?
Yes, but they’ll be smaller and crispier. Adjust the filling amount accordingly.

How do I prevent soggy egg rolls?
Make sure the filling isn’t too wet, and let the cooked beef cool slightly before assembling. Also, fry at the right temperature—too low, and they’ll absorb excess oil.

Is there a gluten-free option?
Use gluten-free egg roll wrappers or rice paper wrappers for a gluten-free version.

Final Thoughts

These Big Mac Egg Rolls are a fun, delicious twist on a classic that’s sure to impress anyone who tries them. Whether you’re serving them at a party, enjoying them as a snack, or just indulging in a nostalgic craving, they’re guaranteed to be a hit. The crispy exterior, juicy filling, and that unmistakable Big Mac flavor make them irresistible. So gather your ingredients, heat up that oil, and get ready to enjoy one of the most addictive appetizers you’ll ever make. Happy cooking!

Print
clock clock iconcutlery cutlery iconflag flag iconfolder folder iconinstagram instagram iconpinterest pinterest iconfacebook facebook iconprint print iconsquares squares iconheart heart iconheart solid heart solid icon

Big Mac Egg Rolls

  • Author: The Creative Kitchen

Description

A fun twist on the classic Big Mac, these crispy egg rolls are stuffed with all the iconic flavors – seasoned beef, special sauce, cheese, pickles, and onions. Perfect for game day or party appetizers!


Ingredients

Scale

For the Crust:

  • For the filling:
  • 1 lb ground beef (80/20 blend)
  • 1 tsp garlic powder
  • 1 tsp onion powder
  • 1/2 tsp salt
  • 1/4 tsp black pepper
  • 1 tbsp Worcestershire sauce
  • 1/2 cup shredded iceberg lettuce
  • 1/4 cup finely diced white onion
  • 1/4 cup chopped dill pickles
  • 1 cup shredded American cheese
  • For the special sauce:
  • 1/2 cup mayonnaise
  • 2 tbsp sweet pickle relish
  • 1 tbsp yellow mustard
  • 1 tsp white vinegar
  • 1 tsp paprika
  • 1/2 tsp garlic powder
  • For assembly:
  • 12 egg roll wrappers
  • 1 egg (beaten, for sealing)
  • Vegetable oil (for frying)
  • For serving:
  • Extra special sauce
  • Sesame seeds

Instructions

1. Prepare the Crust:

  1. 1. Make the special sauce: Whisk together all sauce ingredients in a bowl. Refrigerate until ready to use.
  2. 2. Cook the beef: Brown ground beef in a skillet over medium heat, breaking it into small pieces. Drain excess fat, then stir in garlic powder, onion powder, salt, pepper, and Worcestershire sauce. Cook 1 more minute, then let cool slightly.
  3. 3. Assemble egg rolls: Lay an egg roll wrapper diagonally. Spread 1 tsp sauce in center, then layer with 2 tbsp beef, pinch of cheese, few pieces of lettuce, onion, and pickles.
  4. 4. Fold bottom corner over filling, fold in sides, then roll tightly. Seal edge with beaten egg. Repeat with remaining wrappers.
  5. 5. Fry: Heat 2 inches of oil to 350°F in a deep pot. Fry 2-3 egg rolls at a time for 3-4 minutes until golden brown, turning occasionally. Drain on paper towels.
  6. 6. Serve hot with extra sauce for dipping and a sprinkle of sesame seeds.

Notes

• Air fryer option: Brush rolls with oil and air fry at 390°F for 8-10 minutes, flipping halfway. • For crispier rolls, double-fry: Fry once to cook, let rest 5 minutes, then fry again 1-2 minutes. • Substitute ground turkey for a lighter version.

Chocolate Chip Cookie Brownie Bars

Chocolate Chip Cookie Brownie Bars

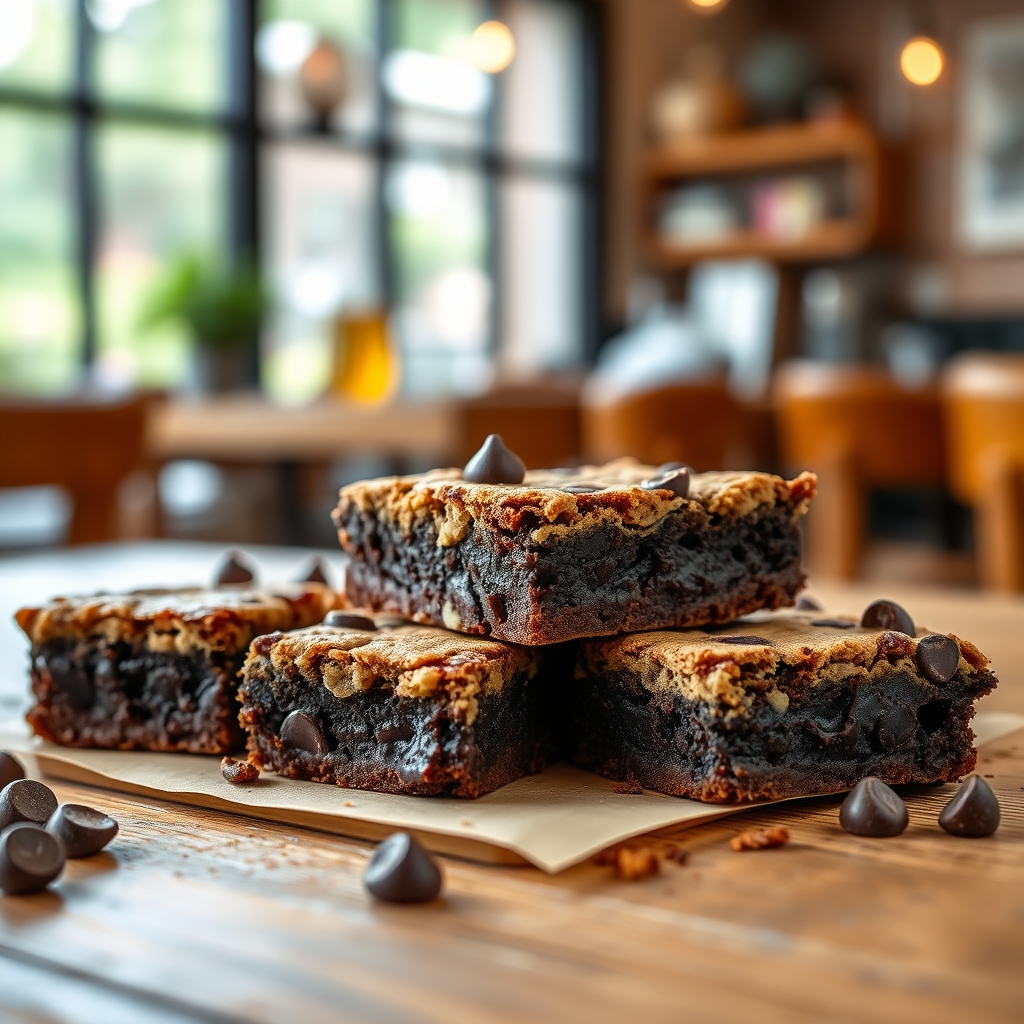
If you’ve ever found yourself torn between the chewy goodness of chocolate chip cookies and the rich, fudgy decadence of brownies, this recipe is your dream come true. Chocolate Chip Cookie Brownie Bars combine the best of both worlds into one irresistible dessert. Imagine a soft, buttery chocolate chip cookie base topped with a layer of dense, chocolatey brownie—each bite delivers the perfect harmony of textures and flavors. Whether you’re baking for a party, a potluck, or just a cozy night in, these bars are guaranteed to disappear fast.

Why You’ll Love This Recipe

There are countless reasons why Chocolate Chip Cookie Brownie Bars deserve a spot in your baking repertoire. Here are just a few:

  • Double the indulgence: By layering two beloved desserts, you get an ultra-satisfying treat that satisfies every sweet tooth.
  • Easy to make: No complicated techniques here—just simple steps that even beginner bakers can master.
  • Crowd-pleasing appeal: These bars are a hit at parties, bake sales, and family gatherings, making them a reliable go-to dessert.
  • Perfect texture contrast: The chewy cookie base balances the fudgy brownie layer for a mouthwatering experience.
  • Customizable: Add nuts, swirls of caramel, or even a sprinkle of sea salt to make them your own.

Ingredients Breakdown

Every great recipe starts with quality ingredients. Here’s what you’ll need and why each one matters:

  • Butter: The foundation of both the cookie and brownie layers, butter adds richness and moisture. Use unsalted for better control over sweetness.
  • Brown and granulated sugar: Brown sugar keeps the cookie layer soft and chewy, while granulated sugar helps the brownie layer achieve a slight crisp top.
  • Eggs: Essential for binding the ingredients and adding structure to both layers.
  • Vanilla extract: A splash of vanilla enhances the depth of flavor in both the cookie and brownie batters.
  • All-purpose flour: Provides the necessary structure. Be sure to measure it correctly to avoid dense bars.
  • Cocoa powder: Opt for high-quality unsweetened cocoa powder for a deep chocolate flavor in the brownie layer.
  • Chocolate chips: Semi-sweet chips work best, but dark or milk chocolate can be used depending on preference.
  • Baking soda and salt: These leavening agents ensure the cookie layer rises slightly, while salt balances the sweetness.

How to Make Chocolate Chip Cookie Brownie Bars

Follow these steps to create the ultimate dessert bars:

  1. Preheat and prepare: Start by preheating your oven to 350°F (175°C). Line a 9×13-inch baking pan with parchment paper, leaving an overhang for easy removal.
  2. Make the cookie layer: In a large bowl, cream together softened butter, brown sugar, and granulated sugar until light and fluffy. Beat in eggs one at a time, followed by vanilla. Gradually mix in flour, baking soda, and salt until just combined. Fold in chocolate chips.
  3. Press the cookie dough: Spread the cookie dough evenly into the prepared pan, pressing it down with slightly damp hands to avoid sticking.
  4. Prepare the brownie batter: In another bowl, melt butter and whisk in granulated sugar. Add eggs and vanilla, then sift in cocoa powder, flour, and salt. Stir until smooth.
  5. Layer and bake: Pour the brownie batter over the cookie dough layer, spreading it gently to cover. Bake for 30–35 minutes, or until a toothpick inserted into the center comes out with a few moist crumbs.
  6. Cool and slice: Let the bars cool completely in the pan before lifting them out using the parchment paper. Cut into squares and serve.

Pro Tips for the Best Results

  • Room-temperature ingredients: Ensure your butter and eggs are at room temperature for smoother batter.
  • Don’t overmix: Overworking the dough can lead to tough bars. Mix just until ingredients are incorporated.
  • Use parchment paper: This prevents sticking and makes cleanup a breeze.
  • Check for doneness early: Ovens vary, so start checking at the 25-minute mark to avoid overbaking.
  • Let them cool: Cutting warm bars can result in messy edges. Patience ensures clean slices.

Variations and Substitutions

Customize your Chocolate Chip Cookie Brownie Bars with these fun twists:

  • Nutty crunch: Add chopped walnuts or pecans to the cookie layer for extra texture.
  • Minty twist: Stir mint chocolate chips into the brownie batter for a refreshing flavor.
  • Gluten-free: Substitute all-purpose flour with a gluten-free blend for dietary needs.
  • Peanut butter swirl: Drop spoonfuls of peanut butter onto the brownie batter and swirl with a knife before baking.
  • Sea salt finish: Sprinkle flaky sea salt on top before baking for a sweet-and-salty contrast.

What to Serve With It

These bars are delicious on their own, but pairing them with the right accompaniments can take them to the next level:

  • Vanilla ice cream: A scoop of creamy vanilla ice cream melts beautifully over a warm bar.
  • Whipped cream: Light and airy whipped cream adds a delightful contrast.
  • Hot coffee or milk: A cup of coffee or cold milk balances the richness perfectly.
  • Fresh berries: Strawberries or raspberries add a tart freshness.

How to Store and Reheat

To keep your Chocolate Chip Cookie Brownie Bars fresh:

  • Room temperature: Store in an airtight container for up to 3 days.
  • Refrigerate: For longer storage, refrigerate for up to a week.
  • Freeze: Wrap individual bars in plastic wrap and freeze for up to 3 months. Thaw at room temperature before serving.
  • Reheat: Warm bars in the microwave for 10–15 seconds to restore that fresh-from-the-oven taste.

Frequently Asked Questions (FAQs)

Can I use boxed mixes for this recipe?
Yes, you can use pre-made cookie and brownie mixes for a shortcut. Prepare each according to package instructions, then layer and bake as directed.

Why did my bars turn out cakey instead of fudgy?
Overbaking or using too much flour can lead to a cakey texture. Measure flour carefully and check for doneness early.

Can I make these bars ahead of time?
Absolutely! These bars actually taste better the next day as the flavors meld. Store them properly to maintain freshness.

How do I prevent the brownie layer from sinking into the cookie layer?
Spread the brownie batter gently and evenly over the cookie dough. Avoid overmixing or pressing too hard.

Can I add other mix-ins?
Definitely! Try white chocolate chips, toffee bits, or even a swirl of caramel for extra decadence.

Final Thoughts

Chocolate Chip Cookie Brownie Bars are the ultimate dessert for anyone who loves the combination of chewy cookies and rich brownies. Whether you’re baking for a special occasion or just treating yourself, these bars are sure to impress. Don’t be surprised if they become a regular request from friends and family. Happy baking, and enjoy every delicious bite!

Print
clock clock iconcutlery cutlery iconflag flag iconfolder folder iconinstagram instagram iconpinterest pinterest iconfacebook facebook iconprint print iconsquares squares iconheart heart iconheart solid heart solid icon

Chocolate Chip Cookie Brownie Bars

  • Author: Baking Enthusiast

Description

A decadent dessert combining the best of both worlds—chewy chocolate chip cookies and fudgy brownies—layered into irresistible bars perfect for any occasion.


Ingredients

Scale

For the Crust:

  • For Cookie Layer:
  • 1 cup (2 sticks) unsalted butter, softened
  • 1 cup granulated sugar
  • 1 cup packed brown sugar
  • 2 large eggs
  • 2 teaspoons vanilla extract
  • 3 cups all-purpose flour
  • 1 teaspoon baking soda
  • 1/2 teaspoon salt
  • 2 cups semi-sweet chocolate chips
  • For Brownie Layer:
  • 1/2 cup (1 stick) unsalted butter, melted
  • 1 cup granulated sugar
  • 2 large eggs
  • 1 teaspoon vanilla extract
  • 1/3 cup unsweetened cocoa powder
  • 1/2 cup all-purpose flour
  • 1/4 teaspoon salt
  • 1/4 teaspoon baking powder

Instructions

1. Prepare the Crust:

  1. Preheat oven to 350°F (175°C). Grease a 9×13-inch baking pan and line with parchment paper.
  2. Make the cookie layer: In a large bowl, cream butter and sugars until light and fluffy. Beat in eggs and vanilla.
  3. In a separate bowl, whisk flour, baking soda, and salt. Gradually mix into wet ingredients. Fold in chocolate chips.
  4. Spread cookie dough evenly in the prepared pan, reserving 1 cup for topping.
  5. Make the brownie layer: Whisk melted butter, sugar, eggs, and vanilla. Stir in cocoa powder, flour, salt, and baking powder until just combined.
  6. Pour brownie batter over cookie layer. Drop reserved cookie dough in small pieces on top.
  7. Bake for 30–35 minutes, or until a toothpick inserted in the center comes out with moist crumbs (not wet batter).
  8. Cool completely in pan before slicing into bars.

Notes

For extra gooeyness, slightly underbake. Store in an airtight container for up to 5 days or freeze for longer storage.