Fresh Watermelon Mint Slush
There’s something undeniably refreshing about a cold, fruity slush on a hot summer day. And when that slush is made with juicy watermelon and fragrant mint, it becomes an irresistible treat that cools you down and lifts your spirits. This Fresh Watermelon Mint Slush is not just a drink—it’s a vibrant, hydrating experience that’s as simple to make as it is delicious. Whether you’re lounging by the pool, hosting a backyard barbecue, or just craving a sweet escape from the heat, this recipe is your answer.
Why You’ll Love This Recipe
This Fresh Watermelon Mint Slush is more than just a thirst-quencher—it’s a celebration of summer in a glass. Here’s why it’s bound to become a staple in your warm-weather repertoire:
- Ultra-Refreshing: The combination of watermelon’s natural sweetness and mint’s cooling effect makes this slush the ultimate hydrating treat on scorching days.
- Effortless to Make: With just a handful of ingredients and a blender, you can whip up this slush in minutes—no fancy equipment needed.
- Naturally Sweet: Watermelon provides all the sweetness you need, reducing the reliance on added sugars while keeping the flavor bright and satisfying.
- Versatile: Serve it as a non-alcoholic family-friendly drink or spike it with a splash of vodka or rum for a fun adult twist.
- Nutrient-Packed: Watermelon is rich in vitamins A and C, while mint aids digestion, making this slush as good for you as it is delicious.
Ingredients Breakdown
Every ingredient in this Fresh Watermelon Mint Slush plays a crucial role in creating the perfect balance of flavor and texture. Here’s what you’ll need and why each component matters:
- Fresh Watermelon: The star of the show, watermelon provides natural sweetness and a high water content, ensuring a smooth, slushy consistency. Opt for a ripe, seedless watermelon for the best results.
- Fresh Mint Leaves: Mint adds a refreshing, aromatic note that complements the watermelon beautifully. It also brings a slight herbal complexity that elevates the drink.
- Lime Juice: A splash of lime juice brightens the flavors, adding a subtle tang that keeps the slush from being overly sweet.
- Ice: Essential for achieving that signature slushy texture, ice thickens the drink while keeping it frosty cold.
- Honey or Agave (Optional): If your watermelon isn’t as sweet as you’d like, a touch of honey or agave can enhance the flavor without overpowering it.
How to Make Fresh Watermelon Mint Slush
Making this slush is as easy as blending and sipping, but a few key steps ensure the best results. Follow this simple guide for a flawless batch every time.
- Prep the Watermelon: Cut the watermelon into chunks, discarding the rind. For the smoothest texture, remove any seeds if your watermelon isn’t seedless.
- Blend the Base: Add the watermelon chunks, fresh mint leaves, and lime juice to a high-powered blender. Blend until completely smooth, about 30–45 seconds.
- Add Ice: Toss in a handful of ice cubes and blend again until the mixture reaches a thick, slushy consistency. If needed, add more ice for extra thickness.
- Taste and Adjust: Give the slush a quick taste. If it needs a touch more sweetness, drizzle in honey or agave and blend once more.
- Serve Immediately: Pour the slush into glasses, garnish with a sprig of mint or a small watermelon wedge, and enjoy right away for the best texture.
Pro Tips for the Best Results
Want to take your Fresh Watermelon Mint Slush from good to extraordinary? These insider tips will help you nail it every time:
- Freeze Your Watermelon: For an even thicker, frostier slush, freeze the watermelon chunks for 1–2 hours before blending. This reduces the need for extra ice, keeping the flavor more concentrated.
- Use Cold Ingredients: Chill your watermelon and mint in the fridge beforehand to ensure the slush stays icy cold longer.
- Don’t Overblend: Blend just until the ice is crushed—overblending can melt the ice too much, resulting in a watery texture.
- Strain for Smoothness: If you prefer a silky-smooth slush without tiny mint flecks, strain the blended mixture through a fine-mesh sieve before adding ice.
- Experiment with Texture: For a chunkier, granita-like treat, pulse the ice instead of fully blending it.
Variations and Substitutions
This recipe is wonderfully adaptable. Whether you’re catering to dietary restrictions or just craving a new twist, here are some delicious variations to try:
- Spiked Slush: Add a shot of vodka, rum, or tequila for a boozy version perfect for summer parties.
- Herbal Twists: Swap mint for basil or cilantro for a more complex, savory edge.
- Citrus Variations: Replace lime juice with lemon or orange juice for a different citrus profile.
- Berry Boost: Toss in a handful of strawberries or raspberries for a mixed-fruit slush with added tartness.
- Dairy-Free Creaminess: Blend in a splash of coconut milk for a richer, creamier texture.
What to Serve With It
This Fresh Watermelon Mint Slush is fantastic on its own, but pairing it with the right dishes can turn it into part of a memorable meal. Here are some serving ideas:
- Grilled Fare: Serve alongside grilled shrimp skewers, chicken satay, or veggie kebabs for a light, summery meal.
- Fresh Salads: Pair with a crisp cucumber salad or a tangy watermelon-feta salad for a refreshing combo.
- Brunch Spread: Offer it with avocado toast, fluffy pancakes, or a fruit platter for a vibrant brunch addition.
- Dessert Pairings: Complement with lemon bars, coconut macaroons, or a simple sorbet for a sweet finish.
How to Store and Reheat
While this slush is best enjoyed fresh, you can prep parts of it ahead of time if needed. Here’s how to store and revive leftovers:
- Refrigeration: Store any leftover blended mixture (without ice) in an airtight container in the fridge for up to 2 days. Re-blend with fresh ice before serving.
- Freezing: Pour the blended slush into ice cube trays and freeze. Later, blend the cubes with a splash of water or lime juice to revive the slushy texture.
- No Reheating Needed: Since this is a cold drink, reheating isn’t necessary—just give it a quick stir or re-blend if separation occurs.
Frequently Asked Questions (FAQs)
Here are answers to some common questions about making the perfect Fresh Watermelon Mint Slush:
Can I use frozen watermelon instead of fresh? Absolutely! Frozen watermelon works great and reduces the need for extra ice, making the flavor even more intense.
How can I make this slush sweeter without added sugar? Try using a riper watermelon, or add a medjool date or a splash of apple juice for natural sweetness.
Can I make this slush ahead of time for a party? Yes—blend the watermelon and mint base ahead, then store it in the fridge. Add ice and re-blend just before serving.
Is this recipe kid-friendly? Definitely! Omit any alcohol, and kids will love the sweet, fruity flavor. You can even pour it into popsicle molds for frozen treats.
What if I don’t have a high-powered blender? No problem—just blend the watermelon and mint first until smooth, then crush the ice in small batches for easier blending.
Final Thoughts
There’s a reason this Fresh Watermelon Mint Slush feels like summer in a glass—it’s bright, effortless, and utterly satisfying. Whether you’re sipping it by the pool, serving it at a gathering, or treating yourself to a midday refreshment, it’s a recipe that brings joy with every frosty sip. So grab your blender, a ripe watermelon, and a handful of mint, and let this slush become your go-to for beating the heat. Cheers to simple, delicious moments!
Print
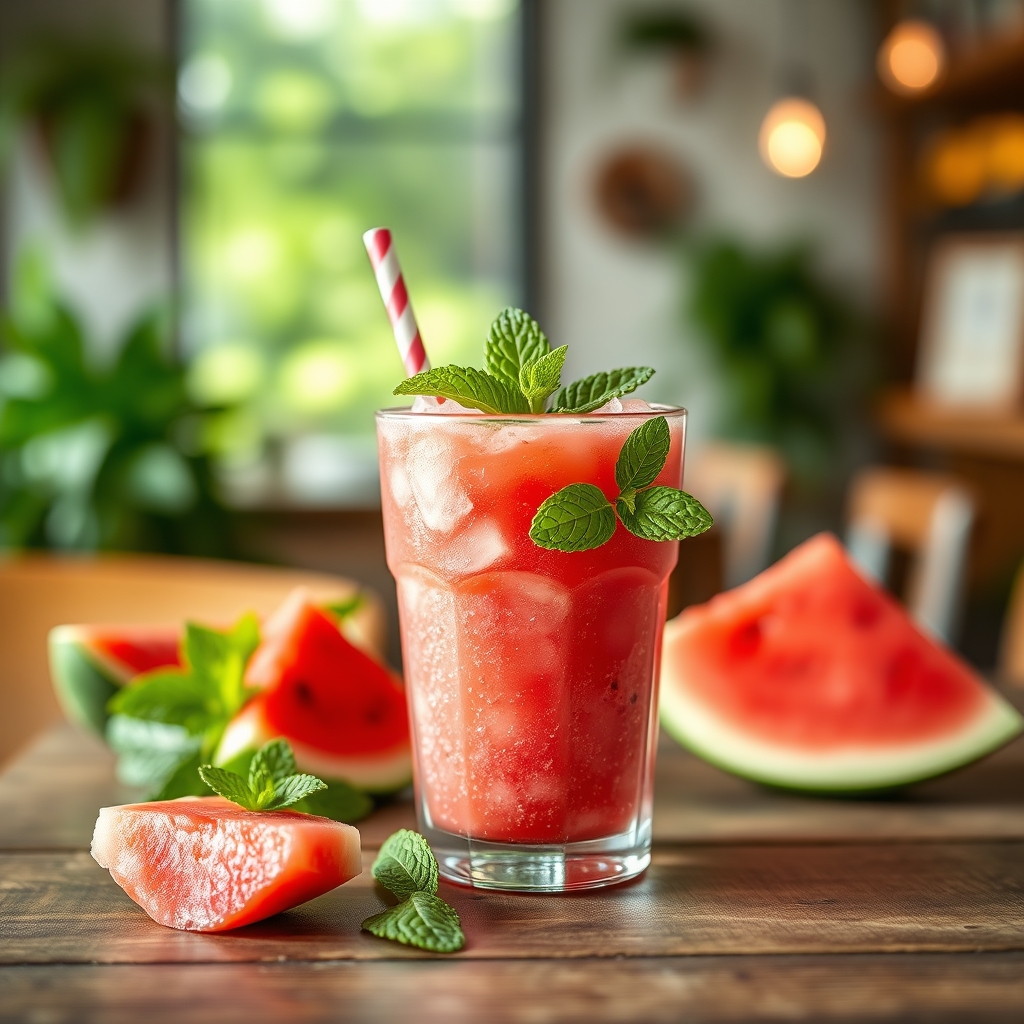
Fresh Watermelon Mint Slush
Description
A cool and hydrating summer slush made with fresh watermelon, mint, and a hint of lime for the perfect refreshing treat.
Ingredients
For the Crust:
- For the slush:
- 4 cups fresh watermelon, cubed and seeded
- 1/4 cup fresh mint leaves
- 2 tablespoons fresh lime juice
- 1 tablespoon honey or agave syrup (optional)
- 1 cup ice cubes
- For garnish:
- Fresh mint sprigs
- Watermelon wedges
- Lime slices
Instructions
1. Prepare the Crust:
- 1. In a blender, combine the watermelon, mint leaves, lime juice, and honey (if using). Blend until smooth.
- 2. Add the ice cubes and blend again until the mixture is slushy and well-combined.
- 3. Taste and adjust sweetness or tartness by adding more honey or lime juice if needed.
- 4. Pour the slush into serving glasses.
- 5. Garnish with fresh mint sprigs, watermelon wedges, and lime slices.
- 6. Serve immediately and enjoy!
Notes
For a boozy version, add 1-2 ounces of vodka or rum before blending. Store any leftovers in the freezer, but note that the texture may change slightly upon thawing.