Passionfruit Peach Iced Tea

Passionfruit Peach Iced Tea

There’s something magical about the combination of passionfruit and peach—it’s tropical, sweet, and just a little tangy, making it the perfect base for a refreshing iced tea. Whether you’re lounging by the pool, hosting a summer brunch, or just craving a vibrant drink to brighten your day, this Passionfruit Peach Iced Tea is a must-try. With its balance of fruity flavors and crisp tea undertones, it’s a drink that feels both indulgent and refreshingly light. Let’s dive into how to make this delicious beverage that’s sure to become a staple in your warm-weather rotation.

Why You’ll Love This Recipe

First, let’s talk about why this Passionfruit Peach Iced Tea deserves a spot in your recipe collection. Here are a few reasons it stands out:

  • Bursting with tropical flavor: The natural sweetness of ripe peaches and the exotic tang of passionfruit create a dynamic duo that’s impossible to resist.
  • Effortless to make: No complicated steps or hard-to-find ingredients—just simple, fresh components that come together in minutes.
  • Versatile for any occasion: Serve it at brunch, sip it by the pool, or even turn it into a mocktail or cocktail base for happy hour.
  • Naturally refreshing: Unlike overly sugary store-bought versions, this homemade iced tea lets you control the sweetness while keeping it light and hydrating.
  • Beautiful presentation: The golden hue of the tea with flecks of passionfruit seeds makes it as visually appealing as it is delicious.

Ingredients Breakdown

Every great recipe starts with quality ingredients, and this Passionfruit Peach Iced Tea is no exception. Here’s what you’ll need and why each component matters:

  • Black tea bags: The backbone of the drink, black tea provides a robust base that balances the sweetness of the fruit. Opt for a high-quality loose-leaf or bagged tea for the best flavor.
  • Fresh peaches: Ripe peaches bring natural sweetness and a juicy, floral note. If fresh peaches aren’t in season, frozen peaches work well too.
  • Passionfruit pulp: This is where the tropical magic happens. The tart, aromatic flavor of passionfruit elevates the tea with its distinct tang. You can use fresh passionfruit or store-bought pulp.
  • Honey or agave syrup: A touch of natural sweetener enhances the fruit flavors without overpowering them. Adjust to taste based on your preference.
  • Fresh lemon juice: A splash of lemon brightens the entire drink, adding a subtle acidity that keeps it from being too cloying.
  • Cold water and ice: Essential for brewing and serving, ensuring your tea is perfectly chilled.

How to Make Passionfruit Peach Iced Tea

Now, let’s walk through the step-by-step process of crafting this refreshing beverage. Follow these instructions for the best results:

  1. Brew the tea: Steep 4 black tea bags in 4 cups of hot water for about 5 minutes. Avoid over-steeping to prevent bitterness. Remove the tea bags and let the tea cool to room temperature.
  2. Prepare the peach puree: In a blender, combine 2 ripe peaches (peeled and sliced) with 1 tablespoon of honey or agave. Blend until smooth. If you prefer a smoother texture, strain the puree through a fine-mesh sieve.
  3. Mix the passionfruit: Scoop out the pulp of 2 passionfruits (or use 1/4 cup of store-bought pulp) and stir it into the cooled tea along with the peach puree.
  4. Add lemon juice: Squeeze in the juice of half a lemon to balance the sweetness.
  5. Chill and serve: Refrigerate the tea for at least an hour to let the flavors meld. When ready to serve, pour over ice and garnish with peach slices or a sprinkle of passionfruit seeds.

Pro Tips for the Best Results

To take your Passionfruit Peach Iced Tea to the next level, keep these expert tips in mind:

  • Use filtered water: Since tea is mostly water, using filtered or spring water ensures a cleaner, crisper taste.
  • Adjust sweetness gradually: Start with less sweetener and add more to taste—remember, the fruit already brings natural sugars.
  • Infuse with herbs: A few fresh mint or basil leaves steeped with the tea can add an extra layer of freshness.
  • Double-batch for parties: This tea is a crowd-pleaser, so consider making a larger quantity if serving guests.
  • Let it steep, but not too long: Over-steeping black tea can lead to bitterness, so stick to the recommended 5 minutes.

Variations and Substitutions

This recipe is wonderfully adaptable. Here are some ways to tweak it to suit your preferences or dietary needs:

  • Tea alternatives: Swap black tea for green tea or hibiscus tea for a different flavor profile.
  • Sweetener swaps: Use maple syrup, stevia, or simple syrup if you don’t have honey or agave.
  • Frozen fruit option: If fresh peaches or passionfruit aren’t available, frozen fruit works just as well in the puree.
  • Sparkling twist: Top off your glass with a splash of sparkling water for a fizzy variation.
  • Spiked version: Add a shot of vodka or rum for an adults-only cocktail.

What to Serve With It

This Passionfruit Peach Iced Tea pairs beautifully with a variety of dishes. Here are some serving ideas:

  • Summer salads: A crisp kale salad or a watermelon-feta salad complements the tea’s fruity notes.
  • Light sandwiches: Try cucumber tea sandwiches or a chicken salad croissant for a balanced brunch.
  • Grilled seafood: The tropical flavors pair wonderfully with grilled shrimp or fish tacos.
  • Desserts: Serve alongside lemon bars, shortbread cookies, or a peach cobbler for a sweet finish.

How to Store and Reheat

If you have leftovers (though it’s so good, you might not!), here’s how to keep them fresh:

  • Refrigeration: Store in an airtight pitcher or jar for up to 3 days. The flavors may intensify over time.
  • Freezing: Pour into ice cube trays to make tea ice cubes—perfect for chilling future batches without dilution.
  • Serving later: Give the tea a good stir before serving, as the fruit pulp may settle. Add fresh ice if needed.

Frequently Asked Questions (FAQs)

Here are answers to some common questions about Passionfruit Peach Iced Tea:

  • Can I use canned peaches? Yes, but opt for peaches in juice rather than heavy syrup to avoid excess sweetness.
  • Is there a caffeine-free version? Absolutely! Use decaf black tea or herbal tea like rooibos for a caffeine-free alternative.
  • How do I make it less tart? Add more sweetener or reduce the amount of lemon juice to balance the passionfruit’s tang.
  • Can I make this ahead of time? Yes, it actually tastes better after chilling for a few hours as the flavors meld.
  • Where can I find passionfruit pulp? Check the international aisle of your grocery store or Latin or Asian markets. Online retailers also carry it.

Final Thoughts

There you have it—a simple yet stunning Passionfruit Peach Iced Tea that’s as enjoyable to make as it is to drink. Whether you’re serving it at a gathering or treating yourself to a quiet afternoon pick-me-up, this recipe is sure to impress. The blend of sweet peaches and zesty passionfruit creates a harmony of flavors that feels like a vacation in a glass. So go ahead, brew a batch, kick back, and savor every sip of this tropical delight. Cheers to refreshing, homemade goodness!

Print
clock clock iconcutlery cutlery iconflag flag iconfolder folder iconinstagram instagram iconpinterest pinterest iconfacebook facebook iconprint print iconsquares squares iconheart heart iconheart solid heart solid icon

Passionfruit Peach Iced Tea

  • Author: Tea Enthusiast

Description

A refreshing tropical iced tea blending sweet peaches and tangy passionfruit, perfect for hot summer days. This easy recipe uses real fruit for maximum flavor.


Ingredients

Scale

For the Crust:

  • For Tea Base:
  • 4 cups water
  • 4 black tea bags (or 2 tbsp loose leaf)
  • For Fruit Syrup:
  • 2 ripe peaches, peeled and diced
  • 1/2 cup passionfruit pulp (about 45 fruits)
  • 1/2 cup granulated sugar
  • 1/2 cup water
  • For Assembly:
  • Ice cubes
  • Fresh mint leaves (garnish)
  • Peach slices (garnish)
  • Passionfruit seeds (garnish)

Instructions

1. Prepare the Crust:

  1. 1. Steep tea bags in 4 cups hot water for 5 minutes. Remove bags and let cool completely.
  2. 2. Make syrup: Combine peaches, passionfruit pulp, sugar and 1/2 cup water in saucepan. Simmer for 10 minutes until fruit breaks down.
  3. 3. Strain syrup through fine mesh sieve, pressing solids to extract maximum flavor. Discard pulp.
  4. 4. Combine cooled tea and fruit syrup in pitcher. Chill for at least 2 hours.
  5. 5. Serve over ice, garnished with mint, peach slices and passionfruit seeds.

Notes

For stronger tea flavor, steep bags longer (up to 10 min). Adjust sugar to taste – tropical fruits vary in sweetness. Store refrigerated for up to 3 days.

Lemon Raspberry Shortbread Bars

Lemon Raspberry Shortbread Bars

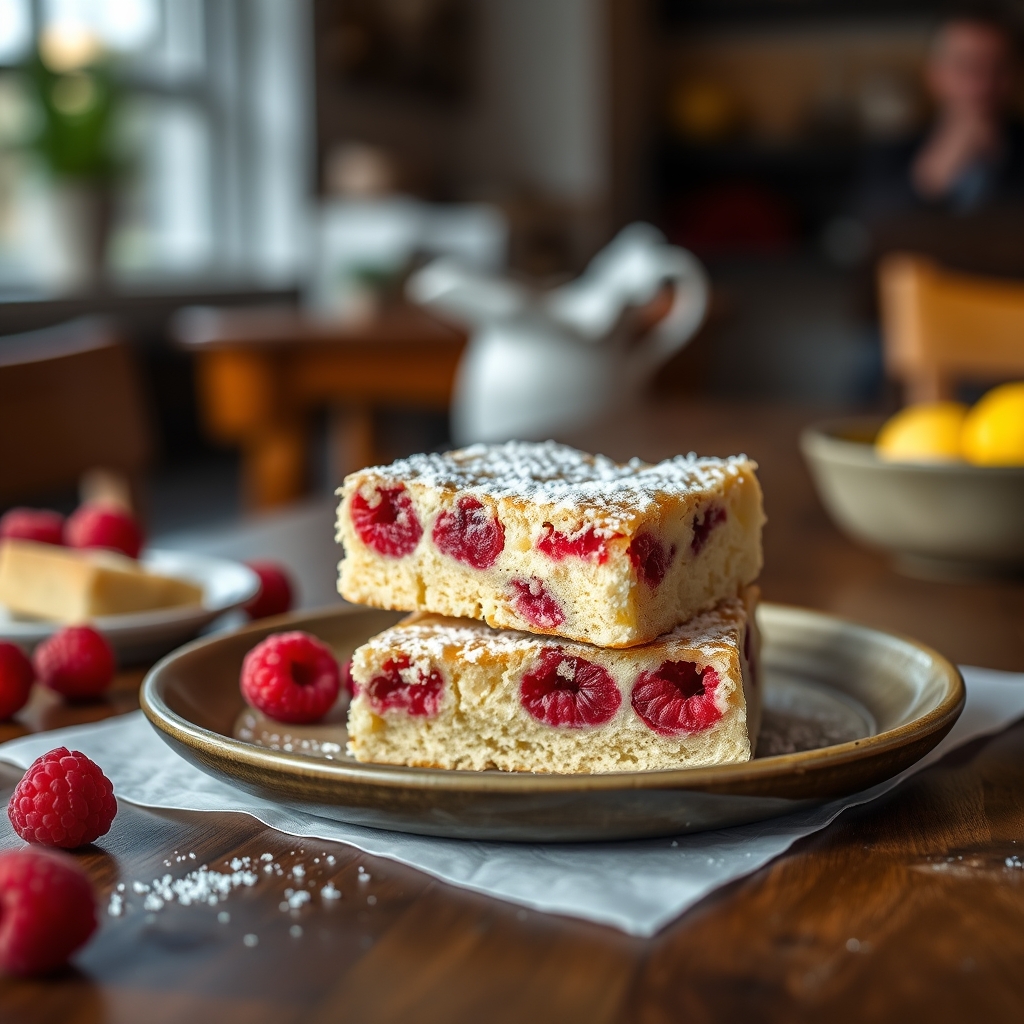
There’s something undeniably magical about the combination of tart lemon and sweet raspberries nestled in a buttery shortbread crust. These Lemon Raspberry Shortbread Bars are the perfect balance of flavors and textures—crisp, crumbly, and bursting with bright, fruity goodness. Whether you’re hosting an afternoon tea, bringing dessert to a potluck, or simply treating yourself, this recipe is a guaranteed crowd-pleaser. Let’s dive into the details of how to make these irresistible bars from scratch.

Why You’ll Love This Recipe

First, let’s talk about why these Lemon Raspberry Shortbread Bars deserve a spot in your baking repertoire.

  • Perfect balance of flavors – The zesty lemon curd cuts through the sweetness of the raspberry jam, while the buttery shortbread base ties everything together.
  • Easy yet impressive – With simple ingredients and straightforward steps, this recipe is beginner-friendly but looks and tastes like it came from a bakery.
  • Versatile for any occasion – Serve them at brunch, pack them for picnics, or enjoy them as an elegant dessert.
  • Make-ahead friendly – These bars keep well in the fridge or freezer, making them ideal for meal prep or last-minute guests.
  • Crowd-pleasing texture – The contrast between the crisp shortbread, creamy lemon layer, and jammy raspberries is simply irresistible.

Ingredients Breakdown

Every ingredient in this recipe plays a crucial role in creating the perfect Lemon Raspberry Shortbread Bars. Here’s what you’ll need and why each one matters:

  • Butter – The foundation of the shortbread crust, butter provides richness and that signature crumbly texture. Use unsalted butter for better control over the sweetness.
  • Granulated sugar – Sweetens the shortbread base and balances the tartness of the lemon and raspberry layers.
  • All-purpose flour – Gives structure to the shortbread. For a slightly nuttier flavor, you can substitute a portion with almond flour.
  • Cornstarch – A secret weapon for extra tender shortbread.
  • Lemon zest and juice – Freshly grated lemon zest and juice bring vibrant citrus flavor to the curd layer.
  • Eggs – Help thicken the lemon curd for a luscious, creamy texture.
  • Raspberry jam – Use a high-quality jam with real fruit for the best flavor. Seedless or seeded both work—just pick your preference.
  • Powdered sugar – Optional for dusting on top for a pretty finishing touch.

How to Make Lemon Raspberry Shortbread Bars

Now, let’s walk through the step-by-step process to create these delightful bars. Follow these instructions closely for the best results.

Step 1: Prepare the Shortbread Crust

Preheat your oven to 350°F and line an 8×8-inch baking pan with parchment paper, leaving an overhang for easy removal later. In a mixing bowl, cream together 1 cup of softened unsalted butter and ½ cup granulated sugar until light and fluffy. Add 2 cups all-purpose flour and ¼ cup cornstarch, mixing just until the dough comes together. Press the dough evenly into the prepared pan, then prick all over with a fork to prevent air bubbles. Bake for 20-25 minutes, or until the edges are lightly golden. Let it cool slightly while you prepare the lemon layer.

Step 2: Make the Lemon Curd Filling

In a medium saucepan, whisk together 3 large eggs, 1 cup granulated sugar, ½ cup freshly squeezed lemon juice, and 2 tablespoons lemon zest. Cook over medium heat, stirring constantly, until the mixture thickens enough to coat the back of a spoon (about 8-10 minutes). Remove from heat and stir in ¼ cup butter, one tablespoon at a time, until fully melted and smooth. Pour the lemon curd over the warm shortbread crust, spreading it evenly.

Step 3: Add the Raspberry Layer

Warm ½ cup raspberry jam in a small saucepan or microwave until slightly runny. Drop spoonfuls of the jam over the lemon layer, then use a toothpick or knife to swirl it gently into the lemon curd. Be careful not to overmix—you want beautiful marbled streaks.

Step 4: Bake and Cool

Return the pan to the oven and bake for another 10-12 minutes, just until the lemon layer is set. Let the bars cool completely at room temperature, then refrigerate for at least 2 hours (or overnight) to firm up before slicing. Dust with powdered sugar if desired.

Pro Tips for the Best Results

Want to take your Lemon Raspberry Shortbread Bars to the next level? Here are some expert tricks:

  • Use room-temperature butter – This ensures a smooth, even shortbread crust without overworking the dough.
  • Don’t skip the cornstarch – It’s the key to achieving that melt-in-your-mouth shortbread texture.
  • Strain the lemon curd – For an ultra-smooth filling, pass the lemon curd through a fine-mesh sieve before pouring it over the crust.
  • Chill before slicing – Patience pays off! Letting the bars set in the fridge ensures clean, neat cuts.
  • Experiment with swirls – For a stunning presentation, try creating heart-shaped swirls or zigzag patterns with the raspberry jam.

Variations and Substitutions

This recipe is wonderfully adaptable. Here are some delicious ways to mix it up:

  • Berry alternatives – Swap raspberry jam for strawberry, blackberry, or even blueberry preserves.
  • Citrus twists – Try lime or orange zest and juice instead of lemon for a different citrus profile.
  • Gluten-free option – Replace the all-purpose flour with a 1:1 gluten-free flour blend for a celiac-friendly version.
  • Nutty crunch – Add ¼ cup finely chopped almonds or pecans to the shortbread dough for extra texture.
  • White chocolate drizzle – For an indulgent finish, melt white chocolate and drizzle it over the cooled bars.

What to Serve With It

These bars are delightful on their own, but here are some perfect pairings:

  • A cup of Earl Grey tea or freshly brewed coffee for an afternoon pick-me-up.
  • A scoop of vanilla bean ice cream for a decadent dessert.
  • Fresh berries and whipped cream for an elegant plating option.
  • A glass of sparkling rosé for a sophisticated summer treat.

How to Store and Reheat

To keep your Lemon Raspberry Shortbread Bars fresh:

  • Room temperature – Store in an airtight container for up to 2 days.
  • Refrigerator – Keep chilled for up to 1 week.
  • Freezer – Wrap individual bars in plastic wrap and freeze for up to 3 months. Thaw in the fridge overnight before serving.
  • Reheating – While best served cold or at room temperature, you can briefly warm them in the microwave (10 seconds) if you prefer a softer texture.

Frequently Asked Questions (FAQs)

Can I use store-bought lemon curd?

Yes, though homemade has a brighter flavor. If using store-bought, you’ll need about 1 ½ cups. Look for a high-quality brand with real lemon juice.

Why did my lemon layer crack?

This usually happens if the bars cool too quickly. Let them cool gradually at room temperature before refrigerating to prevent cracks.

Can I double this recipe?

Absolutely! Use a 9×13-inch pan and increase baking times by 5-7 minutes for each step.

My shortbread is too crumbly—what went wrong?

You may have overmixed the dough or baked it too long. Next time, mix just until combined and watch the baking time closely.

Can I make these bars vegan?

Yes! Use plant-based butter, flax eggs (1 tbsp ground flax + 3 tbsp water per egg), and a vegan lemon curd substitute.

Final Thoughts

There you have it—everything you need to know to make perfect Lemon Raspberry Shortbread Bars. This recipe is one of my all-time favorites because it’s equally suited for casual snacking and special occasions. The bright citrus, sweet berries, and buttery shortbread create a harmony of flavors that never fails to impress. I hope these bars bring as much joy to your kitchen as they have to mine. Happy baking!

Print
clock clock iconcutlery cutlery iconflag flag iconfolder folder iconinstagram instagram iconpinterest pinterest iconfacebook facebook iconprint print iconsquares squares iconheart heart iconheart solid heart solid icon

Lemon Raspberry Shortbread Bars

  • Author: Baking Enthusiast

Description

These Lemon Raspberry Shortbread Bars feature a buttery shortbread crust, tangy lemon filling, and sweet raspberry jam swirl for a perfect balance of flavors. Ideal for spring gatherings or afternoon tea.


Ingredients

Scale

For the Crust:

  • For the Shortbread Crust:
  • 1 1/2 cups all-purpose flour
  • 1/2 cup granulated sugar
  • 1/2 teaspoon salt
  • 3/4 cup unsalted butter (cold, cubed)
  • For the Lemon Filling:
  • 3 large eggs
  • 1 cup granulated sugar
  • 1/4 cup all-purpose flour
  • 1/2 cup fresh lemon juice (about 3 lemons)
  • 1 tablespoon lemon zest
  • For the Raspberry Swirl:
  • 1/2 cup raspberry jam (seedless preferred)
  • 1 tablespoon water

Instructions

1. Prepare the Crust:

  1. Preheat oven to 350°F (175°C). Line an 8×8-inch baking pan with parchment paper, leaving overhang for easy removal.
  2. Make the crust: In a food processor, pulse flour, sugar, and salt. Add cold butter and pulse until mixture resembles coarse crumbs.
  3. Press dough evenly into the prepared pan. Bake for 18-20 minutes until lightly golden. Let cool slightly.
  4. Prepare lemon filling: Whisk eggs, sugar, flour, lemon juice, and zest until smooth. Pour over warm crust.
  5. Warm raspberry jam with water in a microwave for 15-20 seconds until thin. Drop spoonfuls over lemon filling, then swirl with a knife.
  6. Bake for 25-30 minutes until filling is set. Cool completely in pan, then chill for 2 hours before slicing.

Notes

For cleaner slices, wipe knife between cuts. Bars keep refrigerated for up to 5 days. Frozen raspberries can replace jam—simmer with 1 tbsp sugar before using.

Frozen Strawberry Kiwi Yogurt Bark

Frozen Strawberry Kiwi Yogurt Bark

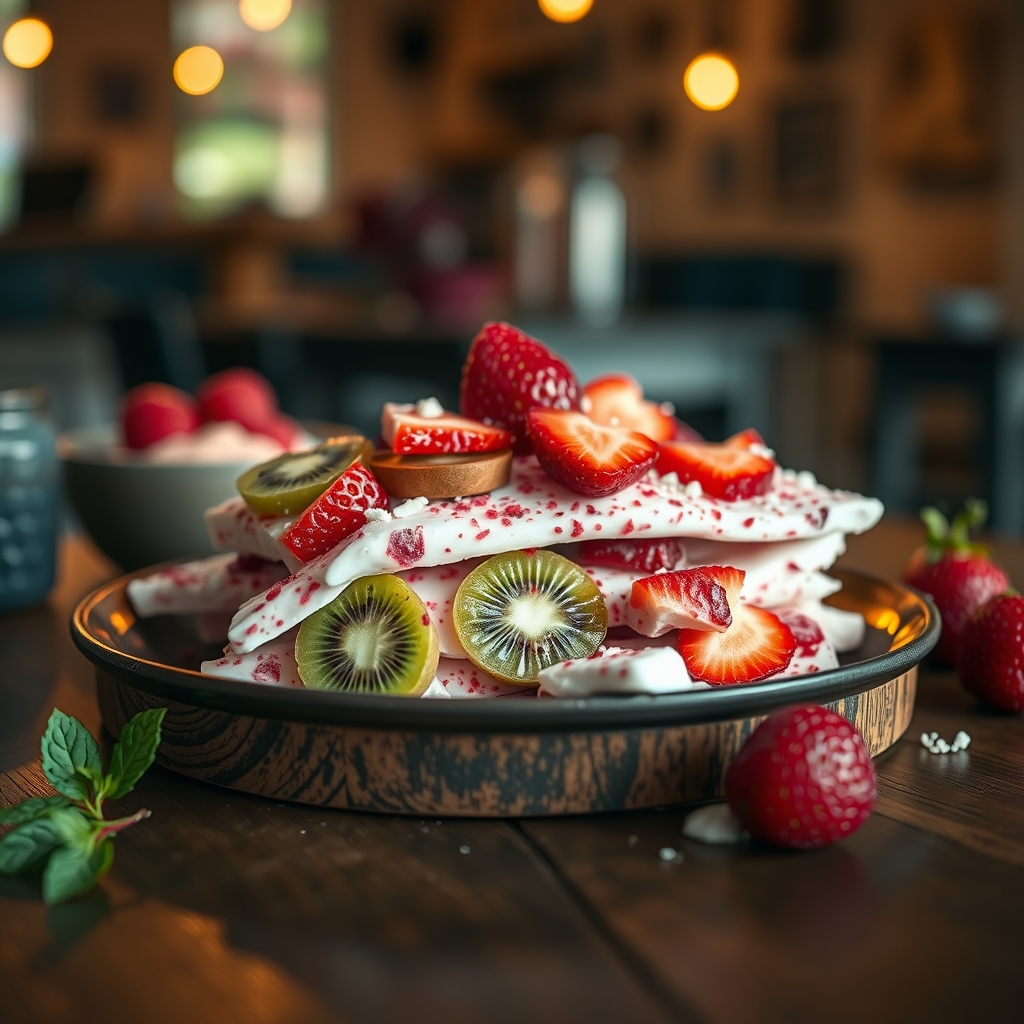
There’s something undeniably magical about a frozen treat that’s both refreshing and wholesome. If you’re looking for a simple yet stunning dessert that doubles as a healthy snack, this Frozen Strawberry Kiwi Yogurt Bark is your answer. Bursting with tangy yogurt, sweet strawberries, and zesty kiwi, this recipe is a vibrant explosion of flavors and textures. Whether you’re hosting a summer gathering or just need a quick pick-me-up, this yogurt bark is a delightful way to satisfy your sweet tooth without the guilt.

Why You’ll Love This Recipe

This Frozen Strawberry Kiwi Yogurt Bark is more than just a pretty face—it’s a game-changer for anyone who loves easy, nutritious desserts. Here’s why you’ll adore it:

  • Effortless and Quick: With just a handful of ingredients and minimal prep time, this recipe is perfect for busy days when you need a treat in a hurry.
  • Healthy Indulgence: Packed with probiotics from yogurt and vitamins from fresh fruit, this bark is a guilt-free way to enjoy something sweet.
  • Kid-Friendly and Crowd-Pleasing: The bright colors and fun texture make it a hit with kids, while adults appreciate its light, refreshing taste.
  • Customizable: Swap fruits, add nuts, or drizzle with honey—this recipe is endlessly adaptable to suit your cravings.
  • Perfect for Meal Prep: Make a big batch ahead of time and store it in the freezer for a ready-to-eat snack whenever the mood strikes.

Ingredients Breakdown

Every ingredient in this Frozen Strawberry Kiwi Yogurt Bark plays a crucial role in creating the perfect balance of flavor and texture. Here’s what you’ll need and why each one matters:

  • Greek Yogurt: The creamy base of this bark, Greek yogurt adds protein and a tangy richness. Opt for full-fat or low-fat depending on your preference.
  • Honey or Maple Syrup: A touch of natural sweetness enhances the yogurt without overpowering the fruit. Use maple syrup for a vegan version.
  • Vanilla Extract: A dash of vanilla adds warmth and depth to the yogurt layer.
  • Fresh Strawberries: Sweet and slightly tart, strawberries bring a juicy burst of flavor and a pop of color.
  • Kiwi: The bright green kiwi slices add a tropical zing and a refreshing contrast to the strawberries.
  • Optional Toppings: Consider adding shredded coconut, chia seeds, or chopped nuts for extra crunch and nutrition.

How to Make Frozen Strawberry Kiwi Yogurt Bark

Making this yogurt bark is as easy as it gets. Follow these simple steps for a flawless result every time:

  1. Prepare the Yogurt Mixture: In a bowl, whisk together the Greek yogurt, honey (or maple syrup), and vanilla extract until smooth. Taste and adjust sweetness if needed.
  2. Line a Baking Sheet: Use parchment paper or a silicone mat to line a rimmed baking sheet. This prevents sticking and makes cleanup a breeze.
  3. Spread the Yogurt: Pour the yogurt mixture onto the lined sheet and spread it evenly into a thin layer, about ¼-inch thick.
  4. Arrange the Fruit: Slice the strawberries and kiwi into thin pieces, then arrange them decoratively over the yogurt. Press them lightly so they stick.
  5. Freeze Until Firm: Place the tray in the freezer for at least 4 hours, or until completely solid.
  6. Break into Pieces: Once frozen, remove the bark from the tray and break it into rustic pieces with your hands or a knife.
  7. Serve or Store: Enjoy immediately, or transfer the pieces to an airtight container for later.

Pro Tips for the Best Results

  • Use Thick Yogurt: Greek yogurt works best because it’s less watery. If using regular yogurt, strain it in a cheesecloth for an hour to remove excess liquid.
  • Slice Fruit Thinly: Thin slices freeze faster and make the bark easier to bite into.
  • Add a Drizzle: Before freezing, drizzle melted dark chocolate or a swirl of nut butter for extra decadence.
  • Freeze on a Flat Surface: Ensure your freezer shelf is level so the yogurt spreads evenly without pooling.

Variations and Substitutions

This recipe is incredibly versatile. Here are some delicious ways to mix it up:

  • Berry Medley: Swap strawberries for raspberries, blueberries, or blackberries.
  • Tropical Twist: Use mango, pineapple, or banana instead of kiwi.
  • Crunchy Add-Ins: Sprinkle granola, chopped almonds, or pistachios before freezing.
  • Dairy-Free: Substitute Greek yogurt with coconut or almond milk yogurt.
  • Chocolate Lover’s Version: Mix cocoa powder into the yogurt or add mini chocolate chips.

What to Serve With It

This Frozen Strawberry Kiwi Yogurt Bark is fantastic on its own, but you can elevate it with these pairings:

  • Fresh Fruit Salad: Serve alongside a bowl of mixed seasonal fruits for a refreshing contrast.
  • Herbal Tea or Iced Coffee: The cool yogurt bark pairs beautifully with a warm cup of tea or a chilled coffee.
  • Granola or Muesli: Crumble the bark over a bowl of granola for added texture.

How to Store and Reheat

To keep your yogurt bark fresh and delicious:

  • Storage: Place broken pieces in an airtight container with parchment paper between layers. Store in the freezer for up to 2 weeks.
  • Serving: Let the bark sit at room temperature for 2-3 minutes before eating to soften slightly.
  • No Reheating Needed: This treat is meant to be enjoyed cold straight from the freezer.

Frequently Asked Questions (FAQs)

Can I use frozen fruit instead of fresh?
Yes, but thaw and pat the fruit dry first to prevent excess moisture from making the bark soggy.

Is this recipe suitable for toddlers?
Absolutely! Just cut the bark into small, bite-sized pieces for little hands.

Can I make this without sugar?
Yes, omit the honey or use a sugar-free sweetener like stevia for a lower-carb version.

Why is my bark too icy?
This happens if the yogurt has too much liquid. Always use thick yogurt or strain it beforehand.

Can I use flavored yogurt?
Sure, but adjust the added sweetener since flavored yogurts often contain extra sugar.

Final Thoughts

This Frozen Strawberry Kiwi Yogurt Bark is proof that healthy eating doesn’t have to be boring. With its creamy texture, vibrant colors, and irresistible taste, it’s a treat you’ll want to make again and again. Whether you’re cooling off on a hot day or looking for a wholesome dessert, this recipe delivers. So grab your favorite fruits, whip up a batch, and enjoy a little slice of frozen heaven.

Print
clock clock iconcutlery cutlery iconflag flag iconfolder folder iconinstagram instagram iconpinterest pinterest iconfacebook facebook iconprint print iconsquares squares iconheart heart iconheart solid heart solid icon

Frozen Strawberry Kiwi Yogurt Bark

  • Author: The Healthy Dessert Blog

Description

A refreshing and healthy frozen treat made with creamy yogurt, sweet strawberries, and tangy kiwi. Perfect for hot summer days or as a guilt-free dessert!


Ingredients

Scale

For the Crust:

  • For the yogurt base:
  • 2 cups Greek yogurt (plain or vanilla)
  • 2 tablespoons honey or maple syrup
  • 1 teaspoon vanilla extract
  • For the toppings:
  • 1 cup fresh strawberries, diced
  • 2 kiwis, peeled and diced
  • 1 tablespoon chia seeds (optional)
  • 1 tablespoon shredded coconut (optional)

Instructions

1. Prepare the Crust:

  1. 1. Line a baking sheet with parchment paper.
  2. 2. In a medium bowl, mix yogurt, honey/maple syrup, and vanilla extract until smooth.
  3. 3. Pour the yogurt mixture onto the prepared baking sheet, spreading it evenly to about 1/4-inch thickness.
  4. 4. Sprinkle diced strawberries, kiwi, chia seeds, and coconut evenly over the yogurt.
  5. 5. Freeze for at least 4 hours or until completely firm.
  6. 6. Once frozen, break into pieces or cut into squares.
  7. 7. Serve immediately or store in an airtight container in the freezer for up to 2 weeks.

Notes

For a dairy-free version, use coconut yogurt. Adjust sweetness to taste by adding more or less honey. Add other fruits like blueberries or mango for variation.

Orange Creamsicle Milkshake

Orange Creamsicle Milkshake

There’s something undeniably nostalgic about the flavor of an orange creamsicle. That perfect balance of zesty citrus and creamy vanilla takes me right back to childhood summers, chasing the ice cream truck down the street. Now, imagine blending that iconic taste into a luscious, frosty milkshake—smooth, refreshing, and utterly irresistible. This Orange Creamsicle Milkshake recipe is a dreamy way to enjoy that classic flavor in sippable form, whether you’re cooling off on a hot day or simply craving a sweet treat.

This recipe is as easy as it is delicious, requiring just a handful of simple ingredients and a blender. Whether you’re making it for kids, serving it at a summer gathering, or treating yourself to a little indulgence, this milkshake is sure to become a fast favorite. Let’s dive into why you’ll love it, how to make it perfectly, and all the ways you can customize it to suit your taste.

Why You’ll Love This Recipe

If you’re looking for a dessert or snack that’s both refreshing and indulgent, this Orange Creamsicle Milkshake checks all the boxes. Here’s why it’s a must-try:

  • Nostalgic Flavor – The combination of bright orange and creamy vanilla instantly transports you back to carefree summer days.
  • Quick and Easy – With just a few ingredients and a blender, you can whip this up in minutes—no fancy equipment needed.
  • Versatile – Enjoy it as a dessert, an afternoon pick-me-up, or even a fun brunch beverage.
  • Crowd-Pleasing – Kids and adults alike adore this flavor, making it a hit for parties and family gatherings.
  • Customizable – Easily adjust the sweetness, creaminess, or even make it dairy-free to suit dietary preferences.

Ingredients Breakdown

Every great milkshake starts with quality ingredients. Here’s what you’ll need and why each one matters:

  • Vanilla Ice Cream – The creamy base of the milkshake, providing richness and that classic creamsicle vanilla flavor. For the best results, use a high-quality, full-fat ice cream.
  • Orange Juice – Freshly squeezed or high-quality store-bought orange juice gives the shake its signature citrusy tang. Avoid overly sweetened varieties to keep the balance just right.
  • Milk – Whole milk makes the shake extra creamy, but you can use any milk you prefer, including almond or oat milk for a dairy-free version.
  • Vanilla Extract – A splash enhances the vanilla notes, making the creamsicle flavor even more pronounced.
  • Whipped Cream (Optional) – For topping, because who doesn’t love a little extra indulgence?

How to Make Orange Creamsicle Milkshake

Making this milkshake couldn’t be simpler. Follow these steps for a perfectly blended, dreamy treat:

  1. Chill Your Glass – For an extra frosty experience, place your serving glass in the freezer for about 10 minutes before blending.
  2. Blend the Ingredients – In a blender, combine 2 cups of vanilla ice cream, ½ cup of orange juice, ¼ cup of milk, and ½ teaspoon of vanilla extract. Blend until smooth and creamy.
  3. Adjust Consistency – If the shake is too thick, add a splash more milk. If it’s too thin, add another scoop of ice cream.
  4. Taste and Sweeten (Optional) – Depending on your preference, you can add a teaspoon of honey or sugar if you’d like it sweeter.
  5. Serve Immediately – Pour into your chilled glass, top with whipped cream if desired, and enjoy right away for the best texture.

Pro Tips for the Best Results

Want to take your Orange Creamsicle Milkshake to the next level? Try these expert tricks:

  • Use Frozen Orange Juice Concentrate – For an even more intense orange flavor, swap the orange juice for a tablespoon of frozen orange juice concentrate.
  • Add a Pinch of Salt – A tiny pinch of salt enhances the sweetness and balances the citrus perfectly.
  • Blend in Orange Zest – For a burst of fresh orange aroma, add a teaspoon of finely grated orange zest before blending.
  • Freeze Your Glass Longer – A super-chilled glass keeps the milkshake colder and thicker for longer.

Variations and Substitutions

This recipe is wonderfully adaptable. Here are some delicious ways to mix it up:

  • Dairy-Free Version – Use coconut milk ice cream and almond milk for a vegan-friendly shake.
  • Protein Boost – Add a scoop of vanilla protein powder for a post-workout treat.
  • Creamsicle Float – Pour the milkshake over a scoop of vanilla ice cream in a tall glass for an extra-decadent dessert.
  • Spiked Shake – For an adult version, blend in a splash of vanilla vodka or orange liqueur.

What to Serve With It

This milkshake is delightful on its own, but pairing it with the right treats can make it even better. Try serving it alongside:

  • Warm chocolate chip cookies for a classic dessert combo.
  • A fresh fruit salad to keep things light and balanced.
  • Buttery shortbread cookies for a crisp contrast to the creamy shake.

How to Store and Reheat

While this milkshake is best enjoyed fresh, you can store leftovers if needed:

  • Refrigeration – Store any extra milkshake in an airtight container in the fridge for up to 24 hours. Give it a quick blend before serving again.
  • Freezing – Pour into an ice cube tray and freeze. Later, blend the cubes with a splash of milk for a revived milkshake.
  • Reheating – Milkshakes are meant to be cold, so reheating isn’t necessary. If it separates, simply stir or blend again.

Frequently Asked Questions (FAQs)

Can I use fresh oranges instead of orange juice?
Absolutely! Freshly squeezed orange juice works wonderfully. Just strain out any pulp if you prefer a smoother texture.

What if I don’t have vanilla ice cream?
You can use plain vanilla ice cream and add an extra splash of vanilla extract, or even substitute with vanilla yogurt for a tangier twist.

How can I make this milkshake healthier?
Swap the ice cream for frozen bananas and Greek yogurt, and use a natural sweetener like honey or maple syrup.

Can I make this ahead of time?
It’s best served fresh, but you can prep the ingredients in advance and blend just before serving.

Is this recipe kid-friendly?
Yes! Kids love the sweet, creamy flavor—just omit any alcohol if making the spiked version.

Final Thoughts

There’s something truly magical about the way this Orange Creamsicle Milkshake captures the essence of summer in a glass. Whether you’re reminiscing about childhood or simply treating yourself to a little sweetness, this recipe is a guaranteed delight. The best part? It’s so easy to customize, so feel free to experiment and make it your own. Pour yourself a tall glass, sit back, and savor every sip of this creamy, citrusy masterpiece. Cheers to simple pleasures and delicious memories!

Print
clock clock iconcutlery cutlery iconflag flag iconfolder folder iconinstagram instagram iconpinterest pinterest iconfacebook facebook iconprint print iconsquares squares iconheart heart iconheart solid heart solid icon

Orange Creamsicle Milkshake

  • Author: Classic Dessert Lover

Description

A creamy, dreamy milkshake that tastes just like the nostalgic orange creamsicle popsicles. Perfect for hot summer days or whenever you need a sweet, refreshing treat.


Ingredients

Scale

For the Crust:

  • For the milkshake:
  • 2 cups vanilla ice cream
  • 1/2 cup milk (whole or 2%)
  • 1/2 cup orange juice (freshly squeezed or store-bought)
  • 1 tsp vanilla extract
  • For the whipped cream topping:
  • 1/2 cup heavy whipping cream
  • 1 tbsp powdered sugar
  • 1/2 tsp vanilla extract
  • For garnish:
  • Orange zest (optional)
  • Maraschino cherry (optional)

Instructions

1. Prepare the Crust:

  1. 1. In a blender, combine the vanilla ice cream, milk, orange juice, and vanilla extract.
  2. 2. Blend on high speed until smooth and creamy, about 30-45 seconds. If the mixture is too thick, add a splash more milk and blend again.
  3. 3. For the whipped cream, in a chilled bowl, whip the heavy cream, powdered sugar, and vanilla extract until soft peaks form.
  4. 4. Pour the milkshake into a tall glass, leaving a little room at the top.
  5. 5. Top with a generous dollop of whipped cream.
  6. 6. Garnish with a sprinkle of orange zest and a maraschino cherry if desired.
  7. 7. Serve immediately with a straw and enjoy!

Notes

For a dairy-free version, use coconut milk ice cream and almond milk. Adjust sweetness by adding more or less orange juice. For an extra creamy texture, freeze the glass for 10 minutes before serving.

Layered Banana Pudding Trifle

Layered Banana Pudding Trifle

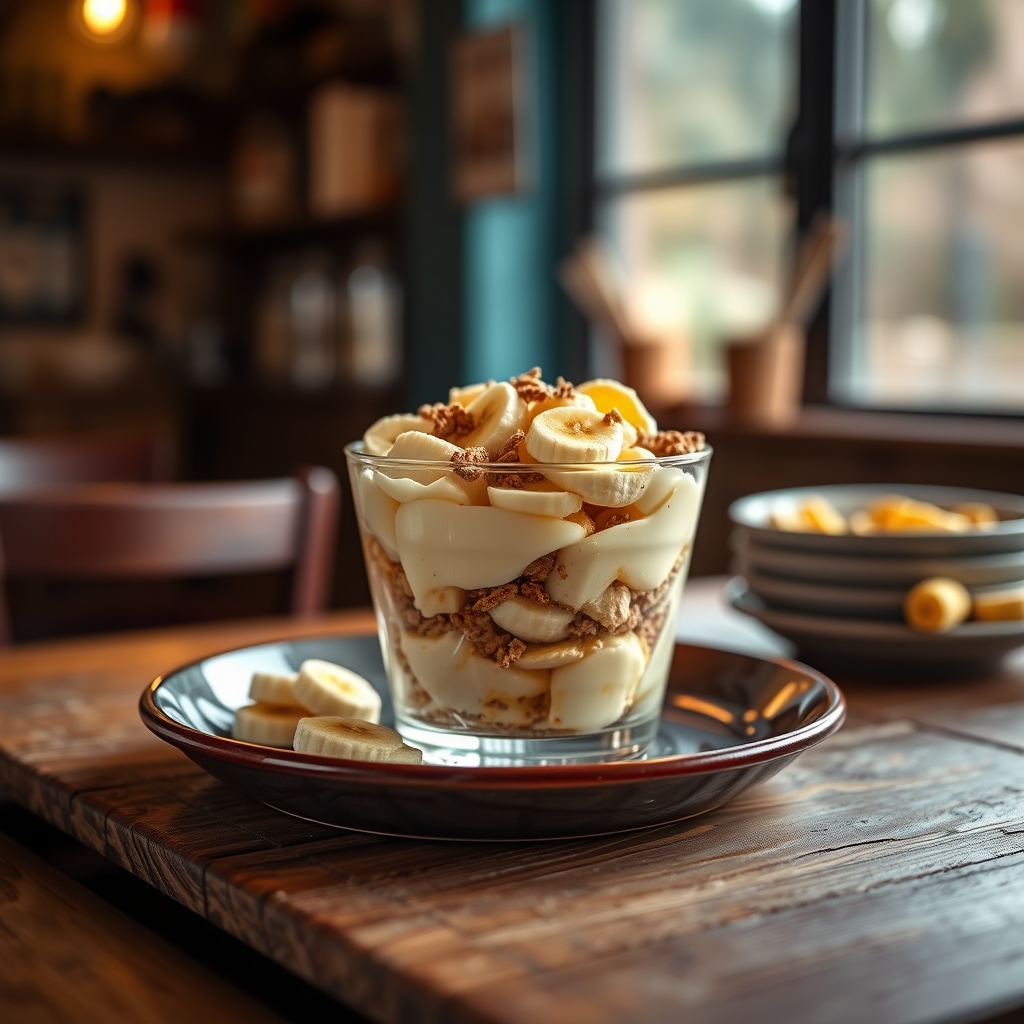
There’s something undeniably comforting about a classic banana pudding, but when you layer it into a stunning trifle, it becomes a showstopper dessert that’s as beautiful as it is delicious. This layered banana pudding trifle recipe is a modern twist on the Southern favorite, combining creamy vanilla pudding, fresh bananas, fluffy whipped cream, and buttery vanilla wafers for a dessert that’s impossible to resist. Whether you’re hosting a summer barbecue, a holiday gathering, or just craving a nostalgic treat, this dessert delivers every time.

Why You’ll Love This Recipe

If you’re looking for a dessert that’s both easy to make and guaranteed to impress, this layered banana pudding trifle is the answer. Here’s why it’s a must-try:

  • Perfect for Any Occasion – Whether it’s a casual family dinner or an elegant party, this trifle fits right in. Its towering layers make it visually stunning, while the flavors keep everyone coming back for seconds.
  • Make-Ahead Friendly – Unlike some desserts that need last-minute assembly, this trifle actually benefits from chilling, allowing the flavors to meld together beautifully.
  • Crowd-Pleasing Texture – The contrast between the creamy pudding, tender bananas, and crisp vanilla wafers creates a mouthwatering experience in every bite.
  • Simple Yet Sophisticated – With just a handful of ingredients, this recipe is approachable for beginners, yet the final result looks and tastes like something from a bakery.

Ingredients Breakdown

Every ingredient in this layered banana pudding trifle plays a crucial role in creating the perfect balance of flavors and textures. Here’s what you’ll need and why each one matters:

  • Vanilla Pudding Mix – The base of this dessert, providing a rich, creamy texture and sweet vanilla flavor. Opt for the cook-and-serve variety for the best consistency.
  • Whole Milk – Using whole milk ensures the pudding is luxuriously smooth and creamy. Skim or low-fat milk can result in a thinner texture.
  • Bananas – Fresh, ripe bananas add natural sweetness and a soft, melt-in-your-mouth texture. Slice them just before assembling to prevent browning.
  • Vanilla Wafers – These classic cookies add a delightful crunch and buttery flavor that contrasts perfectly with the creamy layers.
  • Whipped Cream – Light and airy, whipped cream adds a fluffy layer that balances the richness of the pudding. Homemade whipped cream is best, but store-bought works in a pinch.

How to Make Layered Banana Pudding Trifle

Creating this layered banana pudding trifle is easier than you might think. Follow these steps for a flawless dessert every time:

  1. Prepare the Pudding – In a medium saucepan, whisk together the vanilla pudding mix and milk. Cook over medium heat, stirring constantly, until the mixture thickens and comes to a gentle boil. Remove from heat and let it cool slightly.
  2. Whip the Cream – While the pudding cools, beat heavy cream with a bit of sugar and vanilla extract until stiff peaks form. This will be used for layering and topping the trifle.
  3. Slice the Bananas – Cut the bananas into thin rounds, about ¼-inch thick. Toss them lightly in lemon juice if you want to slow down browning, though this step is optional.
  4. Layer the Trifle – In a large trifle dish or glass bowl, start with a layer of vanilla wafers, followed by a layer of sliced bananas. Spoon half of the pudding over the bananas, then spread a layer of whipped cream. Repeat the layers, finishing with a final dollop of whipped cream and a few crushed wafers for garnish.
  5. Chill Before Serving – Cover the trifle with plastic wrap and refrigerate for at least 4 hours, or overnight if possible. This allows the wafers to soften slightly and the flavors to meld.

Pro Tips for the Best Results

To take your layered banana pudding trifle to the next level, keep these expert tips in mind:

  • Use Homemade Whipped Cream – While store-bought is convenient, homemade whipped cream has a fresher taste and better texture. Simply beat cold heavy cream with a touch of sugar and vanilla until fluffy.
  • Don’t Overcook the Pudding – The pudding should be thick but still pourable. Overcooking can make it too stiff, making layering difficult.
  • Assemble Just Before Serving (If Possible) – While the trifle can be made ahead, if you prefer a crispier wafer texture, assemble it a few hours before serving rather than overnight.
  • Add a Hint of Bourbon – For a grown-up twist, stir a tablespoon of bourbon into the pudding mixture before layering. It adds a subtle depth of flavor.

Variations and Substitutions

This recipe is wonderfully adaptable. Here are some delicious ways to customize it:

  • Chocolate Banana Trifle – Swap the vanilla pudding for chocolate pudding and add a layer of chocolate shavings between the bananas.
  • Dairy-Free Option – Use coconut milk or almond milk in place of whole milk, and opt for dairy-free whipped topping.
  • Nutty Crunch – Sprinkle chopped toasted pecans or walnuts between layers for added texture and flavor.
  • Berry Twist – Add fresh strawberries or blueberries alongside the bananas for a fruity variation.

What to Serve With It

While this layered banana pudding trifle is delicious on its own, pairing it with complementary dishes can make it part of a larger dessert spread. Consider serving it with:

  • A scoop of vanilla bean ice cream for an extra-indulgent treat.
  • A cup of hot coffee or iced tea to balance the sweetness.
  • Fresh berries on the side for a light, refreshing contrast.

How to Store and Reheat

Since this dessert contains fresh bananas, it’s best enjoyed within 2 days of assembly. Here’s how to store it properly:

  • Refrigeration – Cover the trifle tightly with plastic wrap or transfer leftovers to an airtight container. Store in the fridge for up to 48 hours.
  • Freezing – Freezing is not recommended, as the bananas and whipped cream will lose their texture when thawed.
  • Serving Leftovers – If the wafers have softened too much, sprinkle a few fresh ones on top before serving to revive the crunch.

Frequently Asked Questions (FAQs)

Can I use instant pudding instead of cook-and-serve?
Yes, but the texture will be slightly different. Cook-and-serve pudding sets firmer, while instant pudding is lighter. If using instant, let it chill completely before layering.

How do I prevent the bananas from turning brown?
Tossing them in a little lemon juice helps, but the best method is to assemble the trifle shortly before serving. If making ahead, place plastic wrap directly on the banana layer to minimize air exposure.

Can I make this in individual servings?
Absolutely! Layer the ingredients in small mason jars or dessert cups for a cute, portion-controlled presentation.

What can I use instead of vanilla wafers?
Shortbread cookies, graham crackers, or even ladyfingers work well as substitutes.

Final Thoughts

This layered banana pudding trifle is more than just a dessert—it’s a celebration of classic flavors in a stunning, shareable form. Whether you’re reminiscing about childhood favorites or introducing this treat to a new generation, it’s guaranteed to bring smiles to the table. The next time you need a dessert that’s both effortless and extraordinary, give this recipe a try. One bite, and you’ll understand why it’s stood the test of time.

Print
clock clock iconcutlery cutlery iconflag flag iconfolder folder iconinstagram instagram iconpinterest pinterest iconfacebook facebook iconprint print iconsquares squares iconheart heart iconheart solid heart solid icon

Layered Banana Pudding Trifle

  • Author: Classic Southern Desserts

Description

A decadent Southern-style trifle featuring layers of vanilla pudding, fresh bananas, whipped cream, and vanilla wafers. Perfect for potlucks or family gatherings.


Ingredients

Scale

For the Crust:

  • For the pudding:
  • 3 cups whole milk
  • 1 (3.4 oz) box instant vanilla pudding mix
  • 1 (14 oz) can sweetened condensed milk
  • 1 tsp vanilla extract
  • For assembly:
  • 45 ripe bananas, sliced
  • 1 (11 oz) box vanilla wafers
  • For the whipped cream:
  • 2 cups heavy whipping cream
  • 1/4 cup powdered sugar
  • 1 tsp vanilla extract
  • For garnish:
  • Additional vanilla wafers
  • Banana slices

Instructions

1. Prepare the Crust:

  1. 1. Make pudding: In a large bowl, whisk together milk, pudding mix, sweetened condensed milk, and vanilla extract until smooth. Refrigerate for 5 minutes to thicken.
  2. 2. Make whipped cream: Using a hand mixer, beat heavy cream, powdered sugar, and vanilla until stiff peaks form.
  3. 3. Fold half of the whipped cream into the pudding mixture until combined.
  4. 4. Assemble trifle: In a large glass bowl, layer vanilla wafers, banana slices, then pudding mixture. Repeat layers 2-3 times.
  5. 5. Top with remaining whipped cream and garnish with crushed wafers and banana slices.
  6. 6. Cover and refrigerate for at least 4 hours (preferably overnight) before serving.

Notes

For best results, assemble trifle no more than 8 hours before serving to prevent bananas from browning. Can substitute with homemade pudding if preferred.