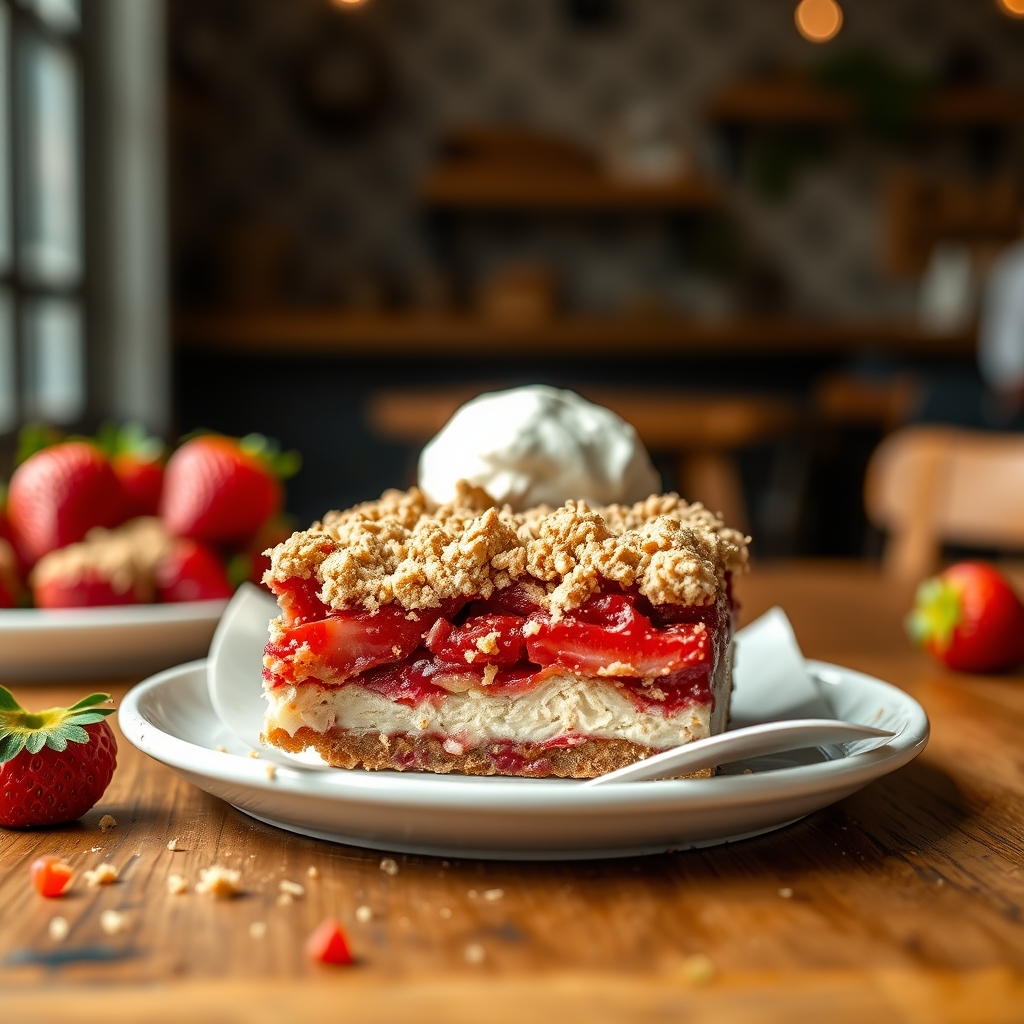
Strawberry Shortcake Crumble Bars
There’s something undeniably magical about the combination of buttery crumble, sweet strawberries, and tender shortcake. These Strawberry Shortcake Crumble Bars are the perfect marriage of two beloved desserts—strawberry shortcake and crumble bars—resulting in a treat that’s both nostalgic and excitingly new. Whether you’re hosting a summer gathering, looking for a dessert to bring to a potluck, or simply craving a sweet indulgence, this recipe is sure to become a favorite. Let’s dive into why these bars are so irresistible and how you can make them at home.
Why You’ll Love This Recipe
First, let’s talk about why these Strawberry Shortcake Crumble Bars deserve a spot in your baking repertoire. Here are just a few reasons:
- Perfect Texture Contrast: The buttery crumble topping gives way to a soft, cake-like base, while the juicy strawberry filling adds a burst of freshness in every bite.
- Easy to Make: Unlike traditional strawberry shortcake, which requires assembling individual servings, these bars come together in one pan with minimal fuss.
- Versatile for Any Occasion: Serve them warm with a scoop of vanilla ice cream for a decadent dessert, or pack them for a picnic—they’re just as delicious at room temperature.
- Make-Ahead Friendly: These bars hold up well in the fridge or freezer, making them a great option for meal prep or last-minute guests.
- Crowd-Pleasing Flavor: The combination of sweet strawberries and buttery shortcake is universally loved, making these bars a guaranteed hit.
Ingredients Breakdown
Understanding the role of each ingredient will help you achieve the best results. Here’s what you’ll need:
- Fresh Strawberries: The star of the show. Their natural sweetness and slight tartness balance the richness of the crumble and shortcake layers.
- All-Purpose Flour: Provides structure for both the crumble and the shortcake base.
- Granulated Sugar: Sweetens the strawberries and enhances their natural juices.
- Brown Sugar: Adds depth and a slight caramel note to the crumble topping.
- Butter: Cold butter is key for achieving that perfect crumbly texture in both the base and topping.
- Egg: Binds the shortcake layer, giving it a tender, cake-like consistency.
- Vanilla Extract: Enhances the overall flavor profile with its warm, aromatic notes.
- Baking Powder: Gives the shortcake layer a slight lift, ensuring it’s not too dense.
- Salt: Balances the sweetness and intensifies the flavors.
How to Make Strawberry Shortcake Crumble Bars
Now, let’s walk through the steps to create these delicious bars. Follow along for foolproof results:
- Prepare the Strawberry Filling: Hull and slice the strawberries, then toss them with granulated sugar and a bit of cornstarch (if needed for thickening). Let them sit while you prepare the other layers to allow the juices to release.
- Make the Shortcake Base: In a large bowl, whisk together flour, sugar, baking powder, and salt. Cut in cold butter until the mixture resembles coarse crumbs. Add the egg and vanilla, mixing just until a soft dough forms. Press this evenly into the bottom of a lined baking pan.
- Assemble the Crumble Topping: In the same bowl (no need to wash it), combine flour, brown sugar, and a pinch of salt. Cut in cold butter until the mixture is crumbly but still slightly chunky.
- Layer and Bake: Spread the macerated strawberries over the shortcake base, then sprinkle the crumble topping evenly over the strawberries. Bake until the topping is golden and the strawberry filling is bubbly.
- Cool Before Slicing: Let the bars cool completely in the pan before cutting into squares. This ensures clean slices and allows the filling to set.
Pro Tips for the Best Results
Want to take your Strawberry Shortcake Crumble Bars to the next level? Try these expert tips:
- Use Cold Butter: This is non-negotiable for achieving the perfect crumbly texture in both the base and topping.
- Don’t Overmix the Dough: Overworking the shortcake base can make it tough. Mix just until the ingredients come together.
- Adjust Sweetness to Taste: If your strawberries are very sweet, you can reduce the sugar in the filling slightly.
- Add a Hint of Lemon: A teaspoon of lemon zest in the strawberry filling brightens the flavor beautifully.
- Bake Until Golden: The crumble topping should be deeply golden, and the strawberry filling should be bubbling at the edges.
Variations and Substitutions
This recipe is wonderfully adaptable. Here are some ways to make it your own:
- Gluten-Free Option: Swap the all-purpose flour for a 1:1 gluten-free baking blend.
- Dairy-Free Version: Use plant-based butter and a flax egg (1 tbsp ground flaxseed + 3 tbsp water) instead of regular butter and egg.
- Berry Swaps: Try raspberries, blueberries, or a mix of berries instead of strawberries.
- Add Nuts: Stir chopped almonds or pecans into the crumble topping for extra crunch.
- Spice It Up: A pinch of cinnamon or cardamom in the crumble adds warmth.
What to Serve With It
These bars are delicious on their own, but here are a few serving ideas to make them even more special:
- Vanilla Ice Cream: A scoop of creamy vanilla ice cream melts beautifully over a warm bar.
- Whipped Cream: A dollop of freshly whipped cream adds a light, airy contrast.
- Lemon Curd: Drizzle a bit of tangy lemon curd over the top for a citrusy twist.
- Iced Tea or Coffee: Serve with a glass of cold iced tea or a hot cup of coffee for a delightful afternoon treat.
How to Store and Reheat
To keep your Strawberry Shortcake Crumble Bars fresh:
- Room Temperature: Store in an airtight container for up to 2 days.
- Refrigerator: For longer storage, refrigerate for up to 5 days. Let them come to room temperature before serving.
- Freezer: Wrap individual bars tightly in plastic wrap and freeze for up to 3 months. Thaw in the fridge overnight.
- Reheating: Warm in a 300°F oven for 10 minutes to revive the crumble’s texture.
Frequently Asked Questions (FAQs)
Here are answers to some common questions:
- Can I use frozen strawberries? Yes, but thaw and drain them first to avoid excess moisture.
- Why is my crumble topping not crispy? Make sure your butter is cold and bake until the topping is deeply golden.
- Can I make these bars ahead? Absolutely! They keep well in the fridge or freezer.
- How do I prevent the bars from falling apart? Let them cool completely before slicing for clean cuts.
- Can I use a different pan size? A 9×9-inch pan works best, but an 8×8-inch pan will yield thicker bars—adjust baking time as needed.
Final Thoughts
There’s something truly special about baking a dessert that brings together the best of two worlds—crumbly, buttery goodness and juicy, sweet strawberries. These Strawberry Shortcake Crumble Bars are a testament to how simple ingredients can create something extraordinary. Whether you’re baking them for a special occasion or just because, I hope they bring as much joy to your kitchen as they have to mine. Happy baking!
Print
Strawberry Shortcake Crumble Bars
Description
These Strawberry Shortcake Crumble Bars combine the classic flavors of strawberry shortcake with a buttery crumble topping and base. Perfect for summer gatherings or a sweet treat any time of year!
Ingredients
For the Crust:
- For the crust and crumble:
- 2 cups all-purpose flour
- 1/2 cup granulated sugar
- 1/2 teaspoon baking powder
- 1/4 teaspoon salt
- 1 cup unsalted butter, cold and cubed
- 1 large egg
- 1 teaspoon vanilla extract
- For the strawberry filling:
- 2 cups fresh strawberries, diced
- 1/4 cup granulated sugar
- 1 tablespoon lemon juice
- 2 teaspoons cornstarch
- For the whipped cream topping:
- 1 cup heavy whipping cream
- 2 tablespoons powdered sugar
- 1/2 teaspoon vanilla extract
Instructions
1. Prepare the Crust:
- Preheat oven to 375°F (190°C). Line an 8×8-inch baking pan with parchment paper, leaving an overhang for easy removal.
- Make the crust/crumble: In a large bowl, whisk together flour, sugar, baking powder, and salt. Cut in cold butter using a pastry cutter or fork until mixture resembles coarse crumbs.
- Add egg and vanilla extract, mixing until dough comes together. Reserve 1 cup of the mixture for the topping. Press remaining dough evenly into the prepared pan.
- Bake crust for 15 minutes until lightly golden. Let cool slightly while preparing filling.
- Make strawberry filling: In a medium bowl, toss strawberries with sugar, lemon juice, and cornstarch. Spread evenly over baked crust.
- Sprinkle reserved crumble mixture over strawberry layer. Bake for 30-35 minutes until topping is golden and filling is bubbly.
- Cool completely in pan on wire rack (about 1 hour).
- Make whipped cream: Beat heavy cream, powdered sugar and vanilla until stiff peaks form. Spread over cooled bars or serve dolloped on individual servings.
- Chill for at least 1 hour before slicing into bars. Store leftovers in refrigerator.
Notes
For best results, use fresh strawberries when in season. Frozen strawberries can be used (thaw and drain first). Bars keep well in refrigerator for 3 days. The crumble can be made 1 day ahead and stored covered at room temperature.