Chocolate Mousse Parfait Cups

Chocolate Mousse Parfait Cups

There’s something undeniably magical about the combination of rich chocolate mousse and delicate layers of texture in a dessert. These Chocolate Mousse Parfait Cups are not just a treat for the taste buds but also a feast for the eyes. Whether you’re hosting a dinner party or simply indulging in a sweet moment for yourself, this recipe is guaranteed to impress. With its velvety smooth chocolate mousse, crunchy layers, and elegant presentation, it’s a dessert that feels luxurious yet is surprisingly simple to make. Let’s dive into the world of decadent chocolate and discover how to create these stunning parfait cups.

Why You’ll Love This Recipe

If you’re looking for a dessert that balances sophistication with ease, these Chocolate Mousse Parfait Cups are the answer. Here’s why they’ll become a staple in your recipe collection:

  • Luxurious yet simple – Despite its elegant appearance, this dessert comes together with minimal effort, making it perfect for both special occasions and everyday cravings.
  • Customizable layers – The parfait structure allows for endless creativity, whether you prefer crushed cookies, fresh berries, or toasted nuts between the layers of mousse.
  • Crowd-pleasing flavor – Rich, creamy chocolate mousse is a universal favorite, and when served in individual cups, it feels personalized and special.
  • Make-ahead friendly – You can prepare these parfaits hours (or even a day) in advance, giving you more time to enjoy with guests.
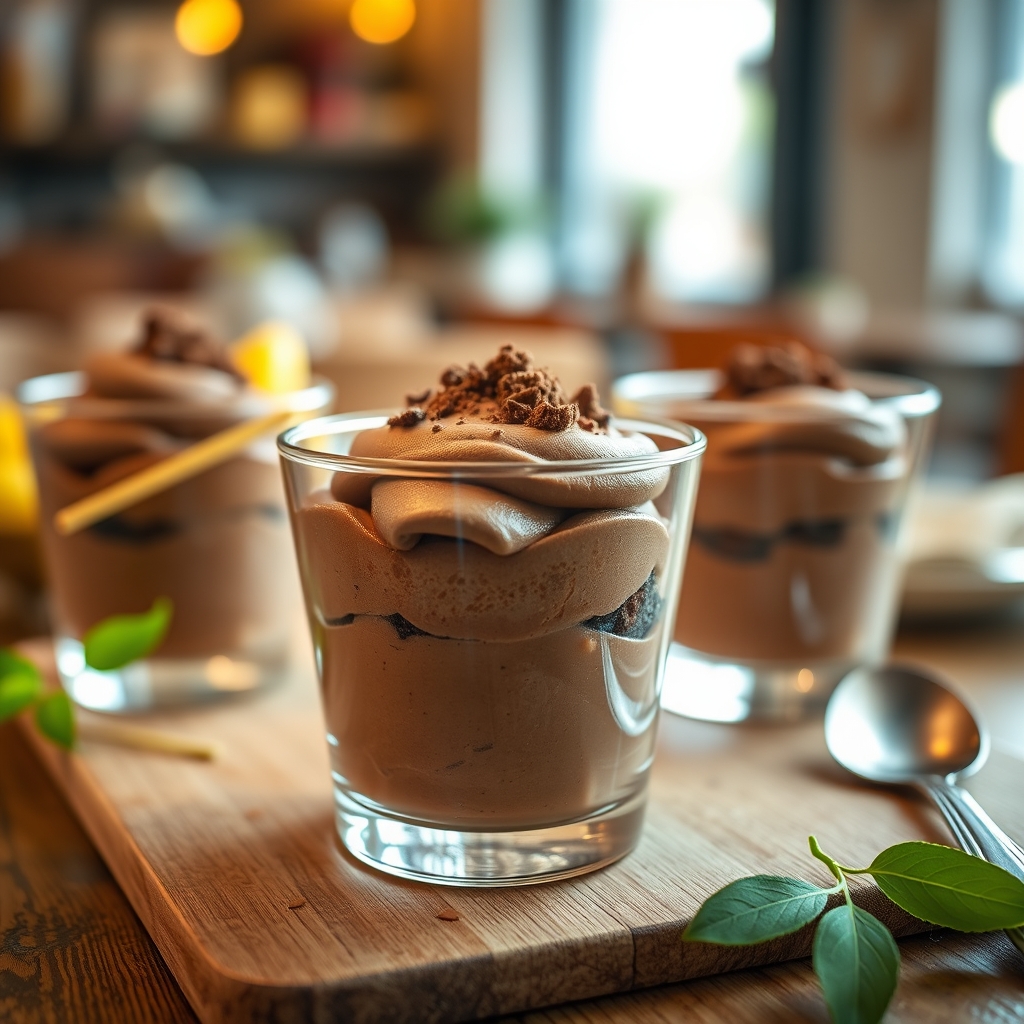
  • Visually stunning – The layered presentation in clear glasses or jars makes this dessert as beautiful as it is delicious, perfect for Instagram-worthy moments.

Ingredients Breakdown

Every ingredient in this Chocolate Mousse Parfait Cups recipe plays a crucial role in creating the perfect balance of flavor and texture. Here’s what you’ll need and why each component matters:

  • Dark chocolate (70% cocoa) – The star of the show, high-quality dark chocolate ensures a deep, rich flavor and smooth texture in the mousse.
  • Heavy cream – Whipped to soft peaks, it gives the mousse its light, airy consistency while adding a luxurious creaminess.
  • Egg yolks – These add richness and help stabilize the mousse, creating a silky-smooth texture.
  • Granulated sugar – A touch of sweetness balances the bitterness of the dark chocolate.
  • Vanilla extract – Enhances the chocolate flavor with a subtle warmth and depth.
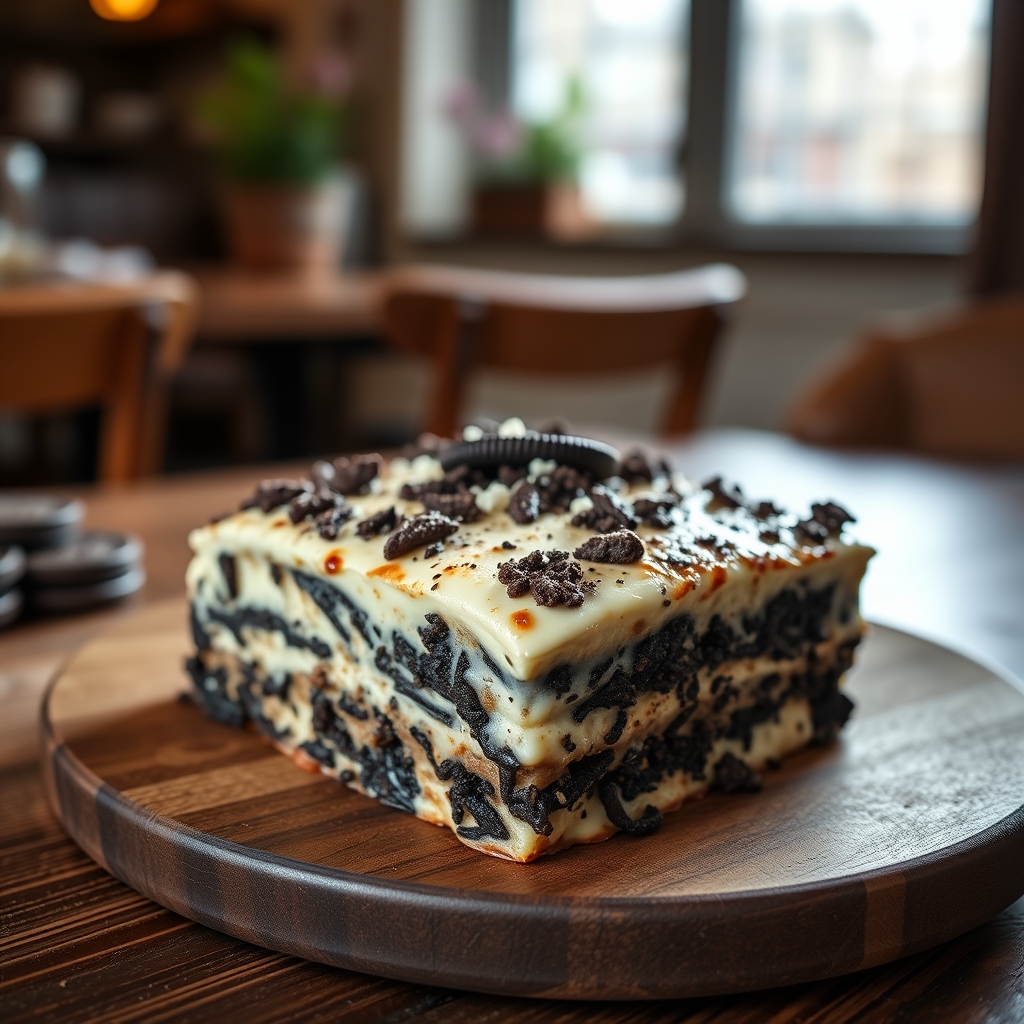
  • Crushed cookies or graham crackers – Adds a delightful crunch between the layers of mousse, creating contrast in every bite.
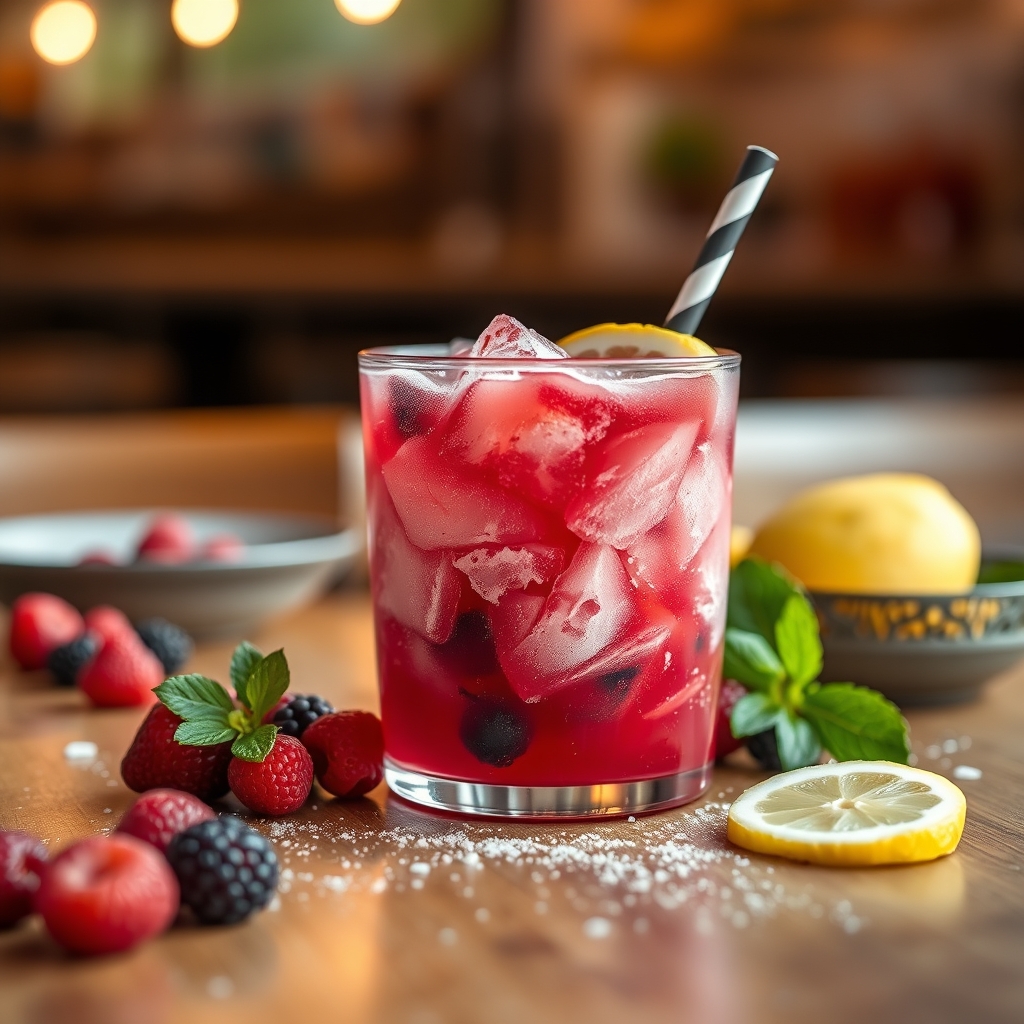
  • Fresh berries (optional) – A pop of tartness from raspberries or strawberries cuts through the richness of the chocolate.

How to Make Chocolate Mousse Parfait Cups

Creating these elegant parfaits is easier than you might think. Follow these steps for a foolproof dessert that will wow everyone at the table.

  1. Melt the chocolate – Begin by gently melting the dark chocolate in a heatproof bowl set over simmering water (double boiler method). Stir occasionally until smooth, then remove from heat and let it cool slightly.
  2. Whip the cream – In a separate bowl, beat the heavy cream until soft peaks form. Be careful not to over-whip, as stiff peaks can make the mousse too dense.
  3. Prepare the egg yolk mixture – Whisk the egg yolks with sugar and vanilla extract in another bowl until pale and slightly thickened. Gradually fold in the melted chocolate until fully combined.
  4. Fold in the whipped cream – Gently incorporate the whipped cream into the chocolate mixture in thirds, using a spatula to maintain the airy texture.
  5. Layer the parfaits – In serving glasses or jars, start with a layer of crushed cookies, followed by a generous spoonful of chocolate mousse. Repeat the layers, finishing with mousse on top.
  6. Chill and set – Refrigerate the parfaits for at least 2 hours (or overnight) to allow the mousse to firm up.
  7. Garnish and serve – Before serving, top with fresh berries, a dusting of cocoa powder, or a dollop of whipped cream for an extra touch of elegance.

Pro Tips for the Best Results

To ensure your Chocolate Mousse Parfait Cups turn out perfectly every time, keep these expert tips in mind:

  • Use room-temperature eggs – Cold eggs can cause the chocolate to seize when mixed, so let them sit out for about 30 minutes before using.
  • Chill your mixing bowl – For the fluffiest whipped cream, place your bowl and beaters in the freezer for 10 minutes before whipping.
  • Fold gently – Overmixing the mousse can deflate the whipped cream, so use a light hand when combining ingredients.
  • Layer strategically – For a clean presentation, wipe the inside of the glasses with a paper towel after each layer to keep the edges neat.
  • Let it rest – The mousse needs time to set, so resist the temptation to serve it immediately. A few hours in the fridge ensures the perfect texture.

Variations and Substitutions

One of the best things about this recipe is its versatility. Here are some delicious ways to customize your Chocolate Mousse Parfait Cups:

  • Dairy-free option – Substitute coconut cream for heavy cream and use dairy-free chocolate to make a vegan-friendly version.
  • Flavor infusions – Add a splash of espresso, orange zest, or a hint of cinnamon to the melted chocolate for a unique twist.
  • Crunchy alternatives – Swap graham crackers for crushed pretzels, toasted almonds, or even granola for added texture.
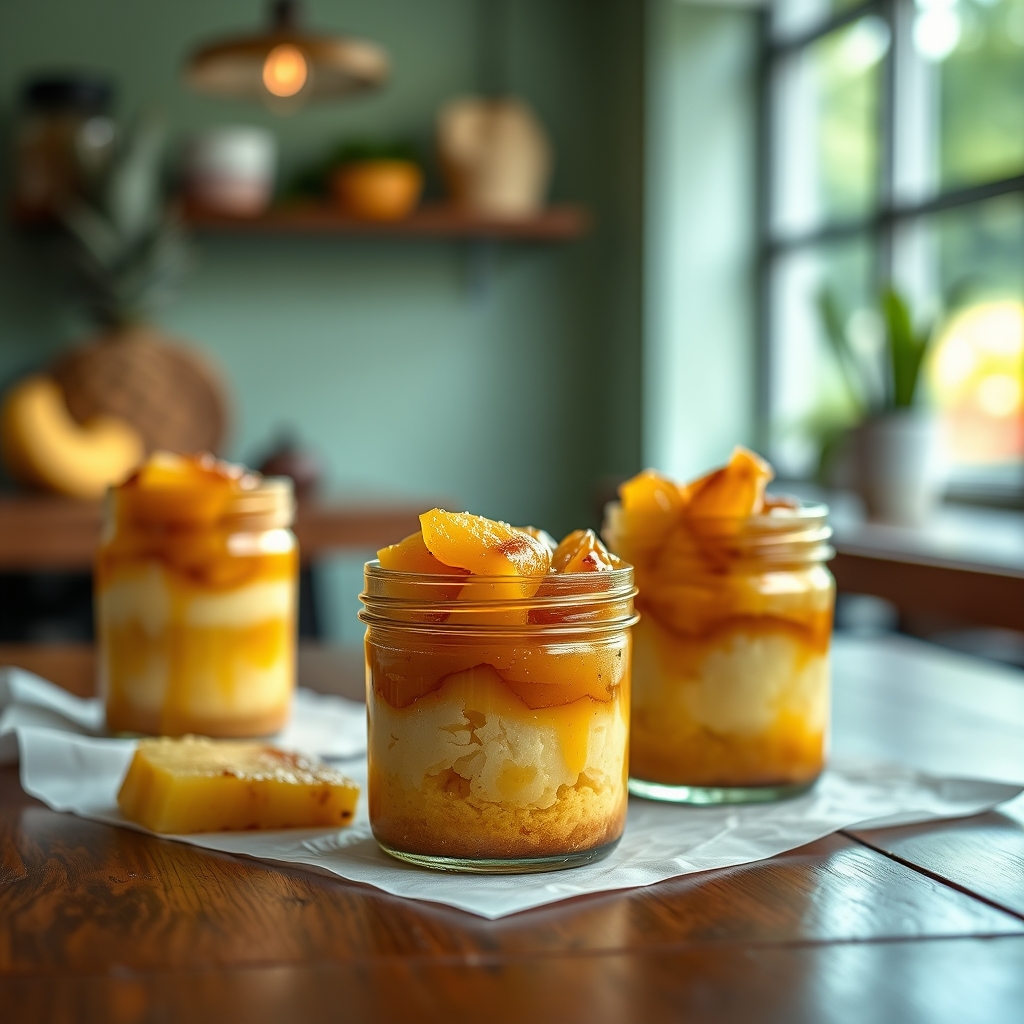
  • Fruit variations – Instead of berries, try layering with caramelized bananas, passionfruit curd, or a drizzle of raspberry coulis.
  • Mini dessert option – Serve in shot glasses for bite-sized portions at a party or buffet.

What to Serve With It

While these Chocolate Mousse Parfait Cups are delightful on their own, pairing them with complementary flavors can elevate the experience. Here are some serving suggestions:

  • Fresh berries – A side of strawberries, raspberries, or blackberries adds a refreshing contrast to the rich chocolate.
  • Whipped cream – A dollop of lightly sweetened whipped cream on top enhances the creaminess.
  • Crème anglaise – A drizzle of vanilla custard sauce creates an elegant dessert presentation.
  • Espresso or coffee – The bitterness of coffee balances the sweetness of the mousse beautifully.
  • Dessert wine – A glass of port or late-harvest Riesling pairs wonderfully with dark chocolate.

How to Store and Reheat

Proper storage ensures your Chocolate Mousse Parfait Cups stay fresh and delicious. Here’s how to handle leftovers (if there are any!):

  • Refrigeration – Cover the parfaits with plastic wrap or store in an airtight container for up to 3 days in the fridge.
  • Freezing – While possible, freezing can alter the texture of the mousse. If needed, freeze for up to 1 month and thaw in the refrigerator before serving.
  • Reheating – This dessert is best served cold, so reheating isn’t necessary. However, if the mousse becomes too firm, let it sit at room temperature for 10 minutes before serving.

Frequently Asked Questions (FAQs)

Here are answers to some common questions about making Chocolate Mousse Parfait Cups:

  • Can I make this without eggs? Yes, you can omit the egg yolks and stabilize the mousse with gelatin or simply rely on whipped cream for a lighter version.
  • How far in advance can I prepare these? These parfaits can be made up to 24 hours ahead, making them perfect for entertaining.
  • Can I use milk chocolate instead of dark? Absolutely, but reduce the sugar slightly since milk chocolate is sweeter.
  • Why did my mousse turn grainy? This can happen if the chocolate was too hot when mixed with the eggs or if the mixture was overworked. Gentle folding is key.
  • Can I use store-bought whipped cream? While homemade whipped cream is preferred for texture, you can use stabilized store-bought whipped topping in a pinch.

Final Thoughts

There’s no denying the allure of a perfectly layered Chocolate Mousse Parfait Cup. It’s a dessert that feels indulgent yet approachable, sophisticated yet simple. Whether you’re serving it at a dinner party or treating yourself to a little moment of sweetness, this recipe is sure to delight. The best part? You can make it your own with endless variations—try adding a sprinkle of sea salt, a dash of liqueur, or even a layer of peanut butter for a playful twist. No matter how you customize it, one thing is certain: every spoonful will be pure bliss. So grab your favorite glasses, whip up a batch, and savor the joy of homemade chocolate mousse parfaits.

Print
clock clock iconcutlery cutlery iconflag flag iconfolder folder iconinstagram instagram iconpinterest pinterest iconfacebook facebook iconprint print iconsquares squares iconheart heart iconheart solid heart solid icon

Chocolate Mousse Parfait Cups

  • Author: Dessert Delights

Description

Indulgent chocolate mousse layered with whipped cream and fresh berries in elegant parfait cups. A perfect dessert for special occasions or a luxurious treat.


Ingredients

Scale

For the Crust:

  • For the chocolate mousse:
  • 200g dark chocolate (70% cocoa), finely chopped
  • 3 large eggs, separated
  • 50g granulated sugar
  • 1 tsp vanilla extract
  • 250ml heavy cream
  • For the assembly:
  • 300ml heavy cream, chilled
  • 2 tbsp powdered sugar
  • 1 tsp vanilla extract
  • 200g mixed fresh berries (strawberries, raspberries, blueberries)
  • Chocolate shavings for garnish
  • Mint leaves for garnish (optional)

Instructions

1. Prepare the Crust:

  1. 1. Melt the dark chocolate in a heatproof bowl set over simmering water (bain-marie), stirring until smooth. Remove from heat and let cool slightly.
  2. 2. In a large bowl, whisk egg yolks with 25g sugar until pale and thickened. Gradually whisk in the melted chocolate and vanilla extract.
  3. 3. In another bowl, whip 250ml heavy cream to soft peaks. Gently fold into the chocolate mixture.
  4. 4. In a clean bowl, beat egg whites until foamy. Gradually add remaining 25g sugar and beat to stiff peaks. Carefully fold into chocolate mixture in two additions.
  5. 5. Divide mousse among 6 serving glasses or bowls. Chill for at least 4 hours (or overnight).
  6. 6. Before serving, whip remaining 300ml cream with powdered sugar and vanilla to stiff peaks. Pipe or spoon over chilled mousse.
  7. 7. Top with fresh berries, chocolate shavings and mint leaves if using. Serve immediately.

Notes

For best results, use high-quality chocolate. The mousse can be made 1 day ahead – add whipped cream and toppings just before serving. For alcohol variation, add 1 tbsp liqueur (Grand Marnier, Kahlúa or Chambord) to the melted chocolate.

No-Bake Oreo Cookie Lasagna

No-Bake Oreo Cookie Lasagna

If you’re looking for a show-stopping dessert that requires zero oven time, this No-Bake Oreo Cookie Lasagna is about to become your new favorite. Layers of creamy filling, crunchy Oreo crust, and rich chocolate come together in a dessert that’s as indulgent as it is easy to make. Perfect for potlucks, birthdays, or just because, this dessert lasagna is guaranteed to impress. Let’s dive into why this recipe is a must-try and how you can make it at home.

Why You’ll Love This Recipe

There are countless reasons to adore this No-Bake Oreo Cookie Lasagna, but here are just a few that make it irresistible:

  • No oven required – Ideal for hot summer days or when you want a fuss-free dessert without heating up the kitchen.
  • Crowd-pleasing flavors – The combination of Oreos, cream cheese, and whipped cream is universally loved by kids and adults alike.
  • Make-ahead friendly – This dessert actually tastes better after chilling, making it perfect for preparing in advance.
  • Customizable – Easily adapt the layers with different cookies, flavored pudding, or toppings to suit your taste.
  • Visually stunning – The layered presentation makes it look like you spent hours, even though it comes together quickly.

Ingredients Breakdown

Every ingredient in this No-Bake Oreo Cookie Lasagna plays a crucial role in creating the perfect texture and flavor. Here’s what you’ll need:

  • Oreo cookies – The star of the show, providing a rich, chocolatey crust and crumbly topping. You’ll use both whole cookies for the base and crushed pieces for texture.
  • Cream cheese – Adds a tangy, velvety layer that balances the sweetness of the other components.
  • Cool Whip or homemade whipped cream – Lightens the filling and gives it a fluffy, mousse-like consistency.
  • Instant chocolate pudding mix – Creates a smooth, decadent layer that pairs perfectly with the Oreos.
  • Milk – Used to prepare the pudding, ensuring it sets to the right consistency.
  • Butter – Binds the Oreo crust together for a firm base.
  • Chocolate syrup or hot fudge – Drizzled on top for an extra layer of indulgence.

How to Make No-Bake Oreo Cookie Lasagna

Follow these simple steps to create the ultimate No-Bake Oreo Cookie Lasagna:

  1. Prepare the crust – Crush about 30 Oreo cookies (filling included) into fine crumbs. Mix with melted butter and press firmly into a 9×13-inch dish. Chill for 10 minutes to set.
  2. Make the cream cheese layer – Beat softened cream cheese with powdered sugar until smooth. Fold in half of the Cool Whip, then spread this mixture over the chilled crust.
  3. Layer the pudding – Whisk the chocolate pudding mix with cold milk until thickened. Let it sit for 5 minutes, then spread over the cream cheese layer.
  4. Add the final whipped layer – Spread the remaining Cool Whip over the pudding for a light, airy finish.
  5. Top with Oreos – Crush additional Oreos and sprinkle over the top. Drizzle with chocolate syrup for extra decadence.
  6. Chill and serve – Refrigerate for at least 4 hours (or overnight) to allow the layers to set. Slice and enjoy!

Pro tip: For cleaner slices, dip your knife in hot water before cutting.

Pro Tips for the Best Results

Take your No-Bake Oreo Cookie Lasagna to the next level with these expert tricks:

  • Use full-fat cream cheese for the richest, creamiest texture.
  • If you prefer homemade whipped cream, beat heavy cream with powdered sugar until stiff peaks form.
  • For a deeper chocolate flavor, swap the chocolate pudding for dark chocolate or fudge pudding.
  • Let the dessert chill for at least 4 hours—overnight is even better—to ensure clean layers.
  • Garnish with mini Oreos or chocolate shavings for an elegant presentation.

Variations and Substitutions

This recipe is wonderfully adaptable. Here are some delicious twists to try:

  • Mint Oreo version – Use mint Oreos for a refreshing twist.
  • Peanut butter lovers – Swirl peanut butter into the cream cheese layer or use Reese’s Pieces as a topping.
  • Gluten-free option – Substitute gluten-free chocolate sandwich cookies.
  • Lighter version – Use reduced-fat cream cheese, sugar-free pudding, and light Cool Whip.
  • Berry delight – Add a layer of fresh strawberries or raspberries between the pudding and whipped cream.

What to Serve With It

While this dessert is fantastic on its own, here are some pairing ideas:

  • A scoop of vanilla ice cream for an à la mode treat.
  • Fresh berries to cut through the richness.
  • A cold glass of milk or a hot coffee for dunking.
  • For parties, serve alongside other mini desserts like brownie bites or cheesecake bars.

How to Store and Reheat

This dessert keeps beautifully when stored properly:

  • Refrigeration – Cover tightly with plastic wrap and store in the fridge for up to 4 days.
  • Freezing – Freeze individual slices in airtight containers for up to 2 months. Thaw in the refrigerator before serving.
  • Reheating – Since this is a no-bake dessert, simply let it sit at room temperature for 10 minutes if too cold from the fridge.

Frequently Asked Questions (FAQs)

Can I use homemade whipped cream instead of Cool Whip?
Absolutely! Just beat 2 cups of heavy cream with 1/4 cup powdered sugar until stiff peaks form.

Can I make this ahead of time?
Yes! In fact, it tastes even better after chilling overnight as the flavors meld together.

Why is my crust crumbling when I cut it?
Make sure you press the Oreo crust firmly into the pan and chill it before adding the next layer. Adding an extra tablespoon of butter can also help bind it better.

Can I use a different type of cookie?
Definitely! Golden Oreos, chocolate chip cookies, or even graham crackers work well for variations.

How do I prevent the layers from mixing?
Allow each layer to set slightly before adding the next. The chilled crust helps, and spreading the pudding over the cream cheese layer while it’s still soft ensures they adhere without blending.

Final Thoughts

This No-Bake Oreo Cookie Lasagna is more than just a dessert—it’s a guaranteed smile-maker. Whether you’re serving it at a family gathering, potluck, or just treating yourself, its layers of chocolatey goodness never disappoint. The best part? You don’t need any baking skills to pull it off. So grab those Oreos, whip up the creamy layers, and get ready for the compliments to roll in. Happy no-bake baking!

Print
clock clock iconcutlery cutlery iconflag flag iconfolder folder iconinstagram instagram iconpinterest pinterest iconfacebook facebook iconprint print iconsquares squares iconheart heart iconheart solid heart solid icon

No-Bake Oreo Cookie Lasagna

  • Author: Dessert Enthusiast

Description

A decadent, no-bake dessert lasagna made with layers of Oreo cookies, creamy cheesecake filling, and whipped topping. Perfect for any occasion!


Ingredients

Scale

For the Crust:

  • For the crust:
  • 36 Oreo cookies (regular or double-stuff)
  • 6 tablespoons unsalted butter, melted
  • For the cheesecake layer:
  • 16 ounces cream cheese, softened
  • 1/2 cup granulated sugar
  • 2 teaspoons vanilla extract
  • 1 cup heavy whipping cream, whipped to stiff peaks
  • For the whipped topping layer:
  • 8 ounces whipped topping (Cool Whip or homemade)
  • For garnish:
  • Additional Oreo cookies, crushed
  • Chocolate syrup (optional)

Instructions

1. Prepare the Crust:

  1. 1. Prepare the crust: Crush 36 Oreo cookies (filling included) into fine crumbs using a food processor or rolling pin.
  2. 2. Mix the cookie crumbs with melted butter until fully combined.
  3. 3. Press the mixture firmly into the bottom of a 9×13-inch baking dish to form an even crust. Chill in the refrigerator for 10 minutes.
  4. 4. Make the cheesecake layer: In a large bowl, beat the softened cream cheese, sugar, and vanilla extract until smooth and creamy.
  5. 5. Gently fold in the whipped heavy cream until fully incorporated.
  6. 6. Spread the cheesecake mixture evenly over the chilled Oreo crust.
  7. 7. Top with a layer of whipped topping, spreading it smoothly over the cheesecake layer.
  8. 8. Garnish with crushed Oreo cookies and drizzle with chocolate syrup if desired.
  9. 9. Chill in the refrigerator for at least 4 hours (or overnight) before serving.

Notes

For best results, use full-fat cream cheese and chill the dessert thoroughly before serving. You can also customize with different Oreo flavors or add a layer of chocolate pudding for extra richness.

Frozen Mixed Berry Lemonade

Frozen Mixed Berry Lemonade

There’s something undeniably magical about sipping on a frosty, fruity drink on a warm afternoon. This Frozen Mixed Berry Lemonade is the perfect blend of tangy, sweet, and refreshing—a vibrant drink that’s as beautiful as it is delicious. Whether you’re hosting a summer gathering or just craving a cool treat, this recipe is a guaranteed crowd-pleaser. Let’s dive into why this frozen berry lemonade deserves a spot in your recipe collection.

Why You’ll Love This Recipe

First, this Frozen Mixed Berry Lemonade is incredibly refreshing. The combination of tart lemons and sweet mixed berries creates a perfectly balanced flavor that quenches your thirst on even the hottest days. Second, it’s effortless to make. With just a handful of ingredients and a blender, you can whip up this drink in minutes. Third, it’s versatile—you can easily adjust the sweetness or swap out berries based on what’s in season. And finally, it’s a showstopper. The vibrant pink-purple hue makes it a stunning addition to any table, whether you’re serving it at a brunch or an evening barbecue.

Ingredients Breakdown

Let’s take a closer look at the key ingredients that make this frozen berry lemonade so special:

  • Mixed Berries – Strawberries, blueberries, raspberries, and blackberries bring natural sweetness and a burst of antioxidants. Frozen berries work perfectly, ensuring a thick, slushy texture.
  • Fresh Lemons – Lemon juice adds that essential tangy brightness, balancing the sweetness of the berries. Freshly squeezed is best for the most vibrant flavor.
  • Honey or Agave Syrup – A natural sweetener that blends seamlessly into the drink. Adjust to taste depending on how sweet your berries are.
  • Ice – The key to that frosty, slushy consistency. Crushed ice blends more smoothly, but regular ice cubes work too.
  • Sparkling Water (Optional) – For a fizzy twist, a splash of sparkling water adds a light, effervescent finish.

How to Make Frozen Mixed Berry Lemonade

Making this frozen berry lemonade is as easy as blending and sipping. Here’s the step-by-step breakdown:

  1. Prep the Berries – If using fresh berries, wash and hull them. Frozen berries can go straight into the blender.
  2. Juice the Lemons – Roll the lemons on the counter to loosen the juice, then squeeze until you have about ½ cup of fresh lemon juice.
  3. Blend the Ingredients – Add the mixed berries, lemon juice, honey (or agave), and a cup of ice to a high-powered blender. Blend until smooth and slushy.
  4. Adjust Consistency – If the mixture is too thick, add a splash of cold water or sparkling water. If it’s too thin, toss in more ice.
  5. Taste and Sweeten – Give it a quick taste and add more sweetener if needed.
  6. Serve Immediately – Pour into chilled glasses, garnish with a lemon slice or fresh berries, and enjoy!

Pro Tips for the Best Results

  • Freeze Your Glasses – For an extra frosty experience, chill your glasses in the freezer for 10-15 minutes before serving.
  • Use High-Quality Honey – A good raw honey enhances the flavor far better than processed syrups.
  • Blend in Batches – If your blender struggles with thick mixtures, blend in smaller portions to avoid overheating.
  • Strain for a Smoother Texture – If you prefer a seedless drink, strain the blended mixture through a fine-mesh sieve before serving.

Variations and Substitutions

This recipe is wonderfully adaptable. Here are some delicious twists to try:

  • Vegan Option – Swap honey for maple syrup or agave nectar.
  • Herbal Infusion – Muddle a few fresh mint or basil leaves into the mix for an herbal note.
  • Tropical Twist – Add a handful of pineapple or mango for a fruity variation.
  • Boozy Upgrade – For an adult version, add a splash of vodka or rum.

What to Serve With It

This frozen berry lemonade pairs beautifully with light, summery dishes. Try serving it alongside:

  • Grilled shrimp skewers with a citrus marinade
  • A fresh watermelon and feta salad
  • Mini chicken and avocado wraps
  • Lemon poppy seed muffins for a sweet brunch pairing

How to Store and Reheat

While this drink is best enjoyed fresh, you can store any leftovers in an airtight container in the freezer for up to a week. When ready to serve, let it thaw slightly and re-blend with a splash of water or lemon juice to refresh the texture. Avoid refrigerating for more than a day, as the ice will melt and dilute the flavors.

Frequently Asked Questions (FAQs)

Can I use only one type of berry?

Absolutely! If you prefer just strawberries or blueberries, feel free to use a single berry variety. The flavor will be slightly different but still delicious.

Is this recipe kid-friendly?

Yes! Kids love the sweet-tart flavor and vibrant color. For a fun twist, pour it into popsicle molds for homemade berry lemonade pops.

Can I make this ahead of time?

You can blend the mixture and freeze it, but it’s best served immediately for the ideal slushy texture. If making ahead, store the base without ice and blend with ice just before serving.

What if I don’t have a high-powered blender?

A standard blender will work—just pulse in short bursts and scrape down the sides as needed. Adding a bit of liquid (water or lemon juice) can help it blend more smoothly.

Can I use bottled lemon juice?

Fresh lemon juice is preferred for the brightest flavor, but in a pinch, bottled lemon juice will work. Just adjust the sweetness to taste.

Final Thoughts

This Frozen Mixed Berry Lemonade is more than just a drink—it’s a little sip of sunshine. Whether you’re cooling off after gardening, hosting friends on the patio, or just treating yourself to a midday refreshment, this recipe is sure to delight. The best part? It’s endlessly customizable, so you can make it your own. So grab your blender, toss in those berries, and get ready to enjoy the perfect frozen summer sip. Cheers to sweet, tangy, berry-filled goodness!

Print
clock clock iconcutlery cutlery iconflag flag iconfolder folder iconinstagram instagram iconpinterest pinterest iconfacebook facebook iconprint print iconsquares squares iconheart heart iconheart solid heart solid icon

Frozen Mixed Berry Lemonade

  • Author: Fresh Kitchen Creations

Description

A refreshing and vibrant frozen lemonade blended with mixed berries for a sweet-tart summer treat. Perfect for hot days when you need a cool, fruity drink.


Ingredients

Scale

For the Crust:

  • For the Lemonade Base:
  • 1 cup freshly squeezed lemon juice (about 46 lemons)
  • 1/2 cup granulated sugar
  • 1 cup cold water
  • For the Berry Blend:
  • 2 cups frozen mixed berries (strawberries, blueberries, raspberries)
  • 1 cup ice cubes
  • Optional Garnish:
  • Fresh mint leaves
  • Lemon slices
  • Extra berries

Instructions

1. Prepare the Crust:

  1. 1. In a pitcher, combine lemon juice, sugar, and cold water. Stir until sugar dissolves completely. Set aside.
  2. 2. In a blender, add frozen mixed berries, ice cubes, and prepared lemonade.
  3. 3. Blend on high until smooth and slushy, about 1-2 minutes. If too thick, add a splash of water.
  4. 4. Taste and adjust sweetness by adding more sugar if needed.
  5. 5. Pour into chilled glasses and garnish with fresh mint, lemon slices, or extra berries.
  6. 6. Serve immediately with a straw and enjoy!

Notes

For a creamier texture, add 1/4 cup Greek yogurt. To make it boozy, mix in 1-2 oz vodka per serving. Store leftovers in the freezer, but blend again before serving as it hardens.

Pineapple Upside-Down Cupcake Jars

Pineapple Upside-Down Cupcake Jars

There’s something undeniably nostalgic about pineapple upside-down cake—the caramelized fruit, the tender crumb, the way it brings back memories of family gatherings. But what if you could enjoy all that deliciousness in a portable, single-serving format? Enter Pineapple Upside-Down Cupcake Jars, a fun twist on the classic dessert that’s as charming as it is irresistible. Perfect for picnics, parties, or just treating yourself, these little jars pack all the flavor of the original with none of the fuss. Let’s dive into why this recipe is a must-try and how to make it shine.

Why You’ll Love This Recipe

First, let’s talk about why these Pineapple Upside-Down Cupcake Jars deserve a spot in your baking rotation.

Portable and mess-free: Unlike traditional cakes, these jars are easy to transport and serve, making them ideal for potlucks or gifting. No slicing required—just grab a spoon and dig in.

Visually stunning: The layers of golden pineapple, sticky caramel, and fluffy cake create a gorgeous presentation that’s sure to impress. They look like they came straight from a bakery.

Perfectly portioned: Each jar is a single serving, so there’s no temptation to overindulge (unless you go back for seconds, which you probably will).

Customizable: You can easily adapt this recipe to suit different tastes or dietary needs—swap fruits, adjust sweetness, or even make it gluten-free.

Great for make-ahead: These jars stay fresh for days, so you can bake them in advance for stress-free entertaining.

Ingredients Breakdown

Before we get to the step-by-step, let’s break down the key ingredients and their roles in this delightful dessert.

Canned pineapple rings: The star of the show, pineapple adds natural sweetness and a tropical flair. Opt for pineapple in juice (not syrup) for the best flavor.

Brown sugar: Combined with butter, it creates that signature caramelized topping. Dark brown sugar adds a deeper molasses note, but light brown works too.

Unsalted butter: Used in both the topping and the batter, butter ensures richness and moisture. Always use room-temperature butter for even mixing.

Maraschino cherries: These classic garnishes add a pop of color and a burst of sweetness. You can also use fresh cherries if preferred.

All-purpose flour: The foundation of the cupcake batter. For a lighter texture, sift it before mixing.

Granulated sugar: Balances the tartness of the pineapple and helps achieve a tender crumb.

Eggs: Provide structure and lift. Room-temperature eggs blend more smoothly into the batter.

Buttermilk: Adds a slight tang and keeps the cake moist. No buttermilk? Make a quick substitute with milk and lemon juice.

Vanilla extract: Enhances the overall flavor profile. Pure vanilla extract makes a noticeable difference.

How to Make Pineapple Upside-Down Cupcake Jars

Now, let’s walk through the process of creating these adorable Pineapple Upside-Down Cupcake Jars. Follow these steps for foolproof results.

Step 1: Prep the jars and topping
Start by preheating your oven to 350°F. Lightly grease the inside of clean mason jars (wide-mouth, 8-ounce jars work best). In a small saucepan, melt butter and brown sugar over medium heat, stirring until smooth. Spoon a thin layer of this caramel mixture into the bottom of each jar.

Step 2: Arrange the pineapple
Cut pineapple rings into smaller pieces to fit the jars. Place a few pieces over the caramel layer, then add a maraschino cherry in the center. Press gently to secure.

Step 3: Make the batter
In a bowl, whisk together flour, baking powder, and salt. In another bowl, cream butter and granulated sugar until light and fluffy. Beat in eggs one at a time, then stir in vanilla. Alternate adding the dry ingredients and buttermilk, mixing just until combined.

Step 4: Fill and bake
Spoon the batter over the pineapple layer, filling each jar about two-thirds full. Place the jars on a baking sheet and bake for 20-25 minutes, or until a toothpick inserted comes out clean.

Step 5: Cool and serve
Let the jars cool for 10 minutes, then run a knife around the edges to loosen. Invert onto plates if desired, or serve directly from the jars for a rustic touch.

Pro Tips for the Best Results

Want to take your Pineapple Upside-Down Cupcake Jars to the next level? Try these expert tips.

Use room-temperature ingredients: Cold eggs or butter can cause the batter to separate, leading to a dense texture. Let everything sit out for at least 30 minutes before baking.

Don’t overfill the jars: The cake will rise as it bakes, so leave some headspace to prevent overflow.

Check for doneness early: Oven temperatures vary, so start testing at the 18-minute mark to avoid overbaking.

Add a splash of rum: For an adult twist, brush the baked pineapple layer with a bit of spiced rum before adding the batter.

Serve warm: These jars taste best slightly warm, with the caramel still gooey. Reheat briefly in the microwave if needed.

Variations and Substitutions

This recipe is wonderfully adaptable. Here are some creative ways to mix it up.

Fruit swaps: Try using peach slices, mango, or even apple for a different flavor profile.

Gluten-free option: Replace all-purpose flour with a 1:1 gluten-free baking blend. The texture will be slightly denser but still delicious.

Dairy-free version: Use coconut oil instead of butter and coconut milk mixed with vinegar in place of buttermilk.

Nutty crunch: Sprinkle chopped pecans or walnuts over the caramel layer for added texture.

Spiced twist: Add a pinch of cinnamon or cardamom to the batter for warm, aromatic notes.

What to Serve With It

While these cupcake jars are delightful on their own, here are some pairing ideas to make them even more special.

Whipped cream or vanilla ice cream: A dollop of either adds a creamy contrast to the warm cake.

Coconut whipped cream: Enhances the tropical vibe and keeps it dairy-free if needed.

Fresh berries: Strawberries or raspberries add a refreshing, tart balance.

Coffee or tea: A hot cup of Earl Grey or dark roast coffee complements the sweetness perfectly.

Sparkling wine: For a celebratory touch, serve with Prosecco or Moscato.

How to Store and Reheat

These cupcake jars keep well, so you can enjoy them over several days.

Room temperature: Store in an airtight container for up to 2 days. The caramel may soften but will still taste great.

Refrigerator: For longer storage, keep in the fridge for up to 5 days. Let them come to room temperature or warm briefly before serving.

Freezer: Wrap individual jars tightly in plastic wrap and freeze for up to 3 months. Thaw overnight in the fridge before reheating.

Reheating: Microwave for 15-20 seconds to restore the gooey caramel texture. Alternatively, warm in a 300°F oven for 10 minutes.

Frequently Asked Questions (FAQs)

Can I use fresh pineapple instead of canned?
Yes, but fresh pineapple contains enzymes that can break down the cake’s structure. If using fresh, lightly cook the pineapple first to neutralize these enzymes.

What size jars should I use?
8-ounce wide-mouth mason jars are ideal. Smaller jars may overflow, while larger ones will require adjusting bake time.

Can I make these without jars?
Absolutely! Use a muffin tin lined with parchment paper for a traditional cupcake version.

Why did my caramel harden?
Overcooking the caramel can make it too firm. Remove it from heat as soon as the sugar dissolves for a softer texture.

Can I double the recipe?
Yes, this recipe scales well. Just be sure to mix the batter in batches if your bowl isn’t large enough.

Final Thoughts

Pineapple Upside-Down Cupcake Jars are more than just a dessert—they’re a little jar of happiness. Whether you’re reliving childhood memories or creating new ones, these sweet treats are sure to delight. The best part? They’re as fun to make as they are to eat. So gather your jars, preheat that oven, and get ready to enjoy a modern twist on a timeless classic. Happy baking!

Print
clock clock iconcutlery cutlery iconflag flag iconfolder folder iconinstagram instagram iconpinterest pinterest iconfacebook facebook iconprint print iconsquares squares iconheart heart iconheart solid heart solid icon

Pineapple Upside-Down Cupcake Jars

  • Author: Baking Enthusiast

Description

A fun twist on the classic pineapple upside-down cake, these individual servings are baked in jars for a portable and adorable dessert. Layers of caramelized pineapple, cherries, and moist vanilla cake make these a showstopper.


Ingredients

Scale

For the Crust:

  • For the pineapple layer:
  • 1/2 cup unsalted butter, melted
  • 1 cup packed light brown sugar
  • 1 can (20 oz) pineapple rings, drained and patted dry
  • 12 maraschino cherries, drained
  • For the cake batter:
  • 1 1/2 cups all-purpose flour
  • 1 1/2 teaspoons baking powder
  • 1/4 teaspoon salt
  • 1/2 cup unsalted butter, softened
  • 1 cup granulated sugar
  • 2 large eggs
  • 1 teaspoon vanilla extract
  • 1/2 cup whole milk

Instructions

1. Prepare the Crust:

  1. Preheat oven to 350°F (175°C). Grease 12 wide-mouth 8-oz mason jars with butter or cooking spray.
  2. Make the pineapple layer: Divide melted butter evenly among jars (about 2 tsp each). Sprinkle 1 tbsp brown sugar into each jar. Place 1 pineapple ring in the bottom of each jar (trim to fit if needed). Add 1 cherry in the center of each pineapple ring.
  3. Make the cake batter: Whisk flour, baking powder, and salt in a bowl. In another bowl, beat softened butter and sugar until light and fluffy. Add eggs one at a time, then vanilla. Alternate adding flour mixture and milk, beginning and ending with flour.
  4. Divide batter evenly among jars, filling each about 2/3 full (do not overfill). Place jars on a baking sheet and bake for 25-30 minutes until a toothpick comes out clean.
  5. Cool jars for 5 minutes, then carefully run a knife around edges and invert onto plates (or serve directly from jars). Serve warm or at room temperature.

Notes

• Jars must be heat-safe (no lids while baking). • For easier removal, line jars with parchment circles before adding pineapple layer. • Store covered at room temperature for up to 2 days.

Creamy Avocado Banana Smoothie

Creamy Avocado Banana Smoothie

There’s something magical about blending creamy avocado with sweet bananas—it creates a smoothie so rich and satisfying, it feels like a dessert but fuels your body like a superfood powerhouse. Whether you’re looking for a quick breakfast, a post-workout refresher, or a midday pick-me-up, this Creamy Avocado Banana Smoothie is a game-changer. It’s packed with nutrients, requires minimal prep, and delivers a velvety texture that’s downright addictive. Let’s dive into why this recipe deserves a permanent spot in your blender rotation.

Why You’ll Love This Recipe

First, let’s talk about what makes this smoothie stand out from the rest. Here’s why you’ll be hooked after the first sip:

  • Ultra-creamy texture: The combination of ripe avocado and banana creates a luscious, almost milkshake-like consistency without any dairy.
  • Nutrient-dense powerhouse: Avocados bring healthy fats and fiber, while bananas add potassium and natural sweetness—making this smoothie as nourishing as it is delicious.
  • Quick and effortless: With just 5 minutes and a handful of ingredients, you can whip up a breakfast or snack that keeps you full for hours.
  • Versatile base: Customize it with your favorite add-ins like protein powder, greens, or nut butter to suit your taste and dietary needs.
  • Kid-friendly: The mild, sweet flavor makes it a hit with even the pickiest eaters—a great way to sneak in extra nutrients.

Ingredients Breakdown

Every ingredient in this smoothie plays a crucial role in building flavor, texture, and nutrition. Here’s what you’ll need and why each one matters:

  • Ripe avocado: The star of the show, avocado adds creaminess and healthy monounsaturated fats. Choose one that’s slightly soft to the touch for the best texture.
  • Banana: Use a ripe, spotty banana for natural sweetness and a thick, smooth consistency. Frozen banana works even better for a frostier drink.
  • Milk of choice: Almond milk, oat milk, or coconut milk keep it dairy-free, but regular milk works too. Adjust the amount for your preferred thickness.
  • Greek yogurt or coconut yogurt: Adds protein and tanginess. Skip it for a lighter version or use a dairy-free alternative.
  • Honey or maple syrup: Optional, but a drizzle enhances sweetness if your banana isn’t quite ripe enough.
  • Vanilla extract: A splash elevates the flavor, making it taste like a dessert.
  • Ice cubes: For a chilled, refreshing finish.

How to Make Creamy Avocado Banana Smoothie

Ready to blend? Follow these simple steps for the perfect smoothie every time:

  1. Prep your ingredients: Peel and pit the avocado, slice the banana, and measure out your liquids. If using frozen banana, skip the ice for now.
  2. Add to blender: Start with the milk and yogurt, followed by the avocado, banana, sweetener (if using), and vanilla. This order helps the blender process everything evenly.
  3. Blend until smooth: Start on low speed, then gradually increase to high to avoid lumps. Pause to scrape down the sides if needed.
  4. Adjust consistency: Too thick? Add a splash more milk. Too thin? Toss in a few ice cubes or extra banana.
  5. Taste and tweak: Need more sweetness? Add another drizzle of honey. For a flavor boost, a pinch of cinnamon or cocoa powder works wonders.
  6. Serve immediately: Pour into a glass, add a straw, and enjoy the creamy goodness right away for the best texture.

Pro Tips for the Best Results

Take your smoothie from good to extraordinary with these expert tricks:

  • Freeze your banana ahead: Sliced, frozen bananas make the smoothie colder and thicker without diluting it like ice can.
  • Use full-fat yogurt: It adds richness and a more satisfying mouthfeel compared to low-fat versions.
  • Chill your glass: A frosty glass keeps the smoothie cold longer, especially on warm days.
  • Layer flavors: Add a sprinkle of granola or chia seeds on top for crunch, or a drizzle of nut butter for depth.
  • Blend in stages: If adding greens like spinach, blend them with the milk first to avoid leafy chunks.

Variations and Substitutions

This recipe is endlessly adaptable. Here are some delicious twists to try:

  • Chocolate avocado smoothie: Add 1 tablespoon cocoa powder or cacao nibs for a dessert-like treat.
  • Green powerhouse: Toss in a handful of spinach or kale—you won’t taste it, but you’ll get a nutrient boost.
  • Tropical version: Swap half the banana for frozen mango or pineapple, and use coconut milk for a vacation vibe.
  • Protein-packed: Stir in a scoop of vanilla or unflavored protein powder post-blending to avoid grittiness.
  • Nutty delight: Blend in 1 tablespoon almond butter or peanut butter for extra creaminess and staying power.

What to Serve With It

While this smoothie is satisfying on its own, pairing it with the right sides can turn it into a full meal or snack:

  • Toast points: Whole-grain toast with almond butter or smashed berries complements the creaminess.
  • Energy bites: Homemade oat-date balls or store-bought granola bars add a chewy contrast.
  • Fresh fruit salad: A mix of berries, kiwi, and citrus brightens up the meal.
  • Savory eggs: Scrambled or hard-boiled eggs balance the sweetness with protein.
  • Coffee or tea: A hot cup of black coffee or herbal tea makes a great companion for a morning smoothie.

How to Store and Reheat

Smoothies are best enjoyed fresh, but if you need to prep ahead, here’s how to store them properly:

  • Refrigeration: Store in an airtight jar for up to 24 hours. The avocado may oxidize slightly, so give it a shake or quick blend before drinking.
  • Freezing: Pour into ice cube trays or a freezer-safe container for up to 1 month. Thaw in the fridge overnight or blend frozen cubes with a splash of milk to revive.
  • No reheating needed: This smoothie is meant to be served cold. If it separates, a quick stir or blend will bring it back together.

Frequently Asked Questions (FAQs)

Let’s tackle some common queries to ensure smoothie success:

Can I make this smoothie without avocado?

Yes, but you’ll lose the signature creaminess. Substitute with 1/4 cup Greek yogurt or half a ripe pear for a similar texture.

Why is my smoothie turning brown?

Avocados oxidize when exposed to air. To prevent browning, add a squeeze of lemon juice or consume the smoothie within a few hours of making it.

Is this smoothie good for weight loss?

It can be! The healthy fats and fiber keep you full, but watch portion sizes and skip added sweeteners if you’re calorie-conscious.

Can I use water instead of milk?

You can, but the result will be less creamy and flavorful. For a compromise, try half water and half milk.

How can I make it vegan?

Use plant-based milk, coconut yogurt, and maple syrup instead of honey. It’s just as delicious!

Final Thoughts

This Creamy Avocado Banana Smoothie is more than just a drink—it’s a nourishing ritual that fits seamlessly into busy mornings, lazy afternoons, or even as a healthy dessert. The first time I made it, I was amazed at how something so simple could feel so indulgent. Whether you’re sipping it after a workout, sharing it with kids, or sneaking in greens without tasting them, this recipe is a keeper. So grab your blender, ripe avocados, and a sense of adventure—your new favorite smoothie awaits. Cheers to creamy, wholesome goodness!

Print
clock clock iconcutlery cutlery iconflag flag iconfolder folder iconinstagram instagram iconpinterest pinterest iconfacebook facebook iconprint print iconsquares squares iconheart heart iconheart solid heart solid icon

Creamy Avocado Banana Smoothie

  • Author: Smoothie Enthusiast

Description

A rich and creamy smoothie blending the goodness of avocado and banana for a nutritious breakfast or snack. Packed with healthy fats and natural sweetness, this smoothie is both satisfying and energizing.


Ingredients

Scale

For the Crust:

  • For the smoothie base:
  • 1 ripe avocado, peeled and pitted
  • 1 large banana, preferably frozen
  • 1 cup almond milk (or any milk of choice)
  • For added flavor:
  • 1 tablespoon honey or maple syrup (optional)
  • 1/2 teaspoon vanilla extract
  • For topping (optional):
  • A sprinkle of chia seeds
  • A few banana slices

Instructions

1. Prepare the Crust:

  1. 1. Add the peeled and pitted avocado, banana, and almond milk to a blender.
  2. 2. Blend on high speed until smooth and creamy, about 1-2 minutes.
  3. 3. Taste and add honey or maple syrup if additional sweetness is desired, along with vanilla extract. Blend again briefly to combine.
  4. 4. Pour into a glass and top with chia seeds and banana slices if using.
  5. 5. Serve immediately and enjoy!

Notes

For a thicker smoothie, use frozen banana. Adjust sweetness based on preference. This smoothie is best enjoyed fresh but can be stored in the fridge for up to 24 hours (stir before drinking).