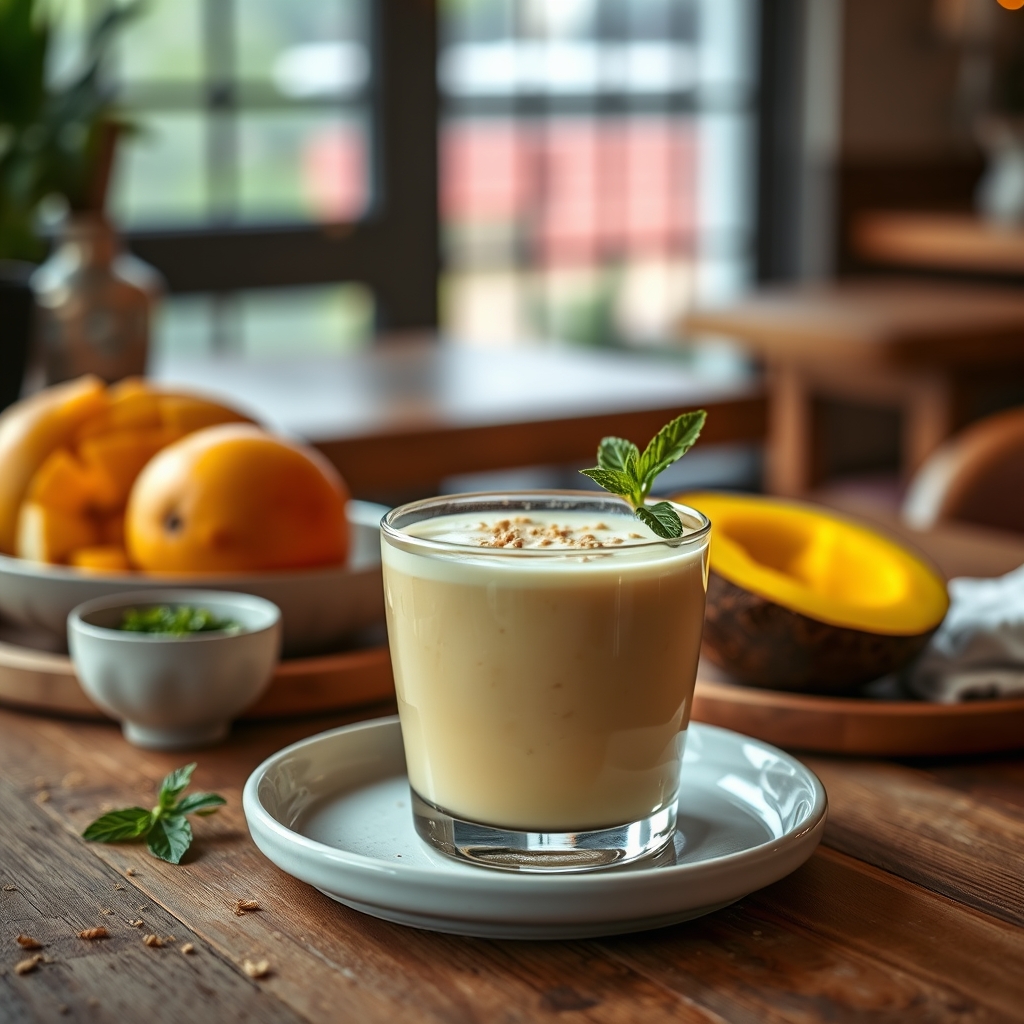
Creamy Mango Coconut Lassi
There’s something undeniably magical about blending the tropical sweetness of ripe mangoes with the rich creaminess of coconut. This Creamy Mango Coconut Lassi is a refreshing twist on the classic Indian yogurt drink, offering a luscious, velvety texture and a burst of sunshine in every sip. Whether you’re craving a cooling summer beverage, a post-workout refresher, or a delightful accompaniment to spicy dishes, this lassi is your answer. Let’s dive into why this recipe deserves a permanent spot in your kitchen repertoire.
Why You’ll Love This Recipe
First, this Creamy Mango Coconut Lassi is effortlessly easy to make. With just a handful of ingredients and a blender, you can whip it up in minutes. No complicated techniques or hard-to-find ingredients—just pure, simple goodness.
Second, it’s incredibly versatile. Enjoy it as a breakfast smoothie, a midday pick-me-up, or a dessert-like treat. The balance of tangy yogurt, sweet mango, and creamy coconut makes it suitable for any time of day.
Third, it’s a nutrient-packed drink. Yogurt provides probiotics for gut health, mangoes deliver a dose of vitamins A and C, and coconut adds healthy fats that keep you satisfied. It’s indulgence with benefits.
Finally, the tropical flavor combination is irresistible. The floral sweetness of mango paired with the nutty richness of coconut creates a harmony that feels like a vacation in a glass.
Ingredients Breakdown
Understanding the role of each ingredient helps you appreciate why this lassi works so well.
Ripe Mango: The star of the show. Use the sweetest, juiciest mango you can find—Alphonso or Ataulfo varieties are ideal. Frozen mango works too, especially when fresh isn’t in season.
Full-Fat Yogurt: Greek yogurt or traditional Indian dahi both work beautifully. The yogurt adds tanginess and creaminess while providing a probiotic boost.
Coconut Milk: Opt for full-fat coconut milk for the richest texture. It lends a silky mouthfeel and a subtle tropical note that complements the mango perfectly.
Honey or Maple Syrup: A natural sweetener to enhance the mango’s sweetness. Adjust to taste, especially if your mango is already very ripe.
Cardamom (Optional): A pinch of ground cardamom adds warmth and complexity, elevating the drink from good to extraordinary.
Ice Cubes: For a chilled, refreshing consistency. Skip if using frozen mango.
How to Make Creamy Mango Coconut Lassi
Follow these steps for a flawless lassi every time.
Step 1: Prep the Mango. Peel and dice a ripe mango, ensuring you have about 1 cup of flesh. If using frozen mango, let it thaw slightly for easier blending.
Step 2: Blend the Base. In a blender, combine the mango, 1/2 cup of yogurt, 1/4 cup of coconut milk, and 1 teaspoon of honey. Add a pinch of cardamom if desired.
Step 3: Adjust Consistency. Blend until smooth. If the mixture is too thick, add a splash of water or more coconut milk. For a frostier texture, toss in a few ice cubes and blend again.
Step 4: Taste and Sweeten. Pause to taste. Depending on the sweetness of your mango, you may want to add another drizzle of honey.
Step 5: Serve Immediately. Pour into glasses and garnish with a sprinkle of shredded coconut or a mango slice. Enjoy right away for the best flavor and texture.
Pro Tips for the Best Results
For an ultra-smooth lassi, strain the yogurt beforehand if it’s watery. This ensures a thicker, creamier result.
If you love a frothy top, blend the mixture on high speed for an extra 10 seconds. The aeration creates a light, airy texture.
For a dairy-free version, swap yogurt with coconut yogurt or a plant-based alternative like almond milk yogurt.
Chill your glass beforehand for an extra-refreshing experience. A frosty glass makes all the difference on a hot day.
Variations and Substitutions
This recipe is wonderfully adaptable. Here are some creative twists:
Pineapple Mango Lassi: Replace half the mango with fresh pineapple for a tropical tang.
Turmeric Boost: Add a pinch of turmeric for an anti-inflammatory kick and a golden hue.
Protein-Packed: Stir in a scoop of vanilla protein powder for a post-workout recovery drink.
Vegan Option: Use coconut yogurt and maple syrup instead of honey for a plant-based version.
What to Serve With It
This lassi pairs beautifully with spicy Indian dishes like biryani, samosas, or vegetable curries. The cool creaminess balances the heat perfectly.
For breakfast, serve it alongside a bowl of granola or a stack of fluffy pancakes. It also makes a delightful dessert when paired with cardamom-scented cookies or a slice of almond cake.
How to Store and Reheat
Lassi is best enjoyed fresh, but if you have leftovers, store them in an airtight container in the fridge for up to 24 hours. Give it a quick stir or shake before serving, as separation may occur.
Freezing isn’t recommended, as the texture can become grainy upon thawing. If you must freeze, blend with a splash of milk or water after thawing to restore creaminess.
Frequently Asked Questions (FAQs)
Can I use canned mango pulp? Yes, canned mango pulp works in a pinch. Just adjust the sweetness since it’s often pre-sweetened.
Is this lassi good for digestion? Absolutely. The probiotics in yogurt aid digestion, and mangoes contain enzymes that support gut health.
Can I make it without coconut milk? Of course. Substitute with regular milk, almond milk, or even coconut water for a lighter version.
How can I make it less thick? Simply add more coconut milk, water, or regular milk until you reach your desired consistency.
Final Thoughts
This Creamy Mango Coconut Lassi is more than just a drink—it’s a little moment of joy in a glass. Whether you’re sipping it on a sunny porch or serving it at a brunch gathering, its vibrant flavors and silky texture are sure to impress. Don’t be afraid to experiment with the recipe to make it your own. After all, the best dishes are the ones that bring both nourishment and happiness. Cheers to delicious, wholesome indulgence!
Print
Creamy Mango Coconut Lassi
Description
A refreshing and creamy Indian-inspired drink made with ripe mangoes, coconut milk, and yogurt. Perfect for hot summer days or as a cooling accompaniment to spicy meals.
Ingredients
For the Crust:
- For the lassi:
- 2 cups ripe mango, peeled and diced (about 2 large mangoes)
- 1 cup plain yogurt (Greek or regular)
- 1/2 cup coconut milk (full-fat for creaminess)
- 2 tablespoons honey or maple syrup (adjust to taste)
- 1/2 teaspoon ground cardamom
- 1/4 teaspoon vanilla extract
- For garnish (optional):
- 1 tablespoon shredded coconut, toasted
- 1 tablespoon chopped pistachios
- A few mint leaves
Instructions
1. Prepare the Crust:
- 1. In a blender, combine the diced mango, yogurt, coconut milk, honey (or maple syrup), cardamom, and vanilla extract.
- 2. Blend on high speed until smooth and creamy, about 1-2 minutes. If the mixture is too thick, add 1-2 tablespoons of water or more coconut milk to reach desired consistency.
- 3. Taste and adjust sweetness by adding more honey if needed.
- 4. Pour into glasses and garnish with toasted shredded coconut, chopped pistachios, and a mint leaf if desired.
- 5. Serve immediately or chill for 30 minutes for a cooler drink.
Notes
For a dairy-free version, use coconut yogurt instead of regular yogurt. Frozen mango can be substituted for fresh mango—just thaw slightly before blending. This lassi is best enjoyed fresh but can be stored in the refrigerator for up to 24 hours (stir well before serving).