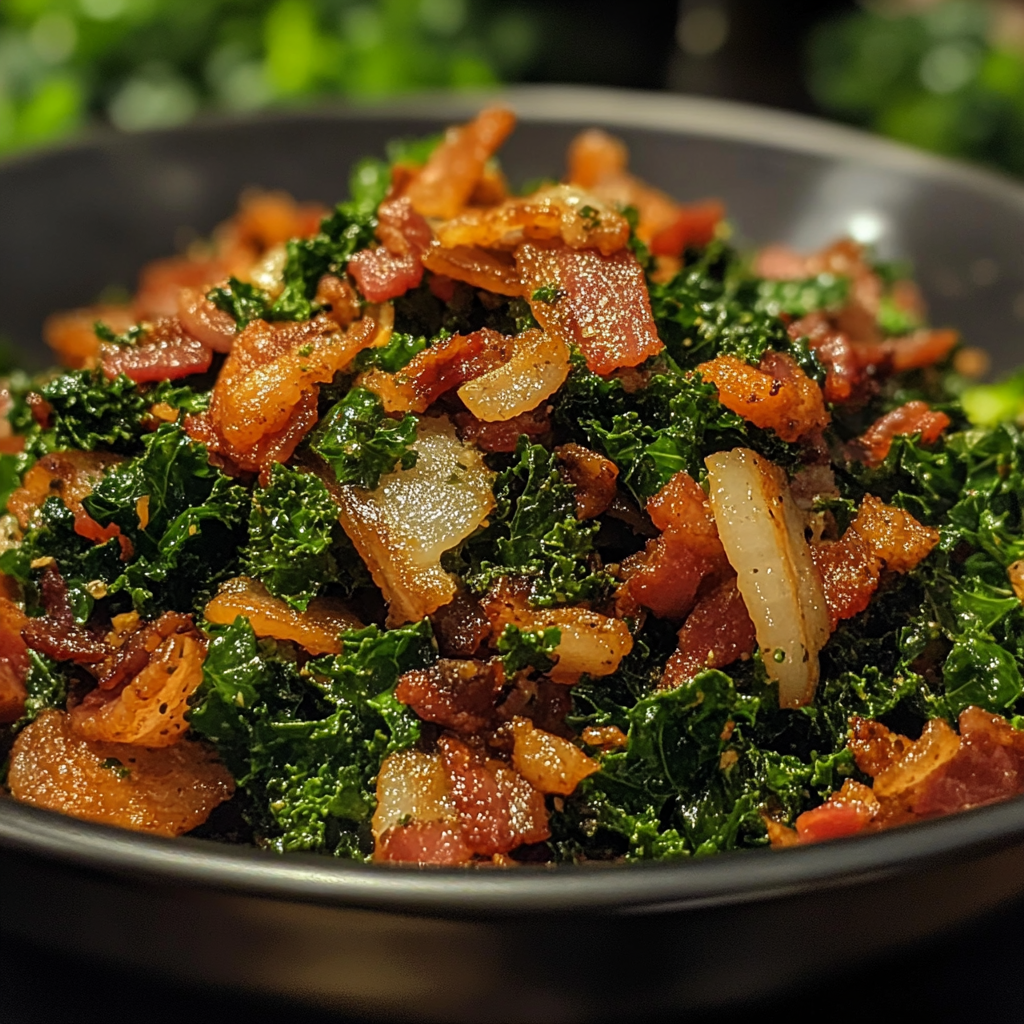
The Ultimate Guide to Making Perfect French Bread Pizza: Quick, Easy, and Delicious

baguette pizza, easy pizza recipe, French loaf pizza, quick homemade pizza, crispy French bread pizza, cheesy bread pizza

The Ultimate Guide to French Bread Pizza: A Delicious, Quick Meal for Any Occasion

If you’re looking for a quick, delicious, and versatile meal, French Bread Pizza is the perfect answer. With minimal ingredients and customization options, this dish can be a great family dinner, a casual snack, or even an appetizer for a party. In this guide, we’ll dive into everything you need to know about making the best French bread pizza, including ingredient options, preparation tips, and even some unique variations to try.

Why French Bread Pizza?

French bread pizza has become a favorite for many because it offers the perfect balance of crispy crust, cheesy goodness, and endless topping possibilities. Unlike traditional pizza, which requires dough preparation or buying pre-made crust, French bread serves as a ready-made base. It’s also ideal for those spontaneous pizza cravings when you want something fast but satisfying.

The texture of French bread—crispy on the outside and soft on the inside—makes it perfect for pizza. Whether you’re making a classic version with tomato sauce and mozzarella or experimenting with different toppings, you’ll find that French bread pizza is a foolproof recipe that delivers every time.

For a detailed, step-by-step guide, take a look at this best French bread pizza recipe from Serious Eats, where you’ll find insights on mastering this simple yet delicious meal.

Essential Ingredients for French Bread Pizza

To make French bread pizza, you need just a few basic ingredients, but the potential for customization is endless.

1. Bread

French bread is the star of the dish. It’s ideal because of its crispy texture and ability to hold the toppings well. You can use:

  • Fresh French Bread: Provides a soft yet sturdy base.
  • Stale French Bread: Surprisingly, stale bread works well since it becomes even crispier when baked.

2. Sauce

You can use a variety of sauces, depending on your flavor preferences. Some popular options include:

  • Pizza Sauce: The classic tomato-based pizza sauce.
  • Marinara Sauce: A slightly thinner sauce with a herbier taste.
  • Pesto: For a more Italian-inspired flavor.
  • Alfredo Sauce: Perfect for a white pizza variation.

If you prefer homemade sauces, check out this easy French bread pizza recipe which guides you through making a quick pizza sauce from scratch.

3. Cheese

Cheese is an essential component of any pizza. For French bread pizza, choose from:

  • Mozzarella: The go-to choice for its meltability.
  • Cheddar: Adds a sharp, tangy flavor.
  • Parmesan: For sprinkling on top to add a salty kick.

4. Toppings

This is where you can really get creative! Some classic topping combinations include:

  • Pepperoni and Sausage: A meaty combination for those who love hearty flavors.
  • Vegetarian Options: Bell peppers, onions, mushrooms, olives.
  • Gourmet Toppings: Feta, sun-dried tomatoes, arugula, and balsamic glaze.

Step-by-Step Guide: How to Make French Bread Pizza

  1. Preheat the Oven: Set the oven to 400°F (200°C) to ensure that the bread becomes crispy.
  2. Prepare the Bread: Slice the French bread in half lengthwise. If you want a crispier texture, toast the bread lightly before adding toppings.
  3. Spread the Sauce: Spread an even layer of your chosen sauce onto each half of the bread. Be sure not to oversaturate the bread to prevent it from becoming soggy.
  4. Add Cheese: Generously sprinkle your preferred cheese over the sauce.
  5. Add Toppings: Customize with your desired toppings. Be mindful not to overtop, as too many ingredients can cause the pizza to become soggy.
  6. Bake: Place the French bread pizzas on a baking sheet and bake for 10-15 minutes or until the cheese is bubbly and golden.
  7. Optional Step – Broil: For an extra crispy top, you can broil the pizzas for the last 2 minutes of baking.

Creative Variations of French Bread Pizza

One of the best parts of French bread pizza is how adaptable it is to different flavors and occasions. Below are some exciting variations you can try.

1. Meat Lovers’ French Bread Pizza

  • Load your pizza with pepperoni, sausage, bacon, and ham for a protein-packed option.

2. Vegetarian French Bread Pizza

  • Opt for fresh vegetables like spinach, bell peppers, onions, and mushrooms for a lighter meal. You can also substitute the regular sauce with pesto for extra flavor.

3. Vegan French Bread Pizza

  • Use vegan cheese and load up on plant-based toppings like roasted veggies and tofu for a delicious, dairy-free alternative.

4. Breakfast French Bread Pizza

  • This unique twist includes scrambled eggs, crispy bacon, and a sprinkle of cheddar for a morning-friendly pizza option.

5. Gourmet French Bread Pizza

  • Top with feta cheese, sun-dried tomatoes, and a handful of fresh arugula. Drizzle with balsamic glaze after baking for a sophisticated flavor profile.

Tips for Perfecting Your French Bread Pizza

Here are some quick tips to make sure your French bread pizza comes out perfectly every time:

  • Pre-toast the bread: Lightly toast the French bread before adding sauce to avoid sogginess.
  • Use high-quality cheese: Blending different types of cheese (like mozzarella and cheddar) can give you the perfect melt and flavor combination.
  • Broil at the end: If you want the toppings to have a little extra crisp, place the pizza under the broiler for 1-2 minutes at the end of baking.

Serving Suggestions and Pairings

French bread pizza is versatile and pairs well with various sides. Here are some ideas for serving:

  • Salads: A fresh, simple salad like Caesar or a garden salad with a light vinaigrette is perfect.
  • Soup: Tomato soup or minestrone works wonderfully as a side.
  • Beverages: Pair with soda for a casual snack or wine for a more elegant meal. A crisp white wine like Sauvignon Blanc can complement the cheesy richness of the pizza.

Frequently Asked Questions (FAQs)

1. What is the best way to store leftover French bread pizza?

You can store leftover French bread pizza in an airtight container in the refrigerator for up to 3 days. To reheat, use an oven or air fryer to keep the crust crispy.

2. Can you freeze French bread pizza?

Yes! To freeze, prepare the pizza without baking and place it in an airtight container or wrap it in plastic. When ready to eat, bake directly from the freezer, adding a few minutes to the bake time.

3. Can I use gluten-free French bread?

Absolutely! There are many gluten-free French bread options available that work just as well for making French bread pizza.

4. How can I make my French bread pizza extra crispy?

To achieve extra crispiness, lightly toast the French bread before adding the sauce. Additionally, using a broiler for the final minute or two of baking can give the pizza a perfectly crisp finish.

5. Can I use other types of bread for this recipe?

While French bread is the classic choice, you can experiment with other types of bread like ciabatta or even baguettes for a slightly different texture.


Conclusion: Why French Bread Pizza is a Must-Try Dish

In conclusion, French bread pizza is a quick, delicious, and versatile meal that’s perfect for any occasion. Whether you’re looking to make a quick dinner, a snack for a game night, or a customizable meal for a family gathering, this dish will never disappoint. With endless topping options, sauce varieties, and creative twists, French bread pizza is a go-to recipe that everyone should have in their culinary repertoire.

For more creative pizza recipes, check out this classic French bread pizza recipe that provides an excellent foundation for further customization.

Almond Joy Cookies – Just 4 Ingredients: Quick and Easy Recipe

easy almond joy cookies, 4-ingredient cookies, coconut chocolate cookies, quick almond cookies, almond joy cookie recipe, simple cookie recipe, almond coconut cookies

Almond Joy Cookies – Just 4 Ingredients: The Perfect Quick Treat

When it comes to easy desserts, few can rival the simplicity and flavor of Almond Joy Cookies. With just four basic ingredients, you can whip up a delicious batch of cookies that mimics the flavors of the beloved Almond Joy candy bar. Combining coconut, chocolate, and almonds, these cookies strike the perfect balance between sweet and nutty, with a chewy texture that’s sure to satisfy any dessert lover.

This recipe is ideal for anyone who wants a quick and tasty treat with minimal effort, whether you’re a beginner in the kitchen or an experienced baker looking for a simple go-to recipe. In this guide, we’ll show you how to make these cookies step by step and provide tips for variations, storing, and serving. Plus, we’ll suggest internal links to help you explore other easy dessert recipes you can make with pantry staples.


Why 4-Ingredient Recipes are Perfect for Quick Baking

Minimalist baking recipes, like these Almond Joy Cookies, are becoming more popular for good reason. With fewer ingredients, you spend less time shopping and prepping, making it easy to bake delicious treats without hassle. This recipe requires only four pantry staples: almonds, shredded coconut, chocolate chips, and sweetened condensed milk, which means you can create a delicious dessert with what you probably already have at home.

Using just four ingredients also means this recipe is more approachable for beginners who may feel intimidated by complex baking techniques. Additionally, it’s a convenient option when you’re short on time but still crave something sweet and indulgent.

Explore More: Discover quick and easy cookie recipes perfect for weeknight baking.


Ingredients for Almond Joy Cookies

The beauty of this recipe lies in its simplicity. Here are the key ingredients you’ll need:

  • 1 cup of shredded coconut: The coconut provides the chewy texture and tropical flavor, essential for recreating the taste of Almond Joy bars.
  • 1 cup of semi-sweet chocolate chips: Chocolate chips melt into the cookies, offering a rich, decadent flavor.
  • 1 cup of chopped almonds: Almonds add a crunchy texture and nutty flavor, complementing the sweetness of the coconut and chocolate.
  • 1 can of sweetened condensed milk: This is the binding agent that holds everything together while adding creamy sweetness.

These four simple ingredients come together to create a perfectly balanced cookie that captures the essence of the Almond Joy candy bar.


Step-by-Step Guide: How to Make Almond Joy Cookies

Making Almond Joy Cookies is as simple as gathering the ingredients, mixing them together, and baking. Here’s the step-by-step process to ensure perfect results every time:

1. Prepare the Ingredients

  • Preheat your oven to 350°F (175°C) and line a baking sheet with parchment paper.
  • Measure out the shredded coconut, chocolate chips, and chopped almonds.

2. Mix the Ingredients

  • In a large bowl, combine the shredded coconut, chocolate chips, and chopped almonds.
  • Pour the sweetened condensed milk over the mixture and stir until all the ingredients are evenly coated and mixed.

3. Shape and Bake the Cookies

  • Using a spoon or cookie scoop, drop tablespoon-sized portions of the mixture onto the prepared baking sheet, spacing them about 2 inches apart.
  • Bake the cookies in the preheated oven for 12-15 minutes or until the edges are golden brown.
  • Allow the cookies to cool on the baking sheet for a few minutes before transferring them to a wire rack to cool completely.

Try More: Explore tips for baking perfect cookies with just a few ingredients.


Customizing Almond Joy Cookies

One of the best things about this Almond Joy Cookie recipe is its flexibility. While the basic version with four ingredients is already delicious, there are plenty of ways to customize and enhance the recipe to suit your preferences.

1. Adding Different Nuts

While almonds are a classic choice that pays homage to the original Almond Joy candy, you can easily swap them for other nuts such as pecans, walnuts, or macadamia nuts for a different flavor and texture.

2. Dairy-Free or Vegan Versions

For those who are lactose intolerant or prefer a vegan version, you can substitute the sweetened condensed milk with coconut condensed milk or a similar dairy-free alternative. This substitution keeps the cookies creamy while adding an extra layer of coconut flavor.

3. Using Different Types of Chocolate

For chocolate lovers, using dark chocolate chips instead of semi-sweet can give these cookies a more intense flavor. Alternatively, white chocolate chips can provide a sweeter contrast to the nutty, coconut base.

Explore More: Find more variations on simple cookie recipes to try.


Storing and Freezing Almond Joy Cookies

These cookies are so easy to make that you might want to bake an extra batch and store them for later. Here are some tips for keeping your Almond Joy Cookies fresh:

1. Storing

Store the baked cookies in an airtight container at room temperature for up to 1 week. The cookies will retain their chewy texture, and the flavors will remain just as delicious.

2. Freezing

To freeze, place the baked cookies in a single layer on a baking sheet and freeze until solid. Once frozen, transfer the cookies to a freezer-safe container or bag and store them for up to 3 months. To serve, thaw the cookies at room temperature and enjoy as a quick, sweet snack whenever you want.


Frequently Asked Questions (FAQs)

1. Can I Make Almond Joy Cookies Without Sweetened Condensed Milk?

Sweetened condensed milk acts as the binding agent in this recipe, making it essential for holding the ingredients together. However, you can substitute it with coconut cream or a vegan condensed milk alternative if you need a dairy-free version.

2. How Long Do These Cookies Last?

These cookies can last up to a week when stored in an airtight container at room temperature. For longer storage, freeze them, and they’ll last up to three months.

3. Can I Use Unsweetened Coconut in This Recipe?

Yes, you can use unsweetened coconut if you prefer a less sweet version of the cookies. However, keep in mind that the cookies will be slightly less rich and sweet than the original recipe.

4. Are These Cookies Gluten-Free?

Yes, this recipe is naturally gluten-free, as it doesn’t require any flour. Just be sure to check the labels on your ingredients to avoid any gluten-containing additives or cross-contamination.


Why Almond Joy Cookies are a Must-Try Recipe

With just four ingredients, Almond Joy Cookies are not only easy to make but also incredibly delicious. The combination of sweet, chewy coconut, rich chocolate, and crunchy almonds captures the classic flavors of an Almond Joy bar, all in the form of a homemade cookie. This recipe is perfect for busy bakers who want something quick, or anyone looking to satisfy their sweet tooth without needing a long list of ingredients.

Whether you’re making these cookies for yourself, your family, or as a gift, they’re sure to be a hit. The simplicity of the recipe means it can be adapted in many ways, so feel free to get creative with your ingredients and make them your own!


Final Tips for the Perfect Almond Joy Cookies

  • Use Fresh Ingredients: Fresh almonds and coconut will make a big difference in the flavor and texture of your cookies.
  • Monitor Baking Time: Keep an eye on the cookies while they bake to ensure the edges turn golden without burning. Baking times may vary depending on your oven.
  • Customize the Recipe: Don’t hesitate to try new flavors and add-ins to suit your preferences or dietary needs.

For more easy dessert recipes and other minimal-ingredient treats, check out our related recipes to discover more delicious ideas for your next baking adventure.

Skillet Pork Chops with Creamy Mushroom Sauce: A Flavorful One-Pan Meal

pork chops with mushroom gravy, creamy mushroom sauce for pork chops, skillet pork recipes, pan-seared pork chops, pork chop dinner ideas

Skillet Pork Chops with Mushroom Sauce: A Delicious and Easy Dinner Recipe

If you’re looking for a quick, flavorful, and satisfying dinner, skillet pork chops with mushroom sauce is an excellent choice. This one-pan meal is packed with rich flavors and is surprisingly easy to make, making it perfect for weeknight dinners or special occasions. The savory combination of tender pork chops and creamy mushroom sauce creates a comforting dish that is sure to impress.

In this article, we’ll walk you through the step-by-step process of making the perfect skillet pork chops with a rich, creamy mushroom sauce. Along the way, we’ll provide helpful tips to ensure you achieve the best results every time. We’ll also suggest some variations and answer frequently asked questions to help customize this recipe for your taste.


Why Skillet Pork Chops Are a Must-Try

Cooking pork chops in a skillet offers several advantages, and it’s a method that many home cooks swear by. Not only does it allow for even heat distribution, but the high heat helps create a golden-brown crust on the pork chops while keeping the inside juicy and tender.

In this recipe, we’ll show you how to sear pork chops to perfection and then create a creamy mushroom sauce in the same skillet, using the flavorful browned bits left from the pork chops to elevate the sauce. This method not only saves on cleanup but also infuses the sauce with extra depth and richness.

Explore More: Learn the best techniques for cooking perfect pork chops.


Ingredients for Skillet Pork Chops with Mushroom Sauce

Before getting started, it’s essential to gather all the necessary ingredients. Here’s what you’ll need for this flavorful dish:

  • 4 bone-in or boneless pork chops (about 1-inch thick)
  • Salt and pepper, to taste
  • 2 tablespoons olive oil
  • 1 tablespoon butter
  • 8 oz. cremini or button mushrooms, sliced
  • 2 cloves garlic, minced
  • ½ cup chicken broth (or white wine for added flavor)
  • 1 cup heavy cream
  • 1 tablespoon Dijon mustard
  • 1 teaspoon thyme (fresh or dried)
  • Chopped parsley (for garnish)

These ingredients come together to form a perfectly balanced meal. The earthy flavor of the mushrooms pairs beautifully with the creaminess of the sauce, while the seared pork chops provide a rich and savory contrast.


Step-by-Step Guide: How to Make Skillet Pork Chops with Mushroom Sauce

1. Prepare the Pork Chops

  • Season the pork chops generously with salt and pepper on both sides.
  • Heat the olive oil in a large skillet over medium-high heat.
  • Add the pork chops to the skillet and sear them for 3-4 minutes on each side, or until they develop a golden-brown crust.
  • Remove the pork chops from the skillet and set them aside on a plate.

2. Sauté the Mushrooms and Garlic

  • In the same skillet, add the butter and let it melt.
  • Add the sliced mushrooms and cook them for 5-6 minutes, stirring occasionally, until they are browned and softened.
  • Stir in the minced garlic and cook for another 1-2 minutes until fragrant.

Try More: Check out our guide on how to make perfect mushroom sauce.

3. Make the Mushroom Sauce

  • Deglaze the skillet with chicken broth or white wine, scraping up any browned bits from the bottom of the pan.
  • Stir in the heavy cream, Dijon mustard, and thyme.
  • Bring the sauce to a simmer and let it cook for 5-7 minutes until it thickens slightly.

4. Return the Pork Chops to the Skillet

  • Add the pork chops back to the skillet, nestling them into the mushroom sauce.
  • Reduce the heat to low and cook for an additional 5-7 minutes, or until the pork chops are cooked through (145°F internal temperature).
  • Spoon the sauce over the pork chops as they cook to ensure they stay moist and flavorful.

5. Serve and Garnish

  • Once the pork chops are fully cooked, remove them from the heat.
  • Garnish with freshly chopped parsley and serve the pork chops with a generous spoonful of mushroom sauce.

Tips for Perfect Pork Chops

Getting the perfect sear and cooking your pork chops just right can sometimes be tricky. Here are a few tips to ensure you end up with delicious, tender pork chops every time:

  • Don’t Overcook: The key to juicy pork chops is to avoid overcooking them. The internal temperature should reach 145°F, and it’s always a good idea to let them rest for a few minutes before serving.
  • Use a Meat Thermometer: A digital meat thermometer is the best tool to ensure your pork chops are cooked to the right temperature without drying out.
  • Deglaze the Pan: When making the mushroom sauce, don’t forget to deglaze the pan. This step adds incredible flavor to the sauce by incorporating the browned bits from the pork chops.

Variations to Try

This recipe is versatile, and there are plenty of ways to tweak it to suit your preferences:

  • Wine Variation: Instead of chicken broth, use white wine to add a subtle sweetness and acidity to the sauce.
  • Mushroom Choices: You can experiment with different types of mushrooms like shiitake, portobello, or oyster mushrooms for a more unique flavor.
  • Dairy-Free Version: Swap out the heavy cream for coconut milk to make a dairy-free version of the sauce.

Try More: Find more variations for skillet pork chop recipes.


What to Serve with Skillet Pork Chops

Pork chops with mushroom sauce pair beautifully with a variety of side dishes. Here are some serving suggestions:

  • Mashed Potatoes: The creamy sauce pairs perfectly with mashed potatoes, making it an ideal comfort food meal.
  • Roasted Vegetables: Serve the pork chops with roasted broccoli, carrots, or asparagus to add some color and nutrients to your plate.
  • Rice or Quinoa: For a lighter option, serve the pork chops with a side of fluffy rice or quinoa.

Frequently Asked Questions (FAQs)

1. Can I Use Bone-In Pork Chops for This Recipe?

Yes, you can! Bone-in pork chops tend to be juicier and more flavorful than boneless pork chops, but they may require a slightly longer cooking time.

2. How Do I Prevent My Pork Chops from Drying Out?

To avoid dry pork chops, make sure you don’t overcook them. Use a meat thermometer to check that they reach an internal temperature of 145°F and let them rest for a few minutes before serving.

3. Can I Make the Mushroom Sauce Ahead of Time?

Yes, you can make the mushroom sauce ahead of time. Store it in an airtight container in the refrigerator and reheat it gently on the stovetop before serving.

4. What’s the Best Type of Mushroom for the Sauce?

Cremini mushrooms are a great choice for this sauce because of their rich, earthy flavor, but button mushrooms or portobello mushrooms also work well.


Conclusion: Why Skillet Pork Chops with Mushroom Sauce Should Be Your Next Meal

Skillet pork chops with mushroom sauce is a delicious, satisfying dish that combines tender meat with rich, flavorful sauce. It’s the perfect meal for busy weeknights or special occasions, offering restaurant-quality results in the comfort of your own kitchen. With just a few simple ingredients and techniques, you can create a meal that will impress everyone at the dinner table.

For more recipe ideas and tips, check out our related recipes to explore new ways to enjoy pork chops and more skillet-cooked meals.

Mama Dee’s Never Fail Creamy Fudge Recipe: A Foolproof Guide to Perfect Fudge

creamy fudge recipe, foolproof fudge, homemade fudge recipe, no-fail fudge, easy chocolate fudge, marshmallow cream fudge, perfect fudge recipe, rich creamy fudge

Mama Dee’s Never Fail Creamy Fudge: A Foolproof Recipe for Rich, Creamy Fudge

When it comes to making fudge, many people fear the process due to concerns about getting the texture just right. Mama Dee’s Never Fail Creamy Fudge is an answer to those concerns. It’s a recipe that promises a smooth, creamy texture every single time. Whether you’re a seasoned baker or just stepping into the kitchen for the first time, this recipe lives up to its name—it truly never fails.

In this guide, we will explore what makes Mama Dee’s Fudge so reliable, walk you through the step-by-step process of making it, and provide tips on how to customize the recipe to your taste. We will also link out to helpful resources on fudge-making techniques and share some suggested internal links to relevant recipes and guides.


What Makes Mama Dee’s Fudge a “Never Fail” Recipe?

The secret to Mama Dee’s Never Fail Creamy Fudge lies in its simple, yet effective combination of ingredients. While many fudge recipes rely on precise timing and careful attention to temperature, this recipe incorporates ingredients like marshmallow cream and evaporated milk, which help stabilize the fudge and give it that perfect creamy texture.

  • Marshmallow Cream: The addition of marshmallow cream is what makes this recipe nearly foolproof. It prevents the fudge from becoming grainy, which can happen when the sugar crystallizes.
  • Evaporated Milk: Evaporated milk adds richness and moisture, helping the fudge stay soft and creamy, even after it sets.

With just a few common ingredients and the right techniques, this recipe guarantees a successful batch of fudge every time.

Explore More: Check out this guide on creating perfect candy textures to take your fudge-making to the next level.


Ingredients for Mama Dee’s Never Fail Creamy Fudge

Before diving into the recipe, it’s important to gather the right ingredients. Below is a list of what you’ll need for this foolproof fudge recipe:

  • 3 cups of sugar
  • ¾ cup of butter
  • 2/3 cup evaporated milk
  • 12 oz. semi-sweet chocolate chips
  • 7 oz. marshmallow cream
  • 1 tsp vanilla extract
  • 1 cup chopped nuts (optional)

This ingredient list may seem simple, but it creates a perfect balance of sweetness, creaminess, and richness. The marshmallow cream, in particular, ensures that your fudge will set without any grainy texture.


Step-by-Step Guide to Making Mama Dee’s Fudge

Now that you have your ingredients ready, let’s dive into the step-by-step process of making Mama Dee’s Never Fail Creamy Fudge. Follow these steps carefully for flawless results.

Step 1: Preparing Your Ingredients

Before you begin cooking, make sure all of your ingredients are pre-measured and ready to go. This will help you avoid any mistakes when cooking at a high temperature. Chop your nuts (if using) and set them aside.

Step 2: Cooking the Fudge Mixture

  • In a large saucepan, combine the sugar, butter, and evaporated milk.
  • Bring the mixture to a rolling boil over medium heat, stirring constantly.
  • Once it reaches a boil, continue to cook for 4 to 5 minutes, stirring continuously. It’s essential to keep stirring to prevent the sugar from sticking and burning.

Step 3: Adding Chocolate and Marshmallow Cream

  • Remove the saucepan from the heat. Immediately stir in the chocolate chips until they melt completely.
  • Add the marshmallow cream and vanilla extract, stirring until the mixture is smooth and well-combined.
  • At this point, you can fold in the chopped nuts if desired.

Step 4: Pouring and Setting the Fudge

  • Pour the mixture into a greased 9×13-inch baking dish, spreading it evenly with a spatula.
  • Allow the fudge to cool at room temperature or place it in the refrigerator for faster setting.
  • Once the fudge has set, cut it into squares and enjoy!

Explore Related: Learn more about avoiding common fudge-making mistakes to ensure success.


Tips for Perfect Fudge Every Time

Making fudge may seem daunting, but with a few key tips, you can ensure that your fudge turns out perfectly every time. Here’s what you need to keep in mind:

  • Stir Constantly: Stirring continuously is crucial when cooking the sugar mixture. This prevents crystallization, which can lead to grainy fudge.
  • Monitor Temperature: While this recipe doesn’t require a candy thermometer, keeping the heat consistent is essential for achieving the right texture.
  • Use High-Quality Ingredients: The type of chocolate you use can significantly impact the flavor of your fudge. Opt for high-quality semi-sweet chocolate chips for the best results.
  • Don’t Rush the Cooling Process: Allow the fudge to cool at room temperature for the best texture. While refrigerating can speed up the process, rapid cooling can sometimes cause the fudge to dry out.

Explore More: Check out our guide on making perfect candies and fudge.


Customizing Your Fudge Recipe: Variations to Try

One of the great things about Mama Dee’s Never Fail Creamy Fudge is its versatility. You can easily customize the recipe to suit your taste or create unique variations for special occasions.

1. Adding Nuts or Dried Fruit

For extra texture and flavor, consider adding chopped nuts such as walnuts, pecans, or almonds. Dried fruit, like cranberries or raisins, can add a chewy sweetness that complements the creamy fudge.

2. Flavored Fudge

You can experiment with different flavorings by adding extracts such as peppermint, almond, or coffee to the mixture. For a holiday twist, try peppermint extract and crushed candy canes.

3. White Chocolate Fudge

For a lighter, sweeter alternative, substitute semi-sweet chocolate with white chocolate chips. This variation results in a creamy, delicate fudge that’s perfect for spring or summer gatherings.

Try More: Explore more fudge recipe variations and how to add flavors.


Frequently Asked Questions About Mama Dee’s Fudge

1. Can I Make Fudge Without Marshmallow Cream?

Marshmallow cream plays a crucial role in this recipe, helping to prevent the fudge from becoming grainy. If you don’t have marshmallow cream, you can substitute it with a homemade version made from marshmallows and corn syrup, though the results may vary.

2. How Long Does the Fudge Last?

When stored in an airtight container, Mama Dee’s Never Fail Creamy Fudge will stay fresh for up to two weeks. For longer storage, you can freeze the fudge for up to three months.

3. Can I Use Different Types of Chocolate?

Absolutely! While the recipe calls for semi-sweet chocolate chips, you can experiment with dark chocolate, milk chocolate, or even white chocolate to create different flavors. Just be aware that the type of chocolate will affect the sweetness and richness of the fudge.

4. What’s the Best Way to Store Fudge?

To keep your fudge fresh and creamy, store it in an airtight container at room temperature. If you live in a particularly warm climate, consider refrigerating the fudge to prevent melting, but be aware that refrigeration can sometimes cause the fudge to lose some of its creaminess.


Why Mama Dee’s Fudge Stands Out

What makes Mama Dee’s Never Fail Creamy Fudge unique is its perfect balance of simplicity and reliability. With just a few ingredients and straightforward steps, this recipe offers a no-fuss way to make homemade fudge that rivals any candy shop’s version. The addition of marshmallow cream ensures that the texture is smooth and creamy every time, while the ability to customize the recipe with nuts, flavors, or different chocolates makes it a versatile go-to treat for any occasion.


Conclusion: Make Mama Dee’s Fudge Your Go-To Recipe

Whether you’re preparing fudge for a family gathering, holiday treat, or just a sweet craving, Mama Dee’s Never Fail Creamy Fudge is a recipe that will never disappoint. Its simplicity and consistency make it a favorite for both novice and experienced bakers. Plus, with endless customization options, you can make this classic fudge recipe your own.

For more dessert inspiration and easy-to-follow recipes, be sure to check out our other guides, including foolproof methods for making candies and confections.

Runza Casserole Recipe: A Hearty Midwestern Comfort Dish

Runza Casserole: A Hearty Midwestern Classic

Few dishes embody Midwestern comfort food like Runza casserole. This delicious and simple-to-make recipe transforms the classic flavors of a traditional Runza sandwich into a baked casserole that the whole family will love. Featuring layers of ground beef, cabbage, and crescent roll dough, this dish is sure to become a staple in your home.

Ingredients for Runza Casserole

  • 1 pound ground beef
  • 1 small onion, diced
  • 1/2 head of cabbage, shredded
  • 1 can of crescent roll dough
  • 2 cups shredded cheddar cheese
  • Salt and pepper to taste
  • 1 tablespoon Worcestershire sauce
  • 1 tablespoon butter

Instructions for Making Runza Casserole

1. Prepare the Ground Beef Filling

In a large skillet, brown the ground beef over medium heat. Add the diced onion and cook until translucent. Stir in the shredded cabbage and cook until the cabbage softens. Season with salt, pepper, and Worcestershire sauce. Remove from heat and set aside.

Suggested Internal Link: If you love ground beef-based recipes, don’t miss out on our Ground Beef Enchilada Casserole for another family favorite that’s quick and easy to make.

2. Assemble the Casserole

Preheat your oven to 375°F. Roll out one can of crescent roll dough and press it into the bottom of a greased 9×13-inch baking dish. Spread the beef and cabbage mixture evenly over the dough. Sprinkle the shredded cheddar cheese on top. Cover with the second can of crescent roll dough.

3. Bake the Casserole

Brush the top layer of crescent roll dough with melted butter. Bake the casserole for 20-25 minutes, or until the dough is golden brown and the cheese is bubbling.

Suggested External Link: For additional tips on baking the perfect crescent rolls, check out this guide on flaky pastry techniques.


Why Runza Casserole is the Perfect Family Meal

Runza casserole has all the elements of a satisfying meal—protein from the ground beef, vegetables from the cabbage, and the comforting flavors of buttery crescent roll dough. It’s a versatile dish that can be made ahead and reheated, making it ideal for busy weeknights or meal prep.

Suggested Internal Link: If you’re looking for more make-ahead meals, try our Crockpot Chicken and Rice for a set-it-and-forget-it dinner solution.

Recipe Variations

  1. Cheesy Runza Casserole: Add extra shredded cheese between the layers of dough for a gooey, cheesy finish.
  2. Spicy Runza Casserole: Add chopped jalapeños or a dash of hot sauce to the beef mixture for a little heat.
  3. Vegetarian Runza Casserole: Substitute the ground beef with a plant-based ground meat alternative and use vegetable broth for seasoning.

Tips for the Perfect Runza Casserole

  • Make sure to cook off any excess moisture from the cabbage to avoid a soggy bottom layer of dough.
  • For a flakier top layer, brush the crescent roll dough with a mixture of melted butter and garlic powder before baking.
  • Let the casserole sit for 5-10 minutes after baking to make slicing and serving easier.

How to Serve Runza Casserole

This hearty casserole can be served as a main dish alongside simple sides like a green salad or steamed vegetables. It’s also great for potlucks or family gatherings where comfort food is always a hit. For an extra touch, serve it with a side of tangy sour cream or mustard for dipping.

Suggested Internal Link: Pair this casserole with our Garlic Roasted Vegetables for a delicious, balanced meal that everyone will love.


Storing and Reheating Runza Casserole

  • Refrigeration: Store leftover casserole in an airtight container in the fridge for up to 4 days.
  • Freezing: Runza casserole freezes well. Simply wrap portions in aluminum foil and place them in freezer bags for up to 3 months.
  • Reheating: Reheat individual portions in the microwave or warm the entire casserole in the oven at 350°F until heated through.

Frequently Asked Questions (FAQs)

Q: Can I make Runza casserole ahead of time?
A: Absolutely! You can prepare the casserole up to the baking step, refrigerate it, and bake it when you’re ready to serve. You can also bake it ahead of time and reheat before serving.

Q: Can I use other vegetables in this casserole?
A: Yes! While cabbage is traditional, you can add shredded carrots, spinach, or mushrooms for additional flavor and nutrition.

Q: What kind of cheese works best in this recipe?
A: Cheddar cheese is a classic choice for its sharp, savory flavor, but mozzarella or Swiss cheese work well too.

Suggested External Link: Looking for more casserole recipes? Visit Best Casserole Dishes for Comfort Food to explore a variety of easy, family-friendly dishes.


Conclusion

Runza casserole is a delightful fusion of hearty beef, tender cabbage, and flaky crescent roll dough, making it the ultimate comfort food. Whether you’re making it for a family dinner or a potluck, this easy casserole will quickly become a go-to recipe.

Suggested Internal Link: For more casserole inspiration, check out our Baked Ziti Casserole, perfect for an Italian twist on classic comfort food.


External Links for Further Reading

  1. Guide to Perfect Crescent Rolls
    Anchor text: perfect crescent rolls
    Link: https://example.com/perfect-crescent-rolls
  2. Best Midwest Casserole Recipes
    Anchor text: Midwest casserole recipes
    Link: https://example.com/midwest-casserole-recipes
  3. Comfort Food Casseroles for Busy Families
    Anchor text: comfort food casseroles
    Link: https://example.com/comfort-food-casseroles