Chicken Tetrazzini: A Creamy, Comforting Pasta Casserole for Any Occasion

creamy chicken casserole, chicken pasta bake, chicken and mushroom tetrazzini, cheesy chicken casserole, baked chicken tetrazzini, easy chicken tetrazzini recipe

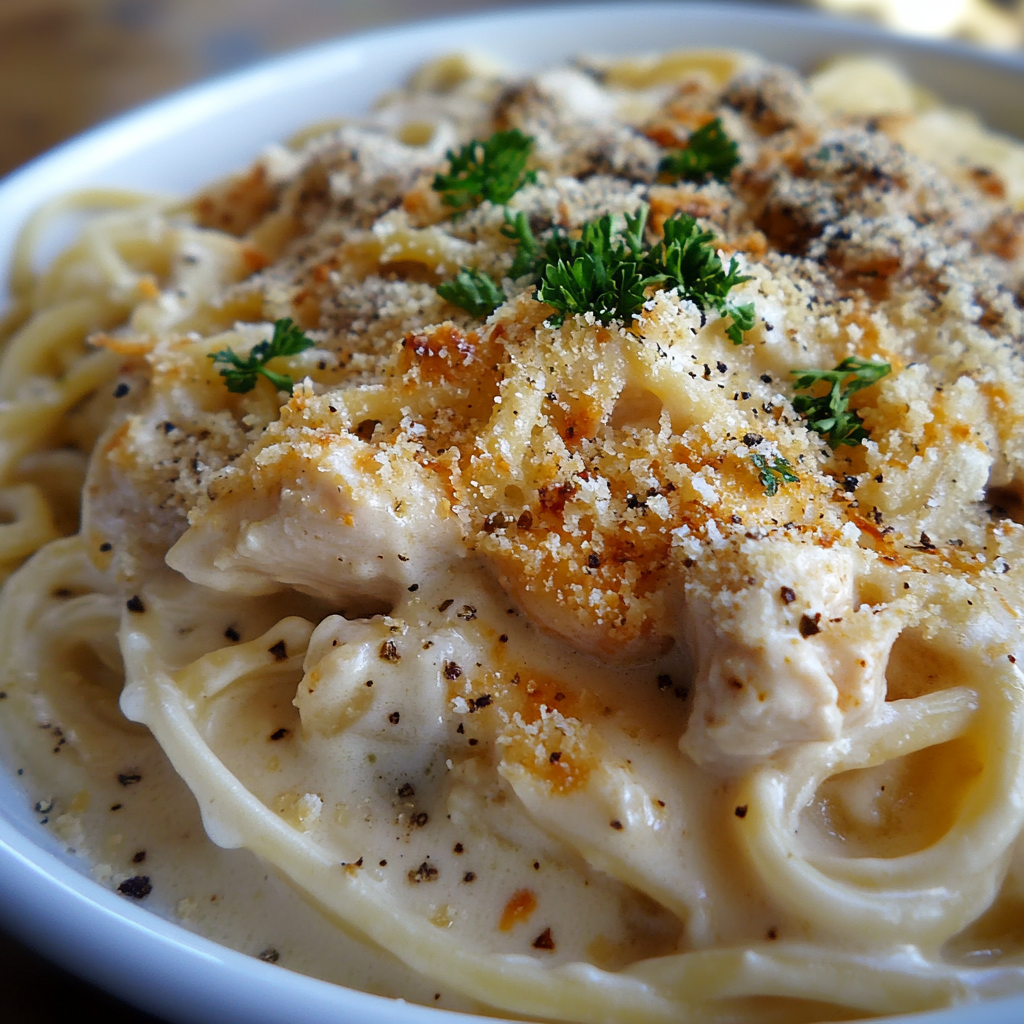
Chicken Tetrazzini: A Creamy Comfort Food Classic

Chicken Tetrazzini is a classic pasta casserole dish that combines tender shredded chicken, creamy sauce, and melted cheese, all baked together for a warm and comforting meal. This dish is a staple in many households because it’s easy to make, customizable, and perfect for feeding a crowd. Whether you’re making it for a family dinner or a potluck, Chicken Tetrazzini never disappoints.

This dish is also incredibly versatile. Not only can you use leftover chicken or turkey, but the combination of creamy sour cream, rich cream of chicken soup, and layers of melted cheese make it a crowd-pleaser. If you’re looking for a classic Chicken Tetrazzini recipe, this Belly Full Chicken Tetrazzini Recipe is a great resource to get started.


Why Chicken Tetrazzini is a Family Favorite

There are several reasons why Chicken Tetrazzini has remained a popular dish for decades:

  • Rich, Creamy Flavor: The combination of cream of mushroom soup, cream of chicken soup, and sour cream creates a luscious sauce that coats the pasta and chicken perfectly.
  • Easy to Customize: This recipe can easily be adapted to your taste preferences. You can use rotisserie chicken, add vegetables like mushrooms or peas, or experiment with different cheeses.
  • Great for Leftovers: Chicken Tetrazzini is also an ideal dish for using up leftover chicken or turkey from previous meals. For those looking for a slightly different take, this Spend With Pennies Easy Chicken Tetrazzini offers another quick and simple approach to this classic dish.

Ingredients for Chicken Tetrazzini

To make the perfect Chicken Tetrazzini, you will need the following ingredients:

  • Chicken: Use pre-cooked, shredded chicken. Rotisserie chicken works perfectly for this dish.
  • Pasta: Thin spaghetti is the traditional pasta used in Tetrazzini, but you can substitute with fettuccine or linguine if preferred.
  • Cream of Chicken Soup and Cream of Mushroom Soup: These canned soups form the base of the sauce, adding creaminess and flavor.
  • Sour Cream: Sour cream adds a slight tang and creaminess that complements the richness of the soups.
  • Cheese: A combination of mozzarella, cheddar, and Parmesan cheeses is used to top the casserole, creating a golden, bubbly crust.
  • Vegetables: Peas, mushrooms, and even carrots can be added for flavor, color, and texture. Frozen peas work best for convenience.
  • Seasonings: Salt, pepper, and garlic powder round out the flavors of the dish.

Step-by-Step Recipe for Chicken Tetrazzini

Follow these steps to create the perfect Chicken Tetrazzini:

Step 1: Cook the Chicken

  • If you’re using raw chicken, cook it in boiling water until it’s fully cooked. Shred the chicken into bite-sized pieces once it has cooled slightly. You can also use leftover chicken or rotisserie chicken to save time.

Step 2: Boil the Pasta

  • Bring a large pot of salted water to a boil and cook the pasta according to package instructions. Be sure to cook the pasta al dente (slightly firm) since it will continue to cook in the oven. Drain the pasta and set aside.

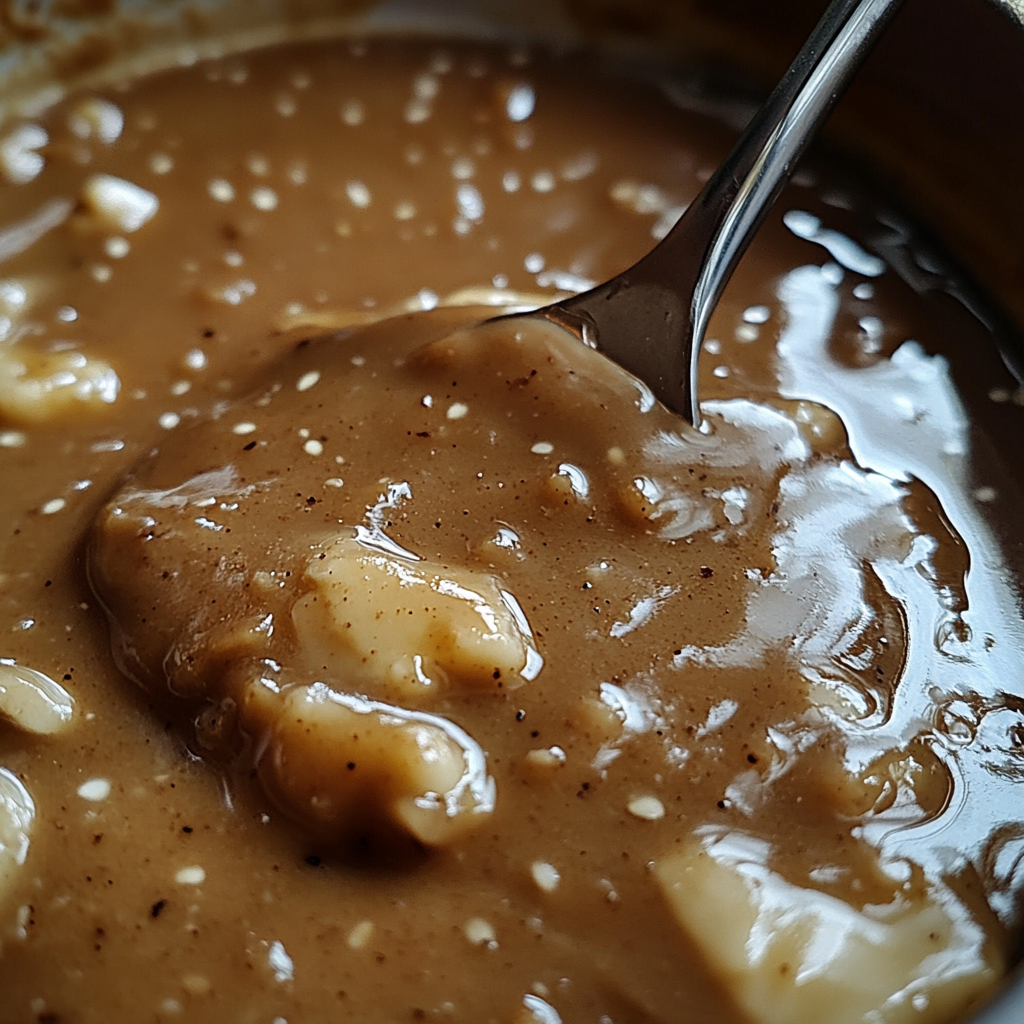
Step 3: Prepare the Sauce

  • In a large mixing bowl, whisk together the cream of chicken soup, cream of mushroom soup, sour cream, melted butter, and chicken broth. Add in the seasonings: salt, pepper, and garlic powder. Stir until fully combined.

Step 4: Combine the Ingredients

  • Gently fold in the shredded chicken, cooked pasta, and peas (if using) into the sauce mixture. Toss everything until the pasta and chicken are fully coated with the sauce.

Step 5: Assemble the Casserole

  • Preheat the oven to 350°F (175°C). Grease a 9×13-inch casserole dish with non-stick cooking spray. Pour the chicken and pasta mixture into the prepared dish, spreading it out evenly.

Step 6: Add the Cheese

  • Sprinkle a combination of mozzarella, cheddar, and Parmesan cheese over the top of the casserole. This creates a golden, cheesy crust as the dish bakes.

Step 7: Bake the Casserole

  • Cover the casserole dish with aluminum foil and bake for 30 minutes. Remove the foil and bake for an additional 15 minutes until the cheese is bubbly and golden brown.

Step 8: Let It Rest and Serve

  • Remove the casserole from the oven and allow it to rest for 5-10 minutes before serving. This helps the sauce to thicken and allows the flavors to meld together.

Recipe Variations for Chicken Tetrazzini

One of the best things about Chicken Tetrazzini is that it’s highly adaptable. Here are a few variations to try:

  • Turkey Tetrazzini: Perfect for using up leftover turkey after Thanksgiving. Substitute the chicken with shredded turkey for a tasty post-holiday meal.
  • Vegetarian Tetrazzini: Skip the chicken and add in sautéed mushrooms, broccoli, and spinach for a veggie-packed version of this casserole.
  • Seafood Tetrazzini: Replace the chicken with shrimp or crab for a seafood-inspired twist.
  • Keto-Friendly Tetrazzini: Swap out the pasta for zucchini noodles or spaghetti squash to make a low-carb version of this creamy dish.

Serving Suggestions for Chicken Tetrazzini

Chicken Tetrazzini is a rich and satisfying dish on its own, but it pairs beautifully with lighter sides. Here are a few ideas:

  • Garlic Bread: Serve with warm, crispy garlic bread to soak up the creamy sauce.
  • Roasted Vegetables: Balance the richness of the dish with simple roasted carrots, broccoli, or asparagus.
  • Simple Green Salad: A crisp green salad with a light vinaigrette is the perfect way to cut through the creaminess of the casserole.

Tips for Perfecting Chicken Tetrazzini

  • Don’t Overcook the Pasta: Be sure to cook the pasta al dente. Overcooked pasta can become mushy after baking.
  • Customize Your Vegetables: Add mushrooms, spinach, or even sun-dried tomatoes to boost the flavor and nutritional value.
  • Add a Crunchy Topping: For a crunchy finish, sprinkle buttered breadcrumbs or crushed Ritz crackers over the cheese layer before baking.
  • Freezer-Friendly: Chicken Tetrazzini freezes well, making it a great option for meal prep. To freeze, assemble the casserole without baking, wrap tightly in foil, and freeze for up to 2 months. When ready to cook, thaw overnight in the fridge and bake as directed.

Frequently Asked Questions (FAQs)

1. Can Chicken Tetrazzini be made ahead of time?

Yes! You can assemble the casserole up to 24 hours in advance. Simply cover it and store it in the fridge, then bake it when ready.

2. Can I freeze Chicken Tetrazzini?

Absolutely. Chicken Tetrazzini is freezer-friendly. Assemble the casserole and freeze it before baking. Thaw overnight in the fridge and bake as directed.

3. What’s the best pasta to use for Chicken Tetrazzini?

Thin spaghetti is traditional, but linguine or fettuccine are great substitutes.

4. Can I make Chicken Tetrazzini without canned soup?

Yes, you can make your own sauce by using a roux of butter, flour, and chicken broth instead of the canned soups.

5. How do I prevent my Chicken Tetrazzini from drying out?

Make sure to cover the casserole with foil while baking to trap moisture. Remove the foil for the last 15 minutes to let the cheese brown.


Conclusion: A Comfort Food Favorite

Chicken Tetrazzini is a classic comfort food that’s rich, creamy, and full of flavor. Whether you’re making it for a family dinner, holiday gathering, or simply as a freezer-friendly meal prep option, this dish is guaranteed to be a hit. The combination of tender chicken, creamy sauce, and melted cheese creates a satisfying meal that everyone will love.

For more inspiration on this comforting dish, check out this AllRecipes Classic Chicken Tetrazzini, which offers a traditional take on this beloved recipe.

Southern Banana Pudding: A Classic Dessert Recipe for Every Occasion

traditional banana pudding, banana pudding recipe, Southern dessert, homemade banana pudding, easy banana pudding, layered banana pudding, vanilla wafer pudding

Southern Banana Pudding: A Classic Dessert That Never Disappoints

When it comes to classic Southern desserts, banana pudding holds a special place in the hearts of many. It’s a staple at family gatherings, potlucks, and holiday celebrations across the South, offering a nostalgic combination of creamy vanilla pudding, ripe bananas, and crunchy vanilla wafers. Whether you’re making it from scratch or using instant pudding for a quick version, this dessert is sure to be a hit with anyone who tries it.

The creamy texture and sweet flavors make this dessert an ideal choice for all occasions. If you’re looking for a quicker version, this Quick Southern Banana Pudding Recipe offers a convenient alternative that still packs all the flavor.


Why Southern Banana Pudding Is a Must-Make Dessert

There are several reasons why Southern banana pudding has stood the test of time:

  • Simplicity: You don’t need a lot of fancy ingredients or complicated techniques to make banana pudding. With just a few basics like bananas, vanilla pudding, and vanilla wafers, you can whip up a dessert that’s both rich and comforting.
  • Crowd-Pleaser: This dessert is loved by both kids and adults. The contrast of creamy pudding, sweet bananas, and crunchy wafers creates a perfect harmony of textures and flavors that appeal to everyone. If you’re planning a gathering or event, banana pudding is a reliable choice that’s sure to be devoured.
  • Nostalgic Comfort: For many Southerners, banana pudding evokes memories of family gatherings and Sunday dinners. The dessert’s connection to tradition and Southern culture makes it more than just a treat; it’s a reminder of home.

For a traditional take on this beloved dessert, you can also explore this Traditional Southern Banana Pudding Recipe, which walks you through every step of creating an authentic, from-scratch version.


Key Ingredients for the Perfect Southern Banana Pudding

Before you get started on making the pudding, it’s important to understand the key ingredients that make this dessert so irresistible:

  • Bananas: Choose bananas that are ripe but firm. Overly ripe bananas can become mushy, while under-ripe bananas lack the sweetness needed for this dessert. For the best results, aim for bananas that have just a few brown spots.
  • Vanilla Pudding: You can use either instant vanilla pudding or make a homemade version. While instant pudding saves time, making the pudding from scratch provides a richer flavor and texture.
  • Vanilla Wafers: Nilla Wafers are the traditional choice for banana pudding. They add a satisfying crunch and eventually soften in the pudding, creating a perfect blend of textures. For a more homemade touch, you can make your own vanilla wafers. Check out this recipe for homemade vanilla wafers if you’re feeling adventurous.
  • Cool Whip or Homemade Whipped Cream: Many modern recipes call for Cool Whip to make the pudding lighter and fluffier, but you can also use homemade whipped cream for a richer finish.

Step-by-Step Recipe for Southern Banana Pudding

Step 1: Prepare the Vanilla Pudding

  • Start by preparing your vanilla pudding. If you’re using instant pudding, whisk the pudding mix with 2 cups of cold milk until it thickens. For a richer flavor, you can reduce the amount of milk slightly. If you’re making the pudding from scratch, follow a traditional custard recipe using egg yolks, sugar, vanilla extract, and milk.

Step 2: Slice the Bananas

  • Peel and slice the bananas into thin rounds. Make sure they are evenly sliced to ensure consistent flavor throughout the dessert.

Step 3: Layer the Vanilla Wafers and Bananas

  • In a large casserole dish, trifle bowl, or individual serving cups, start by adding a layer of vanilla wafers. This will create a crunchy base for the dessert.
  • Add a layer of sliced bananas on top of the wafers.

Step 4: Add the Pudding and Whipped Cream

  • Spread a generous layer of the prepared vanilla pudding over the bananas and wafers. Ensure that the pudding covers the bananas completely to avoid browning.
  • Repeat the layering process until you have used up all the ingredients, making sure the final layer is pudding.

Step 5: Top with Cool Whip and Garnish

  • Add a final layer of Cool Whip or homemade whipped cream on top. Garnish with crushed vanilla wafers for added texture and presentation.

Step 6: Chill Before Serving

  • Refrigerate the pudding for at least 4 hours, or overnight if possible. This allows the flavors to meld together and the wafers to soften slightly, creating the ideal creamy texture.

Recipe Variations for Southern Banana Pudding

This dessert is versatile and can be adapted to suit different tastes and dietary preferences. Here are some fun variations you can try:

  • Traditional Banana Pudding with Meringue
    • Instead of Cool Whip, you can top the pudding with a homemade meringue for a more classic Southern feel. Beat egg whites with sugar until stiff peaks form, then spread the meringue over the pudding and broil for a few minutes until golden brown.
  • Healthier Banana Pudding
    • Swap out full-fat milk for low-fat milk or almond milk and use sugar-free pudding for a lighter version of the dessert. You can also use reduced-fat vanilla wafers.
  • Peanut Butter Banana Pudding
    • Add a layer of peanut butter between the pudding and banana slices for a deliciously indulgent twist. You can also stir peanut butter into the pudding itself for extra flavor.
  • Keto-Friendly Banana Pudding
    • For those following a keto diet, use a sugar-free pudding mix and a low-carb sweetener like Stevia or Monk Fruit. Replace the vanilla wafers with almond flour cookies to keep it low in carbs.

Serving Suggestions and Storage Tips

Southern banana pudding is best served chilled, and it can be a great addition to any dessert table. Here are some serving and storage suggestions to ensure you get the most out of your pudding:

Serving Suggestions

  • Garnish with Fresh Bananas: Before serving, add some freshly sliced bananas on top for a fresh burst of flavor.
  • Serve in Individual Cups: For a more elegant presentation, serve the pudding in individual parfait glasses or mason jars.
  • Top with Toasted Coconut: Add a tropical twist by sprinkling toasted coconut flakes on top of the whipped cream.

Storage Tips

  • Store the banana pudding in the refrigerator for up to 3 days. After that, the bananas may start to brown, and the wafers will become too soft.
  • If you’re preparing the pudding ahead of time for an event, assemble the layers the night before and refrigerate. For best results, add the final garnish of whipped cream and crushed wafers just before serving.

Frequently Asked Questions (FAQs)

1. Can I make banana pudding ahead of time?

Yes, banana pudding can be made the day before and refrigerated overnight. In fact, allowing the pudding to sit for several hours enhances the flavor and allows the wafers to soften to the perfect consistency.

2. What kind of bananas should I use for banana pudding?

Use ripe but firm bananas. Bananas that are too ripe will become mushy, while under-ripe bananas lack sweetness.

3. How can I prevent the bananas from turning brown?

To prevent browning, make sure the bananas are fully covered by the pudding, or lightly coat the banana slices in lemon juice before layering.

4. Can I freeze banana pudding?

It’s not recommended to freeze banana pudding, as the texture of both the bananas and the pudding will be compromised when thawed.

5. Can I use homemade whipped cream instead of Cool Whip?

Yes, homemade whipped cream can be used for a richer and more traditional flavor. Simply beat heavy cream with sugar until stiff peaks form.


Conclusion: A Southern Classic for Every Occasion

Southern Banana Pudding is more than just a dessert—it’s a Southern tradition that brings comfort and joy to any table. Whether you make it with instant pudding for a quick fix or go the extra mile with homemade pudding and wafers, this dessert never disappoints. For those looking for a healthier twist or a richer version, the variations provide endless opportunities to enjoy this beloved dish.

If you’re looking for more inspiration, try this Quick Southern Banana Pudding Recipe for a faster, equally delicious version of the classic dessert.

Sugar-Free Apple Cream Cheese Cake: A Guilt-Free Dessert Delight

sugar-free dessert, low-carb apple cake, sugar-free cheesecake, no-sugar-added apple cake, diabetic-friendly cake, keto apple cream cheese cake

Delicious Sugar-Free Apple Cream Cheese Cake: The Perfect Guilt-Free Dessert

If you’re looking for a dessert that’s both indulgent and healthy, this Sugar-Free Apple Cream Cheese Cake is a perfect choice. It combines the creamy richness of cream cheese, the natural sweetness of apples, and the tangy taste of sugar-free pie filling, making it ideal for anyone on a low-sugar or diabetic-friendly diet. With a fluffy cake base, a smooth cream cheese layer, and a delicious apple topping, this cake offers all the decadence of a traditional cheesecake with none of the guilt.

Sugar-free desserts have grown in popularity as more people seek alternatives to refined sugar. This cake is a great example of how you can enjoy a sweet treat without compromising on flavor. Whether you’re baking for yourself or a crowd, this recipe is sure to impress. For a more classic variation, you might want to explore this Pioneer Woman Sugar-Free Apple Cream Cheese Cake Recipe, which adds an extra layer of traditional flavors to this beloved dessert.


Why Go Sugar-Free with Apple Cream Cheese Cake?

There are many reasons why a sugar-free dessert is appealing:

  • Health Benefits: Reducing your sugar intake can lead to numerous health benefits, including better blood sugar management, weight control, and improved overall well-being. This is particularly important for those managing diabetes or anyone looking to lower their sugar consumption without giving up dessert.
  • Natural Sweetness from Apples: Apples naturally contain sugar, which adds sweetness to the dessert without the need for refined sugars. Using a no-sugar-added apple pie filling allows you to enjoy the flavors of fresh apples while maintaining a low-sugar profile. This Spend With Pennies Low-Carb Apple Dessert also offers a great way to enjoy apples without the sugar overload.

Ingredients for Sugar-Free Apple Cream Cheese Cake

Here’s a breakdown of the key ingredients needed to make this delicious dessert:

  • Sugar-Free Cake Mix: You can either use a store-bought sugar-free cake mix or create your own with almond flour, baking powder, and a sugar substitute like Stevia or Monk Fruit.
  • Neufchatel Cream Cheese: This version of cream cheese is slightly lower in fat compared to regular cream cheese but maintains the same creamy texture and tangy flavor.
  • No-Sugar-Added Apple Pie Filling: It’s crucial to choose a filling that has no added sugars, as this helps keep the dessert diabetic-friendly. You can also make your own filling with fresh apples and a sugar substitute.
  • Eggs and Vanilla Extract: These are essential for binding the ingredients and adding richness to the batter.
  • Natural Sweeteners: If you’re making a homemade sugar-free cake mix, consider using Stevia, Erythritol, or Monk Fruit as a substitute for sugar.

Step-by-Step Recipe for Sugar-Free Apple Cream Cheese Cake

Follow this simple recipe to make the perfect Sugar-Free Apple Cream Cheese Cake:

Step 1: Prepare the Cake Batter

  • In a large bowl, combine the sugar-free cake mix, eggs, water, and vanilla extract. Beat with an electric mixer until the batter is smooth and well-combined.
  • Pour the batter into a greased 9×13-inch baking dish and spread it evenly.

Step 2: Make the Cream Cheese Layer

  • In a separate bowl, beat the Neufchatel cream cheese until smooth. Spread it gently over the top of the cake batter, creating an even layer.

Step 3: Add the Apple Layer

  • Open the can of no-sugar-added apple pie filling and spoon it evenly over the top of the cream cheese layer. For a marbled effect, swirl the apple filling slightly with a toothpick or butter knife.

Step 4: Bake the Cake

  • Preheat the oven to 350°F (175°C) and bake the cake for 40-45 minutes, or until the top is golden brown and the center is set. Allow the cake to cool completely before slicing.

Recipe Variations for Sugar-Free Apple Cream Cheese Cake

This cake is easily adaptable to suit different dietary needs and flavor preferences. Here are some creative variations:

  • Cinnamon Apple Cream Cheese Cake
    Add a teaspoon of ground cinnamon to the cream cheese layer or cake batter for a warm, spiced twist.
  • Keto-Friendly Version
    Substitute the sugar-free cake mix with a keto-friendly cake mix or a combination of almond flour and coconut flour. Use a sugar-free sweetener like Erythritol to keep the cake low in carbs.
  • Gluten-Free Option
    Use a gluten-free cake mix to make this dessert completely gluten-free. You can also make a homemade gluten-free mix using almond flour and baking powder.
  • Dairy-Free Alternative
    Replace the cream cheese with a dairy-free alternative like coconut cream or dairy-free cream cheese to make this recipe suitable for those avoiding dairy.

Serving Suggestions for Sugar-Free Apple Cream Cheese Cake

This cake is best served chilled or at room temperature, depending on your preference. Here are a few ideas to elevate your presentation:

  • Top with Whipped Cream
    Add a dollop of sugar-free whipped cream on each slice for extra richness.
  • Garnish with Cinnamon or Nuts
    Sprinkle some ground cinnamon or chopped pecans over the top for added texture and flavor.
  • Pair with Fresh Berries
    Serve alongside a handful of fresh berries like strawberries or blueberries to add a burst of natural sweetness.

Why This Cake Is a Must-Try

This Sugar-Free Apple Cream Cheese Cake is the perfect dessert for those seeking a healthier alternative to traditional cakes without sacrificing flavor. The natural sweetness of the apples combined with the creamy richness of the cream cheese makes this a satisfying and indulgent treat. Additionally, the sugar-free aspect ensures that everyone, including those with dietary restrictions, can enjoy it guilt-free.


Frequently Asked Questions (FAQs)

1. What is the best sugar substitute for baking cakes?

  • Stevia, Monk Fruit, or Erythritol are excellent substitutes for sugar in baking. These natural sweeteners maintain the sweetness without the added sugar.

2. Can I use fresh apples instead of pie filling?

  • Absolutely! You can slice fresh apples thinly and cook them down with a bit of lemon juice, cinnamon, and your preferred sugar substitute to create a homemade apple filling.

3. Why does my cream cheese layer crack during baking?

  • Cream cheese may crack if it’s overbaked or if the oven temperature is too high. To avoid this, bake at a moderate temperature and keep an eye on the cake towards the end of the baking time.

4. Can I make this cake gluten-free?

  • Yes! Simply use a gluten-free cake mix or almond flour as a base to ensure the cake remains gluten-free.

5. How long does this cake stay fresh?

  • The cake can be stored in an airtight container in the refrigerator for up to 5 days. It can also be frozen for up to 3 months.

Conclusion: A Healthy and Delicious Dessert

This Sugar-Free Apple Cream Cheese Cake strikes the perfect balance between sweet, creamy, and tangy flavors, making it a must-try for any dessert lover. Whether you’re following a low-sugar diet, keto, or just want a healthier option, this cake satisfies without the added sugar. It’s easy to make, highly customizable, and sure to be a hit at your next gathering.

For more sugar-free dessert inspiration, check out this AllRecipes Sugar-Free Cheesecake for another delicious alternative that doesn’t compromise on taste.

Twice Baked Potato Casserole: The Ultimate Creamy and Cheesy Side Dish

loaded potato casserole, cheesy baked potatoes, mashed potato casserole, twice-baked potatoes, baked potato casserole with bacon

The Ultimate Guide to Making Twice Baked Potato Casserole

If you’re looking for the perfect side dish to serve at a family dinner or holiday gathering, Twice Baked Potato Casserole is a sure crowd-pleaser. This creamy, cheesy, and comforting dish takes all the best elements of traditional twice-baked potatoes and turns them into a rich, layered casserole. The dish is packed with fluffy mashed potatoes, savory bacon, and gooey melted cheese, making it the perfect complement to roast meats or as a standalone dish.

Twice Baked Potato Casserole is a staple at many dinner tables because it can be made ahead of time, customized with different ingredients, and appeals to both kids and adults alike. It’s an all-in-one recipe that brings together the best flavors and textures: creamy potatoes, sharp cheddar, smoky bacon, and a crisp golden topping. To get a more unique variation of this dish, you can also check out this Pioneer Woman’s Twice Baked Potato Casserole, which offers an additional layer of comfort food delight.


Why Make a Twice Baked Potato Casserole?

There are many reasons why Twice Baked Potato Casserole is a favorite for family dinners and holiday feasts:

  1. Comfort Food Appeal: This dish has all the comforting flavors of mashed potatoes mixed with melted cheese, crispy bacon, and tangy sour cream. It’s a perfect balance of richness and flavor.
  2. Convenience: Unlike individual twice-baked potatoes, a casserole version is much easier to prepare, especially for large groups. You can even make it ahead of time, refrigerate, and then bake just before serving. For a simplified method, you can look at this Mom On Timeout’s Twice Baked Potato Casserole for a step-by-step guide.
  3. Customizable: Whether you’re adding extra veggies, substituting for a lighter version, or swapping cheeses, the versatility of this casserole makes it a go-to recipe for any occasion.

Ingredients for the Perfect Twice Baked Potato Casserole

Creating the perfect Twice Baked Potato Casserole starts with selecting high-quality ingredients that blend well together. Here’s what you’ll need:

  • Potatoes: Use either Russet potatoes or Yukon Gold for their starchy and fluffy texture. These types of potatoes help create a creamier casserole when baked.
  • Cheese: Sharp cheddar cheese is the classic choice for twice-baked potatoes, but you can mix it with mozzarella or Monterey Jack for more flavor.
  • Bacon: Crispy bacon adds a smoky flavor and a satisfying crunch. Turkey bacon is also a great alternative for those looking to cut back on pork.
  • Sour Cream: Adds tanginess and creaminess to the mashed potatoes.
  • Butter: A generous amount of unsalted butter is needed to make the potatoes rich and creamy.
  • Milk or Heavy Cream: This adds moisture to the mashed potatoes, making them even more velvety.
  • Green Onions: Garnish with green onions for a fresh, sharp flavor that cuts through the richness.

Step-by-Step Recipe for Twice Baked Potato Casserole

Step 1: Prepare the Potatoes

  • Preheat the oven to 400°F (200°C). Wash and scrub your potatoes thoroughly.
  • Pierce the potatoes with a fork and place them directly on the oven rack. Bake for 1 hour or until tender.

Step 2: Scoop and Mash

  • Once the potatoes are baked, let them cool slightly. Slice them in half and scoop out the insides, placing the potato flesh in a large mixing bowl.
  • Mash the potatoes with butter, sour cream, and milk until smooth. Season generously with salt and pepper.

Step 3: Add the Mix-Ins

  • Fold in the cheddar cheese, crispy bacon, and green onions into the mashed potato mixture. Stir until everything is well combined.

Step 4: Assemble the Casserole

  • Grease a large baking dish with butter or cooking spray. Spread the mashed potato mixture evenly in the dish.
  • Top with an additional layer of shredded cheddar cheese and crumbled bacon for a crispy finish.

Step 5: Bake

  • Bake the casserole at 350°F (175°C) for 20-25 minutes, or until the cheese is melted and bubbly.

Step 6: Garnish and Serve

  • Garnish with freshly chopped green onions or parsley for a burst of color and flavor. Serve hot, and enjoy!

Creative Variations of Twice Baked Potato Casserole

Although the classic version is irresistible, there are plenty of ways to customize your Twice Baked Potato Casserole:

  • Loaded Twice Baked Potato Casserole: Add ingredients like sautéed mushrooms, broccoli florets, or even ground beef for a loaded, meal-in-one dish.
  • Vegan Twice Baked Potato Casserole: Swap out the butter, sour cream, and cheese for plant-based alternatives like coconut oil, dairy-free cheese, and cashew cream.
  • Cheesy Twice Baked Potato Casserole: If you love cheese, try mixing in different varieties like Gruyère, Parmesan, or blue cheese to give the dish a gourmet twist.
  • Healthy Version: For a lighter option, substitute Greek yogurt for sour cream, and use turkey bacon or omit it altogether.
  • Spicy Kick: For those who love spice, add diced jalapeños or a dash of cayenne pepper to the potato mixture for a little heat.

Why Twice Baked Potato Casserole Is the Perfect Side Dish

This casserole isn’t just a side dish—it’s a meal in itself. Here’s why it’s perfect for any occasion:

  • Crowd Pleaser: Everyone loves the combination of cheesy, creamy potatoes with crispy bacon.
  • Make-Ahead Option: You can prepare this casserole a day in advance, refrigerate it, and simply pop it in the oven when you’re ready to serve.
  • Versatile: It pairs well with a wide variety of main dishes, from roast beef to grilled chicken and even BBQ ribs.
  • Economical: Potatoes are inexpensive, making this dish budget-friendly without sacrificing flavor or comfort.

FAQs: Twice Baked Potato Casserole

  1. Why are my potatoes gummy after baking?
    • Over-mixing can cause potatoes to become gluey. Make sure to mix just enough to incorporate the ingredients without overworking the potatoes.
  2. Can I freeze Twice Baked Potato Casserole?
    • Yes, you can freeze it before baking. To reheat, let it thaw overnight in the fridge and bake as directed.
  3. What’s the difference between baked potatoes and twice baked potatoes?
    • Regular baked potatoes are served after the first bake, whereas twice-baked potatoes are scooped, mashed, mixed with toppings, and baked again.
  4. Can I use cream cheese in this recipe?
    • Absolutely! Cream cheese can be added to the mashed potatoes for extra richness and creaminess.
  5. Why is my casserole not creamy enough?
    • If your casserole is dry, it’s likely because the potatoes didn’t have enough moisture. Make sure to use enough sour cream, butter, and milk or heavy cream.

Serving Suggestions for Twice Baked Potato Casserole

This dish can easily steal the show, but it pairs beautifully with a wide range of main courses:

  • Roast Chicken or Turkey: Perfect for holiday meals like Thanksgiving or Christmas.
  • Grilled Steak: The creamy potatoes complement the bold flavors of a perfectly grilled steak.
  • Barbecue: Serve alongside BBQ ribs or pulled pork for a hearty meal that will leave everyone satisfied.
  • Salads: Balance the richness of the casserole with a light, fresh salad like a Caesar salad or arugula salad.

Conclusion: Twice Baked Potato Casserole—A Must-Have for Your Next Meal

With its creamy texture, rich flavors, and satisfying combination of ingredients, Twice Baked Potato Casserole is an undeniable winner for any occasion. It’s easy to make, can be customized in numerous ways, and is guaranteed to please a crowd. Whether you’re making it for a holiday dinner or just a casual weeknight meal, this dish is sure to become a family favorite. For even more inspiration, check out this Spend With Pennies Cheesy Potato Casserole to explore another delicious version.

Enjoy serving this comfort food classic that is as versatile as it is tasty, and don’t be afraid to get creative with your additions!

How to Make the Perfect Brown Gravy: A Complete Guide

beef gravy recipe, homemade brown gravy, thick gravy recipe, easy gravy recipe, no-drippings gravy, savory gravy, gravy with broth

How to Make the Perfect Brown Gravy: A Complete Guide

When it comes to elevating any meal, brown gravy is a rich and flavorful sauce that enhances dishes from roasted meats to mashed potatoes. This essential sauce, known for its deep color and savory taste, can be made in different ways depending on the recipe and ingredients available. Whether you’re using beef drippings from a Sunday roast or relying on broth for a quick meal, learning to master the art of making brown gravy is key to perfecting many traditional dishes.

Gravy is an indispensable part of meals like poutine, mashed potatoes, and various cuts of meat. The base of any good brown gravy typically includes a roux made from fat and flour, but there are numerous ways to adapt this versatile recipe. If you don’t have meat drippings on hand, this easy brown gravy recipe is a great guide to creating a delicious sauce with just broth and a few common kitchen ingredients.


Why Brown Gravy Is a Must-Have in Your Kitchen

Brown gravy brings a deep, savory flavor to a wide range of meals. One of the main reasons it’s so popular is its ability to complement and enhance the natural flavors of roasted meats, such as beef, pork, and chicken. In many kitchens, brown gravy is made using the drippings from roasted meats, but the beauty of the recipe lies in its flexibility—you can still create a robust sauce with just broth, bouillon, or a combination of the two.

If you want to take your gravy-making to the next level, consider using a mix of beef broth and chicken broth for a fuller flavor. This combination helps create a balance between the boldness of beef and the lighter flavor of chicken. For more tips on making a flavorful sauce, check out this simple beef gravy recipe without drippings, which provides step-by-step instructions.


Essential Ingredients for Brown Gravy

Before diving into the method, it’s important to understand the core ingredients that make up a rich and flavorful brown gravy. These ingredients are the building blocks of this sauce:

  • Broth: Using a combination of beef and chicken broth is common for balancing out flavor. You can also use vegetable broth for a lighter gravy or bouillon cubes for a more concentrated taste.
  • Fat: Drippings from roasted meats, butter, or oil are used to make the roux, which thickens the gravy.
  • Flour or Cornstarch: These thickeners are key to creating the right consistency. A roux made from fat and flour is more traditional, but a cornstarch slurry is a faster, gluten-free option.
  • Seasonings: Worcestershire sauce, garlic powder, onion powder, and sometimes soy sauce are added to enhance the depth of flavor. Salt and pepper are used to adjust the seasoning, while optional herbs like rosemary or thyme can give the gravy a more aromatic touch.

Step-by-Step Guide to Making Brown Gravy

This method for making brown gravy can be used with or without meat drippings, allowing you to whip up a flavorful sauce no matter what’s in your pantry. Follow these steps for a perfect result:

1. Prepare the Base

  • Combine beef broth and chicken broth in a medium saucepan. If you’re using drippings from roasted meat, add them in now, or substitute with a beef bouillon cube for added flavor.

2. Add Seasonings

  • Stir in Worcestershire sauce, onion powder, and garlic powder. For extra color and flavor, add a few drops of Kitchen Bouquet or Gravy Master.

3. Create the Roux or Slurry

  • Roux Method: Melt butter or use meat drippings in the pan. Add flour and cook, whisking constantly until it turns golden brown.
  • Slurry Method: In a small bowl, mix cold water with cornstarch to form a slurry. Once the broth mixture is simmering, slowly whisk in the slurry to avoid lumps.

4. Let It Thicken

  • Let the gravy simmer and thicken, stirring frequently. For added richness, swirl in a tablespoon of cold butter at the end for a smooth, velvety finish.

5. Adjust Consistency and Seasoning

  • Taste the gravy and adjust seasoning if needed. If the gravy is too thick, you can thin it out by adding more broth. If it’s too thin, let it simmer a bit longer to reduce.

Variations of Brown Gravy

While the classic recipe calls for meat drippings or broth, you can easily modify brown gravy to suit your taste preferences. Here are a few ways to experiment:

  • Mushroom Brown Gravy: Add sautéed mushrooms and onions for an earthy flavor.
  • Herb-Infused Gravy: Incorporate fresh herbs like rosemary, sage, or thyme for a more aromatic touch. This variation pairs wonderfully with roasted meats.
  • Vegan Brown Gravy: Replace the meat-based broth with vegetable broth and use olive oil or a plant-based butter to create a vegan-friendly version.

Serving Suggestions and Pairings

Brown gravy can elevate a variety of dishes, from simple mashed potatoes to more elaborate roasts. Here are some popular ways to serve it:

  • Mashed Potatoes: A classic pairing, brown gravy adds richness to fluffy mashed potatoes.
  • Roast Beef: Use the gravy to enhance the natural juices from the roast, creating a cohesive meal.
  • Poutine: For a Canadian twist, serve the gravy over fries with cheese curds for a traditional poutine.
  • Meatloaf: Drizzle brown gravy over slices of meatloaf for added moisture and flavor.

Frequently Asked Questions (FAQs)

1. What’s the difference between brown gravy and other types of gravy?

  • Brown gravy is made with beef or chicken broth and tends to have a deeper, more savory flavor compared to white gravy, which is typically made with milk or cream.

2. Can I make brown gravy without drippings?

3. How do I thicken my gravy without lumps?

  • To avoid lumps, whisk the flour or cornstarch into cold water before adding it to the hot broth. This ensures a smooth consistency.

4. How long does brown gravy last in the fridge?

  • Brown gravy can be stored in the refrigerator for up to 5 days. To reheat, gently warm it on the stovetop and add a bit of water or broth to loosen it if needed.

5. Can I freeze brown gravy?

  • Yes, brown gravy can be frozen for up to 3 months. Make sure to store it in an airtight container. Thaw in the refrigerator and reheat on the stovetop.

Tips for Perfecting Brown Gravy

Here are some final tips to help you make the best brown gravy possible:

  • Avoid Over-Seasoning: Be mindful when adding salt, especially if you’re using bouillon or soy sauce, as these can already be quite salty.
  • Whisk Constantly: To ensure a smooth consistency, whisk the gravy continuously, especially when adding the roux or slurry.
  • Customize Your Flavor: Don’t be afraid to adjust the seasonings. Add more Worcestershire sauce, soy sauce, or even a splash of red wine for a deeper flavor.

Conclusion: Mastering the Art of Brown Gravy

Brown gravy is an essential part of many comfort foods, from mashed potatoes to roast meats. With just a few ingredients and a little practice, you can create a rich, flavorful sauce that enhances any dish. Whether you’re making it with meat drippings or broth, brown gravy is a versatile sauce that belongs in every home cook’s repertoire. For more inspiration on making gravies, explore this guide on perfecting homemade gravy.