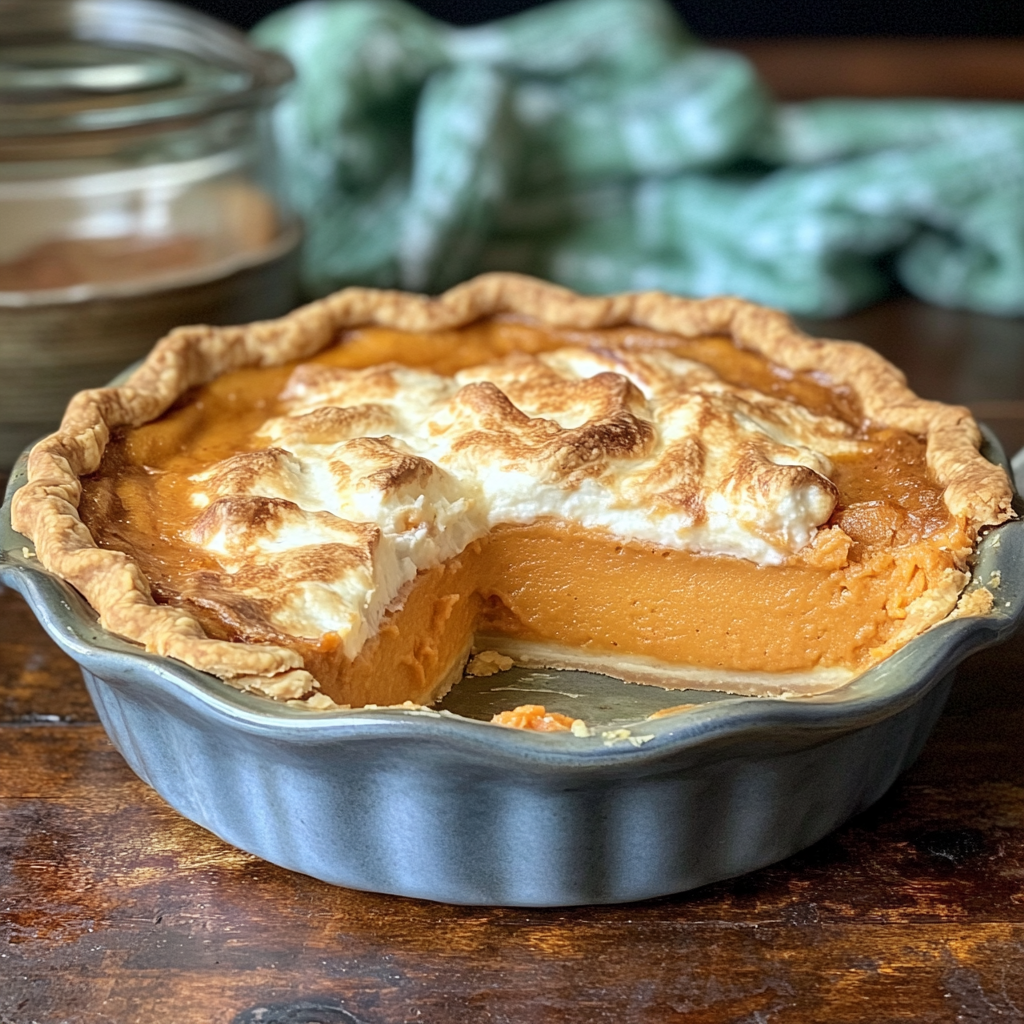
Smothered Chuck Steak Electric Skillet Style: A Hearty, Comforting Meal

smothered chuck steak recipe, electric skillet steak, skillet chuck steak, beef chuck steak, steak with gravy, Southern chuck steak, skillet smothered steak

Smothered Chuck Steak Electric Skillet Style: A Comforting Classic

When you think of hearty, comforting meals, few dishes compare to smothered chuck steak. Cooked in an electric skillet, this classic soul food dish becomes even more convenient, as the skillet allows for even heat distribution, making the meat tender and juicy while creating a rich, savory gravy. If you’re looking for a flavorful, no-fuss meal, this electric skillet version of smothered chuck steak is perfect for family dinners or special occasions.

The use of an electric skillet makes this dish even more accessible for cooks of all skill levels. It’s easy to control the temperature and ensure that the steak cooks evenly, while the gravy comes together right in the same pan, cutting down on cleanup. For more inspiration on similar electric skillet recipes, you can check out Just A Pinch Smothered Chuck Steak Recipe.


Why Chuck Steak is Perfect for Smothering

Chuck steak is a budget-friendly cut of beef known for its rich flavor and tenderness when cooked slowly. When seared and then simmered in a delicious gravy, it becomes melt-in-your-mouth tender. The electric skillet allows for the perfect low-and-slow cooking method, ensuring the steak remains juicy and full of flavor.

  • Affordable and Flavorful: Chuck steak is a more affordable cut compared to ribeye or sirloin, but it doesn’t lack in flavor. When cooked properly, it offers a tender texture and rich, beefy taste.
  • Even Cooking in the Electric Skillet: Using an electric skillet ensures that the heat is evenly distributed, making it easy to avoid burning or undercooking the meat. This also allows the steak to braise in its own juices, resulting in a perfectly tender dish.

For a deeper look into how electric skillets work for braising and other slow-cooking methods, you might also enjoy reading the Serious Eats Guide to Chuck Steak.


Key Ingredients for Smothered Chuck Steak Electric Skillet Style

Here are the essential ingredients you’ll need to make the perfect smothered chuck steak in an electric skillet:

  • Boneless Chuck Steak: Choose chuck steak that’s about 1 inch thick. This cut becomes tender and flavorful after being seared and simmered.
  • Onions and Celery: These vegetables add depth to the gravy and complement the beef’s rich flavor.
  • Olive Oil: Used for searing the steak before it simmers, helping to lock in the juices.
  • Beef Bouillon or Broth: Provides the base for the savory gravy.
  • Cornstarch: Combined with water or milk to thicken the gravy.
  • Milk or Water: Used to make a smooth, rich gravy.
  • Seasonings: Garlic powder, onion powder, salt, pepper, and other spices to enhance the flavor.

Step-by-Step Recipe for Smothered Chuck Steak in an Electric Skillet

Follow these detailed steps to create the perfect smothered chuck steak:

Step 1: Prepare and Season the Steak

  • Wipe the chuck steak dry with paper towels. Season generously with salt, pepper, garlic powder, and onion powder. Let the steak sit for 10 minutes to absorb the flavors.

Step 2: Sear the Steak

  • Preheat your electric skillet to 350°F (175°C) and add a tablespoon of olive oil. Once the oil is hot, add the steak to the skillet. Sear each side for 4-5 minutes until a golden crust forms.

Step 3: Add Vegetables

  • Lower the heat to 300°F (150°C) and add chopped onions and celery to the skillet. Sauté until softened and lightly browned, about 5 minutes.

Step 4: Simmer the Steak

  • Pour in 2 cups of beef broth or dissolve 2 tablespoons of beef bouillon powder in 2 cups of hot water, then pour it over the steak. Cover the skillet and reduce the heat to 275°F (135°C). Let the steak simmer for 1.5 to 2 hours, turning occasionally, until the meat is fork-tender.

Step 5: Make the Gravy

  • Once the steak is tender, remove it from the skillet and set aside. In a small bowl, mix 2 tablespoons of cornstarch with ¼ cup of milk (or water) to create a slurry. Slowly whisk the slurry into the broth in the skillet, stirring constantly to thicken the gravy. Let it simmer for 5-10 minutes, seasoning with salt and pepper to taste.

Step 6: Serve

  • Return the steak to the skillet and spoon the gravy over the top. Serve hot with mashed potatoes or your favorite side dishes.

Recipe Variations for Smothered Chuck Steak

Smothered chuck steak is a versatile dish, and there are many ways to modify it to suit your taste:

  • Mushroom Smothered Chuck Steak
    • Add sliced mushrooms to the skillet along with the onions and celery for an extra layer of flavor. The mushrooms will absorb the savory gravy and complement the richness of the beef.
  • Spicy Smothered Chuck Steak
    • If you prefer a kick of heat, add 1 teaspoon of cayenne pepper or red pepper flakes to the seasoning mix for the steak. This will add a spicy, flavorful twist to the dish.
  • Slow Cooker Variation
    • After browning the steak in the electric skillet, transfer it and the vegetables to a slow cooker. Add the beef broth and cook on low for 6-8 hours. This method will result in an ultra-tender, fall-apart chuck steak.
  • Wine-Infused Gravy
    • Replace ½ cup of the broth with red wine for a richer, more complex gravy. The wine adds depth and enhances the beef’s natural flavors.

Tips for Perfecting Smothered Chuck Steak in an Electric Skillet

Here are some useful tips to ensure your smothered chuck steak turns out perfectly every time:

  • Sear the Steak First: Searing the steak before simmering locks in the juices and creates a flavorful crust. Don’t skip this step!
  • Monitor the Liquid Levels: Keep an eye on the liquid as the steak simmers. Add more broth if necessary to prevent the skillet from drying out.
  • Low and Slow Cooking is Key: Cooking the steak on low heat for an extended period ensures that it becomes tender and absorbs the flavors from the gravy.
  • Use Cornstarch for a Smooth Gravy: When adding the cornstarch slurry, make sure to whisk it in slowly to avoid lumps.

Serving Suggestions for Smothered Chuck Steak

This rich and savory dish pairs beautifully with a variety of side dishes:

  • Mashed Potatoes: Creamy mashed potatoes are the perfect base for soaking up the flavorful gravy from the smothered steak.
  • Green Vegetables: Serve the steak alongside steamed green beans or collard greens to add a fresh, vibrant element to the meal.
  • Buttermilk Biscuits or Cornbread: A side of warm, buttery biscuits or cornbread adds a comforting touch to this hearty meal.

Frequently Asked Questions (FAQs)

1. Can I use a regular skillet instead of an electric skillet?

Yes, you can use a regular skillet on the stovetop, but you’ll need to monitor the heat more carefully. The advantage of an electric skillet is its even heat distribution, making it easier to maintain the perfect temperature.

2. Can I use bone-in chuck steak?

Absolutely! Bone-in chuck steak adds extra flavor to the dish, though it may take slightly longer to cook. Ensure the meat is fully tender before serving.

3. How do I know when the chuck steak is done?

The steak is done when it is fork-tender and pulls apart easily. This usually takes about 1.5 to 2 hours of simmering.

4. Can I add other vegetables to this recipe?

Yes, you can add vegetables like carrots and potatoes for a heartier meal. Add them to the skillet after searing the steak and before adding the broth.

5. Can I make this dish ahead of time?

Yes! Smothered chuck steak can be made ahead of time and reheated. In fact, the flavors deepen over time. Store it in an airtight container in the refrigerator for up to 3 days and reheat on the stovetop.


Conclusion: A Hearty, Flavorful Meal for Any Occasion

Smothered Chuck Steak Electric Skillet Style is a comforting, flavorful meal that’s perfect for family dinners or special occasions. The tender beef, cooked in a rich onion gravy, pairs beautifully with mashed potatoes and vegetables. Whether you’re using an electric skillet or a regular skillet, this recipe is a simple yet satisfying way to enjoy one of the most beloved cuts of beef. For more inspiration on different ways to prepare chuck steak, explore the The Spruce Eats Chuck Steak Recipe.

Grandmother Taylor’s Southern Chess Pie: A Classic Southern Dessert Recipe

Southern chess pie, traditional chess pie recipe, old-fashioned chess pie, classic chess pie, homemade chess pie, easy chess pie recipe, best Southern pies

Grandmother Taylor’s Southern Chess Pie: A Classic Southern Dessert

Grandmother Taylor’s Southern Chess Pie is a nostalgic Southern dessert that has been passed down through generations. With its rich, custard-like filling and simple ingredients, chess pie is the perfect way to end a meal. The subtle crunch from the cornmeal and the smooth texture of the custard create a unique combination that makes this pie stand out among other Southern desserts.

This old-fashioned pie recipe carries with it a sense of history and tradition. Whether you’re preparing it for a special occasion, a family gathering, or simply to enjoy with a cup of coffee, Grandmother Taylor’s Southern Chess Pie delivers a sweet, indulgent experience. For more details on how chess pie became an iconic part of Southern cuisine, you can explore the I Heart Recipes Old-Fashioned Chess Pie Recipe.


Why Chess Pie is a Southern Favorite

Chess pie has earned its place as a beloved Southern dessert for several reasons:

  • Simple Ingredients, Complex Flavor: Made with common pantry staples like eggs, sugar, and butter, chess pie creates a surprisingly rich and flavorful custard. The addition of cornmeal adds a subtle texture that sets it apart from other pies.
  • Timeless Appeal: This pie has been a staple in Southern homes for centuries. With origins dating back to English settlers, the recipe has evolved but still remains true to its roots. The pie’s simplicity and sweet flavor have made it a lasting favorite. For a deep dive into the pie’s history, check out The Washington Post’s story on the origins of chess pie here.
  • Customizable Flavors: While Grandmother Taylor’s recipe is a classic, chess pie can easily be adapted with flavors like lemon, chocolate, or even coconut. Its versatility allows it to suit a variety of tastes and occasions.

Key Ingredients for Southern Chess Pie

Here’s what you’ll need to make the perfect Grandmother Taylor’s Southern Chess Pie:

  • Eggs: Eggs are the foundation of the custard, giving it structure and richness.
  • Granulated Sugar: Sweetens the pie and creates a smooth texture.
  • Cornmeal: Adds a slight crunch and helps the custard set into a perfect, golden-brown crust.
  • Milk or Buttermilk: Used to add richness and creaminess to the filling.
  • White Vinegar: A key ingredient that balances the sweetness and enhances the overall flavor of the pie without being overpowering.
  • Unsalted Butter: Adds a silky texture and richness to the pie.
  • Vanilla Extract: Provides aromatic sweetness and rounds out the flavors.

Step-by-Step Recipe for Grandmother Taylor’s Southern Chess Pie

Follow these steps to make Grandmother Taylor’s Southern Chess Pie:

Step 1: Preheat the Oven

  • Preheat the oven to 325°F (165°C). Roll out a 9-inch pie crust, homemade or store-bought, and press it into a pie dish. Set aside.

Step 2: Mix the Wet Ingredients

  • In a large bowl, whisk together melted butter, granulated sugar, and vanilla extract until well combined. Add the eggs, one at a time, whisking until smooth.

Step 3: Incorporate the Cornmeal and Milk

  • Gradually add the cornmeal and whole milk (or buttermilk) to the mixture. Stir until everything is evenly combined. Lastly, add the white vinegar and whisk again to ensure a smooth filling.

Step 4: Bake the Pie

  • Pour the filling into the prepared pie crust, spreading it evenly. Bake for 60-70 minutes, or until the top is golden brown and the filling is just set. The center should still have a slight jiggle.

Step 5: Cool and Serve

  • Allow the pie to cool completely on a wire rack for at least an hour before serving. The pie will continue to firm up as it cools, resulting in a perfectly set custard.

Recipe Variations for Chess Pie

While the classic version of chess pie is delicious, there are several variations you can explore:

  • Lemon Chess Pie
    • Add ¼ cup of fresh lemon juice and a teaspoon of lemon zest to the filling for a citrusy twist. The tartness of the lemon balances the sweetness of the custard.
  • Chocolate Chess Pie
    • Stir in 2-4 tablespoons of unsweetened cocoa powder to the filling to create a rich, decadent chocolate version of this Southern classic.
  • Coconut Chess Pie
    • Add 1 cup of shredded coconut to the filling for a tropical twist. The coconut adds both flavor and texture to the custard.
  • Brown Sugar Chess Pie
    • Replace half of the granulated sugar with brown sugar for a deeper, caramelized flavor. This version, sometimes called caramel chess pie, has a more complex sweetness.

Tips for Making the Best Southern Chess Pie

Here are a few tips to ensure your chess pie turns out perfectly:

  • Use Room Temperature Ingredients: Using room temperature eggs and butter helps the filling come together smoothly and prevents lumps.
  • Avoid Overbaking: The pie is done when the top is golden brown and the center still has a slight jiggle. Overbaking can result in a dry custard.
  • Cool Completely Before Serving: Letting the pie cool completely ensures that the custard sets properly and slices cleanly.
  • Cornmeal Is Key: The cornmeal in the filling gives chess pie its characteristic texture, so don’t skip this ingredient.

Serving Suggestions for Chess Pie

Chess pie is a rich dessert, and pairing it with lighter elements can enhance the experience:

  • Top with Whipped Cream: A dollop of homemade whipped cream adds a light, airy contrast to the dense custard.
  • Serve with Fresh Berries: Fresh strawberries, blueberries, or raspberries add a pop of tartness and freshness to balance the sweetness of the pie.
  • Pair with Coffee or Tea: The sweetness of chess pie pairs beautifully with a cup of strong, black coffee or a light herbal tea.

Frequently Asked Questions (FAQs)

1. What is the difference between chess pie and buttermilk pie?

Chess pie includes cornmeal in the filling, which gives it a slight texture, while buttermilk pie is creamier and tangier due to the buttermilk. Chess pie is also generally sweeter than buttermilk pie.

2. Can I make chess pie without cornmeal?

Cornmeal is a traditional ingredient in chess pie, but if you don’t have it, you can substitute it with cornstarch or polenta. However, the texture will be slightly different.

3. Can I freeze chess pie?

Yes, chess pie freezes well. After the pie has cooled completely, wrap it tightly in plastic wrap and foil, then freeze for up to 3 months. Thaw in the refrigerator before serving.

4. How do I know when my chess pie is done?

The pie is done when the top is golden brown, and the center is still slightly jiggly. It will firm up as it cools.

5. Can I use a store-bought pie crust?

Yes, using a store-bought pie crust is perfectly fine and saves time. However, making a homemade crust adds a personal touch and can elevate the flavor and texture.


Conclusion: A Timeless Southern Dessert

Grandmother Taylor’s Southern Chess Pie is a timeless dessert that captures the essence of Southern baking. Whether you’re preparing it for a holiday dinner or just as a sweet treat for the family, this pie delivers in flavor and simplicity. With its rich, custard-like filling and a hint of crunch from the cornmeal, this chess pie is sure to become a favorite in your home. For more variations and insights into the history of chess pie, explore the Amish Outlet Store’s Explanation of Pie Chests.

Obie Green’s Smothered Pork Chops: A Soulful Southern Classic

smothered pork chops, Southern pork chops, pork chops with gravy, soul food pork chops, baked smothered pork chops, comfort food pork recipe

Obie Green’s Smothered Pork Chops: A Southern Soul Food Classic

Obie Green’s smothered pork chops are a comforting, flavorful dish deeply rooted in Southern soul food traditions. This iconic recipe has been cherished for generations, combining tender, juicy pork chops with a rich onion gravy. The dish is known for its hearty, satisfying flavors and the way it embodies the essence of Southern home cooking.

Whether you’re preparing a Sunday dinner for the family or looking for a comforting meal during colder months, smothered pork chops are always a crowd-pleaser. Their versatility allows them to be paired with a variety of sides, such as mashed potatoes, collard greens, or cornbread. To explore more traditional variations of this dish, you can check out Just A Pinch Smothered Pork Chops Recipe.


Why Smothered Pork Chops Are a Staple of Soul Food

Smothered pork chops have earned their place as a soul food classic for a few key reasons:

  • Rich and Flavorful: The pork chops are seared to perfection and then slowly baked in a savory onion gravy. The caramelized onions and spices meld together to create a sauce that’s rich and deeply satisfying.
  • Tender, Juicy Pork Chops: Cooking the pork chops slowly in the oven allows them to stay moist and tender, soaking up the flavors of the gravy.
  • Versatile and Customizable: While the classic recipe calls for simple ingredients, smothered pork chops can be adapted with additional flavors such as mushrooms, bacon, or even a dash of cayenne pepper. For a deeper dive into traditional Southern recipes, check out Soul Food and Southern Cooking’s Smothered Pork Chops.

Key Ingredients for Obie Green’s Smothered Pork Chops

To make the perfect Obie Green’s smothered pork chops, you’ll need a few essential ingredients:

  • Bone-In Pork Chops: Center-cut or loin pork chops are ideal for this recipe. Bone-in pork chops tend to have more flavor and retain moisture better than boneless cuts.
  • Onions: Yellow onions are the foundation of the gravy. As they cook down, they caramelize and release their natural sweetness.
  • Pancake Mix or Bisquick: This ingredient is used to coat the pork chops before browning, helping create a crispy, flavorful crust.
  • Flour and Oil: Used to thicken the gravy and give it that smooth, rich texture.
  • Seasonings: A blend of white pepper, salt, and a touch of sugar creates a balanced flavor that enhances the savory notes of the pork and gravy.
  • Boiling Water: Helps the gravy thicken as it simmers over the pork chops, allowing the flavors to blend together beautifully.

Step-by-Step Recipe for Obie Green’s Smothered Pork Chops

Follow these steps to recreate Obie Green’s smothered pork chops at home:

Step 1: Season and Coat the Pork Chops

  • Pat the pork chops dry with paper towels and season generously on both sides with salt and white pepper. Coat the pork chops lightly in pancake mix or Bisquick.

Step 2: Brown the Pork Chops

  • Heat oil in a large skillet over medium-high heat. Brown the pork chops on both sides until golden brown, about 3-4 minutes per side. Once browned, transfer the pork chops to a casserole or baking dish.

Step 3: Prepare the Gravy

  • In the same skillet, add the sliced onions and cook until they soften and begin to caramelize, about 5-7 minutes. Add a little more oil if needed. Stir in flour and cook for 1-2 minutes to eliminate the raw flour taste. Gradually add boiling water, whisking continuously until the gravy thickens.

Step 4: Bake the Pork Chops

  • Pour the onion gravy over the pork chops in the casserole dish. Cover the dish with foil and bake at 350°F for 1 hour and 20 minutes, or until the pork is tender and fully cooked.

Step 5: Serve Hot

  • Remove from the oven and let the pork chops rest for 5-10 minutes. Serve with plenty of gravy spooned over the top.

Recipe Variations for Smothered Pork Chops

While the classic smothered pork chops recipe is delicious on its own, here are a few variations you can try to add your own twist to this traditional dish:

  • Slow Cooker Smothered Pork Chops
    • For an ultra-tender result, prepare the pork chops and gravy as directed, but instead of baking them, transfer everything to a slow cooker. Cook on low for 6-8 hours. This method ensures that the pork becomes melt-in-your-mouth tender.
  • Smothered Pork Chops with Mushrooms
    • Sauté mushrooms along with the onions to add an earthy flavor to the gravy. This variation enhances the richness of the dish.
  • Spicy Smothered Pork Chops
    • Add a pinch of cayenne pepper or paprika to the seasoning mix for a little extra heat. The spice pairs well with the richness of the gravy.
  • Gluten-Free Smothered Pork Chops
    • Substitute the pancake mix and flour with gluten-free alternatives to create a gluten-free version of the dish without sacrificing any flavor.

Tips for Making Perfect Smothered Pork Chops

Here are some tips to help you achieve the best results when making Obie Green’s smothered pork chops:

  • Brown the Pork Chops Thoroughly: A deep, golden-brown sear on the pork chops adds a ton of flavor to the final dish. Don’t rush this step—browning is key to sealing in the juices.
  • Take Your Time with the Gravy: When making the gravy, ensure that you cook the onions and flour long enough for the raw flour taste to dissipate. Slowly whisking in boiling water will help achieve a smooth, rich gravy.
  • Use Bone-In Pork Chops: Bone-in chops tend to have more flavor and stay juicier than boneless chops, making them ideal for this recipe.
  • Rest the Pork Chops After Baking: Letting the pork chops rest for a few minutes after removing them from the oven allows the juices to redistribute, ensuring tender and flavorful meat.

Serving Suggestions for Smothered Pork Chops

Obie Green’s smothered pork chops are rich and flavorful, so they pair beautifully with simple sides that complement the savory gravy:

  • Mashed Potatoes: Creamy mashed potatoes are a classic pairing with smothered pork chops, allowing you to soak up all the delicious gravy.
  • Collard Greens: Serve with collard greens or green beans for a hearty, Southern-style meal.
  • Cornbread: A slice of buttery cornbread is the perfect accompaniment to mop up any extra gravy on the plate.

Frequently Asked Questions (FAQs)

1. Can I make smothered pork chops ahead of time?

Yes, you can prepare smothered pork chops ahead of time. Store them in the refrigerator for up to 3 days. Reheat in the oven or microwave before serving to maintain the tenderness of the pork.

2. What type of pork chops should I use for smothered pork chops?

Bone-in center-cut or loin pork chops are best for this dish, as they retain moisture better during cooking and provide a richer flavor.

3. Can I make this dish in a slow cooker?

Yes, you can prepare the pork chops and gravy in a slow cooker. After browning the chops and preparing the gravy, transfer everything to the slow cooker and cook on low for 6-8 hours.

4. Can I freeze smothered pork chops?

Yes, smothered pork chops can be frozen for up to 3 months. Store in an airtight container and reheat gently on the stove or in the oven when ready to serve.

5. What’s the difference between frying and baking smothered pork chops?

Frying the pork chops helps to sear and lock in flavor, while baking them allows the chops to cook slowly and absorb the flavors of the gravy.


Conclusion: A Soulful Dish to Warm the Heart

Obie Green’s smothered pork chops are the ultimate comfort food, combining tender pork chops with a rich onion gravy. This soul food classic is perfect for a cozy family meal or a special Sunday dinner. Whether you serve it with mashed potatoes, collard greens, or cornbread, this dish is sure to become a favorite in your home. For more smothered pork chop recipes, check out The Spruce Eats Smothered Pork Chops Recipe.

My Mom’s Perfect Thanksgiving Stuffing: A Classic Holiday Recipe

Thanksgiving stuffing, holiday stuffing recipe, classic stuffing, herbed stuffing, best stuffing recipe, turkey stuffing, family stuffing recipe

My Mom’s Perfect Thanksgiving Stuffing: A Classic Family Recipe

Every Thanksgiving, the one dish that stands out on our table is my mom’s perfect Thanksgiving stuffing. It’s a traditional recipe passed down through generations, full of warm flavors and memories. From the savory blend of bread cubes, herbs, and vegetables to the delicious aroma filling the kitchen, this stuffing is the ultimate side dish to accompany the Thanksgiving turkey.

While many Thanksgiving dishes come and go, my mom’s stuffing has become a staple of our holiday meals, earning its rightful place at the center of our table. This stuffing strikes the perfect balance between being flavorful and moist, without being too soggy or dry. If you’re looking for more inspiration to create your version of stuffing, check out this Allrecipes Thanksgiving Stuffing, which provides a traditional take on this holiday classic.


Why This Stuffing Recipe is a Must-Have for Thanksgiving

Stuffing is an essential part of the Thanksgiving meal, and my mom’s version is truly special for a number of reasons:

  • Rich and Savory Flavor: The combination of sautéed vegetables, savory herbs, and chicken broth makes this stuffing rich in flavor. The butter adds a creamy texture that binds everything together.
  • Perfect Balance of Moisture: Achieving the perfect balance of moisture is key to great stuffing. This recipe ensures the bread cubes absorb just the right amount of chicken broth without becoming too soggy. For more traditional variations of stuffing, check out the Jo Cooks Traditional Stuffing Recipe for some additional inspiration.
  • Customizable Ingredients: While my mom’s stuffing follows a classic formula, there are plenty of opportunities to customize it to your taste, whether you prefer adding sausage, dried fruits, or different types of bread.

Key Ingredients for My Mom’s Perfect Thanksgiving Stuffing

Here are the essential ingredients that make this stuffing perfect:

  • Pepperidge Farm Herbed Seasoned Stuffing: This pre-seasoned stuffing mix provides a herby base, adding layers of flavor without too much prep time.
  • Fresh Bread Cubes: Mixing the store-bought stuffing mix with fresh bread cubes gives the stuffing extra texture and a homemade feel. You can use sourdough, French bread, or even cornbread for variety.
  • Onions, Celery, and Green Pepper: These sautéed vegetables add depth of flavor to the stuffing and give it a savory foundation.
  • Butter: Used to sauté the vegetables and moisten the stuffing, butter is essential for achieving the rich flavor and creamy texture that makes this stuffing so delicious.
  • Chicken Broth: Moistens the bread and stuffing mix, ensuring the dish has just the right amount of moisture without being too soggy.
  • Herbs and Seasonings: A combination of poultry seasoning, parsley, oregano, and garlic powder enhances the flavor of the stuffing, giving it an aromatic and savory finish.

Step-by-Step Recipe for My Mom’s Perfect Thanksgiving Stuffing

This easy-to-follow recipe will help you make the perfect stuffing for your Thanksgiving feast:

Step 1: Prepare the Vegetables

  • Dice onions, celery, and green pepper into small, uniform pieces. In a large skillet, melt 4 tablespoons of butter over medium heat. Add the diced vegetables and sauté them until softened and translucent—this should take about 8-10 minutes.

Step 2: Mix the Bread and Stuffing Base

  • In a large mixing bowl, combine Pepperidge Farm herbed seasoned stuffing with fresh bread cubes. This blend of seasoned and fresh bread helps create a balance of flavors and textures.

Step 3: Add Chicken Broth and Seasonings

  • Slowly pour chicken broth over the bread mixture until the cubes are moistened but not too wet. Sprinkle in the poultry seasoning, parsley, oregano, and garlic powder to enhance the flavors.

Step 4: Toss and Mix

  • In a separate small bowl, beat two eggs, then add them to the stuffing mixture. The eggs will help bind everything together. Gently toss the mixture to ensure even distribution of the ingredients.

Step 5: Bake or Stuff the Turkey

  • If you prefer to bake the stuffing separately, transfer it to a buttered baking dish. Bake at 350°F (175°C) for 30-40 minutes, or until the top is golden and crispy. If stuffing the turkey, spoon the mixture loosely into the cavity of the bird and bake according to the turkey’s cooking time.

Recipe Variations for Thanksgiving Stuffing

While the traditional recipe is wonderful on its own, you can easily adapt this stuffing with a few variations to suit your taste:

  • Sausage Stuffing
    • Brown crumbled Italian sausage in a skillet and mix it into the stuffing before baking. The sausage adds a savory, meaty element to the dish that pairs well with the bread and vegetables.
  • Cornbread Stuffing
    • Replace half of the bread cubes with cornbread to give the stuffing a Southern twist. Cornbread adds sweetness and a crumbly texture that contrasts nicely with the herbs and broth.
  • Vegetarian Stuffing
    • Substitute the chicken broth with vegetable broth and add sautéed mushrooms for a vegetarian-friendly stuffing that still packs tons of flavor.
  • Cranberry and Apple Stuffing
    • Add chopped dried cranberries and diced apples to the stuffing for a sweet and savory contrast. This variation works well with turkey and other roasted meats, providing a burst of fruity flavor in each bite.

Tips for Making the Best Thanksgiving Stuffing

Here are a few tips to ensure your stuffing turns out perfectly:

  • Don’t Overmix the Ingredients: Gently toss the bread cubes and stuffing mix to prevent it from becoming mushy. Overmixing can result in a dense and soggy texture.
  • Bake Separately for a Crispy Top: For those who prefer stuffing with a crispy top, bake it in a casserole dish rather than stuffing the turkey. This method allows the stuffing to develop a golden, crunchy crust.
  • Watch the Liquid: Add chicken broth gradually, ensuring that the bread cubes are moistened but not overly saturated. You want the stuffing to have a soft, pillowy texture without being soggy.
  • Use Fresh Herbs for Maximum Flavor: While dried herbs are convenient, using fresh parsley, oregano, and thyme gives the stuffing a vibrant, fresh flavor that enhances the other ingredients.

Serving Suggestions for Thanksgiving Stuffing

Here’s how to serve your stuffing for maximum enjoyment:

  • As a Side Dish: Serve the stuffing alongside roast turkey, mashed potatoes, and gravy for a classic Thanksgiving meal. The rich flavors of the stuffing complement the other holiday dishes perfectly.
  • Leftover Stuffing: If you have leftovers, turn the stuffing into stuffing muffins by scooping portions into a muffin tin and baking until crispy. Alternatively, pan-fry the stuffing for a crispy, savory breakfast hash.
  • Pair with Thanksgiving Favorites: Green bean casserole, sweet potato casserole, and cranberry sauce are all classic side dishes that pair beautifully with this stuffing.

Frequently Asked Questions (FAQs)

1. Can I make this stuffing ahead of time?

Yes! You can prepare the stuffing mixture the day before Thanksgiving and refrigerate it overnight. On the day of, bake the stuffing just before serving to ensure it’s hot and crispy.

2. What is the best bread for stuffing?

A combination of Pepperidge Farm herbed stuffing mix and fresh bread cubes works best. You can use sourdough, French bread, or even white sandwich bread for a variety of textures.

3. How do I keep my stuffing from being dry?

To avoid dry stuffing, make sure to add enough chicken broth to moisten the bread cubes, and cover the baking dish with foil for the first part of the baking time. Uncover it during the last 10 minutes to allow the top to brown.

4. Can I make stuffing without eggs?

Yes, you can omit the eggs. They help bind the stuffing but aren’t essential. Without eggs, the stuffing may be slightly looser in texture but will still taste delicious.

5. What’s the difference between stuffing and dressing?

Stuffing is typically cooked inside the turkey, while dressing is baked separately in a dish. This recipe works for both methods.


Conclusion: A Classic Thanksgiving Tradition

My Mom’s Perfect Thanksgiving Stuffing is more than just a side dish—it’s a family tradition that brings warmth and comfort to the Thanksgiving table. With its perfect blend of savory herbs, tender vegetables, and moist bread cubes, this stuffing is guaranteed to become a beloved part of your holiday meal. For more ideas on crafting the perfect stuffing, check out this Taste of Home Perfect Stuffing Recipe.

Haluski (Cabbage and Noodles): A Hearty and Traditional Comfort Food Recipe

cabbage and noodles, Polish Haluski, Slovak Haluski, fried cabbage noodles, buttery cabbage noodles, traditional Haluski, Eastern European cabbage dish

Haluski (Cabbage and Noodles): A Traditional Comfort Food Dish

Haluski, a classic dish of cabbage and noodles, is a beloved comfort food in Eastern European cuisine. This simple yet flavorful dish consists of fried cabbage, caramelized onions, and egg noodles tossed in butter. Though it’s humble in its ingredients, Haluski packs a satisfying punch of flavor and is a hearty, filling meal perfect for cold weather or casual family gatherings.

In regions like Slovakia, Poland, and Ukraine, Haluski is commonly served as a side dish or a main meal, particularly during Lent. In areas of the United States with a strong Eastern European heritage—like Pittsburgh—this dish has become a popular part of local food culture. For those looking to try an authentic version of this dish, check out the Allrecipes Haluski Recipe for a traditional take.


Why Haluski is So Popular

Several reasons contribute to the enduring popularity of Haluski:

  • Simple Ingredients, Big Flavor: With just a few ingredients—cabbage, noodles, and butter—Haluski delivers a rich, buttery flavor enhanced by the caramelized sweetness of the cabbage and onions.
  • Comfort Food at Its Best: Haluski is warm, satisfying, and sticks to your ribs—making it perfect for cold days or when you’re craving comfort food.
  • Versatility: This dish can be served as a side dish or turned into a hearty main course by adding kielbasa or bacon. For more ideas on different versions of this dish, check out Jo Cooks Haluski Recipe, which provides various ingredient options.

Key Ingredients for Haluski

To create a delicious Haluski, you’ll need a handful of essential ingredients:

  • Cabbage: The star of the dish. Thinly sliced green cabbage is sautéed until caramelized, adding sweetness and depth.
  • Egg Noodles: Traditionally, wide egg noodles are used, as they soak up the buttery sauce and provide a tender, chewy texture.
  • Butter: A generous amount of butter is used to sauté the cabbage and onions, giving the dish its rich flavor.
  • Onions: Sliced onions are caramelized alongside the cabbage, adding sweetness and an extra layer of flavor.
  • Salt and Pepper: Simple seasonings like salt and pepper bring the flavors together.

Step-by-Step Recipe for Haluski

Follow these steps to create a perfect batch of Haluski:

Step 1: Prepare the Cabbage and Onions

  • Thinly slice the cabbage and onions. Heat a large skillet over medium heat and melt 4 tablespoons of butter. Add the sliced onions and sauté until they start to soften and turn translucent.

Step 2: Add the Cabbage

  • Add the sliced cabbage to the skillet with the onions. Stir occasionally and cook until the cabbage is softened and caramelized, about 10-15 minutes. The cabbage should become slightly browned in spots.

Step 3: Cook the Noodles

  • While the cabbage is cooking, bring a large pot of salted water to a boil. Add the egg noodles and cook according to package instructions, until they are al dente. Drain the noodles and set them aside.

Step 4: Combine Noodles with Cabbage and Onions

  • Add the cooked noodles to the skillet with the cabbage and onions. Toss everything together, adding more butter if necessary. Season with salt and pepper to taste.

Step 5: Serve Hot

  • Serve the Haluski immediately, garnished with fresh parsley or a sprinkle of paprika for added color and flavor.

Recipe Variations for Haluski

While the classic Haluski is delicious on its own, there are several variations you can try:

  • Bacon Haluski
    • Add crispy, fried bacon bits to the cabbage and noodles for extra richness and smoky flavor.
  • Haluski with Kielbasa
    • Stir in slices of kielbasa sausage to turn this side dish into a more substantial meal.
  • Vegetarian Haluski
    • Replace the butter with olive oil or a plant-based alternative to create a vegan-friendly version of this dish.
  • Hungarian-Style Haluski
    • Add a pinch of Hungarian paprika to the dish for a slightly smoky and spicy twist.

Serving Suggestions for Haluski

Haluski is a versatile dish that can be served in many different ways. Here are a few serving ideas:

  • Main Course: Serve Haluski as a main dish alongside kielbasa or another type of smoked sausage. The combination of savory sausage and buttery noodles is a perfect pairing.
  • Side Dish: Haluski also works well as a side dish for roasted meats, such as pork loin or grilled chicken. Its rich, buttery flavors complement the heartiness of roasted proteins.
  • Top with Sour Cream: For added richness, serve Haluski with a dollop of sour cream on top. The tanginess of the sour cream cuts through the richness of the butter and adds another layer of flavor.

Tips for Perfecting Haluski

To ensure your Haluski turns out perfect every time, here are a few tips:

  • Caramelize the Cabbage and Onions: The key to a flavorful Haluski is to cook the cabbage and onions slowly until they are soft and caramelized. This adds sweetness and depth to the dish.
  • Don’t Skimp on the Butter: Butter is what gives Haluski its rich, comforting flavor. Make sure to use enough to coat the noodles and cabbage thoroughly.
  • Use Fresh Egg Noodles: For the best texture, use fresh or high-quality egg noodles. Their tenderness and chewiness complement the softness of the cabbage.
  • Add Garlic for Extra Flavor: If you want a more robust flavor, try adding a few cloves of minced garlic to the onions and cabbage while they cook.

Frequently Asked Questions (FAQs)

1. What nationality is Haluski?

Haluski is commonly associated with Slovak, Polish, and other Eastern European cuisines. It has different variations depending on the region but remains a popular comfort food in many countries.

2. Can I make Haluski ahead of time?

Yes, you can make Haluski ahead of time and reheat it when needed. It stores well in the refrigerator and can be reheated in a skillet with a little extra butter to refresh the flavors.

3. Can I freeze Haluski?

While you can freeze Haluski, the noodles may lose some of their texture when reheated. For best results, freeze the cooked cabbage and onions separately and cook fresh noodles when you’re ready to serve.

4. What is the difference between Polish and Slovak Haluski?

The main difference is in the type of noodles used. Polish Haluski typically uses wide egg noodles, while the Slovak version, called Halušky, often uses potato dumplings similar to gnocchi.

5. How do I cut cabbage for Haluski?

Slice the cabbage into thin strips. You can use a sharp knife or a mandoline for even, thin slices that cook evenly.


Conclusion: A Simple, Flavorful Dish for Any Occasion

Haluski (Cabbage and Noodles) is a classic comfort food that’s both simple to make and packed with flavor. Whether you’re enjoying it as a main dish or a side, the buttery noodles, caramelized cabbage, and onions create a dish that’s both satisfying and delicious. For more variations and ideas, check out A Family Feast Haluski Recipe, which offers additional tips for making this traditional dish even more enjoyable.