Boston Cream Pie: A Classic Dessert with a Rich History
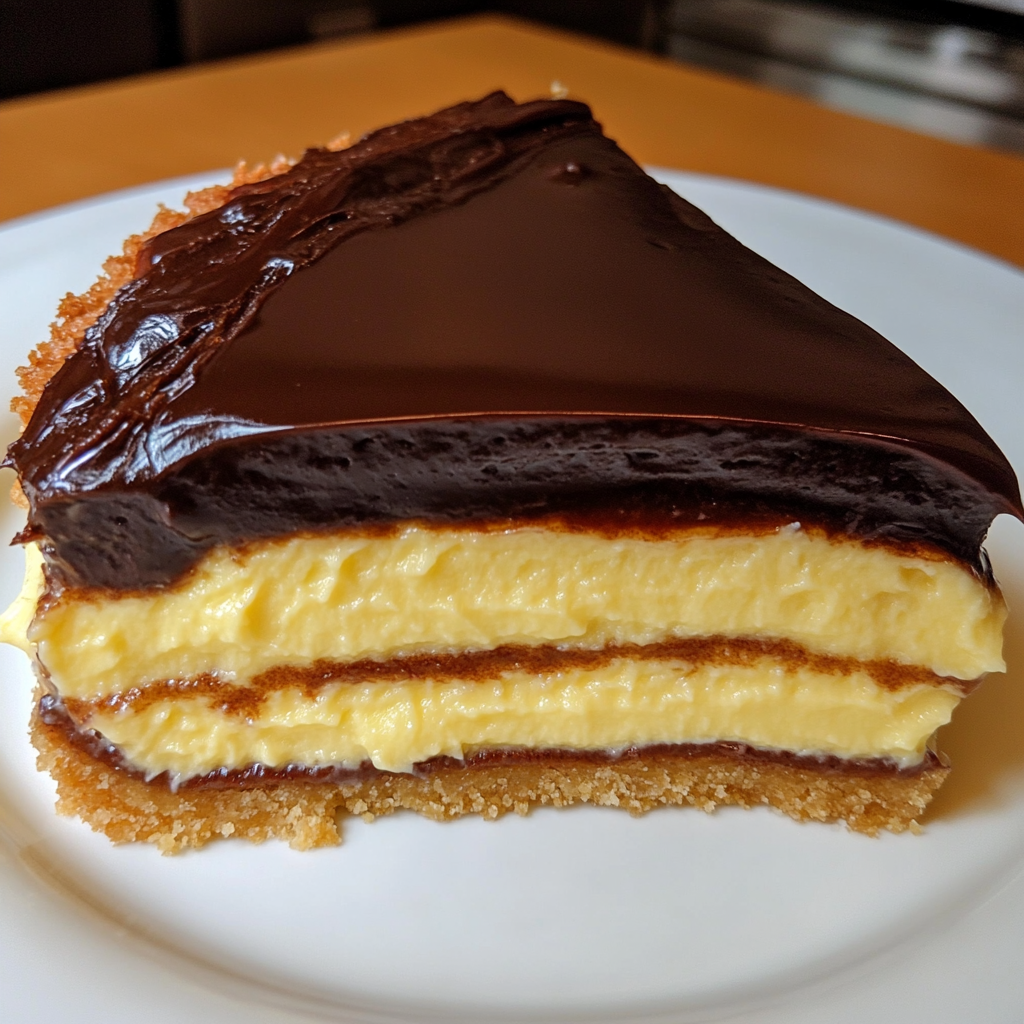
When it comes to classic American desserts, few are as iconic as Boston Cream Pie. This rich and decadent dessert, despite its name, is actually a cake, layered with luscious pastry cream and topped with a smooth, glossy chocolate ganache. The combination of the light and airy sponge cake with creamy custard and a decadent chocolate topping makes it an irresistible treat for dessert lovers everywhere.
Boston Cream Pie has a long history dating back to the 19th century and has since become a favorite in homes and restaurants across the United States. In fact, it is so beloved that it was designated as the official dessert of Massachusetts in 1996.
For those looking to make a Boston Cream Pie from scratch, this comprehensive guide will walk you through each step. If you’re looking for other classic desserts, check out the Taste of Home Boston Cream Pie Recipe for more inspiration.
What Is Boston Cream Pie?
Boston Cream Pie is made up of three key components:
- Sponge Cake: A light, airy cake that forms the base and top layers of the pie.
- Pastry Cream: A rich, creamy custard that sits between the layers of sponge cake.
- Chocolate Ganache: A luxurious chocolate topping made from melted dark chocolate and heavy cream.
Together, these three components create a balanced dessert that is both rich and light, creamy and cakey, with a perfect harmony of flavors.
For another great take on this dessert, check out the AllRecipes Boston Cream Pie, which offers a simple but delicious version of this classic.
Why This Recipe Works
What makes Boston Cream Pie stand out is the delicate interplay between its textures and flavors:
- Airy Sponge Cake: The light sponge cake provides the perfect structure for the rich fillings without being too dense.
- Creamy Custard: The pastry cream adds a smooth, creamy texture that complements the cake’s lightness.
- Rich Chocolate Ganache: The ganache provides a bittersweet contrast to the custard, adding depth to each bite.
Using high-quality ingredients, especially for the ganache, ensures a top-notch dessert that’s perfect for any special occasion.
Step-by-Step Recipe for Boston Cream Pie
This recipe breaks down the process into three main parts: making the sponge cake, preparing the pastry cream, and assembling the cake with the chocolate ganache.
Step 1: Make the Sponge Cake
- Ingredients: 1 cup flour, 1 cup sugar, 4 large eggs, 1 teaspoon vanilla extract, 1 teaspoon baking powder, and ¼ cup milk.
- Instructions:
- Preheat your oven to 350°F (175°C). Grease and line two 9-inch cake pans.
- In a bowl, beat the eggs and sugar until thick and pale. Add the vanilla extract.
- Sift the flour and baking powder into the mixture, folding gently to incorporate.
- Add the milk, folding just until the batter is smooth.
- Divide the batter between the cake pans and bake for 20-25 minutes, or until the cakes are golden and spring back when touched.
- Let the cakes cool completely on a wire rack before proceeding.
Step 2: Prepare the Pastry Cream
- Ingredients: 2 cups milk, ½ cup sugar, ¼ cup cornstarch, 4 large egg yolks, 2 tablespoons butter, and 1 teaspoon vanilla extract.
- Instructions:
- Heat the milk in a saucepan until just simmering.
- In a separate bowl, whisk the sugar, cornstarch, and egg yolks together.
- Slowly pour the hot milk into the egg mixture, whisking constantly to prevent curdling.
- Return the mixture to the saucepan and cook over medium heat, stirring constantly until thickened.
- Remove from heat and stir in the butter and vanilla extract.
- Transfer the pastry cream to a bowl, cover with plastic wrap (pressed directly onto the surface), and chill for at least 2 hours.
Step 3: Make the Chocolate Ganache
- Ingredients: 1 cup dark chocolate, ½ cup heavy cream.
- Instructions:
- Heat the cream in a small saucepan until it just begins to simmer.
- Pour the hot cream over the chocolate in a heatproof bowl. Let it sit for a minute to soften the chocolate.
- Stir until smooth and glossy.
- Allow the ganache to cool slightly before pouring over the assembled cake.
Step 4: Assemble the Boston Cream Pie
- Place one layer of the cooled sponge cake on a serving plate.
- Spread the chilled pastry cream evenly over the cake.
- Top with the second layer of sponge cake.
- Pour the cooled chocolate ganache over the top, allowing it to drip down the sides for a beautiful finish.
- Chill the assembled cake for at least 30 minutes before serving to allow the ganache to set.
Recipe Variations for Boston Cream Pie
- Mini Boston Cream Pies: Create individual-sized cakes by using muffin tins or small cake pans. Fill and top as you would with the traditional version.
- Gluten-Free Boston Cream Pie: Replace regular flour with a gluten-free flour blend to make the sponge cake suitable for gluten-sensitive guests.
- Vegan Boston Cream Pie: Use dairy-free milk, egg substitutes, and vegan chocolate to make a plant-based version of this dessert.
- Boston Cream Pie Cupcakes: Convert the recipe into cupcakes for a fun, handheld version of the classic pie.
Tips for Making the Perfect Boston Cream Pie
- Room Temperature Ingredients: Make sure all ingredients, especially the eggs and butter, are at room temperature before starting. This ensures that the cake batter mixes smoothly and the cake rises evenly.
- Chill the Pastry Cream: Allow the pastry cream to cool completely before assembling the cake. This prevents the cream from becoming too runny and ensures it holds up between the layers.
- Use High-Quality Chocolate: For the best-tasting ganache, opt for high-quality dark chocolate. The rich, bittersweet flavor of the chocolate balances the sweetness of the cake and pastry cream.
Serving Suggestions for Boston Cream Pie
Boston Cream Pie can be served in a variety of ways to suit your preferences:
- Classic Presentation: Serve chilled or at room temperature for a traditional dessert experience.
- With Fresh Berries: Garnish the plate with fresh strawberries or raspberries for a burst of color and freshness.
- As Part of a Dessert Platter: Pair with other classic desserts like lemon bars or tiramisu for a rich, varied dessert offering.
Frequently Asked Questions (FAQs)
1. Why is it called Boston Cream Pie when it’s a cake?
The name comes from the 19th century when pies and cakes were often baked in the same pans. Back then, the term “pie” was more flexible, referring to any dessert baked in a round pan.
2. Can I make the components ahead of time?
Yes! You can bake the sponge cake a day in advance, and the pastry cream can be made up to 2 days ahead. Just store them separately and assemble the pie when ready to serve.
3. What can I use instead of heavy cream for the ganache?
For a dairy-free option, substitute coconut cream for the heavy cream. It will add a slight coconut flavor, which pairs well with the chocolate.
4. Can I freeze Boston Cream Pie?
You can freeze the individual components (sponge cake and pastry cream) separately. However, it’s best to assemble the pie fresh for the best texture and flavor.
5. How do I prevent my sponge cake from deflating?
Be sure to gently fold in the dry ingredients without overmixing. Overmixing can cause the batter to lose air, leading to a denser cake.
Conclusion
Boston Cream Pie is a beloved dessert that combines the best of cake, custard, and chocolate. With its rich history and iconic flavor, it’s no wonder this dessert has stood the test of time. By following this guide, you’ll be able to make a perfect Boston Cream Pie at home, whether you’re preparing it for a special occasion or just because!
For more tips and variations on this classic dessert, be sure to explore Chew Out Loud Boston Cream Pie Recipe.