Easy Chicken Taco Soup: A Flavorful and Hearty Meal for Any Occasion

taco soup with chicken, easy chicken taco soup, creamy taco soup, healthy chicken taco soup, Mexican chicken soup, spicy chicken taco soup

Chicken Taco Soup: A Flavorful and Comforting Dish

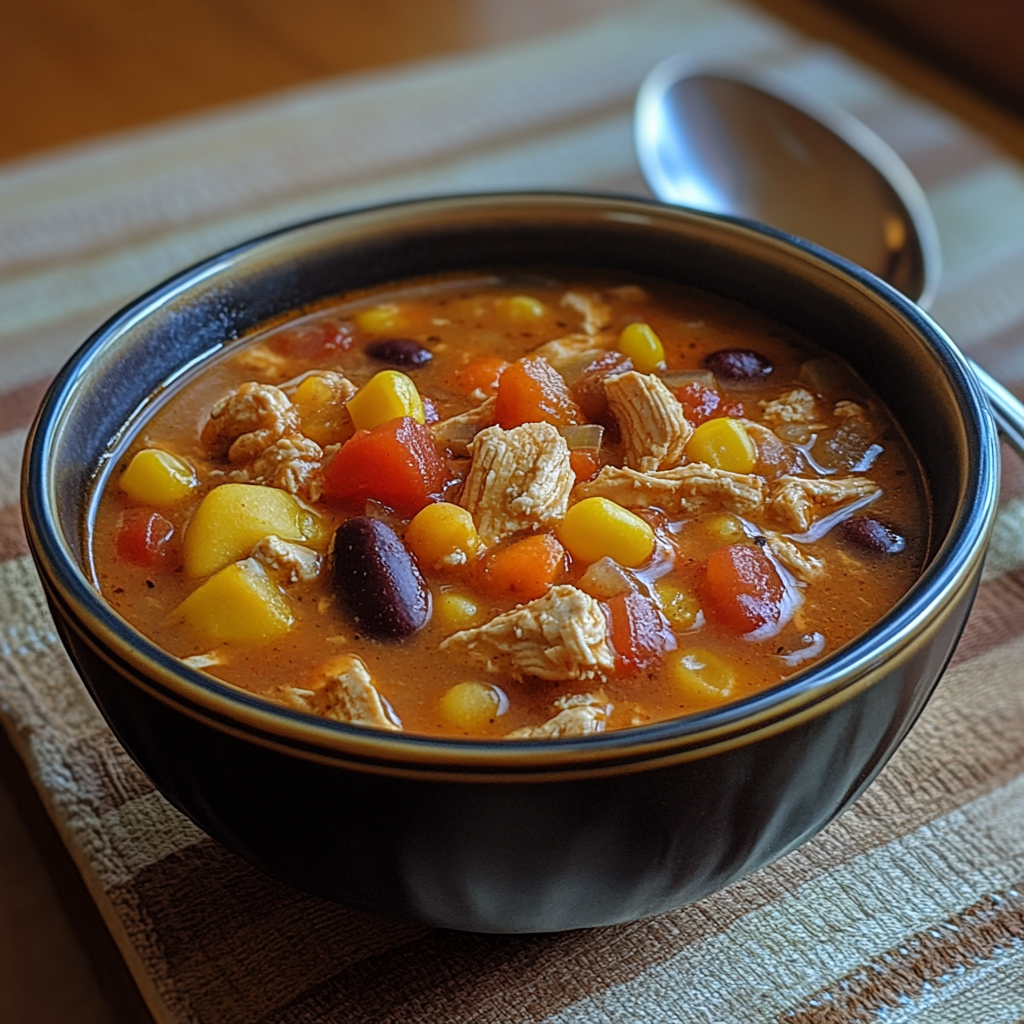
If you’re looking for a delicious and hearty meal that’s easy to make and packed with flavor, Chicken Taco Soup is a perfect choice. This soup combines all the best flavors of tacos—seasoned chicken, beans, tomatoes, and spices—into a warm and comforting dish. It’s versatile, can be customized with your favorite toppings, and is ideal for busy weeknights or meal prep.

Whether you’re preparing it in a slow cooker, Instant Pot, or on the stovetop, this recipe will walk you through each step to create a delicious, satisfying soup that the whole family will love. For a similar recipe with a slightly different twist, check out the AllRecipes Chicken Taco Soup Recipe.


Why Chicken Taco Soup Is a Winner

There are many reasons why Chicken Taco Soup is a favorite among home cooks:

  • Bold, Taco-Inspired Flavors: With the use of taco seasoning, this soup packs a flavorful punch with ingredients like chili powder, cumin, and garlic.
  • Healthy and Hearty: Loaded with lean chicken, beans, and vegetables, this soup provides a nutritious and filling meal.
  • Easy to Prepare: Whether you cook it on the stovetop, in the slow cooker, or with the Instant Pot, it’s simple to throw together with minimal prep.
  • Great for Meal Prep: Make a large batch and store it in the fridge or freezer for easy lunches or dinners throughout the week.

For another variation on this recipe, check out the The Girl Who Ate Everything Chicken Taco Soup.


Key Ingredients for Chicken Taco Soup

The key to making a delicious Chicken Taco Soup lies in the combination of classic taco ingredients with a few extras to create depth of flavor. Here’s what you’ll need:

  • Chicken Breasts: Boneless, skinless chicken breasts work best for this soup, as they become tender and easy to shred once cooked. You can also substitute with chicken thighs for a richer flavor.
  • Taco Seasoning: A blend of chili powder, cumin, paprika, garlic powder, and onion powder gives the soup its signature taco flavor. Store-bought taco seasoning works, but homemade is even better.
  • Canned Tomatoes and Green Chilies: This adds acidity and a bit of heat to the soup. Use fire-roasted tomatoes for a smoky flavor.
  • Beans: Black beans and pinto beans add protein and fiber, making the soup more filling.
  • Corn: Sweet corn complements the spiciness of the soup and adds a touch of sweetness and crunch.
  • Chicken Broth: Forms the base of the soup and enhances the overall flavor. Use low-sodium broth if you prefer to control the salt content.

Step-by-Step Guide to Making Chicken Taco Soup

Step 1: Prep the Ingredients

  • Gather all your ingredients, including chicken, taco seasoning, beans, canned tomatoes, and broth. You can use fresh or canned ingredients for ease of preparation.

Step 2: Cooking Methods

Slow Cooker Method

  • Combine all the ingredients (chicken, taco seasoning, tomatoes, beans, corn, and broth) in the slow cooker.
  • Cook on low for 6-8 hours or on high for 4-5 hours.
  • Once the chicken is tender, remove it from the slow cooker and shred it using two forks. Return the shredded chicken to the soup and stir well.

Instant Pot Method

  • Use the sauté function to cook the onions and garlic until soft and fragrant.
  • Add the remaining ingredients to the Instant Pot and cook on high pressure for 10 minutes.
  • Once done, allow the pressure to release naturally for 10 minutes, then shred the chicken and return it to the soup.

Stovetop Method

  • In a large pot, sauté onions and garlic, then add the rest of the ingredients.
  • Bring the mixture to a boil, then reduce the heat and let it simmer for 25-30 minutes, stirring occasionally.
  • Shred the chicken once it’s fully cooked and return it to the soup.

Recipe Variations for Chicken Taco Soup

While the classic version of Chicken Taco Soup is a hit, you can easily customize it based on your preferences. Here are some variations:

1. Creamy Chicken Taco Soup

  • For a creamier texture, stir in cream cheese, sour cream, or heavy cream at the end of cooking. This creates a richer, more indulgent soup.

2. Vegetarian Taco Soup

  • Simply omit the chicken and add extra beans or a plant-based meat substitute to keep the soup hearty and satisfying. Use vegetable broth instead of chicken broth for a fully vegetarian meal.

3. Spicy Chicken Taco Soup

  • If you like your soup with a bit of a kick, add diced jalapenos, chipotle peppers in adobo sauce, or extra chili powder to the mix.

4. Low-Carb Chicken Taco Soup

  • To make this soup keto-friendly or low-carb, omit the beans and corn. Replace them with extra vegetables like bell peppers, zucchini, or spinach.

For more variations and inspiration, you can explore the Delish Easy Chicken Taco Soup Recipe.


Tips for Making the Best Chicken Taco Soup

Here are some tips to ensure your Chicken Taco Soup turns out perfect every time:

  • Use Fresh Ingredients: Freshly diced tomatoes, onions, and garlic will add a bright flavor to your soup. If you have extra time, consider making your own taco seasoning to enhance the flavor even more.
  • Make a Double Batch: This soup freezes beautifully, so consider making a double batch and freezing half for quick meals in the future. Store the soup in airtight containers for up to 3 months.
  • Adjust the Seasoning: After cooking, taste the soup and adjust the seasonings. You may want to add more salt, pepper, or even a squeeze of lime juice to brighten up the flavors.
  • Control the Spice Level: If you’re cooking for kids or guests who prefer milder flavors, reduce the chili powder or omit the jalapenos. You can always serve with hot sauce on the side for those who like it spicier.

Serving Suggestions for Chicken Taco Soup

Chicken Taco Soup is not just filling; it’s a great canvas for toppings and sides. Here are some ideas:

  • Toppings: Top each bowl of soup with shredded cheddar cheese, a dollop of sour cream, sliced avocado, cilantro, and tortilla chips for extra crunch.
  • Side Dishes: Serve with Mexican rice, cornbread, or a simple green salad to complete the meal.
  • For a Crowd: Double the recipe for gatherings, and set up a soup bar where everyone can customize their bowls with different toppings.

Frequently Asked Questions (FAQs)

1. Can I make Chicken Taco Soup ahead of time?

Yes! You can make this soup up to 3 days in advance. Store it in an airtight container in the refrigerator, and reheat it on the stovetop or in the microwave before serving.

2. Can I freeze Chicken Taco Soup?

Absolutely. Chicken Taco Soup freezes well. Portion it into freezer-safe containers and store it for up to 3 months. To reheat, thaw overnight in the fridge and warm it up on the stove or in the microwave.

3. How do I shred chicken easily for soup?

The easiest way to shred chicken is to use two forks to pull the meat apart. Alternatively, you can place the cooked chicken in a stand mixer with the paddle attachment and mix on low until shredded.

4. Can I make this soup without beans?

Yes, if you prefer a bean-free version, you can simply omit the beans. You can substitute them with more vegetables, such as zucchini, bell peppers, or spinach, to maintain the heartiness of the soup.

5. How can I thicken Chicken Taco Soup?

If you prefer a thicker soup, you can either let it simmer uncovered to reduce the liquid or add a cornstarch slurry (mix cornstarch with water) to the soup as it cooks.


Conclusion

Chicken Taco Soup is a simple yet flavorful dish that’s perfect for any occasion. Whether you’re serving it on a busy weeknight, making it for meal prep, or feeding a crowd, this recipe is versatile and packed with nutritious ingredients. With a balance of spicy, savory, and hearty flavors, it’s a meal everyone will love.

For more variations and soup ideas, check out The Girl Who Ate Everything Chicken Taco Soup and experiment with your own toppings and sides to make it your own.

Grilled Bacon Wrapped Jalapeno Poppers: The Perfect Spicy and Smoky Appetizer

grilled jalapeno poppers, bacon jalapeno snacks, stuffed jalapenos with bacon, low-carb appetizers, spicy grilled appetizers

Grilled Bacon Wrapped Jalapeno Poppers: The Ultimate Party Appetizer

If you’re looking for the perfect finger food for parties, tailgates, or casual gatherings, look no further than bacon wrapped jalapeno poppers. These grilled poppers deliver an irresistible combination of spicy jalapenos, creamy cheese filling, and crispy bacon, all brought together with the smoky flavor from the grill. Whether you’re preparing these for a weekend BBQ or a game-day snack spread, they’re sure to be a crowd-pleaser.

With just a handful of ingredients and a few easy steps, you can make a batch of these poppers in no time. For those who want to enjoy this dish with a slight twist, check out the Delish Grilled Bacon Jalapeno Poppers Recipe for another take on this classic appetizer.


Why Bacon Wrapped Jalapeno Poppers are a Must-Try

The beauty of bacon wrapped jalapeno poppers lies in the balance of flavors:

  • Spice from Jalapenos: Jalapenos bring the heat, but removing the seeds and membranes can help control the spice level, making them customizable for your guests.
  • Creamy Filling: A blend of cream cheese and cheddar provides a creamy, cooling contrast to the spicy jalapenos.
  • Crispy Bacon: Everything tastes better with bacon, and in this recipe, it adds a savory and crunchy texture that ties everything together.
  • Smoky Grilled Flavor: Grilling the poppers adds a smoky depth that enhances all the flavors, making them irresistible.

For an additional grilled popper recipe with slightly different preparation, check out the Spend With Pennies Grilled Bacon Jalapeno Poppers Recipe.


Key Ingredients for Bacon Wrapped Jalapeno Poppers

This recipe is simple and only requires a few basic ingredients:

  • Jalapenos: Fresh jalapenos provide a mild to moderate heat. For extra spice, leave some seeds in, or for a milder version, remove the seeds and membranes.
  • Cream Cheese: The base of the filling, offering a rich and smooth texture.
  • Cheddar Cheese: Adds sharpness to the filling, but you can use pepper jack or Monterey Jack for a different flavor.
  • Bacon: Wraps each jalapeno for a crispy, smoky layer. Thin-cut bacon works best to ensure it cooks fully on the grill.
  • Garlic Powder and Onion Powder: Optional, but these seasonings enhance the flavor of the cheese filling.

Step-by-Step Guide to Making Bacon Wrapped Jalapeno Poppers

Step 1: Prep the Jalapenos

  • Slice the jalapenos lengthwise and scoop out the seeds and membranes using a spoon. Removing the membranes helps reduce the heat, so adjust according to your taste preference.

Step 2: Make the Cheese Filling

  • In a bowl, mix softened cream cheese and shredded cheddar cheese. You can add a pinch of garlic powder or onion powder to enhance the flavor. Stir until smooth and creamy.

Step 3: Stuff the Jalapenos

  • Spoon the cheese mixture into the halved jalapenos, filling them generously but making sure the cheese isn’t overflowing.

Step 4: Wrap with Bacon

  • Cut bacon strips in half, and wrap each stuffed jalapeno with half a strip of bacon. Secure the bacon with a toothpick to keep it in place while grilling.

Step 5: Grill the Poppers

  • Preheat the grill to medium heat. Place the bacon-wrapped jalapenos on the grill, turning them occasionally, for about 15-20 minutes. Grill until the bacon is crispy and the cheese is melted.

Step 6: Serve Hot

  • Remove the poppers from the grill and let them cool slightly. Serve hot with dipping sauces like ranch or blue cheese dressing.

Recipe Variations for Bacon Wrapped Jalapeno Poppers

1. Spicy Poppers

  • Add diced jalapenos or a few drops of hot sauce to the cheese mixture to amp up the heat. This variation is perfect for spice lovers.

2. Cheese Lovers’ Jalapeno Poppers

  • Instead of using just cheddar cheese, try a blend of different cheeses such as Monterey Jack, mozzarella, or pepper jack for added richness and creaminess.

3. Sausage-Stuffed Poppers

  • Cook some Italian sausage or chorizo and mix it into the cream cheese filling for an extra savory twist.

4. Vegetarian Poppers

  • Skip the bacon and instead top the jalapenos with bread crumbs for a crispy texture. Or use plant-based bacon for a vegetarian-friendly version.

Tips for Making the Best Bacon Wrapped Jalapeno Poppers

  • Pre-Cook the Bacon: If you’re worried about the bacon not crisping up on the grill, you can pre-cook it slightly before wrapping the jalapenos. This ensures the bacon crisps fully without overcooking the peppers.
  • Use Gloves: When handling jalapenos, especially if you’re sensitive to spice, wear gloves to avoid irritation from the capsaicin.
  • Secure the Bacon with Toothpicks: Toothpicks are essential to keep the bacon wrapped tightly around the jalapenos during grilling.
  • Adjust the Heat: For milder poppers, remove all the seeds and membranes. If you prefer extra heat, leave some seeds intact.

Serving Suggestions for Bacon Wrapped Jalapeno Poppers

Bacon wrapped jalapeno poppers make an excellent appetizer, but they can also be served alongside other dishes:

  • Game Day Platter: Pair these poppers with Buffalo wings, nachos, and sliders for the ultimate game-day snack platter.
  • Dipping Sauces: Serve with ranch dressing, blue cheese dip, or chipotle aioli for added flavor and to cool down the spice.
  • Low-Carb Side Dish: For those on a low-carb or keto diet, these poppers make a perfect side dish when paired with grilled chicken or steak.
  • Summer BBQ: Serve as part of your BBQ spread alongside grilled meats, salads, and corn on the cob.

Frequently Asked Questions (FAQs)

1. Can I make bacon wrapped jalapeno poppers ahead of time?

Yes! You can prepare the jalapenos up to 24 hours in advance, stuff them, and wrap them with bacon. Store them in an airtight container in the fridge until you’re ready to grill.

2. Can I bake these poppers instead of grilling them?

Absolutely. Preheat your oven to 425°F (220°C), place the poppers on a baking sheet, and bake for 18-23 minutes, or until the bacon is crispy and the cheese is melted.

3. How can I reduce the spiciness of jalapeno poppers?

The heat comes from the seeds and membranes of the jalapenos. Removing them completely will make the poppers much milder. You can also substitute mini sweet peppers for jalapenos if you want a completely mild option.

4. Can I freeze bacon wrapped jalapeno poppers?

Yes, you can freeze the poppers before grilling. Assemble them as instructed, then place them on a tray in the freezer until frozen. Transfer them to a freezer-safe bag. Grill them directly from frozen for 25-30 minutes on medium heat.

5. How long do grilled jalapeno poppers stay fresh?

Leftover poppers can be stored in an airtight container in the fridge for up to 3 days. Reheat them in the oven or air fryer to maintain their crispiness.


Conclusion

Grilled bacon wrapped jalapeno poppers are the perfect addition to any party or casual get-together. They’re easy to make, bursting with flavor, and endlessly customizable. Whether you’re grilling them for game day or serving them at a summer BBQ, they’re guaranteed to be a hit. Plus, with the addition of your favorite dipping sauces and sides, these poppers will disappear in no time!

For more ideas on how to perfect this recipe, check out the AllRecipes Bacon Wrapped Jalapeno Poppers or Spend With Pennies Grilled Bacon Jalapeno Poppers Recipe.

Easy Meat Sauce: A Simple and Delicious Recipe for Pasta and More

simple meat sauce, homemade meat sauce, easy spaghetti meat sauce, ground beef pasta sauce, quick meat sauce, best meat sauce recipe

Easy Meat Sauce: A Perfect Recipe for Busy Weeknights

If you’re searching for a hearty, flavorful sauce that can be whipped up quickly for dinner, look no further than Easy Meat Sauce. Whether you’re planning to serve it over spaghetti, use it in lasagna, or pair it with your favorite vegetable noodles, this versatile sauce is a staple in any kitchen. With just a few basic ingredients—ground beef, tomato sauce, and seasonings—you can create a satisfying meal that will please the whole family.

When it comes to crafting the perfect meat sauce, the key is in the balance of flavors. A rich tomato base combined with savory meat and aromatic herbs creates a dish that’s both delicious and adaptable to a variety of recipes. For another approach to this classic sauce, check out the AllRecipes Easy Meat Sauce Recipe.


Why This Meat Sauce Recipe Works

The beauty of this easy meat sauce lies in its simplicity and versatility:

  • Rich and Savory Flavors: The combination of ground beef with a tomato-based sauce, seasoned with classic Italian herbs like oregano and basil, creates a well-rounded and savory taste.
  • Flexible Recipe: You can easily adapt this sauce to fit your dietary preferences, such as using ground turkey for a leaner option or adding vegetables for a nutritional boost.
  • Meal Prep Friendly: This sauce is perfect for making in large batches and storing in the freezer for future meals.

For a different spin, you might want to explore the Bon Appétit Simple Meat Sauce, which includes additional seasoning options for added depth of flavor.


Key Ingredients for Easy Meat Sauce

Making the perfect meat sauce requires only a few simple, pantry-friendly ingredients. Here’s a breakdown of the main components:

  • Ground Beef: Traditional recipes use ground beef, but you can substitute ground turkey or plant-based meat for a lighter or vegetarian version.
  • Tomato Sauce: Canned tomato sauce and diced tomatoes form the base of the sauce, offering richness and a tangy undertone.
  • Onions and Garlic: These aromatic ingredients provide the depth of flavor that forms the base of the sauce.
  • Italian Seasoning: A mix of oregano, basil, thyme, and parsley brings out classic Italian flavors.
  • Red Wine or Balsamic Vinegar: Optional but highly recommended for adding a deeper, more robust flavor.
  • Olive Oil: Used for sautéing the onions and garlic before adding the meat.

Step-by-Step Guide to Making Easy Meat Sauce

Follow these simple steps to create a delicious meat sauce in no time:

Step 1: Sauté the Aromatics

  • Heat 1-2 tablespoons of olive oil in a large skillet over medium heat. Add one chopped onion and sauté until softened, about 5 minutes. Add 3 cloves of minced garlic and continue to cook for an additional minute until fragrant.

Step 2: Brown the Ground Beef

  • Add 1 pound of ground beef (or substitute ground turkey or a plant-based alternative) to the skillet. Cook, breaking up the meat with a spoon, until it’s browned and fully cooked through.

Step 3: Add the Tomatoes

  • Stir in one 15-ounce can of tomato sauce and one 15-ounce can of diced tomatoes. Mix well to combine the meat with the tomato base.

Step 4: Season the Sauce

  • Add 1 tablespoon of Italian seasoning, 1 teaspoon of salt, ½ teaspoon of black pepper, and a pinch of crushed red pepper flakes for a slight kick. If using, pour in ¼ cup of red wine or balsamic vinegar to deepen the flavor.

Step 5: Simmer the Sauce

  • Reduce the heat to low, cover the skillet, and let the sauce simmer for at least 30 minutes. The longer it simmers, the richer the flavors will become. Stir occasionally to prevent sticking.

Step 6: Taste and Adjust

  • Taste the sauce and adjust the seasoning as needed. If the sauce tastes too acidic, you can add a pinch of sugar to balance it out.

Step 7: Serve or Store

  • Serve the sauce immediately over pasta, or cool it completely before storing in an airtight container. It can be refrigerated for up to 3 days or frozen for up to 3 months.

Recipe Variations for Easy Meat Sauce

This meat sauce recipe is a great base for experimentation. Here are a few ways to switch things up:

Spicy Meat Sauce

  • Add ½ teaspoon of crushed red pepper flakes or chili powder to give the sauce a spicy kick. This version is perfect for pairing with spaghetti or penne.

Garlic Lover’s Meat Sauce

  • Increase the garlic to 5-6 cloves for a bold, garlicky flavor that pairs well with Italian bread or garlic knots.

Vegetarian Meat Sauce

  • Replace the ground beef with plant-based meat or a mixture of finely chopped mushrooms and zucchini for a vegetarian option that’s still hearty and satisfying.

Sausage and Beef Sauce

  • Combine ground Italian sausage with ground beef for a richer, more complex flavor. This combination works especially well in lasagna or baked ziti.

For more creative ideas, you can check out the The Spruce Eats Classic Spaghetti Meat Sauce, which offers additional tips for enhancing your meat sauce.


Tips for Making the Best Meat Sauce

  • Simmer for Depth: The longer you simmer the sauce, the deeper and richer the flavors will become. For the best results, let the sauce simmer for at least 1 hour.
  • Use High-Quality Tomatoes: Opt for San Marzano tomatoes if possible, as they tend to be sweeter and less acidic than regular tomatoes.
  • Balance the Acidity: If your sauce tastes too acidic, add a pinch of sugar or a splash of cream to balance it out.
  • Make a Double Batch: This sauce freezes exceptionally well, so consider making a double batch and freezing half for future meals.

Serving Suggestions for Meat Sauce

This easy meat sauce pairs perfectly with a variety of dishes. Here are some of the best ways to serve it:

  • Over Pasta: The classic option is serving this sauce over spaghetti, fettuccine, or penne. Top with grated Parmesan cheese and fresh basil.
  • In Lasagna: Use this meat sauce as one of the layers in a hearty lasagna, alternating between sauce, ricotta, and mozzarella cheese.
  • With Spaghetti Squash: For a low-carb option, serve the sauce over roasted spaghetti squash for a healthier twist.
  • In Baked Ziti: Mix the sauce with cooked ziti pasta and plenty of cheese, then bake until bubbly and golden for a comforting casserole.
  • Pizza Topping: Spread the sauce on a pizza crust as the base for a meaty pizza topped with mozzarella and your favorite toppings.

Frequently Asked Questions (FAQs)

1. Can I make this meat sauce ahead of time?

Yes, this sauce can be made ahead of time and stored in the refrigerator for up to 3 days. It can also be frozen for up to 3 months for future use.

2. Can I substitute ground turkey or chicken for beef?

Absolutely! You can substitute ground turkey or chicken for beef to make a lighter version of this sauce. Just be mindful of adjusting the seasoning to suit the meat.

3. How can I thicken my meat sauce?

If your sauce turns out too thin, you can simmer it uncovered for an additional 15-20 minutes to reduce the liquid. You can also stir in a tablespoon of tomato paste for added thickness.

4. Can I use fresh tomatoes instead of canned?

Yes, fresh tomatoes can be used, but they may require a longer cooking time to break down and achieve the right consistency. Using Roma or plum tomatoes works best for sauces.

5. What’s the best way to store leftover meat sauce?

Store leftovers in an airtight container in the refrigerator for up to 3 days, or freeze individual portions in freezer-safe bags or containers for up to 3 months.


Conclusion

Easy Meat Sauce is a versatile and flavorful dish that can be made with just a few simple ingredients. Whether you’re serving it over pasta, using it in lasagna, or freezing it for later, this sauce is sure to become a family favorite. By following this guide, you’ll be able to create a rich, savory meat sauce that’s perfect for any meal.

For more ideas and tips, be sure to check out the Bon Appétit Simple Meat Sauce and experiment with different variations to make this recipe your own.

How to Make Shredded Chicken: Easy, Versatile, and Delicious Recipes

easy shredded chicken, shredded chicken recipes, how to shred chicken, chicken breast shredded, pulled chicken, shredded chicken meal prep, tender chicken, shredded chicken for tacos

How to Make Shredded Chicken: A Versatile Kitchen Staple

Shredded chicken is one of the most versatile ingredients you can have in your kitchen. Whether you need a quick protein boost for salads, tacos, sandwiches, or casseroles, this simple and flavorful ingredient fits the bill. It can be made in various ways, including slow cooking, poaching, or using an Instant Pot. Each method results in tender, easy-to-shred chicken that’s perfect for meal prepping or adding to last-minute dinners.

If you’re wondering how to make shredded chicken easily and quickly, this guide will walk you through each method step by step, ensuring your chicken turns out moist, tender, and flavorful every time. You can also check out the Downshiftology Shredded Chicken Recipe for another handy recipe to keep in your repertoire.


Why Make Shredded Chicken at Home?

Making shredded chicken at home comes with a host of benefits:

  • Healthier: You control the ingredients, ensuring no preservatives or high levels of sodium often found in pre-packaged or store-bought shredded chicken.
  • Cost-effective: Buying whole chicken breasts or thighs and making large batches of shredded chicken is often more economical than purchasing pre-shredded meat.
  • Versatile and Meal Prep-Friendly: Shredded chicken can be used in a variety of dishes—everything from salads and tacos to casseroles and sandwiches. It also freezes well, making it an excellent option for meal prep.

Best Cuts of Chicken for Shredding

The most popular cuts of chicken for shredding are chicken breasts and chicken thighs:

  • Chicken Breasts: Boneless, skinless chicken breasts are ideal if you want lean, white meat. They shred easily and can absorb flavors from sauces or broths.
  • Chicken Thighs: Thighs offer darker meat, which tends to be juicier and more flavorful than breasts. Thighs also shred well and are a great option if you prefer a richer taste.

Both cuts are perfect for shredding, and the choice depends on your preference for flavor and texture.

For more guidance on making shredded chicken, check out the Skinnytaste Instant Pot Shredded Chicken, which offers another approach to creating tender shredded chicken.


Step-by-Step Guide to Making Shredded Chicken

Method 1: Stovetop Sauté (Quick and Easy)

This method involves quickly cooking the chicken on the stovetop in broth for a flavorful and moist result.

  • Ingredients: 2 pounds boneless, skinless chicken breasts or thighs, 1 tablespoon olive oil, 1 cup chicken broth, salt and pepper to taste.
  • Instructions:
    1. Heat the olive oil in a large skillet over medium heat.
    2. Season the chicken with salt and pepper, then add to the skillet.
    3. Sear the chicken for 2-3 minutes per side until golden brown.
    4. Pour the chicken broth into the skillet, covering the chicken about halfway.
    5. Cover and simmer for 10-15 minutes until the chicken is fully cooked.
    6. Remove the chicken from the skillet and shred using two forks while still warm.

Method 2: Slow Cooker Shredded Chicken (Hands-Off)

The slow cooker is perfect for making tender, juicy shredded chicken without much effort.

  • Ingredients: 2 pounds chicken breasts or thighs, 1 cup chicken broth, 1 teaspoon garlic powder, 1 teaspoon onion powder, salt and pepper.
  • Instructions:
    1. Place the chicken in the slow cooker.
    2. Add the chicken broth, garlic powder, onion powder, salt, and pepper.
    3. Cover and cook on low for 4-6 hours or on high for 2-3 hours.
    4. Shred the chicken directly in the slow cooker or transfer it to a bowl to shred with two forks.

Method 3: Instant Pot Shredded Chicken (Fast and Flavorful)

If you’re short on time, the Instant Pot is the fastest way to make shredded chicken.

  • Ingredients: 2 pounds chicken breasts, 1 cup chicken broth, salt and pepper.
  • Instructions:
    1. Place the chicken in the Instant Pot and pour the chicken broth over it.
    2. Seal the lid and set the Instant Pot to manual high pressure for 10 minutes.
    3. Once done, allow the pressure to release naturally for 5 minutes, then quick release any remaining pressure.
    4. Remove the chicken and shred using two forks or a stand mixer.

Shredding Techniques

  • Two Forks Method: Place the cooked chicken on a cutting board or in a large bowl. Use two forks to pull the chicken apart into thin, shredded pieces.
  • Stand Mixer Method: Place the cooked chicken in a stand mixer with the paddle attachment. Mix on low for 30-60 seconds until the chicken is shredded to your desired texture.

Recipe Variations for Shredded Chicken

Once you’ve mastered the basics of shredded chicken, try these delicious variations:

Spicy Shredded Chicken

  • Add chili powder, paprika, and sriracha to the broth before cooking for a spicy kick. Perfect for tacos or burritos.

BBQ Shredded Chicken

  • Mix the shredded chicken with your favorite BBQ sauce after cooking to create flavorful BBQ sandwiches or sliders.

Greek-Inspired Shredded Chicken

  • Use lemon juice, oregano, and garlic in the broth for a Mediterranean twist. Great for adding to Greek salads or wraps.

Curry Shredded Chicken

  • Add curry powder and coconut milk to the chicken for a flavorful base for curry bowls or Indian-inspired dishes.

Tips for Making the Best Shredded Chicken

  • Use Broth for Extra Flavor: Cooking the chicken in broth instead of water adds moisture and enhances the flavor.
  • Shred While Warm: It’s easier to shred chicken while it’s still warm. Cold chicken tends to be tougher to pull apart.
  • Store Properly: Shredded chicken can be stored in the refrigerator for up to 4 days or frozen for up to 2 months.
  • Freeze in Portions: Freeze the chicken in portions using freezer-safe bags or containers. This makes it easier to thaw only what you need for future meals.

Serving Suggestions for Shredded Chicken

There are endless ways to incorporate shredded chicken into your meals. Here are a few ideas:

  • In Tacos: Use shredded chicken as a filling for tacos, enchiladas, or quesadillas.
  • On Salads: Top a Caesar salad, cobb salad, or Greek salad with shredded chicken for a protein boost.
  • In Soups and Stews: Add shredded chicken to chicken noodle soup, white chicken chili, or tortilla soup for a hearty meal.
  • In Sandwiches: Make a delicious shredded BBQ chicken sandwich, pulled chicken sliders, or a club sandwich.
  • In Casseroles: Incorporate shredded chicken into casseroles like chicken pot pie, chicken Alfredo bake, or chicken and rice.

Frequently Asked Questions (FAQs)

1. What is the best way to shred chicken?

The easiest way to shred chicken is using two forks or a stand mixer with the paddle attachment. The stand mixer method is faster, especially when shredding large batches.

2. How do I keep shredded chicken moist?

To keep shredded chicken moist, cook it in broth and mix some of the cooking liquid back into the shredded chicken. You can also add a bit of olive oil or sauce to keep it from drying out.

3. Can I freeze shredded chicken?

Yes! Shredded chicken can be frozen for up to 2 months. Make sure to store it in an airtight container or freezer-safe bag, and portion it out before freezing for easy meal prep.

4. Can I use rotisserie chicken to make shredded chicken?

Absolutely. Rotisserie chicken is a convenient option for making shredded chicken quickly. Just remove the skin and bones, and shred the meat with forks.

5. How long can I store shredded chicken in the fridge?

Shredded chicken can be stored in an airtight container in the fridge for up to 4 days. Reheat it in the microwave or on the stovetop before using.


Conclusion

Making shredded chicken at home is incredibly easy and a fantastic way to save time in the kitchen. Whether you choose to sauté it, slow cook it, or pressure cook it, the result is always a tender, flavorful protein that can be used in countless dishes. From salads to tacos to soups, shredded chicken is a true kitchen staple.

For more tips and variations, you can explore the The Kitchn How to Make Shredded Chicken, which offers further insights into preparing this versatile ingredient.

Delicious Ham and Cheese Sliders: Perfect for Parties or Easy Dinners

baked ham and cheese sliders, ham sliders with cheese, Hawaiian roll sliders, easy ham and cheese sandwiches, party sliders, cheesy ham sliders

Ham and Cheese Sliders: The Perfect Snack for Every Occasion

When you’re hosting a party, gathering, or even planning a quick family meal, Ham and Cheese Sliders are a go-to favorite. These delicious little sandwiches are perfect for serving a crowd, whether it’s for a game day, holiday party, or a casual weeknight dinner. What makes them so irresistible is the combination of soft, sweet Hawaiian rolls filled with savory ham and melted cheese, all topped with a flavorful butter sauce that takes these sliders to the next level.

Whether you’re a fan of classic Swiss cheese and ham or want to get creative with different cheeses and toppings, sliders are endlessly versatile. This guide will walk you through the process of making the best Ham and Cheese Sliders, including variations and tips to ensure they come out perfect every time.

If you want more inspiration, check out the Lil’ Luna Easy Ham and Cheese Sliders for another great recipe variation.


Why Ham and Cheese Sliders Are a Hit

What makes Ham and Cheese Sliders stand out from regular sandwiches? It’s the combination of sweet, savory, and buttery goodness packed into each bite. Here’s why:

  • Perfect Balance of Flavors: The sweetness of Hawaiian rolls pairs beautifully with the salty, savory ham and melted cheese.
  • Butter Sauce Magic: A buttery topping infused with Dijon mustard, garlic, and poppy seeds gives these sliders an irresistible flavor.
  • Easy to Customize: You can switch up the ham, cheese, and toppings to create endless variations of sliders.

For a crowd-pleasing twist, you can try the Dinner at the Zoo Ham and Cheese Sliders Recipe for more ideas.


Key Ingredients for Ham and Cheese Sliders

To make the perfect Ham and Cheese Sliders, you only need a few basic ingredients:

  • Hawaiian Rolls: Soft, sweet rolls that hold up well in the oven and balance the savory flavors.
  • Ham: Pre-cooked ham slices work best, and you can use honey ham, smoked ham, or even leftover holiday ham.
  • Cheese: Swiss cheese is the traditional choice, but cheddar, provolone, or mozzarella are excellent alternatives.
  • Butter Sauce: A delicious mixture of melted butter, Dijon mustard, garlic powder, Worcestershire sauce, and poppy seeds.

Step-by-Step Recipe for Ham and Cheese Sliders

Step 1: Prepare the Ingredients

  • Slice one package (12 rolls) of Hawaiian rolls in half horizontally, keeping them attached for easier assembly. Lay the bottom half of the rolls in a greased baking dish.

Step 2: Layer the Ham and Cheese

  • Place 12-16 slices of ham evenly over the rolls, ensuring each slider gets a generous amount of ham. Follow with 12 slices of Swiss cheese or your preferred cheese.

Step 3: Make the Butter Sauce

  • In a small saucepan, melt ½ cup of butter over medium heat. Stir in 1 tablespoon of Dijon mustard, 1 teaspoon of garlic powder, 1 tablespoon of Worcestershire sauce, and 1 tablespoon of poppy seeds. Let the sauce simmer for 1-2 minutes to allow the flavors to meld.

Step 4: Assemble the Sliders

  • Place the top half of the rolls over the ham and cheese layers. Pour the butter sauce evenly over the sliders, using a brush to spread it evenly across the tops of the rolls.

Step 5: Bake the Sliders

  • Cover the baking dish with foil and bake in a preheated oven at 350°F for 15 minutes. Remove the foil and bake for an additional 5 minutes until the tops are golden brown and crispy.

Step 6: Serve

  • Once baked, slice the sliders along the pre-cut roll lines. Serve hot, allowing the melted cheese and buttery sauce to work their magic.

Recipe Variations for Ham and Cheese Sliders

If you want to mix things up, here are a few fun variations:

Spicy Ham and Cheese Sliders

  • Add a layer of sliced jalapeños or use spicy mustard to give your sliders a kick of heat.

Breakfast Sliders

  • Make a breakfast version by layering scrambled eggs, ham, and cheese inside the rolls, and serve with a side of maple syrup for dipping.

Vegetarian Sliders

  • Replace the ham with roasted vegetables like bell peppers, mushrooms, and zucchini for a delicious meat-free option.

Bacon and Ham Sliders

  • For extra richness, add crispy bacon strips alongside the ham for a flavor-packed slider.

For more slider ideas, explore A Southern Soul Best Ham and Cheese Sliders Recipe, which includes a variety of creative spins on this classic.


Tips for Making the Best Ham and Cheese Sliders

  • Use Fresh Rolls: Ensure the Hawaiian rolls are fresh and soft for the best texture.
  • Generous Butter Sauce: Don’t skimp on the butter sauce—it adds a ton of flavor and keeps the rolls moist and flavorful.
  • Make Ahead: You can assemble the sliders a few hours before baking and store them in the refrigerator. Bake them just before serving for fresh, melty sliders.
  • Bake Covered First: Baking with foil ensures the cheese melts evenly, while uncovering at the end gives the rolls a nice golden top.

Serving Suggestions for Ham and Cheese Sliders

Sliders are incredibly versatile and can be served as part of a larger meal or snack spread. Here are some great side dishes to pair with them:

  • Soup and Sliders: Serve with a bowl of tomato soup or chicken noodle soup for a cozy, comforting meal.
  • Salad: A light Caesar salad or garden salad complements the richness of the sliders.
  • Chips and Dips: Serve with potato chips or tortilla chips alongside dips like guacamole, ranch, or honey mustard.
  • Fries: Pair your sliders with crispy French fries or sweet potato fries for a classic game-day combination.

Frequently Asked Questions (FAQs)

1. Can I make Ham and Cheese Sliders ahead of time?

Yes, you can assemble the sliders up to 24 hours in advance. Cover them tightly and store them in the refrigerator. Bake them just before serving for the best results.

2. Can I freeze Ham and Cheese Sliders?

Yes, sliders can be frozen before or after baking. Wrap them in foil and freeze for up to 3 months. To serve, let them thaw in the refrigerator overnight and bake as directed.

3. What other cheeses work well in sliders?

While Swiss cheese is traditional, cheddar, provolone, and pepper jack are excellent alternatives for different flavors. Each cheese melts well and adds a unique twist to the sliders.

4. How do I keep the sliders from becoming soggy?

Avoid adding too much sauce directly to the inside of the rolls, and bake uncovered for the last few minutes to allow the tops to crisp up.

5. Can I make gluten-free Ham and Cheese Sliders?

Yes! Simply swap out the Hawaiian rolls for your favorite gluten-free rolls and use gluten-free mustard and Worcestershire sauce.


Conclusion

Ham and Cheese Sliders are a simple, delicious, and crowd-pleasing dish that’s perfect for any occasion. Whether you’re serving them at a party, as a game-day snack, or for a casual dinner, these sliders always hit the spot. With a soft, buttery roll, savory ham, and gooey melted cheese, it’s hard to resist grabbing seconds—or thirds!

For more variations and ideas on this classic dish, check out the Lil’ Luna Easy Ham and Cheese Sliders or A Southern Soul’s Best Ham and Cheese Sliders.