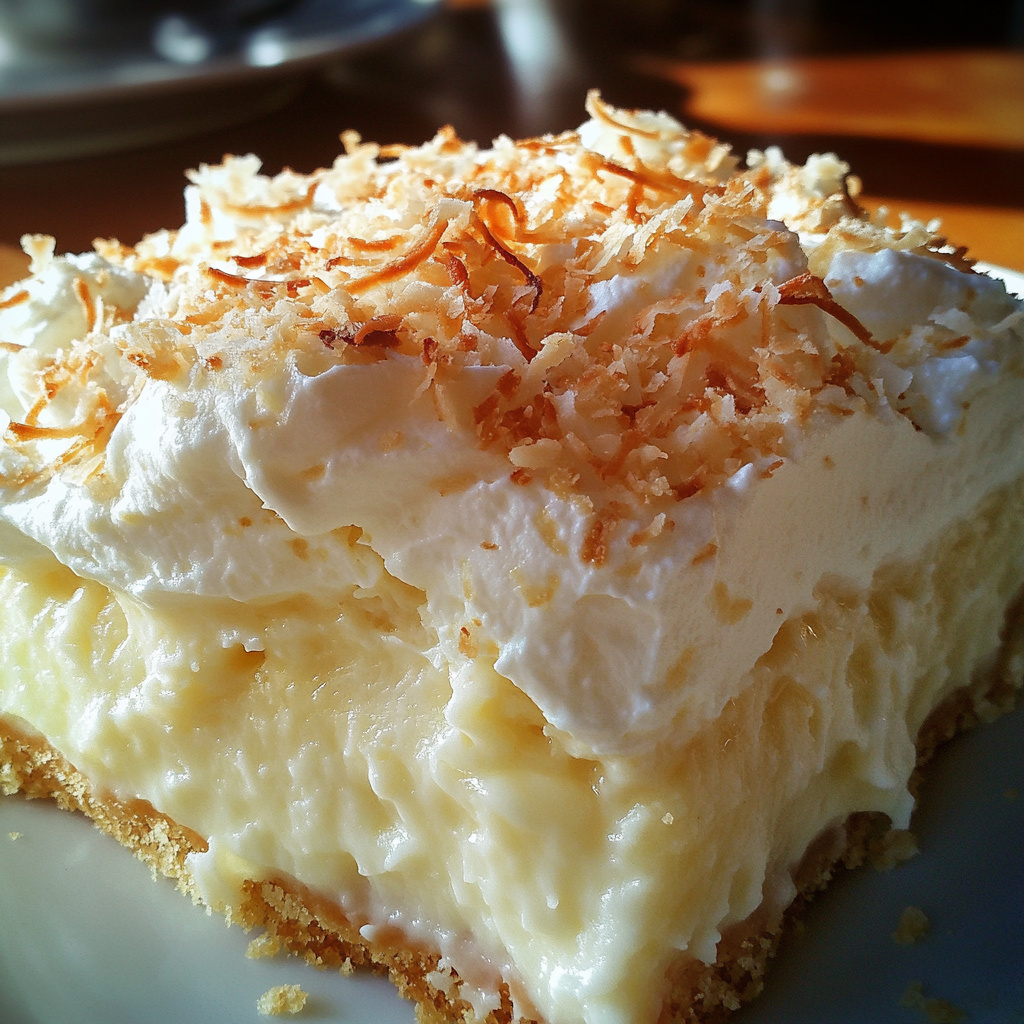
Bridled Noodles: Traditional Pennsylvania Dutch Comfort Food Recipe

buttered noodles, Pennsylvania Dutch noodles, Amish noodles, breadcrumb noodles, egg noodles side dish, baked noodles recipe

Bridled Noodles: A Comforting Pennsylvania Dutch Classic

Bridled noodles are a traditional Pennsylvania Dutch dish that has been passed down through generations, cherished for its simplicity and rich buttery flavor. With just a handful of ingredients—egg noodles, butter, and breadcrumbs—this dish delivers the perfect side for hearty meals, especially when paired with savory gravies, roast chicken, or Thanksgiving turkey. Whether you’re seeking comfort food or a nostalgic addition to your holiday table, bridled noodles offer an easy and affordable option.

For a variation of this dish, you can check out Just A Pinch Bridled Noodles Recipe, which introduces new flavors and cooking techniques.


What are Bridled Noodles?

Bridled noodles derive their name from the Pennsylvania Dutch word meaning “buttered noodles,” and that’s exactly what this dish is. The combination of wide egg noodles cooked to perfection, with a generous amount of butter and crispy breadcrumbs, makes this dish a staple in many homes. Although it’s often served as a side dish, some enjoy it as a standalone meal thanks to its simplicity and satisfying texture.

If you’re interested in learning more about Pennsylvania Dutch cuisine, you can explore additional side dish recipes like AllRecipes Bridled Noodles Recipe.


Key Ingredients for Bridled Noodles

Making bridled noodles requires just a few basic ingredients:

  • Wide Egg Noodles: Traditionally, wide egg noodles are used for their soft texture and ability to absorb butter.
  • Butter: The star of this dish. Using high-quality, salted butter makes a big difference in flavor.
  • Breadcrumbs: Adds a crispy texture to the noodles and absorbs the butter. Italian-style breadcrumbs or homemade breadcrumbs work best.
  • Garlic or Onion Powder: Adds mild seasoning to complement the buttery richness.
  • Gravy (Optional): You can serve these noodles with a side of gravy—either chicken, turkey, or beef—depending on what you pair them with.
  • Salt and Pepper: For seasoning, adjusted to taste.

Step-by-Step Guide to Making Bridled Noodles

Step 1: Boil the Egg Noodles

Start by boiling a large pot of salted water. Add your wide egg noodles and cook them according to the package instructions. Typically, this will take about 8-10 minutes. Once the noodles are tender but not mushy, drain the water, but do not rinse the noodles, as the residual starch will help absorb the buttery goodness.

Step 2: Butter the Noodles

After draining the noodles, return them to the pot while they’re still hot. Add ¾ of a stick of butter to the noodles and gently stir until the butter melts and coats all of the noodles evenly. Be careful not to break the noodles while stirring.

Step 3: Prepare the Breadcrumb Mixture

In a separate skillet, melt the remaining butter and mix it with your breadcrumbs. Add in garlic powder or onion powder for flavor. Stir the breadcrumbs until they are fully coated in butter and become golden and crispy.

Step 4: Layer the Noodles and Breadcrumbs

Now it’s time to layer the dish. In a casserole or baking dish, add one-third of the buttered noodles, then sprinkle one-third of the buttered breadcrumb mixture over the top. Repeat this process two more times until you have three layers of noodles and breadcrumbs.

Step 5: Bake the Noodles

Preheat the oven to 350°F (175°C). Cover the casserole dish with foil and bake for about 30-40 minutes. Remove the foil during the last 5 minutes of baking to allow the breadcrumbs to crisp up even more under the broiler. Keep a close eye on the dish during this time to prevent burning.

Step 6: Serve with Gravy (Optional)

Once the noodles are baked and golden, remove them from the oven and allow them to rest for 10 minutes. Bridled noodles are typically served with a ladle of gravy on top or as a side to roasted meats. You can also enjoy them on their own for a lighter meal.


Recipe Variations

1. Cheesy Bridled Noodles

For a rich, indulgent version, add shredded cheddar cheese or Parmesan between the layers of noodles and breadcrumbs. This gives the dish a creamy texture that pairs beautifully with the crispy breadcrumbs.

2. Vegetable-Loaded Bridled Noodles

Add some nutrition by incorporating vegetables like peas, spinach, or mushrooms. You can sauté the vegetables before mixing them with the noodles for added flavor. This variation makes the dish suitable as a standalone meal.

3. Herbed Bridled Noodles

If you want to add some freshness and aroma, mix in fresh parsley, thyme, or oregano with the butter and breadcrumbs. This variation adds a herbal note to balance the richness of the butter and breadcrumbs.

4. Garlic Butter Noodles

For garlic lovers, increase the garlic flavor by using freshly minced garlic in the butter instead of garlic powder. The fresh garlic will infuse the noodles with a more robust flavor.


Tips for Making the Best Bridled Noodles

To ensure that your bridled noodles turn out perfectly every time, keep the following tips in mind:

  • Use Fresh, Wide Egg Noodles: These noodles hold up better to the butter and breadcrumbs and give the dish its signature texture.
  • Butter Quality Matters: Since butter is one of the primary ingredients, using high-quality butter makes a noticeable difference in taste.
  • Crisp the Breadcrumbs: Don’t skip the broiling step at the end—it adds a delightful crispiness to the top layer of the dish.
  • Serve Immediately: For the best flavor and texture, serve the noodles as soon as they come out of the oven. They will lose their crispiness if left to sit for too long.

Serving Suggestions for Bridled Noodles

Bridled noodles are incredibly versatile and can be served in various ways:

  • As a Side for Roasted Meats: This dish pairs beautifully with roast chicken, pork chops, or Thanksgiving turkey. The butter and breadcrumbs complement the savory meat and gravy.
  • With Vegetables: Serve alongside green beans, roasted carrots, or broccoli for a balanced meal. The richness of the noodles contrasts well with the freshness of vegetables.
  • On Their Own: If you’re in the mood for a simple comfort meal, enjoy bridled noodles as a standalone dish with a side of gravy.

Frequently Asked Questions (FAQs)

1. Can I make bridled noodles ahead of time?

Yes, you can prepare the noodles and breadcrumb mixture ahead of time. Assemble the casserole, cover it, and store it in the refrigerator until you’re ready to bake. Just be sure to bake it fresh for the best texture and flavor.

2. Can I use regular pasta instead of egg noodles?

While wide egg noodles are traditional for this dish, you can substitute other types of pasta, such as fettuccine or pappardelle. However, the texture and flavor will differ slightly.

3. Can I freeze bridled noodles?

Bridled noodles are best enjoyed fresh, but you can freeze them before baking. Assemble the casserole, cover it tightly, and freeze it for up to 3 months. When you’re ready to serve, thaw it in the fridge overnight and bake as directed.

4. What can I do to make this dish healthier?

To make bridled noodles lighter, you can reduce the amount of butter and use whole wheat noodles. Adding vegetables like spinach or peas also boosts the nutritional value.

5. What’s the origin of bridled noodles?

Bridled noodles have roots in Pennsylvania Dutch cuisine, where simple, hearty, and cost-effective dishes were favored. This recipe is often passed down through generations and is a staple at family gatherings and holidays.


Conclusion

Bridled noodles are the epitome of comfort food. Whether you’re looking for a side dish for your next holiday meal or simply want a quick and delicious option for dinner, this recipe delivers. With just a few ingredients, you can create a satisfying, buttery, and crispy dish that pairs perfectly with roasted meats and gravy. Customize the dish to your liking by adding cheese, vegetables, or herbs, and enjoy the simplicity of this Pennsylvania Dutch classic.

For more ideas and variations, check out Delish Egg Noodle Recipes to expand your noodle repertoire.

Easy Refrigerator Bread and Butter Pickles: Sweet, Tangy, and Ready in No Time

easy pickles, homemade bread and butter pickles, sweet pickles, quick pickles, no canning pickles, refrigerator pickles

Refrigerator Bread and Butter Pickles: A Quick and Tangy Delight

Bread and butter pickles are known for their perfect balance of sweet and tangy flavors. They are a classic accompaniment to sandwiches, burgers, and charcuterie boards. What makes refrigerator bread and butter pickles even better is how simple and quick they are to make—no need for special canning equipment or long hours of work. In just a few simple steps, you can create delicious, crispy pickles right in your refrigerator.

For another easy-to-follow guide on this recipe, check out Delish Refrigerator Bread and Butter Pickles Recipe, which offers additional tips on flavoring and preservation.


Why Choose Refrigerator Pickles Over Canned Pickles?

There are many reasons to choose refrigerator pickles over canned varieties:

  • Quick to Make: Refrigerator pickles require less time than traditional canning methods, and they’re ready to eat after just 24 hours of refrigeration.
  • No Special Equipment: Unlike canning, which requires specific tools like a water bath canner and mason jars, all you need for refrigerator pickles is a container and your ingredients.
  • Customizable: You can easily adjust the sweetness, spiciness, and acidity of the pickles to suit your taste.
  • Less Effort, Great Taste: You get that sweet-tangy flavor and crunch without having to commit to a full canning session.

If you want more ideas for creating variations, explore the AllRecipes Bread and Butter Pickles Recipe, which provides insight into modifying the brine for different flavor profiles.


Key Ingredients for Refrigerator Bread and Butter Pickles

To make your own bread and butter pickles at home, you only need a few simple ingredients:

  • Pickling Cucumbers: These smaller cucumbers are best because they maintain their crisp texture after brining. You can use regular cucumbers, but the texture may be softer.
  • White Vinegar and Apple Cider Vinegar: A combination of these vinegars creates the signature tangy base for the brine.
  • Granulated Sugar: The sweetness of the pickles comes from sugar. You can adjust the amount to suit your taste preference.
  • Brown Sugar: Adds depth of flavor to the brine.
  • Mustard Seeds, Celery Seeds, and Ground Turmeric: These spices provide the traditional flavors found in bread and butter pickles.
  • Onions: Sliced onions are included in the brine for added flavor and texture.
  • Salt: Essential for drawing out excess moisture from the cucumbers before pickling.

Step-by-Step Guide to Making Refrigerator Bread and Butter Pickles

Step 1: Prep the Cucumbers

  • Start by slicing your cucumbers into ¼-inch thick rounds. Place them in a colander and sprinkle generously with salt. Let the cucumbers sit for at least 90 minutes. The salt will draw out excess moisture, which will help keep the cucumbers crisp once they’re brined.

Step 2: Rinse the Cucumbers

  • After the cucumbers have sat for 90 minutes, rinse them thoroughly under cold water to remove the salt. Pat them dry with a clean towel.

Step 3: Make the Brine

  • In a medium saucepan, combine white vinegar, apple cider vinegar, granulated sugar, brown sugar, mustard seeds, celery seeds, and ground turmeric. Bring the mixture to a simmer over medium heat, stirring occasionally until the sugar dissolves completely.

Step 4: Combine Cucumbers and Onions

  • Slice the onions and layer them with the cucumbers in a large bowl or container. Pour the hot brine over the cucumbers and onions, ensuring all the vegetables are submerged in the liquid.

Step 5: Refrigerate

  • Let the mixture sit at room temperature for about an hour to cool. Once cooled, transfer the cucumbers and brine to airtight jars or containers. Place the pickles in the refrigerator and allow them to marinate for at least 24 hours before serving. For the best flavor, wait 48 hours.

Recipe Variations

1. Sweet and Spicy Pickles

For those who enjoy a bit of heat, adding a pinch of red pepper flakes or a few slices of jalapeños to the brine will give the pickles a sweet and spicy kick.

2. Garlic Bread and Butter Pickles

For an extra burst of flavor, mince a few cloves of garlic and add them to the brine. The garlic will infuse the pickles with a rich, savory note that complements the sweetness.

3. Honey Bread and Butter Pickles

For a natural sweetness, replace some or all of the sugar with honey. This variation will give the pickles a smooth, floral sweetness that pairs beautifully with savory dishes.

4. Herb-Infused Pickles

If you want to experiment with flavors, add fresh herbs like dill, thyme, or rosemary to the brine. These herbs will add a fresh, aromatic quality to the pickles.

For more flavor ideas, you can also check out the The Spruce Eats Easy Refrigerator Bread and Butter Pickles Recipe, which offers other creative variations.


Tips for Making the Best Refrigerator Bread and Butter Pickles

  • Use Fresh Cucumbers: For the crispiest pickles, it’s essential to use fresh cucumbers. Overripe or soft cucumbers will result in limp pickles.
  • Customize the Sweetness: Adjust the amount of sugar based on your taste. If you prefer less sweetness, reduce the sugar by a few tablespoons.
  • Allow Time for the Pickles to Marinate: While you can eat the pickles after 24 hours, they develop more complex flavors if you allow them to marinate for 48-72 hours.
  • Store Properly: Always store your pickles in airtight containers or jars in the refrigerator. They’ll keep for up to one month.

Serving Suggestions for Bread and Butter Pickles

Bread and butter pickles are incredibly versatile and can be served in many ways:

  • On Sandwiches and Burgers: Their sweet and tangy flavor adds the perfect crunch to any sandwich or burger.
  • With Charcuterie: Include these pickles on a charcuterie board to balance out the richness of cured meats and cheeses.
  • As a Side Dish: Serve them as a refreshing side dish at summer BBQs or picnics.
  • In Potato or Tuna Salad: Chop the pickles and add them to potato salad or tuna salad for an extra burst of flavor.

Frequently Asked Questions (FAQs)

1. How long do refrigerator bread and butter pickles last?

Refrigerator pickles can last for up to one month when stored in an airtight container in the fridge. Make sure to keep them cold and well-sealed to maintain their crispness and flavor.

2. Can I use regular cucumbers instead of pickling cucumbers?

Yes, you can use regular cucumbers if pickling cucumbers are not available. However, pickling cucumbers tend to stay crisper. If using regular cucumbers, try to choose firm, smaller ones.

3. How can I make the pickles spicier?

To make your pickles spicier, add red pepper flakes, jalapeño slices, or crushed chili peppers to the brine. This will infuse the pickles with heat while still keeping the sweet and tangy balance.

4. Can I store these pickles at room temperature?

No, refrigerator pickles must be stored in the refrigerator. Unlike traditional canned pickles, they are not shelf-stable and should be kept cold to prevent spoilage.

5. Can I reduce the sugar in the recipe?

Yes, you can adjust the amount of sugar to your preference. Reducing the sugar will result in a less sweet pickle, but the overall tangy flavor will remain.


Conclusion

Refrigerator bread and butter pickles are a quick, easy, and delicious way to preserve cucumbers without the hassle of traditional canning. Whether you enjoy them on a sandwich, as part of a charcuterie board, or straight from the jar, these pickles are the perfect balance of sweet and tangy. With just a few ingredients and some simple steps, you can enjoy homemade pickles in no time.

For even more creative takes on this classic recipe, check out AllRecipes Bread and Butter Pickles for additional flavor inspirations.

Jalapeño Popper Grilled Cheese: The Perfect Spicy and Cheesy Comfort Food

spicy grilled cheese, jalapeño popper sandwich, bacon grilled cheese, cheesy jalapeño sandwich, jalapeño grilled cheese

Jalapeño Popper Grilled Cheese: The Ultimate Comfort Food Twist

Grilled cheese is a timeless favorite, but when you combine it with the bold flavors of jalapeño poppers, you elevate this classic sandwich to a whole new level. The creamy, cheesy filling, crispy bacon, and spicy kick from the jalapeños make this Jalapeño Popper Grilled Cheese a dish you won’t soon forget. Whether you’re looking for a quick lunch, a game-day snack, or something indulgent, this sandwich is sure to satisfy.

For another variation, check out the Delish Jalapeño Popper Grilled Cheese Recipe, which takes a slightly different approach but is just as delicious.


Why Jalapeño Popper Grilled Cheese is a Must-Try

Combining the flavors of jalapeño poppers with the simplicity of grilled cheese creates a perfect balance of spicy, creamy, and crispy textures. Here’s why this recipe stands out:

  • Spicy Jalapeños: The heat from the jalapeños contrasts beautifully with the richness of the cheese.
  • Creamy Cheese: Both cream cheese and cheddar melt together to create a gooey, irresistible filling.
  • Crispy Bacon: Adds a salty crunch that balances the soft, creamy texture of the filling.
  • Perfect Comfort Food: This sandwich takes comfort food to the next level by merging two beloved dishes into one.

For more ideas on how to customize your grilled cheese, you can also explore the Small Town Woman Jalapeño Popper Grilled Cheese Recipe.


Key Ingredients for Jalapeño Popper Grilled Cheese

Creating this sandwich doesn’t require many ingredients, but each one plays a critical role in building the layers of flavor. Here’s what you need:

  • Jalapeños: These provide the spice. You can remove the seeds and membranes for less heat, or keep them in for a spicier sandwich.
  • Cream Cheese: This gives the sandwich its smooth and creamy texture, making it rich and indulgent.
  • Cheddar Cheese & Monterey Jack: Both cheeses melt well and complement the jalapeños perfectly.
  • Bacon: Crispy bacon adds a savory crunch and pairs beautifully with the creamy filling.
  • Thick Sliced Bread: Use thick white bread, sourdough, or Italian bread to ensure the sandwich holds up to the filling.
  • Butter: Spread on the outside of the bread to get a golden, crispy crust.

Step-by-Step Guide to Making Jalapeño Popper Grilled Cheese

Step 1: Roast the Jalapeños

  • Start by preheating the oven to 400°F. Slice the jalapeños in half lengthwise and remove the seeds and membranes (or leave them in for more heat).
  • Place the jalapeño halves on a baking sheet and roast in the oven for about 15 minutes, or until they are tender and slightly charred. Set them aside to cool.

Step 2: Prepare the Cream Cheese Filling

  • In a bowl, mix softened cream cheese, shredded cheddar cheese, and Monterey Jack. Add a pinch of garlic powder and onion powder for extra flavor. Stir until the mixture is smooth and well combined.

Step 3: Assemble the Sandwich

  • Spread the cheese mixture onto one side of the bread slices. Place the roasted jalapeños on top of the cheese mixture. Add crispy bacon slices for extra flavor and texture.
  • Close the sandwich with another slice of bread, ensuring the buttered side is facing out for grilling.

Step 4: Grill the Sandwich

  • Heat a skillet over medium heat. Grill the sandwich on each side for about 3-4 minutes, or until the bread is golden brown and crispy, and the cheese is melted and gooey.
  • Press the sandwich down slightly with a spatula to help the cheese melt evenly.

Step 5: Serve Hot

  • Slice the sandwich in half and serve immediately. Pair with your favorite dipping sauces or side dishes.

Recipe Variations

1. Spicy Jalapeño Popper Grilled Cheese

  • For those who love extra heat, add diced jalapeños or a drizzle of hot sauce to the cream cheese mixture. This will elevate the spice level and add an extra kick to every bite.

2. Vegetarian Jalapeño Popper Grilled Cheese

  • Omit the bacon for a vegetarian-friendly version. To add more substance, include roasted vegetables like bell peppers or zucchini.

3. Sweet and Spicy Grilled Cheese

  • Add a drizzle of honey or maple syrup to the filling to balance the spiciness with a hint of sweetness. This unexpected twist enhances the flavor profile.

4. Smoky Jalapeño Popper Grilled Cheese

  • Use smoked cheddar or gouda to add a smoky flavor that complements the spicy jalapeños and creamy cheese filling.

Tips for the Best Jalapeño Popper Grilled Cheese

Here are some tips to ensure your Jalapeño Popper Grilled Cheese comes out perfectly every time:

  • Use Thick Bread: A thick-sliced bread like Italian or sourdough holds up better to the weight of the cheese, bacon, and jalapeños.
  • Pre-Cook the Bacon: Ensure your bacon is crispy before adding it to the sandwich. Soggy bacon will make the sandwich less enjoyable.
  • Butter the Bread: Don’t forget to butter the outer sides of the bread! This creates the golden, crispy crust that makes grilled cheese so satisfying.
  • Control the Heat: Remove the seeds and membranes from the jalapeños for a milder flavor. For more heat, leave some seeds intact or use a spicier pepper variety.

Serving Suggestions

While Jalapeño Popper Grilled Cheese is delicious on its own, pairing it with the right sides and dips can make the meal even better:

  • Dipping Sauces: Serve with ranch dressing, sour cream, or chipotle mayo to cool down the spiciness and add an extra layer of flavor.
  • Side Dishes: Pair the sandwich with tomato soup, sweet potato fries, or a fresh green salad for a balanced meal.
  • Game Day Snack: This sandwich makes a perfect appetizer or snack for game days or casual get-togethers. You can make mini versions for a fun party treat.

Frequently Asked Questions (FAQs)

1. Can I make Jalapeño Popper Grilled Cheese ahead of time?

Yes! You can prepare the stuffed jalapeños ahead of time and store them in the fridge. Assemble and grill the sandwich when ready to eat. This saves time if you’re planning a party or meal-prepping for the week.

2. How can I make the jalapeños less spicy?

If you prefer a milder flavor, be sure to remove all the seeds and membranes from the jalapeños before roasting. Alternatively, you can use mini bell peppers for a completely mild option.

3. Can I make this sandwich without bacon?

Definitely. Simply omit the bacon for a vegetarian version of the sandwich. You can also substitute the bacon with roasted vegetables or even avocado slices for added richness.

4. What type of cheese works best for this recipe?

A combination of cheddar and Monterey Jack works best because they both melt well and have complementary flavors. For more variety, try adding pepper jack or mozzarella for an extra cheesy pull.

5. Can I make this sandwich gluten-free?

Yes, just use your favorite gluten-free bread to make this sandwich. Ensure all other ingredients are gluten-free as well, especially the bacon and cheeses.


Conclusion

Jalapeño Popper Grilled Cheese is the ultimate fusion of two classic comfort foods. Whether you’re a fan of spicy jalapeños, gooey cheese, or crispy bacon, this sandwich has something for everyone. With easy-to-find ingredients and simple preparation steps, it’s perfect for a quick lunch, a fun snack, or even a party appetizer. Customize it with your favorite variations and serve it with your choice of sides for a meal that’s sure to impress.

For more ways to enhance your grilled cheese game, check out AllRecipes Jalapeño Popper Grilled Cheese Recipe for more inspiration.

Classic Beef Stew Recipe: Hearty, Flavorful, and Easy to Make

hearty beef stew, classic beef stew, homemade beef stew, slow cooker beef stew, best beef stew recipe, rich beef stew, easy beef stew

Classic Beef Stew Recipe: Comfort in a Bowl

Beef stew is one of those comfort foods that you can never go wrong with. It’s hearty, flavorful, and perfect for a cozy night at home. Slow-cooked, tender beef paired with carrots, potatoes, and a rich broth makes this recipe a go-to when you need something warming and satisfying. Whether you’re using a Dutch oven, slow cooker, or even an Instant Pot, this recipe will guide you step by step to create the perfect beef stew every time.

For a different take on beef stew, check out AllRecipes Classic Beef Stew, which offers another variation of this hearty dish.


Why Beef Stew is the Perfect Comfort Food

There’s something about beef stew that just warms you from the inside out. The combination of slowly simmered beef, hearty vegetables, and rich broth creates a dish that feels both rustic and satisfying. Here’s why this recipe stands out:

  • Rich, Flavorful Broth: Slow cooking allows the beef and vegetables to infuse the broth with deep, savory flavors.
  • Tender Meat: Using the right cut of beef, like chuck roast, ensures that the meat becomes fall-apart tender after simmering for hours.
  • Versatile Cooking Methods: You can make this recipe in a Dutch oven, a slow cooker, or an Instant Pot, giving you flexibility depending on your schedule and preference.

For a richer variation, you can try the Delish Best Ever Beef Stew Recipe, which uses ingredients like red wine to deepen the flavor of the broth.


Key Ingredients for the Best Beef Stew

To make the best beef stew, you only need a few simple but quality ingredients:

  • Beef Chuck Roast: The perfect cut for stew because of its marbling, which breaks down during slow cooking and makes the meat tender.
  • Carrots, Potatoes, and Onions: Classic vegetables that complement the richness of the beef and broth. These are staples in any beef stew recipe.
  • Beef Broth: Forms the flavorful base of the stew. Using a good-quality broth or stock is essential.
  • Red Wine (Optional): Adds a depth of flavor to the stew. The alcohol cooks off, leaving a rich and complex broth.
  • Herbs (Thyme, Bay Leaves): These add a subtle aromatic flavor that pairs well with the beef.
  • Tomato Paste: Helps thicken the broth and adds a rich tomato flavor.

Step-by-Step Guide to Making Beef Stew

Step 1: Brown the Beef

The first step to making a great beef stew is browning the beef. This adds flavor and helps build the foundation of the stew.

  • Cut the chuck roast into 1 ½ inch pieces, season with salt and pepper, and dust lightly with flour.
  • Heat oil in a Dutch oven over medium-high heat and sear the beef in batches until browned on all sides. Remove the beef and set it aside.

Step 2: Sauté the Aromatics

  • In the same pot, add a little more oil if necessary and sauté chopped onions and garlic until softened and fragrant, about 5 minutes. This adds sweetness and depth to the stew.
  • Deglaze the pan with red wine or balsamic vinegar, scraping up any browned bits at the bottom of the pan. These bits are full of flavor!

Step 3: Add the Liquid and Meat

  • Stir in tomato paste and flour to create a base for the broth. This helps thicken the stew.
  • Add beef broth, red wine (if using), thyme, bay leaves, and the seared beef. Bring everything to a simmer, then lower the heat and cover. Let it simmer gently for 2 hours.

Step 4: Add the Vegetables

  • After the beef has simmered for 2 hours, add the carrots and potatoes. Cook for an additional hour or until the vegetables are tender.
  • Taste and adjust seasoning with salt and pepper. If the broth is too thin, you can remove the lid and let it simmer uncovered to thicken slightly.

Recipe Variations for Beef Stew

1. Guinness Beef Stew

  • Replace the red wine with Guinness beer to give the stew a deep, malty flavor. This version is popular for St. Patrick’s Day or when you want a more robust stew.

2. Slow Cooker Beef Stew

  • To make this recipe in a slow cooker, follow the same initial steps for browning the beef and sautéing the onions. Then transfer everything to a slow cooker and cook on low for 8 hours or on high for 4-5 hours.

3. Instant Pot Beef Stew

  • Use the sauté function to brown the beef and onions. Then cook everything under high pressure for 35 minutes, followed by a natural release. This method saves time but still gives you rich, hearty flavors.

4. Vegetable-Loaded Beef Stew

  • Add more vegetables like peas, mushrooms, and celery to make the stew even heartier and more nutritious. This variation is perfect for those who want more veggies in their meal.

For more tips and variations, check out The Spruce Eats Traditional Beef Stew, which offers another take on this classic dish.


Tips for Making the Best Beef Stew

  • Use Well-Marbled Meat: The fat in chuck roast breaks down during cooking, giving you tender and flavorful beef.
  • Deglaze the Pan: After browning the beef, deglaze the pan with wine or broth to capture the fond (those caramelized bits stuck to the bottom). This adds tremendous depth of flavor to the stew.
  • Don’t Rush the Process: Slow cooking is essential for developing deep flavors. Stew is a dish that benefits from time.
  • Adjust the Seasoning: Taste the stew as it cooks and adjust the salt, pepper, and herbs to your liking. A squeeze of lemon or a splash of vinegar can also brighten the flavors at the end.
  • Make it Ahead of Time: Beef stew tastes even better the next day after the flavors have had more time to meld. It’s a great make-ahead meal.

Serving Suggestions for Beef Stew

Beef stew is hearty enough to be a meal on its own, but here are some serving ideas to make it even better:

  • With Buttered Egg Noodles: Serve the stew over buttered egg noodles for an even heartier dish.
  • With Crusty Bread: A loaf of crusty bread is perfect for soaking up the rich broth.
  • Over Mashed Potatoes: For a classic combination, serve the stew over creamy mashed potatoes.
  • Garnish with Fresh Parsley: A sprinkle of fresh parsley adds a burst of color and freshness.

Frequently Asked Questions (FAQs)

1. Can I make beef stew ahead of time?

Yes! Beef stew actually tastes better the next day as the flavors have time to meld. Make it up to 3 days in advance and store it in the fridge. Reheat gently on the stovetop.

2. Can I freeze beef stew?

Absolutely. Beef stew freezes well for up to 3 months. Let it cool completely before transferring to freezer-safe containers. Thaw overnight in the fridge before reheating.

3. What’s the best cut of beef for stew?

Chuck roast is the best cut for beef stew because it becomes tender and flavorful after slow cooking. Avoid leaner cuts like sirloin, as they can become tough.

4. How can I thicken my beef stew?

If your stew is too thin, let it simmer uncovered for the last 30 minutes to reduce the liquid. Alternatively, you can stir in a cornstarch slurry (1 tablespoon cornstarch mixed with 1 tablespoon water) to thicken the broth.

5. Can I add different vegetables?

Definitely! Feel free to add vegetables like peas, mushrooms, celery, or even parsnips for extra flavor and texture.


Conclusion

Beef stew is the ultimate comfort food, combining rich, savory flavors with tender beef and hearty vegetables. Whether you’re making it for a cozy family dinner or prepping it ahead for the week, this recipe will guide you step by step to create the perfect stew. By following the tips and variations in this guide, you’ll be able to customize the stew to your preferences and enjoy a dish that’s both nourishing and satisfying.

For more beef stew ideas, check out Delish Best Ever Beef Stew Recipe for another flavorful take on this classic dish.

Easy Chicken Taco Soup: A Flavorful and Hearty Meal for Any Occasion

taco soup with chicken, easy chicken taco soup, creamy taco soup, healthy chicken taco soup, Mexican chicken soup, spicy chicken taco soup

Chicken Taco Soup: A Flavorful and Comforting Dish

If you’re looking for a delicious and hearty meal that’s easy to make and packed with flavor, Chicken Taco Soup is a perfect choice. This soup combines all the best flavors of tacos—seasoned chicken, beans, tomatoes, and spices—into a warm and comforting dish. It’s versatile, can be customized with your favorite toppings, and is ideal for busy weeknights or meal prep.

Whether you’re preparing it in a slow cooker, Instant Pot, or on the stovetop, this recipe will walk you through each step to create a delicious, satisfying soup that the whole family will love. For a similar recipe with a slightly different twist, check out the AllRecipes Chicken Taco Soup Recipe.


Why Chicken Taco Soup Is a Winner

There are many reasons why Chicken Taco Soup is a favorite among home cooks:

  • Bold, Taco-Inspired Flavors: With the use of taco seasoning, this soup packs a flavorful punch with ingredients like chili powder, cumin, and garlic.
  • Healthy and Hearty: Loaded with lean chicken, beans, and vegetables, this soup provides a nutritious and filling meal.
  • Easy to Prepare: Whether you cook it on the stovetop, in the slow cooker, or with the Instant Pot, it’s simple to throw together with minimal prep.
  • Great for Meal Prep: Make a large batch and store it in the fridge or freezer for easy lunches or dinners throughout the week.

For another variation on this recipe, check out the The Girl Who Ate Everything Chicken Taco Soup.


Key Ingredients for Chicken Taco Soup

The key to making a delicious Chicken Taco Soup lies in the combination of classic taco ingredients with a few extras to create depth of flavor. Here’s what you’ll need:

  • Chicken Breasts: Boneless, skinless chicken breasts work best for this soup, as they become tender and easy to shred once cooked. You can also substitute with chicken thighs for a richer flavor.
  • Taco Seasoning: A blend of chili powder, cumin, paprika, garlic powder, and onion powder gives the soup its signature taco flavor. Store-bought taco seasoning works, but homemade is even better.
  • Canned Tomatoes and Green Chilies: This adds acidity and a bit of heat to the soup. Use fire-roasted tomatoes for a smoky flavor.
  • Beans: Black beans and pinto beans add protein and fiber, making the soup more filling.
  • Corn: Sweet corn complements the spiciness of the soup and adds a touch of sweetness and crunch.
  • Chicken Broth: Forms the base of the soup and enhances the overall flavor. Use low-sodium broth if you prefer to control the salt content.

Step-by-Step Guide to Making Chicken Taco Soup

Step 1: Prep the Ingredients

  • Gather all your ingredients, including chicken, taco seasoning, beans, canned tomatoes, and broth. You can use fresh or canned ingredients for ease of preparation.

Step 2: Cooking Methods

Slow Cooker Method

  • Combine all the ingredients (chicken, taco seasoning, tomatoes, beans, corn, and broth) in the slow cooker.
  • Cook on low for 6-8 hours or on high for 4-5 hours.
  • Once the chicken is tender, remove it from the slow cooker and shred it using two forks. Return the shredded chicken to the soup and stir well.

Instant Pot Method

  • Use the sauté function to cook the onions and garlic until soft and fragrant.
  • Add the remaining ingredients to the Instant Pot and cook on high pressure for 10 minutes.
  • Once done, allow the pressure to release naturally for 10 minutes, then shred the chicken and return it to the soup.

Stovetop Method

  • In a large pot, sauté onions and garlic, then add the rest of the ingredients.
  • Bring the mixture to a boil, then reduce the heat and let it simmer for 25-30 minutes, stirring occasionally.
  • Shred the chicken once it’s fully cooked and return it to the soup.

Recipe Variations for Chicken Taco Soup

While the classic version of Chicken Taco Soup is a hit, you can easily customize it based on your preferences. Here are some variations:

1. Creamy Chicken Taco Soup

  • For a creamier texture, stir in cream cheese, sour cream, or heavy cream at the end of cooking. This creates a richer, more indulgent soup.

2. Vegetarian Taco Soup

  • Simply omit the chicken and add extra beans or a plant-based meat substitute to keep the soup hearty and satisfying. Use vegetable broth instead of chicken broth for a fully vegetarian meal.

3. Spicy Chicken Taco Soup

  • If you like your soup with a bit of a kick, add diced jalapenos, chipotle peppers in adobo sauce, or extra chili powder to the mix.

4. Low-Carb Chicken Taco Soup

  • To make this soup keto-friendly or low-carb, omit the beans and corn. Replace them with extra vegetables like bell peppers, zucchini, or spinach.

For more variations and inspiration, you can explore the Delish Easy Chicken Taco Soup Recipe.


Tips for Making the Best Chicken Taco Soup

Here are some tips to ensure your Chicken Taco Soup turns out perfect every time:

  • Use Fresh Ingredients: Freshly diced tomatoes, onions, and garlic will add a bright flavor to your soup. If you have extra time, consider making your own taco seasoning to enhance the flavor even more.
  • Make a Double Batch: This soup freezes beautifully, so consider making a double batch and freezing half for quick meals in the future. Store the soup in airtight containers for up to 3 months.
  • Adjust the Seasoning: After cooking, taste the soup and adjust the seasonings. You may want to add more salt, pepper, or even a squeeze of lime juice to brighten up the flavors.
  • Control the Spice Level: If you’re cooking for kids or guests who prefer milder flavors, reduce the chili powder or omit the jalapenos. You can always serve with hot sauce on the side for those who like it spicier.

Serving Suggestions for Chicken Taco Soup

Chicken Taco Soup is not just filling; it’s a great canvas for toppings and sides. Here are some ideas:

  • Toppings: Top each bowl of soup with shredded cheddar cheese, a dollop of sour cream, sliced avocado, cilantro, and tortilla chips for extra crunch.
  • Side Dishes: Serve with Mexican rice, cornbread, or a simple green salad to complete the meal.
  • For a Crowd: Double the recipe for gatherings, and set up a soup bar where everyone can customize their bowls with different toppings.

Frequently Asked Questions (FAQs)

1. Can I make Chicken Taco Soup ahead of time?

Yes! You can make this soup up to 3 days in advance. Store it in an airtight container in the refrigerator, and reheat it on the stovetop or in the microwave before serving.

2. Can I freeze Chicken Taco Soup?

Absolutely. Chicken Taco Soup freezes well. Portion it into freezer-safe containers and store it for up to 3 months. To reheat, thaw overnight in the fridge and warm it up on the stove or in the microwave.

3. How do I shred chicken easily for soup?

The easiest way to shred chicken is to use two forks to pull the meat apart. Alternatively, you can place the cooked chicken in a stand mixer with the paddle attachment and mix on low until shredded.

4. Can I make this soup without beans?

Yes, if you prefer a bean-free version, you can simply omit the beans. You can substitute them with more vegetables, such as zucchini, bell peppers, or spinach, to maintain the heartiness of the soup.

5. How can I thicken Chicken Taco Soup?

If you prefer a thicker soup, you can either let it simmer uncovered to reduce the liquid or add a cornstarch slurry (mix cornstarch with water) to the soup as it cooks.


Conclusion

Chicken Taco Soup is a simple yet flavorful dish that’s perfect for any occasion. Whether you’re serving it on a busy weeknight, making it for meal prep, or feeding a crowd, this recipe is versatile and packed with nutritious ingredients. With a balance of spicy, savory, and hearty flavors, it’s a meal everyone will love.

For more variations and soup ideas, check out The Girl Who Ate Everything Chicken Taco Soup and experiment with your own toppings and sides to make it your own.