How to Make the Perfect Peachy Keen Custard: A Delicious Summer Dessert

peach custard, peach dessert, homemade peach custard, creamy peach custard, summer peach dessert, baked peach custard

The Ultimate Guide to Peachy Keen Custard: A Perfect Dessert

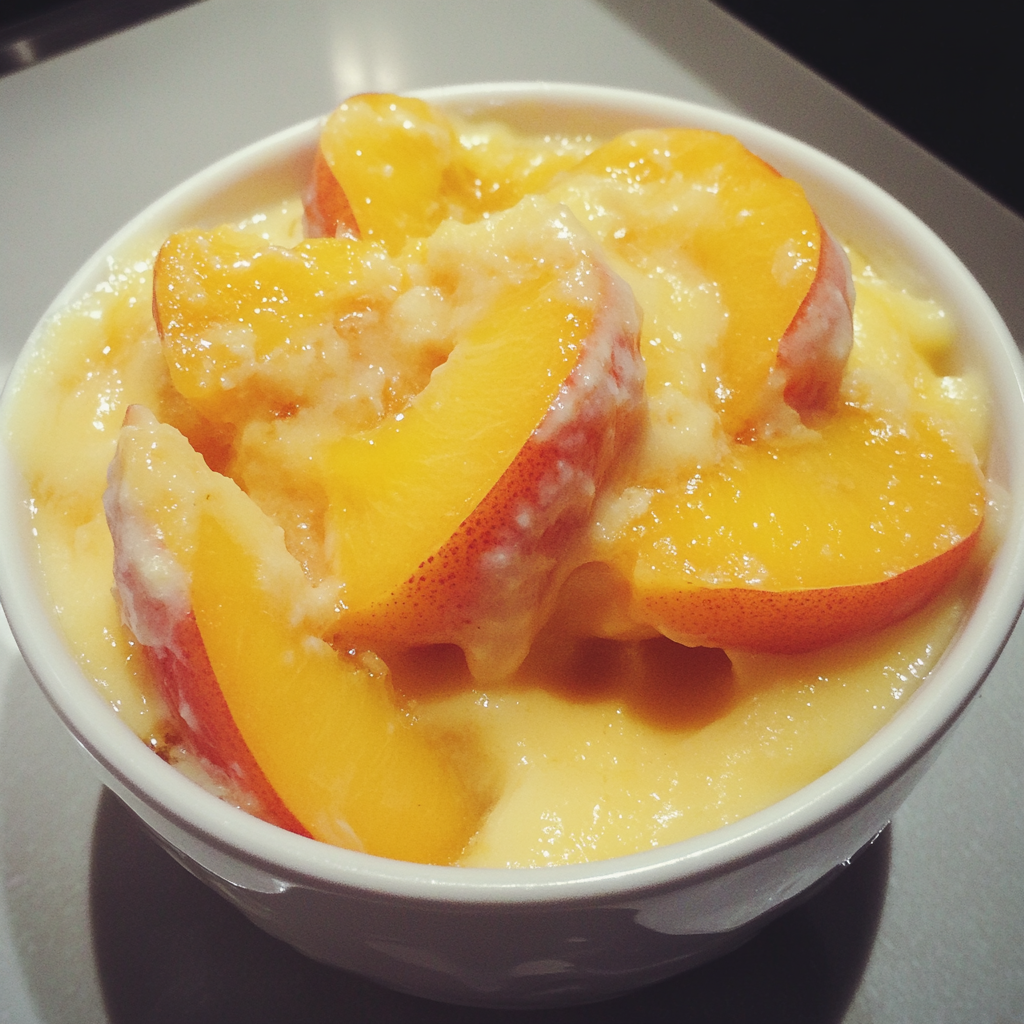
Peachy Keen Custard is a delightful and refreshing dessert that brings together the creamy smoothness of custard with the juicy sweetness of peaches. This dish, which is perfect for summer, showcases the natural flavor of ripe peaches paired with the rich texture of a traditional custard base. Whether served chilled or warm, this dessert is sure to become a favorite at your table.

In this comprehensive guide, we’ll walk you through everything you need to know to create the perfect Peachy Keen Custard. From selecting the best peaches to mastering the custard-making process, you’ll find all the tips and variations you need to craft a delicious dish.

Why Fresh Peaches Are Essential

The flavor of Peachy Keen Custard truly hinges on the quality of peaches you use. Fresh, ripe peaches offer a natural sweetness and juiciness that you simply can’t replicate with canned or frozen alternatives. When selecting peaches, look for those that are firm but slightly tender to the touch and emit a sweet fragrance. Yellow peaches tend to be more tart and are often favored in desserts, while white peaches are milder and sweeter.

If you’re not sure how to pick the perfect peaches, check out this guide on selecting the best peaches for baking. The flavor of your dessert will be greatly enhanced by using peaches at their peak ripeness.

To peel your peaches easily, try blanching them by placing them in boiling water for about 30 seconds, then immediately plunging them into an ice bath. This method helps the skins slip off with minimal effort, preserving the fruit beneath.

Preparing the Peach Filling

Once you’ve selected your peaches, it’s time to prepare the filling. The filling is the heart of Peachy Keen Custard, bringing in the juicy and sweet peachy goodness. Follow these steps to make sure your peaches complement the custard perfectly.

Ingredients for Peach Filling:

  • 4-5 ripe peaches (peeled, pitted, and sliced)
  • 2 tablespoons unsalted butter
  • ½ cup brown sugar
  • 1 teaspoon cinnamon
  • 1 tablespoon fresh lemon juice
  • Pinch of salt

Instructions:

  1. Peel and Slice the Peaches: Peel the peaches using the blanching method, then slice them thinly. Ensure the slices are uniform for even cooking.
  2. Sauté the Peaches: In a skillet, melt the butter over medium heat. Add the peach slices and cook for 3-4 minutes until they start to soften.
  3. Add Sugar and Cinnamon: Sprinkle the brown sugar and cinnamon over the peaches and stir. Let the mixture simmer until the peaches are tender and the sugar has caramelized.
  4. Add Lemon Juice: Stir in the lemon juice and a pinch of salt to balance the sweetness. Let the mixture cool slightly before using.

For an in-depth look at cooking with peaches, see this guide on baking with fresh peaches, which offers great tips for integrating fresh fruits into your baked goods.

Making the Perfect Custard Base

Custard is the silky foundation of this dessert. A good custard is creamy, smooth, and rich, providing the perfect contrast to the fruit filling. Custards are typically made from a combination of eggs, cream or milk, sugar, and flavorings such as vanilla. Here’s how to make the perfect custard base for your Peachy Keen Custard.

Ingredients for Custard Base:

  • 4 large eggs
  • 1 ½ cups heavy cream
  • ½ cup granulated sugar
  • 1 teaspoon vanilla extract
  • Pinch of salt

Instructions:

  1. Whisk Eggs and Sugar: In a large mixing bowl, whisk the eggs with the sugar and a pinch of salt until the mixture is pale and smooth.
  2. Heat the Cream: In a saucepan, gently heat the cream over medium heat until it just begins to steam. Avoid boiling the cream, as this can cause the custard to curdle.
  3. Temper the Eggs: Slowly add the warm cream to the egg mixture, whisking constantly to temper the eggs. This prevents the eggs from scrambling when exposed to the hot cream.
  4. Add Vanilla Extract: Stir in the vanilla extract for flavor.
  5. Strain the Custard: For an extra smooth custard, strain the mixture through a fine-mesh sieve to remove any curdled egg bits.

For a deeper dive into making the perfect custard, check out this resource on creating a smooth custard base, which covers the science behind achieving a silky texture.

Assembling and Baking Peachy Keen Custard

Now that both your peach filling and custard base are ready, it’s time to bring them together in a delicious dessert. Baking the custard in a water bath helps it cook gently and evenly, preventing it from curdling or cracking.

Instructions for Assembling and Baking:

  1. Preheat the Oven: Preheat your oven to 325°F (160°C).
  2. Prepare the Baking Dish: Grease a 9×9-inch baking dish or several individual ramekins. Layer the peach filling at the bottom of the dish(es).
  3. Pour the Custard: Carefully pour the custard mixture over the peach filling, ensuring that the peaches are fully covered.
  4. Water Bath: Place the baking dish in a larger pan filled with hot water. The water should come halfway up the sides of the custard dish. This ensures gentle, even cooking.
  5. Bake: Bake the custard for 40-45 minutes, or until it’s set around the edges but still slightly wobbly in the center.
  6. Cool: Remove the dish from the oven and let it cool to room temperature. You can serve the custard warm or refrigerate it for a few hours to enjoy it chilled.

Variations of Peachy Keen Custard

There are numerous ways to customize Peachy Keen Custard to suit your preferences or the occasion. Here are a few variations you can try:

1. Frozen Peach Custard

Transform your baked custard into a frozen dessert by churning the custard base in an ice cream maker. Once the custard is partially frozen, fold in fresh peach chunks for a refreshing summer treat.

2. Peach Custard Tart

For a more structured dessert, turn your Peachy Keen Custard into a tart. Use a buttery tart crust as the base, layer the peach filling, and pour the custard over the top. Bake the tart until the custard is set, and enjoy the added crunch of the crust.

3. Spiced Peach Custard

If you’re looking for a warm, comforting flavor, add spices like nutmeg, ginger, or cloves to your custard mixture. These spices enhance the peaches’ sweetness and give the dessert an autumnal twist.

Healthier Substitutions for Peachy Keen Custard

If you’re looking for a lighter version of Peachy Keen Custard, there are a few adjustments you can make without sacrificing flavor:

  • Use milk instead of cream: Swap the heavy cream for whole milk or even almond milk for a lighter custard.
  • Reduce the sugar: You can cut back on the sugar by using natural sweeteners like honey or maple syrup.
  • Increase the fruit: Add extra peaches and reduce the custard base for a more fruit-forward dessert.

These changes will lower the calorie content while still delivering a delicious treat.

Frequently Asked Questions About Peachy Keen Custard

1. Can I use canned or frozen peaches instead of fresh?

Yes, canned or frozen peaches can be used as substitutes, but fresh peaches provide the best flavor and texture. If using canned peaches, be sure to drain them thoroughly. Frozen peaches should be thawed and drained before use.

2. How do I prevent my custard from curdling?

The key to preventing curdling is to bake the custard gently at a low temperature and to use a water bath. Tempering the eggs correctly by slowly adding the warm cream is also essential for avoiding scrambled eggs in your custard.

3. How should I store Peachy Keen Custard?

Store your custard in the refrigerator, covered with plastic wrap, for up to 3 days. You can enjoy it cold straight from the fridge or warm it slightly before serving.

4. Can I make Peachy Keen Custard ahead of time?

Yes! Peachy Keen Custard is a great make-ahead dessert. It can be prepared a day in advance and stored in the refrigerator until you’re ready to serve.

5. Is Peachy Keen Custard gluten-free?

Yes, the custard itself is gluten-free. However, if you’re making a tart variation, ensure the crust is gluten-free by using almond flour or a gluten-free flour blend.

Final Tips for Perfect Peachy Keen Custard

Creating the perfect Peachy Keen Custard is all about balancing the sweetness of the peaches with the creaminess of the custard. Here are a few final tips to ensure your dessert turns out perfectly every time:

  • Choose ripe, flavorful peaches for the best results.
  • Use a water bath when baking the custard to ensure even cooking and a smooth texture.
  • Cool the custard properly before serving to allow it to set completely.

Whether you’re enjoying it warm from the oven or chilled on a hot day, Peachy Keen Custard is a versatile dessert that’s sure to impress your guests.

How to Make Perfect Fried Apple Pies: A Step-by-Step Guide

homemade fried apple pies, crispy apple pies, apple hand pies, fried apple hand pies, Southern fried apple pies, McDonald’s-style apple pies

The Ultimate Guide to Fried Apple Pies: A Delicious Homemade Treat

Fried apple pies are a beloved dessert, known for their crisp, golden exterior and warm, sweet apple filling. Whether you’re a fan of Southern comfort food or simply want to replicate that nostalgic McDonald’s treat, fried apple pies can be a delightful addition to your recipe collection. In this guide, we’ll walk through everything you need to know about making the perfect fried apple pie from scratch.

Choosing the Right Apples for the Best Fried Apple Pies

The first step in creating perfect fried apple pies is selecting the right apples. Not all apples are created equal, and choosing a variety that balances tartness and sweetness is crucial for a flavorful filling.

  • Granny Smith: A tart apple that holds up well during cooking, making it perfect for pies.
  • Honeycrisp: A sweet-tart variety that brings a natural sweetness to your filling.
  • Braeburn: Offers a balanced flavor and texture, ideal for apple desserts.

For a deeper understanding of how to choose the best apples for baking, refer to this helpful guide on Best apples for baking and frying. Selecting the right apples is key to creating a filling that holds its shape and provides just the right amount of sweetness.

Preparing the Filling: The Heart of the Pie

A well-prepared filling is the heart of any fried apple pie. The apples should be soft but not mushy, with a sweet and spiced flavor that complements the crispy exterior.

Ingredients for Apple Filling:

  • 4 medium apples (Granny Smith or Honeycrisp)
  • ¼ cup brown sugar
  • 1 teaspoon cinnamon
  • ¼ teaspoon nutmeg
  • 1 tablespoon butter
  • 1 tablespoon lemon juice

Steps to Prepare the Filling:

  1. Peel, core, and dice the apples into small pieces.
  2. In a large saucepan, melt the butter over medium heat.
  3. Add the apples, brown sugar, cinnamon, and nutmeg to the pan.
  4. Cook until the apples are soft and the sugar has caramelized, about 10-15 minutes.
  5. Stir in the lemon juice for a slight tang and let the mixture cool.

The caramelized sugars and spiced apples create the perfect filling for your pies. Fried apple pies are all about the balance of flavors, and ensuring your filling has the right consistency is crucial to avoid soggy pies.

Making the Dough: Store-Bought vs. Homemade

While many recipes suggest using store-bought dough for convenience, nothing compares to a homemade dough. It’s flakier, more tender, and gives your pies that made-from-scratch feel that elevates them to the next level.

Homemade Pie Dough Recipe:

  • 2 cups all-purpose flour
  • 1 teaspoon salt
  • 1 cup unsalted butter (cold and cubed)
  • 6-8 tablespoons ice water

Instructions:

  1. In a large bowl, combine the flour and salt.
  2. Cut the cold butter into the flour mixture using a pastry cutter or two forks until it resembles coarse crumbs.
  3. Slowly add ice water, one tablespoon at a time, until the dough comes together.
  4. Form the dough into a disc, wrap it in plastic, and refrigerate for at least one hour.

For those short on time, you can use a quality store-bought pie dough, but homemade is always recommended. For a guide to making pie dough from scratch, check out this resource on Flaky pie dough from scratch. A good dough is essential for achieving the right texture when frying your pies.

Assembling and Frying Your Apple Pies

Once your filling is prepared and your dough is ready, it’s time to assemble and fry your pies.

Assembling the Pies:

  1. Roll out the dough on a floured surface to about ⅛ inch thickness.
  2. Cut the dough into 5-6 inch circles using a cookie cutter or small bowl.
  3. Spoon 2 tablespoons of the apple filling into the center of each circle.
  4. Fold the dough over the filling to form a half-moon shape.
  5. Crimp the edges with a fork to seal the pies tightly.

Frying Instructions:

  1. Heat oil (vegetable or canola) in a large pot to 350°F.
  2. Carefully add 2-3 pies at a time to the oil, frying for 2-3 minutes on each side until golden brown.
  3. Remove and place on a paper towel-lined plate to drain excess oil.

Make sure the oil temperature is consistent to avoid soggy or burnt pies. Frying at 350°F ensures that your fried apple pies turn out perfectly crisp.

Glazing and Dusting Your Fried Apple Pies

Once the pies are fried, the final touch is either a dusting of sugar or a drizzle of glaze.

Cinnamon Sugar Dusting:

  • ½ cup granulated sugar
  • 1 teaspoon cinnamon

Mix the sugar and cinnamon together, and while the pies are still warm, roll them in the cinnamon sugar mixture for a sweet, crunchy exterior.

Simple Glaze Recipe:

  • 1 cup powdered sugar
  • 2 tablespoons milk
  • 1 teaspoon vanilla extract

Drizzle the glaze over the pies for an extra touch of sweetness. The contrast between the crisp dough and the smooth glaze creates an irresistible combination.

Variations on Traditional Fried Apple Pies

If you’re feeling adventurous, there are several ways to customize your fried apple pies to suit your taste.

McDonald’s-Style Fried Apple Pies

To recreate that crispy, fast-food version of the fried apple pie, use puff pastry instead of traditional pie dough for an extra crunchy texture. Fry them the same way for a fast-food-inspired treat that’s even better than the original.

Southern Hand Pies with Dried Apples

For a more traditional Southern approach, use dried apples in your filling for a more concentrated apple flavor. These “applejacks” are a staple in many Southern kitchens and offer a unique twist on the classic.

Healthier Alternatives: Baked or Air-Fried Apple Pies

If you’re looking for a healthier option, you can easily adapt this recipe by baking or air-frying the pies.

Baking Instructions:

  • Preheat the oven to 375°F.
  • Arrange the assembled pies on a baking sheet lined with parchment paper.
  • Brush with egg wash and bake for 20-25 minutes until golden brown.

Air Frying Instructions:

  • Preheat your air fryer to 350°F.
  • Place the pies in a single layer in the air fryer basket.
  • Cook for 10-12 minutes, flipping halfway through for even browning.

These methods offer a crisp texture with significantly less oil, making them a great option for those looking to indulge without the extra calories. For more tips on air frying, visit Air frying for a healthier alternative.

FAQs About Fried Apple Pies

Can I Make Fried Apple Pies Ahead of Time?

Yes! You can make the pies ahead of time and store them in the refrigerator for up to 3 days or freeze them for up to 2 months. Reheat them in the oven or air fryer for a crisp exterior.

What Oil is Best for Frying Apple Pies?

Neutral oils such as vegetable or canola oil are best because they can handle high heat and won’t impart a strong flavor to your pies.

How Do I Prevent My Pies from Leaking?

Make sure to seal the edges of your pies well by crimping them with a fork. You can also brush the edges with a bit of water or egg wash to help the dough stick.

Can I Use Store-Bought Apple Pie Filling?

While homemade filling offers better flavor and texture, store-bought apple pie filling is a convenient option if you’re short on time.

How Should I Store Leftover Fried Apple Pies?

Store leftover pies in an airtight container at room temperature for up to 2 days. You can also refrigerate them for up to 5 days or freeze them for longer storage.

Conclusion: Enjoying Your Fried Apple Pies

With a crispy exterior and a warm, spiced apple filling, fried apple pies are the perfect dessert for any occasion. Whether you opt for a traditional Southern hand pie or a McDonald’s-style replica, this treat is sure to satisfy your sweet tooth.

Experiment with different fillings, glazes, and dough options to make the recipe your own. And remember, these pies are best enjoyed warm, paired with a scoop of vanilla ice cream!

How to Cook Pork Chops That Melt in Your Mouth: The Ultimate Guide

tender pork chops, juicy pork chops, slow-cooker pork chops, oven-baked pork chops, pan-fried pork chops, best pork chops

Pork Chops That Melt in Your Mouth: The Ultimate Guide

Pork chops can sometimes get a bad reputation for being dry or tough, but when prepared correctly, they can truly melt in your mouth. Whether you prefer them baked, pan-fried, or cooked in a slow cooker, this guide will show you how to turn your pork chops into a tender and juicy delight that everyone will love.

Introduction: The Secret to Tender Pork Chops

For many home cooks, pork chops have become synonymous with bland or tough meat. This happens when pork chops are overcooked or not prepared properly. But what if we told you that achieving that melt-in-your-mouth tenderness is not only possible but easy?

In this comprehensive guide, we will walk you through the process of choosing the right cut of pork, utilizing marinades, and cooking methods that result in juicy, flavorful, and tender pork chops every time. Whether you’re looking for a quick weeknight meal or a slow-cooked feast, these tips will help you make pork chops that you’ll want to eat over and over again.

Choosing the Right Cut of Pork

The first step to achieving tender pork chops is choosing the right cut. Not all pork chops are created equal, and knowing the difference between them can make or break your dish.

Types of Pork Chops:

  • Bone-in Pork Chops: These are typically more flavorful and hold their moisture better during cooking. The bone helps insulate the meat, making it less likely to dry out.
  • Boneless Pork Chops: Easier to cook, but they can dry out more quickly due to the absence of the bone.
  • Thick-Cut Pork Chops: Ideal for grilling or baking as they tend to stay juicier.
  • Thin-Cut Pork Chops: Great for pan-frying, but care must be taken to avoid overcooking.

To learn more about how enzymes and acids break down the fibers of meat, visit How enzymes and acids tenderize meat. Understanding the science behind it can help you make the best decisions for your meat preparation.

The Magic of Marinades

A good marinade is crucial for tenderizing pork chops, adding flavor, and ensuring they stay juicy during the cooking process. Marinades work by using acids or enzymes to break down the proteins in the meat, making it more tender and flavorful.

Essential Marinade Ingredients:

  • Acids: Lemon juice, vinegar, or yogurt are great choices.
  • Fats: Olive oil or other neutral oils help retain moisture.
  • Aromatics: Garlic, herbs, and spices add flavor depth.
  • Sweeteners: Honey, brown sugar, or maple syrup can balance the flavors.

Marinate your pork chops for at least 30 minutes, but preferably a few hours for the best results. For a deeper understanding of the nutritional benefits of pork chops, you might want to check Nutritional benefits of pork chops.

Cooking Methods for Tender Pork Chops

When it comes to cooking pork chops that melt in your mouth, the method is key. Here are some foolproof ways to cook pork chops to perfection.

Oven-Baked Pork Chops

Oven baking is one of the best ways to cook thick-cut pork chops without drying them out. The low and slow heat allows the meat to cook evenly, retaining its juices.

Steps to Perfect Oven-Baked Pork Chops:

  1. Preheat your oven to 350°F.
  2. Season your pork chops generously with salt, pepper, and your preferred herbs.
  3. Sear the pork chops on both sides in a hot skillet for 2-3 minutes.
  4. Transfer to the oven and bake for 15-20 minutes (depending on the thickness) until the internal temperature reaches 145°F.
  5. Let the pork chops rest for 5 minutes before serving.

Pair these baked pork chops with a rich gravy or caramelized onions for added flavor.

Slow-Cooker Pork Chops

If you’re looking for a method that ensures the pork chops come out fork-tender every time, look no further than the slow cooker. Slow-cooking allows the pork chops to cook low and slow, ensuring they are juicy and tender.

Slow-Cooker Recipe:

  1. Place pork chops in the slow cooker.
  2. Add a mixture of broth, onions, garlic, and seasonings.
  3. Cook on low for 6-8 hours or high for 3-4 hours until tender.
  4. Serve with mashed potatoes and a side of vegetables.

Pan-Fried Pork Chops

For a quick and easy meal, pan-frying is a great option. To ensure that the pork chops remain tender, sear them on high heat for a short amount of time.

Pan-Fried Pork Chops Recipe:

  1. Heat olive oil in a skillet over medium-high heat.
  2. Season pork chops with salt, pepper, and garlic powder.
  3. Sear the pork chops for 4-5 minutes on each side, ensuring they reach an internal temperature of 145°F.
  4. Let the pork chops rest for 5 minutes before serving.

For extra tenderness, finish the chops with a pat of butter or a drizzle of honey mustard sauce.

Adding Flavor with Sauces and Gravies

While tender pork chops are delicious on their own, adding a sauce or gravy can take them to the next level. Here are a few options to consider:

Mushroom Gravy:

A creamy mushroom gravy pairs beautifully with pork chops. Simply sauté mushrooms and onions in butter, then add flour and broth to make a rich, velvety sauce.

Honey Mustard Glaze:

Sweet and tangy honey mustard glaze is another great option. Mix honey, Dijon mustard, and a splash of apple cider vinegar for a perfect finishing sauce.

For a more in-depth look at resting meat after cooking, visit Importance of resting meat for tenderness. Letting the meat rest is essential to maintaining moisture.

FAQs: Pork Chops That Melt in Your Mouth

1. Why Are My Pork Chops Tough?

Pork chops become tough when they are overcooked or cooked at too high of a temperature. To avoid this, make sure to cook them at a lower temperature and use a meat thermometer to ensure they are not overcooked.

2. How Can I Make Pork Chops More Tender?

Marinating your pork chops before cooking and using slow-cooking methods are the best ways to achieve tenderness. Letting the pork chops rest after cooking also helps to redistribute the juices.

3. What Temperature Should Pork Chops Be Cooked To?

According to the USDA, pork chops should be cooked to an internal temperature of 145°F. Use a meat thermometer to check the internal temperature before serving.

4. Can I Cook Pork Chops in an Instant Pot?

Yes! Pork chops can be cooked in an Instant Pot for quick, tender results. The high-pressure cooking helps break down the meat fibers, resulting in tender, juicy pork chops in a fraction of the time.

5. How Long Should I Marinate Pork Chops?

For the best results, marinate pork chops for at least 30 minutes, but ideally for 4-6 hours. This gives the marinade enough time to penetrate the meat and break down the fibers.

Conclusion: Perfectly Tender Pork Chops Every Time

In conclusion, achieving tender pork chops that melt in your mouth is easier than you might think. By choosing the right cut of meat, marinating properly, and using the right cooking techniques, you can enjoy juicy, flavorful pork chops that everyone will rave about.

Remember to experiment with different flavors, such as honey mustard or mushroom gravy, and always rest your meat before serving. With these tips, you’ll be cooking pork chops that are tender and juicy every time.

Additional Resources

Melt-in-Your-Mouth Buttermilk Biscuits: The Fluffiest Southern Classic

fluffy buttermilk biscuits, Southern biscuits, easy biscuit recipe, tender buttermilk biscuits, homemade biscuits

Melt-in-Your-Mouth Buttermilk Biscuits: A Fluffy Southern Classic

If you’re in search of the perfect buttermilk biscuit, one that practically melts in your mouth with every bite, then this is the recipe for you. Melt-in-your-mouth buttermilk biscuits are a Southern tradition, known for their soft, tender texture and rich buttery flavor. Whether you’re serving them for breakfast, as a side with dinner, or slathering them with jam, this recipe will become your go-to for fluffy, golden biscuits every time.

For more tips on biscuit perfection, check out this guide on The Science Behind Perfect Biscuits, which delves into the techniques that ensure soft, flaky biscuits every time.


Why These Buttermilk Biscuits Stand Out

Buttermilk biscuits are more than just a bread option—they’re a staple of Southern cuisine. What makes these biscuits special is the combination of cold ingredients and precise handling of the dough. Cold butter creates steam pockets as it melts in the oven, giving the biscuits their flaky layers. The buttermilk adds a slight tanginess and richness that takes the flavor up a notch, resulting in a biscuit that truly melts in your mouth.

Incorporating these expert tips will ensure that your biscuits are the fluffiest, most tender version of this beloved classic.


Ingredients for Melt-in-Your-Mouth Buttermilk Biscuits

Here’s everything you need to make the best buttermilk biscuits from scratch:

  • All-Purpose Flour: The base ingredient for creating a light, fluffy texture.
  • Cold Butter: Use unsalted butter to control the saltiness of the dough. Keeping it cold ensures flaky layers.
  • Baking Powder and Baking Soda: These leavening agents help the biscuits rise and create their soft, airy structure.
  • Salt: Enhances the overall flavor.
  • Buttermilk: The key to adding tanginess and moisture, making the biscuits extra tender.

For those who want to explore different variations, take a look at Melt in Your Mouth Southern Buttermilk Biscuits for more inspiration on flavor variations and additions.


Step-by-Step Guide to Making Buttermilk Biscuits

Follow these simple steps to create perfectly flaky, tender buttermilk biscuits:

Step 1: Preparing the Ingredients

  • Start by sifting together the all-purpose flour, baking powder, baking soda, and salt in a large mixing bowl. This ensures even distribution of the dry ingredients and helps prevent clumps.

Step 2: Incorporating the Cold Butter

  • Cut the cold butter into small cubes, then use a pastry cutter, fork, or your hands to work it into the flour mixture until it resembles coarse crumbs. The key is to keep the butter cold, which helps create steam as the biscuits bake, forming those iconic flaky layers.

Step 3: Adding the Buttermilk

  • Pour the buttermilk into the dry ingredients and stir just until combined. Be careful not to overmix the dough, as this can lead to tough biscuits.

Step 4: Rolling and Cutting the Biscuits

  • Turn the dough onto a lightly floured surface and gently pat or roll it out to about ½-inch thickness. Use a biscuit cutter or a round glass to cut out the biscuits, being careful not to twist the cutter, as this can prevent them from rising properly.

Step 5: Baking the Biscuits

  • Arrange the biscuits on a baking sheet so that the edges are slightly touching. This helps them rise higher. Bake at 450°F for 12-15 minutes, or until the tops are golden brown.

Tips for Making the Best Buttermilk Biscuits

Here are some expert tips to ensure your biscuits turn out perfect every time:

1. Use Cold Ingredients

  • The colder the butter and buttermilk, the better the biscuit texture. Cold butter creates steam pockets as it melts during baking, resulting in flaky layers.

2. Don’t Overmix the Dough

  • Overmixing the dough can result in tough, dense biscuits. Stir the ingredients just until they come together, then gently fold the dough a few times before cutting.

3. Avoid Twisting the Biscuit Cutter

  • When cutting out the biscuits, press straight down with your cutter and lift straight up. Twisting the cutter can seal the edges of the dough, preventing the biscuits from rising properly.

Serving Suggestions for Buttermilk Biscuits

These buttermilk biscuits are incredibly versatile and can be enjoyed in many ways. Here are some ideas:

1. Classic Butter and Honey

  • Serve your warm biscuits with a generous smear of butter and a drizzle of honey for a simple, delicious treat.

2. Biscuits with Gravy

  • Pair these biscuits with a creamy sausage or country gravy for a hearty Southern breakfast.

3. Biscuit Sandwiches

  • Use the biscuits to make breakfast sandwiches. Add bacon, egg, and cheese for a satisfying morning meal.

4. As a Side for Dinner

  • These biscuits make a great accompaniment to stews, soups, or fried chicken, bringing a bit of Southern comfort to any meal.

Recipe Variations for Buttermilk Biscuits

If you’re feeling adventurous, try these delicious variations on the classic buttermilk biscuit:

1. Cheddar and Chive Biscuits

  • Add shredded cheddar cheese and chopped chives to the dough for a savory twist on the traditional biscuit.

2. Sweet Cinnamon Biscuits

  • Mix in a teaspoon of cinnamon and sprinkle sugar on top of the biscuits before baking to create a sweet breakfast treat.

3. Garlic Butter Biscuits

  • Brush the tops of the biscuits with melted garlic butter as soon as they come out of the oven for a rich, savory flavor.

Frequently Asked Questions (FAQs) About Buttermilk Biscuits

1. Can I make buttermilk biscuits ahead of time?

Yes! You can prepare the biscuit dough ahead of time and either refrigerate it for up to a day or freeze the unbaked biscuits. When ready to bake, just pop them into the oven from frozen, adding a couple of extra minutes to the bake time.

2. Why is cold butter important in making biscuits?

Cold butter creates steam pockets as it melts during baking, which is what gives biscuits their flaky texture. If the butter is too warm, the biscuits will be denser and less flaky.

3. Can I substitute regular milk for buttermilk?

If you don’t have buttermilk on hand, you can make a substitute by mixing 1 tablespoon of lemon juice or vinegar with 1 cup of regular milk. Let it sit for a few minutes before using it in the recipe.

4. How should I store leftover biscuits?

Store leftover biscuits in an airtight container at room temperature for up to two days, or freeze them for longer storage. When reheating, wrap them in foil and warm them in the oven to maintain their texture.

5. Can I make gluten-free buttermilk biscuits?

Yes! To make gluten-free buttermilk biscuits, substitute gluten-free all-purpose flour for regular flour. You may need to add a little more liquid to the dough to get the right consistency.


Conclusion

Buttermilk biscuits are a beloved staple in Southern cooking, and this recipe delivers biscuits that truly melt in your mouth. By following these steps and tips, you’ll achieve flaky, buttery layers and a tender crumb that’s perfect for any meal.

Whether you enjoy them with a drizzle of honey, smothered in gravy, or served alongside a comforting bowl of stew, these biscuits are sure to be a hit. Try experimenting with different flavors and variations to make them your own!

For more inspiration on how to elevate your biscuit-making skills, be sure to check out the Classic Buttermilk Biscuit Recipe for additional techniques and ideas.

Tina’s Swedish Meatballs: A Classic Comfort Dish with Creamy Gravy

Swedish meatballs recipe, creamy Swedish meatballs, homemade Swedish meatballs, traditional Swedish meatballs, beef and pork meatballs

Tina’s Swedish Meatballs: A Comfort Food Classic

Swedish meatballs are a classic comfort dish that combines hearty, seasoned meatballs with a creamy gravy and is traditionally served with lingonberry jam and buttered egg noodles. Tina’s Swedish Meatballs offer a special twist on this traditional recipe, making it a favorite for families and gatherings alike.

Swedish cuisine emphasizes the balance between savory and sweet flavors, and the inclusion of spices like allspice and nutmeg in the meatball mixture reflects this perfectly. If you’re looking to elevate your meatball game, this recipe will provide everything you need, from tips on making the perfect meatball to variations of the classic dish.

For more inspiration on meatball dishes, you can explore Tina’s Swedish Meatballs with Cheesy Gravy from Tina’s Tasty Treats.


Why Tina’s Swedish Meatballs Stand Out

Tina’s Swedish Meatballs bring a unique flavor combination that truly makes them stand out from other meatball recipes. The secret lies in the perfectly seasoned meat mixture, rich gravy, and the traditional side dishes like egg noodles and lingonberry jam. The use of ground beef and pork ensures a juicy, flavorful meatball, while the creamy gravy ties the dish together, making it irresistible.

Swedish meatballs aren’t complete without a luscious, creamy sauce made from butter, flour, beef broth, and cream. In addition to the unique flavors in this dish, its simplicity and versatility make it an ideal option for weeknight dinners or holiday feasts.

For a twist on the traditional Swedish meatball dish, you might enjoy the Swedish Meatball Pasta Bake Recipe, a baked version that adds even more depth to the dish.


Ingredients for Tina’s Swedish Meatballs

The following ingredients are essential for preparing Tina’s Swedish Meatballs. This combination of simple ingredients results in a delicious, comforting dish that’s perfect for any occasion.

  • Ground Beef and Pork: Using a combination of meats provides the best texture and flavor.
  • Breadcrumbs: Helps bind the meatballs and creates a tender bite.
  • Egg: Acts as a binding agent to keep the meatballs together.
  • Allspice and Nutmeg: Signature Swedish spices that give the meatballs their unique flavor.
  • Onion: Finely chopped onions add moisture and sweetness to the meatballs.
  • Butter: Used for browning the meatballs and creating the gravy.
  • Flour: Used to thicken the gravy.
  • Beef Broth and Cream: Essential ingredients for making the rich, creamy Swedish gravy.
  • Egg Noodles or Mashed Potatoes: Classic accompaniments for serving Swedish meatballs.

Step-by-Step Guide to Making Tina’s Swedish Meatballs

Step 1: Prepare the Meatball Mixture

  • In a large mixing bowl, combine the ground beef, ground pork, breadcrumbs, egg, onion, allspice, and nutmeg.
  • Mix until all the ingredients are evenly distributed, but be careful not to overmix, as this can make the meatballs tough.

Step 2: Shape the Meatballs

  • Roll the meat mixture into 1-1.5 inch balls, ensuring that they are uniform in size for even cooking.
  • Set the shaped meatballs aside on a plate or tray.

Step 3: Cook the Meatballs

  • Heat butter in a large skillet over medium heat.
  • Add the meatballs to the skillet and brown them on all sides, turning occasionally to ensure even browning.
  • Once the meatballs are browned, remove them from the skillet and set them aside.

Step 4: Make the Gravy

  • In the same skillet, melt butter over medium heat. Whisk in flour to form a roux, cooking for about 2 minutes until the mixture turns golden brown.
  • Slowly add beef broth while whisking continuously to avoid lumps.
  • Stir in cream and bring the mixture to a simmer, allowing it to thicken into a silky gravy.

Step 5: Combine and Serve

  • Return the browned meatballs to the skillet with the gravy.
  • Simmer the meatballs in the gravy for 10-15 minutes, or until fully cooked through.
  • Serve the meatballs over buttered egg noodles or mashed potatoes, with a side of lingonberry jam for an authentic Swedish touch.

Variations of Tina’s Swedish Meatballs

1. Cheesy Mushroom Gravy

  • For a richer, heartier dish, sauté mushrooms in the gravy and stir in shredded cheese like cheddar or Swiss for a cheesy, umami-packed version.

2. Turkey Swedish Meatballs

  • To make a leaner version of Swedish meatballs, substitute the ground beef and pork with ground turkey.
  • This lighter alternative still retains the richness of the gravy but reduces the overall fat content.

3. Swedish Meatball Pasta Bake

  • This variation turns the traditional meatballs into a pasta bake.
  • After making the meatballs and gravy, combine them with cooked pasta in a baking dish, top with shredded cheese, and bake until bubbly and golden.

Tips for Making the Best Swedish Meatballs

1. Don’t Overwork the Meat

  • Mixing the meat mixture too much can result in dense, tough meatballs.
  • Gently fold the ingredients together until just combined for the best texture.

2. Use Fresh Spices

  • For the best flavor, use freshly ground allspice and nutmeg.
  • These spices are key to achieving the authentic Swedish flavor in your meatballs.

3. Let the Meatballs Rest Before Cooking

  • Allowing the shaped meatballs to rest in the refrigerator for 10-15 minutes before cooking helps them hold their shape during cooking.

Serving Suggestions for Tina’s Swedish Meatballs

1. Over Egg Noodles

  • Egg noodles are the traditional pairing with Swedish meatballs, providing a comforting base to soak up the rich gravy.

2. With Mashed Potatoes

  • Another classic side for Swedish meatballs is creamy mashed potatoes, which complements the meatballs and gravy beautifully.

3. With Lingonberry Jam

  • The sweet and tart lingonberry jam adds a Scandinavian touch to the meal, balancing the savory and rich flavors of the dish.

Frequently Asked Questions (FAQs) about Tina’s Swedish Meatballs

1. Can I make Swedish meatballs ahead of time?

Yes, Swedish meatballs can be made ahead of time. You can either refrigerate the uncooked meatballs for up to a day or freeze them for up to a month. When ready to serve, cook the meatballs and prepare the gravy as usual.

2. What can I substitute for allspice in Swedish meatballs?

If you don’t have allspice on hand, you can substitute a mixture of cinnamon and cloves, or even just nutmeg, to achieve a similar warm, spicy flavor.

3. How can I make gluten-free Swedish meatballs?

To make gluten-free Swedish meatballs, substitute gluten-free breadcrumbs in the meat mixture and use gluten-free flour to thicken the gravy.

4. Can I freeze Swedish meatballs?

Yes, Swedish meatballs freeze very well. You can freeze them either before or after cooking. If freezing uncooked, place them on a baking sheet and freeze until solid before transferring them to an airtight container.

5. Why are Swedish meatballs traditionally served with lingonberry jam?

The sweet-tart flavor of lingonberry jam contrasts with the rich, savory flavors of the meatballs and gravy, adding a refreshing element to the dish.


Conclusion

Tina’s Swedish Meatballs are a perfect blend of savory spices, tender meatballs, and creamy gravy that make for a comforting, crowd-pleasing meal. Whether served over egg noodles, mashed potatoes, or with a side of lingonberry jam, these meatballs are sure to become a favorite in your home.

For more ideas on how to elevate this dish, try the Swedish Meatball Pasta Bake Recipe from Tina’s Chic Corner for a comforting twist on the traditional Swedish meatball dish.