Classic Apple Dumplings: A Warm and Comforting Dessert

baked apple dumplings, traditional apple dumplings, easy apple dumplings recipe, cinnamon apple dumplings, homemade apple dumplings

Apple Dumplings: A Classic Comfort Dessert

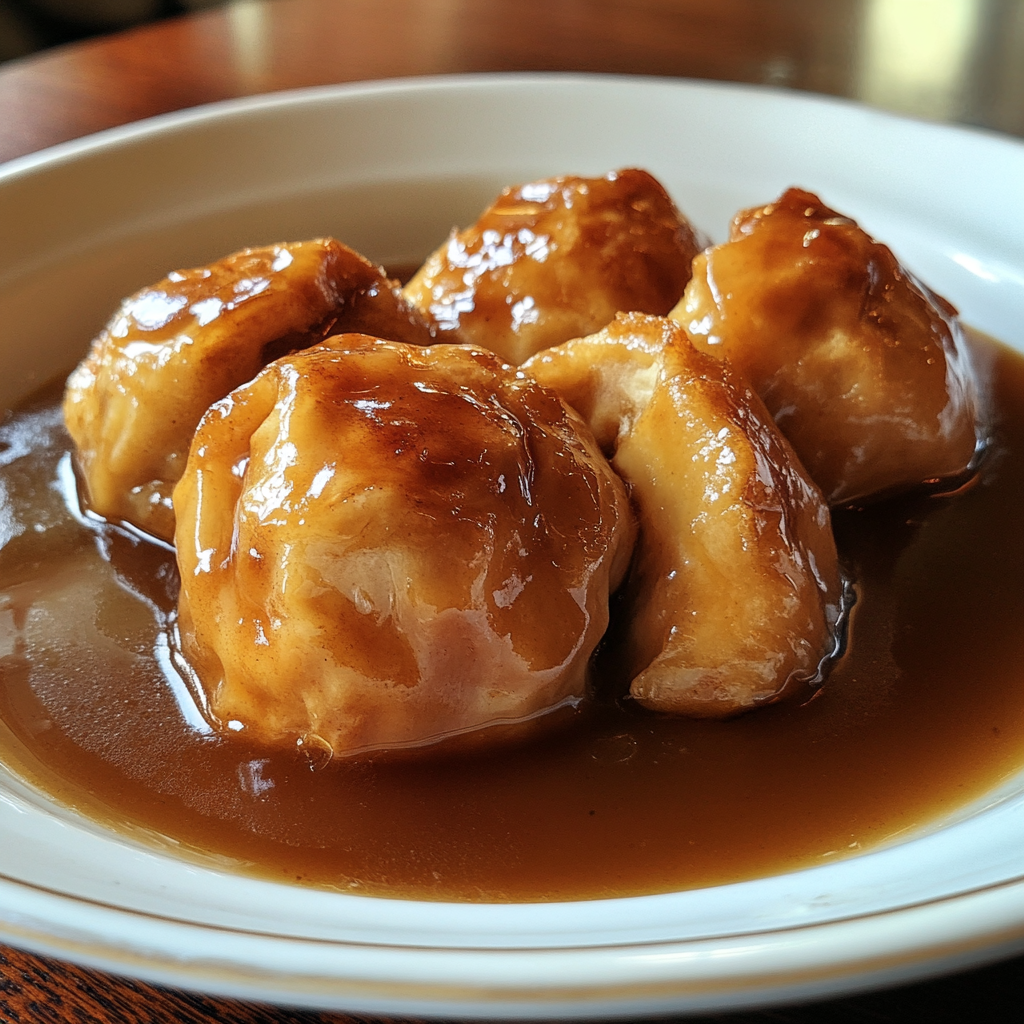
Apple dumplings are a beloved classic dessert, perfect for those cozy fall evenings or any time you crave a warm, comforting treat. This dish combines tender apples wrapped in flaky dough, baked in a rich sauce of sugar, butter, and cinnamon. The result is a sweet and spiced dessert that’s crispy on the outside, tender on the inside, and always delicious.

Apple dumplings have stood the test of time for their simplicity and versatility. While traditional recipes use homemade pie dough, modern versions often utilize crescent rolls or pre-made dough for a quicker preparation. To learn more about the different dough options, check out this easy apple dumplings recipe, which simplifies the process without compromising flavor.


Ingredients for Apple Dumplings

To make perfect apple dumplings, you’ll need a mix of basic ingredients, apples, and some spices. Here’s what you’ll need:

For the Apples and Dough:

  • 6 Granny Smith apples: Granny Smith apples are tart, which balances the sweetness of the sauce.
  • 1 package refrigerated crescent roll dough: A quick and easy alternative to homemade dough.
  • 1 cup butter: Unsalted and melted for the sauce.
  • 1 cup granulated sugar: Adds sweetness to the sauce.
  • 1 teaspoon cinnamon: For warming spice.
  • ½ teaspoon ground nutmeg (optional): Adds a bit of depth to the spice mix.
  • 1 can of Mountain Dew or citrus soda: A unique modern twist that helps keep the dumplings moist and adds a subtle flavor.

Optional Add-Ins:

  • Vanilla extract: 1 teaspoon for a hint of vanilla flavor.
  • Caramel sauce: Drizzle over the baked dumplings for extra indulgence.

By combining the tartness of Granny Smith apples with the buttery richness of the dough and sugar mixture, apple dumplings create a perfect balance of flavors. If you prefer a more traditional approach, you can replace the crescent roll dough with homemade pie crust. For more information on making apple dumplings from scratch, see this traditional apple dumpling recipe.


Step-by-Step Guide to Making Apple Dumplings

1. Preparing the Apples

The first step in making apple dumplings is selecting and preparing the apples. Granny Smith apples are the preferred choice due to their tartness, which pairs well with the sweet sauce.

Instructions:

  1. Peel and Core the Apples: Begin by peeling the apples. Use a corer or paring knife to remove the core, leaving the apples whole.
  2. Cut Apples in Halves: Once cored, cut the apples in halves if you are using smaller dough pieces like crescent rolls. If using pie dough, leave the apples whole.

For a fun variation, try experimenting with other apple varieties like Honeycrisp or Braeburn, which add a sweeter note to the dish.

2. Wrapping the Apples in Dough

Next, it’s time to wrap the apples in the dough. Crescent rolls provide a convenient, easy-to-use option, but feel free to use homemade pie dough if you prefer.

Instructions:

  1. Roll Out the Dough: If you’re using crescent roll dough, roll out the individual triangles. For pie dough, roll it out on a floured surface and cut into squares large enough to wrap around each apple.
  2. Wrap Each Apple Half: Place each apple half in the center of a dough triangle or square. Fold the dough around the apple, pinching the edges to seal tightly.
  3. Place in Baking Dish: Transfer the wrapped apples to a greased 9×13-inch baking dish, ensuring they are spaced evenly.

The process of wrapping the apples can be a fun activity for kids, and it ensures that each dumpling has a crispy, flaky exterior while the apples bake to tender perfection.

3. Making the Sauce

The rich sauce that’s poured over the apple dumplings before baking is what gives them their signature sweetness and flavor.

Instructions:

  1. Melt the Butter: In a medium saucepan, melt 1 cup of butter over medium heat.
  2. Add Sugar and Spices: Stir in the granulated sugar, cinnamon, and nutmeg (if using), and cook until the sugar dissolves and the mixture is smooth. For an extra layer of flavor, you can also stir in 1 teaspoon of vanilla extract.
  3. Pour the Sauce Over the Dumplings: Evenly pour the butter-sugar mixture over the dumplings in the baking dish.

This sauce will bubble up during baking, creating a luscious syrup that coats the dumplings and fills the house with the irresistible scent of cinnamon and apples.

4. Baking the Dumplings

After the dumplings are wrapped and the sauce is prepared, it’s time to bake.

Instructions:

  1. Pour in the Soda: Pour the can of Mountain Dew or citrus soda around the edges of the pan. This helps to keep the dumplings moist and adds a subtle sweetness.
  2. Bake the Dumplings: Preheat the oven to 375°F (190°C) and bake the dumplings for 35-40 minutes, or until the dough is golden brown and the sauce is bubbly.
  3. Cool Slightly: Allow the dumplings to cool in the pan for about 10 minutes before serving.

The result is a batch of perfectly golden-brown apple dumplings, with tender apples on the inside and crispy dough on the outside.


Serving and Storing Apple Dumplings

Once baked, these apple dumplings are best enjoyed warm, straight out of the oven.

Serving Suggestions:

  • With Ice Cream: Serve warm dumplings with a scoop of vanilla ice cream for the perfect contrast between hot and cold.
  • Drizzle Caramel Sauce: For an extra indulgent treat, drizzle the baked dumplings with caramel sauce.

Storing Leftovers:

  • Refrigeration: Store any leftovers in an airtight container in the refrigerator for up to 3 days. To reheat, warm them in the oven at 350°F until heated through.
  • Freezing: If you want to make them ahead or store extras, apple dumplings freeze well. Wrap the individual dumplings tightly in plastic wrap and store them in the freezer for up to 3 months.

Variations of Apple Dumplings

There are many ways to customize this classic dessert to suit your taste:

1. Country Apple Dumplings

  • Instructions: Use crescent roll dough and pour a can of Mountain Dew around the dumplings before baking to keep them moist and create a sweet sauce. This method is quick and delivers a delicious result every time.

2. Amish Apple Dumplings

  • Instructions: For a more traditional approach, use homemade pie crust and pour a rich syrup made from butter, sugar, and cinnamon over the dumplings before baking. See this Amish apple dumpling recipe for more details.

3. Caramel Apple Dumplings

  • Instructions: Add a tablespoon of caramel sauce inside each apple before wrapping it in dough for a rich, caramel-filled center.

FAQs About Apple Dumplings

1. Can I make apple dumplings ahead of time?

Yes, you can assemble the dumplings ahead of time and refrigerate them until you’re ready to bake. Just cover the pan tightly with plastic wrap and refrigerate for up to 24 hours. Bake as directed when ready to serve.

2. Can I use other types of apples?

Granny Smith apples are a popular choice due to their tartness, but other varieties like Honeycrisp, Fuji, or Braeburn can also be used, providing a slightly different sweetness and texture.

3. How do I store leftover apple dumplings?

Store any leftovers in an airtight container in the refrigerator for up to 3 days. Reheat in the oven at 350°F for 10-15 minutes or until heated through.

4. Can I freeze apple dumplings?

Yes, apple dumplings can be frozen. Wrap each dumpling tightly in plastic wrap and store in an airtight container in the freezer for up to 3 months. Thaw overnight in the refrigerator before baking.


Conclusion: A Delicious and Timeless Treat

Apple dumplings are a comforting and versatile dessert that has been loved for generations. Whether you choose to stick with the traditional recipe or try one of the fun variations, this dish is sure to impress your family and friends. The combination of tender baked apples, flaky dough, and rich, buttery sauce is simply irresistible.

For even more apple dumpling inspiration, check out these traditional apple dumpling recipes and start baking this delicious dessert today!

Blue Ribbon Blueberry Coffee Cake: A Perfectly Sweet and Crunchy Treat

blueberry streusel coffee cake, award-winning blueberry cake, homemade blueberry coffee cake, blueberry breakfast cake, easy blueberry coffee cake recipe

Blue Ribbon Blueberry Coffee Cake: A Delightful and Award-Winning Dessert

Blue Ribbon Blueberry Coffee Cake is an iconic treat that has won its place at breakfast tables and dessert spreads alike. With its perfect combination of tender crumb, juicy blueberries, and crunchy streusel topping, this cake is a guaranteed crowd-pleaser. Whether you’re hosting a brunch, enjoying a quiet morning with coffee, or serving dessert at a family gathering, this recipe is an award-winning option that you’ll turn to time and again.

What makes this coffee cake so special is its simple yet flavorful ingredients. By using fresh or frozen blueberries, high-quality butter, and a perfectly spiced streusel topping, this blueberry coffee cake brings comfort and nostalgia to every bite. To achieve the best results, check out these perfect coffee cake tips, which offer expert guidance on achieving the ideal texture and flavor.

Ingredients for Blue Ribbon Blueberry Coffee Cake

To make this blue ribbon blueberry coffee cake, you’ll need a combination of classic baking ingredients, blueberries, and a rich streusel topping. Let’s take a closer look at what you’ll need:

For the Cake:

  • 1 cup (2 sticks) butter: Unsalted, softened to room temperature.
  • 1 ½ cups granulated sugar: For sweetness in the batter.
  • 2 large eggs: At room temperature for easier mixing.
  • 1 teaspoon vanilla extract: Adds warmth and depth to the cake.
  • 2 ¼ cups all-purpose flour: Provides structure and a tender crumb.
  • 1 tablespoon baking powder: Ensures the cake rises properly.
  • ½ teaspoon salt: Balances the sweetness.
  • 1 cup buttermilk: Adds moisture and a slight tang to the cake.
  • 2 cups fresh or frozen blueberries: Tossed with 1 tablespoon of flour to prevent sinking.

For the Streusel Topping:

  • 1 cup all-purpose flour: Forms the base of the crumble.
  • ¾ cup granulated sugar: Adds sweetness and caramelizes during baking.
  • ½ teaspoon ground cinnamon: Adds warmth to the topping.
  • ½ cup (1 stick) cold butter: Cut into small cubes for a crumbly texture.

Using high-quality ingredients such as fresh blueberries and real butter will elevate your coffee cake to an award-winning level. If you’re using frozen blueberries, make sure to thaw them and pat them dry to prevent excess moisture from affecting the cake’s texture. For more guidance on achieving the perfect streusel, check out this helpful streusel topping recipe.

Step-by-Step Guide to Making Blue Ribbon Blueberry Coffee Cake

1. Preparing the Streusel Topping

The streusel is what gives this blueberry coffee cake its signature crunch. It’s easy to prepare and adds both texture and sweetness.

Instructions:

  1. Combine Dry Ingredients: In a medium bowl, mix the flour, sugar, and cinnamon.
  2. Cut in the Butter: Using a pastry cutter or two forks, cut in the cold butter until the mixture forms pea-sized crumbs. You can also use your fingers, but be careful not to overwork the butter.
  3. Chill the Streusel: Place the streusel in the refrigerator while you prepare the cake batter to keep the butter firm.

2. Mixing the Cake Batter

The cake batter for blue ribbon blueberry coffee cake is rich, buttery, and infused with the fresh flavor of blueberries. Here’s how to make it:

Instructions:

  1. Cream the Butter and Sugar: In a large mixing bowl, cream together the softened butter and sugar using an electric mixer until light and fluffy, about 3-4 minutes.
  2. Add Eggs and Vanilla: Beat in the eggs one at a time, making sure each egg is fully incorporated before adding the next. Stir in the vanilla extract.
  3. Mix Dry Ingredients: In a separate bowl, whisk together the flour, baking powder, and salt.
  4. Alternate Wet and Dry Ingredients: Gradually add the dry ingredients to the butter mixture, alternating with the buttermilk. Start and end with the dry ingredients, mixing just until combined.
  5. Fold in Blueberries: Toss the blueberries with 1 tablespoon of flour to prevent them from sinking in the batter, then gently fold them into the mixture.

3. Assembling and Baking the Cake

Now that the batter and streusel are ready, it’s time to assemble the cake.

Instructions:

  1. Prepare the Pan: Grease and flour a 9×13-inch baking pan or line it with parchment paper for easy removal.
  2. Layer the Batter: Spread half of the cake batter evenly in the prepared pan. Sprinkle a small amount of streusel over the top.
  3. Add Remaining Batter and Streusel: Spread the remaining batter over the first layer, then top with the rest of the streusel.
  4. Bake: Preheat your oven to 350°F (175°C) and bake the cake for 40-50 minutes, or until a toothpick inserted into the center comes out clean. Allow the cake to cool in the pan on a wire rack for at least 15 minutes before slicing and serving.

For a lighter texture, make sure not to overmix the batter. Mixing too vigorously can lead to a dense coffee cake instead of a light, tender crumb.

4. Serving and Storing

Serve this delicious blueberry coffee cake warm or at room temperature. It pairs perfectly with a hot cup of coffee or tea, making it an ideal breakfast treat or dessert.

Storing Instructions:

  • Room Temperature: Store the cake in an airtight container at room temperature for up to 2 days.
  • Refrigeration: Refrigerate the cake for up to a week if you want to extend its shelf life.
  • Freezing: You can also freeze individual slices wrapped in plastic wrap and foil for up to 3 months. Thaw at room temperature or reheat in the microwave for a quick treat.

Variations of Blue Ribbon Blueberry Coffee Cake

1. Lemon Blueberry Coffee Cake

For a fresh twist, try adding lemon zest and juice to the batter. The lemon flavor pairs beautifully with the sweetness of the blueberries, adding a bright and zesty note to the cake.

Instructions:

  • Add 1 tablespoon of lemon zest to the sugar before creaming it with the butter.
  • Stir in 1 tablespoon of fresh lemon juice with the buttermilk for a tangy flavor.

2. Gluten-Free Blueberry Coffee Cake

To make a gluten-free version of this cake, simply substitute the all-purpose flour with a 1:1 gluten-free flour blend. Make sure the blend contains xanthan gum or another binding agent to help mimic the structure of regular flour.

Instructions:

  • Use 2 ¼ cups of a trusted gluten-free flour blend, such as Bob’s Red Mill Gluten-Free 1-to-1 Baking Flour.
  • Follow the rest of the recipe as directed.

For more details on creating a gluten-free coffee cake, visit this gluten-free blueberry coffee cake recipe.

3. Almond Streusel Blueberry Coffee Cake

If you love the combination of blueberries and almonds, try adding slivered almonds to the streusel topping for extra crunch and nutty flavor.

Instructions:

  • Stir ½ cup of slivered almonds into the streusel topping before sprinkling it over the cake.

FAQs About Blue Ribbon Blueberry Coffee Cake

1. Can I use frozen blueberries for this recipe?

Yes, you can use frozen blueberries. Be sure to thaw them completely and pat them dry before folding them into the batter. This helps prevent extra moisture from affecting the texture of the cake.

2. What is the best way to store this coffee cake?

Store the coffee cake in an airtight container at room temperature for up to 2 days. For longer storage, refrigerate the cake for up to a week, or freeze individual slices for up to 3 months.

3. How can I prevent the blueberries from sinking?

To prevent blueberries from sinking, toss them with 1 tablespoon of flour before folding them into the batter. This trick helps keep the berries suspended throughout the cake.

4. Can I make this cake in advance?

Yes! You can bake the cake the day before you plan to serve it. Store it in an airtight container at room temperature and, if desired, reheat slices briefly in the microwave before serving.

Conclusion: A Classic and Award-Winning Dessert

This blue ribbon blueberry coffee cake is a dessert that lives up to its reputation. With its tender crumb, bursts of fresh blueberries, and crunchy streusel topping, it’s no wonder this cake is a favorite at competitions and family gatherings alike. Whether you’re baking it for a special occasion or simply to enjoy with your morning coffee, this recipe is sure to impress.

Don’t forget to try the different variations, such as the lemon blueberry or almond streusel versions, to find your perfect combination. For more award-winning coffee cake recipes, visit perfect coffee cake tips and take your baking to the next level!

Jack-o’-Lantern Stuffed Peppers: A Spooky and Delicious Halloween Recipe

Halloween stuffed peppers, Halloween pepper recipe, spooky stuffed peppers, Jack-o'-Lantern bell peppers, Halloween dinner recipe

Jack-o’-Lantern Stuffed Peppers Recipe: A Spooky Halloween Delight

Halloween is the perfect time to get creative in the kitchen, and what better way to celebrate than with Jack-o’-Lantern stuffed peppers? These festive peppers are a fun and spooky twist on traditional stuffed peppers, perfect for Halloween parties, family dinners, or even a creative dinner idea to surprise your kids.

These adorable, carved orange bell peppers, stuffed with a flavorful mixture of ground beef, rice, and spices, resemble mini Jack-o’-Lanterns. Not only are they visually stunning, but they’re also packed with flavor. You can even make them vegetarian or low-carb, making this dish versatile enough for almost any dietary preference.

For tips on carving the perfect peppers, check out these tips for carving jack-o’-lantern peppers, which offer step-by-step instructions on getting the best results.

Ingredients for Jack-o’-Lantern Stuffed Peppers

Before we begin, let’s gather all the necessary ingredients. This recipe uses simple ingredients to create a flavorful stuffing that pairs perfectly with the naturally sweet orange peppers.

For the Peppers:

  • 6 orange bell peppers: These will serve as your edible Jack-o’-Lanterns.
  • Olive oil: To brush the peppers before baking.

For the Filling:

  • 1 lb ground beef or turkey: Ground turkey is a leaner option, but ground beef adds extra flavor.
  • 1 cup cooked rice or quinoa: Adds bulk to the filling. You can use white, brown, or even cauliflower rice for a low-carb option.
  • 1 small onion: Finely chopped to add flavor to the filling.
  • 2 garlic cloves: Minced for an aromatic base.
  • 1 can diced tomatoes (14.5 oz): Provides moisture and a slight tang to the filling.
  • ½ cup shredded cheese: Cheddar, mozzarella, or a blend, for added richness (optional).
  • 1 teaspoon cumin: For a subtle warm spice.
  • 1 teaspoon chili powder: To add a bit of heat, adjust according to your preference.
  • Salt and pepper: To taste.

Optional Toppings:

  • Shredded cheese: Melted on top for a cheesy finish.
  • Chopped parsley: Adds freshness and color to the final dish.

By using simple pantry staples like rice, ground beef, and diced tomatoes, this recipe becomes easy to customize. Feel free to add in your favorite spices, herbs, or even different cheeses to suit your taste. For a vegetarian version, replace the meat with black beans or lentils, and follow this vegetarian stuffed peppers recipe for a plant-based twist.

Step-by-Step Guide to Making Jack-o’-Lantern Stuffed Peppers

1. Preparing the Peppers

The first step is to prepare the orange bell peppers. Since they’ll act as your edible Jack-o’-Lanterns, take care while carving.

Instructions:

  1. Select Your Peppers: Choose large, firm orange bell peppers. These will be the easiest to carve and hold their shape during baking.
  2. Cut the Tops Off: Using a sharp knife, slice off the tops of the peppers and set them aside. These will serve as the lids for your Jack-o’-Lanterns.
  3. Remove Seeds and Membranes: Carefully remove all seeds and membranes inside the peppers to create a hollow space for the stuffing.
  4. Carve the Faces: Use a small paring knife to carve out Jack-o’-Lantern faces on one side of each pepper. Get creative with your designs—whether spooky or cute!

Prepping the peppers is where the fun begins. Kids can join in on the carving, making this an excellent family-friendly recipe. If you’re worried about the peppers collapsing during baking, check out how to carve peppers for Halloween for tips on selecting and prepping the best peppers.

2. Making the Filling

Next, it’s time to create the delicious stuffing that will go inside your peppers. This filling is packed with protein, grains, and flavor.

Instructions:

  1. Cook the Ground Meat: Heat a tablespoon of olive oil in a large skillet over medium heat. Add the ground beef or turkey and cook until browned, breaking it up into small pieces as it cooks.
  2. Add Onions and Garlic: Once the meat is browned, add the chopped onions and garlic to the skillet. Sauté for 3-4 minutes until softened and fragrant.
  3. Stir in Tomatoes and Rice: Add the can of diced tomatoes (with juice) and the cooked rice to the meat mixture. Stir well to combine.
  4. Season the Filling: Sprinkle in cumin, chili powder, salt, and pepper. Adjust seasoning to taste, and cook for another 5 minutes until everything is well-mixed and heated through.

This filling can be easily adapted to your taste preferences. If you want a cheesier texture, consider adding ½ cup of shredded cheese to the mixture before stuffing the peppers. For more inspiration, explore this cheesy stuffed pepper recipe for ideas on using different cheeses.

3. Stuffing the Peppers

Once the filling is prepared, it’s time to stuff your carved peppers.

Instructions:

  1. Fill the Peppers: Using a spoon, carefully fill each carved pepper with the stuffing mixture. Be generous with the filling, but avoid overstuffing as the mixture may expand slightly when cooked.
  2. Top with Cheese: If you’re adding cheese, sprinkle some on top of each stuffed pepper for a gooey, melty finish.
  3. Replace the Pepper Tops: Place the reserved tops back on the peppers to complete the Jack-o’-Lantern look.

4. Baking the Stuffed Peppers

Now it’s time to bake the stuffed peppers to perfection.

Instructions:

  1. Preheat the Oven: Preheat your oven to 375°F (190°C).
  2. Bake the Peppers: Place the stuffed peppers upright in a baking dish. Add about ½ cup of water or broth to the bottom of the dish to prevent the peppers from drying out.
  3. Cover and Bake: Cover the dish with foil and bake for 25-30 minutes. This will allow the peppers to soften and the filling to heat through.
  4. Uncover and Finish Baking: For the last 5 minutes of cooking, remove the foil and let the tops of the peppers and cheese brown slightly. If you want extra color, broil for 1-2 minutes at the end.

Variations of Jack-o’-Lantern Stuffed Peppers

This recipe is incredibly versatile, and there are several ways you can modify it to suit your dietary needs or preferences:

1. Vegetarian Jack-o’-Lantern Stuffed Peppers

  • Swap out ground meat for black beans, quinoa, or lentils. Follow the same steps to sauté the beans and grains with onions, garlic, and spices.

2. Cheesy Jack-o’-Lantern Stuffed Peppers

  • Add 1 cup of shredded cheese directly into the filling mixture. The cheese will make the filling creamier and add a rich flavor.

3. Low-Carb Jack-o’-Lantern Stuffed Peppers

  • Substitute the rice with cauliflower rice for a low-carb version. Simply sauté the cauliflower rice in olive oil for a few minutes before adding it to the filling.

FAQs About Jack-o’-Lantern Stuffed Peppers

1. Can I make jack-o’-lantern stuffed peppers ahead of time?

Yes, you can prepare the peppers and filling ahead of time. Store them separately in the refrigerator and stuff and bake the peppers just before serving.

2. What can I substitute for ground beef?

You can easily substitute ground turkey, chicken, or even plant-based alternatives like black beans or lentils.

3. How do I prevent the peppers from getting soggy?

Avoid overcooking the peppers, and ensure they don’t sit too long in liquid. Lightly roast or blanch the peppers before stuffing for better texture.

4. Can I freeze stuffed peppers?

Yes, you can freeze the stuffed peppers before baking. Thaw them in the refrigerator overnight and bake them as instructed when ready to serve.

Conclusion: A Fun and Festive Halloween Dish

Jack-o’-Lantern stuffed peppers are the perfect way to bring a spooky and delicious twist to your Halloween celebrations. Whether you’re hosting a party or simply looking for a creative dinner idea, these stuffed peppers are sure to impress. The best part? You can easily customize the filling to suit your dietary needs, whether that means making them vegetarian, cheesy, or low-carb.

For more Halloween-inspired recipes, check out these fun Halloween food ideas and enjoy a festive and spooky holiday!

Honey Baked Ham: A Sweet and Savory Holiday Classic

glazed honey ham, holiday ham recipe, spiral cut ham with honey glaze, baked ham with brown sugar, ham with sweet glaze

Honey Baked Ham: A Perfectly Glazed Holiday Classic

When it comes to holiday dinners, honey baked ham is one of the most iconic and beloved dishes. With its sweet and savory glaze, crispy caramelized edges, and tender, juicy meat, this dish has become a go-to centerpiece for gatherings like Thanksgiving, Christmas, and Easter. While many people opt to purchase honey-baked hams from specialty stores, making it at home is surprisingly easy—and far more cost-effective.

Homemade honey baked ham allows you to customize the glaze to your liking, whether you prefer a bit of bourbon for depth, pineapple juice for a tropical twist, or a straightforward honey-sugar mix. Plus, it’s incredibly versatile. Once you’ve had your fill of holiday ham, the leftovers are perfect for sandwiches, breakfast casseroles, and soups.

For more insight into getting the perfect caramelized crust on your ham, check out these perfect baked ham tips, which offer professional advice on glazing and roasting.

Ingredients for Honey Baked Ham

Before diving into the step-by-step process, let’s take a look at the key ingredients you’ll need to make the perfect honey baked ham.

For the Ham:

  • Spiral-cut ham (bone-in or boneless): 7-10 lbs (fully cooked, not raw)
  • Honey: ½ cup
  • Brown sugar: ½ cup
  • Butter: 4 tablespoons (unsalted)
  • Cinnamon: 1 teaspoon
  • Ground cloves: ½ teaspoon
  • Ground mustard: 1 teaspoon
  • Orange or pineapple juice (optional): ¼ cup

Optional Add-ins:

  • Bourbon: ¼ cup for depth and complexity in the glaze
  • Maple syrup: Replace half of the honey for a richer flavor
  • Pineapple slices: Classic accompaniment that adds a bright, sweet note

Using the right ingredients ensures your glaze has the perfect balance of sweetness and spice. The combination of honey, brown sugar, and spices brings out the best in the ham’s natural flavor, while adding citrus juice or bourbon can elevate the glaze to a whole new level.

For those seeking gluten-free options, make sure to check that all your spices and mustard powder are certified gluten-free. More tips on how to adapt recipes for gluten-free diets can be found in this gluten-free honey glaze recipe.

Step-by-Step Guide to Making Honey Baked Ham

1. Preparing the Ham

The first step in making the perfect honey baked ham is selecting the right ham and preparing it for baking.

Instructions:

  1. Choosing the Right Ham: You’ll want a pre-cooked, spiral-cut ham that weighs between 7 and 10 pounds. Spiral-cut hams make carving a breeze and allow the glaze to seep into every slice.
  2. Score the Ham: If your ham isn’t pre-scored, use a sharp knife to make shallow cuts in a diamond pattern on the surface. This helps the glaze penetrate the meat and ensures a flavorful crust.
  3. Preheat the Oven: Set your oven to 325°F. Place the ham in a roasting pan with the flat side down, and cover it loosely with foil to keep it from drying out.

2. Making the Glaze

The glaze is the heart of any honey baked ham, and getting the balance right between sweet, spicy, and tangy is key.

Instructions:

  1. Melt the Butter: In a small saucepan, melt the butter over medium heat. Once melted, stir in the honey, brown sugar, cinnamon, ground cloves, mustard, and orange juice (or bourbon, if using).
  2. Simmer the Glaze: Let the mixture simmer for 3-5 minutes, stirring frequently, until it thickens slightly. The goal is to create a thick, syrupy glaze that will coat the ham beautifully.
  3. Set Aside for Basting: Reserve some glaze for the final basting and crust formation.

For additional tips on how to glaze and bake ham to perfection, check out this helpful Pineapple glazed ham recipe, which offers variations and flavor-boosting ideas.

3. Baking the Ham

Once your ham is prepped and your glaze is ready, it’s time to start baking.

Instructions:

  1. Bake the Ham: Place the ham in the oven, covered with foil, and bake for about 10-12 minutes per pound. For a 7-pound ham, this will take roughly 1 hour and 10 minutes.
  2. Basting the Ham: After 30 minutes of baking, start basting the ham with the glaze every 20 minutes. Remove the foil for the last 30 minutes of baking to allow the glaze to caramelize and form a crispy crust.
  3. Check for Doneness: The internal temperature of the ham should reach 140°F when measured with a meat thermometer. If you’re unsure, give the ham an additional 5-10 minutes in the oven.

4. Creating the Perfect Crust

The final step in making the best honey baked ham is achieving that coveted golden, caramelized crust.

Instructions:

  1. Increase the Temperature: For the last 5 minutes of cooking, increase the oven temperature to 425°F or turn on the broiler. Keep a close eye on the ham during this stage to prevent the glaze from burning.
  2. Rest the Ham: After removing the ham from the oven, let it rest for about 10-15 minutes before carving. This allows the juices to redistribute throughout the meat, ensuring a juicy and flavorful result.

Serving and Storing Honey Baked Ham

Once your honey baked ham is out of the oven, it’s ready to be served. Here are a few tips for serving and storing:

  • Carving Tips: Spiral-cut ham is easy to serve—just follow the natural cuts made by the butcher. Use a sharp knife to slice down the sides and serve with extra glaze drizzled over the top.
  • Storage: Leftover ham can be stored in an airtight container in the refrigerator for up to 5 days. For longer storage, freeze ham slices in freezer-safe bags for up to 3 months.
  • Reheating: Reheat leftover ham in a 300°F oven, covered with foil, for about 10-15 minutes, or until warmed through.

Variations of Honey Baked Ham

Here are a few variations to try if you want to switch things up or add a unique twist to your ham:

1. Bourbon Honey Baked Ham

  • Add ¼ cup of bourbon to the glaze mixture to give the ham a deeper, more complex flavor. The alcohol will cook off, leaving behind a smoky richness that pairs beautifully with the sweetness of the honey and brown sugar.

2. Pineapple Honey Baked Ham

  • Brush the ham with pineapple juice before applying the glaze, and add pineapple slices to the top of the ham before baking. This variation adds a tropical sweetness and pairs wonderfully with the smoky, savory ham.

3. Gluten-Free Honey Baked Ham

  • Ensure all your spices and mustard powder are gluten-free, and you can easily make this dish safe for those with gluten intolerance. The glaze is naturally gluten-free, but double-check your ingredients to be safe.

FAQs About Honey Baked Ham

1. Can I make honey baked ham ahead of time?

Yes, you can bake the ham a day ahead. Let it cool, then wrap it tightly and refrigerate it. When ready to serve, gently reheat it in a 300°F oven for 20-25 minutes.

2. Can I use a boneless ham?

Yes, boneless ham works well with this recipe, although bone-in ham generally has more flavor. The process is the same, but boneless hams tend to cook faster.

3. How do I store leftover honey baked ham?

Leftovers should be stored in an airtight container in the refrigerator for up to 5 days. You can also freeze sliced ham in a freezer-safe container for up to 3 months.

4. What sides go best with honey baked ham?

Classic sides like mashed potatoes, green beans, and dinner rolls pair beautifully with honey baked ham. For a more festive meal, try serving it with cranberry sauce or roasted vegetables.

Conclusion: A Sweet and Savory Holiday Tradition

There’s nothing quite like the combination of sweet honey glaze and savory ham to create the perfect holiday meal. Whether you’re hosting a large gathering or making a small family dinner, honey baked ham is a surefire hit. With its tender meat and caramelized crust, this dish never fails to impress.

Try experimenting with variations like bourbon or pineapple glaze to make the recipe your own, and enjoy the versatility of ham leftovers in soups, sandwiches, and casseroles.

For more ideas on how to elevate your ham, check out gluten-free honey glaze recipe and explore different flavors that make this dish a standout at any gathering.

Salisbury Steak Meatballs: A Comforting Dish with Savory Mushroom Gravy

meatballs with mushroom gravy, easy Salisbury steak recipe, beef meatballs, Salisbury steak with gravy, comfort food meatballs

Salisbury Steak Meatballs: A Comfort Food Classic with Rich Flavor

Salisbury steak meatballs bring all the flavors of the classic Salisbury steak into bite-sized form, perfect for a comforting family dinner. Tender, flavorful beef meatballs simmered in a savory mushroom gravy make this dish a true crowd-pleaser. It’s the perfect meal for busy weeknights, meal prep, or even entertaining guests. You can serve these delicious meatballs with mashed potatoes, egg noodles, or even rice to soak up the rich, savory gravy.

For anyone who loves comfort food with minimal effort, Salisbury steak meatballs are a go-to. Plus, this dish is versatile—you can switch up the ingredients or even make it gluten-free to suit your dietary needs. For tips on creating the perfect meatballs, check out Tips for perfect meatballs, which breaks down the essential steps for meatball success.

Ingredients for Salisbury Steak Meatballs

To get started, you’ll need the following ingredients:

For the Meatballs:

  • 1 ½ lbs ground beef (85/15 is ideal for flavor and juiciness)
  • ½ cup breadcrumbs
  • 1 egg
  • 1 small onion, finely minced
  • 2 cloves garlic, minced
  • 2 tablespoons Worcestershire sauce
  • ½ teaspoon salt
  • ½ teaspoon black pepper
  • 1 tablespoon olive oil (for browning the meatballs)

For the Mushroom Gravy:

  • 1 cup mushrooms, thinly sliced
  • 2 tablespoons butter
  • 2 tablespoons all-purpose flour
  • 2 cups beef broth
  • 2 tablespoons Worcestershire sauce
  • 1 teaspoon Dijon mustard
  • Salt and pepper to taste

Optional Garnishes:

  • Fresh parsley, chopped
  • Thyme, for extra flavor

By combining ground beef with Worcestershire sauce, breadcrumbs, and fresh onion and garlic, you create meatballs that are packed with flavor and moisture. The mushroom gravy is essential to this dish, and it’s the savory component that ties everything together. If you’re interested in gluten-free alternatives, check out these gluten-free breadcrumb substitutes.

Step-by-Step Guide to Making Salisbury Steak Meatballs

1. Preparing the Meatball Mixture

First, you need to make the meatballs.

Instructions:

  1. Mix the Ingredients: In a large bowl, combine the ground beef, breadcrumbs, egg, Worcestershire sauce, minced onion, garlic, salt, and pepper. Use your hands to gently mix everything until just combined. Be careful not to overwork the meat, as this can make the meatballs tough.
  2. Shape the Meatballs: Using your hands, form the mixture into evenly sized meatballs, about 1 inch in diameter. You should have about 16-20 meatballs depending on their size.
  3. Brown the Meatballs: Heat the olive oil in a large skillet over medium heat. Add the meatballs in batches, making sure not to overcrowd the pan. Cook the meatballs for 2-3 minutes per side, until browned all over. Remove the meatballs and set aside.

Browning the meatballs adds depth of flavor and ensures they hold their shape when simmered in the gravy. For more information on browning meat properly, visit Tips for browning meatballs.

2. Making the Mushroom Gravy

While the meatballs are resting, it’s time to make the savory mushroom gravy.

Instructions:

  1. Sauté the Mushrooms: In the same skillet, add the butter and mushrooms. Cook over medium heat, stirring occasionally, until the mushrooms are browned and their moisture has evaporated, about 5 minutes.
  2. Create a Roux: Sprinkle the flour over the mushrooms and stir to combine. Cook for 1-2 minutes to remove the raw flour taste.
  3. Add Broth and Seasoning: Slowly pour in the beef broth, whisking constantly to avoid lumps. Add the Worcestershire sauce, Dijon mustard, and season with salt and pepper. Bring the mixture to a simmer and let it thicken slightly.

The key to a smooth and flavorful gravy is creating a roux and slowly incorporating the broth. If you want a thicker gravy, allow the mixture to simmer longer.

3. Simmering the Meatballs in the Gravy

Once the gravy has thickened, it’s time to return the meatballs to the skillet.

Instructions:

  1. Return the Meatballs: Add the browned meatballs back into the skillet, nestling them into the gravy.
  2. Simmer the Meatballs: Cover the skillet and let the meatballs simmer in the gravy for 10-15 minutes, or until they are cooked through and tender. Stir occasionally to make sure the meatballs are evenly coated in the sauce.

Allowing the meatballs to simmer in the gravy ensures that they are fully cooked and infused with the rich flavors of the sauce.

4. Serving Suggestions

Salisbury steak meatballs pair perfectly with various sides that can soak up the delicious gravy.

Serving Ideas:

  • Mashed Potatoes: Creamy mashed potatoes are the perfect base for these meatballs and their rich gravy.
  • Egg Noodles: The soft, buttery noodles complement the savory sauce and meatballs beautifully.
  • Steamed Vegetables: Balance the richness with a side of steamed broccoli or green beans.

For a beautiful presentation, garnish with freshly chopped parsley or thyme. This adds both color and a fresh pop of flavor to the dish.

Variations of Salisbury Steak Meatballs

There are many ways to customize this recipe to suit your tastes or dietary preferences:

1. Slow Cooker Salisbury Steak Meatballs

If you’re short on time or prefer a hands-off approach, making these meatballs in a slow cooker is a great option.

  • Instructions: After browning the meatballs, transfer them to a slow cooker. Add the gravy ingredients, cover, and cook on low for 4-6 hours. The meatballs will turn out tender and infused with the rich gravy.

2. Salisbury Steak Meatballs with Turkey or Chicken

For a lighter version of this dish, try using ground turkey or chicken instead of beef.

  • Instructions: Follow the same process as the original recipe, but reduce the cooking time slightly since poultry cooks faster. Ensure the internal temperature reaches 165°F.

3. Gluten-Free Salisbury Steak Meatballs

This dish can easily be made gluten-free by swapping out the breadcrumbs and flour.

  • Instructions: Use gluten-free breadcrumbs in the meatball mixture, and replace the all-purpose flour in the gravy with a gluten-free flour blend or cornstarch slurry.

FAQs About Salisbury Steak Meatballs

1. Can I freeze Salisbury steak meatballs?

Yes, Salisbury steak meatballs freeze well. To freeze, cook the meatballs and gravy as directed, then allow everything to cool completely. Transfer to an airtight container or freezer-safe bag and freeze for up to 3 months. When ready to serve, thaw overnight in the refrigerator and reheat on the stovetop.

2. Can I use store-bought frozen meatballs?

Absolutely! You can use store-bought frozen meatballs to save time. Simply brown the frozen meatballs in a skillet and follow the same gravy-making steps.

3. How do I store leftovers?

Store any leftovers in an airtight container in the refrigerator for up to 4 days. Reheat gently in a skillet or microwave, adding a splash of water or broth to loosen the gravy if necessary.

4. What sides go best with Salisbury steak meatballs?

Mashed potatoes, egg noodles, or steamed rice are ideal sides for this dish because they soak up the flavorful gravy. Add a side of roasted vegetables or a simple green salad for a complete meal.

Conclusion: A Comforting, Flavorful Dish

Salisbury steak meatballs are a delicious twist on a comfort food classic. With tender meatballs, a rich mushroom gravy, and the ability to pair with a variety of sides, this dish is perfect for any occasion. Whether you’re feeding a family, meal-prepping for the week, or looking for something hearty to serve at a dinner party, these meatballs are sure to impress.

For more variations or slow cooker recipes, be sure to check out Slow Cooker Salisbury Steak Meatballs, where you’ll find even more ways to enjoy this dish.