Mashed Sweet Potatoes: Creamy, Delicious, and Perfect for Any Meal

sweet potato mash, creamy mashed sweet potatoes, savory mashed sweet potatoes, easy mashed sweet potatoes, holiday sweet potatoes

Mashed Sweet Potatoes: A Creamy and Delicious Side Dish

Mashed sweet potatoes are a versatile and flavorful dish that fits perfectly on any dining table, whether it’s a holiday feast or a simple weeknight meal. Packed with nutrients like fiber, vitamins A and C, and antioxidants, sweet potatoes are not only delicious but also provide a nutritious alternative to regular mashed potatoes. Their natural sweetness pairs wonderfully with both savory and sweet additions, making them a crowd-pleaser for any occasion.

In this comprehensive guide, we’ll explore how to make creamy, smooth mashed sweet potatoes, different flavor variations, and useful tips to make them the perfect side dish for your next meal.

For another quick and easy version of this dish, you can check out this simple mashed sweet potatoes recipe for additional inspiration and serving suggestions.


Ingredients for Mashed Sweet Potatoes

To create the perfect mashed sweet potatoes, you need a few simple ingredients. Each one plays a vital role in balancing sweetness, creaminess, and flavor.

Core Ingredients:

  • 4 medium sweet potatoes: Peeled and cubed for easier cooking.
  • 4 tablespoons unsalted butter: Adds richness and enhances flavor.
  • ½ cup heavy cream (or milk): Makes the mashed sweet potatoes smooth and creamy.
  • Salt and pepper to taste: To balance the sweetness of the potatoes.
  • Optional add-ins: Maple syrup for sweetness, garlic for a savory kick, or cinnamon for warmth.

The combination of these ingredients creates a harmonious balance of flavor and texture. You can even switch out the butter for olive oil and the cream for coconut milk to make it dairy-free. For more ideas on how to customize this dish, visit savory mashed sweet potatoes recipe.


Step-by-Step Guide to Making Mashed Sweet Potatoes

Follow these steps to make your mashed sweet potatoes perfectly creamy and flavorful.

1. Preparing the Sweet Potatoes

The first step in making delicious mashed sweet potatoes is to prepare your potatoes correctly.

Instructions:

  1. Peel and cube the sweet potatoes: Start by peeling the potatoes and cutting them into evenly-sized cubes. This ensures they cook uniformly.
  2. Boil the sweet potatoes: Place the cubed potatoes in a large pot and cover them with cold water. Add a pinch of salt, then bring to a boil. Boil the potatoes for about 15-20 minutes, or until they are fork-tender.

Once the potatoes are cooked through, it’s important to drain them thoroughly to prevent watery mashed potatoes.


2. Mashing the Sweet Potatoes

Mashing sweet potatoes is where you can get creative with flavors and texture.

Instructions:

  1. Mash by hand or use a mixer: For a rustic texture, use a potato masher to mash the sweet potatoes. If you prefer a smoother consistency, use a hand mixer or immersion blender.
  2. Incorporate butter and cream: As you mash, add in the butter and warm cream (or milk) gradually. This helps to create a silky texture.

At this point, you’ll have a basic version of mashed sweet potatoes. To add more flavor, you can mix in a drizzle of maple syrup or a pinch of cinnamon, depending on whether you’re aiming for a sweet or savory version.


3. Seasoning and Enhancing the Flavor

Once your potatoes are mashed to your desired consistency, it’s time to season them.

Instructions:

  1. Add salt and pepper: Season the mashed sweet potatoes with salt and pepper to taste. You may also add garlic powder or fresh herbs like thyme for a more savory flavor profile.
  2. Sweet version options: For a sweeter twist, mix in a tablespoon of brown sugar or maple syrup, and sprinkle in cinnamon or nutmeg.

Enhancing your sweet potatoes with additional flavors allows you to customize them based on your meal or occasion.


4. Serving and Garnishing

Mashed sweet potatoes are a versatile side dish that can be paired with a variety of main courses.

Instructions:

  • Serve immediately: For the best flavor and texture, serve the mashed sweet potatoes right away.
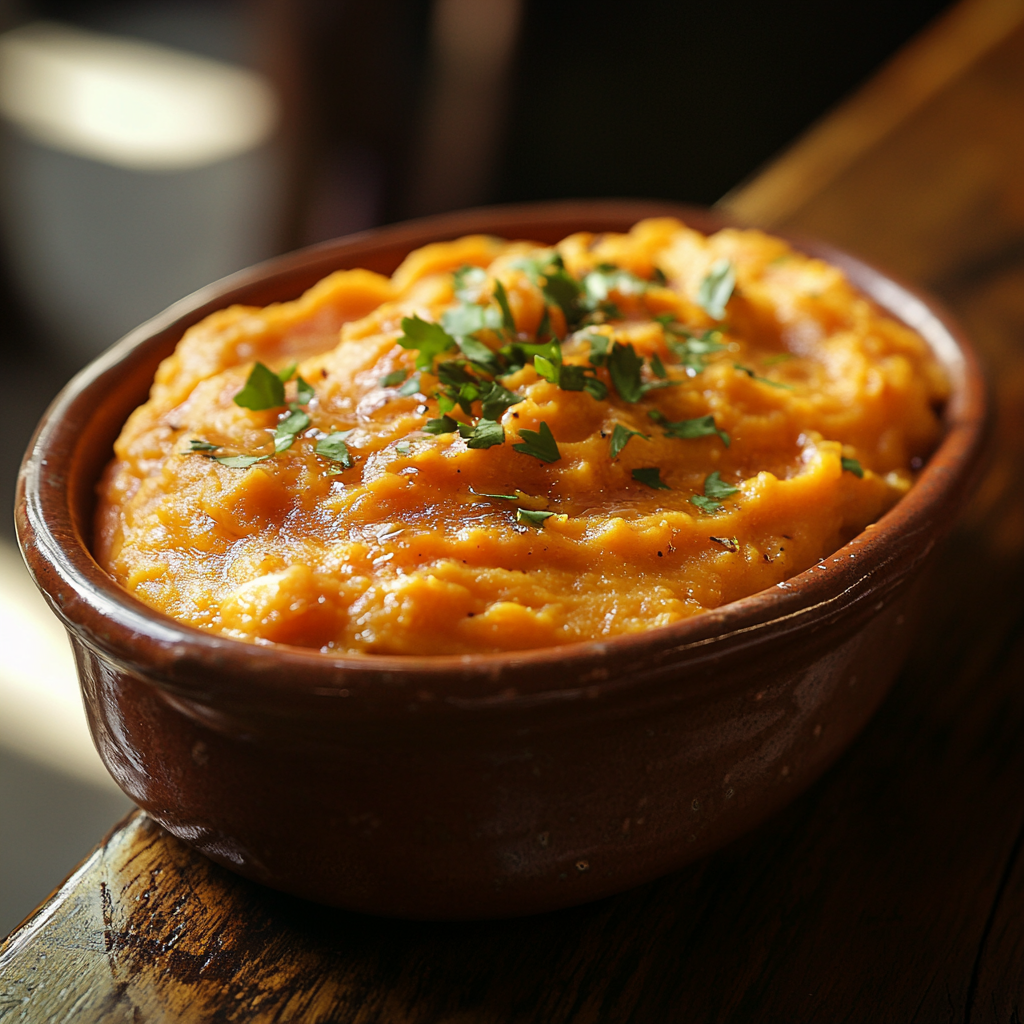
  • Garnish: Add a pat of butter on top for a beautiful, glossy finish or sprinkle with fresh herbs like parsley. You could also top with crispy bacon or toasted pecans for added crunch.

If you’re making them for a holiday meal, consider garnishing with marshmallows or pecans to make them even more festive.


Variations of Mashed Sweet Potatoes

While the classic mashed sweet potatoes are hard to beat, there are many ways to customize this dish to suit different flavor profiles and dietary preferences.

1. Savory Mashed Sweet Potatoes

For those who prefer a savory version, add garlic and herbs to your sweet potatoes.

Instructions:

  • Roast garlic: Add roasted garlic cloves to the mashed sweet potatoes for a deep, savory flavor.
  • Use sour cream or Greek yogurt: Instead of butter and cream, use sour cream or Greek yogurt for a tangier and lighter dish.
  • Season with herbs: Incorporate thyme, rosemary, or chives for a fresh, herbal touch.

2. Sweet Mashed Sweet Potatoes

For a sweeter version, enhance the natural sugars of the sweet potatoes.

Instructions:

  • Maple syrup and cinnamon: Add a tablespoon of maple syrup and a sprinkle of cinnamon for a dessert-like side dish.
  • Brown sugar and nutmeg: Mix in brown sugar and a pinch of nutmeg for a warm, cozy flavor.

3. Healthy Mashed Sweet Potatoes

If you’re looking for a healthier version, you can swap out certain ingredients.

Instructions:

  • Use olive oil instead of butter: For a dairy-free option, use olive oil instead of butter. This still adds richness without the saturated fat.
  • Replace cream with coconut milk: Coconut milk adds a tropical flair while keeping the dish vegan and dairy-free.
  • Reduce sugar: Limit or omit sugar-based ingredients and rely on the natural sweetness of the potatoes.

For more health-conscious variations, check out this healthy mashed sweet potatoes recipe.


FAQs About Mashed Sweet Potatoes

1. Can I make mashed sweet potatoes in advance?

Yes, mashed sweet potatoes can be made ahead of time. Simply store them in an airtight container in the refrigerator for up to 2 days. When reheating, add a little extra butter or cream to maintain their creamy texture.

2. Are mashed sweet potatoes healthy?

Sweet potatoes are rich in vitamins, fiber, and antioxidants, making them a healthy side dish. To keep them even healthier, opt for olive oil instead of butter and reduce added sugars.

3. How do I make mashed sweet potatoes without dairy?

For a dairy-free option, replace butter with olive oil or vegan butter and use almond milk, coconut milk, or broth instead of cream. This keeps the potatoes smooth and creamy without the dairy.

4. Can I freeze mashed sweet potatoes?

Yes, you can freeze mashed sweet potatoes. Place them in an airtight container and freeze for up to 3 months. When ready to use, thaw them overnight in the refrigerator and reheat on the stovetop or in the microwave, adding a splash of milk to revive their creamy texture.


Conclusion: A Versatile and Delicious Side Dish

Mashed sweet potatoes are a delightful and nutritious side dish that can complement any meal. Whether you prefer them savory with garlic and herbs, or sweet with maple syrup and cinnamon, they are a versatile option that can be customized to suit any palate.

Next time you’re planning a family dinner or holiday gathering, consider adding mashed sweet potatoes to the menu. Not only are they easy to make, but they can also be prepared ahead of time, saving you stress in the kitchen.

For more ideas on how to customize this classic dish, check out this simple mashed sweet potatoes recipe for even more tips and tricks.

Classic Beef Stew Recipe: A Hearty and Flavorful Comfort Dish

hearty beef stew, easy beef stew recipe, homemade beef stew, slow cooker beef stew, traditional beef stew

Beef Stew Recipe: Hearty, Flavorful, and Perfect for Any Season

Beef stew is the ultimate comfort food, with its tender chunks of beef, hearty vegetables, and rich, flavorful broth. This one-pot meal has been a family favorite for generations, offering warmth and nourishment during the colder months, but is equally enjoyable year-round. In this guide, we’ll walk you through a detailed recipe for making classic beef stew, along with some delicious variations, helpful tips, and answers to frequently asked questions.

If you’re looking for an easy way to prepare this dish in less time, you might want to try using an Instant Pot or slow cooker. For more information, check out this helpful Instant Pot beef stew recipe, which provides a quicker way to achieve tender, flavorful results.


Ingredients for Classic Beef Stew

A great beef stew recipe starts with high-quality ingredients. Here’s what you’ll need to make a rich, hearty stew:

Core Ingredients:

  • 2 pounds of beef chuck: Cut into 1-inch cubes, perfect for slow cooking and becoming tender.
  • 4 large carrots: Peeled and sliced.
  • 4 large potatoes: Peeled and cubed.
  • 3 stalks of celery: Chopped into small pieces.
  • 1 large onion: Diced.
  • 3 cloves of garlic: Minced.
  • 4 cups beef broth: The foundation of the stew, adds flavor and richness.
  • 2 tablespoons tomato paste: Enhances the depth of flavor.
  • 1 cup red wine (optional): For a richer, more complex flavor.
  • 2 bay leaves: Adds an aromatic, herbal note.
  • 1 teaspoon dried thyme: For subtle earthy flavor.
  • 1 tablespoon Worcestershire sauce: Adds umami and enhances the beef flavor.
  • Salt and pepper to taste: Season as desired.
  • Flour or cornstarch: For thickening the stew.

By combining these core ingredients, you create a flavorful base for your stew. If you prefer a gluten-free option or want to thicken the stew differently, check out this guide to thickening beef stew without flour.


Step-by-Step Guide to Making Beef Stew

1. Preparing the Ingredients

Start by gathering and prepping all your ingredients, which will make the cooking process smoother.

Instructions:

  1. Trim the beef: Cut the beef chuck into 1-inch cubes, trimming off any excess fat.
  2. Chop the vegetables: Dice the carrots, potatoes, celery, and onions into uniform sizes to ensure even cooking.
  3. Mince the garlic: Prepare the garlic by finely chopping it.

2. Browning the Beef

Browning the beef is an important step in developing flavor. This caramelizes the outside of the meat and creates a flavorful fond (browned bits) at the bottom of the pot.

Instructions:

  1. Heat oil in a Dutch oven: Heat 2 tablespoons of olive oil over medium-high heat.
  2. Sear the beef: Add the beef cubes in batches, ensuring not to overcrowd the pot. Brown each side for 3-4 minutes, then remove and set aside.

This process not only improves the taste of the beef but also adds richness to the stew. For more details on why this step is essential, check out this article on properly browning beef for stew.


3. Sautéing the Vegetables

After removing the beef, you’ll use the same pot to sauté the vegetables. This step builds more flavor before combining everything together.

Instructions:

  1. Add the onions and garlic: Sauté the onions for 5-7 minutes until they become soft and translucent. Add garlic and cook for 1 minute.
  2. Add the carrots and celery: Sauté the carrots and celery for 3-4 minutes to soften them slightly.

4. Building the Stew Base

Once your vegetables are softened, it’s time to build the flavorful base of the stew.

Instructions:

  1. Deglaze with red wine: Pour in the red wine (if using) and scrape up the browned bits from the bottom of the pot. Allow it to reduce by half.
  2. Add tomato paste: Stir in the tomato paste and cook for 2 minutes to deepen the flavor.
  3. Add broth and seasonings: Pour in the beef broth, Worcestershire sauce, thyme, and bay leaves. Return the beef to the pot.

5. Simmering the Stew

Now that the stew base is ready, you’ll simmer it slowly to tenderize the beef and bring all the flavors together.

Instructions:

  1. Cover and simmer: Bring the stew to a boil, then reduce the heat to low. Cover and simmer for 1 ½ to 2 hours, or until the beef is fork-tender.
  2. Add potatoes and carrots: About 30 minutes before the stew is done, add the cubed potatoes and sliced carrots. Simmer until the vegetables are soft and tender.

6. Thickening the Stew

Once your beef stew is done cooking, you’ll want to thicken it slightly for a rich, luxurious texture.

Instructions:

  1. Make a slurry: Whisk together 2 tablespoons of flour or cornstarch with ¼ cup water.
  2. Add to the stew: Stir the slurry into the stew and cook for another 5-10 minutes until the broth thickens.

Variations of Beef Stew

While the classic beef stew is delicious on its own, here are a few variations to suit different tastes:

1. Irish Beef Stew (150 words)

  • Substitute the broth with Guinness: Use Guinness beer in place of the beef broth for a deeper, richer flavor.
  • Instructions: Follow the same recipe, but add the Guinness during the deglazing process for that signature Irish taste.

2. Instant Pot Beef Stew (150 words)

  • Quick method for tender stew: Use an Instant Pot to prepare beef stew in under an hour without compromising flavor.
  • Instructions: Use the sauté function to brown the beef and then cook on high pressure for 35 minutes, followed by a natural pressure release.

3. Vegetable-Heavy Beef Stew (100 words)

  • More veggies, less beef: Increase the amount of vegetables like mushrooms, green beans, and parsnips for a lighter yet still hearty stew.
  • Instructions: Simply add more vegetables to the base recipe and reduce the beef if desired.

FAQs About Beef Stew

1. Can I freeze beef stew?

Yes, beef stew freezes very well. Store it in airtight containers or freezer bags for up to 3 months. To thaw, place the frozen stew in the refrigerator overnight and reheat on the stovetop.

2. What is the best cut of beef for stew?

Beef chuck is the best cut for stew because it becomes tender after slow cooking. Other cuts like brisket or round can also be used, but chuck offers the best balance of fat and tenderness.

3. Can I make beef stew in a slow cooker?

Yes, beef stew can easily be made in a slow cooker. Brown the beef first, then transfer all ingredients to the slow cooker and cook on low for 6-8 hours or on high for 4-5 hours.

4. How do I thicken beef stew without flour?

If you prefer not to use flour, you can thicken the stew by using cornstarch, arrowroot powder, or by mashing some of the potatoes in the stew.


Conclusion: The Perfect Comfort Food

Beef stew is the perfect dish when you’re looking for something hearty, flavorful, and satisfying. With its tender beef, rich broth, and perfectly cooked vegetables, this dish is a comforting meal for any season. By using high-quality ingredients and taking your time to simmer the stew, you’ll be rewarded with a dish that’s deeply flavorful and nourishing.

For more inspiration on creating variations of this classic, check out this slow cooker beef stew recipe, or consider making an Irish twist by using Guinness in your broth.

Butter Pecan Pound Cake: A Rich and Buttery Southern Favorite

buttery pecan pound cake, Southern pecan pound cake, rich butter pecan cake, pecan pound cake recipe, toasted pecan pound cake

Butter Pecan Pound Cake: A Rich and Indulgent Southern Classic

Butter pecan pound cake is a decadent and flavorful dessert that embodies everything we love about classic Southern baking. With its rich buttery base, crunchy toasted pecans, and soft, moist texture, this cake is perfect for any special occasion or simply to satisfy your sweet cravings. Whether you’re serving it at a holiday dinner or as an afternoon treat with a cup of coffee, this pound cake will always be a crowd-pleaser.

In this guide, we’ll walk you through the process of making a perfect butter pecan pound cake, highlighting essential ingredients and steps. You’ll also find variations of the recipe to suit different preferences and dietary needs. If you’re a fan of Southern baking, check out this southern butter pecan pound cake recipe for an even more in-depth approach to this classic dessert.


Ingredients for Butter Pecan Pound Cake

A great butter pecan pound cake starts with high-quality ingredients. Each component plays a critical role in delivering the rich, buttery flavor and the perfect crumb texture. Here’s what you’ll need:

For the Cake:

  • 1 cup butter: Unsalted, at room temperature.
  • 1 ½ cups granulated sugar: For sweetness and moisture.
  • 1 cup brown sugar: Adds depth and a caramel-like flavor.
  • 5 large eggs: At room temperature, for structure.
  • 2 ½ cups cake flour: Sifted for a light, tender crumb.
  • 1 teaspoon baking powder: Helps the cake rise.
  • ½ teaspoon salt: Balances the sweetness.
  • 1 cup buttermilk or sour cream: Ensures a moist cake.
  • 2 teaspoons vanilla extract: Adds flavor depth.
  • 1 ½ cups chopped toasted pecans: For crunch and nutty flavor.

For the Glaze (Optional):

  • 1 cup powdered sugar: For a sweet finish.
  • 2-3 tablespoons milk: To thin out the glaze.
  • 1 teaspoon vanilla extract: Enhances the sweetness of the glaze.

By using cake flour and buttermilk, you ensure a tender and moist cake with a melt-in-your-mouth texture. Toasting the pecans also adds an extra layer of flavor, as it brings out the natural oils and intensifies their nuttiness. To learn how to toast pecans properly, check out this helpful toasting pecans guide.


Step-by-Step Guide to Making Butter Pecan Pound Cake

1. Toasting the Pecans

Toasting pecans is an essential step in this recipe, as it enhances their flavor and provides a delicious crunch in every bite.

Instructions:

  1. Preheat the oven: Preheat your oven to 350°F (175°C).
  2. Toast the pecans: Spread the pecans in a single layer on a baking sheet. Toast them for about 7-10 minutes, stirring occasionally, until they are golden brown and fragrant. Allow them to cool before adding them to the batter.

2. Creaming the Butter and Sugars

For the perfect butter pecan pound cake, creaming the butter and sugars together until light and fluffy is a crucial step. This process helps to incorporate air into the batter, giving the cake its characteristic tender crumb.

Instructions:

  1. Cream the butter: In a large bowl, beat the room-temperature butter with a hand mixer or stand mixer on medium speed until creamy, about 1-2 minutes.
  2. Add the sugars: Gradually add the granulated and brown sugar to the butter, continuing to beat until light and fluffy, about 4-5 minutes. Scrape down the sides of the bowl as needed.

3. Incorporating the Eggs and Vanilla

Adding eggs one at a time helps maintain the emulsification of the butter and sugar mixture, ensuring a smooth, even texture.

Instructions:

  1. Add eggs one at a time: Beat in each egg one at a time, making sure each egg is fully incorporated before adding the next.
  2. Stir in vanilla: Once all the eggs are combined, add the vanilla extract and mix until evenly distributed.

4. Mixing the Dry and Wet Ingredients

The alternating method of mixing dry and wet ingredients helps avoid overmixing the batter, which can result in a dense cake.

Instructions:

  1. Combine dry ingredients: In a separate bowl, sift together the cake flour, baking powder, and salt.
  2. Alternate wet and dry ingredients: Gradually add the dry ingredients to the butter mixture, alternating with the buttermilk (or sour cream). Start and end with the dry ingredients, mixing just until combined after each addition.

5. Adding the Toasted Pecans

Once your batter is ready, gently fold in the toasted pecans. Be careful not to overmix, as this can toughen the cake.

Instructions:

  • Fold in pecans: Gently fold the cooled, toasted pecans into the batter with a spatula until evenly distributed.

6. Baking the Pound Cake

Proper baking is key to achieving a moist, perfectly textured butter pecan pound cake.

Instructions:

  1. Prepare the pan: Grease and flour a bundt pan or two 9×5-inch loaf pans.
  2. Bake the cake: Pour the batter into the prepared pans and smooth the top. Bake at 325°F (160°C) for 60-75 minutes, or until a toothpick inserted into the center comes out clean.
  3. Cool the cake: Allow the cake to cool in the pan for 10 minutes before transferring it to a wire rack to cool completely.

For an extra touch, you can top the cake with a sweet glaze made from powdered sugar, milk, and vanilla. Drizzle it over the cooled cake for a beautiful finish.


Variations of Butter Pecan Pound Cake

While the classic butter pecan pound cake is hard to beat, here are a few variations to suit different tastes:

1. Butter Pecan Pound Cake with Cream Cheese Frosting

For a richer finish, add a layer of cream cheese frosting. The tanginess of the cream cheese complements the buttery sweetness of the cake.

Instructions:

  • Make the frosting: Beat 8 oz of cream cheese, ½ cup of softened butter, and 4 cups of powdered sugar until smooth. Spread the frosting over the cooled cake and sprinkle with extra toasted pecans.

2. Keto Butter Pecan Pound Cake

If you’re looking for a low-carb option, you can easily adapt this recipe by substituting almond flour for the cake flour and using a sugar substitute like erythritol.

Instructions:

  • Adjust the recipe: Use 2 ½ cups of almond flour, and reduce the baking time slightly, as almond flour tends to bake faster than traditional flour. You can find more guidance on creating a keto version by checking out this keto butter pecan pound cake recipe.

3. Chocolate-Drizzled Butter Pecan Pound Cake

For chocolate lovers, adding a drizzle of melted chocolate takes this cake to the next level.

Instructions:

  • Drizzle with chocolate: Melt ½ cup of dark or milk chocolate in a double boiler and drizzle it over the cooled cake for a decadent touch.

FAQs About Butter Pecan Pound Cake

1. Can I freeze butter pecan pound cake?

Yes, this cake freezes very well. Wrap it tightly in plastic wrap and foil, and store it in the freezer for up to 3 months. To thaw, place the cake in the refrigerator overnight.

2. How do I store butter pecan pound cake?

Store your pound cake in an airtight container at room temperature for up to 3 days. You can also refrigerate it for up to a week to maintain its freshness.

3. Can I use different nuts instead of pecans?

While pecans are the traditional choice for this cake, you can substitute them with walnuts or almonds for a slightly different flavor and texture.

4. What’s the best way to toast pecans?

Toasting pecans is simple. Spread them in a single layer on a baking sheet and toast them in a preheated oven at 350°F for about 7-10 minutes, stirring halfway through for even browning.


Conclusion: A Rich and Nutty Delight

Butter pecan pound cake is the perfect dessert for those who love rich, buttery flavors paired with the satisfying crunch of toasted pecans. Whether you make it for a special occasion or as an everyday treat, this cake is sure to impress. For best results, use fresh, high-quality ingredients and don’t skip the step of toasting the pecans, as it adds an incredible depth of flavor.

If you’re looking for more ways to enhance this classic recipe, consider trying the cream cheese frosting or chocolate drizzle for an extra indulgent touch. Check out this Southern butter pecan pound cake recipe for even more tips and variations on this beloved dessert.

Coconut Cream Pie Deluxe: Rich, Creamy, and Irresistible

creamy coconut pie, coconut custard pie, coconut pie with whipped cream, deluxe coconut pie, homemade coconut pie

Coconut Cream Pie Deluxe: A Creamy and Indulgent Dessert

Coconut cream pie deluxe is the ultimate tropical dessert, combining rich coconut flavor, a velvety smooth filling, and a flaky pie crust. Whether you’re looking for a show-stopping dessert for a special occasion or a sweet treat for a weekend indulgence, this pie delivers with its layers of coconut custard, whipped cream, and toasted coconut flakes.

This elevated version of coconut cream pie brings all the classic elements you love, with a few extra touches to make it truly indulgent. Perfect for family gatherings, holidays, or simply satisfying a craving for something sweet and tropical. If you’re interested in mastering the art of coconut cream pie, check out this coconut cream pie recipe for step-by-step guidance on creating the perfect pie from scratch.


Ingredients for Coconut Cream Pie Deluxe

The secret to a luxurious coconut cream pie deluxe lies in its ingredients. This pie is all about combining rich, creamy textures with the perfect coconut flavor. Here’s a breakdown of what you’ll need:

For the Pie Crust:

  • 1 pre-made or homemade pie crust: You can use a graham cracker crust, shortbread crust, or traditional pie dough, depending on your preference.

For the Coconut Custard Filling:

  • 1 can (14 oz) coconut milk: Adds a creamy coconut base to the filling.
  • ½ cup heavy cream: Ensures the filling is rich and velvety.
  • ¾ cup granulated sugar: Adds sweetness.
  • ¼ cup cornstarch: Thickens the custard.
  • 4 large egg yolks: Helps thicken and set the custard.
  • 1 cup sweetened shredded coconut: For added texture and coconut flavor.
  • 1 teaspoon vanilla extract: Enhances the overall flavor.
  • 2 tablespoons unsalted butter: For richness.

For the Whipped Cream Topping:

  • 1 cup heavy whipping cream: Whipped to soft peaks.
  • 2 tablespoons powdered sugar: Sweetens the whipped cream.
  • 1 teaspoon vanilla extract: Adds a hint of vanilla to the topping.

For the Garnish:

  • Toasted coconut flakes: Provides a crunchy contrast to the creamy filling.
  • Optional toppings: Caramel or chocolate drizzle, or chopped nuts.

This ingredient list is designed to create a perfectly balanced coconut cream pie deluxe with layers of flavor and texture. For more tips on toasting coconut flakes to perfection, check out this guide on how to toast coconut flakes.


Step-by-Step Guide to Making Coconut Cream Pie Deluxe

1. Preparing the Pie Crust

The foundation of a great coconut cream pie starts with a well-baked crust. Whether you choose to make your own crust from scratch or opt for a store-bought one, the key is to ensure it’s crispy and able to hold the creamy filling.

Instructions:

  1. Preheat the Oven: Preheat your oven to 350°F (175°C).
  2. Blind Bake the Crust: If you’re using homemade pie dough or a store-bought traditional crust, blind bake it by lining the pie shell with parchment paper, filling it with pie weights or dried beans, and baking for 15 minutes. Remove the weights and parchment, then bake for another 5-7 minutes until golden brown.
  3. Cool the Crust: Let the crust cool completely before filling.

For a simpler approach, you can use a pre-made graham cracker crust or shortbread crust. Either way, the crust should be fully baked and cooled before adding the filling.

2. Making the Coconut Custard Filling

The creamy coconut custard is the star of this pie. It’s rich, silky, and bursting with coconut flavor.

Instructions:

  1. Heat the Coconut Milk and Cream: In a medium saucepan, whisk together the coconut milk, heavy cream, and granulated sugar. Heat over medium heat until the mixture begins to steam but doesn’t boil.
  2. Thicken the Custard: In a separate bowl, whisk the egg yolks and cornstarch together until smooth. Slowly pour a small amount of the heated coconut mixture into the yolks while whisking constantly (this tempers the eggs). Then, return the tempered mixture to the saucepan.
  3. Cook Until Thickened: Continue cooking the mixture, stirring constantly, until it thickens into a custard-like consistency. This should take about 5-7 minutes.
  4. Add Vanilla and Butter: Remove the custard from the heat and stir in the vanilla extract, butter, and shredded coconut. Mix until the butter is fully melted and incorporated.
  5. Chill the Filling: Pour the custard into a bowl, cover with plastic wrap pressed directly onto the surface, and chill in the refrigerator for at least 4 hours or overnight.

3. Assembling the Pie

Once the custard has chilled and set, it’s time to assemble the pie.

Instructions:

  1. Fill the Crust: Pour the chilled coconut custard into the prepared pie crust and smooth the top with a spatula.
  2. Whipped Cream Layer: In a separate bowl, whip the heavy cream with powdered sugar and vanilla extract until soft peaks form. Spread a generous layer of whipped cream over the custard.
  3. Garnish with Toasted Coconut: Sprinkle toasted coconut flakes over the top for a crunchy contrast to the creamy pie.

At this point, the pie is ready to be served, but if you’d like to add extra toppings like a drizzle of caramel or chocolate, feel free to get creative.


Variations of Coconut Cream Pie Deluxe

While the classic coconut cream pie deluxe is hard to beat, there are several variations you can try to suit different tastes and dietary preferences:

1. Chocolate Coconut Cream Pie Deluxe

For chocolate lovers, adding a layer of chocolate to the pie elevates the flavor and richness.

Instructions:

  • Melt chocolate: Melt 4 oz of dark or semi-sweet chocolate and spread it over the cooled pie crust before adding the custard filling. Chill the chocolate layer until set, then continue with the rest of the recipe.

2. Coconut Cream Pie with Meringue Topping

If you prefer a meringue topping instead of whipped cream, this variation adds a fluffy, golden-brown finish.

Instructions:

  • Make the Meringue: Whisk egg whites with sugar until stiff peaks form. Spread the meringue over the filled pie and bake at 350°F (175°C) for 10-12 minutes until the meringue is golden brown.

3. Gluten-Free Coconut Cream Pie

For those who need a gluten-free option, you can easily adapt this recipe by using a gluten-free pie crust.

Instructions:

  • Prepare a gluten-free crust: Use a gluten-free graham cracker crust or make a crust from ground almonds and coconut for added texture.

For more guidance on gluten-free versions of this dessert, visit this gluten-free coconut cream pie recipe.


FAQs About Coconut Cream Pie Deluxe

1. Can I make coconut cream pie deluxe ahead of time?

Yes! You can make the pie up to two days in advance. Prepare the pie crust and custard filling, but wait to add the whipped cream until just before serving. This ensures the whipped cream stays light and fluffy.

2. Can I use coconut cream instead of coconut milk?

Absolutely. Coconut cream adds an even richer texture to the pie, though it can make the filling slightly thicker. If using coconut cream, you may want to reduce the amount of sugar to balance the sweetness.

3. How do I store leftovers?

Cover the pie with plastic wrap and store it in the refrigerator for up to 3 days. The whipped cream may lose some of its volume, but the pie will still taste delicious.

4. Can I freeze coconut cream pie?

Freezing is not recommended for coconut cream pie, as the custard and whipped cream tend to separate when thawed. It’s best enjoyed fresh.


Conclusion: A Tropical Dream Come True

Coconut cream pie deluxe is the epitome of indulgence, with its smooth coconut custard, flaky crust, and light whipped cream topping. This dessert is perfect for any occasion, from a casual weekend treat to a special holiday gathering. With a variety of options for customization—whether you add a chocolate layer, swap whipped cream for meringue, or make it gluten-free—this pie can be tailored to suit any taste.

For those looking to explore more delicious variations of coconut cream pie, visit this coconut cream pie recipe and start baking your perfect pie today!

8 Cans Taco Soup: Easy and Flavorful One-Pot Meal

easy taco soup recipe, canned taco soup, dump-and-go taco soup, one-pot taco soup, 8 can chicken taco soup

8 Cans Taco Soup: A Simple and Delicious Pantry-Friendly Meal

When it comes to quick, easy, and flavorful dinners, 8 cans taco soup stands out as one of the best options. This meal requires minimal effort, just a few pantry staples, and delivers a hearty, comforting soup that’s perfect for a busy weeknight or a cozy weekend meal. By simply combining eight canned ingredients with a bit of seasoning, you can create a soup that’s rich in flavor and packed with protein.

This recipe is ideal for those who want something simple without sacrificing taste. With the flexibility to make it vegetarian, adjust the spice level, or use fresh ingredients if desired, 8 cans taco soup is a go-to dish for any occasion. For variations on this recipe, check out this simple 8 can taco soup for an easy, flavorful approach to this classic.


Ingredients for 8 Cans Taco Soup

The beauty of 8 cans taco soup lies in its simplicity. Here’s what you’ll need to create this flavorful dish:

Core Ingredients:

  • 1 can black beans: Drained and rinsed to remove excess sodium.
  • 1 can pinto beans: Drained and rinsed for extra protein.
  • 1 can corn: Adds sweetness and texture.
  • 1 can diced tomatoes: Acts as the base for the soup, adding acidity.
  • 1 can Rotel (diced tomatoes with green chilies): Adds spice and zest for a more robust flavor.
  • 1 can chili beans: For additional protein and a spiced kick.
  • 1 can chicken broth: Provides the liquid base of the soup.
  • 1 can chicken (or use cooked shredded chicken): Adds protein and heartiness to the dish.

Optional Add-Ins:

  • Taco seasoning: 1 packet or homemade for extra flavor.
  • Cilantro: Freshly chopped, for garnish.
  • Shredded cheese: Cheddar or Monterey Jack for a melty finish.
  • Sour cream: Adds creaminess when served.
  • Tortilla chips: For a crunchy topping.

This recipe is incredibly flexible, and you can easily swap out ingredients based on what you have on hand. For example, if you’re looking for a vegetarian version, simply omit the chicken and replace the broth with vegetable broth. You can find more inspiration for variations of taco soup by checking out this slow cooker taco soup recipe, which offers slow cooker tips and ingredient substitutions.


Step-by-Step Guide to Making 8 Cans Taco Soup

1. Preparing the Ingredients

The preparation for this soup couldn’t be easier since it involves primarily opening cans and mixing ingredients together.

Instructions:

  1. Drain and Rinse the Beans: Drain both the black beans and pinto beans, then rinse them under cold water. This helps remove excess sodium and ensures a cleaner taste.
  2. Open the Remaining Cans: No need for chopping or dicing. Simply open the cans of corn, Rotel, chili beans, diced tomatoes, chicken broth, and chicken.

This step should take no more than a few minutes, and everything will be ready to dump into the pot.

2. Cooking the Soup on the Stovetop

Once the ingredients are prepped, it’s time to cook the soup. Here’s how to do it:

Instructions:

  1. Combine Ingredients in a Large Pot: Place all the drained and undrained canned ingredients into a large stockpot.
  2. Add the Seasoning: Stir in 1 packet of taco seasoning or use homemade taco seasoning for a more customized flavor.
  3. Simmer the Soup: Bring the soup to a simmer over medium-high heat. Once it reaches a simmer, reduce the heat to low and cook for 20-30 minutes, stirring occasionally. This allows the flavors to meld together.

This stovetop method is perfect for a quick, 30-minute dinner, but if you prefer a slow cooker or Instant Pot method, keep reading.

3. Slow Cooker Version

For those who prefer a more hands-off approach, the slow cooker method is a great alternative.

Instructions:

  1. Dump the Ingredients into the Slow Cooker: Add all eight cans, along with the taco seasoning, into the slow cooker.
  2. Cook on Low: Set the slow cooker to low and cook for 4-6 hours. The longer it cooks, the deeper the flavors will develop.
  3. Stir Occasionally: Give the soup a stir every couple of hours to ensure even cooking.

This method is great for when you want to prep the meal in the morning and have it ready by dinner. For more details on slow cooker adaptations, check out this Instant Pot taco soup recipe, which also covers cooking time adjustments for pressure cookers.

4. Instant Pot Version

If you’re in a hurry, the Instant Pot is the fastest way to make this soup, ensuring it’s ready in just a fraction of the time.

Instructions:

  1. Add Ingredients to the Instant Pot: Place all ingredients, including the taco seasoning, into the Instant Pot.
  2. Cook on High Pressure for 10 Minutes: Secure the lid, set the Instant Pot to high pressure, and cook for 10 minutes. Let the pressure release naturally for 5 minutes, then manually release the rest.
  3. Stir and Serve: Once the pressure is released, give the soup a good stir and it’s ready to serve.

This method delivers the same deep, rich flavors in a fraction of the time.


Variations of 8 Cans Taco Soup

8 cans taco soup can be easily adapted to suit your taste preferences or dietary restrictions. Here are a few popular variations:

1. Vegetarian 8 Cans Taco Soup

  • Omit the Chicken: For a meat-free version, leave out the canned chicken. Add an extra can of beans (black, pinto, or kidney) for added protein and texture.
  • Vegetable Broth: Replace the chicken broth with vegetable broth to keep it vegetarian.

2. Chicken 8 Cans Taco Soup

  • Shredded Chicken: Instead of using canned chicken, you can add shredded rotisserie chicken or leftover cooked chicken. This adds more texture and flavor to the soup.
  • Broth Adjustments: You may need to reduce the amount of broth if using fresh chicken to maintain a thicker consistency.

3. Fresh Ingredient Version

  • Use Fresh Vegetables: Replace the canned corn, tomatoes, and beans with fresh or frozen alternatives for a more vibrant flavor.
  • Homemade Broth: Instead of using canned chicken broth, opt for homemade broth to enhance the flavor.

FAQs About 8 Cans Taco Soup

1. Can I make this soup in advance?

Yes! 8 cans taco soup can be made in advance and stored in the refrigerator for up to 3 days. Reheat it on the stovetop or in the microwave before serving. This makes it an excellent meal prep option.

2. How can I freeze 8 cans taco soup?

This soup freezes wonderfully. After the soup cools, transfer it to freezer-safe containers or bags, leaving a bit of space at the top for expansion. Freeze for up to 3 months. To reheat, thaw it in the fridge overnight and warm it on the stovetop.

3. What toppings go best with taco soup?

Taco soup is highly customizable with toppings. Popular choices include:

  • Shredded cheese (cheddar, Monterey Jack)
  • Sour cream
  • Diced avocado
  • Fresh cilantro
  • Crushed tortilla chips or Fritos for extra crunch

4. How can I make this soup less spicy?

If you prefer a milder soup, use regular diced tomatoes instead of Rotel, and opt for a mild taco seasoning. You can also omit any extra spicy toppings.


Conclusion: A Versatile and Flavorful Soup

8 cans taco soup is the ultimate solution for anyone seeking a simple, flavorful meal that comes together quickly. With just a few pantry staples and minimal prep time, this soup delivers big on flavor and versatility. Whether you choose to make it on the stovetop, in a slow cooker, or using an Instant Pot, the result will be a satisfying, hearty soup perfect for any occasion.

To further customize your taco soup, try adding your favorite toppings, switching up the protein, or using fresh ingredients when available. For more ideas and tips on preparing this dish, visit these Instant Pot taco soup recipes to explore different methods of making this easy meal.