Old-Fashioned Banana Pudding

Old-Fashioned Banana Pudding

There’s something undeniably comforting about a bowl of old-fashioned banana pudding. This classic Southern dessert, with its layers of creamy custard, fresh bananas, and soft vanilla wafers, has been a staple at potlucks, family gatherings, and Sunday dinners for generations. Whether you grew up with this nostalgic treat or are discovering it for the first time, this recipe will guide you through creating the perfect homemade version that’s rich, creamy, and bursting with flavor.

Why You’ll Love This Recipe

Old-fashioned banana pudding is more than just a dessert—it’s a bite of nostalgia. Here’s why this recipe stands out:

  • Creamy, dreamy texture: The homemade custard is velvety smooth, perfectly complementing the tender bananas and slightly chewy vanilla wafers.
  • Simple yet impressive: With just a handful of pantry staples, you can create a dessert that looks and tastes like it came from a bakery.
  • Perfect for any occasion: Whether it’s a summer barbecue, holiday feast, or a weeknight treat, this pudding fits right in.
  • Make-ahead friendly: The flavors meld beautifully when prepared in advance, making it ideal for entertaining.
  • Family-approved: Kids and adults alike adore this timeless dessert, making it a guaranteed crowd-pleaser.

Ingredients Breakdown

Every ingredient in this old-fashioned banana pudding plays a crucial role in creating its signature taste and texture. Here’s what you’ll need:

  • Granulated sugar: Sweetens the custard without overpowering the natural banana flavor.
  • All-purpose flour: Acts as a thickener for the pudding, ensuring a luscious, creamy consistency.
  • Egg yolks: Add richness and help bind the custard for a smooth, velvety finish.
  • Whole milk: The base of the custard, providing a creamy, luxurious mouthfeel.
  • Vanilla extract: Enhances the overall flavor with warm, aromatic notes.
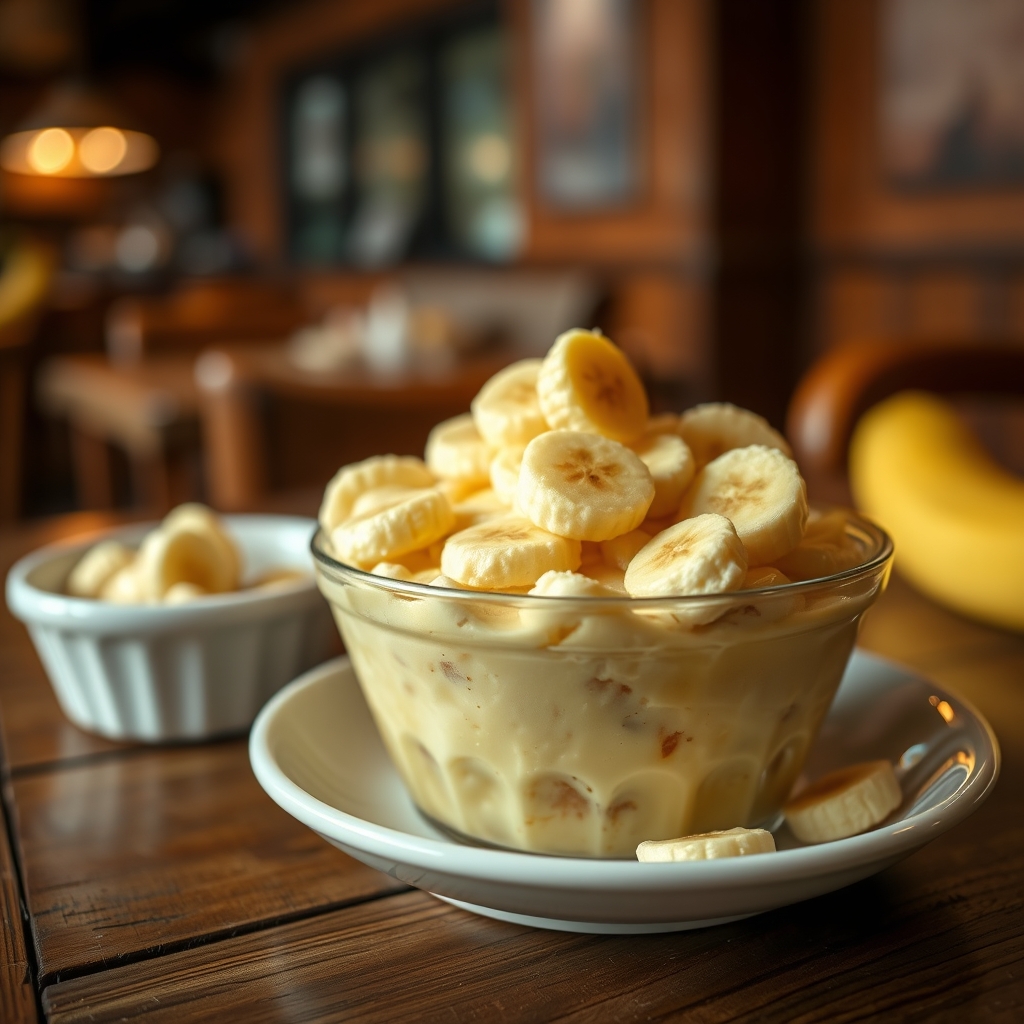
  • Ripe bananas: The star of the show, offering natural sweetness and a soft, melt-in-your-mouth texture.
  • Vanilla wafers: These crisp cookies soften slightly when layered with the pudding, adding a delightful contrast.
  • Heavy cream: Whipped into peaks, it creates a light, airy topping that balances the richness of the custard.

How to Make Old-Fashioned Banana Pudding

Follow these step-by-step instructions for a flawless old-fashioned banana pudding every time.

Step 1: Prepare the Custard

In a medium saucepan, whisk together sugar, flour, and a pinch of salt. Gradually whisk in the milk until smooth. Cook over medium heat, stirring constantly, until the mixture thickens and begins to bubble. Remove from heat.

Step 2: Temper the Egg Yolks

In a separate bowl, lightly beat the egg yolks. Slowly pour a small amount of the hot milk mixture into the yolks while whisking continuously to prevent curdling. Then, pour the tempered yolks back into the saucepan, whisking constantly.

Step 3: Cook Until Thickened

Return the saucepan to medium heat and cook, stirring constantly, until the custard is thick enough to coat the back of a spoon. Remove from heat and stir in vanilla extract. Let cool slightly.

Step 4: Layer the Pudding

In a trifle dish or large bowl, arrange a layer of vanilla wafers. Top with sliced bananas, then spoon a generous layer of custard over them. Repeat the layers, finishing with custard on top.

Step 5: Chill and Top

Cover with plastic wrap, pressing it directly onto the surface of the pudding to prevent a skin from forming. Refrigerate for at least 4 hours, or overnight. Before serving, whip the heavy cream with a touch of sugar and vanilla, then spread it over the pudding.

Pro Tips for the Best Results

  • Use ripe but firm bananas: Overripe bananas can turn mushy, while underripe ones lack sweetness.
  • Don’t skip tempering the eggs: This prevents scrambled eggs in your custard.
  • Let the custard cool slightly before layering: This keeps the bananas from turning brown too quickly.
  • For extra flavor: Add a splash of bourbon or a sprinkle of cinnamon between layers.
  • Make it ahead: The pudding tastes even better the next day as the flavors meld.

Variations and Substitutions

This recipe is versatile—here are some ways to customize it:

  • Dairy-free: Use coconut milk and a plant-based whipped topping.
  • Gluten-free: Swap all-purpose flour for cornstarch or a gluten-free flour blend.
  • Lighter version: Substitute half the milk with almond milk and use light whipped cream.
  • Flavor twists: Add a layer of caramel sauce, chocolate shavings, or toasted coconut.
  • No-bake option: Use instant vanilla pudding mix for a quicker version (though homemade custard is worth the effort).

What to Serve With It

Old-fashioned banana pudding is delightful on its own, but these pairings take it to the next level:

  • A scoop of vanilla bean ice cream for an extra-indulgent treat.
  • A drizzle of salted caramel or hot fudge sauce for a decadent twist.
  • Fresh berries like strawberries or raspberries for a tart contrast.
  • A cup of strong coffee or sweet tea to balance the richness.

How to Store and Reheat

Proper storage keeps your banana pudding fresh and delicious:

  • Refrigeration: Cover tightly with plastic wrap or transfer to an airtight container. It will keep for up to 3 days.
  • Freezing: Freezing isn’t recommended, as the texture of the custard and bananas will change.
  • Serving leftovers: Enjoy chilled straight from the fridge—no reheating needed.

Frequently Asked Questions (FAQs)

Can I use instant pudding instead of homemade custard?

Yes, instant vanilla pudding can be used for a quicker version, but the homemade custard offers a richer, more authentic flavor and creamier texture.

How do I prevent the bananas from turning brown?

Layering them between the custard and wafers minimizes exposure to air. You can also toss banana slices in a little lemon juice, though this may alter the flavor slightly.

Can I make this recipe ahead of time?

Absolutely! In fact, letting it chill overnight allows the flavors to meld beautifully. Just add the whipped cream topping right before serving.

What’s the best dish to use for layering?

A clear glass trifle dish or a deep serving bowl works best, as it showcases the beautiful layers.

Can I add meringue instead of whipped cream?

Yes! A toasted meringue topping is a classic Southern variation. Simply beat egg whites with sugar until stiff peaks form, spread over the pudding, and lightly brown with a kitchen torch or under the broiler.

Final Thoughts

Old-fashioned banana pudding is more than just a dessert—it’s a taste of tradition, a spoonful of comfort, and a reminder of simpler times. Whether you’re making it for a special occasion or just because, this recipe is sure to become a cherished favorite. So gather your ingredients, take your time with the custard, and enjoy the process of creating something truly delicious. After all, the best recipes are the ones made with love and shared with those who matter most.

Print
clock clock iconcutlery cutlery iconflag flag iconfolder folder iconinstagram instagram iconpinterest pinterest iconfacebook facebook iconprint print iconsquares squares iconheart heart iconheart solid heart solid icon

Old-Fashioned Banana Pudding

  • Author: Southern Kitchen Classics

Description

A creamy, nostalgic dessert with layers of vanilla wafers, fresh bananas, and homemade custard topped with fluffy meringue. This classic Southern recipe tastes just like grandma used to make!


Ingredients

Scale

For the Crust:

  • For the custard:
  • 1 1/2 cups granulated sugar
  • 1/3 cup all-purpose flour
  • 1/4 teaspoon salt
  • 3 cups whole milk
  • 4 large egg yolks (reserve whites for meringue)
  • 2 tablespoons unsalted butter
  • 2 teaspoons vanilla extract
  • For assembly:
  • 1 (11 oz) box vanilla wafers
  • 56 ripe bananas, sliced
  • For the meringue:
  • 4 large egg whites
  • 1/4 teaspoon cream of tartar
  • 6 tablespoons granulated sugar

Instructions

1. Prepare the Crust:

  1. 1. Make custard: Whisk sugar, flour and salt in medium saucepan. Gradually whisk in milk until smooth.
  2. 2. Cook over medium heat, stirring constantly, until thickened (about 10-12 minutes).
  3. 3. Temper egg yolks by slowly adding 1 cup hot custard while whisking, then return mixture to saucepan.
  4. 4. Cook 2 more minutes until very thick. Remove from heat, stir in butter and vanilla. Cover surface with plastic wrap to prevent skin.
  5. 5. Preheat oven to 350°F. In 2-quart baking dish, layer 1/3 of wafers, half the banana slices, and 1/3 custard. Repeat layers, ending with custard.
  6. 6. Make meringue: Beat egg whites and cream of tartar until foamy. Gradually add sugar, beating until stiff peaks form.
  7. 7. Spread meringue over pudding, sealing edges. Bake 12-15 minutes until golden. Cool completely before serving.

Notes

For best results, assemble pudding 4-6 hours before serving to allow flavors to meld. Store leftovers refrigerated (the bananas will darken over time). Substitute whipped cream for meringue if preferred.

Classic Ambrosia Fruit Salad

Classic Ambrosia Fruit Salad

There’s something undeniably nostalgic about a Classic Ambrosia Fruit Salad. This timeless dish, with its creamy texture and bursts of citrusy sweetness, has graced countless potlucks, holiday tables, and family gatherings for generations. Whether you’re looking for a refreshing side dish, a light dessert, or a colorful addition to your brunch spread, this recipe delivers. Today, I’m sharing my tried-and-true version of this beloved fruit salad, along with tips, variations, and everything you need to make it shine.

Why You’ll Love This Recipe

If you’ve never made Ambrosia Fruit Salad before, you’re in for a treat. Here’s why this recipe is a must-try:

  • Effortlessly Delicious: With minimal prep and no cooking required, this salad comes together in minutes but tastes like you spent hours on it.
  • Versatile for Any Occasion: Perfect for holidays, picnics, or even as a sweet side dish for weeknight dinners, it fits seamlessly into any meal plan.
  • Crowd-Pleasing Flavor: The combination of juicy fruits, creamy dressing, and a hint of coconut is universally loved by both kids and adults.
  • Make-Ahead Friendly: Unlike many fruit salads that wilt quickly, this one holds up well in the fridge, making it ideal for meal prep or entertaining.
  • Customizable: Easily adapt the ingredients based on what’s in season or your personal preferences.

Ingredients Breakdown

Every ingredient in this Classic Ambrosia Fruit Salad plays a crucial role in creating its signature taste and texture. Here’s what you’ll need:

  • Mandarin Oranges: These sweet, citrusy segments add a burst of freshness and a pop of color. Canned or fresh both work beautifully.
  • Pineapple Chunks: Their tangy sweetness balances the creaminess of the dressing. Opt for fresh pineapple for the best texture, but canned works in a pinch.
  • Mini Marshmallows: A nostalgic touch that adds a soft, pillowy texture. They also help thicken the dressing slightly.
  • Shredded Coconut: Toasted or untoasted, coconut lends a subtle tropical flavor and a pleasant chewiness.
  • Sour Cream & Whipped Topping: The creamy base that ties everything together. Using a mix of sour cream and whipped topping keeps the dressing light but rich.
  • Maraschino Cherries: Optional but highly recommended for a festive pop of color and sweetness.

How to Make Classic Ambrosia Fruit Salad

Follow these simple steps for a foolproof Ambrosia Fruit Salad every time:

  1. Drain the Fruits: If using canned mandarin oranges and pineapple, drain them thoroughly to prevent excess liquid from diluting the dressing.
  2. Combine the Creamy Base: In a large mixing bowl, gently fold together the sour cream and whipped topping until smooth. This creates a light, fluffy dressing.
  3. Add the Fruits and Mix-Ins: Carefully stir in the mandarin oranges, pineapple chunks, mini marshmallows, and shredded coconut. If using, fold in a handful of maraschino cherries for extra color.
  4. Chill Before Serving: Cover the bowl and refrigerate for at least 1 hour before serving. This allows the flavors to meld and the marshmallows to soften slightly.
  5. Garnish and Serve: Just before serving, give the salad a gentle stir and top with additional coconut or cherries for a beautiful presentation.

Pro Tips for the Best Results

Take your Ambrosia Fruit Salad to the next level with these expert tips:

  • Toast the Coconut: Lightly toasting shredded coconut in a dry skillet enhances its nutty flavor and adds a delightful crunch.
  • Use Fresh Citrus Zest: A sprinkle of orange or lime zest brightens up the flavors and adds a sophisticated touch.
  • Adjust Sweetness: If you prefer a less sweet salad, reduce the amount of marshmallows or use unsweetened coconut.
  • Let It Rest: Allowing the salad to chill for a few hours (or overnight) ensures the marshmallows absorb some of the dressing, creating a perfect texture.

Variations and Substitutions

This recipe is wonderfully adaptable. Here are some creative twists to try:

  • Greek Yogurt Swap: Replace the sour cream with Greek yogurt for a tangier, protein-rich version.
  • Tropical Ambrosia: Add diced mango, kiwi, or papaya for a vibrant, island-inspired twist.
  • Nutty Crunch: Stir in chopped pecans or walnuts for added texture and richness.
  • Dairy-Free Option: Use coconut whipped topping and dairy-free yogurt to make this salad vegan-friendly.
  • Seasonal Fruits: Swap in fresh peaches, berries, or grapes when they’re in season for a unique flavor profile.

What to Serve With It

Classic Ambrosia Fruit Salad pairs beautifully with a variety of dishes. Here are some serving ideas:

  • Holiday Feasts: Serve alongside glazed ham, roasted turkey, or savory stuffing for a refreshing contrast.
  • Brunch Spreads: Complement quiches, pancakes, or bacon with this sweet and creamy salad.
  • BBQs and Picnics: Balance grilled meats or sandwiches with this light, fruity side.
  • Dessert Table: Offer it as a lighter dessert option next to pies and cookies.

How to Store and Reheat

Proper storage ensures your Ambrosia Fruit Salad stays fresh and delicious:

  • Refrigeration: Store in an airtight container in the fridge for up to 3 days. The flavors will continue to develop over time.
  • Freezing: Freezing is not recommended, as the texture of the fruits and marshmallows will change upon thawing.
  • Serving Leftovers: If the salad separates slightly after refrigeration, give it a gentle stir before serving. Add a dollop of fresh whipped topping if needed.

Frequently Asked Questions (FAQs)

Here are answers to some common questions about making Ambrosia Fruit Salad:

  • Can I use fresh fruit instead of canned? Absolutely! Fresh mandarin segments and pineapple will give the salad a brighter, more vibrant taste. Just ensure they’re ripe and juicy.
  • How far in advance can I make this salad? You can prepare it up to 24 hours ahead. The marshmallows will soften, but the flavors will be even more delicious.
  • What can I use instead of whipped topping? Freshly whipped cream is a great substitute. Just sweeten it lightly with powdered sugar before folding it in.
  • Is there a way to make this salad healthier? Yes! Use Greek yogurt, reduce the marshmallows, and opt for unsweetened coconut to cut down on sugar.
  • Can I add other fruits? Definitely. Apples, bananas, or berries work well, but add them just before serving to prevent browning or sogginess.

Final Thoughts

Classic Ambrosia Fruit Salad is more than just a recipe—it’s a celebration of simple, comforting flavors that bring people together. Whether you’re making it for a special occasion or just to brighten up a weekday meal, this dish never fails to delight. I hope this recipe becomes a staple in your kitchen, just as it has in mine. Don’t be afraid to get creative with the ingredients and make it your own. After all, the best recipes are the ones that carry a little piece of your heart.

Happy cooking, and enjoy every sweet, creamy bite!

Print
clock clock iconcutlery cutlery iconflag flag iconfolder folder iconinstagram instagram iconpinterest pinterest iconfacebook facebook iconprint print iconsquares squares iconheart heart iconheart solid heart solid icon

Classic Ambrosia Fruit Salad

  • Author: Traditional Southern Recipe

Description

A creamy, sweet, and refreshing fruit salad with marshmallows, coconut, and citrus flavors. Perfect for potlucks, holidays, or as a light dessert.


Ingredients

Scale

For the Crust:

  • For the fruit mixture:
  • 1 (20 oz) can pineapple chunks, drained
  • 1 (11 oz) can mandarin oranges, drained
  • 2 cups mini marshmallows
  • 1 cup sweetened shredded coconut
  • 1 cup maraschino cherries, halved and drained
  • For the creamy dressing:
  • 1 cup sour cream
  • 1/2 cup whipped topping (like Cool Whip)
  • 1 tbsp orange juice
  • 1 tsp vanilla extract

Instructions

1. Prepare the Crust:

  1. 1. In a large mixing bowl, combine pineapple chunks, mandarin oranges, mini marshmallows, shredded coconut, and maraschino cherries.
  2. 2. In a separate bowl, whisk together sour cream, whipped topping, orange juice, and vanilla extract until smooth.
  3. 3. Gently fold the creamy dressing into the fruit mixture until evenly coated.
  4. 4. Cover and refrigerate for at least 2 hours (preferably overnight) to allow flavors to meld.
  5. 5. Stir gently before serving. Garnish with extra coconut or cherries if desired.

Notes

For a lighter version, use Greek yogurt instead of sour cream and unsweetened coconut. Add diced apples or grapes for extra crunch. Avoid overmixing to prevent the fruit from breaking down.

Southern Hummingbird Cake

Southern Hummingbird Cake

There’s something undeniably magical about a Southern Hummingbird Cake. This beloved dessert, with its tropical flavors and luscious cream cheese frosting, has been a staple at Southern gatherings for generations. Whether you’re hosting a summer barbecue, celebrating a birthday, or simply craving a slice of comfort, this cake delivers every time. Today, I’m sharing my tried-and-true recipe, packed with tips to ensure your Hummingbird Cake turns out moist, flavorful, and downright irresistible.

Why You’ll Love This Recipe

If you’ve never tried a Hummingbird Cake before, prepare to fall in love. Here’s why this recipe is a must-make:

  • Bursting with flavor – The combination of ripe bananas, crushed pineapple, and warm spices creates a symphony of sweet and tangy notes in every bite.
  • Unbelievably moist – Thanks to the natural juices from the pineapple and the richness of the oil, this cake stays tender for days.
  • Perfect for any occasion – Whether it’s a casual potluck or an elegant dinner party, this cake fits right in.
  • Easy to make – No fancy techniques required. Just mix, bake, and frost for a showstopping dessert.
  • Crowd-pleasing – Even picky eaters can’t resist the comforting flavors of this Southern classic.

Ingredients Breakdown

Every ingredient in this Southern Hummingbird Cake plays a crucial role in creating its signature taste and texture. Here’s what you’ll need:

  • All-purpose flour – The base of the cake, providing structure.
  • Granulated sugar – Sweetens the cake and helps with browning.
  • Vegetable oil – Keeps the cake incredibly moist compared to butter.
  • Eggs – Bind the ingredients together and add richness.
  • Ripe bananas – Offer natural sweetness and a soft texture.
  • Crushed pineapple – Adds moisture and a subtle tangy flavor.
  • Vanilla extract – Enhances the overall flavor profile.
  • Cinnamon and nutmeg – Warm spices that give the cake its comforting depth.
  • Pecans – Provide a delightful crunch and nutty contrast.
  • Cream cheese, butter, and powdered sugar – The trio that makes the dreamy frosting.

How to Make Southern Hummingbird Cake

Follow these steps for a flawless Hummingbird Cake every time:

  1. Preheat and prepare – Preheat your oven to 350°F. Grease and flour three 9-inch round cake pans, or line them with parchment paper for easy removal.
  2. Mix dry ingredients – In a large bowl, whisk together the flour, sugar, baking soda, salt, cinnamon, and nutmeg.
  3. Combine wet ingredients – In another bowl, beat the eggs, then stir in the oil, vanilla, mashed bananas, and crushed pineapple (with its juice).
  4. Bring it together – Gradually add the wet mixture to the dry ingredients, stirring just until combined. Fold in the chopped pecans.
  5. Bake – Divide the batter evenly among the prepared pans. Bake for 25-30 minutes, or until a toothpick inserted in the center comes out clean.
  6. Cool – Let the cakes cool in the pans for 10 minutes, then transfer to a wire rack to cool completely.
  7. Make the frosting – Beat the cream cheese and butter until smooth. Gradually add powdered sugar and vanilla, beating until fluffy.
  8. Assemble – Once the cakes are cool, frost between the layers and on the top and sides. Garnish with extra pecans if desired.

Pro Tips for the Best Results

  • Use very ripe bananas – The darker the bananas, the sweeter and more flavorful your cake will be.
  • Don’t overmix the batter – Stir just until combined to avoid a dense cake.
  • Toast the pecans – Lightly toasting them before adding to the batter enhances their nutty flavor.
  • Chill the frosting – If it’s too soft, refrigerate it for 15-20 minutes before spreading.
  • Level the cakes – For a professional look, trim any domed tops with a serrated knife before frosting.

Variations and Substitutions

This recipe is versatile! Try these twists:

  • Gluten-free – Swap all-purpose flour for a 1:1 gluten-free baking blend.
  • Nut-free – Omit the pecans or replace with toasted coconut flakes.
  • Spice it up – Add a pinch of cardamom or ginger for extra warmth.
  • Mini cakes – Bake the batter in a muffin tin for individual servings.
  • Dairy-free frosting – Use vegan cream cheese and butter alternatives.

What to Serve With It

Southern Hummingbird Cake is fantastic on its own, but these pairings take it to the next level:

  • A scoop of vanilla bean ice cream for contrast.
  • Fresh berries like strawberries or raspberries for a tart balance.
  • A cup of strong coffee or spiced chai tea.
  • A drizzle of caramel sauce for extra decadence.

How to Store and Reheat

To keep your cake fresh:

  • Room temperature – Store in an airtight container for up to 2 days.
  • Refrigerate – If frosted, refrigerate for up to 5 days. Let it sit at room temperature for 30 minutes before serving.
  • Freeze – Wrap unfrosted cake layers tightly in plastic wrap and freeze for up to 3 months. Thaw overnight before frosting.

Frequently Asked Questions (FAQs)

Can I use fresh pineapple instead of canned?

Yes, but make sure to finely chop it and use about 1 cup along with 2 tablespoons of its juice to maintain moisture.

Why is it called Hummingbird Cake?

The name’s origin is unclear, but some say it’s because the cake is sweet enough to attract hummingbirds, or because people hum with happiness when eating it.

Can I make this cake ahead of time?

Absolutely! Bake the layers a day in advance, wrap them well, and frost the next day.

What if I don’t have three cake pans?

You can bake the layers one at a time, keeping the remaining batter at room temperature while waiting.

Can I use a different frosting?

While cream cheese frosting is traditional, a brown butter frosting or whipped coconut cream would also be delicious.

Final Thoughts

There’s a reason Southern Hummingbird Cake has stood the test of time. It’s the kind of dessert that brings people together, evoking nostalgia and creating new memories with every bite. Whether you’re a seasoned baker or trying your hand at cake-making for the first time, this recipe is forgiving, flavorful, and guaranteed to impress. So preheat that oven, mash those bananas, and get ready to enjoy a slice of Southern hospitality at its finest.

Print
clock clock iconcutlery cutlery iconflag flag iconfolder folder iconinstagram instagram iconpinterest pinterest iconfacebook facebook iconprint print iconsquares squares iconheart heart iconheart solid heart solid icon

Southern Hummingbird Cake

  • Author: Southern Living

Description

A classic Southern dessert packed with bananas, pineapple, and pecans, topped with rich cream cheese frosting. This moist and flavorful cake is perfect for any occasion.


Ingredients

Scale

For the Crust:

  • For the cake:
  • 3 cups all-purpose flour
  • 2 cups granulated sugar
  • 1 teaspoon baking soda
  • 1 teaspoon ground cinnamon
  • 1/2 teaspoon salt
  • 3 large eggs, beaten
  • 1 1/2 cups vegetable oil
  • 1 1/2 teaspoons vanilla extract
  • 1 (8-ounce) can crushed pineapple, undrained
  • 2 cups mashed ripe bananas (about 4 medium bananas)
  • 1 cup chopped pecans
  • For the cream cheese frosting:
  • 1 (8-ounce) package cream cheese, softened
  • 1/2 cup unsalted butter, softened
  • 1 (16-ounce) package powdered sugar
  • 1 teaspoon vanilla extract
  • 1/2 cup chopped pecans (for garnish)

Instructions

1. Prepare the Crust:

  1. Preheat oven to 350°F (175°C). Grease and flour three 9-inch round cake pans.
  2. In a large bowl, whisk together flour, sugar, baking soda, cinnamon, and salt.
  3. Add eggs, oil, and vanilla extract to the dry ingredients, stirring until just combined.
  4. Fold in crushed pineapple, mashed bananas, and chopped pecans.
  5. Divide batter evenly among prepared pans. Bake for 25-30 minutes or until a toothpick inserted in the center comes out clean.
  6. Cool cakes in pans for 10 minutes, then transfer to wire racks to cool completely.
  7. For the frosting: Beat cream cheese and butter until smooth. Gradually add powdered sugar and vanilla, beating until fluffy.
  8. Frost between layers, on top, and sides of the cooled cake. Garnish with chopped pecans.

Notes

Store cake in the refrigerator for up to 5 days. For best flavor, let it sit at room temperature for 30 minutes before serving.

Vintage Cherry Winks Cookies

Vintage Cherry Winks Cookies

There’s something undeniably charming about vintage recipes, and these Cherry Winks Cookies are no exception. A beloved classic from mid-century American baking, these cookies combine the sweetness of maraschino cherries with the crunch of cornflakes for a delightful texture and flavor. Whether you’re a seasoned baker or just starting, this recipe is a nostalgic trip to simpler times, perfect for holiday gatherings, tea parties, or just a cozy afternoon treat.

Why You’ll Love This Recipe

Vintage Cherry Winks Cookies are more than just a cookie—they’re a bite of history with a modern appeal. Here’s why they deserve a spot in your baking repertoire:

  • Nostalgic Flavor: These cookies capture the essence of old-fashioned baking with their chewy centers and crispy edges, evoking memories of grandma’s kitchen.
  • Unique Texture: The combination of chopped maraschino cherries and crushed cornflakes creates a delightful contrast between soft and crunchy.
  • Eye-Catching Appeal: The bright red cherry pieces peeking through the golden dough make these cookies as pretty as they are delicious.
  • Easy to Make: With simple ingredients and straightforward steps, even beginner bakers can achieve perfect results.
  • Perfect for Sharing: These cookies are a crowd-pleaser, ideal for cookie swaps, holiday platters, or gifting in decorative tins.

Ingredients Breakdown

Understanding the ingredients in Cherry Winks Cookies helps you appreciate their unique texture and flavor. Here’s what you’ll need:

  • All-Purpose Flour: The base of the dough, providing structure and stability.
  • Butter: Adds richness and a tender crumb. For best results, use unsalted butter softened to room temperature.
  • Granulated Sugar & Brown Sugar: A mix of both sugars ensures sweetness with a slight caramel depth.
  • Eggs: Bind the ingredients together and contribute to the cookies’ chewiness.
  • Maraschino Cherries: The star ingredient, lending a sweet, fruity flavor and vibrant color.
  • Cornflakes: Crushed cornflakes add a subtle crunch, a signature element of this vintage recipe.
  • Vanilla Extract: Enhances the overall flavor with warm, aromatic notes.
  • Baking Powder & Salt: Essential for leavening and balancing sweetness.

How to Make Vintage Cherry Winks Cookies

Follow these step-by-step instructions to create perfect Cherry Winks Cookies every time:

  1. Preheat & Prep: Preheat your oven to 375°F (190°C) and line baking sheets with parchment paper.
  2. Cream Butter & Sugars: In a large mixing bowl, beat softened butter with granulated and brown sugar until light and fluffy.
  3. Add Wet Ingredients: Beat in eggs one at a time, followed by vanilla extract. Mix until well combined.
  4. Combine Dry Ingredients: In a separate bowl, whisk together flour, baking powder, and salt. Gradually add this to the butter mixture, mixing just until incorporated.
  5. Fold in Cherries & Cornflakes: Gently stir in chopped maraschino cherries and crushed cornflakes until evenly distributed.
  6. Scoop & Shape: Using a cookie scoop or tablespoon, portion dough into small balls. Roll each in additional crushed cornflakes for extra crunch.
  7. Bake: Place dough balls on prepared baking sheets, spacing them about 2 inches apart. Bake for 10–12 minutes, or until edges are golden.
  8. Cool: Let cookies rest on the baking sheet for 5 minutes before transferring to a wire rack to cool completely.

Pro Tips for the Best Results

Elevate your Cherry Winks Cookies with these expert techniques:

  • Chop Cherries Evenly: Uniform pieces ensure every bite has balanced cherry flavor without overwhelming sweetness.
  • Don’t Overmix: Stirring the dough too much can lead to tough cookies. Mix just until ingredients are combined.
  • Use Fresh Cornflakes: Stale cereal won’t provide the same crispness. For maximum crunch, crush them just before using.
  • Chill the Dough: If the dough feels too soft, refrigerate for 30 minutes before shaping to prevent spreading.
  • Watch Baking Time: These cookies are best when slightly soft in the center. Overbaking can make them dry.

Variations and Substitutions

Customize your Cherry Winks Cookies with these creative twists:

  • Nutty Addition: Fold in ½ cup of chopped pecans or walnuts for extra texture.
  • Chocolate Drizzle: Melt white or dark chocolate and drizzle over cooled cookies for a decadent finish.
  • Gluten-Free Option: Substitute all-purpose flour with a gluten-free blend and use certified GF cornflakes.
  • Coconut Lovers: Add ¼ cup shredded coconut to the dough for a tropical touch.
  • Dried Fruit Swap: Replace maraschino cherries with dried cranberries or chopped candied orange peel for a different fruity note.

What to Serve With It

Cherry Winks Cookies are versatile and pair beautifully with:

  • Tea or Coffee: Enjoy with Earl Grey tea or a cup of black coffee for a classic afternoon treat.
  • Vanilla Ice Cream: Sandwich a scoop between two cookies for an indulgent ice cream sandwich.
  • Fruit Compote: Serve alongside a tart berry compote to balance the sweetness.
  • Milk: A cold glass of milk is always a nostalgic pairing for cookies.

How to Store and Reheat

Keep your Cherry Winks Cookies fresh with these storage tips:

  • Room Temperature: Store in an airtight container at room temperature for up to 5 days.
  • Freezing: Freeze baked cookies in a single layer before transferring to a freezer bag. They’ll keep for up to 3 months. Thaw at room temperature before serving.
  • Reheating: Refresh slightly stale cookies by warming them in a 300°F (150°C) oven for 3–5 minutes.

Frequently Asked Questions (FAQs)

Can I use fresh cherries instead of maraschino?
Fresh cherries contain too much moisture and will alter the texture. Stick with maraschino cherries for authenticity.

Why do my cookies spread too much?
This can happen if the butter is too soft or the dough isn’t chilled. Ensure your butter is at room temperature—not melted—and chill the dough if needed.

Can I make these cookies ahead of time?
Yes! The dough can be refrigerated for up to 2 days before baking, or you can freeze unbaked dough balls for later use.

Are there any egg substitutes?
For a vegan version, try flax eggs (1 tbsp ground flaxseed + 3 tbsp water per egg) or commercial egg replacers.

Can I skip the cornflakes?
While cornflakes are traditional, you can substitute with crushed rice cereal or omit them for a softer texture.

Final Thoughts

Vintage Cherry Winks Cookies are more than just a recipe—they’re a celebration of timeless baking traditions. Whether you’re baking them for a special occasion or just to savor a taste of the past, these cookies are sure to bring joy. Their cheerful appearance and delightful texture make them a standout on any dessert table. So preheat your oven, gather your ingredients, and let the sweet aroma of cherries and vanilla fill your kitchen. Happy baking!

Print
clock clock iconcutlery cutlery iconflag flag iconfolder folder iconinstagram instagram iconpinterest pinterest iconfacebook facebook iconprint print iconsquares squares iconheart heart iconheart solid heart solid icon

Vintage Cherry Winks Cookies

  • Author: Grandma's Kitchen

Description

A classic vintage cookie recipe featuring maraschino cherries and a crunchy cornflake coating. These sweet, chewy cookies are perfect for holiday baking or as a nostalgic treat.


Ingredients

Scale

For the Crust:

  • For the dough:
  • 1/2 cup butter, softened
  • 1 cup granulated sugar
  • 2 large eggs
  • 2 tablespoons milk
  • 1 teaspoon vanilla extract
  • 2 1/4 cups all-purpose flour
  • 1 teaspoon baking powder
  • 1/2 teaspoon baking soda
  • 1/2 teaspoon salt
  • For the mix-ins:
  • 1/2 cup chopped maraschino cherries (drained)
  • 1/2 cup chopped nuts (walnuts or pecans)
  • For the coating:
  • 2 cups cornflakes, lightly crushed

Instructions

1. Prepare the Crust:

  1. Preheat oven to 375°F (190°C) and line baking sheets with parchment paper.
  2. In a large bowl, cream together butter and sugar until light and fluffy.
  3. Beat in eggs one at a time, then stir in milk and vanilla extract.
  4. In a separate bowl, whisk together flour, baking powder, baking soda, and salt.
  5. Gradually add dry ingredients to the wet mixture, mixing until just combined.
  6. Fold in chopped cherries and nuts until evenly distributed.
  7. Place crushed cornflakes in a shallow bowl.
  8. Drop dough by tablespoonfuls into cornflakes, rolling gently to coat.
  9. Place coated dough balls 2 inches apart on prepared baking sheets.
  10. Bake for 10-12 minutes until edges are lightly golden.
  11. Let cool on baking sheets for 2 minutes before transferring to wire racks.

Notes

For best results, drain cherries thoroughly and pat dry with paper towels before chopping. Cookies will be soft when warm but firm up as they cool. Store in an airtight container for up to 1 week.

Grandma’s Strawberry Pretzel Salad

Grandma’s Strawberry Pretzel Salad

There’s something undeniably nostalgic about Grandma’s Strawberry Pretzel Salad. This beloved dessert, with its layers of salty pretzel crust, creamy filling, and sweet strawberry topping, is a staple at family gatherings, potlucks, and holiday feasts. It’s not just a dessert—it’s a memory on a plate. Whether you grew up eating it or are discovering it for the first time, this recipe is guaranteed to win hearts. Let’s dive into why this retro dessert deserves a spot in your recipe collection.

Why You’ll Love This Recipe

Grandma’s Strawberry Pretzel Salad is more than just a dessert—it’s a crowd-pleaser for so many reasons. Here’s why you’ll fall in love with it:

  • Perfect Balance of Sweet and Salty: The crunchy pretzel crust contrasts beautifully with the creamy middle and fruity topping, creating a harmony of flavors.
  • No-Bake Simplicity: Unlike fussy desserts, this one comes together with minimal effort—no oven required beyond baking the crust.
  • Make-Ahead Friendly: It’s an ideal dessert for entertaining since it needs time to chill, meaning less stress on the day of your event.
  • Versatile for Any Occasion: Whether it’s a summer barbecue, holiday dinner, or just a weeknight treat, this salad fits right in.
  • Family-Approved: Kids and adults alike adore the combination of textures and flavors, making it a universal favorite.

Ingredients Breakdown

Understanding the ingredients in Grandma’s Strawberry Pretzel Salad helps you appreciate how each layer works together to create magic. Here’s what you’ll need:

  • Pretzel Crust: Crushed pretzels form the base, offering a salty crunch. Combined with melted butter and a touch of sugar, they bake into a sturdy yet tender foundation.
  • Creamy Filling: A mix of cream cheese, whipped topping, and sugar creates a luscious middle layer that’s rich but not overly heavy.
  • Strawberry Topping: Strawberry gelatin and fresh or frozen strawberries make the top layer vibrant and refreshing, adding a burst of fruity sweetness.

Each ingredient plays a crucial role, so resist the urge to skip or substitute unless necessary—though we’ll cover some smart swaps later!

How to Make Grandma’s Strawberry Pretzel Salad

Ready to recreate this classic? Follow these steps for the best results:

  1. Prepare the Pretzel Crust: Preheat your oven to 350°F. Crush 2 cups of pretzels into fine crumbs (a food processor works great). Mix with ¾ cup melted butter and 3 tablespoons sugar. Press firmly into a 9×13-inch baking dish and bake for 10 minutes. Let cool completely.
  2. Make the Creamy Layer: Beat 8 oz softened cream cheese with 1 cup sugar until smooth. Fold in 8 oz whipped topping (like Cool Whip) until fully combined. Spread evenly over the cooled crust.
  3. Create the Strawberry Layer: Dissolve a 6 oz package of strawberry gelatin in 2 cups boiling water. Stir in 2 cups frozen or fresh strawberries. Let it cool slightly (about 10 minutes) before pouring over the cream layer.
  4. Chill to Set: Refrigerate for at least 4 hours, or overnight for best results. The gelatin needs time to firm up, so patience is key!

Pro Tip: For clean slices, dip a sharp knife in warm water before cutting.

Pro Tips for the Best Results

Want to take your Strawberry Pretzel Salad to the next level? Try these expert tricks:

  • Use Fresh Strawberries When Possible: While frozen works, fresh berries add a brighter flavor and firmer texture.
  • Don’t Overbake the Crust: 10 minutes is plenty—any longer, and it might become too hard.
  • Let Layers Cool Properly: Pouring warm gelatin over the cream layer can cause mixing. A slightly cooled (but still liquid) gelatin ensures distinct layers.
  • Add a Citrus Zest: A hint of lemon or orange zest in the cream layer adds a subtle brightness.

Variations and Substitutions

This recipe is flexible! Here are some delicious twists:

  • Different Fruits: Swap strawberries for raspberries, blueberries, or even peaches for a seasonal twist.
  • Gluten-Free: Use gluten-free pretzels to accommodate dietary needs.
  • Lighter Version: Substitute reduced-fat cream cheese and sugar-free gelatin for a lower-calorie option.
  • Nutty Crust: Add chopped pecans or almonds to the pretzel crust for extra crunch.

What to Serve With It

Grandma’s Strawberry Pretzel Salad shines as a standalone dessert, but pairing it thoughtfully can elevate your meal:

  • Summer BBQs: Serve alongside grilled meats and fresh corn on the cob for a refreshing contrast.
  • Holiday Spreads: Pair with roasted turkey or ham for a sweet-savory balance.
  • Brunch: Offer it with quiche or a fruit platter for a delightful midday treat.
  • Beverage Pairings: Iced tea, lemonade, or a sparkling rosé complement its flavors beautifully.

How to Store and Reheat

This dessert keeps well, but proper storage is key:

  • Refrigeration: Cover tightly with plastic wrap and store in the fridge for up to 3 days.
  • Freezing: While possible, the texture may change slightly. Thaw in the fridge overnight before serving.
  • Reheating: Not recommended—this dessert is best enjoyed cold!

Frequently Asked Questions (FAQs)

Can I use homemade whipped cream instead of Cool Whip? Yes, but stabilize it with a bit of powdered sugar to prevent weeping.

Why is my pretzel crust soggy? Ensure the crust is completely cool before adding the cream layer, and avoid overmixing the gelatin.

Can I make this ahead of time? Absolutely! It’s actually better when made a day in advance.

Is there a way to reduce the sugar? Try cutting the sugar in the cream layer by half—the sweetness from the gelatin and fruit will compensate.

Can I use a different pan size? A 9×13-inch dish is ideal, but a square 8×8-inch pan will yield thicker layers—just adjust chilling time.

Final Thoughts

Grandma’s Strawberry Pretzel Salad is more than a recipe—it’s a celebration of tradition, simplicity, and irresistible flavor. Whether you’re making it for the first time or carrying on a family legacy, this dessert is sure to become a cherished favorite. So gather your ingredients, channel those nostalgic vibes, and get ready to enjoy a slice of sweet, salty, creamy perfection. Happy cooking!

Print
clock clock iconcutlery cutlery iconflag flag iconfolder folder iconinstagram instagram iconpinterest pinterest iconfacebook facebook iconprint print iconsquares squares iconheart heart iconheart solid heart solid icon

Grandma’s Strawberry Pretzel Salad

  • Author: Family Recipe

Description

A nostalgic layered dessert with a salty-sweet pretzel crust, creamy filling, and fresh strawberry topping. Perfect for potlucks and family gatherings.


Ingredients

Scale

For the Crust:

  • For the crust:
  • 2 cups crushed pretzels
  • 3/4 cup melted butter
  • 3 tablespoons granulated sugar
  • For the filling:
  • 1 (8 oz) package cream cheese, softened
  • 1 cup granulated sugar
  • 1 (8 oz) container frozen whipped topping, thawed
  • For the topping:
  • 2 (3 oz) packages strawberry gelatin
  • 2 cups boiling water
  • 2 (10 oz) packages frozen strawberries
  • 1 (8 oz) can crushed pineapple, drained (optional)

Instructions

1. Prepare the Crust:

  1. Preheat oven to 350°F (175°C).
  2. Make the crust: Mix crushed pretzels, melted butter, and 3 tbsp sugar. Press into a 9×13-inch baking dish. Bake for 10 minutes. Cool completely.
  3. Make the filling: Beat cream cheese and 1 cup sugar until smooth. Fold in whipped topping. Spread over cooled crust. Refrigerate.
  4. Make the topping: Dissolve gelatin in boiling water. Stir in frozen strawberries (and pineapple if using). Chill until slightly thickened (20-30 min).
  5. Pour gelatin mixture over cream cheese layer. Refrigerate 4+ hours or until fully set.

Notes

For a firmer crust, bake an extra 2-3 minutes. Fresh strawberries can replace frozen—add 1/4 cup sugar to gelatin mixture if using fresh.