Crazy Crust Pie Recipe: Easy, Self-Making Crust for Sweet & Savory Fillings

self-making pie crust, easy pie recipe, crazy pie crust, quick pie recipe, homemade crazy crust pie, unique pie crust ideas, no-roll crust pie

Crazy Crust Pie: The Ultimate Easy Pie Recipe with a Self-Making Crust

Crazy Crust Pie is a unique and creative dessert that practically makes its own crust as it bakes. This vintage recipe has seen a resurgence, thanks to its simplicity and versatility. With just a few pantry ingredients, you can create a delicious pie that works with sweet fillings like apples, berries, or even savory options.

For pie enthusiasts, this fuss-free recipe removes the need for rolling or chilling traditional dough. It’s ideal for both beginners and seasoned bakers who appreciate quick, delicious desserts. For another unique dessert, you might enjoy the Kentucky Butter Cake on ExoRecipes, which also boasts rich flavors and an easy preparation.


What is Crazy Crust Pie?

Crazy Crust Pie stands out because it doesn’t require traditional pie dough. Instead, a batter forms the crust around the filling as it bakes, creating a texture that’s a cross between a pie and a cobbler. This recipe is adaptable to many flavors, so you can make it with various fillings or enjoy it with a sweet or savory twist.

With its origins in the 1970s, this recipe is a throwback to when simple, homemade desserts were cherished. Another easy and comforting vintage dessert you might like is the Classic Apple Dumplings—an old-fashioned recipe that pairs perfectly with Crazy Crust Pie for a nostalgic dessert spread.


Essential Ingredients for Crazy Crust Pie

The ingredients in Crazy Crust Pie are straightforward, with most items likely already in your pantry:

  • Flour: Forms the base of the crust.
  • Baking powder: Helps the batter rise around the filling.
  • Sugar: Adds sweetness and a slight crispiness to the crust.
  • Butter: Contributes to a rich, golden crust.
  • Egg and milk: These bind the ingredients together and add moisture.
  • Fruit filling: Commonly apple or berry, but you can experiment with flavors.

Ingredient Substitutions and Tips

  • Gluten-Free: Substitute with a gluten-free flour blend for a gluten-free crust.
  • Vegan Option: Replace butter with coconut oil or a vegan alternative and use a plant-based milk.

To enhance the flavors, opt for high-quality butter and fresh fruits. For those who love fruity flavors in their desserts, check out the Strawberry Freezer Pie for another refreshing treat.


How to Make Crazy Crust Pie: Step-by-Step Instructions

This recipe is easy to follow and requires minimal preparation. Here’s how to make it:

1. Prepare Your Ingredients

  • Preheat the oven to 350°F (175°C).
  • Grease a pie dish and set it aside.

2. Make the Crust Batter

  • In a mixing bowl, whisk together flour, baking powder, and sugar.
  • Add melted butter, milk, and a beaten egg, mixing until smooth.

3. Add the Filling

  • Pour the batter into the prepared pie dish, creating an even layer.
  • Gently spoon your choice of filling (apple, berry, or even savory vegetables) into the batter. As it bakes, the batter will rise around the filling, forming a crust.

4. Bake the Pie

  • Place the pie dish in the preheated oven and bake for 40-45 minutes, or until the crust is golden and set.

Recipe Variations and Customizations

Crazy Crust Pie is versatile and allows for several creative adjustments:

Sweet Variations

  1. Apple Cinnamon: Mix diced apples with cinnamon and sugar for a warm, comforting filling.
  2. Berry Mix: Use a combination of blueberries, raspberries, and strawberries.
  3. Peach & Cream: Add a layer of cream cheese with sliced peaches for a creamy, fruity pie.

Savory Options

  1. Taco Pie: Fill with seasoned ground beef, cheese, and diced tomatoes for a savory meal.
  2. Spinach & Cheese: Add sautéed spinach and shredded cheese for a vegetable twist.

Crazy Crust Pie can be an adventurous dish, so feel free to experiment with flavors. For another quick and easy pie idea, you may enjoy the Easy Apple Hand Pies recipe, a fun option for on-the-go treats.


Serving and Storage Tips

Crazy Crust Pie is best served fresh, but here are some tips for enjoying it over time:

Serving Suggestions

  • Serve warm with a scoop of vanilla ice cream or whipped cream.
  • For a decadent dessert, drizzle with caramel or chocolate sauce.

Storage Tips

  • Refrigeration: Store leftovers in an airtight container in the refrigerator for up to 3 days.
  • Freezing: To freeze, wrap the pie tightly in plastic wrap and aluminum foil. Freeze for up to 3 months. Thaw in the refrigerator overnight before reheating.

FAQs About Crazy Crust Pie

1. What makes Crazy Crust Pie different from traditional pies?

Crazy Crust Pie doesn’t require a pre-made or rolled crust. The batter creates a crust as it bakes, making it simpler and faster to prepare.

2. Can I make Crazy Crust Pie gluten-free?

Yes, substitute the flour with a gluten-free baking mix for a gluten-free version.

3. What fillings work best with Crazy Crust Pie?

Fruit fillings like apple, berry, or peach work well. You can also try savory fillings, such as taco-seasoned beef or cheese and vegetables.

4. How should I store Crazy Crust Pie after baking?

Store Crazy Crust Pie in the refrigerator for up to 3 days. For longer storage, freeze the pie and reheat when ready to enjoy.


Nutritional Information and Tips for Healthier Options

Crazy Crust Pie is rich and delicious, but here are a few tips for lightening it up:

  • Reduced Sugar: Use a natural sweetener like honey or stevia to reduce sugar content.
  • Whole Wheat Flour: Swap half of the flour with whole wheat for added fiber.

This pie’s versatility extends to its nutritional profile, allowing you to adjust it based on your preferences. If you’re interested in exploring more health-conscious desserts, check out our No-Bake Pumpkin Cheesecake for a creamy, low-sugar option.


Final Thoughts

Crazy Crust Pie is a fun, easy dessert that fits any occasion. With its self-making crust and adaptable filling options, it’s a fantastic addition to any home cook’s recipe collection. Whether you prefer a classic apple filling or want to explore savory combinations, this pie is a surefire hit. For more creative pies and vintage-inspired desserts, explore ExoRecipes and try out our Gone to Heaven Chocolate Pie for another sweet treat to enjoy with loved ones.

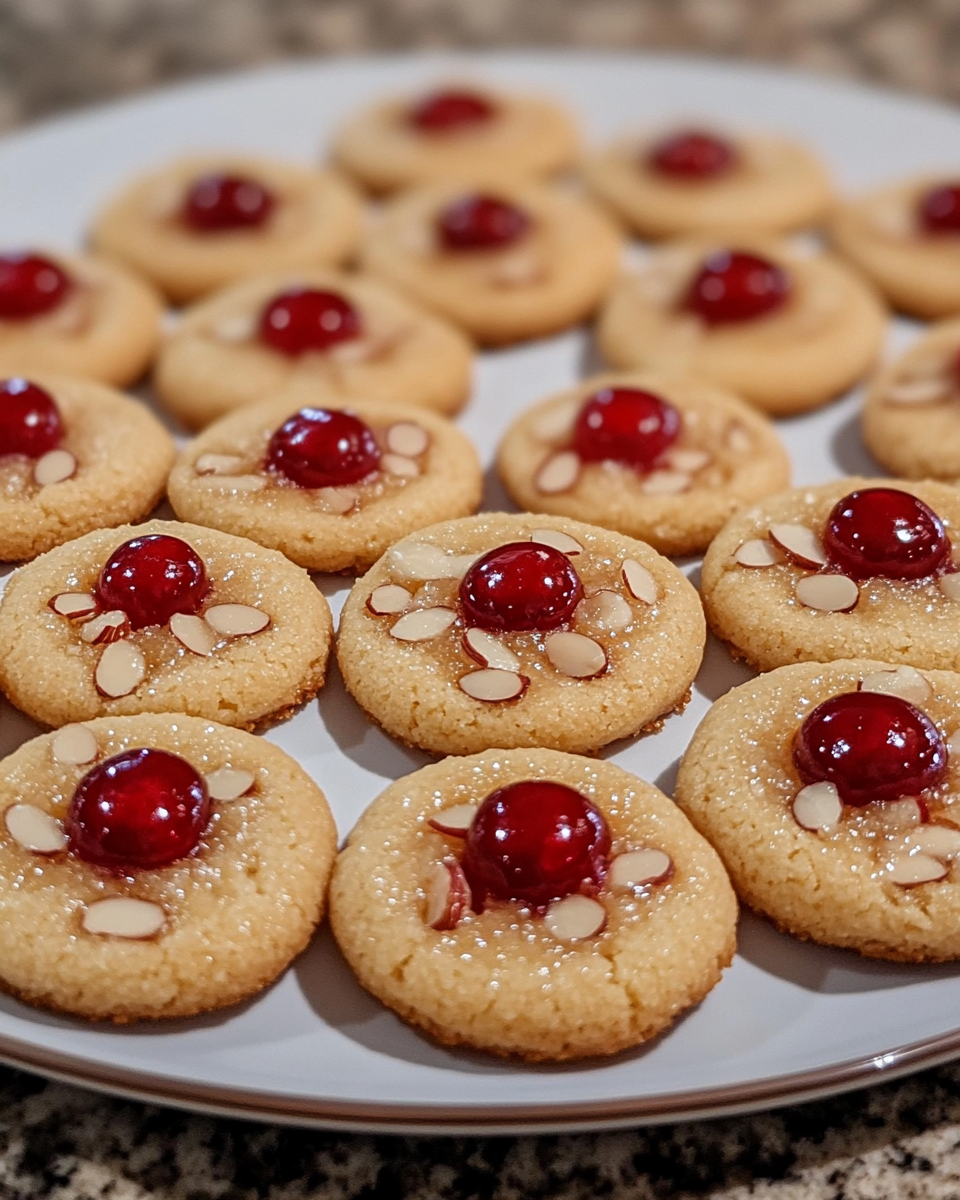
Cherry Almond Amish Sugar Cookies: Soft, Sweet, and Easy Recipe for All Occasions

cherry almond cookies, almond cherry Amish cookies, soft Amish sugar cookies, almond-flavored cookies, Amish cookies with cherries

Cherry Almond Amish Sugar Cookies: A Sweet, Soft Delight

Amish sugar cookies are famous for their soft, melt-in-your-mouth texture and simple, comforting flavor. This recipe for Cherry Almond Amish Sugar Cookies adds a delicious twist with hints of almond extract and pieces of cherry that offer a unique, fruity flavor. Perfect for holidays, special occasions, or as an everyday treat, these cookies are a fantastic way to enjoy the classic Amish recipe with a modern spin.

If you enjoy experimenting with traditional recipes, these cookies are a wonderful place to start. For another delicious treat with a twist, try the Kentucky Butter Cake from ExoRecipes. Like Amish cookies, it’s a classic with deep flavors and an irresistible texture.


The Origin of Amish Sugar Cookies

Amish sugar cookies trace back to Amish communities known for creating recipes using simple, accessible ingredients, crafting delicious dishes with minimalistic techniques. This cookie variation keeps the best qualities of the original recipe but incorporates the subtle flavors of almond and cherry for a delightful twist. To explore more traditional flavors with a creative edge, you might also enjoy the Mini Pineapple Coconut Milk Cheesecakes, perfect for tropical dessert lovers.


Key Ingredients for Cherry Almond Amish Sugar Cookies

The ingredients in these cookies are straightforward but essential to achieving the right flavor and texture:

  • Butter: Adds richness and a soft texture.
  • Granulated Sugar: Sweetens and helps give the cookies their iconic melt-in-your-mouth consistency.
  • Almond Extract: Infuses an almond aroma and flavor that pairs beautifully with cherries.
  • Chopped Maraschino Cherries: Adds color and a sweet, fruity flavor.
  • Flour: The base that forms the dough, giving structure to the cookies.

Ingredient Tips

For best results, opt for high-quality almond extract and use fresh maraschino cherries. Dredge the cherries in flour before adding them to the dough to prevent excess moisture, which can alter the cookies’ texture. If you enjoy baking with unique flavors, ExoRecipes’ Pistachio Shortbread Cookies offer another tasty almond-flavored dessert option.


Step-by-Step Guide to Making Cherry Almond Amish Sugar Cookies

Here’s a complete guide to crafting these delicious cookies:

  1. Preheat the Oven
    • Set the oven to 350°F (175°C) and line a baking sheet with parchment paper to avoid sticking.
  2. Prepare the Dough
    • In a large bowl, cream the butter and sugar together until light and fluffy. This step is crucial for achieving the soft, airy texture that makes Amish cookies unique.
    • Add eggs, one at a time, followed by the almond extract.
    • Gradually incorporate flour, baking soda, and a pinch of salt, mixing until a soft dough forms.
  3. Add the Cherries
    • Gently fold in the flour-dredged cherries, distributing them evenly without crushing them.
  4. Bake
    • Drop spoonfuls of dough onto the baking sheet, spacing them about an inch apart. Bake for 10-12 minutes, or until the edges are lightly golden.
    • Let the cookies cool on a wire rack.

Optional Icing

For an extra touch, drizzle the cookies with a simple almond glaze. Mix powdered sugar with a small amount of almond extract and milk until smooth. Drizzle over the cookies once they’re cool for a beautiful and tasty finishing touch.


Recipe Variations to Explore

One of the beauties of this recipe is its versatility. Here are some fun variations to consider:

  • Cherry-Almond Thumbprint Cookies: Shape the dough into small balls, press a thumbprint into the center, and add a maraschino cherry or cherry jam in the indentation.
  • Coconut-Almond Mix: Fold in shredded coconut with the cherries for an additional layer of flavor.
  • Holiday-Themed Decoration: Use red and green maraschino cherries for a festive look.

Serving Ideas and Storage Tips

These cookies are perfect for any occasion and can be easily adapted to fit various themes or preferences:

  • Serving Suggestions
    • Serve on a holiday cookie platter alongside treats like the Classic Apple Dumplings for a festive dessert spread.
    • Package in a decorative tin for gifting.
  • Storage Tips
    • Store the cookies in an airtight container at room temperature for up to a week.
    • They also freeze well for up to three months if stored in a freezer-safe container with parchment paper between layers.

FAQs About Cherry Almond Amish Sugar Cookies

What makes Amish sugar cookies unique?

Amish sugar cookies are known for their soft, pillowy texture and mild sweetness. The addition of almond and cherry flavors brings a modern twist to this classic.

Can I use fresh cherries instead of maraschino cherries?

Yes, you can substitute fresh cherries, but make sure to pat them dry thoroughly to prevent extra moisture.

How can I keep my cookies soft for longer?

To maintain softness, store them in an airtight container with a piece of bread. The bread will absorb excess moisture, helping the cookies stay fresh.

Can I make these cookies without almond extract?

If you’re not a fan of almond flavor, vanilla extract is a great substitute that still complements the cherry.


Nutritional Information and Health Considerations

These cookies are indulgent, but certain ingredients offer some nutritional benefits:

  • Almonds are a source of healthy fats and add a rich flavor.
  • Cherries provide antioxidants and a natural sweetness.

For a lighter version, try using a reduced amount of sugar or substitute half the flour with almond flour for a richer, nutty flavor.


Wrapping Up

Cherry Almond Amish Sugar Cookies bring together the best of traditional baking with a modern twist. They’re easy to make, customizable, and full of flavors that appeal to both almond and cherry lovers. For more recipes that combine simplicity with delightful flavors, visit ExoRecipes and check out the Momma’s Creamy Baked Macaroni and Cheese, a savory classic that complements any dessert spread.

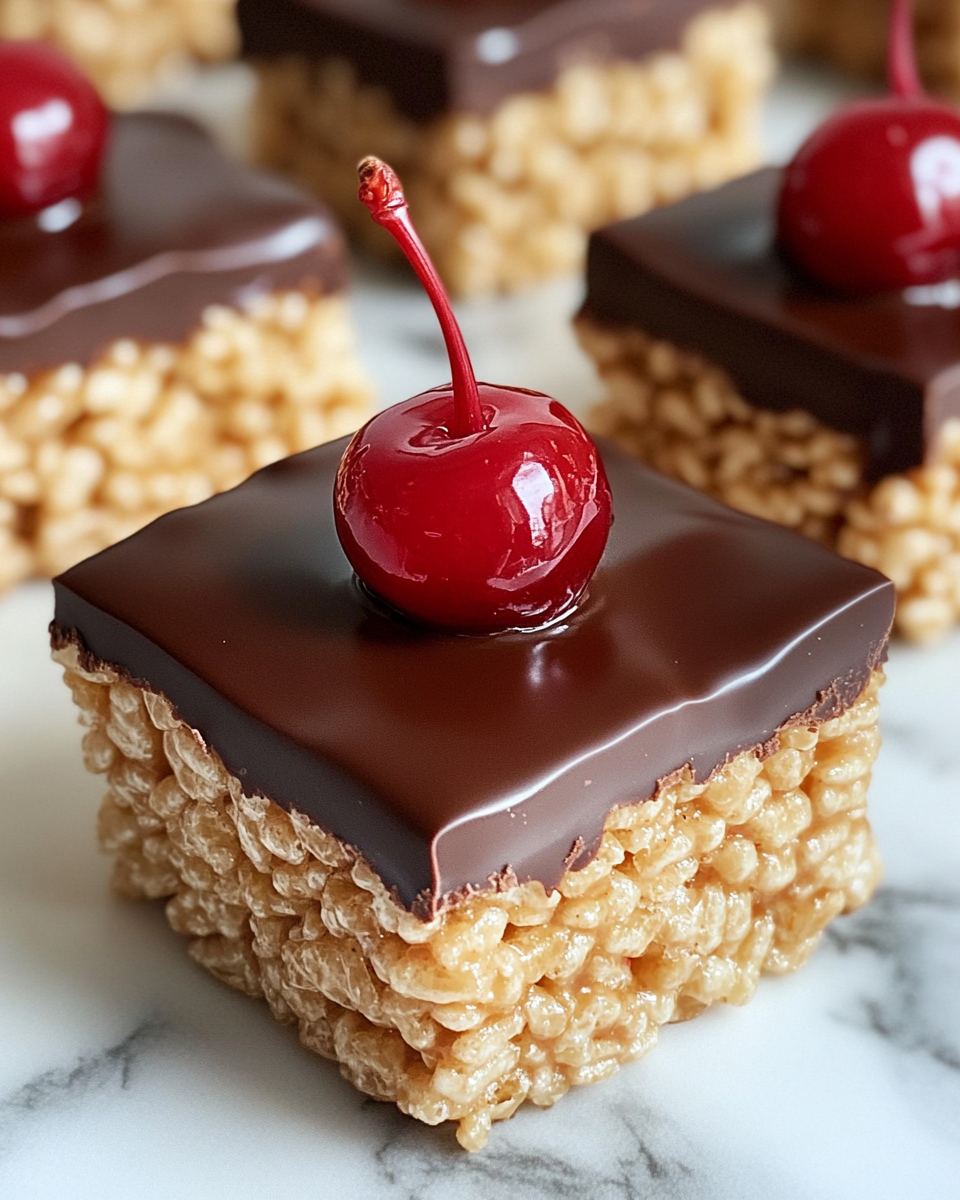
Chocolate Covered Cherry Rice Krispies Treats: Easy Recipe for a Festive Twist

cherry chocolate Rice Krispies treats, Rice Krispies with cherries, chocolate cherry dessert bars, cherry Rice Krispies squares, cherry Rice Krispies snacks

Chocolate Covered Cherry Rice Krispies Treats: A Fun Twist on a Classic Treat

If you’re a fan of Rice Krispies treats, you’ll love this sweet and fruity twist with chocolate and cherry. Chocolate Covered Cherry Rice Krispies Treats are an irresistible treat that combines the crunch of Rice Krispies, the sweetness of maraschino cherries, and a rich layer of chocolate. Perfect for parties, holidays, or a delicious snack, these treats are both easy to make and fun to customize.

For those who enjoy exploring new dessert options, this recipe provides a perfect blend of flavors that elevate the traditional Rice Krispies treat. If you’re interested in making unique desserts, you might also love trying the Mini Pineapple Coconut Milk Cheesecakes on ExoRecipes for a tropical twist on classic flavors.


The Appeal of Chocolate Covered Cherry Rice Krispies Treats

This recipe stands out for its delightful balance of flavors and textures. By combining the familiar crunch of Rice Krispies with cherries and chocolate, it becomes a gourmet treat without requiring extensive baking experience. Plus, it’s perfect for those who want to prepare something quick and impressive.

Chocolate and cherry are timeless dessert combinations, frequently used in treats like Raspberry Cheesecake Brownie Bites for their complementary flavors. The rich chocolate enhances the fruity notes of the cherries, making each bite a deliciously balanced experience.


Ingredients for Chocolate Covered Cherry Rice Krispies Treats

The ingredient list for this dessert is simple, yet each component adds to the flavor and texture:

  • Rice Krispies cereal: This classic cereal provides the necessary crunch.
  • Maraschino cherries: These sweet, juicy cherries add a fruity burst in each bite.
  • Semi-sweet or dark chocolate: Provides a rich chocolate flavor that pairs well with cherries.
  • Marshmallows: Acts as the binding agent to hold the treats together.
  • Butter: Adds a touch of richness to the marshmallow mixture.

For those who enjoy experimenting with different textures, consider adding ingredients like chopped nuts or coconut flakes for an extra crunch.


Step-by-Step Recipe Guide

Creating these treats is straightforward, even if you’re new to dessert making. Here’s how to make Chocolate Covered Cherry Rice Krispies Treats:

  1. Preparation
    • Line a baking sheet with parchment paper for easy clean-up.
    • Measure out all ingredients to ensure a smooth cooking process.
  2. Melting and Mixing
    • In a large saucepan, melt butter over low heat. Add marshmallows and stir until completely melted and smooth.
    • Remove from heat, then stir in the Rice Krispies cereal until evenly coated.
    • Fold in chopped maraschino cherries, ensuring they are distributed throughout the mixture.
  3. Adding the Chocolate
    • Melt semi-sweet or dark chocolate in a microwave-safe bowl or over a double boiler.
    • Pour the melted chocolate over the Rice Krispies mixture and spread it evenly with a spatula.
    • For an extra layer of indulgence, you can dip the bottom of each treat in chocolate or drizzle additional chocolate on top.
  4. Setting and Serving
    • Let the treats cool and set in the refrigerator for at least 30 minutes.
    • Once set, cut into squares and serve.

Customization Ideas and Recipe Variations

This recipe is versatile and offers various ways to tailor it to your preferences. Here are some fun ideas:

  • Chocolate Variations
    • Try a mix of milk and dark chocolate or add a white chocolate drizzle for a beautiful contrast.
  • Different Fruits
    • Substitute maraschino cherries with dried cherries for a chewier texture and a more intense cherry flavor.
  • Holiday-Themed Decorations
    • For festive occasions, add sprinkles, edible glitter, or colored chocolate for a seasonal touch.

For more dessert ideas, check out ExoRecipes’ Easy No-Bake Banana Split Cheesecake, another fantastic option for those who love creative treats.


Serving Ideas and Storage Tips

Chocolate Covered Cherry Rice Krispies Treats are perfect for serving at parties, gatherings, or as a quick homemade gift. Here are some ways to serve and store them:

  • Presentation
    • Serve these treats on a decorative tray or as part of a dessert platter. Pair them with a bowl of fruity cocktails or hot chocolate for added indulgence.
  • Storage
    • Store in an airtight container at room temperature for up to five days. For longer storage, refrigerate the treats in a sealed container to maintain their freshness and prevent the chocolate from melting.

FAQs About Chocolate Covered Cherry Rice Krispies Treats

Can I use fresh cherries instead of maraschino cherries?

Yes, fresh cherries can be used, but they may add extra moisture, which could make the treats softer. If using fresh cherries, be sure to dry them thoroughly before adding them to the mixture.

How can I make Rice Krispies treats less sticky?

Using buttered or oiled spatulas and hands when pressing the mixture into the pan can help. Also, ensure the marshmallow mixture isn’t overcooked, as this can make it stickier.

Can I freeze Chocolate Covered Cherry Rice Krispies Treats?

Yes, these treats freeze well. Store them in a freezer-safe container with parchment paper between layers. When ready to serve, thaw them at room temperature.


Nutritional Information and Health Tips

While these treats are indulgent, they do contain some beneficial ingredients:

  • Cherries provide antioxidants and natural sweetness.
  • Dark chocolate can offer heart-healthy benefits when used in moderation.

For those looking to lighten up the recipe, you can try reducing the amount of marshmallows or using a lower-sugar cereal.


Wrapping Up

Chocolate Covered Cherry Rice Krispies Treats are a delightful twist on a classic dessert. They’re easy to make, customizable, and perfect for almost any occasion. Whether you’re looking to satisfy a sweet tooth or need a quick dessert option for guests, these treats are sure to impress.

For more creative dessert inspiration, visit ExoRecipes and try their Salted Caramel Rice Krispie Treats for a rich and salty twist on a familiar favorite.

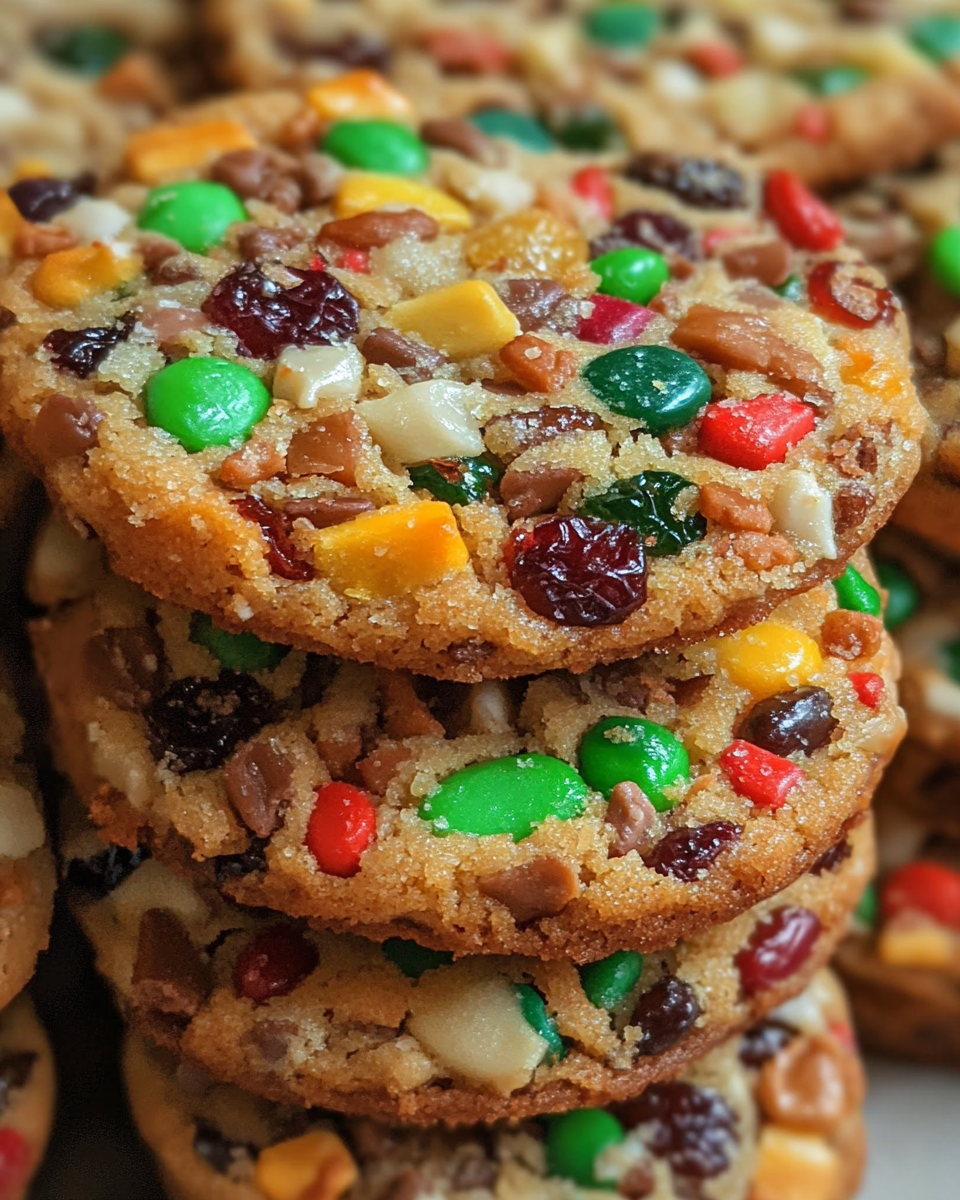
Old-Fashioned Fruitcake Cookies Recipe: A Classic Holiday Treat with a Twist

traditional fruitcake cookies, holiday fruitcake cookies, fruit and nut cookies, Christmas fruitcake cookies, vintage fruitcake cookies

Old-Fashioned Fruitcake Cookies: A Nostalgic Holiday Treat

Old-fashioned fruitcake cookies capture the essence of traditional fruitcake in a delicious, portable form. These cookies are an ideal choice for those who love the flavors of fruitcake but prefer something easier to make and share. Bursting with candied fruits, nuts, and a hint of spice, these cookies are a delightful addition to any holiday spread.

For those who are interested in making seasonal treats with a twist, old-fashioned fruitcake cookies bring a refreshing update to the festive dessert table. Unlike their cake counterpart, these cookies are lighter, more approachable, and allow the flavors of the season to shine. For more inspiration on festive holiday treats, check out this guide to holiday baking tips.

The History and Evolution of Fruitcake Cookies

The traditional fruitcake has ancient roots, often associated with celebrations and good luck. Over time, bakers adapted the dense cake into a more accessible form—fruitcake cookies—keeping the same festive ingredients but with added convenience. This transformation allowed more people to enjoy fruitcake flavors without the dense, sometimes overly sweet texture that not everyone favors.

Today, fruitcake cookies are enjoyed for their unique taste, combining textures of crunchy nuts, chewy dried fruits, and a hint of aromatic spices. If you’d like to explore other timeless recipes that highlight classic holiday flavors, this recipe for Momma’s Creamy Baked Macaroni and Cheese offers a warm, comforting side dish perfect for holiday gatherings.

Ingredients for Making Fruitcake Cookies

The quality of ingredients is essential to capturing the authentic, rich taste of fruitcake cookies. Below are some of the main ingredients that bring out the best flavors:

  • Candied fruits: A mix of candied cherries, pineapple, and orange peel works well, providing sweetness and vibrant colors.
  • Nuts: Pecans and walnuts are classic choices, adding a satisfying crunch that balances the sweetness of the fruit.
  • Spices: Cinnamon, nutmeg, and cloves create a warm and inviting aroma, reminiscent of holiday baking.
  • Alcohol (optional): Traditional recipes sometimes include a splash of brandy or rum for a deeper flavor, but this can be omitted or substituted with extra vanilla extract if preferred.

Ingredient Tips

To enhance the overall flavor, look for high-quality candied fruits and fresh nuts. Dredging the fruit in flour before mixing helps distribute it evenly throughout the dough and prevents clumping. For a deliciously rich option, consider using Taste of Home’s traditional fruitcake recipe as a guide.

Step-by-Step Recipe for Fruitcake Cookies

Creating these cookies is relatively simple, with minimal prep time. Here’s a step-by-step guide to making old-fashioned fruitcake cookies:

  1. Preparation
    • Preheat your oven to 300°F (150°C).
    • Line baking sheets with parchment paper or lightly grease them to prevent sticking.
  2. Mixing Ingredients
    • Cream the butter and sugar in a mixing bowl until light and fluffy.
    • Add the eggs, one at a time, followed by the vanilla extract (or almond extract for an extra layer of flavor).
    • Gradually mix in the flour, spices, and dredged fruit and nuts.
  3. Shaping and Baking
    • Drop spoonfuls of dough onto the prepared baking sheets, spacing them about an inch apart.
    • Bake for 15-20 minutes, or until the cookies are set and slightly golden.
    • Allow the cookies to cool on a wire rack to enhance the texture and flavor.

By following these simple steps, you can create cookies that are both delicious and visually appealing, perfect for sharing or gifting.

Variations and Customization Options

One of the great things about fruitcake cookies is their versatility. Here are some popular ways to customize them:

  • Alcohol-Free Version: Replace the brandy with extra vanilla extract or a touch of almond extract.
  • Dairy-Free Alternative: Swap the butter with coconut oil for a subtle tropical flavor that complements the fruit.
  • Gluten-Free: Substitute the flour with a gluten-free baking mix for a celiac-friendly option.

For a fun twist on classic desserts, explore our Delicious Mini Pineapple Coconut Milk Cheesecakes for a tropical-flavored treat that complements the fruity notes in these cookies.

Serving Suggestions

Fruitcake cookies are a delightful addition to holiday parties, gatherings, or as homemade gifts. Here are a few creative ways to serve them:

  • Holiday Cookie Trays: Arrange them on a tray with a mix of other cookies for a festive presentation.
  • Gift Packaging: Wrap them in decorative tins or bags with holiday ribbon for a thoughtful homemade gift.
  • Pairings: Serve these cookies alongside a warm drink like mulled wine, eggnog, or hot cocoa to accentuate the spices.

Storage and Make-Ahead Tips

One of the unique benefits of fruitcake cookies is that their flavors tend to improve with time. Here’s how to store them for maximum freshness:

  • Room Temperature: Store in an airtight container for up to two weeks. Allowing the cookies to sit for a day or two can enhance their flavor as the ingredients meld together.
  • Freezing: These cookies freeze well for up to three months. Place parchment paper between layers in a freezer-safe container to prevent sticking.

Frequently Asked Questions (FAQs)

  1. What makes fruitcake cookies different from regular fruitcake?
    Fruitcake cookies capture the flavors of fruitcake without the dense, heavy texture. They’re easier to make and portion, making them perfect for sharing.
  2. Can I make these cookies without alcohol?
    Yes! Simply substitute the alcohol with vanilla or almond extract for a non-alcoholic version that’s just as flavorful.
  3. How should I store fruitcake cookies to keep them fresh?
    Store them in an airtight container at room temperature. These cookies improve in flavor with time, making them ideal for make-ahead treats.
  4. What types of nuts and fruits are best for fruitcake cookies?
    Pecans and walnuts are popular choices, while candied cherries, pineapple, and citrus peels add a classic fruitcake flavor.

Nutritional Benefits and Health Considerations

While fruitcake cookies are a treat, they do offer some nutritional benefits from the inclusion of fruits and nuts:

  • Nuts provide healthy fats, protein, and fiber, supporting heart health.
  • Dried fruits are rich in antioxidants and natural sugars, making them a healthier sweetener.

For a lighter take, consider reducing the sugar or using whole-grain flour for added fiber.

Wrapping Up: Why Old-Fashioned Fruitcake Cookies Are a Must-Have for the Holidays

Old-fashioned fruitcake cookies are a delightful way to celebrate the holiday season. They combine the best aspects of traditional fruitcake in a more accessible, cookie form that’s perfect for gifting, sharing, and enjoying throughout the season. Whether you make them as part of a holiday baking tradition or as a thoughtful gift, these cookies are sure to be a hit.

For more inspiration on festive treats, try our Cinnamon Roll Cake with Cream Cheese Glaze for another holiday dessert that pairs beautifully with your favorite holiday flavors.

Apple Salad with Honeycrisp Apples: Fresh, Crunchy, and Perfect for Fall

Honeycrisp apple salad, apple and greens salad, fall apple salad, healthy apple salad recipe, autumn apple salad

Apple Salad with Honeycrisp Apples: A Crisp and Flavorful Delight

Apple salads are a refreshing addition to any meal, combining the sweetness of Honeycrisp apples with the crunch of fresh greens, nuts, and a flavorful dressing. This apple salad with Honeycrisp apples is ideal for fall gatherings, holiday dinners, or even a quick weekday lunch.

For another apple-inspired dish, see our guide on Classic Apple Dumplings—a warm, comforting dessert that’s perfect for autumn.


Essential Ingredients for Honeycrisp Apple Salad

This salad is all about simplicity and fresh ingredients. Here’s a breakdown of the essentials:

  • Honeycrisp Apples: Known for their sweet-tart flavor and crisp texture, Honeycrisps are the star of this salad.
  • Salad Greens: Arugula, spinach, or mixed greens work wonderfully as a base.
  • Nuts: Pecans or walnuts add crunch and a slightly earthy flavor.
  • Dried Cranberries: Add a pop of sweetness and color.
  • Cheese: Feta or blue cheese provides a tangy contrast.
  • Homemade Dressing: An apple cider vinaigrette brings everything together.

For tips on selecting the best apples, visit our article on Choosing Apples for Baking, which includes a guide to different apple varieties.


Step-by-Step Guide to Making Honeycrisp Apple Salad

Creating this salad is simple yet rewarding. Follow these steps for the best results:

1. Slice the Apples

  • Use a sharp knife or a mandoline to thinly slice the Honeycrisp apples. Squeeze a bit of lemon juice on them to prevent browning.

2. Prepare the Greens

  • Rinse and dry your greens thoroughly. Use a salad spinner to remove excess water.

3. Assemble the Salad

  • In a large bowl, combine the greens, apples, nuts, dried cranberries, and cheese.

4. Make the Dressing

  • For a classic apple cider vinaigrette, whisk together apple cider vinegar, olive oil, honey, Dijon mustard, salt, and pepper.

5. Toss and Serve

  • Pour the dressing over the salad just before serving and toss gently to coat.

For more salad dressing options, try our Guide to Homemade Dressings, which includes easy recipes for vinaigrettes and creamy dressings.


Variations to Try

This salad is highly versatile, so feel free to experiment with flavors and textures.

Classic Apple and Pecan Salad

  • Replace the dried cranberries with fresh grapes or pomegranate seeds for extra juiciness.

Maple Walnut Apple Salad

  • Use a maple-based vinaigrette and walnuts for a cozy, autumnal twist.

Blue Cheese and Bacon Apple Salad

  • Add crispy bacon and swap feta for blue cheese to create a bold flavor profile.

For a variation with cheese, check out our Raspberry Shortbread with White Chocolate Drizzle, which offers another example of sweet and savory pairings.


Tips for the Perfect Apple Salad

Achieving a balanced, flavorful salad is all about technique and freshness. Here are a few expert tips:

  • Keep Ingredients Fresh: Use high-quality, fresh greens and crisp apples.
  • Layering Flavors: Balance the sweetness of the apples and cranberries with the tanginess of the cheese and vinaigrette.
  • Add Texture: Nuts and seeds provide crunch, enhancing the overall experience.
  • Proper Storage: Store ingredients separately if making ahead and combine just before serving.

FAQs: Apple Salad with Honeycrisp Apples

How Can I Keep Apples from Browning in the Salad?

To prevent browning, toss the apple slices in a bit of lemon juice. This keeps them fresh without altering the flavor.

What’s the Best Nut for Apple Salad?

Pecans and walnuts are excellent choices for this salad. Their earthy flavor pairs well with the sweetness of Honeycrisp apples.

Can I Make This Salad Ahead of Time?

Yes! Prepare the ingredients separately and store them in the fridge. Assemble and dress the salad right before serving.

How Can I Make This Salad Vegan?

Substitute the honey in the vinaigrette with maple syrup, and use a vegan cheese or omit it altogether.

For more on storing produce, read our Ultimate Guide to Fresh Produce Storage.


Nutritional Benefits of Honeycrisp Apple Salad

Each ingredient in this salad contributes unique nutritional value:

  • Honeycrisp Apples: High in fiber and antioxidants.
  • Greens: Packed with vitamins A, C, and K.
  • Nuts: Rich in healthy fats and protein.
  • Cheese: Provides calcium and protein.
  • Dressing: When made with olive oil, the dressing adds healthy monounsaturated fats.

If you’re interested in learning more about nutritious salad options, explore our Apple Cranberry Walnut Salad, which offers a slightly sweeter flavor profile.


Storing Leftovers

Store any leftover salad in an airtight container in the refrigerator. Avoid dressing the entire salad if you plan to save some for later. Instead, keep the dressing in a separate container and add just before eating.


Apple salads like this one are versatile, healthy, and perfect for any occasion. Whether you’re serving it as a side dish for Thanksgiving or enjoying it as a light lunch, this Honeycrisp apple salad is sure to impress. The balance of flavors, textures, and freshness is what makes this recipe a winner.

If you’re looking for more apple-inspired dishes, check out our Cider-Basted Apple Dumplings for a delicious dessert that celebrates the season.