Amish Peanut Butter Cream Pie: A Sweet and Creamy Classic Dessert

peanut butter cream pie, Amish dessert pie, creamy peanut butter pie, no-bake peanut butter pie, classic Amish pie, peanut butter custard pie

Amish Peanut Butter Cream Pie: A Slice of Comfort and Tradition

Amish Peanut Butter Cream Pie combines the simplicity and richness of Amish cooking with a creamy, nutty twist. Known for its light yet indulgent filling layered in a perfectly sweet crust, this pie is a favorite at gatherings, family dinners, and potlucks. It’s easy to make, requires simple ingredients, and delivers a nostalgic taste that’s both satisfying and unforgettable.

For more peanut butter desserts, don’t miss our Ultimate Peanut Butter Pie, a classic favorite.


Ingredients for Amish Peanut Butter Cream Pie

This creamy dessert is made with readily available ingredients, making it a perfect recipe for those who love peanut butter. Here’s what you’ll need:

  • Graham Cracker Crust: Provides a slightly sweet and crunchy base.
  • Peanut Butter: Choose creamy for a smooth filling, or use chunky for texture.
  • Vanilla Pudding: Adds a smooth, custard-like consistency.
  • Whipped Topping: Lightens the filling, making it airy and creamy.
  • Sugar and Milk: Balances the sweetness and texture of the filling.

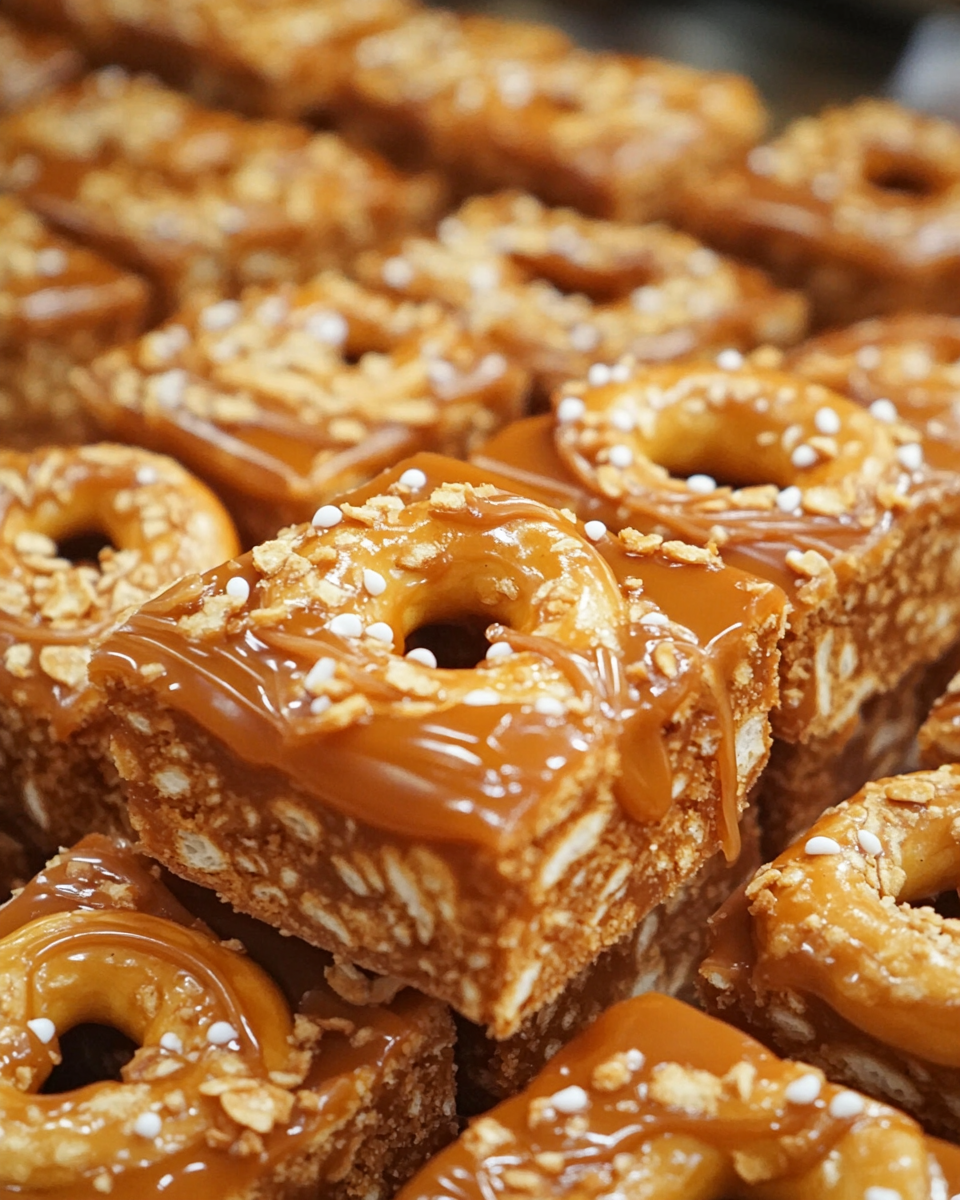
For a delightful caramel twist, consider trying our Salted Caramel Rice Krispie Treats, a sweet addition to any dessert spread.

Ingredient Substitutions and Variations

  • Gluten-Free Option: Use a gluten-free graham cracker crust.
  • Dairy-Free: Replace milk with almond or coconut milk and use dairy-free whipped topping.
  • Add a Layer of Chocolate: Melt chocolate and spread it over the crust before adding the filling.

Preparing the Pie Crust

  1. Choose Your Crust: While graham cracker crust is popular, a traditional pie crust also works well.
  2. Bake or Chill: Bake the crust for a toasted flavor or chill it for a no-bake option.
  3. Optional Chocolate Layer: Add a layer of melted chocolate on the crust to enhance flavor.

Pro Tip: Chilling the crust after pressing it into the pie dish helps it hold shape when filling is added.


Making the Peanut Butter Cream Filling

The filling is the heart of this pie, with its creamy, rich peanut butter flavor:

  1. Mix Ingredients: Blend peanut butter, vanilla pudding, and whipped topping until smooth.
  2. Adjust Sweetness: Add sugar gradually to control sweetness, depending on your taste.
  3. Spread in Crust: Pour the filling into the crust and smooth it out.

For another variation on indulgent cream desserts, try our Cinnamon Roll Cake with Cream Cheese Glaze, a perfect pairing with this pie.


Assembling and Chilling the Pie

  1. Layer the Filling: Spread the peanut butter mixture into the crust and level the top.
  2. Optional Whipped Topping Layer: Spread an additional layer of whipped topping for extra creaminess.
  3. Chill: Refrigerate the pie for at least 4 hours or overnight for the best texture.

Creative Variations for Amish Peanut Butter Cream Pie

This pie lends itself to many delicious twists. Here are a few ideas:

  • Chocolate Peanut Butter Cream Pie: Add a layer of chocolate pudding or sprinkle chocolate chips on top.
  • No-Bake Version: Skip baking the crust and use instant pudding mix for a faster version.
  • Salted Peanut Butter: Add a sprinkle of sea salt for a salty-sweet combination.

For a delightful chocolate and peanut butter pairing, explore our Ultimate Peanut Butter Pie, an excellent alternative dessert for peanut butter lovers.


Serving Suggestions and Garnishing Ideas

Amish Peanut Butter Cream Pie can be dressed up or down depending on the occasion:

  • Chocolate Drizzle: Melt chocolate and drizzle it over the top for an elegant touch.
  • Peanut Butter Crumbles: Add a sprinkle of peanut butter crumbles or crushed peanuts for texture.
  • Serve with Coffee: A slice of this pie pairs wonderfully with a hot cup of coffee or a glass of milk.

Tip: If you love caramel flavors, try serving it with our Salted Caramel Rice Krispie Treats, a delightful side that complements this pie’s nutty flavor.


Storage Tips and Make-Ahead Options

Amish Peanut Butter Cream Pie is ideal for making ahead and storing:

  • Refrigerate: Store in the fridge for up to 3 days, covered with plastic wrap to keep it fresh.
  • Freezing: Wrap individual slices in plastic wrap and freeze for up to 1 month. Thaw in the fridge before serving.
  • Transporting: Use a pie container for safe transport to gatherings.

FAQs About Amish Peanut Butter Cream Pie

Q: Can I make this pie without baking?
Yes, a no-bake version can be made using a pre-made graham cracker crust and instant pudding.

Q: What’s the best way to make it less sweet?
Use unsweetened peanut butter and reduce the sugar.

Q: Can I make a chocolate variation?
Absolutely! Add chocolate pudding or a drizzle of melted chocolate.

Q: Do I have to use whipped topping?
No, you can substitute it with homemade whipped cream or skip it for a denser filling.

Q: Is there a way to make this pie gluten-free?
Yes, simply use a gluten-free crust and check that other ingredients are gluten-free.


Conclusion

Amish Peanut Butter Cream Pie is a rich, creamy dessert that’s simple to make and perfect for any occasion. Whether you follow the classic recipe or try one of the variations, this pie will be a hit. Serve it alongside Salted Caramel Rice Krispie Treats or enjoy on its own for a sweet, satisfying experience.

Classic Stuffed Cabbage Rolls Recipe: A Comforting Family Favorite

cabbage roll recipe, classic stuffed cabbage, savory cabbage rolls, cabbage rolls with meat, easy cabbage rolls, homemade cabbage rolls

Stuffed Cabbage Rolls: A Traditional Comfort Food with Global Roots

Stuffed cabbage rolls are a beloved dish with roots in many cuisines around the world, from Eastern European to Middle Eastern traditions. This dish offers a comforting combination of savory meat, rice, and seasonings, all wrapped in tender cabbage leaves and simmered in a flavorful tomato sauce. With just a few basic ingredients and simple steps, stuffed cabbage rolls are perfect for cozy family dinners and holiday gatherings alike.

For another cozy recipe to serve alongside, try Mom’s Tender and Juicy Pork Chops, which add a savory pairing to this classic dish.


Ingredients for Classic Stuffed Cabbage Rolls

To make stuffed cabbage rolls, gather the following ingredients:

  • Ground Meat: Traditionally a mix of beef and pork.
  • Rice or Grains: Typically white rice, which cooks inside the roll.
  • Aromatics: Onion, garlic, and parsley for added flavor.
  • Cabbage Leaves: Use green or savoy cabbage for the best results.
  • Tomato-Based Sauce: A mix of tomato sauce, broth, and seasonings.

For another comforting option, check out Ultimate Comfort Food: Bacon Ranch Chicken Quesadillas, a family favorite that complements the flavors of these rolls.

Ingredient Substitutions and Variations

  • Low-Carb Version: Use cauliflower rice instead of traditional rice.
  • Vegetarian: Substitute meat with lentils or mushrooms.
  • Flavor Add-Ins: Try a hint of cinnamon or allspice for a Middle Eastern twist.

Preparing the Cabbage Leaves

  1. Core the Cabbage: Use a knife to cut around the core and remove it.
  2. Soften Leaves: Boil the whole cabbage for a few minutes, or freeze overnight to make leaves pliable.
  3. Separate and Trim: Carefully separate leaves, trimming thick veins to aid in rolling.

Pro Tip: Boiling makes the cabbage pliable, preventing leaves from tearing during rolling.


Making the Filling and Assembling the Rolls

  1. Mix the Filling: Combine ground meat, rice, garlic, onion, parsley, and seasonings.
  2. Spoon and Roll: Place filling in the center of each leaf, then roll tightly.
  3. Secure the Rolls: Arrange seam-side down in the cooking dish.

For a savory soup pairing, try our Hearty Ham and Potato Soup as a delicious side to serve with cabbage rolls.


Cooking Methods for Stuffed Cabbage Rolls

  1. Oven-Baked: Cover with tomato sauce and bake at 350°F for 1-2 hours.
  2. Stovetop Simmer: Simmer rolls in a large pot for a hands-on approach.
  3. Slow Cooker: Cook on low for 6-8 hours for ultra-tender rolls.

Each method offers a different texture, with the slow cooker providing the most tender results.


Serving Suggestions for Stuffed Cabbage Rolls

Stuffed cabbage rolls are versatile and pair well with various sides:

  • With Crusty Bread: Perfect for soaking up the sauce.
  • With Sour Cream: Add a dollop for a creamy, tangy contrast.
  • With Savory Dishes: Serve with Mom’s Tender and Juicy Pork Chops for a complete meal.

Storage and Reheating Tips

Store leftovers in an airtight container in the fridge for up to 4 days. They can also be frozen for up to 3 months.

  • Reheating: Warm in the oven or microwave to preserve the texture.
  • Freezing Tips: Freeze individually for easy meal prep portions.

For an additional meal idea, enjoy your rolls with a side of Hearty Ham and Potato Soup.


FAQs About Stuffed Cabbage Rolls

Q: Can I make cabbage rolls ahead of time?
Yes, assemble them a day in advance, then refrigerate until ready to cook.

Q: Can I use red cabbage?
Green or savoy cabbage is recommended for easier rolling.

Q: Can I make a gluten-free version?
Yes, replace bread crumbs with gluten-free options or omit them.


Conclusion

Stuffed cabbage rolls are a classic comfort food, blending savory flavors and wholesome ingredients into a delicious, nourishing meal. With easy preparation methods and endless variations, this dish can be adapted to suit various tastes and dietary needs. Enjoy these rolls on their own, or with delicious sides like Mom’s Tender and Juicy Pork Chops or Hearty Ham and Potato Soup, for a hearty meal that warms the heart and home.

Caramel Pretzel Crack Bars: Sweet and Salty Perfection

sweet and salty bars, caramel chocolate pretzel bars, easy pretzel crack recipe, homemade caramel bars, crunchy caramel chocolate bars, addictive snack bars

Caramel Pretzel Crack Bars: The Ultimate Sweet and Salty Treat

If you’re looking for a dessert that perfectly balances sweet and salty flavors, Caramel Pretzel Crack Bars are exactly what you need. This treat is easy to make, requires minimal ingredients, and is highly addictive—just the right combination for any occasion. From holiday gatherings to casual snacks, these bars are a hit with everyone who tries them.

For a similar sweet and salty dessert, check out our Salted Caramel Rice Krispie Treats, another beloved recipe that’s perfect for parties.


Ingredients for Caramel Pretzel Crack Bars

To make these irresistible bars, gather the following ingredients:

  • Pretzels: The base of the bars, adding crunch and saltiness.
  • Butter and Brown Sugar: Essential for creating a homemade caramel layer.
  • Chocolate Chips: Melted over the caramel for a rich, chocolatey finish.
  • Optional Toppings: Sea salt, crushed nuts, or festive sprinkles for extra texture and flavor.

For more caramel-based recipes, explore our Decadent Caramel Chocolate Cupcakes here.

Ingredient Substitutions and Customizations

  • Gluten-Free: Use gluten-free pretzels to make these bars suitable for those with gluten sensitivities.
  • Dark Chocolate: Substitute dark chocolate chips for a less sweet, richer flavor.
  • Add-In Ideas: Try crushed nuts or a drizzle of white chocolate for a personalized touch.

Preparing the Pretzel Base

  1. Layer the Pretzels: Arrange a layer of pretzels on a parchment-lined baking sheet. This ensures an even layer of crunch across each bar.
  2. Break or Whole?: You can break the pretzels into smaller pieces or keep them whole, depending on your texture preference.

Pro Tip: For easy cleanup, line the baking sheet with parchment paper.


Making the Caramel Sauce

Creating a smooth, rich caramel sauce is essential for these bars:

  1. Melt Butter and Brown Sugar: Combine in a saucepan over medium heat, stirring constantly.
  2. Boil the Mixture: Let it boil for 3-4 minutes, or until the mixture thickens and turns a rich caramel color.
  3. Pour Over Pretzels: Evenly pour the caramel sauce over the pretzels.

For more caramel dessert ideas, try our Cinnamon Roll Cookies with Cream Cheese Drizzle.


Assembling and Baking the Bars

  1. Bake the Caramel Pretzels: Place the baking sheet in a preheated oven at 350°F (175°C) and bake for about 5-7 minutes to set the caramel.
  2. Add the Chocolate Layer: Remove from the oven and immediately sprinkle chocolate chips over the caramel layer.
  3. Spread the Chocolate: Allow the chocolate to melt, then spread it evenly over the bars.

Tip: Use a spatula dipped in hot water to smooth the chocolate layer for a professional finish.


Creative Variations and Topping Ideas

These bars are versatile, and you can add various toppings to make them even more exciting:

  • Peanut Butter Swirl: Drizzle melted peanut butter over the chocolate layer and swirl with a toothpick.
  • Nutty Crunch: Sprinkle chopped pecans, almonds, or walnuts over the chocolate before it sets.
  • S’mores Twist: Add mini marshmallows and a sprinkle of graham cracker crumbs.

For an easy variation on bar desserts, our Salted Caramel Rice Krispie Treats offer a similar mix of sweet and salty.


Serving Suggestions

Caramel Pretzel Crack Bars are perfect for various occasions:

  • Holiday Platters: Arrange with other treats like cookies or fudge.
  • Dessert Boards: Pair with other caramel and chocolate desserts, like our Decadent Caramel Chocolate Cupcakes.
  • Gift Idea: Package in decorative boxes or bags for a delicious homemade gift.

Storage and Freezing Tips

These bars store well, making them a great make-ahead option:

  • Room Temperature: Store in an airtight container for up to a week.
  • Freezing: Wrap each bar individually in parchment paper and place in a freezer-safe container for up to 3 months. Thaw at room temperature before serving.

FAQs About Caramel Pretzel Crack Bars

Q: Can I use store-bought caramel sauce instead of making it from scratch?
Yes, though homemade caramel adds a richer, fresher flavor.

Q: How do I keep the chocolate layer smooth?
Spread while warm or use a warm spatula for a glossy finish.

Q: Are these bars gluten-free?
They can be made gluten-free by using gluten-free pretzels.

Q: Can I add other toppings?
Absolutely! Crushed nuts, sprinkles, and a drizzle of peanut butter are popular options.

Q: How do I prevent the caramel from sticking to the pan?
Line your baking sheet with parchment paper for easy removal.


Conclusion

Caramel Pretzel Crack Bars are the ultimate sweet and salty dessert, combining the rich flavors of caramel and chocolate with the satisfying crunch of pretzels. Perfect for gatherings or as a homemade gift, these bars are easy to make and endlessly customizable. Try different toppings, play with flavors, and enjoy the simplicity of this addictive treat.

Looking for more irresistible snacks? Try our Salted Caramel Rice Krispie Treats or Cinnamon Roll Cookies with Cream Cheese Drizzle for more fun, easy-to-make sweets.

Irresistible Texas Sheet Cake Cookies: A Delicious Twist on a Classic

Texas sheet cake cookies, chocolate sheet cake cookies, Southern chocolate cookies, easy chocolate glaze cookies, chocolate dessert bites, classic cake cookies

Irresistible Texas Sheet Cake Cookies: A Decadent Southern Delight

If you’re a fan of rich chocolate flavors and decadent textures, Texas Sheet Cake Cookies are about to become your new favorite dessert. Inspired by the classic Texas sheet cake, these cookies combine a soft, chewy cookie base with a luscious chocolate glaze, delivering a bite-sized indulgence that’s perfect for gatherings, holidays, or simply satisfying a chocolate craving.

For more chocolatey goodness, don’t miss our Ultimate Thick Homemade Chocolate Chip Cookies, another favorite for cookie enthusiasts.


Ingredients for Texas Sheet Cake Cookies

Creating these cookies requires only a few basic ingredients commonly found in a baker’s pantry. Here’s what you’ll need:

  • Butter: Adds richness and soft texture to the cookies.
  • Granulated Sugar: Provides sweetness and helps with browning.
  • Eggs: Bind the ingredients and give structure to the cookies.
  • Vanilla Extract: Enhances the flavor.
  • Flour and Baking Powder: Essential for the cookie base.
  • Cocoa Powder: The star ingredient for that deep chocolate flavor.
  • Powdered Sugar and Milk (for the glaze): Ensures a smooth, glossy finish.

For those who love Southern desserts, be sure to check out our indulgent Kentucky Butter Cake for another treat that’s rich, moist, and full of flavor.

Ingredient Substitutions and Customizations

  • Butter Alternatives: Use plant-based butter for a dairy-free option.
  • Gluten-Free: Swap with a 1:1 gluten-free flour blend.
  • Extra Flavor: Add a pinch of cinnamon for a Mexican chocolate twist.

Preparing the Cookie Dough

  1. Cream Butter and Sugar: Start by mixing the softened butter and sugar until fluffy, which helps create a soft, light texture.
  2. Add Eggs and Vanilla: Incorporate eggs one at a time, followed by vanilla extract.
  3. Combine Dry Ingredients: Gradually add flour, cocoa powder, and baking powder until you have a cohesive dough.
  4. Chill Dough (optional): For slightly thicker cookies, chill the dough for 15-20 minutes before baking.

Step-by-Step Baking Instructions

  1. Preheat Oven: Set to 350°F (175°C).
  2. Shape Cookies: Use a cookie scoop or tablespoon to drop dough onto a lined baking sheet.
  3. Bake: Bake for 8-10 minutes, checking for a slightly soft center for chewy cookies.
  4. Cool: Allow cookies to cool on the baking sheet for a few minutes before transferring to a wire rack.

Pro Tip: Slightly under-baking the cookies helps maintain a chewy texture, similar to a Texas sheet cake.


Making the Chocolate Glaze

This simple glaze is what truly transforms these cookies into Texas sheet cake treats:

  1. Melt Butter with Cocoa Powder and Milk: Stir until smooth and slightly thickened.
  2. Add Powdered Sugar: Gradually whisk in powdered sugar until the glaze is smooth.
  3. Adjust Consistency: If too thick, add a splash of milk; if too thin, add a bit more powdered sugar.
  4. Apply to Cookies: Drizzle over each cookie or dip the tops directly into the glaze.

If you’re interested in easy, crowd-pleasing treats, try our Salted Caramel Rice Krispie Treats, which also feature a rich, sweet topping.


Variations and Customizations

Personalize your Texas Sheet Cake Cookies with these tasty ideas:

  • Pecan Chocolate: Add chopped pecans to the cookie dough for a nutty twist.
  • Mint Chocolate: Add a few drops of peppermint extract to the glaze.
  • Spicy Chocolate: Mix a pinch of cayenne pepper or cinnamon into the dough for a subtle kick.
  • Gluten-Free Option: Use gluten-free flour to make this recipe suitable for those with gluten sensitivities.

Serving Suggestions

These cookies are versatile and perfect for various occasions:

  • Holiday Parties: Arrange on a festive platter or add sprinkles for a holiday touch.
  • Dessert Boards: Pair with brownies, chocolate truffles, and Kentucky Butter Cake for a rich dessert spread.
  • Coffee Pairing: Serve alongside a hot cup of coffee or milk for a cozy treat.

Storage and Freezing Tips

Here’s how to keep these cookies fresh and delicious:

  • Room Temperature: Store in an airtight container at room temperature for up to 5 days.
  • Freezing: Freeze individually on a baking sheet, then transfer to a freezer-safe bag. Thaw and enjoy within 3 months.
  • Reheating: Warm briefly in the microwave to bring back the fresh-baked texture.

Creative Uses for Leftover Cookies

If you have extra Texas sheet cake cookies, try these fun ideas:

  • Cookie Crumble Topping: Crush and use as a topping for ice cream or yogurt.
  • Ice Cream Sandwiches: Place a scoop of ice cream between two cookies for a decadent dessert.
  • Blended Milkshake: Blend with ice cream and milk for a rich, chocolatey milkshake.

FAQs About Texas Sheet Cake Cookies

Q: Can I use salted butter instead of unsalted?
Yes, but reduce the added salt in the recipe by half.

Q: How can I make the glaze thicker?
Add more powdered sugar to reach the desired consistency.

Q: What’s the best way to keep the cookies soft?
Store with a slice of bread in the container to maintain moisture.

Q: Can I add other mix-ins like chocolate chips?
Absolutely! Just avoid overloading to maintain the cookie texture.

Q: Do these cookies need to be refrigerated?
No, but refrigerating will help the glaze set quickly.


Conclusion

Texas Sheet Cake Cookies capture the rich, chocolatey goodness of the classic sheet cake in a convenient, bite-sized form. Perfect for parties, gifts, or a special treat, these cookies are easy to make and even easier to customize. Whether you stick with the traditional chocolate glaze or add a unique twist, these cookies are sure to be a hit.

For more cookie inspiration, explore our Crafting the Ultimate Thick Homemade Chocolate Chip Cookies and other recipes that bring comfort and joy to the table.

Classic Christmas Cranberry Sauce Recipe: A Holiday Must-Have

holiday cranberry sauce, easy cranberry sauce recipe, cranberry sauce with orange, homemade cranberry sauce, festive cranberry sauce, traditional cranberry sauce

Christmas Cranberry Sauce Recipe: A Festive Holiday Essential

Cranberry sauce is a classic side dish that adds a burst of color and flavor to any Christmas table. With its perfect balance of tart and sweet, this Christmas cranberry sauce recipe is an easy-to-make, versatile addition to your holiday feast. Made with fresh cranberries and just a few other ingredients, it pairs beautifully with turkey, ham, and even vegetarian options.

For a creative salad to complement your cranberry sauce, try our Apple Cranberry Walnut Salad, a holiday favorite that brings out the best in seasonal flavors.


Essential Ingredients for a Traditional Cranberry Sauce

This recipe keeps things simple, relying on fresh ingredients to let the cranberries shine. Here’s what you’ll need:

  • Cranberries: Fresh or frozen cranberries work equally well.
  • Sugar: White or brown sugar for sweetness; adjust to taste.
  • Orange Juice: Adds a citrusy note that complements the tartness.
  • Water: Helps cook down the cranberries to a sauce-like consistency.
  • Optional Additions: Orange zest, cinnamon sticks, or cloves for added depth of flavor.

For a similar festive condiment, check out our Spicy Pineapple Jalapeño Chutney, which offers a sweet and spicy twist.

Ingredient Substitutions and Customizations

If you want to try some variations, here are a few ideas:

  • Honey or Maple Syrup: Use in place of sugar for a natural sweetness.
  • Apple Juice: Substitute for orange juice for a milder flavor.
  • Ginger: Fresh or ground ginger adds a spicy warmth to the sauce.

Preparing Fresh Cranberries

Start by rinsing your cranberries and removing any that are bruised or soft. This quick step ensures the freshest, highest quality sauce. If using frozen cranberries, there’s no need to thaw them first—just add them directly to the pot and adjust cooking time slightly.


Step-by-Step Instructions for Making Cranberry Sauce

  1. Combine Ingredients: Place cranberries, sugar, and orange juice in a medium saucepan over medium heat.
  2. Cook Until Berries Pop: Stir occasionally, cooking until the cranberries start to pop (about 10 minutes).
  3. Simmer and Thicken: Lower heat and let the sauce simmer, stirring frequently, until it reaches your desired consistency (about 10 more minutes).
  4. Adjust Sweetness: Taste and add extra sugar if needed.
  5. Cool and Store: Let cool before serving, or refrigerate for up to a week.

Festive Variations on the Classic Cranberry Sauce

Make this cranberry sauce uniquely yours by trying one of these festive variations:

  • Orange-Cranberry Sauce: Add orange zest and a splash of extra orange juice for a bright citrus twist.
  • Spiced Cranberry Sauce: Include a cinnamon stick, a few cloves, or a dash of nutmeg for warm holiday flavors.
  • Maple Cranberry Sauce: Substitute maple syrup for sugar to create a rich, earthy sweetness.

For a unique side pairing, serve your cranberry sauce with Perfect Homemade Stuffing Balls, which capture the flavors of the season.


Serving Suggestions for Christmas Cranberry Sauce

Wondering how to serve cranberry sauce this Christmas? Here are a few ideas to make the most of this festive condiment:

  • Classic Pairing with Turkey: Perfectly balances the richness of holiday turkey or ham.
  • Cheese Boards: Spoon cranberry sauce over a block of cream cheese or brie and serve with crackers for a quick appetizer.
  • Dessert Garnish: Serve with vanilla ice cream or cheesecake for a sweet contrast.

Consider pairing this cranberry sauce with a cozy holiday favorite like our Apple Cranberry Walnut Salad.


Storage and Freezing Tips

Cranberry sauce is an excellent make-ahead dish that can be stored for future meals:

  • Refrigeration: Store in an airtight container in the refrigerator for up to a week.
  • Freezing: Freeze for up to three months. When ready to use, thaw in the refrigerator overnight and stir before serving.

Creative Uses for Leftover Cranberry Sauce

Leftover cranberry sauce is surprisingly versatile! Here are some ideas for using up any extra:

  • Sandwich Spread: Add to turkey sandwiches or wraps.
  • Breakfast Topping: Stir into oatmeal or spread over toast.
  • Baking Ingredient: Swirl into muffins, scones, or quick bread for added flavor.

FAQs About Christmas Cranberry Sauce

Q: Can I use frozen cranberries instead of fresh?
Yes, frozen cranberries work well—just add a few extra minutes to the cooking time.

Q: How can I make cranberry sauce less tart?
Add more sugar or a splash of orange juice to balance the tartness.

Q: Can I make cranberry sauce in advance?
Absolutely! It keeps well in the fridge for up to a week, and flavors deepen over time.

Q: Is cranberry sauce served hot or cold?
Typically, cranberry sauce is served chilled or at room temperature.

Q: How do I thicken cranberry sauce?
If your sauce is too thin, let it simmer a bit longer to reduce the liquid, or add a small amount of cornstarch dissolved in water.


Conclusion

This Christmas Cranberry Sauce Recipe is an easy, festive addition to your holiday table. Whether you keep it classic or experiment with fun variations, cranberry sauce is a must-have for Christmas dinner. Serve it with roasted turkey, creamy cheeses, or as a topping for dessert, and enjoy the vibrant flavors that bring warmth and joy to the season.

For more holiday recipes, don’t miss ExoRecipes’ Perfect Homemade Stuffing Balls or the delightful Apple Cranberry Walnut Salad to round out your festive meal.