Classic 7-Layer Gelatin Salad

Classic 7-Layer Gelatin Salad

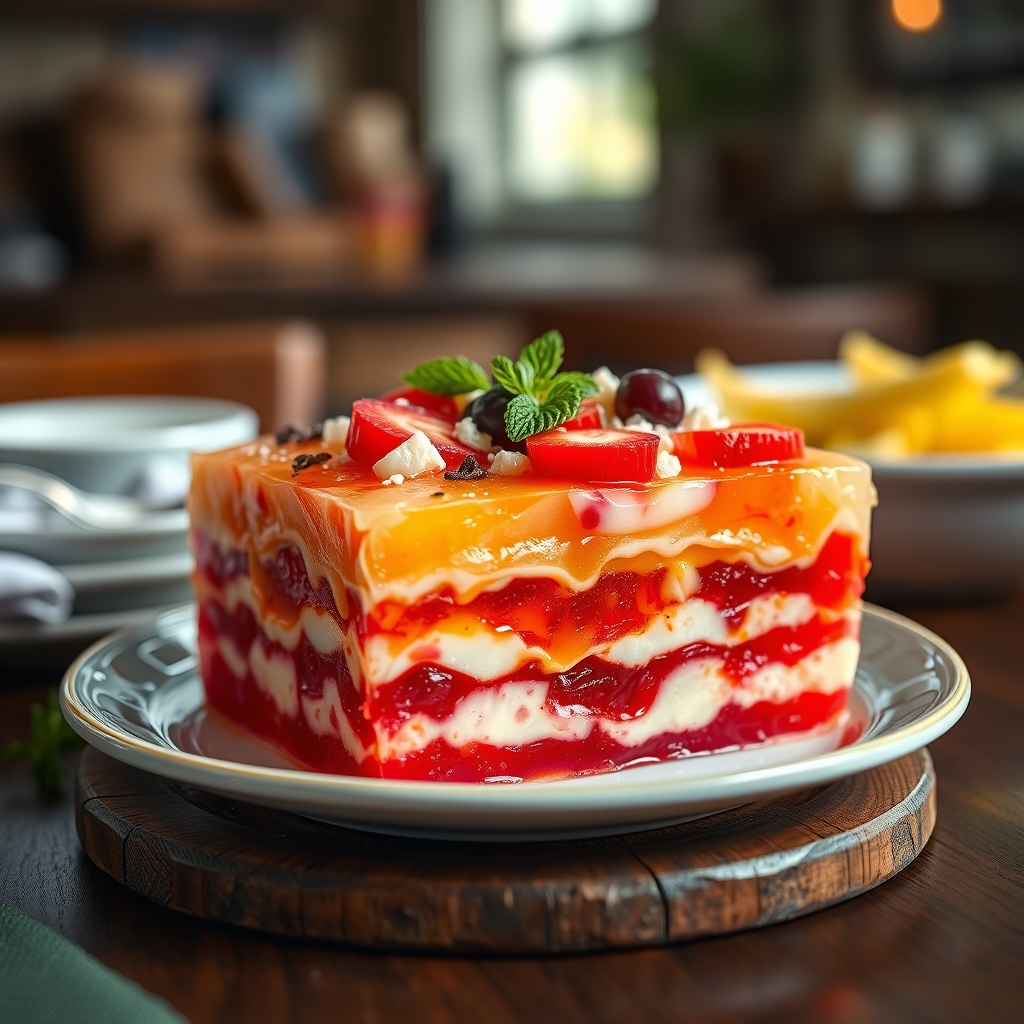
There’s something undeniably nostalgic about a Classic 7-Layer Gelatin Salad. This retro dish, often found at potlucks and holiday gatherings, is a vibrant, jiggly masterpiece that brings both color and flavor to the table. Whether you remember it from childhood or are discovering it for the first time, this recipe is a delightful blend of sweet, tangy, and creamy layers that come together in perfect harmony. Let’s dive into why this vintage favorite deserves a spot in your recipe collection.

Why You’ll Love This Recipe

First, the visual appeal of this dish is unmatched. The rainbow-like layers make it a showstopper at any gathering, guaranteed to draw compliments from guests. Second, the texture contrast between the firm gelatin and the creamy layers creates a satisfying bite that keeps you coming back for more. Third, it’s incredibly versatile—you can customize the flavors and colors to match any occasion. Fourth, it’s a make-ahead dish, meaning less stress on the day of your event. And finally, it’s a crowd-pleaser, loved by both kids and adults alike.

Ingredients Breakdown

Understanding the ingredients is key to mastering this Classic 7-Layer Gelatin Salad. Here’s what you’ll need and why each component matters:

  • Gelatin (multiple flavors) – The foundation of the dish, gelatin provides structure and vibrant color. Using different flavors like lime, cherry, and lemon adds variety.
  • Cottage cheese or sour cream – These creamy layers balance the sweetness of the gelatin and add a rich, tangy contrast.
  • Crushed pineapple (drained) – Adds natural sweetness and a tropical touch while keeping the texture light.
  • Whipped topping (like Cool Whip) – Introduces a fluffy, airy layer that lightens the overall dish.
  • Chopped nuts (optional) – For a bit of crunch and nutty depth, walnuts or pecans work beautifully.
  • Mini marshmallows (optional) – A playful addition that adds chewiness and extra sweetness.

How to Make Classic 7-Layer Gelatin Salad

Follow these steps to create a flawless 7-Layer Gelatin Salad:

  1. Prepare the first gelatin layer – Dissolve one package of gelatin in boiling water, then stir in cold water. Pour into a clear glass dish and refrigerate until firm (about 1 hour).
  2. Add the creamy layer – Mix cottage cheese or sour cream with a bit of sugar and vanilla. Spread gently over the set gelatin and return to the fridge for 30 minutes.
  3. Repeat with the next gelatin layer – Choose a contrasting color and flavor, prepare as before, and pour over the creamy layer. Chill again.
  4. Layer the fruit and nuts – Sprinkle crushed pineapple and chopped nuts (if using) over the set gelatin.
  5. Finish with whipped topping – Spread a fluffy layer of whipped topping as the final touch.
  6. Chill thoroughly – Let the salad set for at least 4 hours, preferably overnight, for clean slices.

For best results, use a clear trifle dish or glass pan to showcase the beautiful layers.

Pro Tips for the Best Results

  • To prevent layers from bleeding, ensure each gelatin layer is fully set before adding the next.
  • For a smoother creamy layer, blend the cottage cheese until creamy before mixing.
  • If using fresh fruit, pat it dry to avoid excess moisture seeping into the gelatin.
  • For a boozy twist, replace some of the cold water in the gelatin with flavored liqueur.

Variations and Substitutions

This recipe is highly adaptable. Here are some creative twists:

  • Dietary swaps – Use sugar-free gelatin and low-fat dairy for a lighter version.
  • Flavor variations – Try berry medleys, tropical flavors, or even a citrus blend.
  • Vegan option – Substitute agar-agar for gelatin and use coconut yogurt in place of dairy.
  • Texture additions – Layer in shredded coconut, mandarin oranges, or even berries.

What to Serve With It

This salad pairs wonderfully with a variety of dishes. Consider serving it alongside:

  • Classic baked ham or roasted turkey for a holiday spread.
  • Fresh green salads with a light vinaigrette to balance the sweetness.
  • Buttery dinner rolls or cornbread for a comforting meal.
  • Sparkling lemonade or iced tea for a refreshing beverage pairing.

How to Store and Reheat

Since this is a chilled dish, storage is simple:

  • Refrigeration – Cover tightly with plastic wrap and store for up to 5 days.
  • Freezing – Not recommended, as gelatin can become watery when thawed.
  • Serving leftovers – Keep refrigerated until ready to serve; no reheating needed.

Frequently Asked Questions (FAQs)

Can I use fresh fruit instead of canned?
Yes, but ensure the fruit is well-drained and patted dry to prevent excess moisture.

How do I prevent the layers from mixing?
Make sure each layer is fully set before adding the next, and pour gently over the back of a spoon.

Can I make this ahead of time?
Absolutely! This dish actually tastes better when made a day in advance.

What’s the best dish to use for presentation?
A clear glass trifle bowl or rectangular baking dish showcases the layers beautifully.

Is there a way to make this less sweet?
Opt for less sugar in the creamy layers or use tart fruit like cranberries to balance the sweetness.

Final Thoughts

The Classic 7-Layer Gelatin Salad is more than just a dish—it’s a celebration of color, texture, and nostalgia. Whether you’re bringing it to a summer picnic or a festive holiday table, its playful layers and delightful flavors are sure to impress. Don’t be afraid to make it your own with creative variations. After all, the best recipes are those that bring joy to both the maker and the eater. Happy layering!

Print
clock clock iconcutlery cutlery iconflag flag iconfolder folder iconinstagram instagram iconpinterest pinterest iconfacebook facebook iconprint print iconsquares squares iconheart heart iconheart solid heart solid icon

Classic 7-Layer Gelatin Salad

  • Author: Vintage Recipe Collection

Description

A retro-inspired layered gelatin salad with vibrant colors and sweet-tangy flavors. Perfect for potlucks, holidays, or as a nostalgic dessert.


Ingredients

Scale

For the Crust:

  • For Gelatin Layers:
  • 1 (3 oz) package lime gelatin
  • 1 (3 oz) package lemon gelatin
  • 1 (3 oz) package orange gelatin
  • 1 (3 oz) package strawberry gelatin
  • 4 cups boiling water (divided)
  • 4 cups cold water (divided)
  • For Cream Layer:
  • 1 (3 oz) package unflavored gelatin
  • 1/2 cup cold water
  • 1 (14 oz) can sweetened condensed milk
  • 1 (8 oz) package cream cheese, softened
  • 1 cup sour cream
  • 1 tsp vanilla extract
  • For Topping:
  • 1 cup whipped cream
  • 1/4 cup chopped pecans

Instructions

1. Prepare the Crust:

  1. Day 1 – Prepare Gelatin Layers:
  2. 1. Dissolve each flavored gelatin separately: Mix one package with 1 cup boiling water until fully dissolved, then add 1 cup cold water.
  3. 2. Pour lime gelatin into a 9×13″ glass dish. Refrigerate 45 minutes until set but not firm.
  4. 3. Repeat with lemon, orange, and strawberry layers, chilling each 45 minutes before adding next.
  5. Day 2 – Make Cream Layer:
  6. 1. Sprinkle unflavored gelatin over 1/2 cup cold water. Let bloom 5 minutes.
  7. 2. Microwave 30 seconds until dissolved. Whisk into condensed milk.
  8. 3. Beat cream cheese until smooth. Add sour cream, vanilla, and gelatin mixture.
  9. 4. Pour over set gelatin layers. Chill 2 hours.
  10. Final Assembly:
  11. 1. Spread whipped cream over top. Sprinkle with pecans.
  12. 2. Chill 4 hours or overnight before serving.

Notes

• Use clear glass dish to showcase layers • Substitute sugar-free gelatin if needed • For cleaner cuts, dip knife in hot water between slices • Make 2 days ahead for best results
Tuna Noodle Casserole with Potato Chips

Tuna Noodle Casserole with Potato Chips

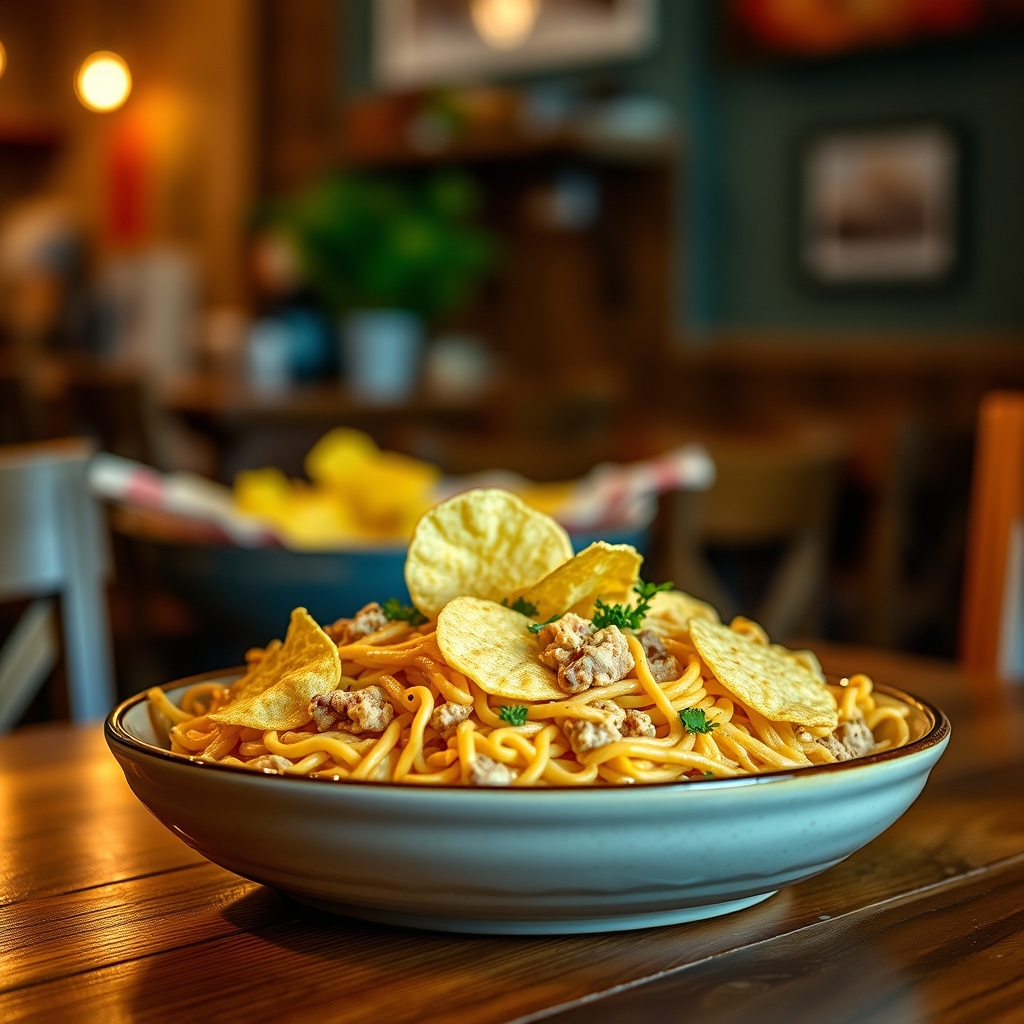
There’s something undeniably comforting about a classic tuna noodle casserole. It’s the kind of dish that brings back memories of family dinners, cozy evenings, and the satisfying crunch of potato chips on top. This version, with its creamy sauce, tender noodles, and crispy potato chip topping, is a nostalgic favorite with a modern twist. Whether you’re feeding a crowd or just craving a hearty meal, this tuna noodle casserole with potato chips is sure to become a staple in your recipe rotation.

Why You’ll Love This Recipe

This tuna noodle casserole stands out for so many reasons. Here’s why it’s a must-try:

  • Perfect Comfort Food: Creamy, cheesy, and packed with flavor, this casserole is the ultimate comfort dish for chilly nights or busy weeknights.
  • Crunchy Potato Chip Topping: The crispy potato chips add an irresistible texture contrast to the creamy noodles, making every bite exciting.
  • Easy to Make: With simple ingredients and straightforward steps, this recipe is beginner-friendly yet impressive enough for guests.
  • Budget-Friendly: Canned tuna and egg noodles keep this dish affordable without sacrificing taste or satisfaction.
  • Great for Leftovers: It reheats beautifully, making it a fantastic make-ahead meal for meal prep or busy families.

Ingredients Breakdown

Let’s take a closer look at the key ingredients and why they work so well together:

  • Egg Noodles: Their sturdy texture holds up well in the creamy sauce without turning mushy.
  • Canned Tuna: A pantry staple that adds protein and a rich, savory flavor. Opt for tuna packed in water for a lighter dish or in oil for extra richness.
  • Cream of Mushroom Soup: The base of the creamy sauce, adding depth and umami. You can substitute with cream of celery or chicken soup if preferred.
  • Sour Cream: Adds tanginess and creaminess, balancing the richness of the soup.
  • Cheddar Cheese: Melts into the sauce for a gooey, cheesy layer. Sharp cheddar works best for maximum flavor.
  • Potato Chips: The star topping! Their salty crunch elevates the dish from ordinary to extraordinary.

How to Make Tuna Noodle Casserole with Potato Chips

Follow these simple steps for a foolproof tuna noodle casserole every time:

  1. Preheat the Oven: Start by preheating your oven to 375°F (190°C) to ensure even cooking.
  2. Cook the Noodles: Boil the egg noodles according to package instructions until al dente. Drain and set aside.
  3. Prepare the Sauce: In a large mixing bowl, combine the cream of mushroom soup, sour cream, milk, and half of the shredded cheddar cheese. Stir until smooth.
  4. Add Tuna and Noodles: Gently fold in the drained tuna and cooked noodles, ensuring everything is evenly coated in the sauce.
  5. Transfer to Baking Dish: Pour the mixture into a greased 9×13-inch baking dish, spreading it out evenly.
  6. Top with Cheese and Chips: Sprinkle the remaining cheddar cheese over the top, followed by a generous layer of crushed potato chips.
  7. Bake: Place the casserole in the oven and bake for 20-25 minutes, or until the top is golden and bubbly.
  8. Serve Warm: Let it cool for a few minutes before serving to allow the sauce to set slightly.

Pro Tips for the Best Results

  • Don’t Overcook the Noodles: They’ll continue to soften in the oven, so aim for al dente when boiling.
  • Use Freshly Crushed Chips: Crush the potato chips by hand for irregular pieces that add more texture.
  • Add Fresh Herbs: Stir in a handful of chopped parsley or dill for a bright, fresh contrast to the richness.
  • Broil for Extra Crispiness: For an even crispier topping, broil the casserole for the last 2-3 minutes of baking.

Variations and Substitutions

This recipe is versatile and can be adapted to suit different tastes and dietary needs:

  • Gluten-Free: Use gluten-free egg noodles and a gluten-free cream soup.
  • Vegetable-Packed: Add sautéed mushrooms, peas, or diced bell peppers for extra nutrition.
  • Spicy Twist: Mix in a dash of hot sauce or cayenne pepper for a kick.
  • Different Proteins: Swap tuna for canned chicken or salmon for a variation in flavor.
  • Alternative Toppings: Try crushed crackers, panko breadcrumbs, or French fried onions instead of potato chips.

What to Serve With It

This casserole is hearty enough to stand alone, but here are a few sides to round out the meal:

  • Green Salad: A crisp salad with a tangy vinaigrette balances the richness of the casserole.
  • Steamed Vegetables: Broccoli, green beans, or carrots add color and freshness.
  • Garlic Bread: Perfect for soaking up any extra creamy sauce.
  • White Wine or Iced Tea: A chilled glass of Sauvignon Blanc or sweet tea complements the flavors beautifully.

How to Store and Reheat

Leftovers can be just as delicious the next day if stored properly:

  • Refrigeration: Store in an airtight container for up to 3 days.
  • Freezing: Freeze individual portions for up to 2 months. Thaw in the fridge before reheating.
  • Reheating: Warm in the oven at 350°F (175°C) for 15-20 minutes or microwave in 30-second intervals until heated through. Add a few fresh potato chips on top before reheating to restore crunch.

Frequently Asked Questions (FAQs)

Can I use fresh tuna instead of canned?

Yes, but you’ll need to cook and flake it first. Canned tuna is preferred for its convenience and consistent texture.

What’s the best type of potato chips to use?

Classic salted or ridged potato chips work best, but feel free to experiment with flavored varieties like sour cream and onion.

Can I make this ahead of time?

Absolutely! Assemble the casserole (without baking) and refrigerate for up to 24 hours. Add the potato chips just before baking.

How do I prevent the topping from getting soggy?

For maximum crispiness, add the chips in the last 10 minutes of baking or broil briefly at the end.

Is there a dairy-free version?

Yes, substitute the sour cream with dairy-free yogurt, use a plant-based cream soup, and opt for vegan cheese.

Final Thoughts

Tuna noodle casserole with potato chips is more than just a meal—it’s a comforting tradition that brings people together. Whether you’re making it for a weeknight dinner or a potluck, its creamy, crunchy goodness is always a hit. Don’t be afraid to make it your own with different add-ins or toppings. After all, the best recipes are the ones that spark joy and creativity in the kitchen. So grab your ingredients, preheat that oven, and get ready to enjoy a dish that’s as satisfying to make as it is to eat.

Print
clock clock iconcutlery cutlery iconflag flag iconfolder folder iconinstagram instagram iconpinterest pinterest iconfacebook facebook iconprint print iconsquares squares iconheart heart iconheart solid heart solid icon

Tuna Noodle Casserole with Potato Chips

  • Author: Classic Comforts Kitchen

Description

A creamy, comforting tuna noodle casserole topped with crispy potato chips for the perfect crunch. This easy-to-make dish is a family favorite that combines pantry staples with a nostalgic twist.


Ingredients

Scale

For the Crust:

  • For the casserole base:
  • 8 oz egg noodles
  • 2 cans (5 oz each) tuna in water, drained
  • 1 can (10.5 oz) condensed cream of mushroom soup
  • 1 cup milk
  • 1 cup frozen peas
  • 1/2 cup diced celery
  • 1/2 cup diced onion
  • 1 tsp garlic powder
  • 1/2 tsp black pepper
  • For the topping:
  • 2 cups crushed potato chips
  • 1/4 cup grated Parmesan cheese
  • 2 tbsp melted butter

Instructions

1. Prepare the Crust:

  1. 1. Preheat oven to 375°F (190°C) and grease a 9×13 inch baking dish.
  2. 2. Cook egg noodles according to package directions until al dente. Drain and set aside.
  3. 3. In a large bowl, combine tuna, cream of mushroom soup, milk, peas, celery, onion, garlic powder, and black pepper. Mix well.
  4. 4. Add cooked noodles to the tuna mixture and stir until evenly coated.
  5. 5. Transfer the mixture to the prepared baking dish and spread evenly.
  6. 6. In a separate bowl, mix crushed potato chips, Parmesan cheese, and melted butter.
  7. 7. Sprinkle the potato chip mixture evenly over the casserole.
  8. 8. Bake for 25-30 minutes until bubbly and the topping is golden brown.
  9. 9. Let cool for 5 minutes before serving.

Notes

For extra flavor, try using flavored potato chips like sour cream & onion. Leftovers can be stored in the refrigerator for up to 3 days. Reheat in the oven at 350°F for best texture.

Old-Fashioned Tomato Aspic

Old-Fashioned Tomato Aspic

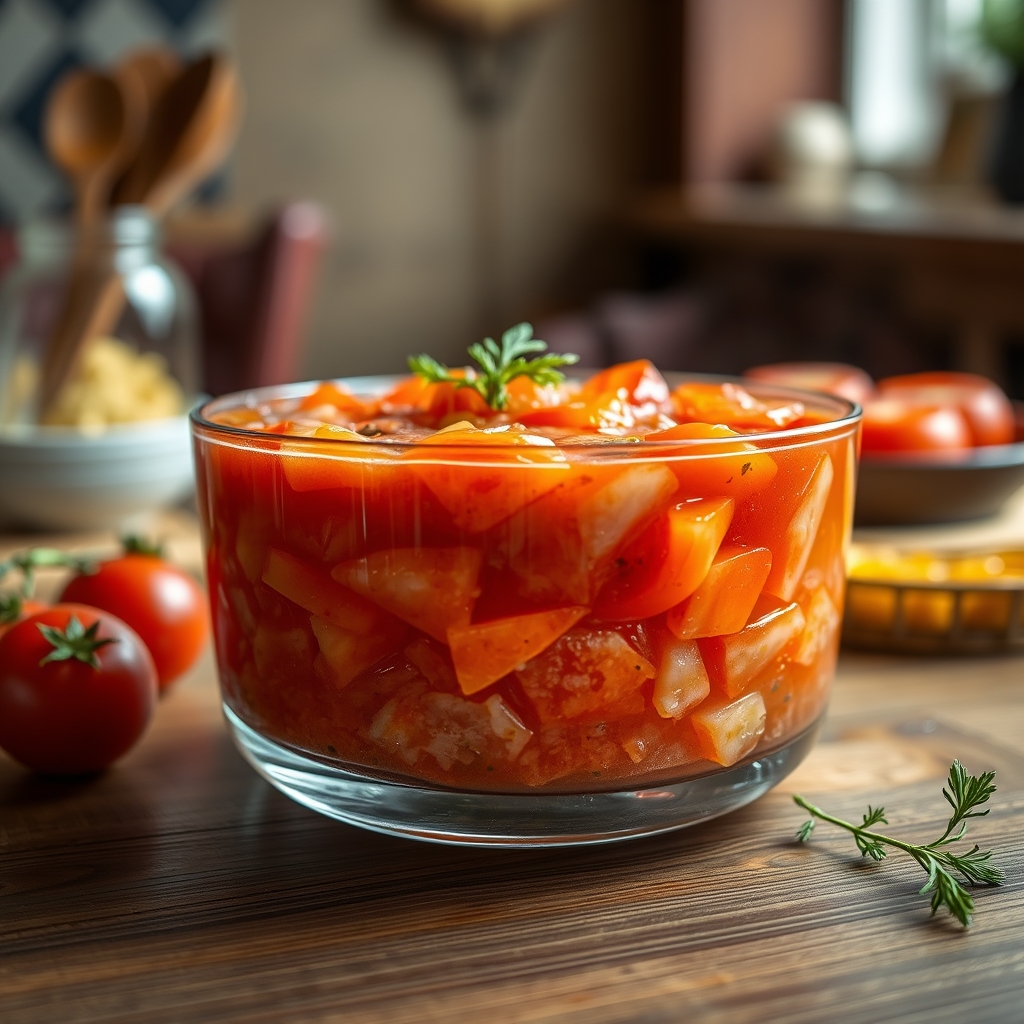
There’s something undeniably charming about old-fashioned recipes that stand the test of time. Tomato aspic, a vintage gem from mid-century America, is one of those dishes that brings nostalgia to the table while offering a refreshing, savory bite. This shimmering, gelatin-based dish might seem unusual to modern palates, but its bright tomato flavor and elegant presentation make it a conversation starter at any gathering. Whether you’re a fan of retro cuisine or simply looking for a unique appetizer, this old-fashioned tomato aspic recipe is worth trying.

Why You’ll Love This Recipe

If you’ve never experienced the delight of tomato aspic, let me share why this recipe deserves a spot in your culinary repertoire.

  • Nostalgic yet refreshing – Tomato aspic is a throwback to classic dinner parties of the 1950s, offering a taste of culinary history with its tangy, savory profile.
  • Light and versatile – Perfect as an appetizer or side dish, this aspic is a great way to enjoy tomatoes in a unique, chilled form.
  • Simple ingredients – With just a handful of pantry staples, you can create an impressive dish that looks far more complex than it is.
  • Make-ahead convenience – Since it needs time to set, this is an ideal dish to prepare in advance for stress-free entertaining.
  • Eye-catching presentation – The jewel-toned gelatin shimmering in a mold makes for a stunning centerpiece that will wow your guests.

Ingredients Breakdown

Understanding the role of each ingredient will help you appreciate the balance of flavors and textures in this old-fashioned tomato aspic.

  • Tomato juice – The star of the dish, providing the base flavor and vibrant color. Opt for high-quality, low-sodium juice for the best taste.
  • Unflavored gelatin – This acts as the setting agent, giving the aspic its signature jiggly texture without altering the flavor.
  • Lemon juice – A splash brightens the tomato flavor and adds a subtle tang.
  • Worcestershire sauce – A dash deepens the umami notes, enhancing the savory profile.
  • Celery, bell pepper, and onion – These finely diced vegetables add crunch and freshness, balancing the smooth texture of the aspic.
  • Hot sauce (optional) – For those who enjoy a little heat, a few drops can elevate the dish.

How to Make Old-Fashioned Tomato Aspic

Follow these step-by-step instructions to create a flawless tomato aspic that holds its shape and delivers on flavor.

  1. Bloom the gelatin – In a small bowl, sprinkle the gelatin over cold water and let it sit for 5 minutes to soften.
  2. Heat the tomato juice – In a saucepan, warm the tomato juice over medium heat until just steaming (do not boil). Remove from heat.
  3. Dissolve the gelatin – Stir the bloomed gelatin into the warm tomato juice until fully dissolved.
  4. Season the mixture – Add lemon juice, Worcestershire sauce, and hot sauce (if using). Taste and adjust seasoning as needed.
  5. Chill briefly – Refrigerate the mixture for about 30 minutes until it thickens slightly but isn’t fully set.
  6. Add vegetables – Fold in the diced celery, bell pepper, and onion for texture.
  7. Pour into molds – Lightly grease a gelatin mold or individual ramekins, then pour in the mixture.
  8. Set completely – Refrigerate for at least 4 hours, preferably overnight, until firm.
  9. Unmold and serve – To release, dip the mold briefly in warm water, then invert onto a serving plate.

Pro Tips for the Best Results

Mastering the art of tomato aspic requires a few insider tricks to ensure a flawless result every time.

  • For a crystal-clear aspic, strain the tomato juice before using to remove any pulp.
  • If your aspic doesn’t release easily, wrap a warm towel around the mold for a few seconds to loosen it.
  • For extra flavor, steep a bay leaf or fresh herbs in the tomato juice as it warms, then remove before adding gelatin.
  • To prevent weeping (excess liquid pooling on the surface), avoid over-chilling the mixture before adding vegetables.
  • For a smoother texture, blend the vegetables into the tomato juice before setting.

Variations and Substitutions

While traditional tomato aspic is delightful on its own, feel free to experiment with these creative twists.

  • Spicy version – Add minced jalapeños or a pinch of cayenne pepper for a kick.
  • Seafood twist – Fold in cooked shrimp or crabmeat for a luxurious upgrade.
  • Vegetarian option – Use agar-agar instead of gelatin for a plant-based alternative.
  • Herb-infused – Stir in fresh basil, dill, or tarragon for a garden-fresh note.
  • Cucumber crunch – Replace bell peppers with finely diced cucumber for a cooler flavor.

What to Serve With It

Tomato aspic shines as part of a well-curated menu. Here are some perfect pairings.

  • Classic accompaniments – Serve with a dollop of mayonnaise or a side of deviled eggs for a retro-inspired spread.
  • Fresh salads – Pair with a crisp green salad or a tangy coleslaw for contrast.
  • Protein partners – Excellent alongside roasted chicken, grilled fish, or cold cuts.
  • Crusty bread – Offer slices of baguette or buttery crackers for scooping.
  • Wine pairing – A dry rosé or crisp Sauvignon Blanc complements the aspic’s acidity beautifully.

How to Store and Reheat

Since tomato aspic is served chilled, storage is straightforward, though reheating isn’t applicable.

  • Refrigeration – Keep covered in the mold or an airtight container for up to 3 days.
  • Freezing – Not recommended, as gelatin can become grainy when thawed.
  • Serving leftovers – If the aspic loses its shape, chop it into cubes and toss into a salad for a creative reuse.

Frequently Asked Questions (FAQs)

Here are answers to common questions about making and serving tomato aspic.

Can I use fresh tomatoes instead of tomato juice?

While fresh tomatoes can be used, they require straining and reducing to achieve the right consistency. Tomato juice is more reliable for a smooth texture.

Why did my aspic turn out rubbery?

Over-measuring the gelatin can lead to a tough texture. Stick to the recipe’s proportions for the perfect jiggle.

Can I make this recipe ahead of time?

Absolutely! In fact, aspic benefits from an overnight chill to fully set and develop flavors.

Is there a way to make this without a mold?

Yes, you can set the aspic in a glass dish and scoop servings with a spoon for a more casual presentation.

What’s the best way to clean a gelatin mold?

Soak in warm, soapy water immediately after unmolding to prevent residue buildup in intricate designs.

Final Thoughts

Old-fashioned tomato aspic might seem like a relic of the past, but its bright, savory flavor and elegant presentation make it worth reviving. Whether you’re hosting a themed dinner party or simply exploring vintage recipes, this dish offers a delightful way to enjoy tomatoes in a whole new form. Don’t be intimidated by the gelatin—once you master the technique, you’ll appreciate the simplicity behind its impressive appearance. So dust off that vintage mold and give this classic a try. Who knows? It might just become your new favorite conversation-starting appetizer.

Print
clock clock iconcutlery cutlery iconflag flag iconfolder folder iconinstagram instagram iconpinterest pinterest iconfacebook facebook iconprint print iconsquares squares iconheart heart iconheart solid heart solid icon

Old-Fashioned Tomato Aspic

  • Author: Vintage Recipe Revival

Description

A classic gelatin salad with bright tomato flavor and crisp vegetables, perfect for potlucks or as a retro appetizer. This savory aspic was a mid-century staple that deserves a comeback.


Ingredients

Scale

For the Crust:

  • For the aspic base:
  • 2 cups tomato juice
  • 2 packets (0.25 oz each) unflavored gelatin
  • 1 tablespoon lemon juice
  • 1 teaspoon Worcestershire sauce
  • 1/2 teaspoon celery salt
  • 1/4 teaspoon onion powder
  • For the mix-ins:
  • 1/2 cup finely diced celery
  • 1/4 cup finely minced green bell pepper
  • 2 tablespoons minced fresh parsley
  • 1 tablespoon grated onion
  • 1 hard-boiled egg, finely chopped (optional)

Instructions

1. Prepare the Crust:

  1. 1. Pour 1/2 cup tomato juice into a small bowl. Sprinkle gelatin over the top and let bloom for 5 minutes.
  2. 2. Heat remaining 1 1/2 cups tomato juice in a saucepan until steaming (do not boil). Remove from heat.
  3. 3. Whisk bloomed gelatin mixture into the hot tomato juice until completely dissolved.
  4. 4. Stir in lemon juice, Worcestershire sauce, celery salt, and onion powder. Let cool to room temperature.
  5. 5. Fold in celery, bell pepper, parsley, grated onion, and chopped egg (if using).
  6. 6. Pour into a 4-cup mold or individual ramekins. Refrigerate at least 4 hours or until firmly set.
  7. 7. To unmold, dip mold briefly in warm water and invert onto a serving plate. Garnish with lettuce leaves and additional parsley if desired.

Notes

For clearer aspic, strain tomato juice before using. Substitute V8 juice for deeper flavor. Add 1/2 tsp hot sauce for spice. Keeps refrigerated for 3 days.

Ambrosia with Mini Marshmallows

Ambrosia with Mini Marshmallows

There’s something undeniably nostalgic about a bowl of ambrosia salad. This classic dessert, often called heavenly ambrosia salad or fruit salad with marshmallows, is a staple at potlucks, holiday gatherings, and family reunions. Creamy, sweet, and bursting with tropical flavors, it’s a dish that brings back memories of childhood and simpler times. Today, we’re diving into a beloved version—ambrosia with mini marshmallows—that’s as easy to make as it is delightful to eat. Whether you’re a longtime fan or new to this retro treat, this recipe will quickly become a favorite in your dessert rotation.

Why You’ll Love This Recipe

If you’ve never tried ambrosia salad before, or if you’re looking for the perfect version to add to your recipe collection, here’s why this one stands out:

  • Effortless to Prepare: No baking or complicated techniques required. Just mix, chill, and serve.
  • Crowd-Pleasing Flavor: The combination of creamy coconut, juicy fruit, and pillowy mini marshmallows is irresistible to kids and adults alike.
  • Versatile for Any Occasion: Perfect for holidays, summer picnics, or as a sweet side dish at brunch.
  • Make-Ahead Friendly: This dish actually tastes better after chilling, making it ideal for meal prep or stress-free entertaining.
  • Customizable: Easily adapt it to suit dietary preferences or whatever fruits you have on hand.

Ingredients Breakdown

Ambrosia salad is all about the harmony of textures and flavors. Here’s what you’ll need and why each ingredient matters:

  • Mandarin Oranges: These sweet, citrusy segments add a bright, juicy contrast to the creamy base.
  • Crushed Pineapple: Drained well to avoid excess liquid, it brings a tropical tang that balances the sweetness.
  • Mini Marshmallows: The star of this recipe, they melt slightly into the mixture, creating pockets of soft sweetness.
  • Shredded Coconut: Adds a chewy texture and rich, nutty flavor that defines traditional ambrosia.
  • Sour Cream & Whipped Topping: The duo creates a luscious, creamy base without being overly heavy.
  • Maraschino Cherries: Optional but recommended for a pop of color and a hint of extra sweetness.

How to Make Ambrosia with Mini Marshmallows

Follow these simple steps for a flawless ambrosia salad every time:

  1. Drain the Fruit: Thoroughly drain the mandarin oranges and crushed pineapple in a colander. Press gently to remove excess juice—this prevents a watery salad.
  2. Combine the Creamy Base: In a large mixing bowl, fold together the sour cream and whipped topping until smooth.
  3. Add the Goodies: Gently stir in the drained fruit, mini marshmallows, shredded coconut, and halved maraschino cherries (if using). Avoid overmixing to keep the marshmallows intact.
  4. Chill: Cover and refrigerate for at least 2 hours, or overnight. This allows the flavors to meld and the marshmallows to soften slightly.
  5. Serve: Give it a final gentle stir before transferring to a serving bowl. Garnish with extra coconut or cherries if desired.

Pro Tips for the Best Results

  • For a lighter version, swap the sour cream for Greek yogurt or use a sugar-free whipped topping.
  • Toast the shredded coconut in a dry skillet for 2–3 minutes to enhance its nutty flavor before adding it to the mix.
  • If your ambrosia salad seems too thick, a splash of reserved pineapple or orange juice can loosen it up.
  • For a festive twist, use pastel-colored marshmallows during Easter or holiday-themed ones in December.

Variations and Substitutions

Ambrosia salad is wonderfully adaptable. Here are some creative ways to make it your own:

  • Fruit Variations: Add diced apples, grapes, or fresh berries for extra texture and flavor.
  • Nutty Crunch: Stir in chopped pecans or walnuts for a satisfying contrast to the creamy base.
  • Dairy-Free: Use coconut yogurt and dairy-free whipped topping to make it vegan-friendly.
  • Citrus Boost: A teaspoon of orange zest or a splash of lime juice can brighten the flavors.

What to Serve With It

Ambrosia salad pairs beautifully with a variety of dishes, making it a versatile addition to any menu:

  • As a side dish for holiday meals, especially alongside ham, turkey, or roasted chicken.
  • With a brunch spread featuring quiche, biscuits, and scrambled eggs.
  • As a dessert after a barbecue, served with grilled pineapple or vanilla ice cream.
  • For a light lunch, pair it with a crisp green salad and buttery croissants.

How to Store and Reheat

Ambrosia salad is best enjoyed cold and doesn’t require reheating. Here’s how to keep it fresh:

  • Refrigeration: Store in an airtight container for up to 3 days. Stir gently before serving if separation occurs.
  • Freezing: Not recommended, as the texture of the marshmallows and dairy will change upon thawing.
  • Serving Leftovers: If the salad becomes too thick after chilling, fold in a tablespoon of whipped topping to refresh it.

Frequently Asked Questions (FAQs)

Can I use fresh pineapple instead of canned?

Absolutely! Fresh pineapple adds a vibrant flavor, but be sure to chop it finely and drain any excess juice to prevent a soggy salad.

How far in advance can I make ambrosia salad?

This dish holds well for up to 24 hours in the fridge. The flavors deepen, but the marshmallows may soften further over time.

Can I omit the coconut?

Yes, though it’s a signature ingredient, you can leave it out or replace it with toasted almonds for a different texture.

Is there a way to reduce the sugar content?

Opt for unsweetened coconut, sugar-free marshmallows, and light whipped topping to cut down on sugar without sacrificing taste.

Why is my ambrosia salad watery?

This usually happens if the fruit isn’t drained well. Press the fruit in a colander or even pat it dry with a paper towel before mixing.

Final Thoughts

Ambrosia with mini marshmallows is more than just a dessert—it’s a bite of nostalgia, a celebration of simplicity, and a guaranteed crowd-pleaser. Whether you’re serving it at a family gathering, a holiday feast, or just as a sweet treat for yourself, this recipe is sure to bring smiles. Don’t be afraid to experiment with flavors or make it your own. After all, the best recipes are the ones that evolve with your tastes and memories. So grab a spoon, dig in, and enjoy this little taste of heaven.

Print
clock clock iconcutlery cutlery iconflag flag iconfolder folder iconinstagram instagram iconpinterest pinterest iconfacebook facebook iconprint print iconsquares squares iconheart heart iconheart solid heart solid icon

Ambrosia with Mini Marshmallows

  • Author: Classic Recipe Collection

Description

A creamy, fruity, and fluffy ambrosia salad loaded with citrus, coconut, and mini marshmallows for a nostalgic dessert or side dish.


Ingredients

Scale

For the Crust:

  • For the fruit base:
  • 2 cups mandarin orange segments, drained
  • 1 cup pineapple chunks, drained
  • 1 cup maraschino cherries, drained and halved
  • For the creamy mixture:
  • 1 cup sour cream
  • 1/2 cup whipped topping (like Cool Whip)
  • 1/4 cup granulated sugar
  • For add-ins:
  • 1 cup mini marshmallows
  • 1/2 cup sweetened shredded coconut
  • 1/4 cup chopped pecans (optional)

Instructions

1. Prepare the Crust:

  1. 1. In a large mixing bowl, gently combine mandarin oranges, pineapple chunks, and maraschino cherries.
  2. 2. In a separate bowl, whisk together sour cream, whipped topping, and sugar until smooth.
  3. 3. Pour the creamy mixture over the fruit and fold gently until evenly coated.
  4. 4. Add mini marshmallows, shredded coconut, and pecans (if using). Fold again to distribute.
  5. 5. Cover and refrigerate for at least 2 hours (or overnight) to allow flavors to meld.
  6. 6. Stir gently before serving. Garnish with extra coconut or marshmallows if desired.

Notes

For a lighter version, substitute Greek yogurt for sour cream. Omit nuts for allergies. Best served within 24 hours as marshmallows may soften over time.

Classic Pineapple Cheese Ball

Classic Pineapple Cheese Ball

There’s something undeniably nostalgic about a well-made cheese ball—creamy, tangy, and just a little bit sweet. The Classic Pineapple Cheese Ball is a retro appetizer that never goes out of style, and for good reason. It’s a crowd-pleaser at potlucks, holiday gatherings, and casual get-togethers. With its perfect balance of cream cheese, crushed pineapple, and crunchy pecans, this cheese ball is a guaranteed hit. Whether you’re hosting a party or just craving a savory-sweet snack, this recipe is a must-try.

Why You’ll Love This Recipe

If you’ve never made a Classic Pineapple Cheese Ball before, you’re in for a treat. Here’s why this recipe stands out:

  • Perfect Balance of Flavors – The combination of creamy cheese, sweet pineapple, and savory spices creates a delightful contrast that keeps you coming back for more.
  • Easy to Make – With just a few simple ingredients and minimal prep time, this recipe is foolproof, even for beginners.
  • Versatile for Any Occasion – Whether it’s a holiday party, game day snack, or an elegant appetizer spread, this cheese ball fits right in.
  • Great for Make-Ahead – You can prepare it a day or two in advance, making it a stress-free option for entertaining.
  • Crowd-Pleasing Texture – The creamy interior and crunchy pecan coating offer a satisfying bite that everyone loves.

Ingredients Breakdown

Every ingredient in this Classic Pineapple Cheese Ball plays a crucial role in creating its signature taste and texture. Here’s what you’ll need:

  • Cream Cheese – The base of the cheese ball, providing a rich and creamy texture. Always use full-fat for the best consistency.
  • Crushed Pineapple – Adds sweetness and a slight tang. Be sure to drain it well to avoid excess moisture.
  • Green Onions – Brings a mild onion flavor that balances the sweetness of the pineapple.
  • Bell Pepper – Finely diced for a subtle crunch and fresh flavor.
  • Worcestershire Sauce – A dash deepens the umami notes and enhances the overall taste.
  • Salt and Pepper – Essential for seasoning and bringing all the flavors together.
  • Chopped Pecans – The outer coating adds a nutty crunch and makes the presentation elegant.

How to Make Classic Pineapple Cheese Ball

Making this cheese ball is simple, but a few key steps ensure the best results. Follow this step-by-step guide:

  1. Drain the Pineapple – Place the crushed pineapple in a fine-mesh strainer and press out as much liquid as possible. This prevents the cheese ball from becoming too soft.
  2. Mix the Ingredients – In a large bowl, combine softened cream cheese, drained pineapple, finely chopped green onions, diced bell pepper, Worcestershire sauce, salt, and pepper. Mix until fully incorporated.
  3. Chill the Mixture – Cover the bowl and refrigerate for at least 30 minutes. This makes the mixture easier to shape.
  4. Shape the Cheese Ball – Scoop the mixture onto a sheet of plastic wrap and form it into a ball. Wrap tightly and refrigerate for another hour to firm up.
  5. Coat with Pecans – Spread chopped pecans on a plate. Unwrap the cheese ball and roll it in the pecans, pressing gently to adhere.
  6. Serve or Store – Place the finished cheese ball on a serving dish with crackers or veggies. If not serving immediately, keep refrigerated until ready.

Pro Tips for the Best Results

To take your Classic Pineapple Cheese Ball to the next level, keep these expert tips in mind:

  • Use Room Temperature Cream Cheese – Softened cream cheese blends more smoothly, preventing lumps.
  • Double Drain the Pineapple – For extra dryness, wrap the pineapple in a clean kitchen towel and squeeze out excess juice.
  • Toast the Pecans – Lightly toasting the pecans before chopping enhances their nutty flavor.
  • Adjust Seasonings to Taste – Taste the mixture before shaping and add more Worcestershire or salt if needed.
  • Use a Cookie Scoop for Uniform Portions – If making mini cheese balls, a scoop ensures even sizing.

Variations and Substitutions

This recipe is flexible, so feel free to customize it based on your preferences or dietary needs:

  • Spicy Version – Add a pinch of cayenne pepper or a dash of hot sauce for a kick.
  • Nut-Free Option – Substitute pecans with toasted coconut or breadcrumbs for a crunchy coating.
  • Different Cheeses – Mix in a bit of shredded cheddar or blue cheese for extra depth.
  • Vegetarian Adaptation – Use a vegan Worcestershire sauce and dairy-free cream cheese.
  • Herb-Infused – Stir in fresh dill or chives for a garden-fresh twist.

What to Serve With It

The Classic Pineapple Cheese Ball pairs beautifully with a variety of dippers and accompaniments:

  • Crackers – Buttery Ritz, whole wheat, or gluten-free options work well.
  • Fresh Vegetables – Sliced cucumbers, carrot sticks, and bell pepper strips add a refreshing crunch.
  • Bread – Baguette slices or toasted crostini make a great base.
  • Fruit – Apple slices or grapes complement the sweet and savory flavors.
  • Wine Pairing – A crisp white wine like Sauvignon Blanc or a light sparkling wine balances the richness.

How to Store and Reheat

Proper storage ensures your cheese ball stays fresh and delicious:

  • Refrigeration – Wrap the cheese ball tightly in plastic wrap or store in an airtight container for up to 5 days.
  • Freezing – While possible, freezing may slightly alter the texture. If needed, freeze without the nut coating and add fresh pecans after thawing.
  • Serving After Chilling – Let the cheese ball sit at room temperature for 15-20 minutes before serving for optimal creaminess.

Frequently Asked Questions (FAQs)

Here are answers to some common questions about making the Classic Pineapple Cheese Ball:

Can I use fresh pineapple instead of canned?
Yes, but fresh pineapple contains more moisture. Be sure to drain and pat it dry thoroughly to avoid a soggy texture.

How far in advance can I make this cheese ball?
You can prepare it up to 2 days ahead. Store it wrapped in the fridge and add the pecan coating just before serving.

What if my cheese ball is too soft?
If it’s not holding shape, refrigerate it longer or mix in a tablespoon of grated Parmesan to help firm it up.

Can I make mini cheese balls instead of one large one?
Absolutely! Use a small cookie scoop to portion the mixture, then roll into bite-sized balls for a fun appetizer spread.

Is there a substitute for Worcestershire sauce?
Soy sauce or a splash of balsamic vinegar can work in a pinch, though the flavor will be slightly different.

Final Thoughts

The Classic Pineapple Cheese Ball is more than just a recipe—it’s a little bite of nostalgia that brings people together. Whether you’re serving it at a holiday gathering or enjoying it as a simple snack, its creamy, tangy, and slightly sweet flavors are sure to delight. Don’t be surprised if guests ask for the recipe after their first bite. So grab your ingredients, mix up a batch, and get ready to savor this timeless appetizer. Happy entertaining!

Print
clock clock iconcutlery cutlery iconflag flag iconfolder folder iconinstagram instagram iconpinterest pinterest iconfacebook facebook iconprint print iconsquares squares iconheart heart iconheart solid heart solid icon

Classic Pineapple Cheese Ball

  • Author: Traditional Recipe

Description

A creamy, sweet and savory cheese ball with crushed pineapple, green peppers, and onions, perfect for parties and gatherings. This classic appetizer is always a crowd-pleaser with its delightful mix of flavors and textures.


Ingredients

Scale

For the Crust:

  • For the cheese ball:
  • 2 (8 oz) packages cream cheese, softened
  • 1 (8 oz) can crushed pineapple, well drained
  • 1/4 cup finely chopped green bell pepper
  • 2 tablespoons finely chopped onion
  • 1 teaspoon seasoned salt
  • For the coating:
  • 1 cup chopped pecans or walnuts

Instructions

1. Prepare the Crust:

  1. In a large mixing bowl, combine softened cream cheese, drained crushed pineapple, chopped green bell pepper, chopped onion, and seasoned salt.
  2. Mix thoroughly until all ingredients are well incorporated.
  3. Shape the mixture into a ball using your hands or a spatula.
  4. Place the chopped pecans or walnuts on a plate or shallow dish.
  5. Roll the cheese ball in the nuts, pressing gently to ensure even coating.
  6. Wrap the coated cheese ball in plastic wrap and refrigerate for at least 2 hours (or overnight) to firm up.
  7. Serve chilled with crackers, toasted bread, or vegetable sticks.

Notes

For best results, drain the pineapple thoroughly to prevent excess moisture. If the mixture is too soft after mixing, chill for 30 minutes before shaping. Leftovers can be stored in the fridge for up to 5 days.