Easy 3-Ingredient Peanut Butter Balls: A Quick and Healthy Snack

3-ingredient energy balls, no-bake peanut butter bites, healthy peanut butter snacks, easy energy ball recipe, quick no-bake snacks

Easy 3-Ingredient Peanut Butter Balls: A Quick and Healthy Treat

Easy 3-Ingredient Peanut Butter Balls are the perfect no-bake snack for those who crave something sweet yet simple. With minimal ingredients and preparation time, these energy-packed treats are a favorite for both kids and adults.


Why Make Peanut Butter Balls?

  • Convenient and Quick: Ready in just minutes without the need for baking.
  • Healthy and Satisfying: Packed with protein and natural sweetness, perfect for an on-the-go snack.
  • Customizable: Add your favorite mix-ins for endless flavor possibilities.

For more easy no-bake recipes, explore No-Bake Peanut Butter Oatmeal Cookies.


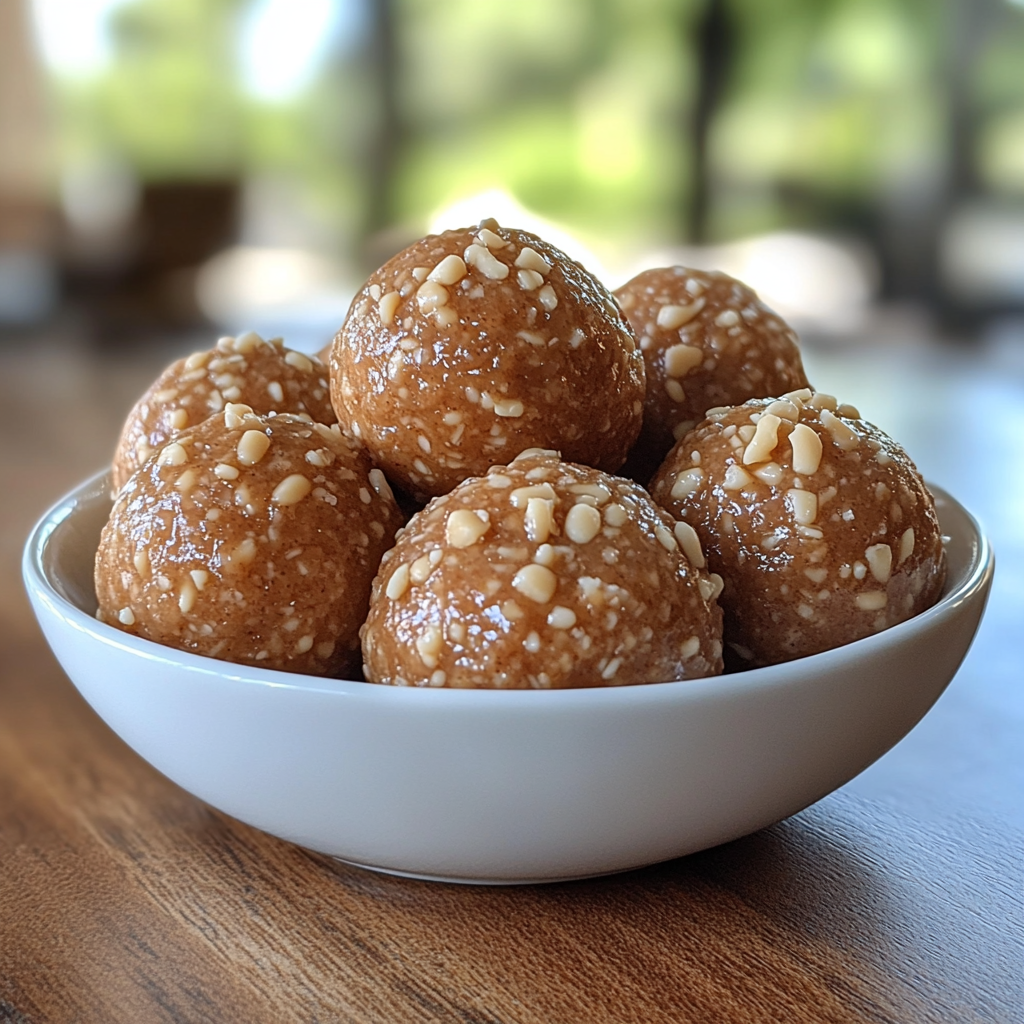
Ingredients for Peanut Butter Balls

Core Ingredients

  • Peanut Butter: Smooth or crunchy (½ cup).
  • Sweetener: Honey or maple syrup (¼ cup).
  • Binding Ingredient: Oat flour or blended oats (1 cup).

Optional Add-Ins

  • Chocolate chips for added sweetness.
  • Shredded coconut for a tropical twist.
  • Crushed nuts for extra crunch.

Step-by-Step Instructions

  1. Mix the Ingredients:
    Combine peanut butter, sweetener, and oat flour in a large bowl. Stir until well blended.
  2. Chill the Mixture:
    Refrigerate the mixture for 30 minutes to make it easier to handle.
  3. Shape the Balls:
    Roll the mixture into small balls using your hands. Grease hands lightly with oil if needed.
  4. Store and Serve:
    Arrange the balls on a parchment-lined tray and refrigerate for at least an hour before serving.

For more no-bake tips, visit Tips for No-Bake Desserts.


Tips for Success

  • Adjusting Texture:
    • Add more oat flour if the mixture is too sticky.
    • Add a splash of milk if the mixture is too dry.
  • Make It Vegan:
    • Use maple syrup instead of honey.
    • Opt for vegan-friendly chocolate chips.

Creative Variations

Chocolate-Covered Peanut Butter Balls

  • Dip the chilled balls into melted chocolate for a dessert-like twist.

Holiday-Themed Treats

  • Roll the balls in festive sprinkles for Christmas or birthday celebrations.

High-Protein Version

  • Mix in protein powder for a post-workout snack.

Pair these with Cinnamon Roll Cookies with Cream Cheese Drizzle for a sweet dessert platter.


Storage and FAQs

Storage Tips

  • Refrigeration: Store in an airtight container for up to one week.
  • Freezing: Freeze for up to one month; thaw before serving.

FAQs

1. Can I use crunchy peanut butter?

Yes, it adds texture and crunch.

2. Are these gluten-free?

Use certified gluten-free oats for a gluten-free version.

3. How do I prevent sticking?

Chill the mixture and grease your hands lightly before rolling.

4. Can I make these ahead?

Yes, they store well and are perfect for meal prep.


Internal Linking Opportunities


Why You’ll Love Peanut Butter Balls

These Easy 3-Ingredient Peanut Butter Balls are more than just a snack—they’re a testament to the beauty of simplicity. With their rich flavor, customizable options, and no-bake convenience, they’re bound to become a favorite in your household.

For more delicious recipes, visit ExoRecipes.

Trisha Yearwood’s Butterscotch Bars Recipe: A Southern Classic

butterscotch bars recipe, Southern dessert bars, peanut butter butterscotch bars, chewy bar desserts, Trisha Yearwood dessert recipes

Trisha Yearwood’s Butterscotch Bars Recipe: A Decadent Southern Treat

Trisha Yearwood’s Butterscotch Bars combine creamy peanut butter, rich butterscotch, and a luscious glaze to create a dessert that’s both indulgent and easy to prepare. Whether for a casual family dinner or a holiday spread, these bars are a guaranteed crowd-pleaser.


What Makes Butterscotch Bars Special?

  • Southern Comfort: These bars reflect the rich flavors and simplicity of Southern desserts.
  • Perfect for Any Occasion: Easy enough for weeknights, impressive enough for gatherings.
  • Customizable: Add nuts, drizzle with chocolate, or tweak the glaze for personal flair.

For other sweet Southern treats, explore Kentucky Butter Cake.


Ingredients You’ll Need

Core Ingredients

  • 1 cup all-purpose flour
  • ½ teaspoon baking soda
  • ¼ teaspoon salt
  • ½ cup quick-cooking oatmeal
  • ½ cup butter, softened
  • ½ cup granulated sugar
  • ½ cup packed brown sugar
  • ½ cup peanut butter, divided
  • 1 large egg
  • 1 teaspoon vanilla extract
  • 1 cup butterscotch chips

For the Glaze

  • 1 cup powdered sugar
  • 4 tablespoons milk
  • ¼ cup peanut butter

How to Make Trisha Yearwood’s Butterscotch Bars

Step-by-Step Instructions

  1. Prepare the Dough:
    • Cream butter, granulated sugar, brown sugar, and ¼ cup peanut butter until fluffy.
    • Add egg and vanilla, mix well.
  2. Mix Dry Ingredients:
    • In a separate bowl, sift together flour, baking soda, and salt. Stir in oatmeal.
    • Gradually combine with the wet mixture until a smooth dough forms.
  3. Assemble and Bake:
    • Preheat oven to 350°F (175°C). Grease a 9×13-inch baking pan.
    • Spread dough evenly in the pan. Sprinkle butterscotch chips on top.
    • Bake for 20–25 minutes until golden and set.
  4. Glaze the Bars:
    • Mix powdered sugar, milk, and remaining peanut butter.
    • Spread glaze over warm bars for a shiny finish.

Tips for Perfect Butterscotch Bars

  • Room-Temperature Ingredients: Ensure butter and peanut butter are softened for easy mixing.
  • Don’t Overbake: Remove from the oven as soon as the edges turn golden brown to keep the bars chewy.
  • Customizations: Add chopped pecans for a crunchy texture or drizzle melted dark chocolate for a richer taste.

Learn more about perfect baking at Tips for Baking Bars.


Serving Suggestions

  • Pairing Ideas: Serve with a scoop of vanilla ice cream or a drizzle of caramel sauce.
  • Presentation Tips: Cut into uniform squares and place in cupcake liners for a polished look.

For a festive dessert tray, pair these bars with Cinnamon Roll Cookies with Cream Cheese Drizzle.


FAQs About Butterscotch Bars

1. Can I Use Different Chips?

Yes, chocolate or white chocolate chips can replace butterscotch chips.

2. Are These Bars Gluten-Free?

Not as written, but substituting a gluten-free flour blend should work.

3. How Do I Store Butterscotch Bars?

Store in an airtight container at room temperature for up to 5 days or freeze for up to 3 months.

4. What’s the Best Way to Reheat Bars?

Microwave for 15–20 seconds to restore their gooey texture.


Internal Linking Opportunities


Why You’ll Love These Butterscotch Bars

Trisha Yearwood’s Butterscotch Bars are the perfect blend of simplicity and indulgence. Whether as a nostalgic nod to Southern baking or a new favorite for your family, these bars deliver in flavor, texture, and versatility. Serve them warm, glazed, and with a smile for a dessert everyone will remember.

For more delectable recipes, visit ExoRecipes.

Christmas Cream Cheese Mints: A Festive Homemade Candy

holiday cream cheese mints, festive peppermint candies, homemade Christmas candy, no-bake cream cheese mints, Christmas candy recipes

Christmas Cream Cheese Mints: Festive Candies for Every Occasion

Christmas Cream Cheese Mints are a quintessential holiday treat that blends creamy sweetness with refreshing peppermint flavors. These no-bake, easy-to-make candies are perfect for festive gatherings, gifting, and holiday dessert tables.


Why Christmas Cream Cheese Mints Are a Holiday Favorite

  • Versatile Treat: These mints can be customized in shapes, colors, and flavors to suit any theme.
  • Ease of Preparation: Simple ingredients and no baking make them an effortless addition to holiday menus.
  • Nostalgic Charm: Their melt-in-your-mouth texture brings a touch of tradition to modern festivities.

For more holiday candy recipes, explore Homemade Peppermint Patties.


Ingredients for Christmas Cream Cheese Mints

Core Ingredients

  • 4 ounces cream cheese, softened
  • 4 cups powdered sugar
  • 1 teaspoon peppermint extract
  • Gel food coloring (red, green, or other festive colors)

Optional Additions

  • Vanilla or almond extract for flavor variations
  • Edible glitter or sprinkles for decoration

How to Make Christmas Cream Cheese Mints

Step-by-Step Instructions

  1. Prepare the Dough:
    Beat cream cheese until smooth. Gradually add powdered sugar until a pliable dough forms.
  2. Add Flavor and Color:
    Stir in peppermint extract and divide the dough for coloring. Add a few drops of gel food coloring to each portion.
  3. Shape the Mints:
    Roll dough into small balls and flatten with a fork or mold into festive shapes using silicone molds.
  4. Refrigerate:
    Place shaped mints on a parchment-lined tray and refrigerate for 2 hours until firm.

For more details on candy-making techniques, visit Candy Mold Tips.


Creative Variations and Serving Suggestions

Flavor Variations

  • Chocolate-Dipped Mints: Dip hardened mints in melted chocolate for a decadent twist.
  • Citrus Mints: Replace peppermint extract with orange or lemon extract for a zesty flavor.
  • Nutty Mints: Add finely chopped walnuts or pecans to the dough for added texture.

Serving Ideas

  • Arrange in mini cupcake liners for gifting.
  • Pair with cookies and truffles on a festive dessert platter.

For a complementary dessert, try Cinnamon Roll Cookies with Cream Cheese Drizzle.


Storage Tips

  • Refrigeration:
    Store mints in an airtight container in the fridge for up to 2 weeks.
  • Freezing:
    Freeze mints in layers separated by parchment paper for up to 2 months. Thaw in the fridge before serving.

FAQs About Christmas Cream Cheese Mints

1. Can I Make Mints Without Cream Cheese?

Substitute with softened butter or a vegan cream cheese alternative.

2. How Do I Keep the Dough From Sticking?

Dust your hands and molds with powdered sugar to prevent sticking.

3. Can I Make These Mints Ahead of Time?

Yes, mints can be made weeks in advance and stored in the freezer.

4. What Other Shapes Can I Use?

Use holiday-themed silicone molds for trees, snowflakes, or stars.


Internal Linking Opportunities


Why You Should Make Christmas Cream Cheese Mints This Holiday Season

With their creamy texture, refreshing flavor, and festive appearance, Christmas Cream Cheese Mints are an essential holiday treat. Their simplicity and versatility make them perfect for gifting, entertaining, or indulging in a sweet moment of holiday cheer.

For more holiday dessert ideas, visit ExoRecipes.

Crispy Air Fryer Apple Fries: A Sweet and Healthy Snack

air fryer apple fries, crispy apple wedges, healthy apple snacks, air fryer desserts, cinnamon apple fries, sweet air fryer treats

Crispy Air Fryer Apple Fries: A Delightful Snack Made Easy

Crispy Air Fryer Apple Fries are a unique and delicious way to enjoy apples, combining a crispy coating with the natural sweetness of the fruit. Perfect for snacks, desserts, or gatherings, this recipe showcases how versatile the air fryer can be.


Why Try Air Fryer Apple Fries?

  • Healthier Option: These apple fries use minimal oil, making them a lighter alternative to traditional fried desserts.
  • Fast and Convenient: The air fryer ensures they are ready in minutes.
  • Versatile Flavors: Pair with dips like caramel, chocolate, or vanilla glaze.

For more air fryer inspirations, explore Air Fryer Apple Hand Pies.


Ingredients for Air Fryer Apple Fries

Core Ingredients

  • 3 large apples (Honeycrisp or Granny Smith for tartness)
  • 1 cup all-purpose flour
  • 2 teaspoons cinnamon
  • ½ teaspoon nutmeg
  • ½ teaspoon salt
  • 2 large eggs, beaten
  • 1 cup panko breadcrumbs
  • ¼ cup granulated sugar

Optional Toppings

  • Powdered sugar or a drizzle of honey for sweetness.
  • Crushed nuts for added crunch.

Step-by-Step Instructions

Step 1: Prepare the Apples

  1. Peel and slice apples into thick wedges.
  2. Toss apple slices in a mixture of cinnamon and nutmeg.

Step 2: Coat the Apples

  • Dry Mix: Combine flour, salt, and sugar in a shallow dish.
  • Wet Mix: Beat eggs with a tablespoon of water.
  • Breadcrumbs: Mix panko breadcrumbs with additional cinnamon for flavor.

Step 3: Bread the Apples

  • Dredge apple slices in the flour mixture, dip into the egg, and coat with breadcrumbs. Repeat for a thicker crust.

Step 4: Air Frying

  1. Preheat the air fryer to 350°F (175°C).
  2. Place coated apple slices in a single layer in the basket.
  3. Air fry for 8-10 minutes, flipping halfway, until golden brown.

Tips for Perfect Apple Fries

Choosing the Right Apples

  • Use firmer varieties like Honeycrisp, Granny Smith, or Fuji.
  • Softer apples may become mushy during cooking.

Achieving Maximum Crispiness

  • Ensure apples are coated evenly with breadcrumbs.
  • Avoid overcrowding the air fryer basket.

Learn more about air fryer techniques at Air Fryer Tips for Perfect Results.


Serving Suggestions and Variations

Serving Ideas

  • Dust with powdered sugar for a classic finish.
  • Serve with dips like warm caramel, vanilla glaze, or whipped cream.

Creative Variations

  • Spiced Apple Fries: Add a pinch of cayenne to the breadcrumb mixture for a sweet-spicy combo.
  • Chocolate Apple Fries: Drizzle with melted dark chocolate.
  • Vegan Apple Fries: Replace eggs with almond milk or aquafaba.

For other apple-based treats, try Homemade Apple Dumplings.


FAQs About Air Fryer Apple Fries

1. Can I Use Gluten-Free Flour?

Yes, substitute all-purpose flour with a gluten-free flour blend for similar results.

2. How Do I Store Leftovers?

Place cooled apple fries in an airtight container and refrigerate for up to 2 days. Reheat in the air fryer to restore crispiness.

3. Can I Make These Without Breadcrumbs?

Yes, use crushed cornflakes or omit the coating for a lighter version.

4. How Do I Prevent Apples from Browning?

Toss apple slices in lemon juice before breading to maintain their fresh appearance.


Internal Linking Opportunities


Why Air Fryer Apple Fries Should Be Your Next Snack

Crispy Air Fryer Apple Fries bring together the natural sweetness of apples with the crunch of a perfectly breaded coating. Quick, easy, and versatile, they’re an ideal addition to your snack repertoire. Whether paired with a warm caramel dip or served with powdered sugar, these fries are guaranteed to please.

For more innovative recipes, visit ExoRecipes.

Cranberry Orange Shortbread Cookies: A Festive Holiday Treat

cranberry orange cookies, orange cranberry shortbread, festive holiday cookies, citrus shortbread cookies, buttery shortbread recipe

Cranberry Orange Shortbread Cookies: A Holiday Favorite

Cranberry Orange Shortbread Cookies offer the perfect balance of buttery richness, zesty citrus, and sweet-tart cranberries. They’re ideal for holiday gifting, festive trays, or simply indulging with a warm drink on a chilly day.


Why Cranberry Orange Shortbread Cookies Shine

  • Festive Appeal: The vibrant cranberries and orange zest make these cookies visually stunning.
  • Simple Elegance: With minimal ingredients, they deliver maximum flavor.
  • Perfect Texture: Crisp edges with a soft, buttery crumb.

For more holiday cookies, explore Raspberry Shortbread with White Chocolate Drizzle.


Ingredients for Cranberry Orange Shortbread Cookies

Core Ingredients

  • 1 cup unsalted butter, cold and cubed
  • 2½ cups all-purpose flour
  • ¾ cup sugar, divided
  • ½ cup dried cranberries, finely chopped
  • Zest of 1 large orange
  • 1 teaspoon almond extract

Optional Add-Ins

  • 1 tablespoon orange juice for enhanced citrus flavor.
  • ¼ cup white chocolate chips for added sweetness.

Step-by-Step Recipe Instructions

Step 1: Preparing the Dough

  1. Combine chopped cranberries and ¼ cup sugar in a food processor. Pulse until finely chopped.
  2. In a bowl, mix flour and remaining sugar. Cut in cold butter until the mixture resembles fine crumbs.

Step 2: Adding Flavor

  • Mix in orange zest, almond extract, and cranberry-sugar mixture.
  • Knead dough gently until it forms a ball.

Step 3: Shaping and Chilling

  • Shape dough into a log, wrap in plastic, and refrigerate for at least 2 hours.

Step 4: Baking

  1. Preheat oven to 325°F (165°C).
  2. Slice dough into ¼-inch rounds.
  3. Place slices on a baking sheet lined with parchment paper.
  4. Bake for 12–15 minutes or until the edges are lightly golden.

Tips for Perfect Shortbread Cookies

Achieving the Best Texture

  • Use cold butter for a flakier result.
  • Avoid overmixing to maintain a tender crumb.

Flavor Enhancements

  • Add finely chopped nuts like pecans or pistachios for added crunch.
  • Substitute almond extract with vanilla for a classic shortbread taste.

Discover more shortbread tips at How to Bake Perfect Shortbread Cookies.


Creative Variations

Flavor Twists

  • White Chocolate Cranberry Orange: Drizzle melted white chocolate over cooled cookies.
  • Cranberry Lime Shortbread: Replace orange zest with lime for a tropical flavor.
  • Gluten-Free Version: Use a 1:1 gluten-free flour blend.

Serving Ideas


Storage and Make-Ahead Tips

Storing Baked Cookies

  • Store in an airtight container at room temperature for up to 1 week.
  • Freeze baked cookies for up to 3 months.

Freezing Dough

  • Freeze dough logs for up to 3 months. Thaw in the refrigerator before slicing and baking.

FAQs About Cranberry Orange Shortbread Cookies

1. Can I Use Fresh Cranberries Instead of Dried?

Yes, but finely chop them and adjust sugar to balance tartness.

2. How Do I Prevent the Dough from Cracking?

Ensure the butter is cold but not frozen, and knead the dough gently.

3. Can I Make the Dough Ahead of Time?

Yes, you can refrigerate the dough for up to 3 days before baking.

4. How Do I Keep Cookies from Spreading?

Chill the dough thoroughly before slicing and baking.


Internal Linking Opportunities


Why Cranberry Orange Shortbread Cookies Are a Holiday Essential

These Cranberry Orange Shortbread Cookies are the perfect blend of festive flavors and simple preparation. With their bright colors, sweet-tart taste, and buttery texture, they’re a must for any holiday baking lineup. Whether gifting, sharing, or indulging, these cookies make every moment sweeter.

For more holiday dessert inspiration, visit ExoRecipes.