Strawberry Cream Swiss Roll: Light, Fluffy, and Delicious

strawberry swiss roll, cream-filled strawberry roll, fluffy swiss roll dessert, easy swiss roll recipe, strawberry and cream roll cake

Strawberry Cream Swiss Roll: A Light and Elegant Dessert

The Strawberry Cream Swiss Roll is the epitome of dessert perfection, combining a delicate sponge cake with luscious cream and fresh strawberries. Whether it’s for a special occasion or an afternoon treat, this dessert is guaranteed to impress.

For more indulgent dessert options, explore Strawberry Shortcake Sushi: Sweet Fusion Delight.


Why the Strawberry Cream Swiss Roll is Perfect

This dessert stands out for its:

  • Light and Airy Texture: The sponge cake is soft and perfectly complements the creamy filling.
  • Beautiful Presentation: Rolled into an elegant spiral, it’s as visually appealing as it is tasty.
  • Versatility: Customizable with various fruits, flavors, or toppings.

If you love desserts with strawberries, try Raspberry Lemon Bars with Shortbread Crust Recipe for a zesty twist.


Ingredients for the Perfect Strawberry Cream Swiss Roll

Sponge Cake:

  • 4 large eggs, separated
  • ½ cup granulated sugar
  • ½ teaspoon vanilla extract
  • ½ cup all-purpose flour
  • 1 teaspoon baking powder

Filling:

  • 1 cup heavy cream
  • ¼ cup powdered sugar
  • ½ cup pureed strawberries
  • ½ cup diced fresh strawberries

Optional Toppings:

  • Powdered sugar for dusting
  • Fresh strawberries or mint leaves for garnish

How to Make the Strawberry Cream Swiss Roll

Step 1: Prepare the Sponge Cake

  1. Preheat the oven to 375°F (190°C) and line a jelly roll pan with parchment paper.
  2. Whisk egg yolks and sugar until pale and fluffy. Add vanilla extract.
  3. In a separate bowl, beat egg whites until stiff peaks form.
  4. Gently fold the egg whites into the yolk mixture, then sift in flour and baking powder.
  5. Spread the batter evenly in the pan and bake for 10–12 minutes.

Step 2: Roll the Cake

  1. While warm, turn the cake onto a clean kitchen towel dusted with powdered sugar.
  2. Gently roll the cake with the towel and let it cool completely.

Step 3: Prepare the Filling

  1. Whip heavy cream and powdered sugar until soft peaks form.
  2. Fold in pureed and diced strawberries.

Step 4: Assemble the Swiss Roll

  1. Unroll the cooled cake and spread the filling evenly.
  2. Carefully roll it back up and refrigerate for at least 1 hour before serving.

Tips for Success

  • Use Fresh Strawberries: They provide the best flavor and texture.
  • Don’t Overbake the Sponge: A dry cake is harder to roll without cracking.
  • Chill Before Slicing: This ensures clean and neat slices.

For another impressive dessert, check out Delightful Mini Pineapple Upside-Down Cakes.


Creative Variations

Flavor Options:

  • Add lemon zest to the sponge for a citrusy touch.
  • Substitute strawberries with raspberries or peaches for a new flavor profile.

Dietary Adjustments:

  • Use gluten-free flour for a celiac-friendly option.
  • Swap heavy cream with coconut cream for a dairy-free version.

FAQs About Strawberry Cream Swiss Roll

Can I Make the Swiss Roll in Advance?

Yes, it’s best made a day ahead to allow the flavors to meld. Store in the refrigerator.

What if My Cake Cracks During Rolling?

Cracks can be hidden with powdered sugar or a drizzle of chocolate. Rolling the cake while warm reduces cracking.

How Do I Store Leftovers?

Keep in an airtight container in the refrigerator for up to 3 days.


Internal Linking Opportunities


Conclusion

The Strawberry Cream Swiss Roll is a delightful blend of simplicity and elegance. Its soft sponge, creamy filling, and vibrant strawberry flavor make it a dessert that’s hard to resist. Whether you’re hosting a party or craving something sweet, this recipe is sure to be a crowd-pleaser.

For more dessert inspirations, visit ExoRecipes, where creativity meets deliciousness!

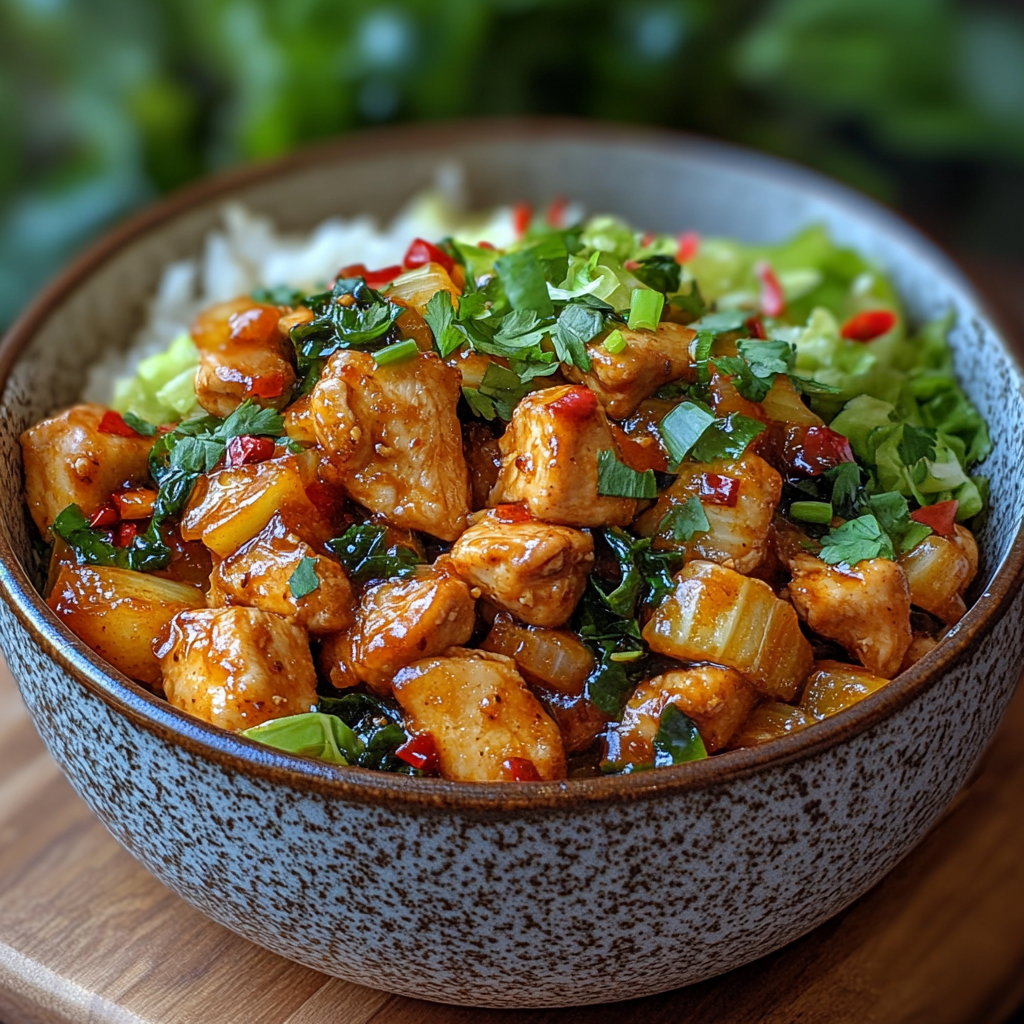
Chinese Chicken Cabbage Stir-Fry: Quick, Healthy, and Delicious

chicken and cabbage stir-fry, Chinese stir-fry with chicken, healthy chicken stir-fry recipe, cabbage stir-fry with chicken, easy stir-fry recipes

Chinese Chicken Cabbage Stir-Fry: A Flavorful, Quick, and Healthy Dish

The Chinese Chicken Cabbage Stir-Fry is a delightful combination of tender chicken, crisp cabbage, and savory seasonings, making it a perfect choice for a quick and healthy meal. With its vibrant flavors and simple preparation, this dish is ideal for weeknight dinners or meal prep.

Discover more stir-fry inspirations like Garlic Rosemary Steak and Potatoes Skillet for a hearty and flavorful option.


Why Chinese Chicken Cabbage Stir-Fry is Popular

This dish stands out because of its:

  • Health Benefits: High in protein and fiber, making it a balanced meal.
  • Quick Preparation: Ready in under 30 minutes, ideal for busy lifestyles.
  • Versatility: Easily customizable with your favorite vegetables or protein alternatives.

For another quick and delicious recipe, try Slow Cooker Magic: Crockpot Baked Ziti.


Ingredients for Chinese Chicken Cabbage Stir-Fry

Essential Ingredients:

  • 1 lb boneless, skinless chicken breast or thighs, thinly sliced
  • ½ head green cabbage, shredded
  • 1 medium onion, sliced
  • 1 orange bell pepper, sliced
  • 2 garlic cloves, minced
  • 1 tablespoon fresh ginger, minced
  • 3 tablespoons soy sauce
  • 1 tablespoon oyster sauce
  • 1 teaspoon sesame oil
  • 1 tablespoon vegetable oil

Optional Garnishes:

  • Sliced green onions
  • Sesame seeds
  • Red chili flakes

Step-by-Step Recipe Instructions

Step 1: Prepare Ingredients

  • Slice chicken thinly for quick and even cooking.
  • Shred cabbage and chop other vegetables into bite-sized pieces.
  • Mix soy sauce, oyster sauce, and sesame oil in a small bowl to create the stir-fry sauce.

Step 2: Cook the Chicken

  • Heat vegetable oil in a wok or skillet over high heat.
  • Add chicken slices and cook until browned. Remove and set aside.

Step 3: Stir-Fry the Vegetables

  • In the same wok, sauté garlic and ginger until fragrant.
  • Add onions, bell peppers, and cabbage. Stir-fry for 3–4 minutes until tender-crisp.

Step 4: Combine and Serve

  • Return the chicken to the wok and pour in the stir-fry sauce.
  • Toss everything together until evenly coated and heated through.
  • Garnish with green onions and sesame seeds before serving.

Tips for the Best Stir-Fry

  • Use a high heat setting to achieve a quick cook time and prevent sogginess.
  • Slice ingredients uniformly for even cooking.
  • Adjust the sauce proportions to your taste preferences.

For a comforting one-pot option, explore Ultimate Loaded Sweet Potato Nachos Recipe for your next meal idea.


Creative Variations

Swap Proteins:

  • Replace chicken with shrimp, tofu, or beef for different flavors.

Add Vegetables:

  • Include carrots, snap peas, or mushrooms for more texture and nutrition.

Make it Spicy:

  • Add red chili flakes, sriracha, or fresh sliced jalapeños for a spicy kick.

Serving Suggestions

  • Serve over steamed jasmine rice or noodles for a filling meal.
  • Pair with a light soup or egg rolls for a complete Chinese-inspired dinner.

Frequently Asked Questions (FAQs)

Can I Use Frozen Vegetables?

Yes, but thaw them first and pat dry to avoid excess moisture in the stir-fry.

How Long Does This Dish Last in the Fridge?

Store leftovers in an airtight container for up to 3 days.

What Can I Use Instead of Oyster Sauce?

Substitute with hoisin sauce or an additional teaspoon of soy sauce.


Internal Linking Opportunities


Conclusion

The Chinese Chicken Cabbage Stir-Fry is a quick, healthy, and versatile recipe perfect for any meal. Its balance of tender chicken, crisp vegetables, and savory sauce makes it a must-try for stir-fry enthusiasts. Experiment with flavors and ingredients to make it uniquely yours!

For more flavorful recipes and meal ideas, visit ExoRecipes, your destination for culinary inspiration!

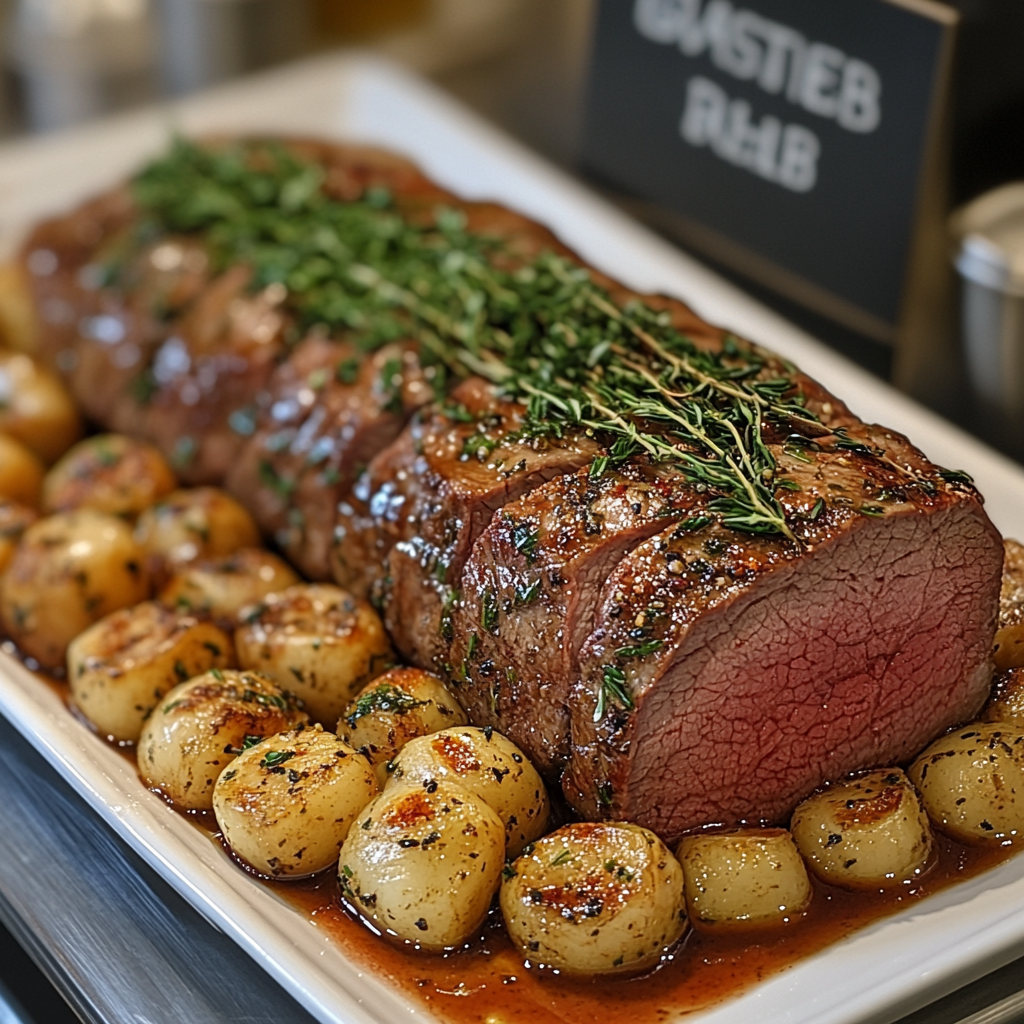
Million Dollar Roast Beef Tenderloin: Perfectly Tender and Flavorful

roast beef tenderloin recipe, beef tenderloin with garlic butter, perfect roast tenderloin, herb-crusted beef tenderloin, holiday beef roast

Million Dollar Roast Beef Tenderloin: A Luxurious Centerpiece for Any Occasion

The Million Dollar Roast Beef Tenderloin is a dish that commands attention and admiration. Its buttery tenderness and savory flavors make it the ideal centerpiece for festive gatherings, special occasions, or an indulgent family dinner.

For expert searing techniques, explore How to Perfectly Sear Beef for tips on creating a flavorful crust.


Why Million Dollar Roast Beef Tenderloin Is Special

This dish stands out for its:

  • Exquisite Taste: A perfect balance of savory herbs and garlic butter.
  • Premium Cut: Tenderloin is prized for its melt-in-your-mouth texture.
  • Simple Yet Impressive Preparation: Achievable elegance without complexity.

Learn more about roasting perfection in Cooking Temperature Guide for Beef for accurate doneness.


Ingredients for Million Dollar Roast Beef Tenderloin

You will need:

  • 1 whole beef tenderloin (about 4-5 pounds), trimmed and tied
  • 3 tablespoons olive oil
  • 2 teaspoons kosher salt
  • 1 teaspoon black pepper
  • 4 cloves garlic, minced
  • 2 tablespoons fresh rosemary, chopped
  • 1 tablespoon fresh thyme, chopped
  • ½ cup unsalted butter, softened

Step-by-Step Instructions

Step 1: Prepare the Tenderloin

  • Trim off excess fat and silverskin. Tie the tenderloin with butcher’s twine for even cooking.
  • Pat dry and season generously with salt and pepper.

Step 2: Sear the Tenderloin

  • Heat olive oil in a cast-iron skillet over high heat.
  • Sear the tenderloin on all sides until a golden crust forms.

Step 3: Roast to Perfection

  • Preheat oven to 425°F (220°C).
  • Mix butter, garlic, rosemary, and thyme into a smooth paste. Spread over the tenderloin.
  • Roast in the oven until internal temperature reaches desired doneness:
    • Rare: 120°F
    • Medium-Rare: 130°F
    • Medium: 140°F

Step 4: Rest and Serve

  • Let the tenderloin rest for 15 minutes before slicing to retain juices.

Tips for a Perfect Roast Beef Tenderloin

  • Use an oven-safe thermometer to monitor internal temperature.
  • Resting the meat is crucial for retaining its natural juices.
  • Don’t skip the searing step; it locks in flavor and enhances texture.

Variations and Serving Ideas

Flavor Enhancements

  • Coat the tenderloin with Dijon mustard before roasting for a tangy kick.
  • Add a crust of breadcrumbs mixed with Parmesan and herbs for a crunchy topping.

Best Side Dishes

  • Creamy mashed potatoes, roasted asparagus, or sautéed mushrooms.
  • Pair with a bold red wine like Cabernet Sauvignon for an elevated dining experience.

For another main dish idea, try Perfect Ribeye Steak Recipe: Master the Art of Steak Cooking.


Frequently Asked Questions (FAQs)

How Long Does It Take to Cook a Beef Tenderloin?

Cooking time depends on the size of the tenderloin and desired doneness. Generally, 40–45 minutes is ideal for medium-rare.

Can I Prepare This Ahead of Time?

Yes, you can season and tie the tenderloin the night before. Let it come to room temperature before searing and roasting.

How Do I Reheat Leftovers Without Drying Them Out?

Wrap slices in foil with a splash of beef broth and warm in a low-temperature oven.


Internal Linking Opportunities

For complementary recipes and sides, link to these:


Conclusion

The Million Dollar Roast Beef Tenderloin is a culinary masterpiece that combines simple preparation with show-stopping flavor. Whether for a holiday feast or a celebratory dinner, this tenderloin recipe is sure to impress. Try it today and elevate your dining experience!

For more exceptional recipes, visit ExoRecipes, your source for inspired cooking ideas.

Raspberry Celebration Cookies: Festive, Fruity, and Delicious

festive raspberry cookies, fruity celebration cookies, raspberry butter cookies, raspberry dessert cookies, holiday raspberry cookie recipe

Raspberry Celebration Cookies: A Festive Treat for All Occasions

Raspberry Celebration Cookies are the perfect combination of fruity sweetness and buttery goodness, ideal for any celebration. Whether you’re planning a holiday party or simply craving a delicious dessert, these cookies are guaranteed to impress.

For more delightful cookie recipes, check out Reese’s Pieces Chocolate Chip Cookie Bars for a chocolatey twist.


Why Raspberry Celebration Cookies Are Irresistible

These cookies are cherished for their:

  • Vibrant Flavors: The tartness of raspberries balanced with a sweet cookie base.
  • Festive Appeal: Beautiful colors and delicious taste make them perfect for special occasions.
  • Customizable Options: Easily tailored to suit various preferences or dietary needs.

For another festive idea, explore Raspberry Cheesecake Brownie Bites Recipe for a rich, chocolatey option.


Ingredients for Raspberry Celebration Cookies

You’ll need:

  • 1 cup unsalted butter, softened
  • ¾ cup granulated sugar
  • ½ cup light brown sugar
  • 2 large eggs
  • 1 teaspoon vanilla extract
  • 2 ¾ cups all-purpose flour
  • 1 teaspoon baking soda
  • ½ teaspoon salt
  • 1 cup fresh or freeze-dried raspberries
  • Optional: white chocolate chips or lemon zest for extra flavor

How to Make Raspberry Celebration Cookies

Step 1: Prepare the Dough

  • Cream butter and sugars together until light and fluffy.
  • Beat in eggs and vanilla extract.

Step 2: Mix the Dry Ingredients

  • Combine flour, baking soda, and salt in a separate bowl.
  • Gradually mix the dry ingredients into the wet mixture.

Step 3: Incorporate Raspberries

  • Gently fold in fresh or freeze-dried raspberries and any additional mix-ins like white chocolate chips.

Step 4: Shape and Bake

  • Preheat the oven to 350°F (175°C).
  • Roll dough into 1-inch balls and place on a parchment-lined baking sheet.
  • Bake for 10–12 minutes, or until edges are lightly golden.

Tips for Perfect Cookies

  1. Chill the Dough: Chilling prevents the cookies from spreading too much while baking.
  2. Use Freeze-Dried Raspberries: These offer intense flavor without adding excess moisture.
  3. Avoid Overmixing: Gently fold in the raspberries to maintain their structure.

For another fruity treat, explore Raspberry Lemon Bars with Shortbread Crust Recipe.


Creative Variations

Flavor Enhancements

  • Add lemon zest for a tangy kick.
  • Incorporate dark chocolate chips for a richer flavor.
  • Use almond extract instead of vanilla for a nutty undertone.

Dietary Adjustments

  • Make it gluten-free by using a gluten-free all-purpose flour blend.
  • Replace butter with vegan butter for a plant-based option.

Serving Suggestions

  • Serve with tea, coffee, or sparkling water for a delightful pairing.
  • Include these cookies in a holiday cookie tray for a festive presentation.
  • Wrap them in decorative bags for party favors or gifts.

Frequently Asked Questions (FAQs)

Can I Use Frozen Raspberries?

Yes, but thaw them first and pat dry to avoid excess moisture.

How Should I Store These Cookies?

Store in an airtight container at room temperature for up to 5 days.

Can I Freeze the Dough?

Absolutely! Roll the dough into balls and freeze them on a baking sheet. Transfer to a freezer bag for up to 3 months.


Internal Linking Opportunities

Enhance user experience by linking to these related recipes:


Conclusion

Raspberry Celebration Cookies are a must-try for their vibrant flavors, festive appearance, and versatile recipe. Whether you’re baking for a holiday, a party, or just to enjoy at home, these cookies are sure to delight. Try the recipe today and bring a pop of color and flavor to your table.

For more inspiring dessert ideas and creative recipes, visit ExoRecipes, your go-to source for culinary adventures!

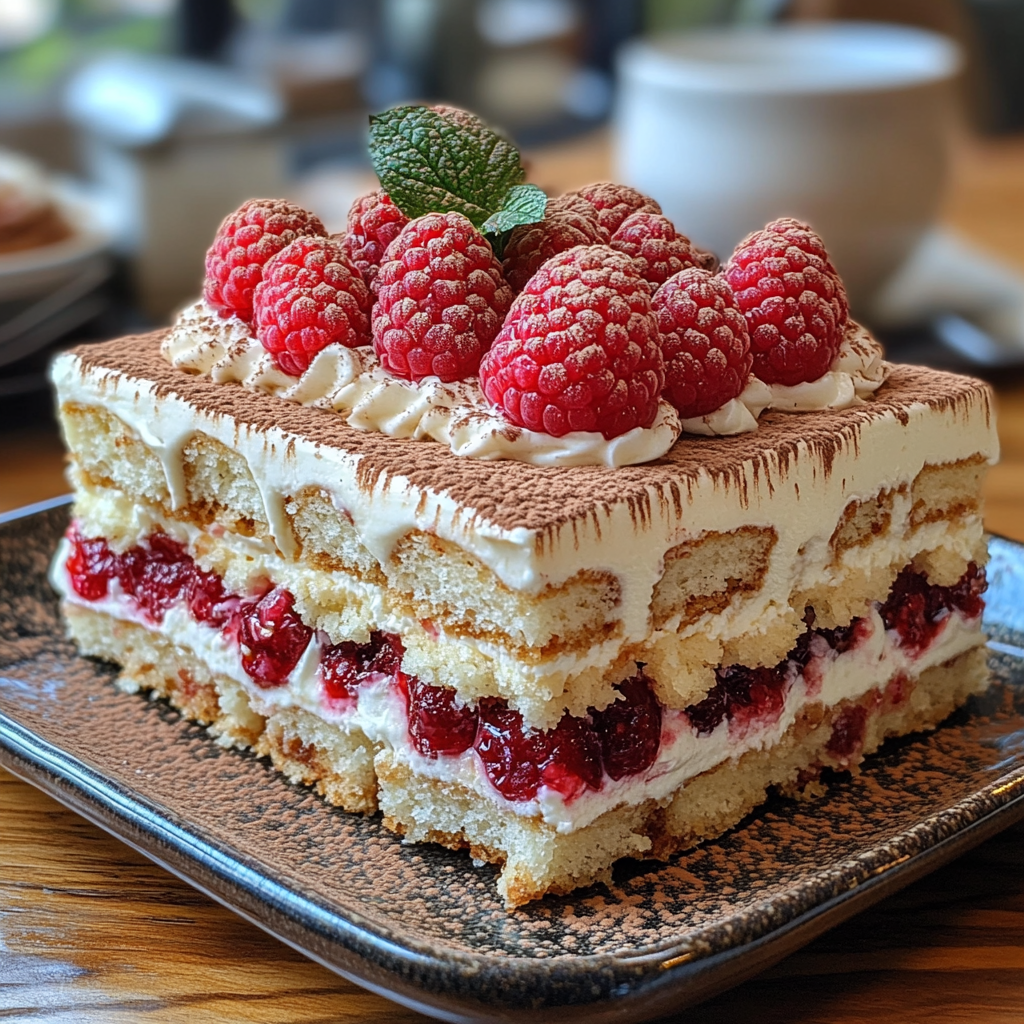
Raspberry Dreams Tiramisu: A No-Bake Dessert Masterpiece

raspberry tiramisu, no-bake raspberry dessert, mascarpone raspberry layers, tiramisu with berries, raspberry and cream dessert

Raspberry Dreams Tiramisu: A Fresh Twist on a Classic Dessert

Raspberry Dreams Tiramisu combines the richness of traditional tiramisu with the refreshing tartness of raspberries. This elegant dessert is perfect for special occasions or simply treating yourself to something extraordinary.

For more fruit-inspired desserts, check out Raspberry Cheesecake Brownie Bites Recipe.


Why Raspberry Dreams Tiramisu is a Showstopper

This dessert is beloved for its:

  • Unique Flavor Combination: Layers of mascarpone, ladyfingers, and raspberries create a symphony of sweetness and tartness.
  • No-Bake Convenience: Ideal for summer days or when you need a quick yet impressive dessert.
  • Versatility: Easily customizable with different fruits or flavors.

For a similar layered treat, try Easy No-Bake Banana Split Cheesecake Recipe.


Ingredients for Raspberry Dreams Tiramisu

To create this delightful dessert, you’ll need:

  • 1 package (24) ladyfingers
  • 1 cup strong brewed coffee or espresso
  • 3 tablespoons raspberry liqueur or syrup
  • 1 cup fresh or frozen raspberries
  • 8 oz mascarpone cheese
  • 1 cup heavy whipping cream
  • ½ cup powdered sugar
  • White chocolate shavings and mint leaves for garnish

Step-by-Step Recipe

Step 1: Prepare the Layers

  • Mix the brewed coffee with raspberry liqueur or syrup in a shallow dish.
  • Whip mascarpone cheese, powdered sugar, and cream until soft peaks form.

Step 2: Assemble the Tiramisu

  • Dip ladyfingers into the coffee mixture and layer them in a 9×9-inch dish.
  • Spread a layer of mascarpone cream over the ladyfingers.
  • Add a layer of fresh raspberries.
  • Repeat until all ingredients are used, finishing with mascarpone cream.

Step 3: Chill and Garnish

  • Refrigerate for at least 4 hours or overnight.
  • Before serving, garnish with white chocolate shavings and mint leaves.

Tips for Success

  1. Perfect Coffee Mixture: Adjust the sweetness of the coffee mixture to complement the tart raspberries.
  2. Layer Consistency: Ensure even layers for the best presentation.
  3. Chill Time: Allow the tiramisu to chill adequately to enhance flavors.

Explore more no-bake desserts like Raspberry Lemon Bars with Shortbread Crust Recipe.


Creative Variations

Flavor Twists

  • Use lemon curd instead of raspberry liqueur for a citrusy punch.
  • Swap raspberries for mixed berries or strawberries.

Dietary Adjustments

  • Replace mascarpone with dairy-free cream cheese for a vegan version.
  • Use gluten-free ladyfingers for a gluten-free option.

Serving Suggestions

  • Serve chilled with a drizzle of raspberry coulis for extra flavor.
  • Pair with a glass of chilled dessert wine or herbal tea.
  • Add a sprinkle of powdered sugar for a professional touch.

Frequently Asked Questions (FAQs)

Can I Make Raspberry Dreams Tiramisu Ahead of Time?

Yes, it’s best when prepared a day in advance and chilled overnight.

How Long Can This Dessert Be Stored?

Store in an airtight container in the refrigerator for up to 3 days.

Can I Substitute Raspberries?

Absolutely! Try blueberries, strawberries, or blackberries for a different flavor profile.


Internal Linking Opportunities

Enhance the user experience with these relevant recipes:


Conclusion

Raspberry Dreams Tiramisu is a delightful fusion of traditional tiramisu and vibrant raspberry flavors. Its elegant layers and easy preparation make it a favorite for all occasions. Try this recipe today and enjoy the dreamy combination of creamy mascarpone and tart raspberries.

For more unique dessert ideas and inspiration, visit ExoRecipes, your trusted source for culinary creativity!