Coconut Macaroons: A Delightfully Chewy and Easy Dessert Recipe

chewy coconut cookies, gluten-free coconut macaroons, easy coconut dessert, homemade macaroons, coconut treat recipe

Markdown Article: Coconut Macaroons


Coconut Macaroons: A Classic Sweet Treat

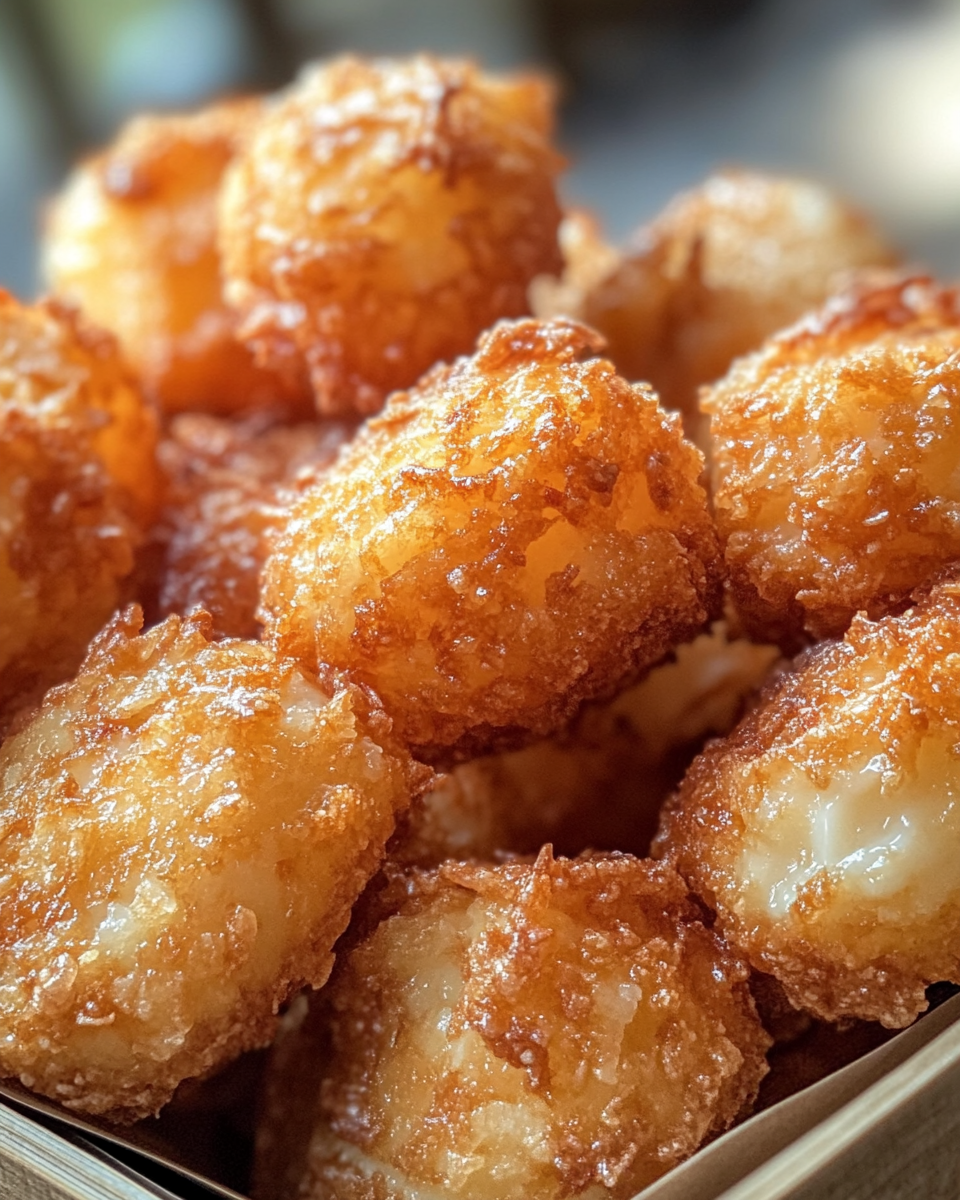
Chewy, golden, and delightfully easy to make, coconut macaroons are a timeless dessert favorite. This guide explores their versatility, offers a foolproof recipe, and provides variations to suit every taste.


Ingredients and Preparation

Why Coconut Macaroons Are So Loved

Coconut macaroons are naturally gluten-free and require only a few pantry staples. Their rich flavor and chewy texture make them a perfect addition to holiday tables or casual tea times. With customization options like chocolate dipping or almond enhancements, these treats cater to all palates.

Check out expert advice on baking with coconut to ensure you choose the right type of shredded coconut.


What You’ll Need

  • Ingredients
    • 2 cups shredded coconut (sweetened or unsweetened).
    • 1 can sweetened condensed milk (14 ounces).
    • 1 teaspoon vanilla extract.
    • Optional: Chocolate for dipping or drizzling.
  • Tools
    • Large mixing bowl.
    • Baking sheet lined with parchment paper.
    • Cookie scoop for uniform shaping.

Explore this guide to perfect ingredient measurements to avoid common baking mishaps.


Step-by-Step Recipe

1. Mixing the Ingredients

Combine shredded coconut with condensed milk and vanilla extract in a bowl. Mix until fully incorporated. Adjust sweetness if using unsweetened coconut.

2. Shaping the Macaroons

Using a cookie scoop, form small mounds. Place evenly on a parchment-lined baking sheet, leaving space between each macaroon.

3. Baking to Perfection

Preheat your oven to 325°F (163°C). Bake for 15–20 minutes, or until the tops are golden brown. Allow them to cool before handling.

4. Adding the Finishing Touch

Dip or drizzle the cooled macaroons with melted chocolate for an elegant touch. Try these Almond Joy-style macaroons by adding slivered almonds and chocolate chips before baking.


Variations and Serving Ideas

Creative Takes on Coconut Macaroons

  • Chocolate-Dipped Macaroons
    • Dip the bottoms into dark chocolate for a rich contrast.
  • Citrus Macaroons
    • Add orange or lemon zest to the mix for a refreshing twist.
  • Nutty Macaroons
    • Incorporate crushed pistachios or almonds for added crunch.

Serving Suggestions

Pair coconut macaroons with coffee, tea, or dessert wine. Arrange alongside other tropical-inspired treats like pineapple soft serve for a themed dessert spread.


Common Questions About Coconut Macaroons

FAQs

Q: Can I make coconut macaroons dairy-free?
A: Use coconut cream as a substitute for sweetened condensed milk.

Q: How do I prevent them from sticking to the baking sheet?
A: Always use parchment paper or a silicone baking mat.

Q: Are coconut macaroons freezer-friendly?
A: Absolutely! Store them in an airtight container for up to three months.


Pro Tips for Perfect Macaroons

  • Use room-temperature ingredients for smoother mixing.
  • Avoid overmixing, as it can make the texture too dense.
  • Keep an eye on the baking time to prevent burning.

Check out this troubleshooting guide for sticky desserts to resolve common baking issues.


Conclusion

Coconut macaroons are a beloved classic, offering endless opportunities for creativity and indulgence. Whether you’re hosting a party, looking for a quick dessert, or trying to perfect your baking skills, these chewy treats never disappoint.

For more dessert inspiration, explore Cool Whip Cookies and Mini Pineapple Cheesecakes.

Fresh Blueberry Cheesecake: A Perfect Dessert for Every Occasion

blueberry cheesecake recipe, homemade blueberry cheesecake, easy blueberry dessert, creamy fruit cheesecake, baked blueberry cheesecake

Fresh Blueberry Cheesecake: A Creamy and Tangy Delight

Internal Linking Opportunities from ExoRecipes:


Ingredients for Fresh Blueberry Cheesecake

For the Crust:

  • 1 ½ cups graham cracker crumbs
  • 6 tbsp unsalted butter, melted
  • ¼ cup granulated sugar

For the Cheesecake Filling:

  • 16 oz cream cheese, softened
  • ¾ cup granulated sugar
  • 2 large eggs
  • ½ cup sour cream
  • 1 tsp vanilla extract
  • 1 tsp lemon zest

For the Blueberry Topping:

  • 2 cups fresh blueberries
  • ½ cup granulated sugar
  • 1 tbsp cornstarch
  • ¼ cup water
  • 1 tsp lemon juice

Step-by-Step Instructions

Step 1: Preparing the Crust

  1. Preheat your oven to 325°F (163°C).
  2. Combine graham cracker crumbs, melted butter, and sugar in a bowl.
  3. Press the mixture into the base of a 9-inch springform pan.
  4. Bake for 10 minutes, then cool.

Tip: For a richer flavor, toast the crumbs lightly before adding the butter.

Step 2: Making the Cheesecake Filling

  1. Beat cream cheese and sugar until smooth.
  2. Add eggs one at a time, mixing after each addition.
  3. Stir in sour cream, vanilla extract, and lemon zest.
  4. Pour the filling over the cooled crust.

Step 3: Baking the Cheesecake

  1. Place the springform pan in a water bath to prevent cracks.
  2. Bake at 325°F for 50-60 minutes until the edges are set but the center jiggles slightly.
  3. Turn off the oven and let the cheesecake cool inside with the door ajar.

Step 4: Preparing the Blueberry Topping

  1. Heat blueberries, sugar, cornstarch, water, and lemon juice in a saucepan.
  2. Simmer until thickened, about 5 minutes.
  3. Cool before spreading over the chilled cheesecake.

Creative Variations

Lemon Blueberry Cheesecake

Add extra lemon zest and juice to the filling for a tangier flavor.

Chocolate Blueberry Cheesecake

Drizzle melted dark chocolate over the cheesecake for a decadent touch.

No-Bake Blueberry Cheesecake

Replace the baked filling with a mixture of whipped cream, cream cheese, and gelatin.


Serving Suggestions and Pairings


FAQs About Fresh Blueberry Cheesecake

1. Can I use frozen blueberries?
Yes, but thaw and drain them first to avoid excess moisture.

2. How long does it take to set?
Refrigerate the cheesecake for at least 4 hours or overnight.

3. Can I make it gluten-free?
Use gluten-free graham crackers for the crust.

4. What’s the best way to store leftovers?
Keep in an airtight container in the fridge for up to 5 days.


Pro Tips for Success

  • Use Room-Temperature Ingredients: Prevent lumps in the filling.
  • Avoid Overmixing: Overmixing can incorporate air and cause cracks.
  • Invest in a Springform Pan: Makes it easy to remove the cheesecake without damaging it.

Conclusion

Fresh Blueberry Cheesecake is a dessert that impresses with its balance of flavors and stunning presentation. Whether you’re hosting a dinner party or indulging in a personal treat, this cheesecake offers the perfect creamy and fruity combination. Serve it with complementary dishes like Blue Ribbon Blueberry Coffee Cake or Cool Whip Cookies for a complete dessert spread.

Zesty Lemon Lush Dessert: The Ultimate Layered Citrus Treat

lemon layered dessert, lemon lush recipe, citrus cream dessert, lemon pudding dessert, easy lemon dessert

Lemon Lush Dessert: A Tangy Delight for Any Occasion

Internal Linking Opportunities from ExoRecipes:


Ingredients for Lemon Lush Dessert

For the Crust:

  • 1 cup all-purpose flour
  • ½ cup softened unsalted butter
  • ¼ cup powdered sugar
  • ½ cup chopped pecans

For the Cream Cheese Layer:

  • 8 oz softened cream cheese
  • 1 cup powdered sugar
  • 1 cup whipped topping

For the Lemon Pudding Layer:

  • 2 boxes (3.4 oz each) instant lemon pudding mix
  • 3 cups cold milk

For the Topping:

  • 1 cup whipped topping
  • Garnishes: Lemon zest or pecans

Step-by-Step Instructions

Step 1: Prepare the Crust

  1. Preheat your oven to 350°F (175°C).
  2. Mix flour, butter, powdered sugar, and pecans until crumbly.
  3. Press the mixture evenly into a 9×13-inch dish.
  4. Bake for 15-20 minutes or until golden brown. Cool completely.

Pro Tip: Using parchment paper ensures the crust doesn’t stick to the pan.

Step 2: Make the Cream Cheese Layer

  1. Beat cream cheese and powdered sugar until smooth.
  2. Fold in whipped topping gently.
  3. Spread the mixture over the cooled crust.

Step 3: Lemon Pudding Layer

  1. Whisk pudding mix with cold milk for 2 minutes until thickened.
  2. Spread evenly over the cream cheese layer.

Step 4: Final Topping

  1. Spread whipped topping across the pudding layer.
  2. Garnish with lemon zest or pecans for added texture.

Tips for Success

  • Chill Thoroughly: Refrigerate the dessert for at least 4 hours to set properly.
  • Use Fresh Lemon Zest: It enhances the citrus flavor.
  • Layer Evenly: Spread each layer to the edges for a neat appearance.

Creative Variations

Berry Lemon Lush

Add a layer of fresh berries between the pudding and whipped topping for a fruity twist.

Chocolate Lemon Lush

Drizzle melted chocolate on the top layer for a decadent contrast.

Coconut Lemon Lush

Sprinkle shredded coconut over the whipped topping for a tropical flavor.


Pairings to Complete Your Meal

Pair Lemon Lush Dessert with these dishes for a balanced menu:


FAQs About Lemon Lush Dessert

1. Can I make this dessert ahead of time?
Yes, it’s best made a day before serving to allow the layers to set.

2. How long can I store Lemon Lush Dessert?
Refrigerate for up to 4 days in an airtight container.

3. Can I freeze Lemon Lush Dessert?
Freezing isn’t recommended as the creamy layers may separate when thawed.

4. What are crust alternatives?
Try using graham cracker crumbs or a pre-made shortbread crust.


Why You’ll Love Lemon Lush Dessert

This dessert combines a buttery crust, creamy layers, and zesty lemon pudding for a crowd-pleasing treat. Its refreshing flavor and elegant presentation make it perfect for any gathering or special occasion.

Whether you’re hosting a family dinner or attending a potluck, Lemon Lush Dessert is guaranteed to be a hit. Pair it with other complementary dishes and enjoy a complete culinary experience!

Two-Ingredient Lemon Bars: The Easiest Dessert Recipe You’ll Love

easy lemon bars, simple lemon dessert recipe, lemon bars with cake mix, quick lemon dessert, two-ingredient dessert recipe, tangy lemon bars

Super Easy Two-Ingredient Lemon Bars Recipe: A Tangy Delight for All Occasions

Creating delicious desserts doesn’t have to be complicated, and these Two-Ingredient Lemon Bars prove just that. With only two simple ingredients, you can whip up a tangy, sweet treat that’s perfect for any gathering. Pair them with Cool Whip Cookies or balance the citrusy flavor with a creamy dessert like Strawberry Freezer Pie for a versatile dessert spread.


Ingredients for Two-Ingredient Lemon Bars

Essential Ingredients:

  • Lemon Pie Filling: The tangy base that gives these bars their signature citrus flavor.
  • Angel Food Cake Mix: Adds a light, airy texture that balances the lemony richness.

Optional Additions:

  • Powdered sugar for a dusted finish.
  • Fresh lemon zest for an added burst of citrus flavor.

Tools You’ll Need

  • Mixing bowl and spatula for combining the ingredients.
  • A 9×13-inch baking pan lined with parchment paper or greased to prevent sticking.
  • A cooling rack for post-baking.

How to Make Two-Ingredient Lemon Bars

Step 1: Preparing the Batter

  • Preheat your oven to 350°F (175°C).
  • In a large mixing bowl, combine the angel food cake mix and lemon pie filling. Stir gently until fully incorporated, being careful not to overmix.

Step 2: Baking the Bars

  • Pour the batter into the prepared baking dish.
  • Spread evenly with a spatula.
  • Bake for 30–35 minutes, or until the top is golden and a toothpick inserted in the center comes out clean.

Step 3: Cooling and Serving

  • Let the bars cool completely on a wire rack before slicing into squares.
  • For an elegant touch, dust with powdered sugar or garnish with lemon zest.

Tips for Perfect Lemon Bars

  • Grease Thoroughly: Ensure the baking dish is properly greased to prevent sticking.
  • Cool Completely: Cutting the bars while warm can cause them to crumble.
  • Storage: Store in an airtight container in the refrigerator for up to 3 days.

For more tips on working with cake mixes, check out How to Work with Angel Food Cake Mix for expert advice.


Variations to Try

  • Berry Lemon Bars: Add blueberries or raspberries to the batter for a fruity twist.
  • Zesty Lemon Bars: Mix in freshly grated lemon zest for a more intense citrus flavor.
  • Tropical Lemon Bars: Substitute part of the lemon pie filling with pineapple for a tropical flair.

Pairing Ideas


Frequently Asked Questions

1. Can I make these lemon bars gluten-free?
Yes! Use a gluten-free cake mix and ensure the pie filling is also gluten-free.

2. How can I store leftovers?
Place in an airtight container and refrigerate for up to three days. Serve chilled or at room temperature.

3. Can I freeze lemon bars?
Yes, freeze the bars in a single layer, then store in a freezer-safe bag for up to two months. Thaw at room temperature before serving.

4. What if I can’t find lemon pie filling?
Use lemon curd or homemade lemon filling as a substitute.


Troubleshooting Common Issues

  • Runny Bars: Ensure the pie filling is thick and not overly runny.
  • Cracking on Top: Avoid overbaking, which can cause cracks.
  • Sticky Edges: Grease the baking dish thoroughly or use parchment paper.

For more troubleshooting tips, explore Creative Lemon Dessert Ideas for additional insights.


Internal Linking Opportunities


Conclusion

These Two-Ingredient Lemon Bars are a testament to how simple ingredients can create extraordinary desserts. Whether you’re short on time or want an easy recipe to wow your guests, these lemon bars are the perfect solution. Pair them with complementary dishes for a complete dining experience or enjoy them on their own as a delightful treat.

Let me know if you need further customization or additional recipes!

Super Easy Crab Puffs Recipe: A Quick and Delicious Appetizer

easy crab appetizers, crab puffs with cream cheese, quick seafood snacks, crab pastry bites, simple crab recipes

Super Easy Crab Puffs Recipe: A Crowd-Pleasing Appetizer

Crab puffs are a delectable combination of creamy crab filling encased in crispy puff pastry. They’re perfect for parties, family gatherings, or as a delightful snack. With a simple recipe and minimal preparation, these appetizers are sure to impress. Enhance your appetizer lineup with recipes like Cool Whip Cookies or pair them with hearty dishes like Dorito Chicken Casserole for a full meal experience.


Ingredients You’ll Need

Essential Ingredients:

  • 1 cup crab meat (fresh, canned, or imitation)
  • ½ cup cream cheese (softened)
  • 1 tablespoon mayonnaise
  • 2 tablespoons chopped green onions or parsley
  • 1 teaspoon garlic powder
  • 1 teaspoon lemon juice
  • Pre-made puff pastry or wonton wrappers

Optional Additions:

  • Pinch of red chili flakes for a spicy kick
  • Shredded cheese for a creamy texture

Tools for Preparation

  • Mixing Bowl: For blending the filling ingredients.
  • Pastry Cutter: To shape the puff pastry.
  • Baking Sheet: Lined with parchment paper for easy cleanup.

How to Make Crab Puffs

Step 1: Prepare the Filling

  • Combine crab meat, cream cheese, mayonnaise, garlic powder, and lemon juice in a mixing bowl.
  • Fold in green onions or parsley for freshness.
  • Adjust seasoning with salt and pepper to taste.

Step 2: Assemble the Puffs

  • Roll out puff pastry or prepare wonton wrappers.
  • Place 1 tablespoon of filling onto each pastry square.
  • Fold and seal edges using water or egg wash.

Step 3: Cook the Crab Puffs

  • Baking: Preheat oven to 375°F (190°C). Bake on a lined tray for 12–15 minutes or until golden brown.
  • Frying: Heat oil in a skillet and fry until crispy, flipping occasionally.

Step 4: Serve and Enjoy

  • Let cool slightly before serving.
  • Pair with dipping sauces like sweet chili, garlic aioli, or tartar sauce.

Tips for Success

  • Use Cold Pastry: Keep the puff pastry cold to ensure it puffs properly during baking.
  • Seal Well: Use water or egg wash to seal the edges securely and prevent filling leakage.
  • Prepare Ahead: Assemble the puffs in advance and refrigerate until ready to bake or fry.

For more handy cooking tips, explore Slow Cooker Baked Ziti for effortless meal prep ideas.


Variations to Try

  • Cheesy Crab Puffs: Add shredded mozzarella or Parmesan cheese to the filling.
  • Spicy Crab Puffs: Mix in red chili flakes or a dash of hot sauce.
  • Mini Crab Puffs: Use smaller pastry squares for bite-sized appetizers.

Suggested Pairings


FAQs About Crab Puffs

1. Can I make crab puffs ahead of time?
Yes, assemble them and store in the refrigerator for up to 24 hours before baking or frying.

2. Can I freeze crab puffs?
Absolutely! Freeze unbaked puffs on a tray, then transfer to a freezer bag. Bake directly from frozen, adding a few minutes to the cooking time.

3. What type of crab meat works best?
Fresh crab is ideal, but canned or imitation crab meat can be used as a budget-friendly alternative.

4. How do I reheat leftovers?
Reheat in an oven at 350°F (175°C) for 5–7 minutes to maintain crispiness.


Internal Linking Opportunities


Conclusion

Super Easy Crab Puffs are a versatile appetizer that combines the flavors of creamy crab filling with crispy pastry. They’re simple to make and a guaranteed crowd-pleaser for any occasion. Whether paired with complementary dishes or enjoyed on their own, these crab puffs are sure to become a go-to recipe in your kitchen.

For more creative recipes and ideas, visit ExoRecipes and bring your culinary visions to life!