Classic Greek Salad: A Fresh and Flavorful Mediterranean Recipe

Greek vegetable salad, Mediterranean cucumber tomato salad, authentic Greek salad recipe, healthy Greek side dish, Horiatiki salad

Classic Greek Salad: A Timeless Mediterranean Dish

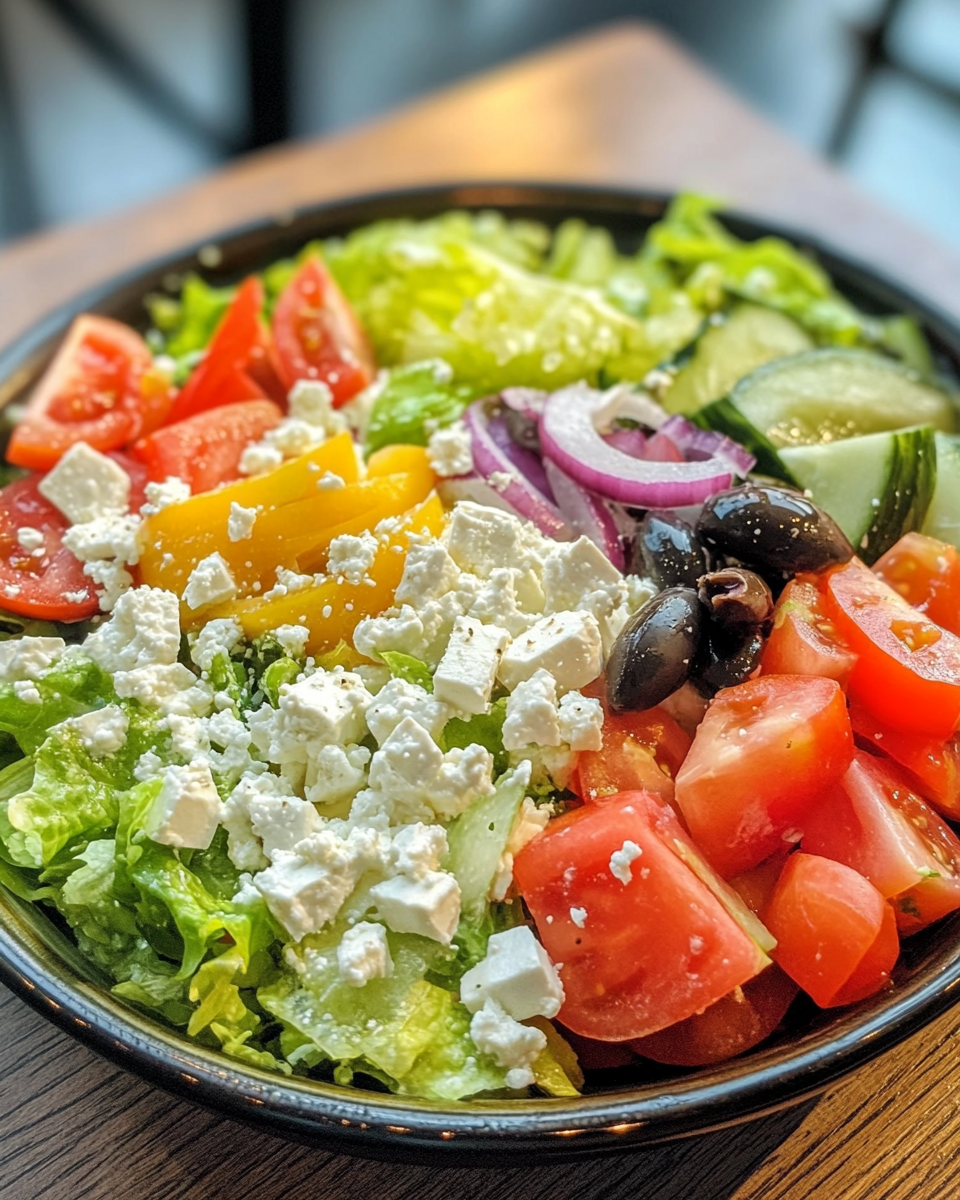
The Classic Greek Salad is a celebration of fresh, vibrant flavors that capture the essence of Mediterranean cuisine. With its mix of crisp vegetables, creamy feta cheese, and briny olives, this salad is not only delicious but also incredibly easy to prepare, making it perfect for any occasion.


Why Classic Greek Salad Stands Out

Greek salad, or Horiatiki, embodies the simplicity and healthfulness of the Mediterranean diet. It’s a versatile dish that pairs well with various meals or stands alone as a refreshing light lunch. For insights into the Mediterranean diet’s health benefits, visit Healthline’s guide to the Mediterranean Diet.


Ingredients for Classic Greek Salad

Vegetables

  • Cucumbers: Peeled or unpeeled, sliced into rounds or half-moons.
  • Tomatoes: Juicy and ripe, cut into wedges.
  • Red onion: Thinly sliced for a mild, sharp flavor.
  • Bell peppers: Green or a mix of colors for crunch.

Other Essentials

  • Feta cheese: Crumbled or cubed, made from sheep’s milk for authenticity.
  • Kalamata olives: Pitted for ease, adding a salty, briny kick.
  • Dressing: Extra virgin olive oil, red wine vinegar, dried oregano, and salt.

For tips on selecting the best feta cheese, check out Cheese.com’s Feta Guide.


Step-by-Step Recipe Guide

1. Preparing the Vegetables

  • Wash and dry the cucumbers, tomatoes, and bell peppers.
  • Slice the cucumbers and bell peppers into thin rounds or strips.
  • Cut tomatoes into wedges and thinly slice the red onion.

2. Making the Dressing

  1. In a small bowl, whisk together:
    • 1/3 cup olive oil
    • 2 tablespoons red wine vinegar
    • 1 teaspoon dried oregano
    • A pinch of salt and black pepper
  2. Adjust the seasoning to taste.

3. Assembling the Salad

  • In a large bowl, combine the cucumbers, tomatoes, red onions, and bell peppers.
  • Top with feta cheese and olives.
  • Drizzle the dressing over the salad and toss gently to coat.

4. Serving Tips

  • Serve immediately or let it sit for 10–15 minutes to allow the flavors to meld.
  • Pair with grilled chicken or warm pita bread for a complete meal.

Variations and Customizations

1. Protein Additions

  • Grilled chicken, shrimp, or chickpeas for a heartier dish.

2. Seasonal Ingredients

  • Add roasted red peppers, capers, or artichoke hearts for a twist.

3. Dietary Modifications

  • Substitute vegan feta for a dairy-free version.
  • Use gluten-free croutons or leave out the bread entirely.

For a similar fresh and colorful dish, try Apple Cranberry Walnut Salad.


FAQs About Classic Greek Salad

1. What makes Greek salad authentic?
Authenticity lies in simplicity: fresh vegetables, feta cheese, Kalamata olives, and a simple olive oil dressing.

2. Can I make Greek salad ahead of time?
Yes, but store the dressing separately and add it just before serving.

3. What’s the best way to store leftovers?
Refrigerate in an airtight container for up to two days. Keep the dressing separate to prevent sogginess.

4. Is lettuce traditional in Greek salad?
No, traditional Greek salad does not include lettuce, but it can be added if desired.


How to Serve Classic Greek Salad

  • Arrange on a large serving platter for a family-style presentation.
  • Pair with dishes like grilled lamb, moussaka, or falafel.
  • Serve as a refreshing starter or alongside soups like lentil or tomato.

Why You’ll Love This Recipe

  • Healthy and Nutritious: Packed with vitamins, minerals, and healthy fats.
  • Quick and Easy: Ready in under 15 minutes.
  • Customizable: Adapt it to suit any dietary preference or occasion.

LSI and NLP Keywords for SEO

  • Mediterranean vegetable salad
  • Authentic Greek recipes
  • Traditional Horiatiki salad
  • Easy summer salad recipes
  • Fresh cucumber and tomato salad
  • Healthy Mediterranean side dish

Conclusion

The Classic Greek Salad is a timeless dish that brings together the best of Mediterranean flavors. Its simplicity, versatility, and nutritional benefits make it a staple for any table. Whether you’re hosting a dinner party or looking for a quick, healthy meal, this salad is guaranteed to impress.

Pepper Steak Pasta Delight: A Savory Fusion of Steak, Peppers, and Pasta

steak and pasta recipe, pepper steak noodles, beef pepper pasta, easy steak pasta dinner, savory steak and peppers dish

Pepper Steak Pasta Delight: A Savory Fusion of Flavors

Combining the richness of tender steak, the vibrancy of fresh bell peppers, and the heartiness of pasta, Pepper Steak Pasta Delight is a dish that satisfies every craving. This recipe is perfect for weeknight dinners or entertaining guests, offering a simple yet sophisticated meal that’s full of bold flavors and a touch of elegance.


What Makes Pepper Steak Pasta Delight Unique?

This dish stands out because of its balance of textures and flavors. The juicy steak, cooked to perfection, contrasts beautifully with the crisp bell peppers and the al dente pasta. A savory sauce ties everything together, making it a complete and delightful meal.

For a perfectly cooked steak, check out Serious Eats’ guide to cooking steak. And for additional tips on pasta pairing, visit Pasta Evangelists’ resource on pasta types.


Ingredients for Pepper Steak Pasta Delight

For the Steak and Vegetables

  • 1 lb sirloin or flank steak, thinly sliced
  • 2 tablespoons olive oil
  • 1 red bell pepper, sliced
  • 1 yellow bell pepper, sliced
  • 1 medium onion, thinly sliced

For the Sauce

  • 2 cloves garlic, minced
  • 1/4 cup soy sauce
  • 1 tablespoon Worcestershire sauce
  • 1 teaspoon Italian seasoning
  • 1 teaspoon paprika
  • Salt and black pepper to taste

For the Pasta

  • 12 oz fettuccine or spaghetti
  • 1 tablespoon olive oil
  • Fresh parsley and grated Parmesan for garnish

Step-by-Step Instructions

1. Cook the Pasta

  • Boil pasta in salted water until al dente, following package instructions.
  • Drain and toss with olive oil to prevent sticking.

2. Prepare the Steak

  1. Heat olive oil in a large skillet over medium-high heat.
  2. Sear the steak strips for 2–3 minutes on each side until browned.
  3. Remove steak from the skillet and set aside.

3. Sauté the Vegetables

  1. In the same skillet, add bell peppers and onions.
  2. Cook for 5–7 minutes until softened but still crisp.

4. Make the Sauce

  1. Add garlic to the skillet and sauté for 1 minute.
  2. Stir in soy sauce, Worcestershire sauce, Italian seasoning, and paprika.
  3. Simmer the sauce for 2–3 minutes to let the flavors meld.

5. Combine Ingredients

  • Return the steak to the skillet and toss with the vegetables and sauce.
  • Add the cooked pasta to the skillet and toss until evenly coated.

6. Serve and Garnish

  • Plate the pasta and top with fresh parsley and Parmesan cheese.
  • Serve immediately with garlic bread or a side salad.

Why You’ll Love This Recipe

1. Simple and Quick

  • Ready in under 30 minutes, this dish is perfect for busy weeknights.

2. Versatile

  • Customize with your favorite vegetables or pasta types.

3. Nutrient-Packed

  • Packed with protein from the steak and vitamins from the peppers.

For a similarly hearty dish, explore One-Pot Sausage Spinach Pasta.


Variations and Customizations

Flavor Twists

  • Add mushrooms or cherry tomatoes for extra depth.
  • Sprinkle with crushed red pepper flakes for a spicy kick.

Dietary Adjustments

  • Use zucchini noodles for a low-carb option.
  • Swap steak for chicken or tofu for a lighter version.

Creamy Sauce Option

  • Stir in a splash of heavy cream or cream cheese for a richer sauce.

FAQs: Pepper Steak Pasta Delight

1. What is the best steak cut for this recipe?
Sirloin and flank steak are ideal for their tenderness and flavor.

2. Can I make this dish ahead of time?
Yes, but keep the pasta and sauce separate until serving to prevent sogginess.

3. How do I store leftovers?
Store in an airtight container in the refrigerator for up to three days.

4. Can I use a different type of pasta?
Absolutely! Penne or bowtie pasta works wonderfully as well.

For another quick and delicious meal, check out Perfect Ribeye Steak Recipe.


Presentation Tips

  • Plate with a swirl of pasta at the center, topped with steak and peppers.
  • Garnish with freshly cracked black pepper and Parmesan for a restaurant-quality look.

LSI and NLP Keywords

To improve SEO readability, incorporate these keywords naturally:

  • Steak pasta recipes
  • Easy pepper steak dish
  • Hearty beef pasta meal
  • Savory steak and vegetable pasta
  • Quick weeknight dinner recipe

Conclusion

Pepper Steak Pasta Delight is a crowd-pleasing meal that combines bold flavors, vibrant colors, and satisfying textures. Whether you’re cooking for a family dinner or a special occasion, this dish is sure to impress. With its quick preparation and endless customization options, it’s destined to become a favorite in your recipe collection.

Belgian Double Chocolate Mini Cheesecakes: Decadent Bite-Sized Desserts

mini chocolate cheesecakes, double chocolate desserts, Belgian chocolate cheesecake bites, chocolate mini cheesecake recipe, decadent chocolate desserts

Belgian Double Chocolate Mini Cheesecakes: The Ultimate Indulgent Dessert

For chocolate lovers and cheesecake enthusiasts alike, Belgian Double Chocolate Mini Cheesecakes are the ultimate treat. These individual-sized desserts combine the rich, velvety texture of cheesecake with the bold flavors of Belgian chocolate, creating a dessert that is as indulgent as it is convenient for serving at parties or special occasions.


Why Belgian Chocolate is Key

Belgian chocolate is renowned for its high-quality cocoa and smooth texture, making it the perfect ingredient for these mini cheesecakes. Its complex flavor profile elevates the dessert, providing a luxurious experience in every bite. For tips on tempering Belgian chocolate for flawless results, check out Serious Eats’ Chocolate Guide.


Ingredients for Belgian Double Chocolate Mini Cheesecakes

To create these decadent desserts, you’ll need:

For the Crust

  • 1 ½ cups Oreo cookie crumbs or graham crackers
  • 3 tbsp melted butter

For the Filling

  • 8 oz cream cheese (room temperature)
  • ½ cup granulated sugar
  • 2 large eggs
  • 1 cup Belgian dark chocolate (melted and slightly cooled)
  • ½ cup sour cream or heavy cream for added richness
  • 1 tsp pure vanilla extract

For the Topping

  • Belgian milk chocolate ganache or whipped cream
  • Optional: Fresh berries, chocolate curls, or crushed hazelnuts

Step-by-Step Recipe Instructions

1. Preparing the Crust

  1. Mix cookie crumbs with melted butter until well combined.
  2. Press the mixture into the bottom of a greased muffin pan or mini cheesecake molds.
  3. Bake the crust at 325°F (165°C) for 5–7 minutes. Allow to cool.

2. Making the Chocolate Cheesecake Filling

  1. Beat cream cheese and sugar until smooth.
  2. Add eggs one at a time, mixing until fully incorporated.
  3. Blend in melted Belgian dark chocolate, sour cream, and vanilla extract.

3. Assembling the Cheesecakes

  • Spoon the filling over the cooled crusts.
  • Smooth the tops with a spatula to ensure even layers.

4. Baking the Mini Cheesecakes

  1. Bake at 325°F (165°C) for 20–25 minutes or until set.
  2. Cool in the pan for 15 minutes before transferring to the refrigerator.

5. Adding the Topping

  • Once chilled, spread ganache over each cheesecake.
  • Garnish with whipped cream, berries, or chocolate shavings.

For more creative topping ideas, visit Taste of Home’s Cheesecake Tips.


Serving and Presentation

  • Arrange the cheesecakes on a decorative platter for events.
  • Pair with espresso or dessert wine to complement the rich chocolate flavors.
  • Serve chilled for the best texture and flavor.

Why You’ll Love This Recipe

1. Perfect for Any Occasion

These mini cheesecakes are ideal for holidays, birthdays, or elegant dinner parties.

2. Customizable

  • Swap Belgian dark chocolate for white chocolate to create a contrast.
  • Add a swirl of caramel or raspberry puree for a burst of flavor.

3. Easy to Store

Refrigerate for up to five days or freeze for longer storage.

For a similar dessert experience, explore Pecan Pie Balls for bite-sized indulgence.


Variations and Customizations

Flavor Twists

  • Mocha Cheesecakes: Replace some of the cream with espresso for a coffee-infused treat.
  • Mint Chocolate: Add a drop of peppermint extract to the filling for a refreshing twist.

Dietary Adjustments

  • Use gluten-free cookies for the crust.
  • Opt for plant-based cream cheese and dairy-free chocolate for a vegan version.

FAQs About Belgian Double Chocolate Mini Cheesecakes

1. Can I make these cheesecakes ahead of time?
Yes! Prepare and refrigerate them up to two days in advance.

2. How do I prevent cracks in the cheesecake?
Bake at a low temperature and avoid over-mixing the batter to minimize air bubbles.

3. What’s the best way to melt Belgian chocolate?
Use a double boiler or microwave in short intervals, stirring frequently.

4. Can I freeze mini cheesecakes?
Absolutely. Freeze them in an airtight container for up to two months.


Internal Linking Opportunities

To enhance your dessert repertoire, check out related recipes:


LSI and NLP Keywords

To boost SEO, include these keywords naturally throughout the article:

  • Mini chocolate cheesecakes
  • Double chocolate dessert ideas
  • Individual-sized cheesecakes
  • Belgian chocolate recipes
  • Decadent mini desserts
  • Creamy chocolate cheesecake bites

Conclusion

Belgian Double Chocolate Mini Cheesecakes are the epitome of indulgence. With their rich flavor and elegant presentation, they are perfect for any occasion. Whether you’re serving them at a party or enjoying them as a personal treat, these mini desserts are guaranteed to impress.

Hot Fudge Chocolate Pudding Cake: The Ultimate Gooey Chocolate Dessert

gooey chocolate pudding cake, chocolate self-saucing dessert, hot fudge cake recipe, warm chocolate pudding cake, easy fudge chocolate dessert

Hot Fudge Chocolate Pudding Cake: A Decadent Delight for Dessert Lovers

If you’re a chocolate enthusiast, the Hot Fudge Chocolate Pudding Cake will be your ultimate go-to dessert. This self-saucing cake combines the rich flavors of a moist chocolate layer with a gooey fudge sauce that forms as it bakes. Not only is it a breeze to prepare, but it’s also a dessert that brings comfort with every bite.


What Makes Hot Fudge Chocolate Pudding Cake Special?

This cake is a marvel of simple chemistry and deliciousness. A straightforward batter transforms in the oven into a moist, cake-like top layer and a luscious pudding-like sauce at the bottom. Pairing it with vanilla ice cream or whipped cream elevates the dessert to a restaurant-quality indulgence. For tips on perfecting your baking technique, visit King Arthur Baking.


Ingredients for Hot Fudge Chocolate Pudding Cake

Here’s what you’ll need to create this chocolate masterpiece:

  • All-purpose flour – The base for the cake layer.
  • Granulated sugar – Adds sweetness to the cake and pudding layers.
  • Cocoa powder – The key ingredient for the rich chocolate flavor.
  • Baking powder – Ensures the cake rises to a fluffy texture.
  • Salt – Balances the sweetness.
  • Milk – Adds moisture.
  • Butter – For richness and depth.
  • Vanilla extract – Enhances flavor.
  • Brown sugar – Adds a caramel-like depth to the sauce.
  • Hot water or coffee – The secret ingredient that creates the pudding layer.

For more creative dessert recipes, check out ExoRecipes’ No-Bake Peanut Butter Oatmeal Cookies.


Step-by-Step Instructions

1. Preparing the Batter

  1. In a bowl, mix the dry ingredients: flour, granulated sugar, cocoa powder, baking powder, and salt.
  2. In another bowl, combine milk, melted butter, and vanilla extract.
  3. Gradually add the wet ingredients to the dry mixture, stirring until smooth.

2. Layering the Cake

  • Spread the batter evenly in a greased baking dish.
  • Sprinkle a mixture of brown sugar and cocoa powder over the batter.

3. Adding the Secret Ingredient

  • Pour hot water or coffee over the layered batter without mixing. This creates the magic pudding layer as it bakes.

4. Baking to Perfection

  • Bake in a preheated oven at 350°F (175°C) for about 35–40 minutes, or until the cake layer is set and the pudding layer bubbles around the edges.

Serving Suggestions

  • Serve the cake warm with a scoop of vanilla ice cream or whipped cream on top.
  • Drizzle with caramel or chocolate syrup for added decadence.
  • Add a sprinkle of powdered sugar for a classic touch.

For a similar indulgence, try Pecan Pie Balls for a bite-sized dessert experience.


Why You’ll Love This Recipe

1. Easy to Make

With simple ingredients and minimal preparation, this dessert is perfect for busy days.

2. Customizable

  • Add cinnamon or orange zest for a twist.
  • Incorporate chocolate chips or chopped nuts into the batter.

3. Perfect for Any Occasion

Whether it’s a cozy family dinner or a holiday celebration, this dessert fits every event.


FAQs: Hot Fudge Chocolate Pudding Cake

1. What creates the fudge sauce layer?
The hot water or coffee poured over the batter melts the sugar and cocoa, forming the pudding layer as the cake bakes.

2. Can I make this dessert ahead of time?
While best served warm, you can reheat individual portions in the microwave.

3. How long does it stay fresh?
Store leftovers in an airtight container in the refrigerator for up to three days.

4. Can I make this gluten-free?
Yes, substitute the flour with a gluten-free all-purpose blend for similar results.


Variations and Customizations

Dietary Alternatives

  • Use almond milk and vegan butter for a dairy-free version.
  • Substitute with gluten-free flour for a celiac-friendly option.

Flavor Additions

  • Sprinkle cinnamon or nutmeg into the batter for a spiced touch.
  • Replace hot water with brewed coffee for a mocha flavor.

Creative Toppings

  • Crushed peppermint candies for a holiday vibe.
  • Salted caramel sauce for a sweet-salty twist.

For another take on comforting desserts, check out The Ultimate Peanut Butter Pie.


LSI and NLP Keywords

To optimize for SEO, incorporate these keywords naturally:

  • Gooey chocolate pudding cake
  • Easy hot fudge dessert
  • Chocolate self-saucing cake
  • Warm chocolate pudding recipe
  • Homemade chocolate fudge cake

Conclusion

Hot Fudge Chocolate Pudding Cake is the epitome of comfort food desserts. Its rich, gooey texture and warm flavors make it an instant hit for any occasion. Easy to prepare and endlessly customizable, this dessert is bound to become a staple in your recipe collection.

Luxurious Butterfinger Balls: The Ultimate No-Bake Chocolate Treat

no-bake Butterfinger balls, chocolate Butterfinger treats, Butterfinger candy balls, peanut butter and chocolate desserts, easy no-bake snacks

Luxurious Butterfinger Balls: A Decadent No-Bake Treat

Craving something sweet yet simple to make? Luxurious Butterfinger Balls are the perfect dessert for anyone who loves a balance of peanut butter, chocolate, and the unique crunch of Butterfinger candy bars. This no-bake treat is not only easy to prepare but also makes for a crowd-pleasing addition to any party, holiday gathering, or personal indulgence.


What Are Butterfinger Balls?

Butterfinger Balls are small, bite-sized treats made by combining crushed Butterfinger candy bars with a rich peanut butter mixture, coated in smooth chocolate for the perfect finish. These delightful confections are similar to Buckeyes but with an added crunch that makes them irresistible.

For tips on achieving the perfect chocolate coating, check out Serious Eats’ guide.


Ingredients You’ll Need

To make Luxurious Butterfinger Balls, gather the following ingredients:

  • Butterfinger candy bars (crushed)
  • Peanut butter (creamy or crunchy, based on preference)
  • Graham cracker crumbs for texture
  • Powdered sugar to sweeten and bind the mixture
  • Chocolate chips (milk, dark, or white for coating)
  • Butter to enhance creaminess

Optional garnishes:

  • Sea salt for a savory touch
  • Crushed Butterfinger bits for extra crunch

For similar no-bake ideas, explore Easy Dessert Recipes.


Step-by-Step Recipe Guide

1. Prepare the Mixture

  • Combine peanut butter, powdered sugar, and melted butter in a bowl. Mix until smooth.
  • Fold in crushed Butterfinger candy bars and graham cracker crumbs until well incorporated.

2. Shape the Balls

  • Using your hands or a cookie scoop, form small balls (around 1 inch in diameter).
  • Place the balls on a parchment-lined baking sheet.

3. Chill for Stability

  • Refrigerate the formed balls for 30 minutes to firm them up. This step makes them easier to coat in chocolate.

4. Dip in Chocolate

  • Melt your choice of chocolate chips in a double boiler or microwave.
  • Using a fork or dipping tool, coat each ball evenly in melted chocolate.

5. Decorate and Set

  • Sprinkle additional crushed Butterfinger bits or sea salt while the chocolate is still wet.
  • Allow the balls to set at room temperature or refrigerate them for faster results.

Why You’ll Love Butterfinger Balls

1. Easy to Make

These are no-bake, making them an ideal dessert when you’re short on time.

2. Perfect for Any Occasion

From holidays to birthdays, Butterfinger Balls can be dressed up or down to suit any event.

3. Customizable

Switch up the flavors by using almond butter or adding a dash of vanilla extract.

4. Crowd-Pleasing Treat

Kids and adults alike will adore these bite-sized pieces of heaven.


Variations and Customizations

Healthier Alternatives

  • Swap out graham cracker crumbs for almond flour to reduce carbs.
  • Use dark chocolate instead of milk chocolate for a less sugary option.

Flavor Twists

  • Add shredded coconut to the peanut butter mixture.
  • Mix in mini chocolate chips for extra decadence.

Dietary Adjustments

  • Substitute with gluten-free graham crackers for a celiac-friendly treat.
  • Use vegan chocolate chips and almond butter for a dairy-free and plant-based version.

For other no-bake dessert inspirations, visit To Simply Inspire.


Serving and Storing Butterfinger Balls

Serving Tips

  • Arrange on a decorative platter for a visually appealing presentation.
  • Pair with coffee or hot cocoa for a delightful treat.

Storage Instructions

  • Refrigerator: Store in an airtight container for up to two weeks.
  • Freezer: Freeze for up to three months. Allow to thaw before serving.

Frequently Asked Questions

1. Can I use a different candy bar?
Yes! Snickers, Reese’s, or Twix can be great alternatives for unique flavor profiles.

2. What type of chocolate works best for coating?
While milk chocolate is classic, dark or white chocolate can add a gourmet touch.

3. How long does it take to make Butterfinger Balls?
Preparation and assembly take about 45 minutes, with additional chilling time.

4. Are these suitable for gifting?
Absolutely! Package them in decorative boxes or cellophane bags for the perfect homemade gift.


Internal Linking Opportunities

To further enhance your dessert repertoire, explore these related recipes:


LSI and NLP Keywords

  • Butterfinger dessert recipes
  • No-bake candy recipes
  • Peanut butter chocolate treats
  • Holiday dessert ideas
  • Buckeye-style desserts
  • Easy party snacks
  • Chocolate-dipped candy balls
  • Homemade truffle recipes

Conclusion

Luxurious Butterfinger Balls are the ultimate treat for anyone who loves combining rich chocolate with the crunch of Butterfinger. Whether you’re making these for a party, gifting them to loved ones, or simply indulging yourself, they’re guaranteed to impress. With endless customization options, this no-bake dessert is a must-try for anyone looking to create something truly special.