Alabama Fire Crackers: A Spicy Southern Snack Favorite

spicy seasoned crackers, ranch-flavored snacks, firecracker saltines, Southern snack recipes, homemade cracker ideas, bold party appetizers

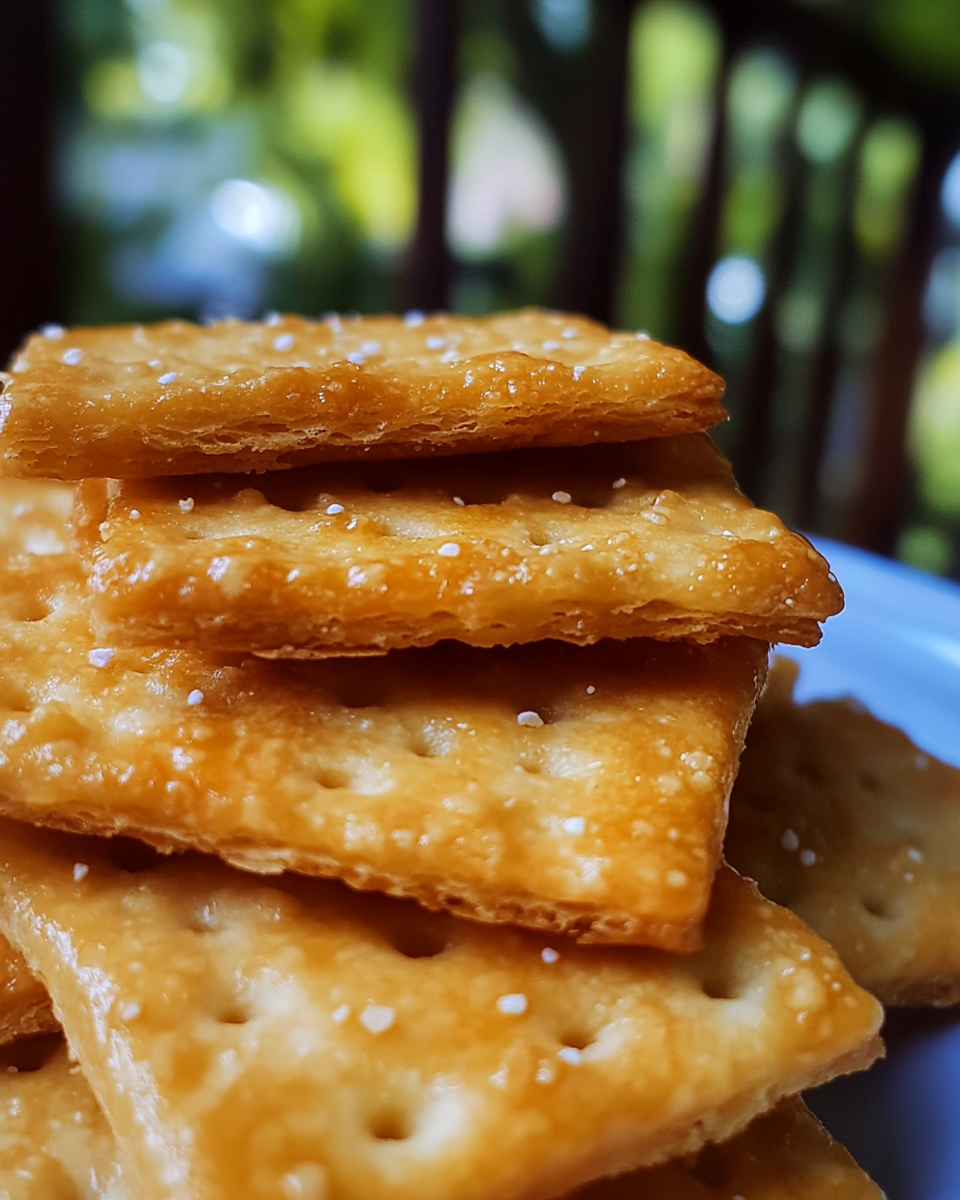
Alabama Fire Crackers: A Spicy Snack Sensation

Alabama Fire Crackers are a perfect balance of crunch, spice, and flavor, making them an ideal snack for any occasion. Whether you’re hosting a party, preparing for a road trip, or looking for a quick treat, these seasoned crackers deliver a delightful burst of flavor.


What Are Alabama Fire Crackers?

These spicy, seasoned crackers are a Southern classic, loved for their bold flavor and ease of preparation. With a simple mix of saltines, spices, and oil, they’re marinated to perfection and optionally baked for added crunch. If you’re a fan of creative snacks, check out Crispy Air Fryer Onion Rings for more ideas.


Ingredients for Alabama Fire Crackers

Core Ingredients

  • Saltine Crackers: The perfect base for absorbing flavors.
  • Vegetable Oil: Helps the seasoning adhere to the crackers.
  • Ranch Dressing Mix: Adds a tangy, herbaceous kick.
  • Red Pepper Flakes: Brings the heat and spice.
  • Garlic Powder and Onion Powder: Enhance the depth of flavor.

Optional Additions

  • Cayenne pepper for extra heat.
  • Smoked paprika for a subtle smoky taste.
  • Grated Parmesan for a cheesy twist.

Step-by-Step Recipe Instructions

1. Prepare the Seasoning

  1. In a bowl, whisk together oil, ranch mix, red pepper flakes, garlic powder, and onion powder.
  2. Adjust the spice level with additional cayenne or black pepper if desired.

2. Coat the Crackers

  • Place saltines in a large Ziploc bag or mixing bowl.
  • Pour the seasoning mixture over the crackers and gently toss or shake until evenly coated.

3. Marinate

  • Let the crackers sit for at least 12 hours, flipping the bag occasionally to distribute the seasoning evenly.

4. Bake for Extra Crunch (Optional)

  • Spread crackers on a parchment-lined baking sheet.
  • Bake at 250°F (120°C) for 15–20 minutes, then cool completely.

For more seasoning tips, visit Allrecipes Seasoned Crackers Guide.


Creative Variations for Alabama Fire Crackers

1. Cracker Alternatives

  • Use Ritz crackers for a buttery flavor.
  • Try oyster crackers or Cheez-Its for a bite-sized option.

2. Flavor Variations

  • Add dill or thyme for an herbaceous twist.
  • Use hot sauce in the oil mixture for a tangy kick.

3. Diet-Friendly Options

  • Opt for gluten-free crackers.
  • Use olive oil for a lighter alternative.

For another bold flavor snack, check out Cheesy Bacon Jalapeño Corn Dip.


Tips for Making the Best Alabama Fire Crackers

  • Fresh Crackers: Ensure they are fresh for maximum crunch.
  • Even Coating: Flip the Ziploc bag several times during marination for even flavor.
  • Baking Optional: Baking extends shelf life and enhances the crunch.

How to Serve and Store Alabama Fire Crackers

Serving Suggestions

  • Pair with dips like ranch, hummus, or cheese sauce.
  • Include them on a charcuterie board for added texture.

Storage Tips

  • Store in an airtight container for up to a week.
  • Freeze for longer storage and re-crisp in the oven before serving.

FAQs About Alabama Fire Crackers

1. Can these crackers be made ahead of time?
Yes, they taste even better after marinating overnight.

2. Can I adjust the spice level?
Absolutely, reduce or increase red pepper flakes and cayenne as desired.

3. Are there vegan or gluten-free options?
Use plant-based crackers and oil, and ensure seasonings are vegan and gluten-free.

4. How long do they last?
Stored properly, they stay fresh for up to a week.


LSI and NLP Keywords for SEO

  • Spicy seasoned crackers
  • Ranch-flavored snacks
  • Southern-style appetizers
  • Homemade cracker recipes
  • Firecracker saltines
  • Easy party snacks

Internal Linking Opportunities


Conclusion

Alabama Fire Crackers are a versatile and flavorful snack that’s easy to prepare and perfect for any occasion. Whether you enjoy them as a party appetizer, a road trip treat, or a quick snack, they’re sure to satisfy. With endless customization options, they can be tailored to suit every taste.

Cherry Cheesecake Egg Rolls: A Crispy and Creamy Dessert Delight

cheesecake-filled egg rolls, crispy dessert rolls, cherry dessert egg rolls, fruity cheesecake bites, sweet fried treats

Cherry Cheesecake Egg Rolls: A Sweet and Crispy Delight

Combining the creamy richness of cheesecake, the fruity tang of cherries, and the crispy texture of egg roll wrappers, Cherry Cheesecake Egg Rolls are an irresistible dessert. Whether for a party or a cozy family treat, these rolls are a crowd-pleaser.


What Are Cherry Cheesecake Egg Rolls?

Cherry Cheesecake Egg Rolls take the creamy tanginess of cheesecake and combine it with the fruity sweetness of cherry pie filling, all wrapped in a crispy egg roll wrapper. Perfect for a unique dessert twist, these rolls are quick to make and endlessly customizable. For other delightful dessert recipes, check out Mini Pineapple Coconut Milk Cheesecakes.


Ingredients for Cherry Cheesecake Egg Rolls

Core Ingredients

  • Egg Roll Wrappers: Provide a crispy shell when fried or baked.
  • Cream Cheese: The main ingredient for the cheesecake filling.
  • Cherry Pie Filling: Adds a burst of fruity sweetness.

Optional Additions

  • Vanilla extract for enhanced flavor.
  • Powdered sugar for garnishing.
  • Chocolate drizzle for a luxurious finish.

Step-by-Step Recipe Instructions

1. Preparing the Filling

  1. In a bowl, beat softened cream cheese with sugar and vanilla extract until smooth.
  2. Fold in a small portion of cherry pie filling for added flavor.

2. Assembling the Egg Rolls

  • Lay an egg roll wrapper flat on a clean surface.
  • Add a spoonful of cheesecake filling and a spoonful of cherry pie filling.
  • Roll tightly, sealing the edges with water or egg wash.

3. Cooking Methods

  • Deep Frying: Heat oil to 375°F (190°C) and fry until golden brown.
  • Air Frying: Brush with oil and cook at 375°F for 6–8 minutes.
  • Baking: Preheat oven to 400°F (200°C), brush rolls with oil, and bake until crisp.

4. Garnishing

  • Dust with powdered sugar or drizzle with chocolate syrup before serving.

For more tips on frying techniques, visit Serious Eats Frying Guide.


Creative Variations of Cherry Cheesecake Egg Rolls

  • Flavor Swaps: Use blueberry, apple, or mixed berry filling instead of cherry.
  • Textural Additions: Add crushed graham crackers or mini chocolate chips.
  • Dietary Modifications: Use gluten-free wrappers or low-fat cream cheese.

For another innovative dessert recipe, explore Smores Crunchwraps.


Tips for Perfect Egg Rolls

  • Do Not Overfill: Prevent leaks by using small amounts of filling.
  • Seal Properly: Use water or egg wash to seal the edges securely.
  • Consistent Oil Temperature: Ensure even frying by maintaining a stable oil temperature.

How to Serve and Store Cherry Cheesecake Egg Rolls

Serving Suggestions

  • Pair with whipped cream or a scoop of vanilla ice cream.
  • Plate with fresh cherries for a visually appealing presentation.

Storage Tips

  • Store leftovers in an airtight container in the refrigerator for up to 3 days.
  • Reheat in an air fryer or oven to restore crispiness.

FAQs About Cherry Cheesecake Egg Rolls

1. Can these egg rolls be made ahead of time?
Yes, assemble and freeze them for later frying or baking.

2. Are there vegan options for this recipe?
Use plant-based cream cheese and cherry filling along with vegan wrappers.

3. Can I bake these egg rolls instead of frying?
Absolutely, baking is a healthier alternative that still yields crispy results.

4. How do I prevent the wrappers from breaking?
Keep them moist by covering with a damp cloth while assembling.


LSI and NLP Keywords for SEO

  • Cheesecake egg rolls recipe
  • Sweet dessert rolls
  • Crispy cheesecake bites
  • Cherry pie egg rolls
  • Air fryer dessert ideas
  • Fruity cheesecake snacks

Internal Linking Opportunities


Conclusion

Cherry Cheesecake Egg Rolls combine the best of creamy cheesecake and crispy egg rolls for a unique dessert experience. Perfect for parties, family gatherings, or just a sweet treat, these rolls are versatile, easy to customize, and absolutely delicious. For more dessert ideas, explore the wealth of recipes on ExoRecipes, and let your creativity shine in the kitchen.

Christmas Pretzel Hugs: Sweet and Salty Holiday Treats

holiday pretzel snacks, festive chocolate pretzel treats, sweet and salty holiday snacks, Christmas candy recipes, easy Christmas desserts

Christmas Pretzel Hugs: Festive Sweet and Salty Treats

The combination of sweet, creamy Hershey’s Hugs, crunchy pretzels, and colorful M&Ms makes Christmas Pretzel Hugs an irresistible treat for the holiday season. These easy-to-make, no-bake snacks are a festive addition to your dessert table and a perfect gift option for friends and family.


What Makes Christmas Pretzel Hugs Special?

Christmas Pretzel Hugs are loved for their simplicity and versatility. The blend of sweet and salty flavors, combined with festive red and green colors, makes them a perfect holiday treat. If you’re looking to explore more sweet holiday recipes, check out Decadent Caramel Chocolate Cupcakes.


Ingredients for Christmas Pretzel Hugs

Core Ingredients

  • Pretzels: Mini twists or square snaps for the base.
  • Hershey’s Hugs: The creamy, striped chocolate that melts perfectly.
  • M&Ms: Red and green for a festive touch.

Optional Additions

  • Festive sprinkles or crushed candy canes for extra holiday cheer.
  • White chocolate chips as a substitute for Hershey’s Hugs.

Step-by-Step Recipe Instructions

1. Preparation

  1. Preheat the oven to 200°F (95°C).
  2. Line a baking sheet with parchment paper for easy cleanup.

2. Assembly

  • Arrange pretzels on the baking sheet in a single layer.
  • Place a Hershey’s Hug on each pretzel.

3. Melting and Topping

  • Bake for 4–5 minutes or until the chocolates are soft but not completely melted.
  • Quickly press an M&M onto the center of each Hug, spreading the chocolate slightly.

4. Cooling

  • Let the treats cool at room temperature or in the refrigerator until the chocolate hardens.

For additional tips on melting chocolate effectively, visit Serious Eats Chocolate Guide.


Creative Variations for Christmas Pretzel Hugs

1. Flavor Twists

  • Use Rolos for a caramel-filled version.
  • Experiment with dark chocolate or peppermint-flavored Hugs.

2. Topping Options

  • Add crushed nuts for texture.
  • Use multicolored sprinkles to match different themes.

3. Shape Alternatives

  • Swap traditional pretzels with pretzel rods or stars for a unique presentation.

For another festive snack idea, check out Smores Jars.


Why You’ll Love This Recipe

  • Quick and Easy: Ready in just 20 minutes.
  • No-Bake: Minimal effort, perfect for kids to help.
  • Customizable: Endless options for toppings and flavors.

Tips for Perfect Christmas Pretzel Hugs

  • Watch the Chocolate: Do not overheat to prevent melting into a puddle.
  • Use Parchment Paper: Prevents sticking and makes cleanup easier.
  • Cool Properly: Allow the treats to fully set before serving or packaging.

FAQs About Christmas Pretzel Hugs

1. Can I make these ahead of time?
Yes, they can be stored in an airtight container for up to two weeks.

2. Can I use other types of chocolate?
Absolutely! Try dark chocolate, white chocolate, or flavored Hershey’s Kisses.

3. What if I can’t find red and green M&Ms?
Use any festive candy or sprinkles to match the occasion.

4. How do I package these treats as gifts?
Use holiday-themed tins or cellophane bags tied with a festive ribbon. For more ideas, explore The Spruce’s Holiday Wrapping Guide.


Serving and Gifting Ideas

  • Serve on a festive platter at holiday parties.
  • Package in jars or bags as thoughtful homemade gifts.
  • Pair with hot chocolate for a cozy treat.

LSI and NLP Keywords for SEO

  • Festive holiday pretzel snacks
  • Hershey’s Hug recipes
  • Easy Christmas candy ideas
  • Sweet and salty holiday treats
  • Holiday party snacks
  • Chocolate-covered pretzel ideas

Internal Linking Opportunities


Conclusion

Christmas Pretzel Hugs are a delightful combination of sweet and salty flavors, perfect for the holiday season. Their simplicity, versatility, and festive appearance make them a must-try recipe for both novice and experienced cooks. Whether you’re looking to create a festive gift or add to your holiday dessert spread, these treats are sure to impress.

Garlic Butter Bacon Cheeseburger Rollups: A Savory Snack Sensation

bacon cheeseburger rollups, crescent dough cheeseburger recipe, garlic butter stuffed rolls, savory crescent roll snacks, easy bacon cheeseburger bites

Garlic Butter Bacon Cheeseburger Rollups: The Ultimate Comfort Food

Combining the savory goodness of bacon, the richness of cheese, and the buttery delight of crescent dough, Garlic Butter Bacon Cheeseburger Rollups are the perfect indulgence. Whether you’re hosting a game-day party or need a quick family dinner idea, this dish delivers bold flavors and a satisfying crunch.


Why You’ll Love Garlic Butter Bacon Cheeseburger Rollups

These rollups are not only delicious but also incredibly versatile. They combine the flavors of a classic cheeseburger with a buttery, flaky dough, making them a hit for all ages. If you’re a fan of innovative recipes, explore Italian Stromboli: Rolling Up Comfort in Every Bite for another take on stuffed pastries.


Ingredients for Garlic Butter Bacon Cheeseburger Rollups

Core Ingredients

  • Ground beef: Seasoned for a traditional cheeseburger flavor.
  • Bacon: Cooked to crispy perfection.
  • Cheddar cheese: Melty and flavorful.
  • Crescent roll dough: Ensures a flaky, golden crust.
  • Butter and garlic: Creates a savory garlic butter topping.

Optional Additions

  • Diced onions or pickles for tang.
  • Sriracha or hot sauce for heat.
  • Sesame seeds for a burger-like finishing touch.

Step-by-Step Recipe Guide

1. Prepare the Filling

  1. Cook bacon in a skillet until crispy. Set aside and crumble.
  2. In the same skillet, cook ground beef with onions and garlic. Season with salt and pepper.
  3. Allow the beef mixture to cool slightly and mix in shredded cheddar cheese.

2. Assemble the Rollups

  • Roll out crescent dough triangles on a baking sheet.
  • Place a spoonful of the beef mixture on each triangle.
  • Add crumbled bacon and roll tightly, ensuring the seam is on the bottom.

3. Add Garlic Butter Topping

  1. Melt butter and mix with minced garlic and parsley.
  2. Brush the garlic butter mixture generously over the rollups.

4. Bake to Perfection

  • Preheat the oven to 375°F (190°C).
  • Bake for 12–15 minutes, or until the rollups are golden brown and flaky.

For tips on perfecting crescent dough recipes, visit Pillsbury Crescent Roll Ideas.


Serving and Presentation Ideas

  • Serve with dipping sauces such as ketchup, mustard, or ranch.
  • Garnish with chopped parsley or sesame seeds for a professional touch.
  • Pair with a fresh side salad or crispy fries for a complete meal.

Variations and Customizations

1. Protein Options

  • Replace ground beef with ground turkey, chicken, or plant-based alternatives.

2. Cheese Choices

  • Experiment with mozzarella, pepper jack, or a cheese blend for different flavors.

3. Spice It Up

  • Add jalapeños, sriracha, or crushed red pepper flakes for a spicy twist.

For another versatile meal idea, try Chicken Bacon Ranch Potatoes.


FAQs: Garlic Butter Bacon Cheeseburger Rollups

1. Can I make these rollups ahead of time?
Yes, assemble them ahead and bake when ready to serve.

2. How do I store leftovers?
Store in an airtight container in the refrigerator for up to three days. Reheat in the oven to maintain crispiness.

3. Are there gluten-free dough options?
Yes, gluten-free crescent dough is available in many stores.

4. How can I ensure the rollups don’t unroll during baking?
Secure the edges tightly and place the seam side down on the baking sheet.


Why These Rollups Are a Hit

  • Crowd-Pleasing: Perfect for parties, family dinners, or as an appetizer.
  • Quick and Easy: Ready in under 30 minutes.
  • Highly Customizable: Endless options to suit every palate.

LSI and NLP Keywords for SEO

  • Crescent roll cheeseburger recipe
  • Bacon cheeseburger appetizers
  • Savory garlic butter snacks
  • Quick dinner ideas with crescent rolls
  • Flaky dough stuffed recipes

Internal Linking Opportunities


Conclusion

Garlic Butter Bacon Cheeseburger Rollups are the ultimate combination of comfort and convenience. With a crispy, buttery exterior and a cheesy, savory filling, these rollups are sure to impress. Perfect for any occasion, they’re a must-try for food enthusiasts.

Loaded Meatball Cheeseburger Potatoes: The Ultimate Comfort Food Fusion

cheeseburger stuffed potatoes, loaded baked potatoes with meatballs, cheesy meatball potato recipe, comfort food potato recipe, loaded potato ideas

Loaded Meatball Cheeseburger Potatoes: A Comfort Food Fusion

Combining the hearty satisfaction of baked potatoes, the savory delight of meatballs, and the indulgent essence of cheeseburgers, Loaded Meatball Cheeseburger Potatoes are a crowd-pleaser. This recipe merges three beloved comfort foods into one, perfect for weeknight dinners or game-day gatherings.


What Are Loaded Meatball Cheeseburger Potatoes?

This dish features fluffy baked potatoes stuffed with flavorful meatballs, topped with melted cheese, and finished with classic cheeseburger toppings. Each bite offers layers of texture and flavor, from the crispness of bacon to the creaminess of sour cream. To explore other potato-focused dishes, visit The Best Potato Salad Recipe.


Ingredients for Loaded Meatball Cheeseburger Potatoes

For the Potatoes

  • Russet potatoes: Large, baked until tender.
  • Butter: Adds richness to the mashed potato filling.

For the Meatballs

  • Ground beef: For classic cheeseburger flavor.
  • Breadcrumbs: To bind the mixture.
  • Egg: Helps maintain the meatball shape.
  • Spices: Garlic powder, onion powder, salt, and pepper.

Toppings

  • Cheese: Cheddar, American, or a blend.
  • Bacon bits: Crispy and savory.
  • Sour cream: Adds creaminess.
  • Pickles: For a tangy kick.
  • Green onions: For freshness.

Step-by-Step Recipe Guide

1. Prepare the Potatoes

  1. Preheat the oven to 400°F (200°C).
  2. Wash and pierce the potatoes with a fork.
  3. Bake directly on the oven rack for 50–60 minutes or until soft.

2. Make the Meatballs

  1. In a bowl, combine ground beef, breadcrumbs, egg, and spices.
  2. Form small meatballs and bake on a parchment-lined sheet at 375°F (190°C) for 15–20 minutes.

3. Assemble the Potatoes

  • Once cool, cut each potato lengthwise and scoop out the insides.
  • Mash the potato insides with butter, cheese, and a pinch of salt.
  • Fill the hollowed potato shells with the mashed mixture.

4. Add the Toppings

  • Place cooked meatballs on top of the potato filling.
  • Sprinkle with more cheese and bake until melted.

5. Garnish and Serve

  • Top with bacon bits, sour cream, pickles, and green onions.

For perfect meatballs every time, check out Serious Eats’ Meatball Guide.


Serving and Presentation Tips

  • Arrange the potatoes on a large platter for a family-style presentation.
  • Serve with a side salad or roasted vegetables to balance the richness.
  • Provide condiments like ketchup and mustard on the side for dipping.

Variations and Customizations

1. Protein Options

  • Substitute ground beef with turkey, chicken, or plant-based alternatives.

2. Potato Alternatives

  • Use sweet potatoes for a slightly sweet and savory combination.

3. Spice It Up

  • Add jalapeños or hot sauce for a spicy kick.

4. Cheeseburger Enhancements

  • Incorporate diced onions or mushrooms into the meatballs.

Explore other loaded potato ideas at Loaded Potato Skins.


Why You’ll Love This Recipe

  • Versatile: Perfect as a main course or party appetizer.
  • Customizable: Endless options for toppings and flavors.
  • Kid-Friendly: A creative way to combine their favorite foods.

FAQs: Loaded Meatball Cheeseburger Potatoes

1. Can I make this recipe ahead of time?
Yes! Prepare the meatballs and potatoes in advance and assemble before baking.

2. How do I store leftovers?
Store in an airtight container in the refrigerator for up to three days.

3. Can I freeze this dish?
Yes, freeze stuffed potatoes without the toppings and reheat before serving.

4. What’s the best way to reheat?
Warm in a 350°F (175°C) oven until heated through.


Internal Linking Opportunities


Conclusion

Loaded Meatball Cheeseburger Potatoes are the ultimate comfort food mashup. Combining the hearty satisfaction of baked potatoes, the indulgence of cheeseburgers, and the savoriness of meatballs, this dish is sure to become a family favorite. Customize it to suit your taste and enjoy it as a deliciously unique meal.