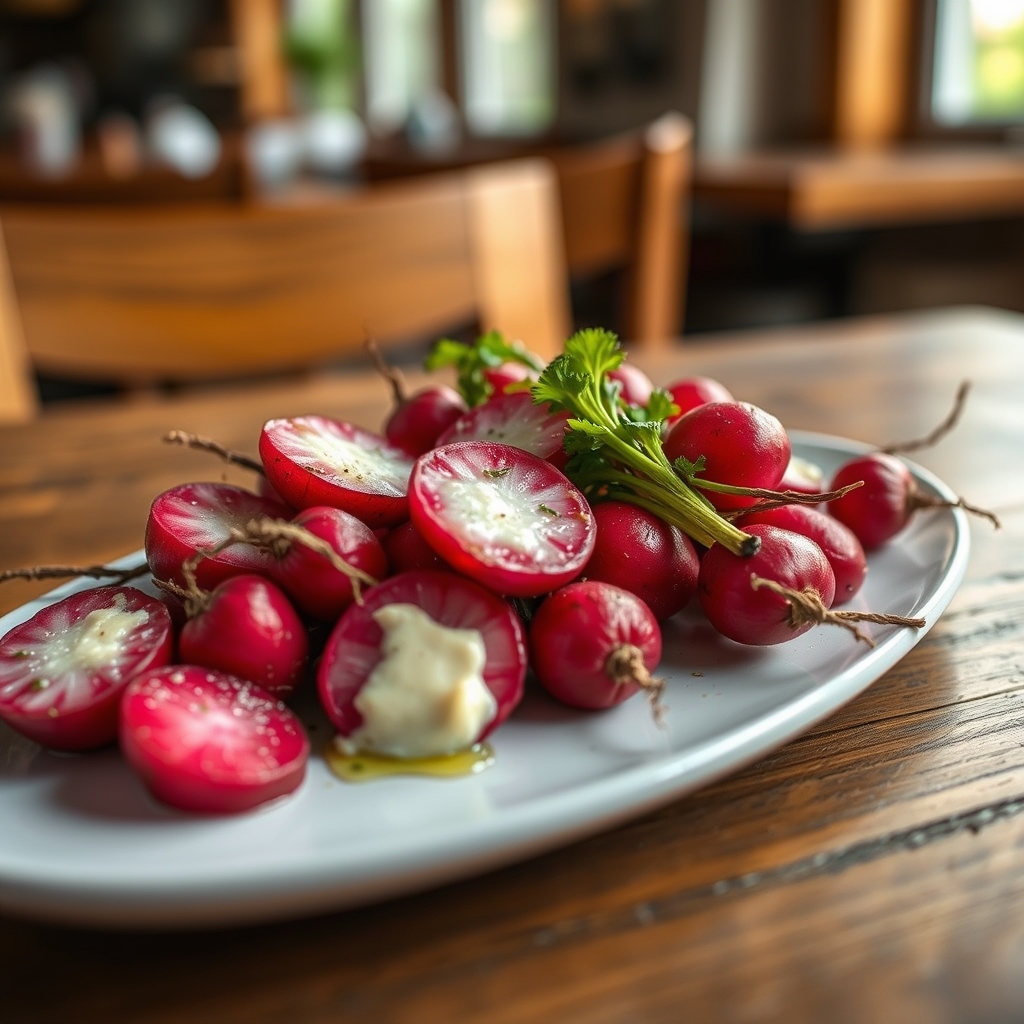
Roasted Radishes with Garlic Butter
If you’ve only ever eaten radishes raw, you’re in for a delightful surprise. Roasting transforms these crisp, peppery root vegetables into something tender, slightly sweet, and utterly irresistible—especially when tossed in a luscious garlic butter sauce. This roasted radishes with garlic butter recipe is a simple yet elegant side dish that pairs beautifully with everything from weeknight dinners to holiday feasts. Let’s dive into why this dish deserves a spot on your table.
Why You’ll Love This Recipe
First, let’s talk about why roasted radishes with garlic butter will become your new go-to side dish. Here are just a few reasons:
- Unexpected Flavor Transformation: Roasting mellows the sharp bite of radishes, bringing out their natural sweetness while maintaining a subtle peppery note.
- Quick and Easy: With just a handful of ingredients and minimal prep time, this dish comes together effortlessly.
- Versatile Pairing: Whether served alongside roasted chicken, grilled fish, or a hearty grain bowl, these radishes complement a wide range of main courses.
- Beautiful Presentation: The vibrant pink and red hues of radishes turn golden and caramelized in the oven, making them as visually appealing as they are delicious.
- Low-Carb and Nutrient-Packed: Radishes are low in calories but high in vitamin C, fiber, and antioxidants, making this dish both healthy and satisfying.
Ingredients Breakdown
This roasted radishes recipe keeps things simple, but each ingredient plays a crucial role in building layers of flavor. Here’s what you’ll need:
- Fresh Radishes: Look for firm, bright radishes with crisp greens still attached if possible. The greens can be saved for pesto or sautéing.
- Butter: Unsalted butter allows you to control the seasoning, and its richness balances the radishes’ natural spice.
- Garlic: Freshly minced garlic infuses the butter with aromatic depth, elevating the entire dish.
- Olive Oil: A light drizzle helps the radishes crisp up while roasting.
- Salt and Black Pepper: These basics enhance the natural flavors of the radishes and butter.
- Fresh Herbs (Optional): A sprinkle of thyme, parsley, or chives adds a fresh finishing touch.
How to Make Roasted Radishes with Garlic Butter
Ready to turn those humble radishes into a show-stopping side? Follow these easy steps:
- Preheat the Oven: Start by heating your oven to 400°F (200°C). This high temperature ensures the radishes caramelize nicely.
- Prep the Radishes: Trim off the tops and tails, then slice larger radishes in half. Smaller ones can stay whole for a rustic look.
- Toss with Oil and Season: Place the radishes on a baking sheet, drizzle with olive oil, and season generously with salt and pepper. Toss to coat evenly.
- Roast Until Tender: Spread the radishes in a single layer and roast for 20-25 minutes, stirring halfway, until golden and fork-tender.
- Make the Garlic Butter: While the radishes roast, melt butter in a small saucepan over low heat. Add minced garlic and cook for 1-2 minutes until fragrant but not browned.
- Combine and Serve: Transfer the roasted radishes to a serving dish, drizzle with garlic butter, and toss gently. Garnish with fresh herbs if desired.
Pro Tips for the Best Results
Take your roasted radishes with garlic butter from good to exceptional with these expert tips:
- Don’t Overcrowd the Pan: Giving the radishes space ensures they roast instead of steam, leading to better caramelization.
- Use Fresh Garlic: Pre-minced garlic lacks the vibrant flavor of freshly minced cloves.
- Try Compound Butter: For extra flair, mix softened butter with garlic, herbs, and a pinch of lemon zest before melting.
- Check for Doneness: Radishes should be tender but not mushy. A fork should slide in easily.
Variations and Substitutions
This recipe is wonderfully adaptable. Here are some creative twists to try:
- Spicy Kick: Add a pinch of red pepper flakes or a dash of hot sauce to the garlic butter.
- Dairy-Free: Swap butter for extra-virgin olive oil or vegan butter.
- Herb-Infused: Stir in rosemary, dill, or tarragon for a different herbal note.
- Citrus Brightness: Finish with a squeeze of lemon juice or orange zest for a refreshing contrast.
What to Serve With It
Roasted radishes with garlic butter shine alongside a variety of dishes. Consider pairing them with:
- Protein: Grilled steak, roasted chicken, or pan-seared salmon.
- Grains: Quinoa, farro, or creamy polenta for a hearty meal.
- Salads: A crisp arugula or spinach salad balances the richness.
- Bread: Crusty sourdough to soak up the garlic butter.
How to Store and Reheat
Leftovers? Here’s how to keep them tasting fresh:
- Refrigeration: Store in an airtight container for up to 3 days.
- Reheating: Warm in a 350°F (175°C) oven for 10 minutes or sauté in a pan to revive crispness.
- Freezing: Not recommended, as radishes can become watery when thawed.
Frequently Asked Questions (FAQs)
Can I use frozen radishes?
Fresh radishes are best for roasting, as frozen ones tend to lose texture and become mushy.
Do I need to peel radishes before roasting?
No! The skin is edible and becomes tender when roasted. Just give them a good scrub.
Can I make this dish ahead of time?
While best served fresh, you can roast the radishes in advance and reheat with the garlic butter just before serving.
Are radish greens edible?
Absolutely! Sauté them with garlic or blend into pesto for zero-waste cooking.
Final Thoughts
Roasted radishes with garlic butter might just be the dish that changes how you view this underrated vegetable. Whether you’re looking for a simple weeknight side or a vibrant addition to your dinner party spread, this recipe delivers on flavor, ease, and versatility. Give it a try, and you might find yourself reaching for radishes more often than you’d expect. Happy roasting!
Print
Roasted Radishes with Garlic Butter
Description
A simple yet flavorful side dish where radishes transform into tender, caramelized bites with rich garlic butter. Perfect for spring dinners or holiday tables.
Ingredients
For the Crust:
- For the radishes:
- 2 bunches fresh radishes (about 20-24), trimmed and halved
- 1 tablespoon olive oil
- 1/2 teaspoon sea salt
- 1/4 teaspoon black pepper
- For the garlic butter:
- 3 tablespoons unsalted butter, softened
- 2 cloves garlic, minced
- 1 teaspoon lemon zest
- 1 tablespoon fresh parsley, finely chopped
- 1/4 teaspoon salt
Instructions
1. Prepare the Crust:
- Preheat oven to 425°F (220°C). Line a baking sheet with parchment paper.
- Toss halved radishes with olive oil, salt, and pepper. Spread in a single layer on the baking sheet.
- Roast for 20-25 minutes, stirring once halfway, until golden and fork-tender.
- While radishes roast, mix butter, garlic, lemon zest, parsley, and salt in a small bowl until combined.
- Transfer roasted radishes to a serving dish. Dollop garlic butter over hot radishes and toss gently to coat.
- Serve immediately with extra parsley garnish if desired.
Notes
For a dairy-free version, substitute vegan butter. Radish greens can be sautéed separately as a garnish. Leftovers store well in the fridge for 2 days (reheat gently).